Gitlab7.14 中文版安装教程
注:- 本教程由羞涩梦整理同步发布,本人技术分享站点:blog.hukanfa.com
- 转发本文请备注原文链接,本文内容整理日期:2024-01-28
- csdn 博客名称:五维空间-影子,欢迎关注
1 简要说明
-
说明
- 为何写本文
1、本人所在公司目前在用的gilab版本为7.14.3,鉴于版本比较老打算迁移到新版。 2、旧版乃前人所部署,部署方式也比较传统:通过手动一步步搭环境和组件,还是比较繁琐 3、本人一般用docker方式部署gitlab,借此机会通过手动方式实现下gilab部署也是有必要的- gitlab简介
1、Ruby on Rails 开发的开源应用程序,实现一个自托管的Git项目仓库,可通过Web界面进行访问公开的或者私人项目 2、与Github类似的功能,能够浏览源代码,管理缺陷和注释, 3、可以管理团队对仓库的访问,它非常易于浏览提交过的版本并提供一个文件历史库- 本次部署gitlab所用到的环境和依赖版本说明
# 以下依赖版本可根据需求选择,可以使用较新版本代替* 系统版本:Centos 7
* gitlab:7-14中文版|英文版
* ruby:2.2.0
* mysql:5.7
* nginx:1.8.0
* git: 2.8.2
* redis:yum 版本
特别说明:由于旧版距今很多年,重新部署还是有很多坑。也许你按照文档走还会碰到新的问题,希望能克服!
2 前期部署
2.1 基本配置
-
操作如下
- 关闭防火墙相关
# 永久 sed -i 's/^SELINUX=enforcing/SELINUX=disabled/g' /etc/sysconfig/selinux # 临时 setenforce 0systemctl stop firewalld systemctl disable firewalld- 安装
epel源
# 方式一yum -y install epel* # 方式二(推荐)wget https://dl.fedoraproject.org/pub/epel/epel-release-latest-7.noarch.rpmrpm -ivh epel-release-latest-7.noarch.rpm# 导入keyrpm --import https://dl.fedoraproject.org/pub/epel/RPM-GPG-KEY-EPEL-7- 安装
puias源
# puias 是基于RH的一个扩展distribution和mirror,目前它由普林斯顿高能所维护。# /etc/yum.repos.d/puias-computational.repo [PUIAS_computational] name=PUIAS computational Base $releasever - $basearch mirrorlist=http://puias.math.ias.edu/data/puias/computational/$releasever/$basearch/mirrorlist #baseurl=http://puias.math.ias.edu/data/puias/computational/$releasever/$basearch gpgcheck=1 gpgkey=file:///etc/pki/rpm-gpg/RPM-GPG-KEY-puias# 导入key,下面二选一 rpm --import http://puias.princeton.edu/data/puias/7/x86_64/os/RPM-GPG-KEY-puias # rpm --import http://springdale.math.ias.edu/data/puias/7/x86_64/os/RPM-GPG-KEY-puias- 重新建立缓存
# 建立缓存 yum clean all && yum makecache- 创建git用户
# 请确保用户家目录有足够磁盘空间,因为后续仓库默认的数据都在其家目录下。也可修改到其他目录
# 默认/home/git,如需指定家目录使用 -d 参数
useradd git
# 设置密码  fZ2ICa7w
passwd git
# 配置sudo权限
echo "git ALL=(ALL) NOPASSWD: ALL" >>/etc/sudoersecho "export git_SSL_NO_VERIFY=1" >> /home/git/.bash_profile
source /home/git/.bash_profile# 不添加变量的话使用https链接会报如下错误,不过本文没有使用https
fatal: unable to access 'https://github.com/gitlabhq/grit.git/': Peer certificate cannot be authenticated with known CA certificates
2.2 安装Development Tools
-
操作如下
- 不要 用yum安装ruby、git、nginx 和 mysql,redis可以使用yum安装
yum -y install readline readline-devel ncurses-devel gdbm-devel glibc-devel tcl-devel expat-devel db4-devel byacc sqlite-devel libyaml libyaml-devel libffi libffi-devel libxml2 libxml2-devel libxslt libxslt-devel libicu libicu-devel system-config-firewall-tui python-devel redis wget crontabs logwatch logrotate perl-Time-HiRes gettext gettext-devel openssl-devel zlib-devel gcc gcc-c++ make autoconf tk-devel python-pip patch pcre-devel curl curl-devel sudo yum-plugin-fastestmirror cmake perl-CPAN nodejs automake libxml* libmcrypt* libtool-ltdl-devel* yum-utils- 卸载已经安装的包
yum -y remove ruby git nginx mysql mysql-server- 安装Development Tools开发组包
yum -y groupinstall 'Development Tools'
2.3 配置时间同步
-
操作如下
- 更新
localtime文件
rm -f /etc/localtime ln -s /usr/share/zoneinfo/Asia/Shanghai /etc/localtime- 安装
# yum 方式 yum -y install ntp # 同步时间 ntpdate pool.ntp.org# 配置定时任务同步时间,也可以通过 crontba -e 设置 echo '*/20 * * * * /usr/sbin/ntpdate pool.ntp.org > /dev/null 2>&1' >> /var/spool/cron/root# 查看 $ crontab -l */20 * * * * /usr/sbin/ntpdate pool.ntp.org > /dev/null 2>&1 - 更新
2.4 安装git
-
操作如下
- 下载安装包
# 不检查证书下载
wget https://mirrors.edge.kernel.org/pub/software/scm/git/git-2.8.2.tar.gz --no-check-certificate# 编译安装
tar zxvf git-2.8.2.tar.gz && cd git-2.8.2
./configure --prefix=/usr/local/git
make && make install# 确认git版本,如有其他旧版本是还没卸载干净
$ git --version
git version 1.8.3.1
$ yum -y remove git# 全局环境变量
echo 'export PATH="/usr/local/git/bin:$PATH"' >> /etc/profile
# 刷新
source /etc/profile# 验证
git --version
2.5 安装nginx
-
操作如下
- 下载源码包并安装
# 下载
wget http://nginx.org/download/nginx-1.8.0.tar.gz# 解压
tar -zxvf nginx-1.8.0.tar.gz && cd nginx-1.8.0# 编译安装
./configure --prefix=/usr/local/nginx --user=hukanfa --group=hukanfa --with-http_ssl_module --with-http_stub_status_module --with-pcremake && make install
3 安装redis
-
操作如下
- 前面已经使用yum安装过了,下面主要是配置
- 使用socket方式连接
redis(>= redis 2.4.0)
# 备份之前配置,修改端口号,添加socket配置,添加socket权限,启动服务 cp -ar /etc/redis.conf /etc/redis.conf.bak# 修改以下redis配置 /etc/redis.conf bind 0.0.0.0 port 6379 unixsocket /var/run/redis/redis.sock unixsocketperm 0775# 启动服务 systemctl start redis systemctl status redis# 配置开机自启 systemctl enable redis # chkconfig redis on- 将git用户添加到redis组
$ gpasswd -a git redis
Adding user git to group redis
$ id git
uid=1001(git) gid=1001(git) groups=1001(git),993(redis)
4 安装mysql
4.1 下载安装包
-
操作如下
- 添加mysql用户
groupadd mysql useradd -g mysql -s /sbin/nologin mysql- 获取安装包
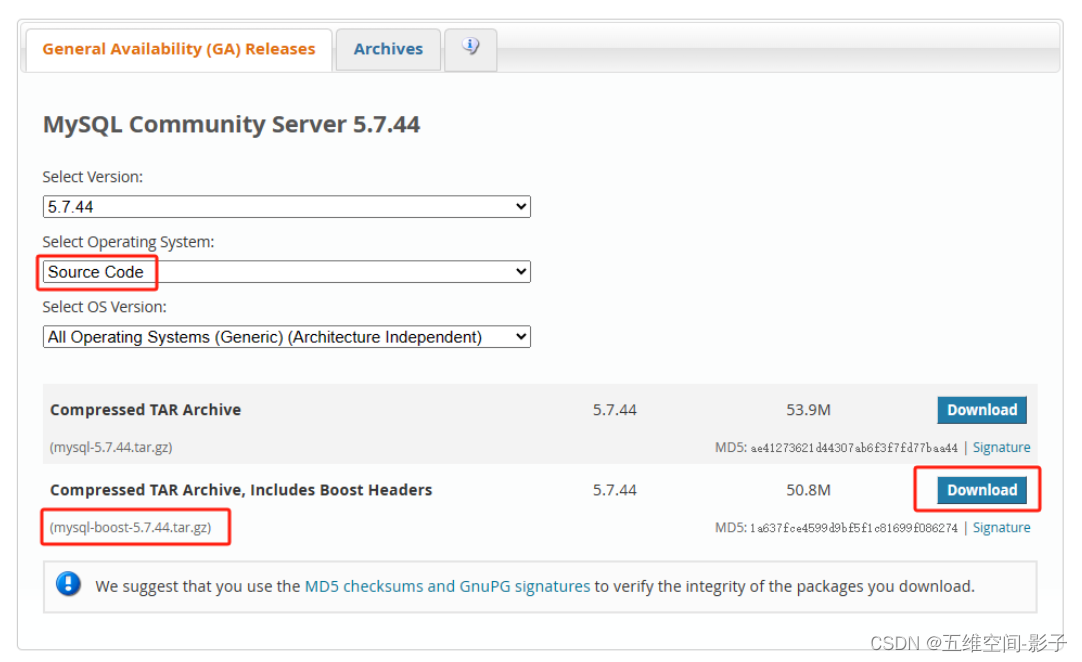
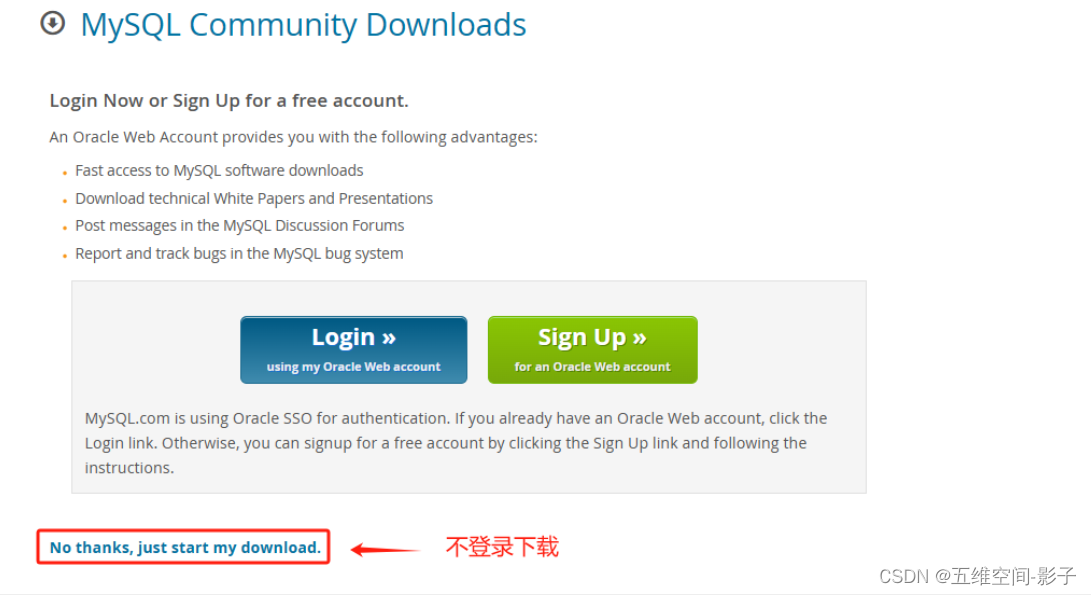
# 官网源码包下载地址,选择对应版本下载即可。下载跳转页面选择左下角不登陆下载,见图
https://dev.mysql.com/downloads/mysql/
# 具体下载链接(下载带boots的,后续mysql版本都需要boots)
wget https://cdn.mysql.com//Downloads/MySQL-5.7/mysql-boost-5.7.44.tar.gz
# 百度网盘下载链接
https://pan.baidu.com/s/1wrlTyaigxvTKTNf6H8F4KQ?pwd=fniy
4.2 编译安装
-
操作如下
- 准备所需的文件路径
# 安装目录及pid文件所在目录\数据目录、日志目录 mkdir -p /usr/local/mysql57/{data,logs} # socket 文件路径 /tmp- 安装
msyql-boost
# 解压 tar -zxvf mysql-boost-5.7.44.tar.gz # 进入到解压目录下 cd mysql-5.7.44- 编译安装
# 注意 -DWITH_BOOST=boost 只是相对于cmake执行的当前路径,若是其他路径请写全路径 # 预编译 cmake . \ -DCMAKE_INSTALL_PREFIX=/usr/local/mysql57 \ -DDOWNLOAD_BOOST=1 \ -DWITH_BOOST=boost \ -DWITH_INNOBASE_STORAGE_ENGINE=1 \ -DMYSQL_TCP_PORT=3306 \ -DWITH_EXTRA_CHARSETS=all \ -DWITH_READLINE=1 \ -DENABLED_LOCAL_INFILE=1 \ -DDEFAULT_CHARSET=utf8mb4 \ -DDEFAULT_COLLATION=utf8mb4_general_ci# 正式编译(这个过程需要等待十几分钟),安装过程无异常退出则成功(~ ~) make && make install- 安装成功后,路径下会有以下目录
$ pwd
/usr/local/mysql57
$ ls
bin  data  docs  include  lib  LICENSE  logs  man  mysql-test  README  README-test  share  support-files
4.3 调整配置
-
操作如下
- 目录授权
# 更改安装目录所属为mysql用户 chown -R mysql:mysql /usr/local/mysql57- 编辑主配置文件
my.cnf
# 备份原配置 cp -ar /etc/my.cnf /etc/my.cnf.bak # 清空配置文件 > /etc/my.cnf # vim /etc/my.cnf [client] port = 3306 socket = /tmp/mysql.sock default-character-set = utf8mb4[mysqld] port = 3306 user = mysql pid-file = /usr/local/mysql57/mysql.pid socket = /tmp/mysql.sock basedir = /usr/local/mysql57 datadir = /usr/local/mysql57/datalog_error = /usr/local/mysql57/logs/error.log slow_query_log_file = /usr/local/mysql57/logs/slow.log[mysqldump] quick max_allowed_packet = 16M[myisamchk] key_buffer_size = 256M sort_buffer_size = 8M read_buffer = 4M write_buffer = 4M- 初始化
# cd /usr/local/mysql57 ./bin/mysqld --initialize-insecure --user=mysql --basedir=/usr/local/mysql57 --datadir=/usr/local/mysql57/data # 执行完成后data目录下会生产初始数据- 配置环境变量
# 全局环境变量 echo 'export PATH="/usr/local/mysql57/bin:$PATH"' >> /etc/profile # 刷新 source /etc/profile -
初始化特别说明
–initialize:会生成一个随机密码(~/.mysql_secret)--initialize-insecure:不会生成密码,后续再另行设定
4.4 启动项设置
-
操作如下
- 使用 systemctl 管理
# vim /usr/lib/systemd/system/mysql.service [Unit] Description=The Mysql Process Manager After=syslog.target network.target remote-fs.target nss-lookup.target[Service] Type=forking PIDFile=/usr/local/mysql57/mysql.pid ExecStart=/usr/local/mysql57/support-files/mysql.server start ExecReload=/bin/kill -s HUP $MAINPID ExecStop=/bin/kill -s QUIT $MAINPID PrivateTmp=false[Install] WantedBy=multi-user.target- 启动服务
# 重载配置 systemctl daemon-reload # 启动服务 systemctl start mysql # 查看状态 [root@hukanfa support-files]# systemctl status mysql ● mysql.service - The Mysql Process ManagerLoaded: loaded (/usr/lib/systemd/system/mysql.service; disabled; vendor preset: disabled)Active: active (running) # 开机自启动 systemctl enable mysql- 创建数据库及gitlab用户
# 登录数据库,无密码。后续可自行设置 mysql -u root # 创建数据库 CREATE DATABASE IF NOT EXISTS gitlabhq_production; # 创建用户 GRANT ALL PRIVILEGES ON gitlabhq_production.* TO 'git'@'%' IDENTIFIED BY 'cX4ncpjZMU'; # 刷新权限 FLUSH PRIVILEGES;- 测试连接
# 输入密码后登录
mysql -ugit -p
# 查看库
mysql> show databases;
+---------------------+
| Database            |
+---------------------+
| information_schema  |
| gitlabhq_production |
+---------------------+
2 rows in set (0.00 sec)
5 安装gitlab
注:此篇开始,一般使用git用户环境操作
5.1 安装ruby
-
操作如下
- 下载ruby源码包
# 查看ruby版本 https://www.ruby-lang.org/zh_cn/downloads/releases/# 下载 wget http://cache.ruby-lang.org/pub/ruby/2.2/ruby-2.2.0.tar.gz- 编译安装ruby
# 解压
tar -zxvf tar -zxvf ruby-2.2.0.tar.gz# 编译安装
cd ruby-2.2.0
./configure --prefix=/usr/local/ruby --disable-install-rdoc
make clean && make && make install# 全局环境变量
echo 'export PATH="/usr/local/ruby/bin:$PATH"' >> /etc/profile
# 刷新
source /etc/profile# 验证
gem --version
####
2.4.5
ruby --version
####
ruby 2.2.0p0 (2014-12-25 revision 49005) [x86_64-linux]chown -R git:git /usr/local/ruby
5.2 安装bundler
-
操作如下
- 添加国内源
# gem source --remove|-r --add|-a # 删除默认源 # 新增国内源 gem sources --add https://gems.ruby-china.com/ --remove https://rubygems.org/ # gem source -a http://mirrors.aliyun.com/rubygems/ # 更新缓存 gem sources -u # 查看在用的源 gem sources -l- 安装bundler
# ruby2.5.0 版本只支持 bundler2.0.0以下版本,之下最新版本为:1.17.3 gem install bundler -v 1.17.3 # 安装完成后,bundle/bundler命令默认在ruby安装目录bin下,如/usr/local/ruby/bin/# bundler版本查看链接 https://github.com/rubygems/bundler/tags- 如果遇到 SSL 证书问题,请修改
~/.gemrc文件,增加ssl_verify_mode: 0配置,以便于 RubyGems 可以忽略 SSL 证书错误。
# vim ~/.gemrc
:sources:
-
https://gems.ruby-china.com
:ssl_verify_mode: 0
5.3 安装gitlab-shell
-
操作如下
- 切换到git用户
su - git # 配置gem安装忽略证书认证 vim ~/.gemrc --- :backtrace: false :bulk_threshold: 1000 :sources: - https://gems.ruby-china.com/ :ssl_verify_mode: 0 :update_sources: true :verbose: true- 下载仓库代码
git clone https://gitlab.com/gitlab-org/gitlab-shell.git -b v2.7.2 cd gitlab-shell/ cp config.yml.example config.yml vi config.yml- 修改配置
# 配置自己的gitlab域名和端口,没有就用默认 gitlab_url: "http://localhost:8080" # 下面修改的内容为git指定家目录后的操作,如果是默认的/home/git则不需要修改,后面不再提示 ################################## repos_path: "/home/git/repositories" auth_file: "/home/git/.ssh/authorized_keys" ##################################- 配置gitlab-shell使用reidis-socket
redis: bin: /usr/bin/redis-cli # host: 127.0.0.1 # port: 6379 # pass: redispass # Allows you to specify the password for Redis database: 0 socket: /var/run/redis/redis.sock namespace: resque:gitlab- 安装
./bin/install# cd ~
5.4 拉取代码
-
操作如下
- 方式一
# 从官网下载,英文版本。低版本gitlab估计是不能选择语言,最新版本是可以在设置界面选择语言 git clone https://gitlab.com/gitlab-org/gitlab-ce.git -b 7-14-stable gitlab- 方式二
# 中文版 7.14
git clone https://gitee.com/hukanfa/gitlab.git -b 7-14-zh gitlab
5.5 修改主配置
-
操作如下
- 复制配置文件
# 切换到git用户,进入到gitlab根目录 cp config/gitlab.yml.example config/gitlab.yml- 修改
gitlab.yml配置文件,默认用了/home/git路径的基本不用改
vim config/gitlab.yml ################ :%s/home/data/g ################ ## gitLab settings gitlab: ## 设置域名或用默认 host: localhost port: 8080 https: false # 如果准备使用smtp方式发送邮件,这里可以修改为发送邮件的账号,如果使用系统sendmail就不用修改 email_from: noreply@cass.com email_display_name: GitLab email_reply_to: noreply@cass.com # 允许使用用户名或邮箱账号登录 allow_username_or_email_login: true # 根据需要设定 path: /home/git/gitlab-satellites/gitlab_shell:path: /home/git/gitlab-shell/# REPOS_PATH MUST NOT BE A SYMLINK!!! repos_path: /home/git/repositories/ hooks_path: /home/git/gitlab-shell/hooks/ ################################## # ssh端口,根据实际修改 ssh_port: 22 # 下面是编译安装git后的路径,默认文件最大大小和超时时间 git:bin_path: /usr/local/bin/gitmax_size: 524288000 # 5.megabytestimeout: 300- 修改
unicorn.rb,默认**/home/git**目录的不用改
cp config/unicorn.rb.example config/unicorn.rb vim config/unicorn.rb ################################### working_directory "/home/git/gitlab" # available in 0.94.0+ listen "/home/git/gitlab/tmp/sockets/gitlab.socket", :backlog => 64 pid "/home/git/gitlab/tmp/pids/unicorn.pid" stderr_path "/home/git/gitlab/log/unicorn.stderr.log" stdout_path "/home/git/gitlab/log/unicorn.stdout.log"# 默认8080端口,如果被占用自修改 listen "127.0.0.1:8080", :tcp_nopush => true timeout 300- 创建目录
mkdir /home/git/gitlab-satellites- 关于
rack_attack.rb
# rack-attack 可以根据ip、域名等设置黑名单、设置访问频率。请按需配置,这里暂不配置
cp config/initializers/rack_attack.rb.example config/initializers/rack_attack.rb
# 关于这块使用附上参考博文: https://blog.csdn.net/qq_41037744/article/details/134519179
5.6 修改数据库配置
-
操作如下
- 修改连接redis配置
cp config/resque.yml.example config/resque.yml # 修改配置 vim config/resque.yml ################################### development: redis://localhost:6379 test: redis://localhost:6379 production: unix:/var/run/redis/redis.sock- 修改连接数据mysql库配置
cp config/database.yml.mysql config/database.yml
vim config/database.yml
############################
production:adapter: mysql2encoding: utf8mb4collation: utf8mb4_general_cireconnect: falsedatabase: gitlabhq_productionpool: 10username: root  # 这里之前用git用户,但发现有下面报错提示,懒得排查直接换成root,之前没设置过密码#password: "cX4ncpjZMUv"#host: localhost# socket: /tmp/mysql.sock# 用git用户报错
Access denied for user 'git'@'localhost' (using password: YES)Please provide the root password for your mysql installation
5.7 安装gems
-
操作如下
- 安装
cd ~/gitlab sudo gem install charlock_holmes --version '0.6.9' ##### Fetching: charlock_holmes-0.6.9.gem (100%) ... Installing ri documentation for charlock_holmes-0.6.9 Done installing documentation for charlock_holmes after 6 seconds 1 gem installed- 修改源为国内
# 1 vim Gemfile source "https://rubygems.org" 改为 source "https://gems.ruby-china.com" # source "http://mirrors.aliyun.com/rubygems" # 2 vim Gemfile.lock source "https://gems.ruby-china.com"- 修改文件
# 【1】第一波更改 ### vim Gemfile.lock 行首添加 GITremote: https://gitee.com/hukanfa/gemnasium-gitlab-servicerevision: 4f2f3cb0003c8f5938286cb7161ff93d2804f934specs:gemnasium-gitlab-service (0.2.6)rugged (~> 0.21) # 删掉 260 gemnasium-gitlab-service (0.2.6) 261 rugged (~> 0.21) # 改为感叹号 789 gemnasium-gitlab-service!### vim Gemfile # 增加 gem "gemnasium-gitlab-service", git: "https://gitee.com/hukanfa/gemnasium-gitlab-service" # 删掉 157 gem "gemnasium-gitlab-service", "~> 0.2"# 两个文件修改mysql2的版本为 0.3.21 # 之后遇到一些依赖报错直接在上面两个文件直接删掉就行,版本过于老旧一些依赖在源中已经找不到了或者新版不支持了- 执行安装
# 有些版本低的依赖可打开源站所属对应依赖有哪些版本,重新指定版本
bundle install --deployment --without development test postgres puma aws wiki
gem install rdoc-data; rdoc-data --install
5.8 数据初始化及配置检查
-
操作如下
- 初始化数据库
# bundle exec rake gitlab:setup RAILS_ENV=production --verbose
...
Do you want to continue (yes/no)? yes
#最后初始化成功后会获得账号和密码
== Seed from /home/git/gitlab/db/fixtures/production/001_admin.rbAdministrator account created:login.........root
password......5iveL!fe
- 检查gitLab及其环境的配置是否正确```shellcd ~/gitlabbundle exec rake gitlab:env:info RAILS_ENV=production##########[git@hukanfa gitlab]$ bundle exec rake gitlab:env:info RAILS_ENV=productionSystem informationSystem:Current User: gitUsing RVM: noRuby Version: 2.2.0p0Gem Version: 2.4.5Bundler Version:1.17.3Rake Version: 10.4.2Sidekiq Version:3.3.0GitLab informationVersion: 7.14.3Revision: 12bbae4Directory: /home/git/gitlabDB Adapter: mysql2URL: http://localhost:8080HTTP Clone URL: http://localhost:8080/some-group/some-project.gitSSH Clone URL: git@localhost:some-group/some-project.gitUsing LDAP: noUsing Omniauth: noGitLab ShellVersion: 2.7.2Repositories: /home/git/repositories/Hooks: /home/git/gitlab-shell/hooks/Git: /usr/bin/git# bundle exec rake sidekiq:start RAILS_ENV=production# bundle exec rake gitlab:check RAILS_ENV=production# 这里都走一遍chmod -R ug+rwX,o-rwx /home/git/repositories/chmod -R ug-s /home/git/repositories/find /home/git/repositories/ -type d -print0 | sudo xargs -0 chmod g+ssudo chmod u+rwx,g=rx,o-rwx /home/git/gitlab-satellites
5.9 配置nginx
-
操作如下
- 创建启动脚本
# root执行
cp lib/support/init.d/gitlab /etc/init.d/gitlab
cp lib/support/init.d/gitlab.default.example /etc/default/gitlab
cp lib/support/logrotate/gitlab /etc/logrotate.d/gitlab
chmod +x /etc/init.d/gitlab# 配置开机启动
chkconfig --add gitlab
chkconfig gitlab on##### 下面这里如果安装目录不是/home/git/gitlab就需要改 ########
# vim /etc/default/gitlab
# app_root="/data/$app_user/gitlab"#无需下载
##sudo wget https://raw.github.com/gitlabhq/gitlab-recipes/master/init/sysvinit/centos/gitlab-unicorn -P /etc/init.d/
##sudo mv /etc/init.d/gitlab-unicorn /etc/init.d/gitlab
##########################
- 调整配置```shell# 复制配置文件cd ~/gitlabsudo mkdir /usr/local/nginx/conf/conf.d/ -psudo cp lib/support/nginx/gitlab /usr/local/nginx/conf/conf.d/cd /usr/local/nginx/conf/conf.d/sudo chown -R git:git .cp gitlab gitlab.confvim /usr/local/nginx/conf/nginx.conf# 修改nginx主配置user git;worker_processes 2;events {worker_connections 1024;}http {include mime.types;# 这句话加入include conf.d/*.conf;......# gitlab虚拟主机的配置vim /usr/local/nginx/conf/conf.d/gitlab.confserver {listen 0.0.0.0:8080 default_server;#listen [::]:80 default_server;server_name gitlab.hkf56.com;# 修改日志路径access_log /usr/local/nginx/logs/gitlab_access.log;error_log /usr/local/nginx/logs/gitlab_error.log;location ~ ^/(assets)/ {root /home/git/gitlab/public;#gzip_static on;access_log /var/log/nginx/gitlab_access.log;error_log /var/log/nginx/gitlab_error.log;
-
修改后得
gitlab.conf内容如下upstream gitlab {server unix:/home/git/gitlab/tmp/sockets/gitlab.socket fail_timeout=0; }server {listen 80;server_name gitlab.hkf56.com;server_tokens off;root /home/git/gitlab/public;client_max_body_size 20m;access_log logs/gitlab_access.log;error_log logs/gitlab_error.log;location / {try_files $uri $uri/index.html $uri.html @gitlab;}location /uploads/ {proxy_read_timeout 300;proxy_connect_timeout 300;proxy_redirect off;proxy_set_header Host $http_host;proxy_set_header X-Real-IP $remote_addr;proxy_set_header X-Forwarded-For $proxy_add_x_forwarded_for;proxy_set_header X-Forwarded-Proto $scheme;proxy_set_header X-Frame-Options SAMEORIGIN;proxy_pass http://gitlab;}location @gitlab {proxy_read_timeout 300;proxy_connect_timeout 300;proxy_redirect off;proxy_set_header Host $http_host;proxy_set_header X-Real-IP $remote_addr;proxy_set_header X-Forwarded-For $proxy_add_x_forwarded_for;proxy_set_header X-Forwarded-Proto $scheme;proxy_set_header X-Frame-Options SAMEORIGIN;proxy_pass http://gitlab;}location ~ ^/(assets)/ {root /home/git/gitlab/public;#gzip_static on;expires max;add_header Cache-Control public;}error_page 502 /502.html; }- 拉取gitLab静态文件
su - git && cd ~/gitlab
bundle exec rake assets:precompile RAILS_ENV=production
# redis的socket文件授权
chmod 777 /var/run/redis/redis.sock
# 启动gitlab服务
sudo service gitlab restart
#####
...
The GitLab Unicorn web server with pid 49907 is running.
The GitLab Sidekiq job dispatcher with pid 49938 is running.
GitLab and all its components are up and running.
# 查看端口
netstat -antlp |grep 8080
# 启动nginx
sudo /usr/local/nginx/sbin/nginx
5.10 访问测试
-
操作如下
- 修改本地hosts文件增加解析如下
# window 路径如下 C:\Windows\System32\drivers\etc\hosts 192.168.26.8 gitlab.hkf56.com- 页面访问域名,输入下面账号密码
# 初始管理员帐号密码为
root  5iveL!fe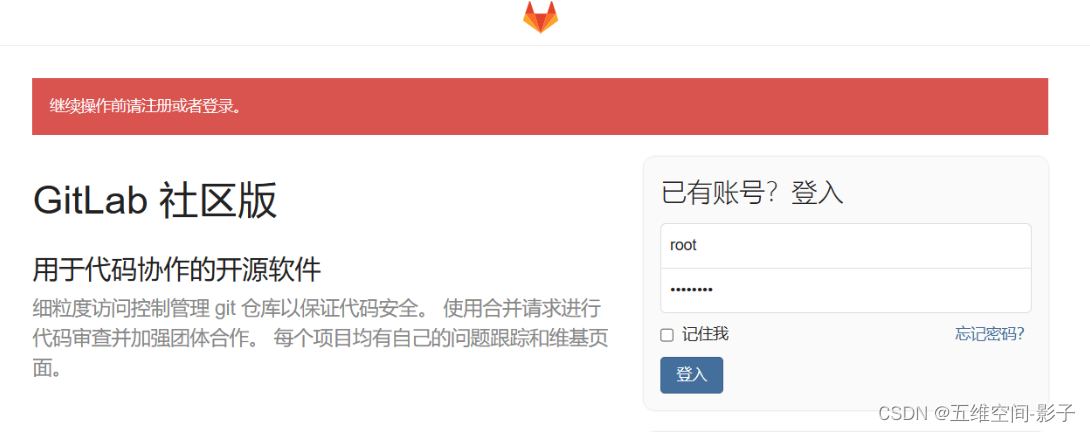
-
登入后重置密码
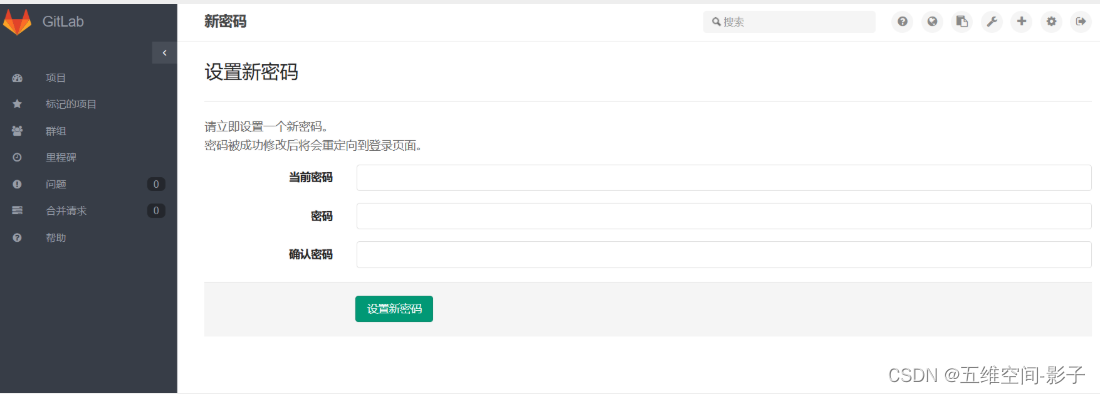
-
最终效果如下
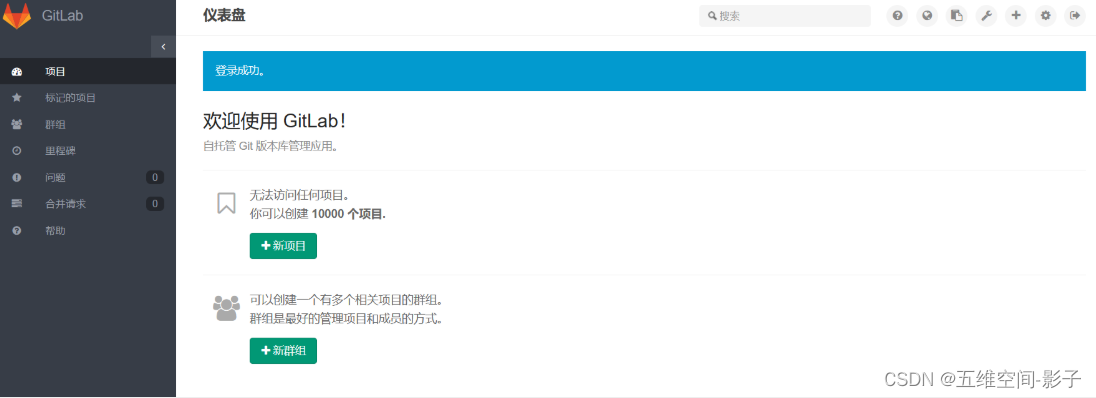
-
恭喜你,已经完成了gitlab7.14.3版本部署。过程很多坑,但按照文档走一定顺利
5.11 修改邮件发送
注:此部分内容作者本人并未测试过,有需要请自行完成配置并测试
-
操作如下
- 修改配置
cd ~/gitlab/ vim config/environments/production.rbconfig.action_mailer.delivery_method = :smtpcp config/initializers/smtp_settings.rb.sample config/initializers/smtp_settings.rbvim config/initializers/smtp_settings.rb if Rails.env.production?Gitlab::Application.config.action_mailer.delivery_method = :smtpActionMailer::Base.smtp_settings = { address: "smtp.163.com", port: 25, user_name: "xxx@cass.com", password: "password", domain: "smtp.163.com", authentication: :plain, enable_starttls_auto: true, #openssl_verify_mode: 'peer' # See ActionMailer documentation for other possible options } end- 8.x版本的邮件配置和7.x有所不同
cd ~/gitlab/ vim config/environments/production.rb config.action_mailer.delivery_method = :smtp config.action_mailer.smtp_settings = { :address => "smtp.163.com", :port => "25", :domain => "smtp.163.com", :authentication => :plain, :user_name => "xxx@163.com", :password => "xxx", :enable_starttls_auto => true }- 配置好你的邮箱和密码
# 编辑config/gitlab.yml 对应修改一下配置
email_from: xxx@cass.com
email_display_name: GitLab
email_reply_to:xxx@cass.com
