一、生成对应深度图
C++
#include <iostream>
#include <pcl/io/pcd_io.h>
#include <pcl/point_types.h>
#include <pcl/common/io.h>
#include <pcl/range_image/range_image.h>
#include <pcl/visualization/range_image_visualizer.h>
#include <boost/thread/thread.hpp>
#include <pcl/visualization/cloud_viewer.h>
#include <pcl/common/common_headers.h>
using namespace std;int main(int, char** argv)
{pcl::PointCloud<pcl::PointXYZ>::Ptr cloud(new pcl::PointCloud<pcl::PointXYZ>);//要配准变化的点云pcl::PointCloud<pcl::PointXYZ>::Ptr cloud_target(new pcl::PointCloud<pcl::PointXYZ>);//目标点云(不变的)if (pcl::io::loadPCDFile<pcl::PointXYZ>("pcd/pig_view1.pcd", *cloud) == -1){PCL_ERROR("加载点云失败\n");}if (pcl::io::loadPCDFile<pcl::PointXYZ>("pcd/pig_view2.pcd", *cloud_target) == -1){PCL_ERROR("加载点云失败\n");}pcl::RangeImage::CoordinateFrame coordinate_frame = pcl::RangeImage::CAMERA_FRAME;Eigen::Affine3f scene_sensor_pose_src(Eigen::Affine3f::Identity());Eigen::Affine3f scene_sensor_pose_tgt(Eigen::Affine3f::Identity());scene_sensor_pose_src = Eigen::Affine3f(Eigen::Translation3f(cloud->sensor_origin_[0],cloud->sensor_origin_[1], cloud->sensor_origin_[2])) * Eigen::Affine3f(cloud->sensor_orientation_);scene_sensor_pose_tgt = Eigen::Affine3f(Eigen::Translation3f(cloud_target->sensor_origin_[0],cloud_target->sensor_origin_[1], cloud_target->sensor_origin_[2])) * Eigen::Affine3f(cloud_target->sensor_orientation_);//-------------从点云创建深度图像———————————float noise_level = 0.0;float min_range = 0.0f;int border_size = 1;pcl::RangeImage::Ptr range_image_src(new pcl::RangeImage);pcl::RangeImage::Ptr range_image_tgt(new pcl::RangeImage);range_image_src->createFromPointCloud(*cloud, pcl::deg2rad(0.02f), pcl::deg2rad(0.02f),pcl::deg2rad(360.0f), pcl::deg2rad(180.0f), scene_sensor_pose_src, coordinate_frame,noise_level, min_range, border_size);range_image_tgt->createFromPointCloud(*cloud_target, pcl::deg2rad(0.02f), pcl::deg2rad(0.02f),pcl::deg2rad(360.0f), pcl::deg2rad(180.0f), scene_sensor_pose_tgt, coordinate_frame,noise_level, min_range, border_size);boost::shared_ptr <pcl::visualization::PCLVisualizer> viewer1(new pcl::visualization::PCLVisualizer("3D Viewer1"));//创建窗口,并设置名字为3D Viewerpcl::visualization::PointCloudColorHandlerCustom < pcl::PointWithRange>range_image_color_handler1(range_image_src, 0, 0, 0);viewer1->setBackgroundColor(1, 1, 1); viewer1->addPointCloud(range_image_src, range_image_color_handler1, "range image");viewer1->setPointCloudRenderingProperties(pcl::visualization::PCL_VISUALIZER_POINT_SIZE, 1, "range image");while (!viewer1->wasStopped()){viewer1->spinOnce(100);boost::this_thread::sleep(boost::posix_time::microseconds(100));}boost::shared_ptr <pcl::visualization::PCLVisualizer> viewer2(new pcl::visualization::PCLVisualizer("3D Viewer2"));//创建窗口,并设置名字为3D Viewerpcl::visualization::PointCloudColorHandlerCustom < pcl::PointWithRange>range_image_color_handler2(range_image_tgt, 0, 0, 0);viewer2->setBackgroundColor(1, 1, 1);viewer2->addPointCloud(range_image_tgt, range_image_color_handler2, "range image");viewer2->setPointCloudRenderingProperties(pcl::visualization::PCL_VISUALIZER_POINT_SIZE, 1, "range image");while (!viewer2->wasStopped()){viewer2->spinOnce(100);boost::this_thread::sleep(boost::posix_time::microseconds(100));}boost::shared_ptr <pcl::visualization::PCLVisualizer> viewer3(new pcl::visualization::PCLVisualizer("3D Viewer3"));//创建窗口,并设置名字为3D Viewerpcl::visualization::PointCloudColorHandlerCustom < pcl::PointWithRange>range_image_color_handler3(range_image_src, 255, 0, 0);pcl::visualization::PointCloudColorHandlerCustom < pcl::PointWithRange>range_image_color_handler4(range_image_tgt, 0, 0, 0);viewer3->setBackgroundColor(1, 1, 1);viewer3->addPointCloud(range_image_src, range_image_color_handler3, "range image1");viewer3->addPointCloud(range_image_tgt, range_image_color_handler4, "range image2");viewer3->setPointCloudRenderingProperties(pcl::visualization::PCL_VISUALIZER_POINT_SIZE, 1, "range image1");viewer3->setPointCloudRenderingProperties(pcl::visualization::PCL_VISUALIZER_POINT_SIZE, 1, "range image2");while (!viewer3->wasStopped()){viewer3->spinOnce(100);boost::this_thread::sleep(boost::posix_time::microseconds(100));}return 0;
}
关键代码解析:
pcl::RangeImage::CoordinateFrame coordinate_frame = pcl::RangeImage::CAMERA_FRAME;Eigen::Affine3f scene_sensor_pose_src(Eigen::Affine3f::Identity());Eigen::Affine3f scene_sensor_pose_tgt(Eigen::Affine3f::Identity());scene_sensor_pose_src = Eigen::Affine3f(Eigen::Translation3f(cloud->sensor_origin_[0],cloud->sensor_origin_[1], cloud->sensor_origin_[2])) * Eigen::Affine3f(cloud->sensor_orientation_);scene_sensor_pose_tgt = Eigen::Affine3f(Eigen::Translation3f(cloud_target->sensor_origin_[0],cloud_target->sensor_origin_[1], cloud_target->sensor_origin_[2])) * Eigen::Affine3f(cloud_target->sensor_orientation_);//-------------从点云创建深度图像———————————float noise_level = 0.0;float min_range = 0.0f;int border_size = 1;pcl::RangeImage::Ptr range_image_src(new pcl::RangeImage);pcl::RangeImage::Ptr range_image_tgt(new pcl::RangeImage);range_image_src->createFromPointCloud(*cloud, pcl::deg2rad(0.02f), pcl::deg2rad(0.02f),pcl::deg2rad(360.0f), pcl::deg2rad(180.0f), scene_sensor_pose_src, coordinate_frame,noise_level, min_range, border_size);range_image_tgt->createFromPointCloud(*cloud_target, pcl::deg2rad(0.02f), pcl::deg2rad(0.02f),pcl::deg2rad(360.0f), pcl::deg2rad(180.0f), scene_sensor_pose_tgt, coordinate_frame,noise_level, min_range, border_size);-
pcl::RangeImage::CoordinateFrame coordinate_frame = pcl::RangeImage::CAMERA_FRAME;:这里定义了深度图像的坐标系,常用的坐标系包括相机坐标系 (CAMERA_FRAME) 和激光雷达坐标系 (LASER_FRAME)。 -
Eigen::Affine3f scene_sensor_pose_src(Eigen::Affine3f::Identity());和Eigen::Affine3f scene_sensor_pose_tgt(Eigen::Affine3f::Identity());:创建了两个Affine3f类型的对象,用于表示点云的姿态(位置和方向)。 -
通过以下代码计算了源点云和目标点云的姿态(位置和方向):
scene_sensor_pose_src = Eigen::Affine3f(Eigen::Translation3f(cloud->sensor_origin_[0],cloud->sensor_origin_[1], cloud->sensor_origin_[2])) * Eigen::Affine3f(cloud->sensor_orientation_); scene_sensor_pose_tgt = Eigen::Affine3f(Eigen::Translation3f(cloud_target->sensor_origin_[0],cloud_target->sensor_origin_[1], cloud_target->sensor_origin_[2])) * Eigen::Affine3f(cloud_target->sensor_orientation_); -
设置了创建深度图像所需的参数:
float noise_level = 0.0;:噪声水平,表示深度图像中的噪声级别。float min_range = 0.0f;:最小测量范围,表示深度图像中的最小测量距离。int border_size = 1;:边界大小,表示深度图像周围的边界大小。
-
创建了两个深度图像对象的指针:
pcl::RangeImage::Ptr range_image_src(new pcl::RangeImage);和pcl::RangeImage::Ptr range_image_tgt(new pcl::RangeImage); -
通过以下代码,使用点云数据创建深度图像:
range_image_src->createFromPointCloud(*cloud, pcl::deg2rad(0.02f), pcl::deg2rad(0.02f),pcl::deg2rad(360.0f), pcl::deg2rad(180.0f), scene_sensor_pose_src, coordinate_frame,noise_level, min_range, border_size);
range_image_tgt->createFromPointCloud(*cloud_target, pcl::deg2rad(0.02f), pcl::deg2rad(0.02f),pcl::deg2rad(360.0f), pcl::deg2rad(180.0f), scene_sensor_pose_tgt, coordinate_frame,noise_level, min_range, border_size);
在这里,参数的设置会影响深度图像的质量和内容。例如,noise_level、min_range 和 border_size 参数会影响深度图像的噪声水平、最小测量范围以及边界大小。而角度参数 pcl::deg2rad() 用于将角度转换为弧度。
结果:
输入点云的深度图

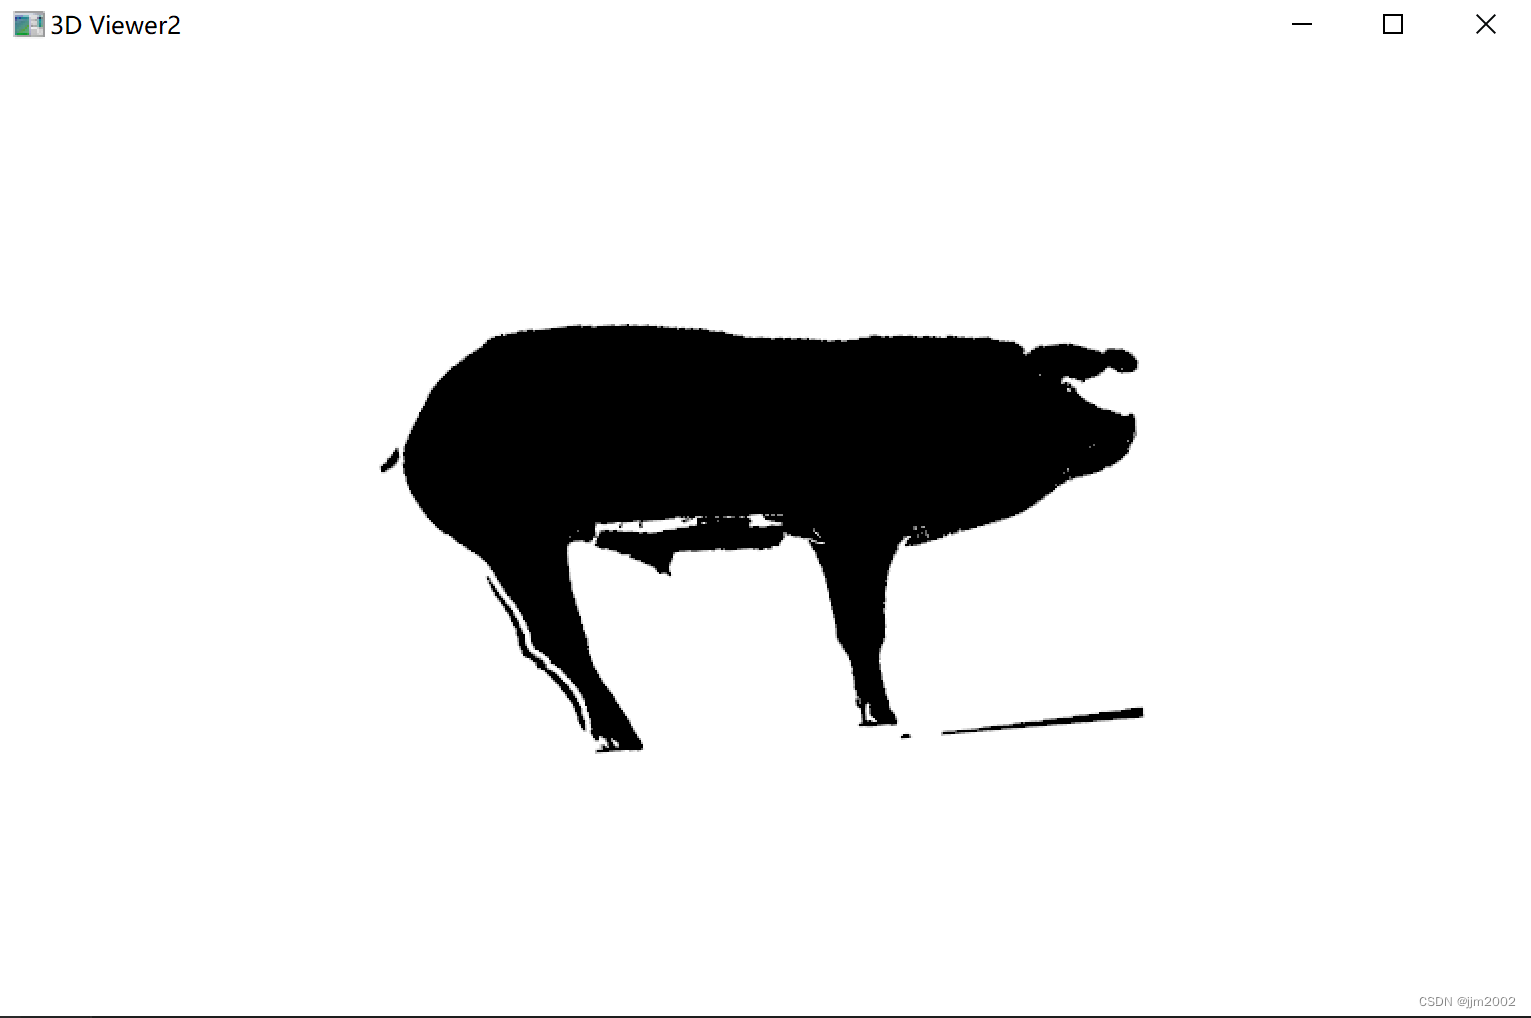
输出点云的深度图
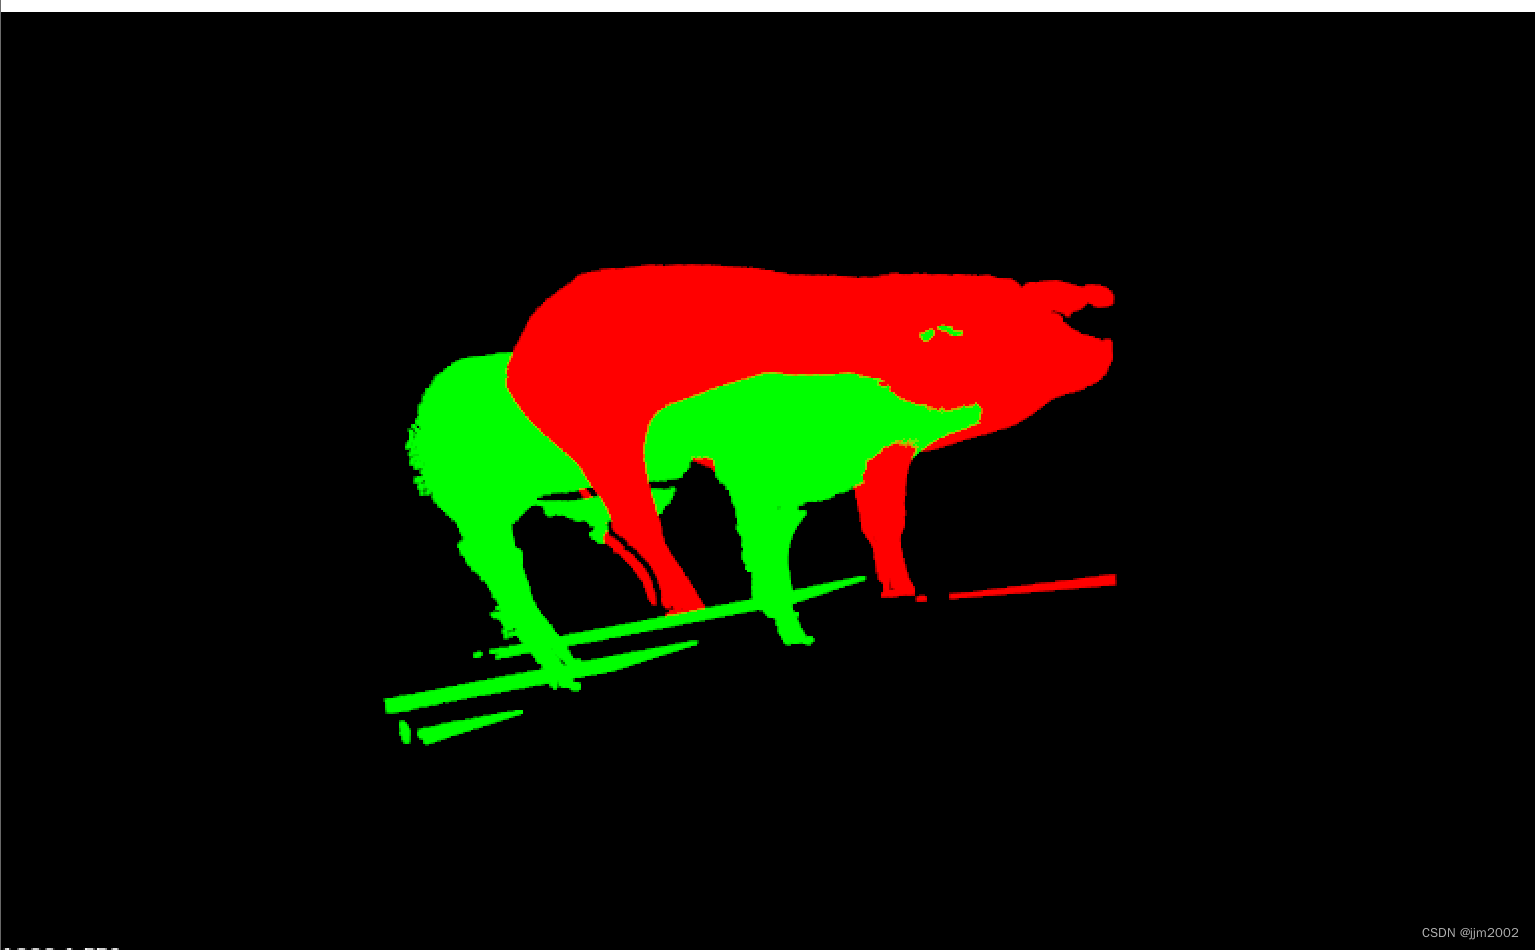
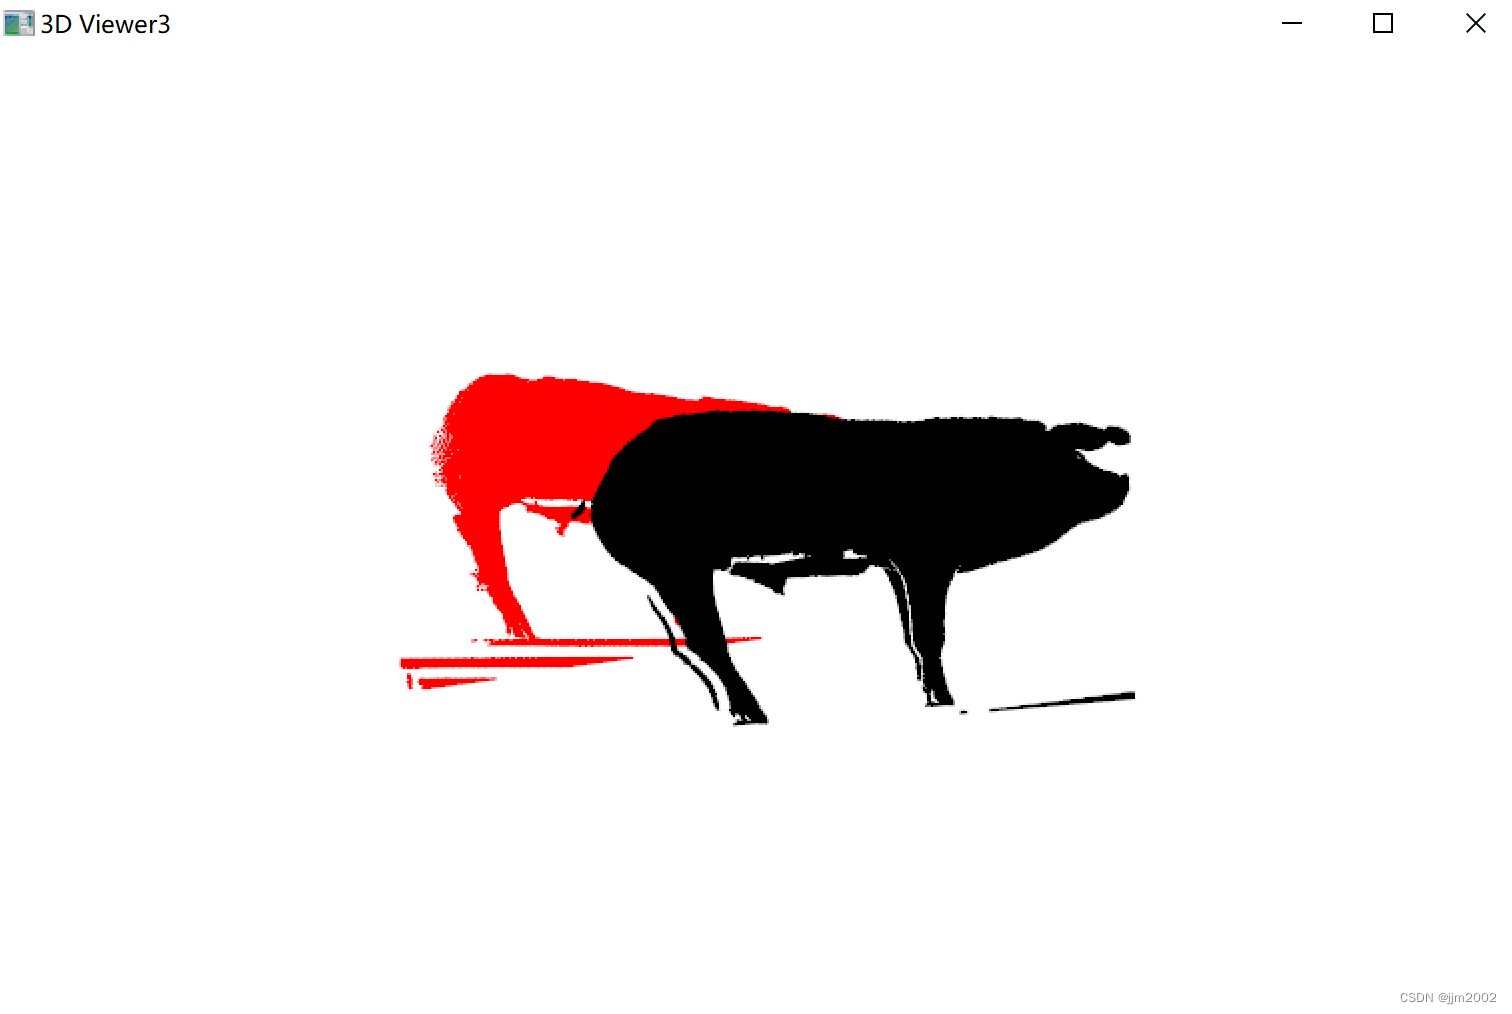
输入点云和输出点云放在一起的深度图 ,为了区别,我把输入点云深度图颜色改成红色
二、 NARF关键点检测
C++
#include <iostream>
#include <pcl/io/pcd_io.h>
#include <pcl/point_types.h>
#include <pcl/common/io.h>
#include <pcl/visualization/pcl_visualizer.h>
#include <boost/thread/thread.hpp>
#include <pcl/visualization/cloud_viewer.h>
#include <pcl/common/common_headers.h>
#include <pcl/range_image/range_image.h>
#include <pcl/features/range_image_border_extractor.h>
#include <pcl/keypoints/narf_keypoint.h>
using namespace std;int main(int, char** argv)
{pcl::PointCloud<pcl::PointXYZ>::Ptr cloud(new pcl::PointCloud<pcl::PointXYZ>);//要配准变化的点云pcl::PointCloud<pcl::PointXYZ>::Ptr cloud_target(new pcl::PointCloud<pcl::PointXYZ>);//目标点云(不变的)if (pcl::io::loadPCDFile<pcl::PointXYZ>("pcd/pig_view1.pcd", *cloud) == -1){PCL_ERROR("加载点云失败\n");}if (pcl::io::loadPCDFile<pcl::PointXYZ>("pcd/pig_view2.pcd", *cloud_target) == -1){PCL_ERROR("加载点云失败\n");}cout << "读取原点云个数: " << cloud->points.size() << endl;cout << "读取目标点云个数: " << cloud_target->points.size() << endl;pcl::RangeImage::CoordinateFrame coordinate_frame = pcl::RangeImage::CAMERA_FRAME;Eigen::Affine3f scene_sensor_pose_src(Eigen::Affine3f::Identity());Eigen::Affine3f scene_sensor_pose_tgt(Eigen::Affine3f::Identity());scene_sensor_pose_src = Eigen::Affine3f(Eigen::Translation3f(cloud->sensor_origin_[0],cloud->sensor_origin_[1], cloud->sensor_origin_[2])) * Eigen::Affine3f(cloud->sensor_orientation_);scene_sensor_pose_tgt = Eigen::Affine3f(Eigen::Translation3f(cloud_target->sensor_origin_[0],cloud_target->sensor_origin_[1], cloud_target->sensor_origin_[2])) * Eigen::Affine3f(cloud_target->sensor_orientation_);//-------------从点云创建深度图像———————————float noise_level = 0.0;float min_range = 0.0f;int border_size = 1;pcl::RangeImage::Ptr range_image_src(new pcl::RangeImage);pcl::RangeImage::Ptr range_image_tgt(new pcl::RangeImage);range_image_src->createFromPointCloud(*cloud, pcl::deg2rad(0.02f), pcl::deg2rad(0.02f),pcl::deg2rad(360.0f), pcl::deg2rad(180.0f), scene_sensor_pose_src, coordinate_frame,noise_level, min_range, border_size);range_image_tgt->createFromPointCloud(*cloud_target, pcl::deg2rad(0.02f), pcl::deg2rad(0.02f),pcl::deg2rad(360.0f), pcl::deg2rad(180.0f), scene_sensor_pose_tgt, coordinate_frame,noise_level, min_range, border_size);//range_image->setUnseenToMaxRange();//设置不能观察到的点都为远距离点//-----------提取NARF关键点-------------pcl::RangeImage& range_image1 = *range_image_src;pcl::RangeImageBorderExtractor range_image_border_extractor1;pcl::PointCloud<pcl::PointXYZ>::Ptr keypoints1(new pcl::PointCloud<pcl::PointXYZ>());pcl::NarfKeypoint narf_keypoint_detector1(&range_image_border_extractor1);narf_keypoint_detector1.setRangeImage(&range_image1);//指定深度图narf_keypoint_detector1.getParameters().support_size = 0.2f;//指定搜索空间球体的半径,指定计算感兴趣值时所使用的领域范围narf_keypoint_detector1.getParameters().add_points_on_straight_edges = true;//指点是否添加垂直边缘上的点narf_keypoint_detector1.getParameters().distance_for_additional_points = 0.5;pcl::PointCloud<int>keypoint_indices1;narf_keypoint_detector1.compute(keypoint_indices1);//计算索引keypoints1->points.resize(keypoint_indices1.size());keypoints1->height = keypoint_indices1.height;keypoints1->width = keypoint_indices1.width;for (std::size_t i = 0; i < keypoint_indices1.points.size(); ++i){keypoints1->points[i].getVector3fMap() = range_image_src->points[keypoint_indices1.points[i]].getVector3fMap();}cout << "NARF points 的原点云提取结果为 " << keypoints1->points.size() << endl;pcl::RangeImage& range_image2 = *range_image_tgt;pcl::RangeImageBorderExtractor range_image_border_extractor2;pcl::PointCloud<pcl::PointXYZ>::Ptr keypoints2(new pcl::PointCloud<pcl::PointXYZ>());pcl::NarfKeypoint narf_keypoint_detector2(&range_image_border_extractor2);narf_keypoint_detector2.setRangeImage(&range_image2);//指定深度图narf_keypoint_detector2.getParameters().support_size = 0.2f;//指定搜索空间球体的半径,指定计算感兴趣值时所使用的领域范围narf_keypoint_detector2.getParameters().add_points_on_straight_edges = true;//指点是否添加垂直边缘上的点narf_keypoint_detector2.getParameters().distance_for_additional_points = 0.5;pcl::PointCloud<int>keypoint_indices2;narf_keypoint_detector2.compute(keypoint_indices2);//计算索引keypoints2->points.resize(keypoint_indices2.size());keypoints2->height = keypoint_indices2.height;keypoints2->width = keypoint_indices2.width;for (std::size_t i = 0; i < keypoint_indices2.points.size(); ++i){keypoints2->points[i].getVector3fMap() = range_image_tgt->points[keypoint_indices2.points[i]].getVector3fMap();}cout << "NARF points 的目标点云提取结果为 " << keypoints2->points.size() << endl;//关键点显示boost::shared_ptr<pcl::visualization::PCLVisualizer> viewer1(new pcl::visualization::PCLVisualizer("V1"));viewer1->setBackgroundColor(0, 0, 0);viewer1->setWindowName("NARF Key point extraction");pcl::visualization::PointCloudColorHandlerCustom<pcl::PointXYZ> single_color1(cloud, 0.0, 255, 0.0);viewer1->addPointCloud<pcl::PointXYZ>(keypoints1, single_color1, "key cloud");//特征点viewer1->setPointCloudRenderingProperties(pcl::visualization::PCL_VISUALIZER_POINT_SIZE, 3, "key cloud");while (!viewer1->wasStopped()){viewer1->spinOnce(100);boost::this_thread::sleep(boost::posix_time::microseconds(100));}boost::shared_ptr<pcl::visualization::PCLVisualizer> viewer2(new pcl::visualization::PCLVisualizer("V2"));viewer2->setBackgroundColor(0, 0, 0);viewer2->setWindowName("NARF Key point extraction");pcl::visualization::PointCloudColorHandlerCustom<pcl::PointXYZ> single_color2(cloud, 0.0, 255, 0.0);viewer2->addPointCloud<pcl::PointXYZ>(keypoints2, single_color2, "key cloud");//特征点viewer2->setPointCloudRenderingProperties(pcl::visualization::PCL_VISUALIZER_POINT_SIZE, 3, "key cloud");while (!viewer2->wasStopped()){viewer2->spinOnce(100);boost::this_thread::sleep(boost::posix_time::microseconds(100));}boost::shared_ptr<pcl::visualization::PCLVisualizer> viewer3(new pcl::visualization::PCLVisualizer("V3"));viewer3->setBackgroundColor(0, 0, 0);viewer3->setWindowName("NARF Key point extraction");pcl::visualization::PointCloudColorHandlerCustom<pcl::PointXYZ> single_color3(cloud, 0.0, 255, 0.0);viewer3->addPointCloud<pcl::PointXYZ>(cloud, single_color3, "sample cloud");viewer3->addPointCloud<pcl::PointXYZ>(keypoints1, "key cloud");//特征点viewer3->setPointCloudRenderingProperties(pcl::visualization::PCL_VISUALIZER_POINT_SIZE, 3, "key cloud");viewer3->setPointCloudRenderingProperties(pcl::visualization::PCL_VISUALIZER_COLOR, 1.0, 0.0, 0.0, "key cloud");while (!viewer3->wasStopped()){viewer3->spinOnce(100);boost::this_thread::sleep(boost::posix_time::microseconds(100));}boost::shared_ptr<pcl::visualization::PCLVisualizer> viewer4(new pcl::visualization::PCLVisualizer("V4"));viewer4->setBackgroundColor(0, 0, 0);viewer4->setWindowName("NARF Key point extraction");pcl::visualization::PointCloudColorHandlerCustom<pcl::PointXYZ> single_color4(cloud, 0.0, 255, 0.0);viewer4->addPointCloud<pcl::PointXYZ>(cloud_target, single_color4, "sample cloud");viewer4->addPointCloud<pcl::PointXYZ>(keypoints2, "key cloud");//特征点viewer4->setPointCloudRenderingProperties(pcl::visualization::PCL_VISUALIZER_POINT_SIZE, 3, "key cloud");viewer4->setPointCloudRenderingProperties(pcl::visualization::PCL_VISUALIZER_COLOR, 1.0, 0.0, 0.0, "key cloud");while (!viewer4->wasStopped()){viewer4->spinOnce(100);boost::this_thread::sleep(boost::posix_time::microseconds(100));}return 0;
}
关键代码解析:
pcl::RangeImage& range_image1 = *range_image_src;pcl::RangeImageBorderExtractor range_image_border_extractor1;pcl::PointCloud<pcl::PointXYZ>::Ptr keypoints1(new pcl::PointCloud<pcl::PointXYZ>());pcl::NarfKeypoint narf_keypoint_detector1(&range_image_border_extractor1);narf_keypoint_detector1.setRangeImage(&range_image1);//指定深度图narf_keypoint_detector1.getParameters().support_size = 0.2f;//指定搜索空间球体的半径,指定计算感兴趣值时所使用的领域范围narf_keypoint_detector1.getParameters().add_points_on_straight_edges = true;//指点是否添加垂直边缘上的点narf_keypoint_detector1.getParameters().distance_for_additional_points = 0.5;pcl::PointCloud<int>keypoint_indices1;narf_keypoint_detector1.compute(keypoint_indices1);//计算索引keypoints1->points.resize(keypoint_indices1.size());keypoints1->height = keypoint_indices1.height;keypoints1->width = keypoint_indices1.width;for (std::size_t i = 0; i < keypoint_indices1.points.size(); ++i){keypoints1->points[i].getVector3fMap() = range_image_src->points[keypoint_indices1.points[i]].getVector3fMap();}-
pcl::RangeImage& range_image1 = *range_image_src;:将源深度图像的引用保存到range_image1中,以便后续使用。 -
pcl::RangeImageBorderExtractor range_image_border_extractor1;:创建深度图像边界提取器的实例,用于边界处理。 -
pcl::PointCloud<pcl::PointXYZ>::Ptr keypoints1(new pcl::PointCloud<pcl::PointXYZ>());:创建一个点云对象keypoints1用于存储提取的关键点。 -
pcl::NarfKeypoint narf_keypoint_detector1(&range_image_border_extractor1);:创建 NARF 关键点检测器的实例,并将边界提取器传递给它。 -
narf_keypoint_detector1.setRangeImage(&range_image1);:指定 NARF 关键点检测器要使用的深度图像。 -
narf_keypoint_detector1.getParameters().support_size = 0.2f;:设置搜索空间球体的半径,该参数影响关键点的计算感兴趣值时所使用的领域范围。较小的值可能导致检测到更细小的关键点。 -
narf_keypoint_detector1.getParameters().add_points_on_straight_edges = true;:指定是否在垂直边缘上添加点。设置为true可以增加关键点的数量,但可能也增加噪声。 -
narf_keypoint_detector1.getParameters().distance_for_additional_points = 0.5;:设置额外点之间的距离。该参数用于在一些特殊情况下添加额外的关键点。 -
pcl::PointCloud<int> keypoint_indices1;:创建一个整数类型的点云对象,用于存储关键点的索引。 -
narf_keypoint_detector1.compute(keypoint_indices1);:计算关键点的索引。 -
keypoints1->points.resize(keypoint_indices1.size());:调整关键点点云的大小。 -
使用循环将关键点的坐标从深度图像的索引中提取并存储到
keypoints1中。
结果:
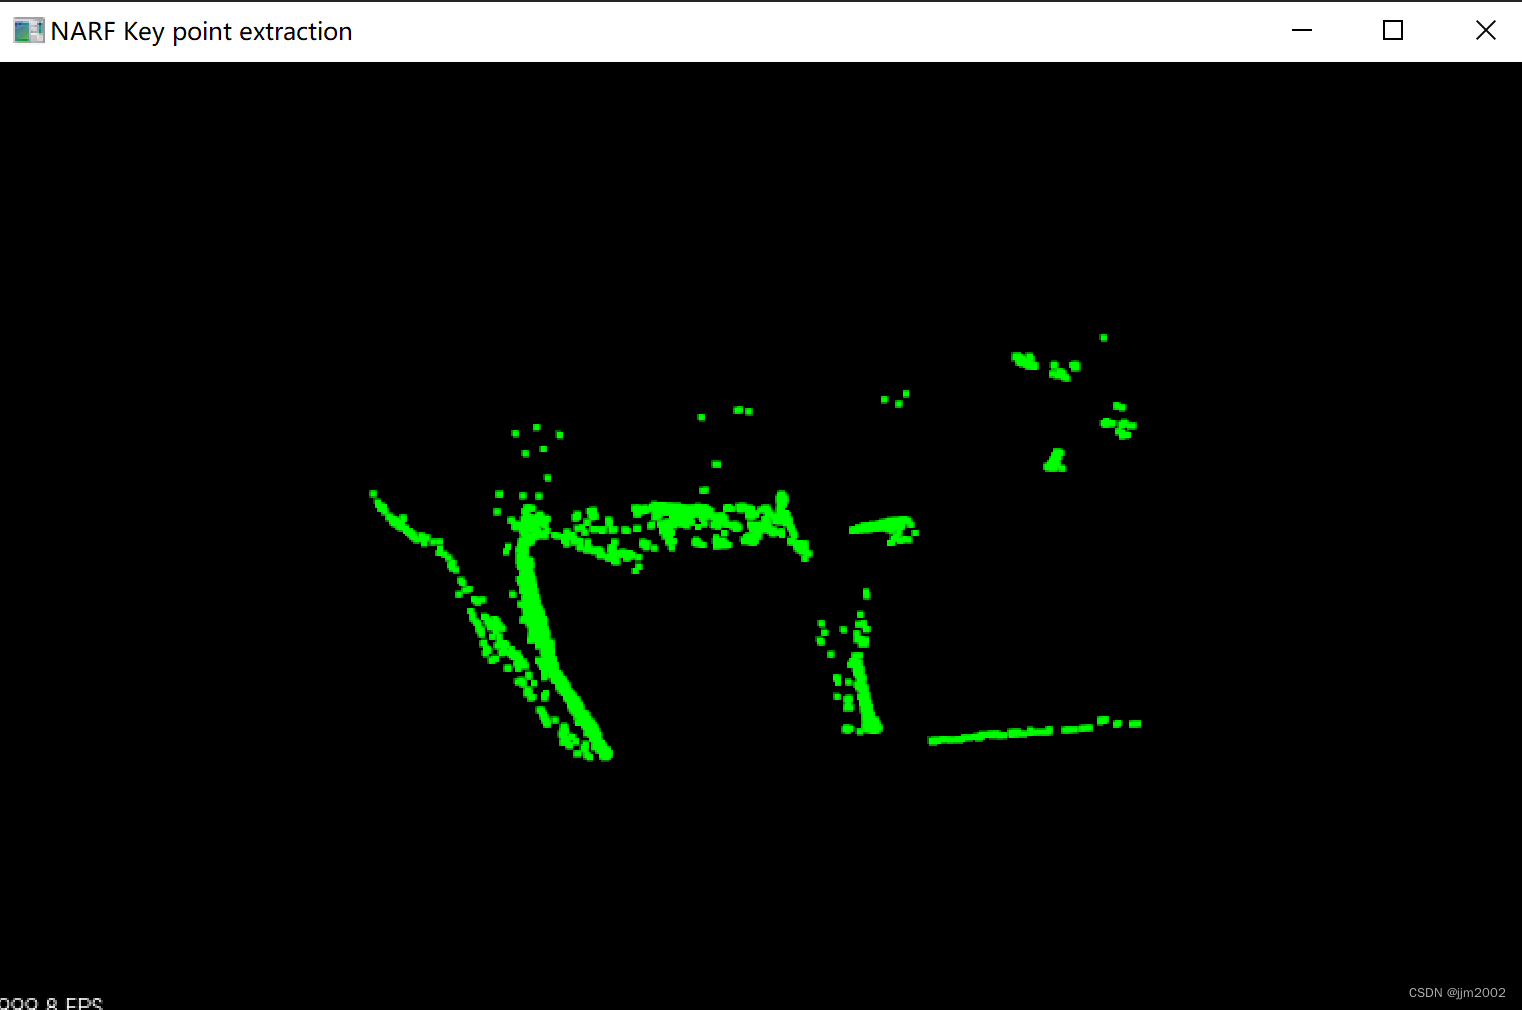
输入点云的关键点

输出点云的关键点
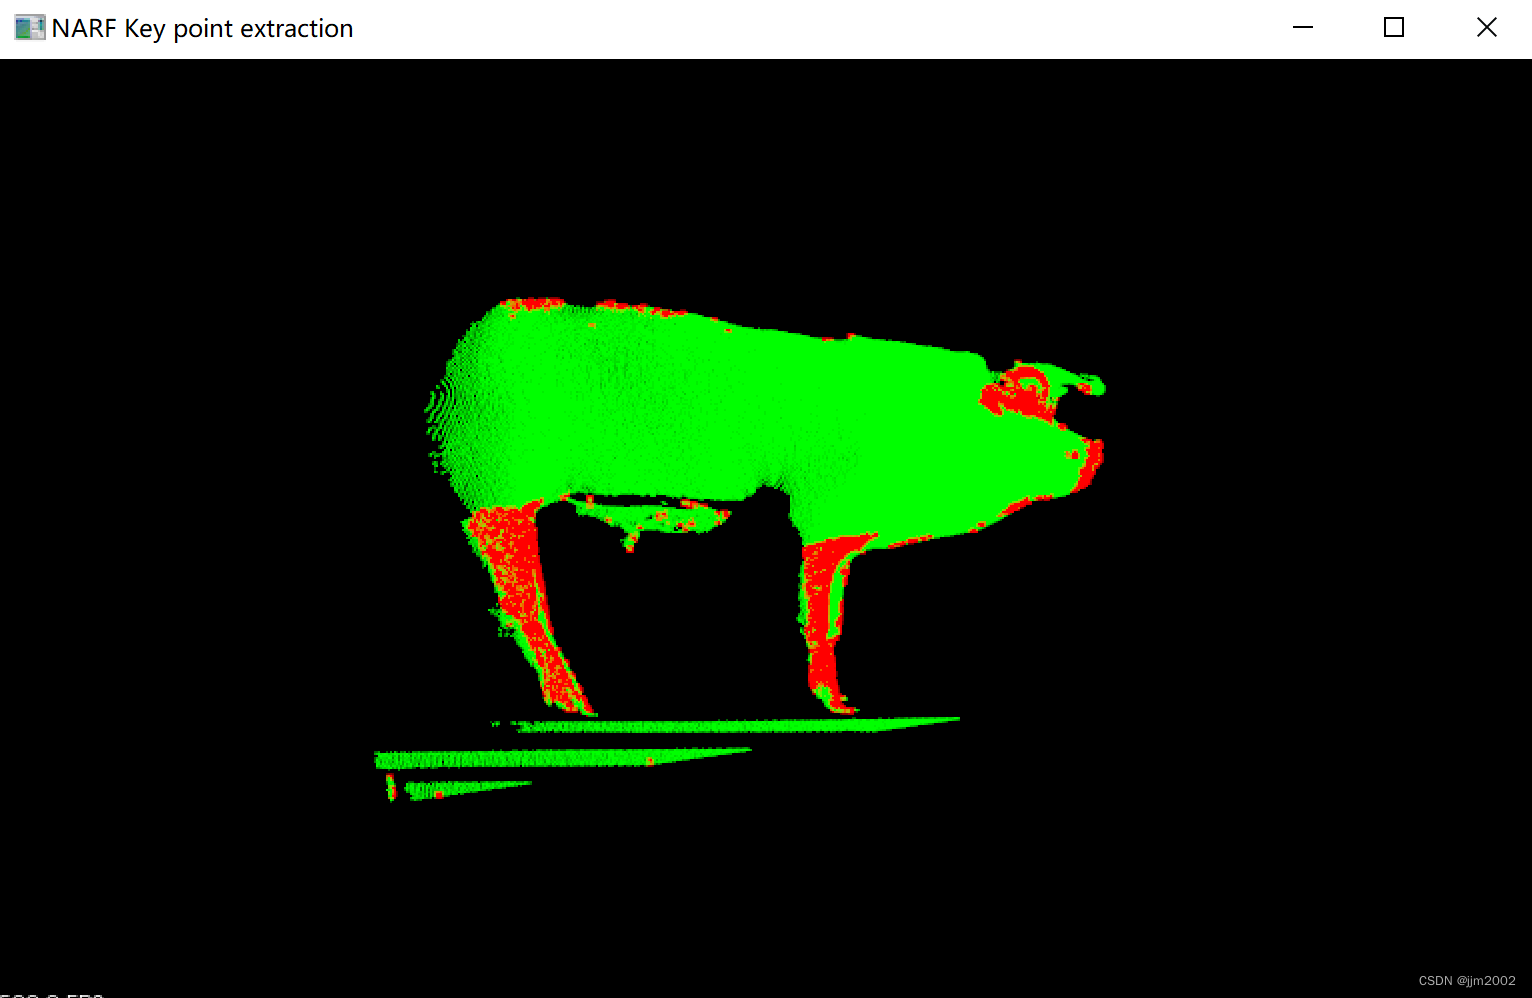
输入点云的关键点与输入点云一起展示
输出点云的关键点与输出点云一起展示

三、NARF关键点检测及SAC-IA粗配准
C++
#include <iostream>
#include <pcl/io/pcd_io.h>
#include <pcl/point_types.h>
#include <pcl/common/io.h>
#include <pcl/keypoints/iss_3d.h>
#include <pcl/features/normal_3d.h>
#include <pcl/visualization/pcl_visualizer.h>
#include <boost/thread/thread.hpp>
#include <pcl/visualization/cloud_viewer.h>
#include <pcl/features/fpfh_omp.h>
#include <pcl/common/common_headers.h>
#include <pcl/registration/ia_ransac.h>
#include <pcl/range_image/range_image.h>
#include <pcl/features/range_image_border_extractor.h>
#include <pcl/keypoints/narf_keypoint.h>using namespace std;
void extract_keypoint(pcl::PointCloud<pcl::PointXYZ>::Ptr& cloud, pcl::PointCloud<pcl::PointXYZ>::Ptr& keypoint)
{pcl::RangeImage::CoordinateFrame coordinate_frame = pcl::RangeImage::CAMERA_FRAME;Eigen::Affine3f scene_sensor_pose(Eigen::Affine3f::Identity());scene_sensor_pose = Eigen::Affine3f(Eigen::Translation3f(cloud->sensor_origin_[0],cloud->sensor_origin_[1], cloud->sensor_origin_[2])) * Eigen::Affine3f(cloud->sensor_orientation_);//-------------从点云创建深度图像———————————float noise_level = 0.0;float min_range = 0.0f;int border_size = 1;pcl::RangeImage::Ptr range_image(new pcl::RangeImage);range_image->createFromPointCloud(*cloud, pcl::deg2rad(0.02f), pcl::deg2rad(0.02f),pcl::deg2rad(360.0f), pcl::deg2rad(180.0f), scene_sensor_pose, coordinate_frame,noise_level, min_range, border_size);//range_image->setUnseenToMaxRange();//设置不能观察到的点都为远距离点//-----------提取NARF关键点-------------pcl::RangeImage& range_image0 = *range_image;pcl::RangeImageBorderExtractor range_image_border_extractor;pcl::NarfKeypoint narf_keypoint_detector(&range_image_border_extractor);narf_keypoint_detector.setRangeImage(&range_image0);//指定深度图narf_keypoint_detector.getParameters().support_size = 0.2f;//指定搜索空间球体的半径,指定计算感兴趣值时所使用的领域范围narf_keypoint_detector.getParameters().add_points_on_straight_edges = true;//指点是否添加垂直边缘上的点narf_keypoint_detector.getParameters().distance_for_additional_points = 0.5;pcl::PointCloud<int>keypoint_indices;narf_keypoint_detector.compute(keypoint_indices);//计算索引keypoint->points.resize(keypoint_indices.size());keypoint->height = keypoint_indices.height;keypoint->width = keypoint_indices.width;for (std::size_t i = 0; i < keypoint_indices.points.size(); ++i){keypoint->points[i].getVector3fMap() = range_image->points[keypoint_indices.points[i]].getVector3fMap();}}
pcl::PointCloud<pcl::FPFHSignature33>::Ptr compute_fpfh_feature(pcl::PointCloud<pcl::PointXYZ>::Ptr& keypoint)
{pcl::search::KdTree<pcl::PointXYZ>::Ptr tree;pcl::PointCloud<pcl::Normal>::Ptr normals(new pcl::PointCloud<pcl::Normal>);pcl::NormalEstimation<pcl::PointXYZ, pcl::Normal> n;n.setInputCloud(keypoint);n.setSearchMethod(tree);n.setKSearch(10);n.compute(*normals);pcl::PointCloud<pcl::FPFHSignature33>::Ptr fpfh(new pcl::PointCloud<pcl::FPFHSignature33>);pcl::FPFHEstimationOMP<pcl::PointXYZ, pcl::Normal, pcl::FPFHSignature33> f;f.setNumberOfThreads(8);f.setInputCloud(keypoint);f.setInputNormals(normals);f.setSearchMethod(tree);f.setRadiusSearch(50);f.compute(*fpfh);return fpfh;
}
pcl::PointCloud<pcl::PointXYZ>::Ptr sac_align(pcl::PointCloud<pcl::PointXYZ>::Ptr& cloud, pcl::PointCloud<pcl::PointXYZ>::Ptr s_k, pcl::PointCloud<pcl::PointXYZ>::Ptr t_k, pcl::PointCloud<pcl::FPFHSignature33>::Ptr sk_fpfh, pcl::PointCloud<pcl::FPFHSignature33>::Ptr tk_fpfh)
{pcl::SampleConsensusInitialAlignment<pcl::PointXYZ, pcl::PointXYZ, pcl::FPFHSignature33> scia;scia.setInputSource(s_k);scia.setInputTarget(t_k);scia.setSourceFeatures(sk_fpfh);scia.setTargetFeatures(tk_fpfh);scia.setMinSampleDistance(7);///参数:设置采样点之间的最小距离,满足的被当做采样点scia.setNumberOfSamples(250);设置每次迭代设置采样点的个数(这个参数多可以增加配准精度)scia.setCorrespondenceRandomness(4);//设置选择随机特征对应点时要使用的邻域点个数。值越大,特征匹配的随机性就越大/*scia.setEuclideanFitnessEpsilon(0.001);scia.setTransformationEpsilon(1e-10);scia.setRANSACIterations(30);*/pcl::PointCloud<pcl::PointXYZ>::Ptr sac_result(new pcl::PointCloud<pcl::PointXYZ>);scia.align(*sac_result);pcl::transformPointCloud(*cloud, *sac_result, scia.getFinalTransformation());return sac_result;
}
int main(int, char** argv)
{pcl::PointCloud<pcl::PointXYZ>::Ptr cloud(new pcl::PointCloud<pcl::PointXYZ>);//要配准变化的点云pcl::PointCloud<pcl::PointXYZ>::Ptr cloud_target(new pcl::PointCloud<pcl::PointXYZ>);//目标点云(不变的)if (pcl::io::loadPCDFile<pcl::PointXYZ>("pcd/pig_view1.pcd", *cloud) == -1){PCL_ERROR("加载点云失败\n");}if (pcl::io::loadPCDFile<pcl::PointXYZ>("pcd/pig_view2.pcd", *cloud_target) == -1){PCL_ERROR("加载点云失败\n");}boost::shared_ptr<pcl::visualization::PCLVisualizer>viewer1(new pcl::visualization::PCLVisualizer("v1"));viewer1->setBackgroundColor(0, 0, 0);  //设置背景颜色为黑色// 对目标点云着色可视化 (red).pcl::visualization::PointCloudColorHandlerCustom<pcl::PointXYZ>target_color1(cloud_target, 255, 0, 0);viewer1->addPointCloud<pcl::PointXYZ>(cloud_target, target_color1, "target cloud");viewer1->setPointCloudRenderingProperties(pcl::visualization::PCL_VISUALIZER_POINT_SIZE, 2, "target cloud");// 对源点云着色可视化 (green).pcl::visualization::PointCloudColorHandlerCustom<pcl::PointXYZ>input_color1(cloud, 0, 255, 0);viewer1->addPointCloud<pcl::PointXYZ>(cloud, input_color1, "input cloud");viewer1->setPointCloudRenderingProperties(pcl::visualization::PCL_VISUALIZER_POINT_SIZE, 2, "input cloud");//while (!viewer1->wasStopped()){viewer1->spinOnce(100);boost::this_thread::sleep(boost::posix_time::microseconds(100));}////粗配准pcl::PointCloud<pcl::PointXYZ>::Ptr s_k(new pcl::PointCloud<pcl::PointXYZ>);pcl::PointCloud<pcl::PointXYZ>::Ptr t_k(new pcl::PointCloud<pcl::PointXYZ>);extract_keypoint(cloud, s_k);extract_keypoint(cloud_target, t_k);std::cout << "关键点数量" << s_k->size() << std::endl;std::cout << "关键点数量" << t_k->size() << std::endl;pcl::PointCloud<pcl::FPFHSignature33>::Ptr sk_fpfh = compute_fpfh_feature(s_k);pcl::PointCloud<pcl::FPFHSignature33>::Ptr tk_fpfh = compute_fpfh_feature(t_k);pcl::PointCloud<pcl::PointXYZ>::Ptr result(new pcl::PointCloud<pcl::PointXYZ>);result = sac_align(cloud, s_k, t_k, sk_fpfh, tk_fpfh);boost::shared_ptr<pcl::visualization::PCLVisualizer>viewer2(new pcl::visualization::PCLVisualizer("显示点云"));viewer2->setBackgroundColor(0, 0, 0);  //设置背景颜色为黑色// 对目标点云着色可视化 (red).pcl::visualization::PointCloudColorHandlerCustom<pcl::PointXYZ>target_color2(cloud_target, 255, 0, 0);viewer2->addPointCloud<pcl::PointXYZ>(cloud_target, target_color2, "target cloud");viewer2->setPointCloudRenderingProperties(pcl::visualization::PCL_VISUALIZER_POINT_SIZE, 2, "target cloud");// 对源点云着色可视化 (green).pcl::visualization::PointCloudColorHandlerCustom<pcl::PointXYZ>input_color2(result, 0, 255, 0);viewer2->addPointCloud<pcl::PointXYZ>(result, input_color2, "input cloud");viewer2->setPointCloudRenderingProperties(pcl::visualization::PCL_VISUALIZER_POINT_SIZE, 2, "input cloud");//while (!viewer2->wasStopped()){viewer2->spinOnce(100);boost::this_thread::sleep(boost::posix_time::microseconds(100));}return 0;
}
关键代码解析:
我之前在iss关键点检测以及SAC-IA粗配准-CSDN博客
已经解释了大部分函数,这篇文章就不赘述了
range_image->setUnseenToMaxRange();这一行是上述代码被注释掉的部分,稍微解释一下
setUnseenToMaxRange() 被调用后,范围图像中未被看到的点(通常由传感器视野限制或遮挡造成)的范围值会被设置为最大可能的范围值
scia.setEuclideanFitnessEpsilon(0.001);
scia.setTransformationEpsilon(1e-10);
scia.setRANSACIterations(30);
这三行也是上述代码被注释掉的部分,稍微解释一下
-
scia.setEuclideanFitnessEpsilon(0.001);:- 这一行代码设置了模型配准中的欧氏距离收敛标准(Euclidean Fitness Epsilon)。
- 欧氏距离是指在配准的过程中,通过优化变换矩阵,使得目标点云与源点云的每个点之间的欧氏距离小于该阈值。
- 参数值
0.001表示当欧氏距离小于或等于 0.001 时,认为配准已经收敛。
-
scia.setTransformationEpsilon(1e-10);:- 这一行代码设置了模型配准中的变换矩阵收敛标准(Transformation Epsilon)。
- 变换矩阵收敛标准是指通过优化变换矩阵的过程中,变换矩阵的变化小于该阈值时,认为配准已经收敛。
- 参数值
1e-10是一个非常小的数,表示当变换矩阵的变化小于或等于 1e-10 时,认为配准已经收敛。
-
scia.setRANSACIterations(30);:- 这一行代码设置了模型配准中的 RANSAC 迭代次数。
- RANSAC(Random Sample Consensus)是一种迭代优化的方法,通过随机采样来估计变换矩阵。
- 参数值
30表示进行 30 次 RANSAC 迭代来估计最优的变换矩阵。
影响:
- 调整
setEuclideanFitnessEpsilon的值会影响收敛的条件,更小的值可能导致更严格的收敛,但也可能增加算法运行时间。 - 调整
setTransformationEpsilon的值会影响变换矩阵的收敛条件,较小的值表示更精确的匹配,但也可能增加计算开销。 - 调整
setRANSACIterations的值会影响 RANSAC 迭代的次数,更多的迭代次数可能带来更精确的变换矩阵,但也增加了计算时间。
结果:
输入点云与输出点云
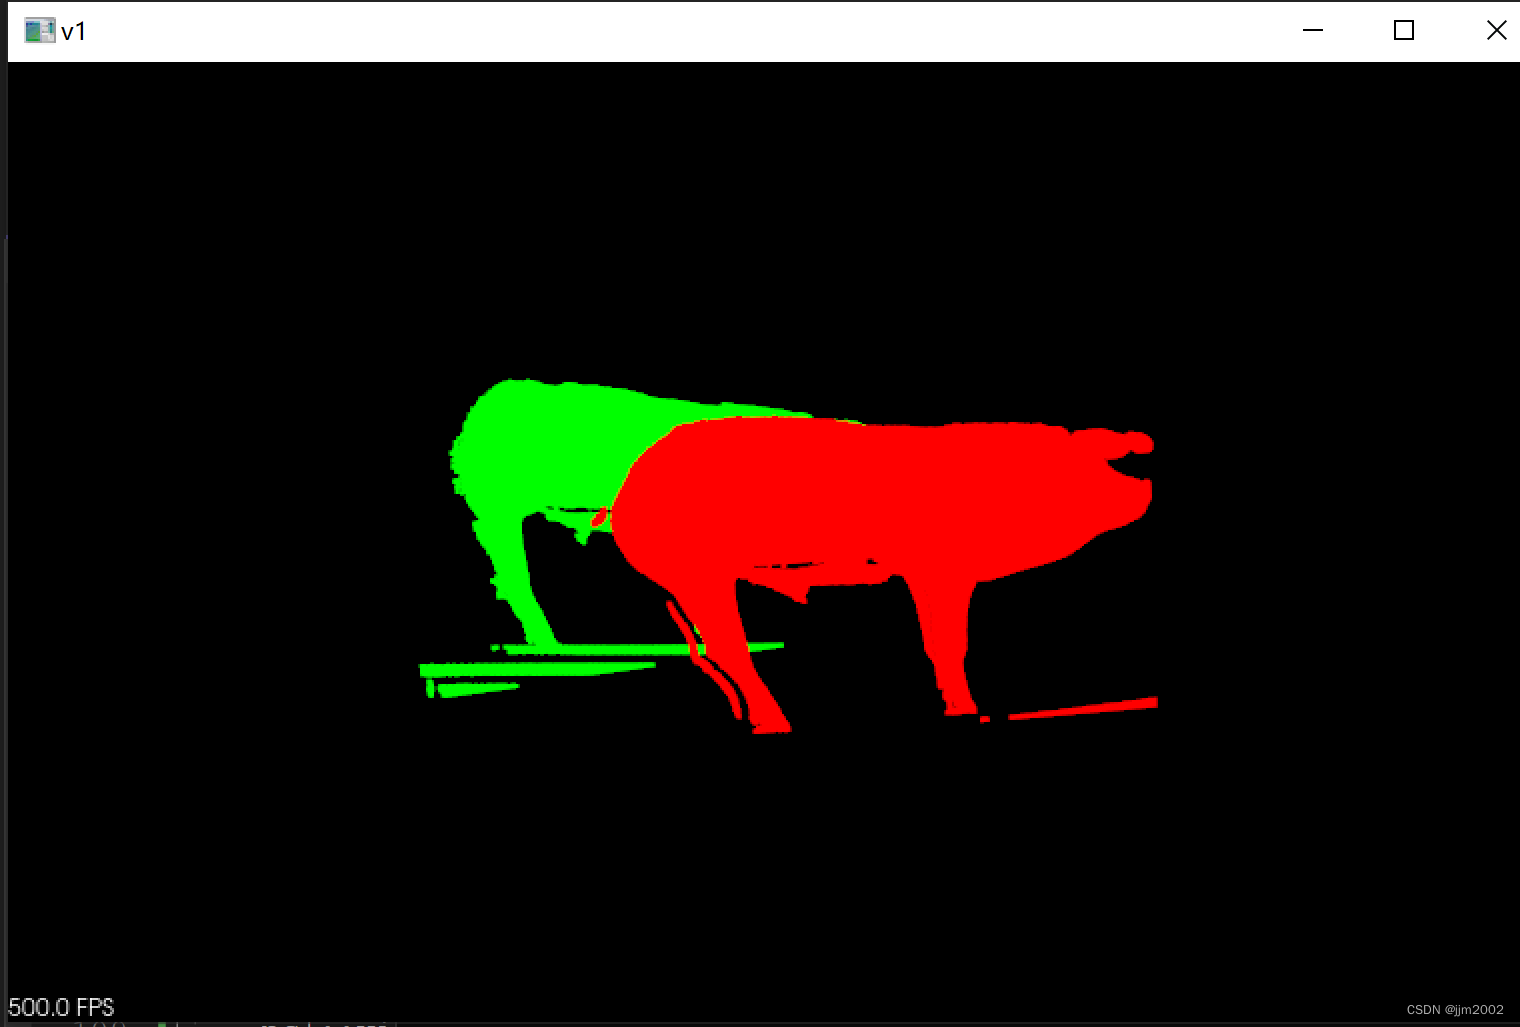
配准后的输入点云与输出点云,实际效果并不好,运行也慢,需要好几分钟