一、http设置
1.1 验证模块 需要输入用户名和密码


htpasswd
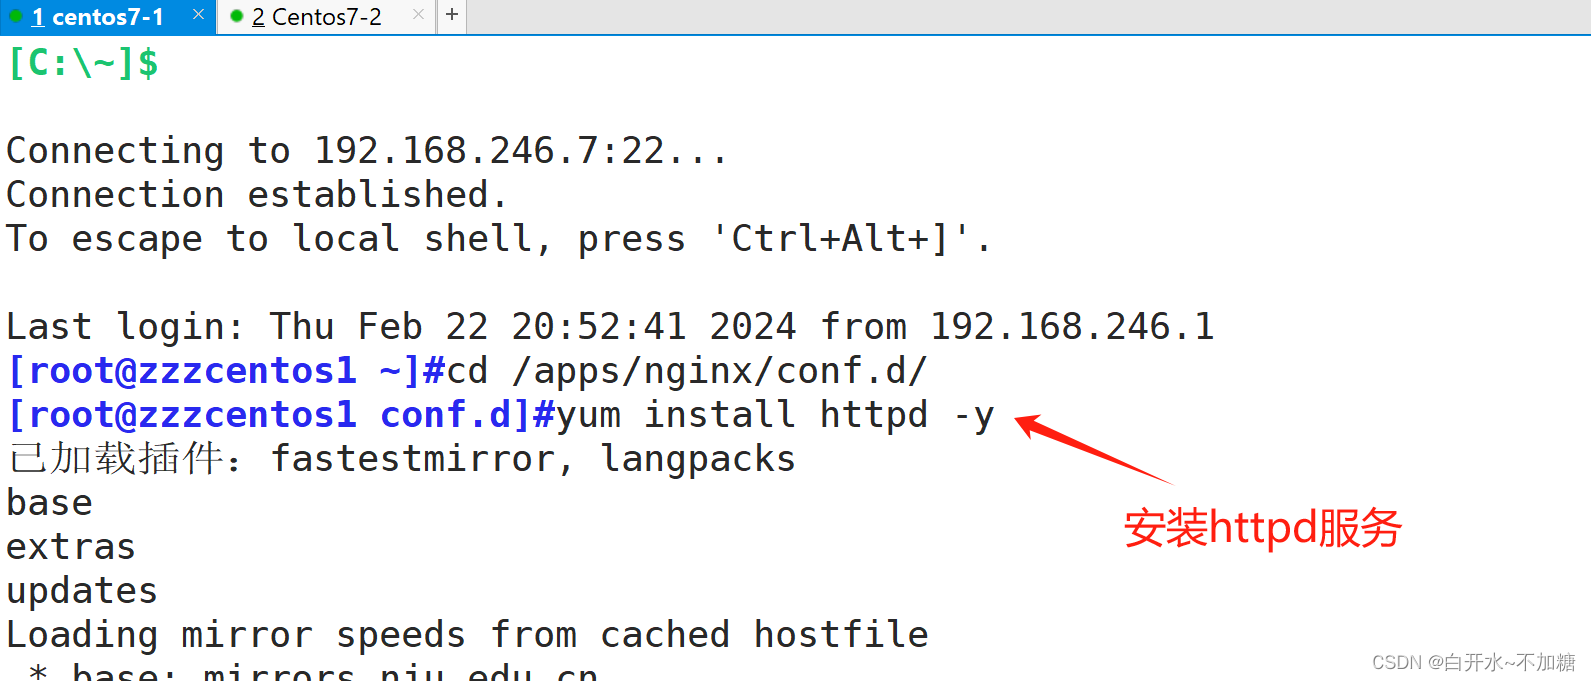
此命令来自于 httpd-tools 包,如果没有安装 安装一下即可
也可以安装httpd 直接yum install httpd -y 也一样
第一次生成文件
htpasswd -c 文件路径 姓名 交互式生成密码
htpasswd -bc 文件路径 姓名 密码 直接将密码跟在后面
htpasswd -c 文件路径 姓名 交互式生成密码

htpasswd -b 文件路径 姓名 密码 直接将密码跟在后面
再添加一个用户

验证:
192.168.246.7/admin

实验:


server{listen 80;server_name www.lucky.com;root /data/html/;location /admin{auth_basic "welcome cxk";#提示信息,不是所有浏览器都有用auth_basic_user_file /mnt/.nginxuser;#密码文件存放位置} }验证:
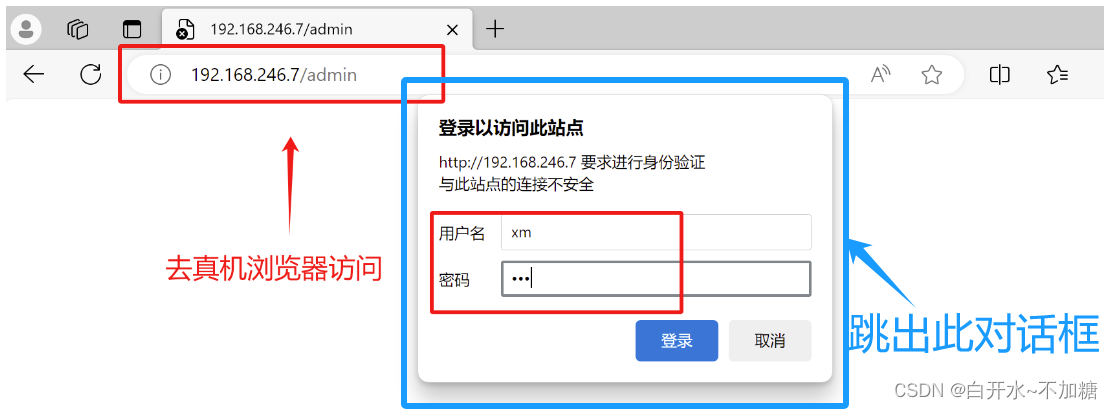

为社么找不到页面,那怎么办呢? 因为我们没有建这个文件夹,所以访问找不到页面404
根据配置文件建立文件夹


验证方法一:真机中验证

验证方法二:去虚拟机也可以验证


1.2 网页的状态页
基于nginx 模块 ngx_http_stub_status_module 实现,在编译安装nginx的时候需要添加编译参数 --with-http_stub_status_module,否则配置完成之后监测会是提示语法错误注意: 状态页显示的是整个服务器的状态,而非虚拟主机的状态

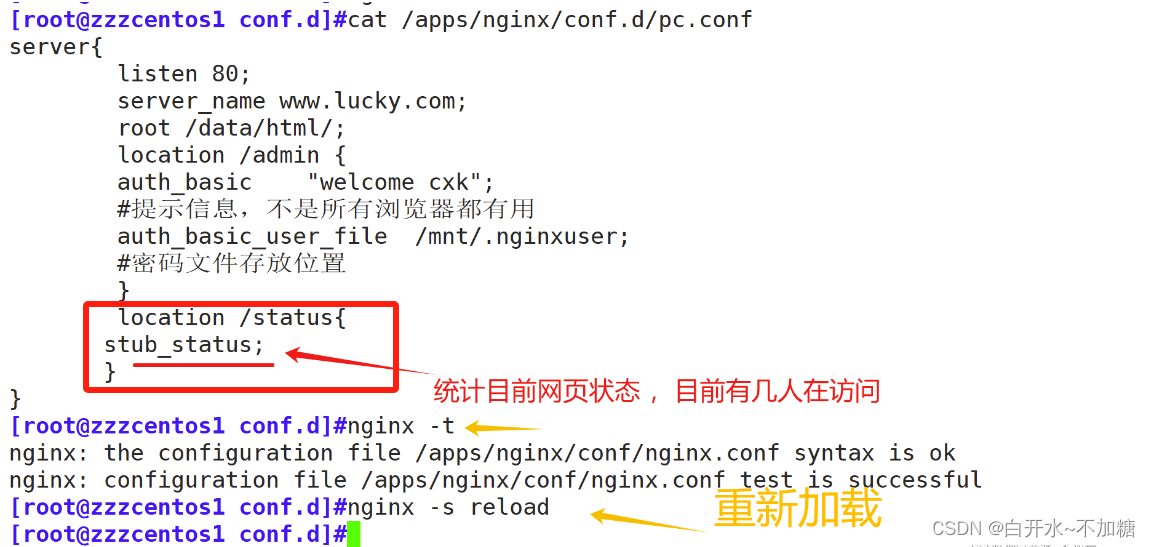
server{listen 80;server_name www.lucky.com;root /data/html/;location /admin {   auth_basic    "welcome cxk";#提示信息,不是所有浏览器都有用auth_basic_user_file  /mnt/.nginxuser;#密码文件存放位置}location /status{stub_status;}
}
去真机浏览器访问:

#状态页用于输出nginx的基本状态信息:
#输出信息示例:
Active connections: 291
server accepts handled requests16630948 16630948 31070465上面三个数字分别对应accepts,handled,requests三个值
Reading: 6 Writing: 179 Waiting: 106Active connections:
#当前处于活动状态的客户端连接数,包括连接等待空闲连接数=reading+writing+waiting
accepts:
#统计总值,Nginx自启动后已经接受的客户端请求的总数。
handled:
#统计总值,Nginx自启动后已经处理完成的客户端请求总数,通常等于accepts,除非有因worker_connections限制等被拒绝的连接
requests:
#统计总值,Nginx自启动后客户端发来的总的请求数。
Reading:
#当前状态,正在读取客户端请求报文首部的连接的连接数,数值越大,说明排队现象严重,性能不足
Writing:
#当前状态,正在向客户端发送响应报文过程中的连接数,数值越大,说明访问量很大
Waiting:
#当前状态,正在等待客户端发出请求的空闲连接数,开启 keep-alive的情况下,这个值等于active – (reading+writing)
提取数字学习下
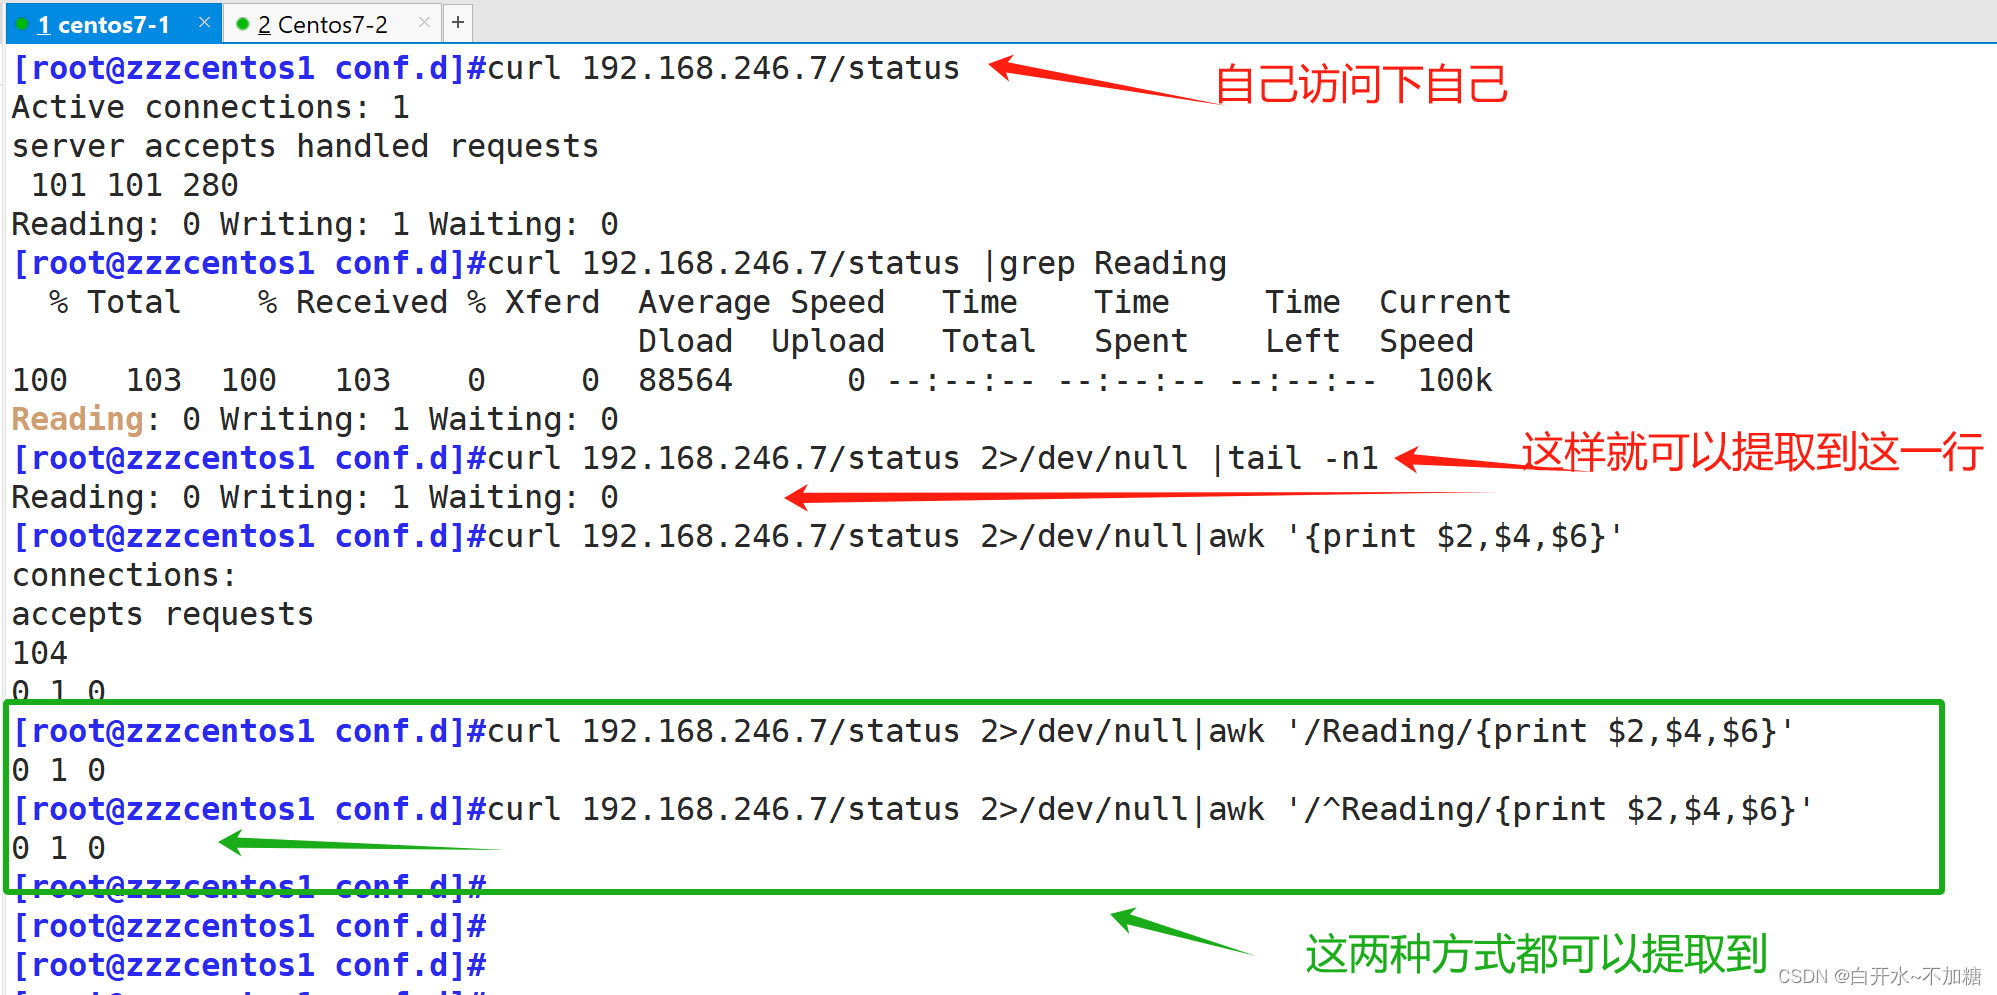
找到包含Reading的行,以空格为分隔符打印出第二列,第四列和第六列

[root@zzzcentos1 conf.d]#curl 192.168.246.7/status 2>/dev/null|awk '/^Reading/{print $2,$4,$6}'
0 1 0
[root@zzzcentos1 conf.d]#curl 192.168.246.7/status 2>/dev/null|awk '/Reading/{print $2,$4,$6}'
0 1 0
再进入配置文件:


验证


补充下:
这样就可以提取了

1.3自定义 错误页面
我们 可以改变 默认的错误页面,同时也可以用指定的响应状态码进行响应, 可用位置:http, server, location, if in location
格式:
error_page code ... [=[response]] uri;
页面错误代码
error_page    固定写法
code          响应码
=             可以将响应码转换
uri           访问连接
错误页面默认 404 报错

实验1:


server{listen 80;server_name www.lucky.com;root /data/html/;error_page 404 /index.html;location /status {stub_status;auth_basic    "welcome cxk";#提示信息,不是所有浏览器都有用auth_basic_user_file   /mnt/.nginxuser;}
}

去真机浏览器检测

实验2:自定义错误页面
server{listen 80;server_name www.lucky.com;root /data/html/;error_page 404 /40x.html;location = /40x.html {root /mnt/error;}location /status {stub_status;auth_basic    "welcome cxk";auth_basic_user_file   /mnt/.nginxuser;}
}


去检测:

实验3:把错误码 404 指定成302
server{listen 80;server_name www.lucky.com;root /data/html/;error_page 404 =302 /40x.html;location = /40x.html {root /mnt/error;}location /status {stub_status;auth_basic    "welcome cxk";auth_basic_user_file   /mnt/.nginxuser;}
}

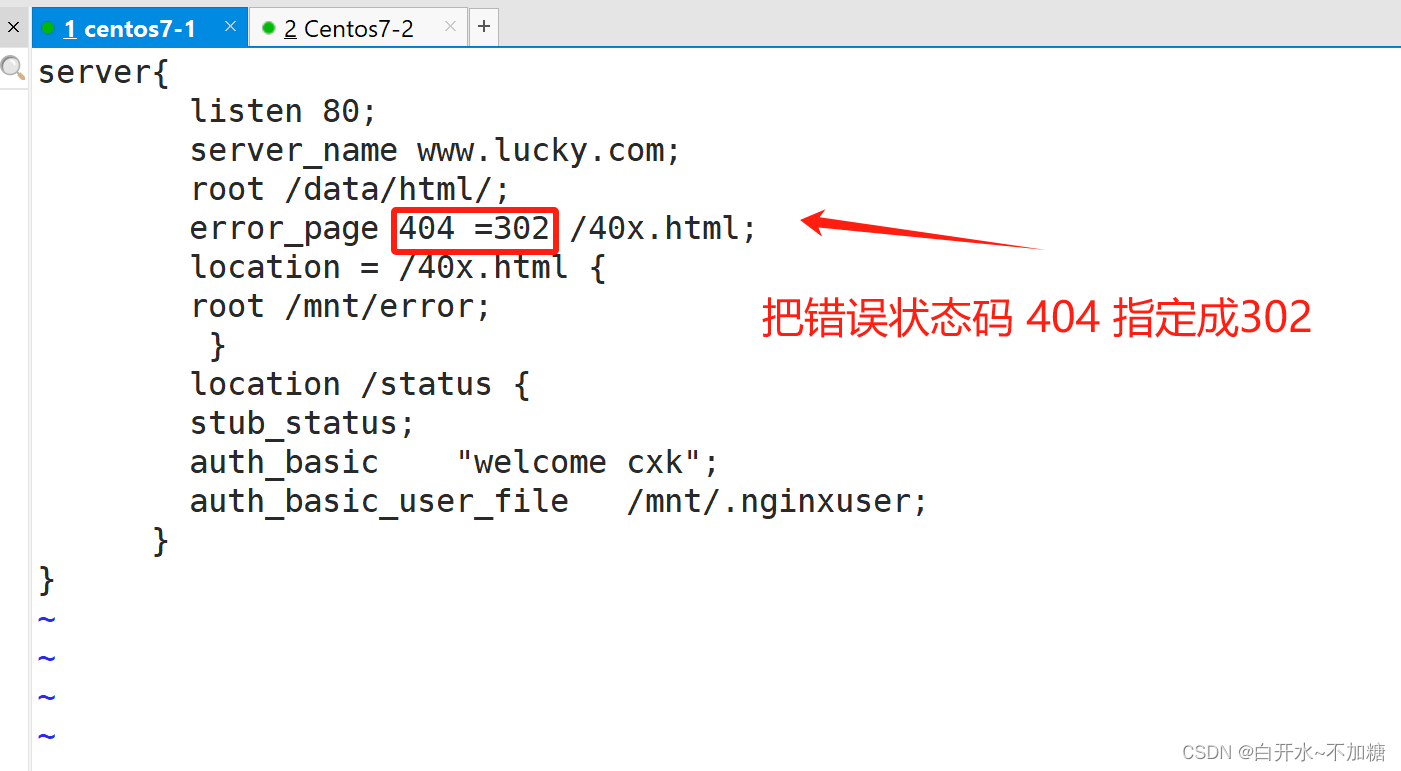

检测:

1.4检测文件是否存在
try_files会按顺序检查文件是否存在,返回第一个找到的文件或文件夹(结尾加斜线表示为文件夹),如果所有文件或文件夹都找不到,会进行一个内部重定向到最后一个参数。只有最后一个参数可以引起一个内部重定向,之前的参数只设置内部URI的指向。最后一个参数是回退URI且必须存在,否则会出现内部500错误。
语法格式:
Syntax: try_files file ... uri;
try_files file ... =code;
Default: —
Context: server, location
实验:
server{listen 80;server_name www.lucky.com;root /data/html/;location / {root /data;try_files $uri $uri.html $uri/index.html /about/default.html;
}
}


检测:

当不存在的时候,有托底页面,显示内容

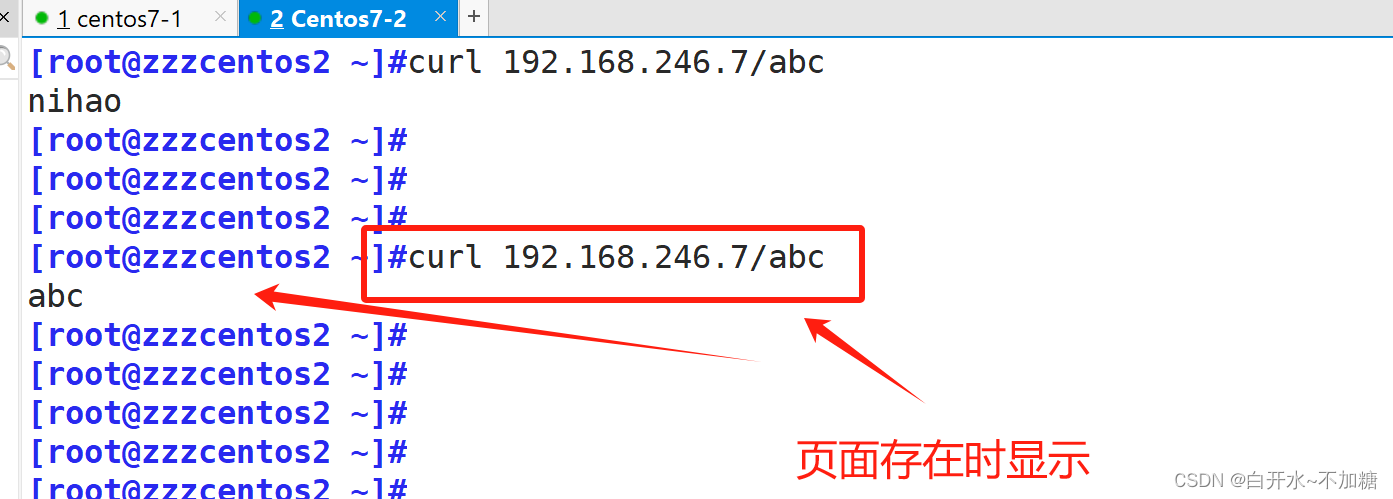
当访问的页面存在时,那就去访问这个页面,不会显示about 显示自己页面内容
1.5日志位置存放
#格式
Syntax: error_log file [level];
error_log    /apps/nginx/logs/kgc_error.log;
固定格式      文件路径                         级别(info  debug等  可以忽略不写)
为了不影响实验,先把之前about删除了

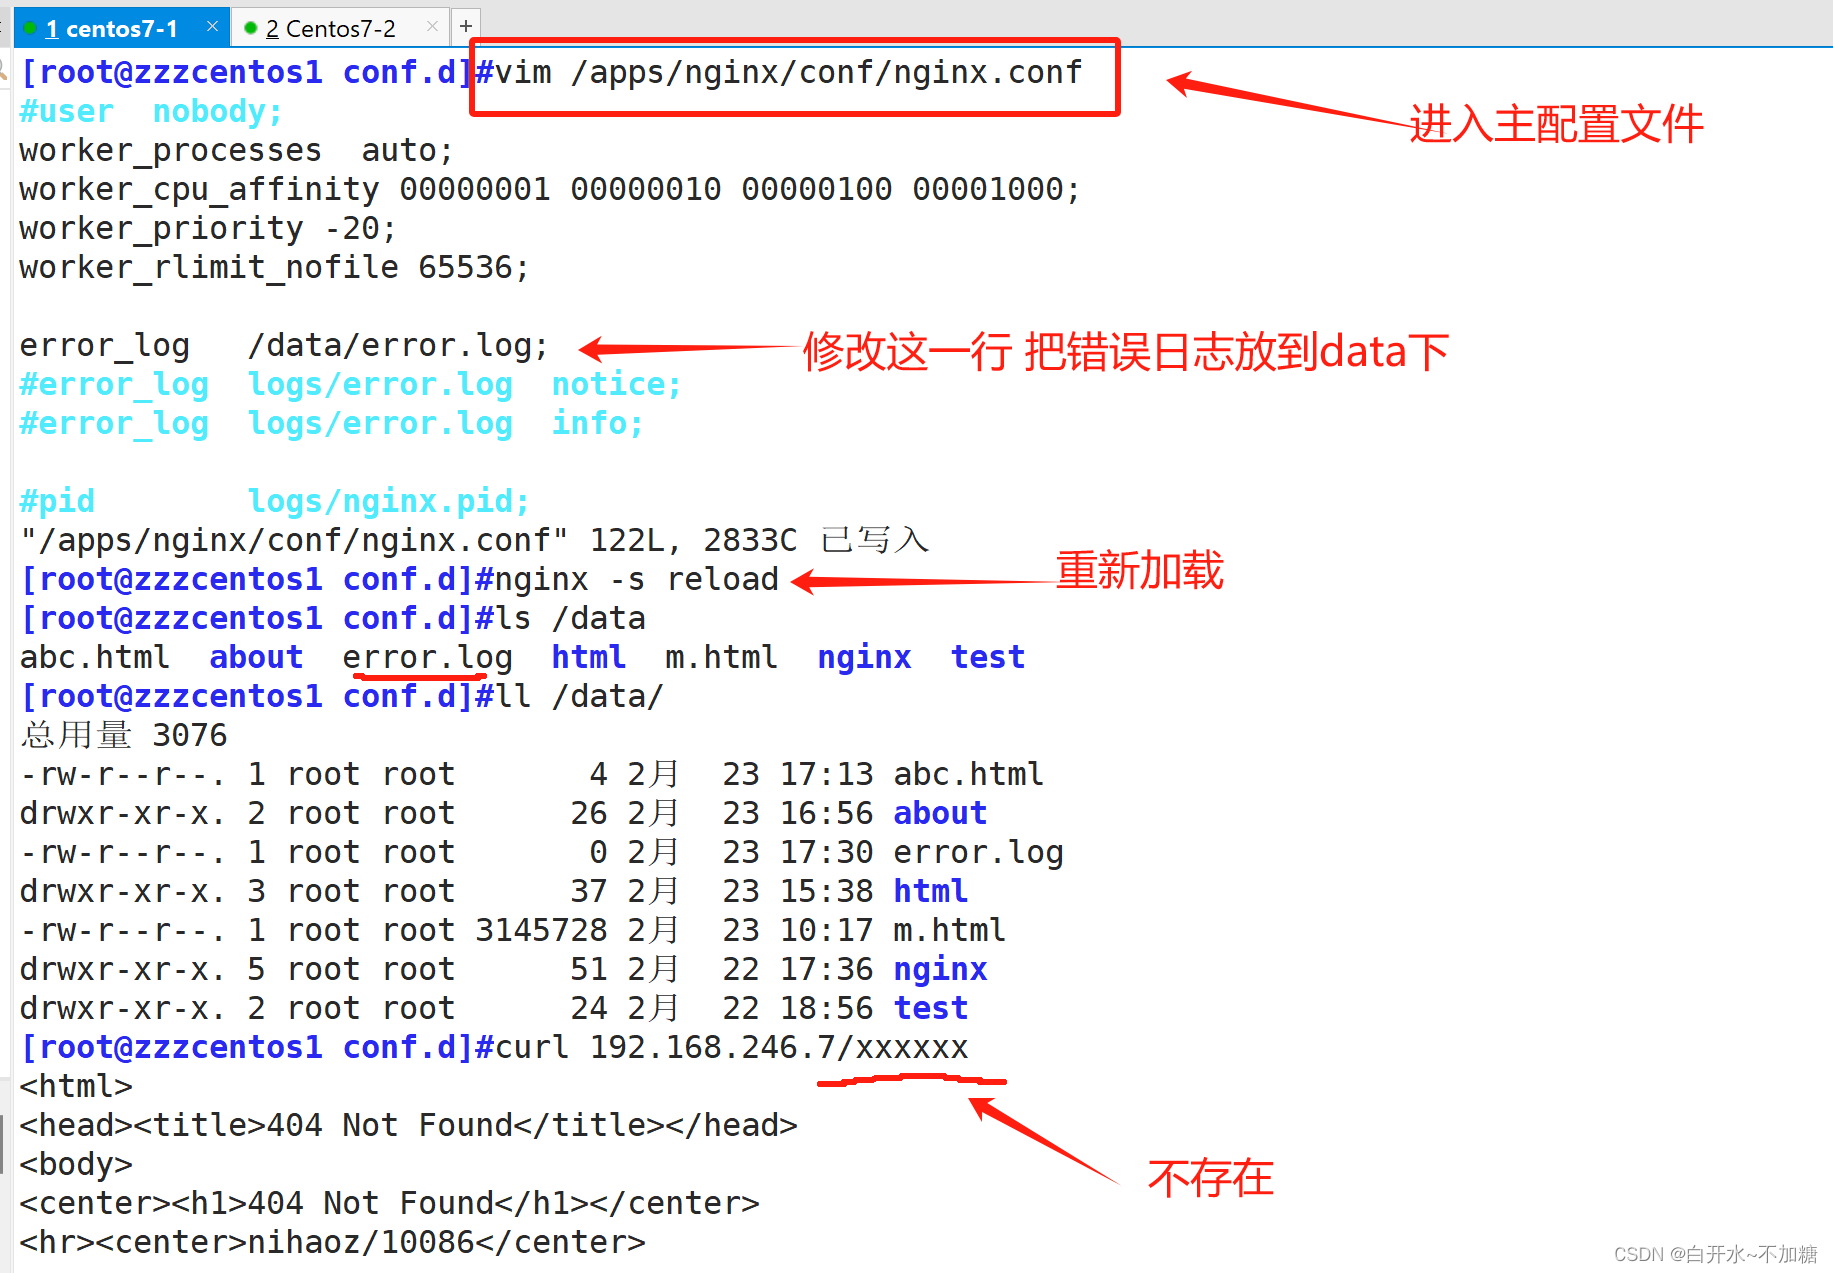
实验:自定义错误日志的位置
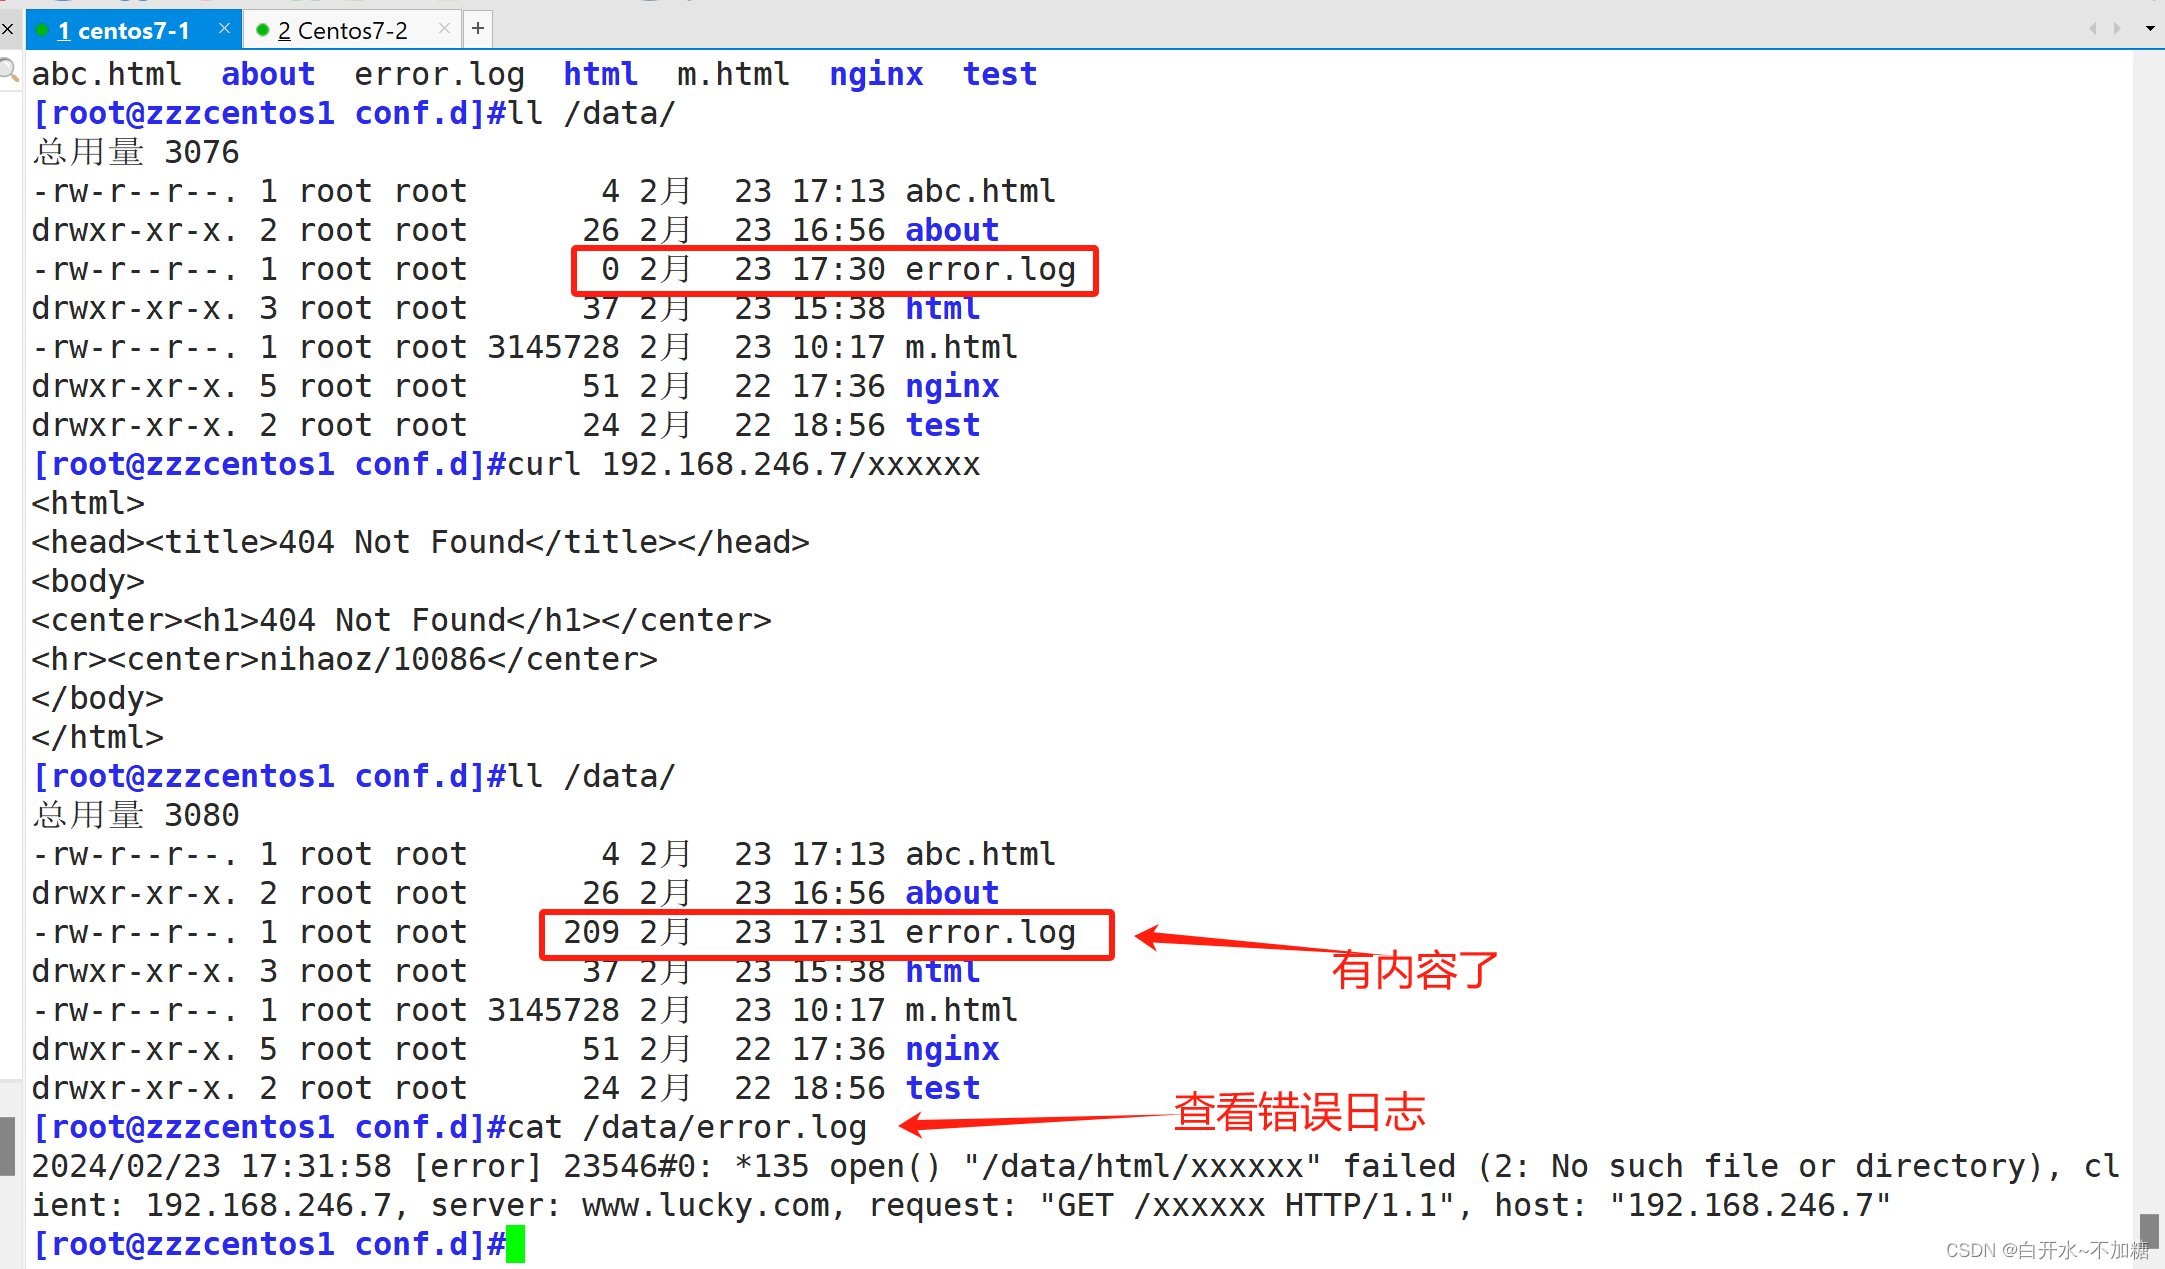
实验:将两个网站的 日志分离
[root@localhost error]#vim /apps/nginx/conf.d/m.conf
server{listen 80;server_name  www.m.com;root /data/nginx/m/;error_log    /data/logs/m_error.log;access_log  /data/logs/m_access.log;
}[root@localhost error]#vim /apps/nginx/conf.d/pc.conf
server{listen 80;server_name  www.pc.com;root /data/nginx/pc;error_log    /data/logs/pc_error.log;access_log  /data/logs/pc_access.log;
}
[root@localhost error]#mkdir /data/logs
[root@localhost error]#nginx -t
nginx: the configuration file /apps/nginx/conf/nginx.conf syntax is ok
nginx: configuration file /apps/nginx/conf/nginx.conf test is successful
[root@localhost error]#nginx -s reload查看日志是否生效
1.6长连接
http 基于 tcp 协议 先要 三次握手然后 再传输数据
相关设置:
keepalive_timeout timeout [header_timeout];
#设定保持连接超时时长,0表示禁止长连接,默认为75s,通常配置在http字段作为站点全局配置
keepalive_requests number;
#在一次长连接上所允许请求的资源的最大数量,默认为100次,建议适当调大,比如:500
可以加在全局或者 server
例子
keepalive_requests 3;
#最大下载三个资源就会断开
keepalive_timeout 60 65; #只能有一个空格 #版本不一可能不一样时间
#开启长连接后,返回客户端的会话保持时间为60s,单次长连接累计请求达到指定次数请求或65秒就会被断开,后面的60为发送给客户端应答报文头部中显示的超时时间设置为60s:如不设置客户端将不显示超时时间。
Keep-Alive:timeout=60 #浏览器收到的服务器返回的报文
Connection:close #浏览器收到的服务器返回的报文
#使用命令测试:telnet
对哪种浏览器禁用长连接
keepalive_disable none | browser ...;
#对哪种浏览器禁用长连接
1.7作为下载服务器配置
ngx_http_autoindex_module 模块处理以斜杠字符 "/" 结尾的请求,并生成目录列表,可以做为下载服务
配置使用
官方文档
http://nginx.org/en/docs/http/ngx_http_autoindex_module.html配置:
[root@localhost nginx-1.18.0]#./configure --help |grep auto
#自带--without-http_autoindex_module    disable ngx_http_autoindex_moduleautoindex on | off;
#自动文件索引功能,默为off
autoindex_exact_size on | off;
#计算文件确切大小(单位bytes),off 显示大概大小(单位K、M),默认on
autoindex_localtime on | off ;
#显示本机时间而非GMT(格林威治)时间,默认off
autoindex_format html | xml | json | jsonp;
#显示索引的页面文件风格,默认html
limit_rate rate;
#限制响应客户端传输速率(除GET和HEAD以外的所有方法),单位B/s,即bytes/second,默认值0,表示无限制,此指令由ngx_http_core_module提供
set $limit_rate
#变量提供 限制   变量优先级高
补充:
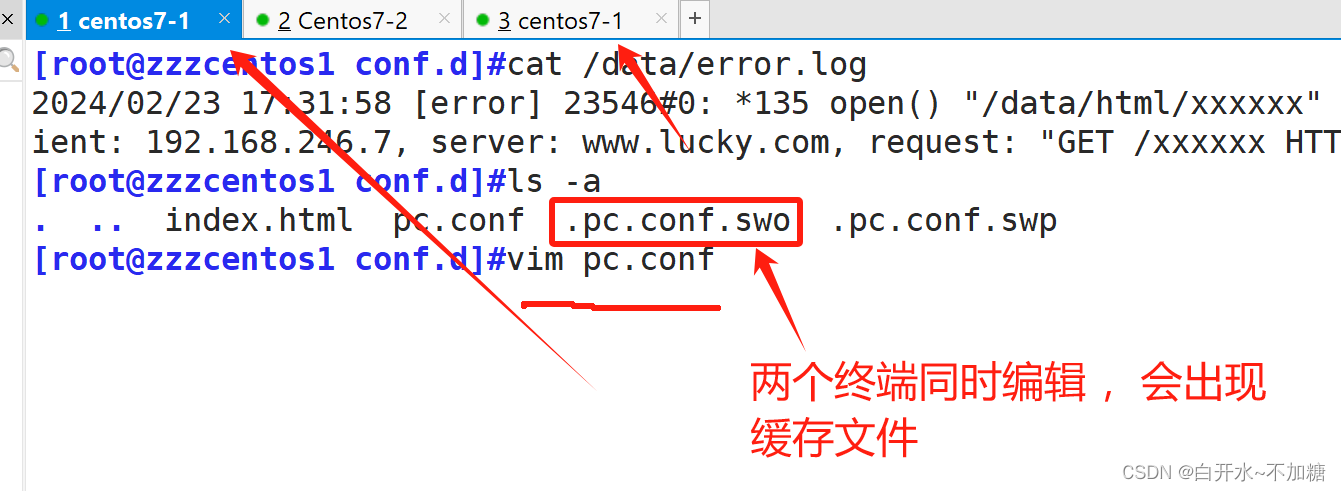

不管直接按 ENTER 进入,这是一个缓存文件
实验开始:实验1
①文件配置
server{listen 80;server_name www.lucky.com;root /data/html/;location /download {autoindex on;root /mnt/;
}
}
②目录添加文件


③检测
换一台浏览器谷歌访问下看看啊

实验2:给文件内容加上单位
server{listen 80;server_name www.lucky.com;root /data/html/;location /download {autoindex on;autoindex_exact_size off;root /mnt/;
}
}

去谷歌浏览器检测

其它例子:
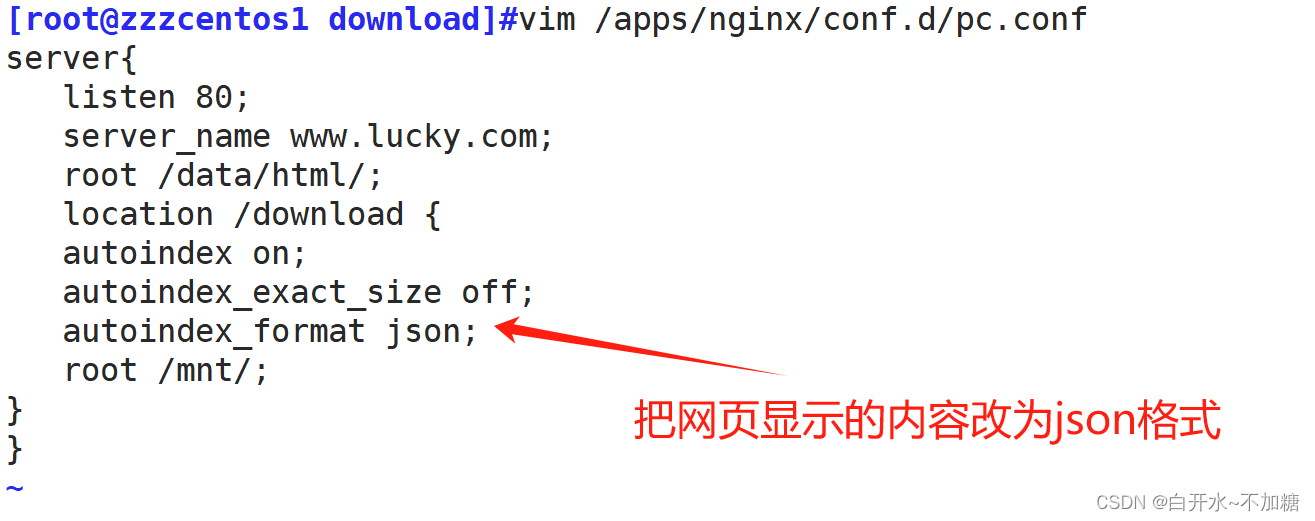
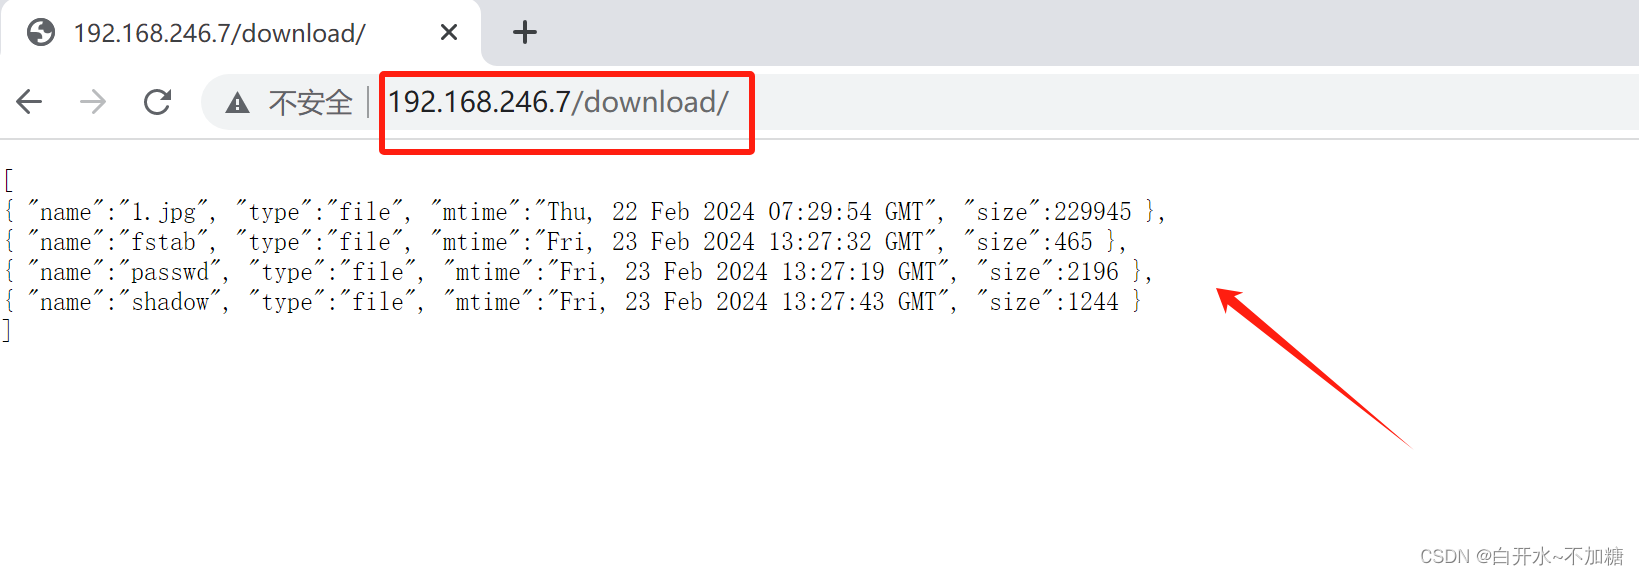
location /download {autoindex on;#开启下载服务器autoindex_exact_size on;#开启确切大小不建议开启autoindex_localtime on;#使用当地时间limit_rate 1024k;#所有人限速1024k,默认单位是字节数set $limit_rate 2M;#谁先生效alias /opt/download;}实验3:显示索引的页面文件风格,默认html 把它修改为 json
server{listen 80;server_name www.lucky.com;root /data/html/;location /download {autoindex on;autoindex_exact_size off;autoindex_format json;root /mnt/;
}
}

验证:
1.8用户上传资料
上传需要借助开发小的程序, 并且程序 5M 和 nginx 10M 都会限制。 两者取最小
client_max_body_size 1m;
#设置允许客户端上传单个文件的最大值,默认值为1m,上传文件超过此值会出413错误
client_body_buffer_size size;
#用于接收每个客户端请求报文的body部分的缓冲区大小;默认16k;超出此大小时,其将被暂存到磁盘上的由下面client_body_temp_path指令所定义的位置
client_body_temp_path path [level1 [level2 [level3]]];
#设定存储客户端请求报文的body部分的临时存储路径及子目录结构和数量,目录名为16进制的数字,使用hash之后的值从后往前截取1位、2位、2位作为目录名上传文件大于限制  错误代码413
1.9其他设置
directio size | off;
#操作完全和aio相反,aio是读取文件而directio是写文件到磁盘,启用直接I/O,默认为关闭,当文件大于等于给定大小时,例如:directio 4m;同步(直接)写磁盘,而非写缓存。直接 写入 磁盘     还是等待一定数据量写入磁盘
open_file_cache off; #是否缓存打开过的文件信息
open_file_cache max=N [inactive=time];
#nginx可以缓存以下三种信息:
(1) 文件元数据:文件的描述符、文件大小和最近一次的修改时间
(2) 打开的目录结构
(3) 没有找到的或者没有权限访问的文件的相关信息
max=N:#可缓存的缓存项上限数量;达到上限后会使用LRU(Least recently used,最近最少使用)算法实现管理
inactive=time:#缓存项的非活动时长,在此处指定的时长内未被命中的或命中的次数少于open_file_cache_min_uses
#指令所指定的次数的缓存项即为非活动项,将被删除
open_file_cache_valid time;
#缓存项有效性的检查验证频率,默认值为60s
open_file_cache_errors on | off;
#是否缓存查找时发生错误的文件一类的信息,默认值为off
open_file_cache_min_uses number;
#open_file_cache指令的inactive参数指定的时长内,至少被命中此处指定的次数方可被归类为活动项,默认值为1范例:
open_file_cache max=10000 inactive=60s;
#最大缓存10000个文件,非活动数据超时时长60s
open_file_cache_valid 60s;
#每间隔60s检查一下缓存数据有效性
open_file_cache_min_uses 5;
#60秒内至少被命中访问5次才被标记为活动数据
open_file_cache_errors on;
#缓存错误信息limit_except method ... { ... },仅用于location
#限制客户端使用除了指定的请求方法之外的其它方法
method:GET, HEAD, POST, PUT, DELETE,MKCOL, COPY, MOVE, OPTIONS, PROPFIND,
PROPPATCH, LOCK, UNLOCK, PATCH
limit_except GET {allow 192.168.91.101;deny all;
}
#除了GET和HEAD 之外其它方法仅允许192.168.1.0/24网段主机使用