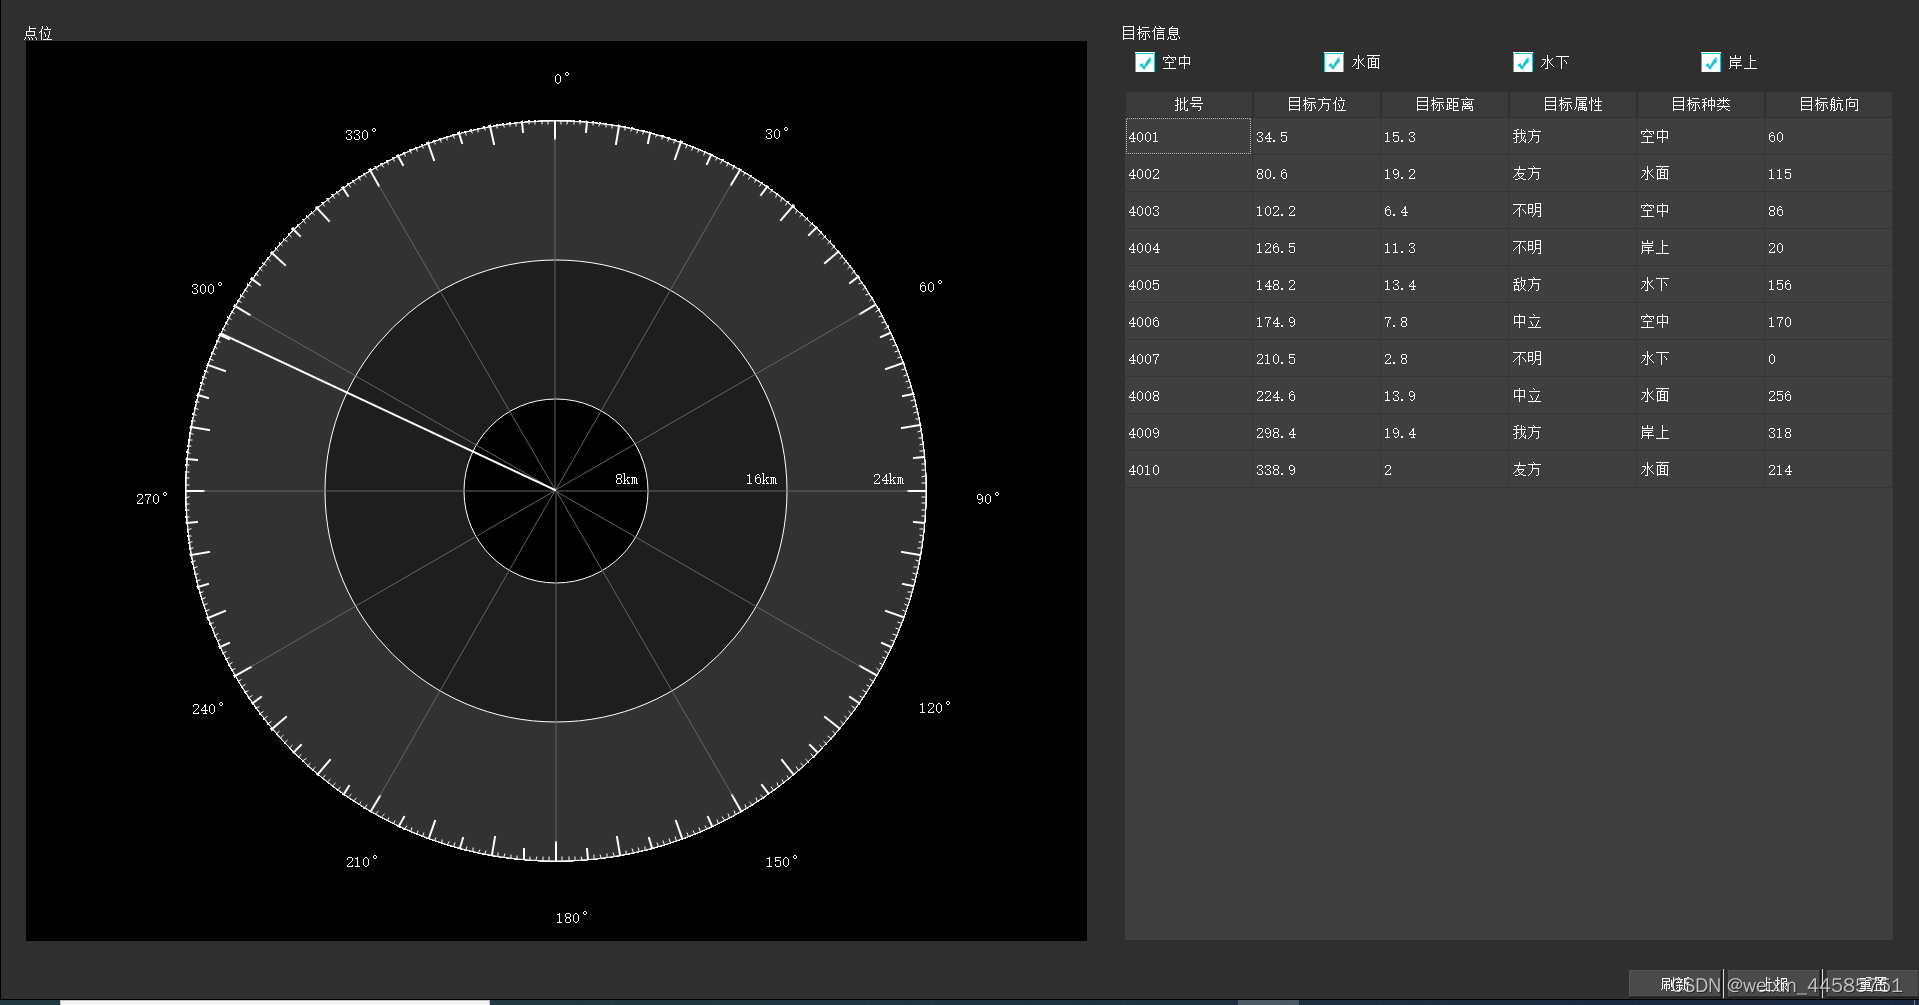
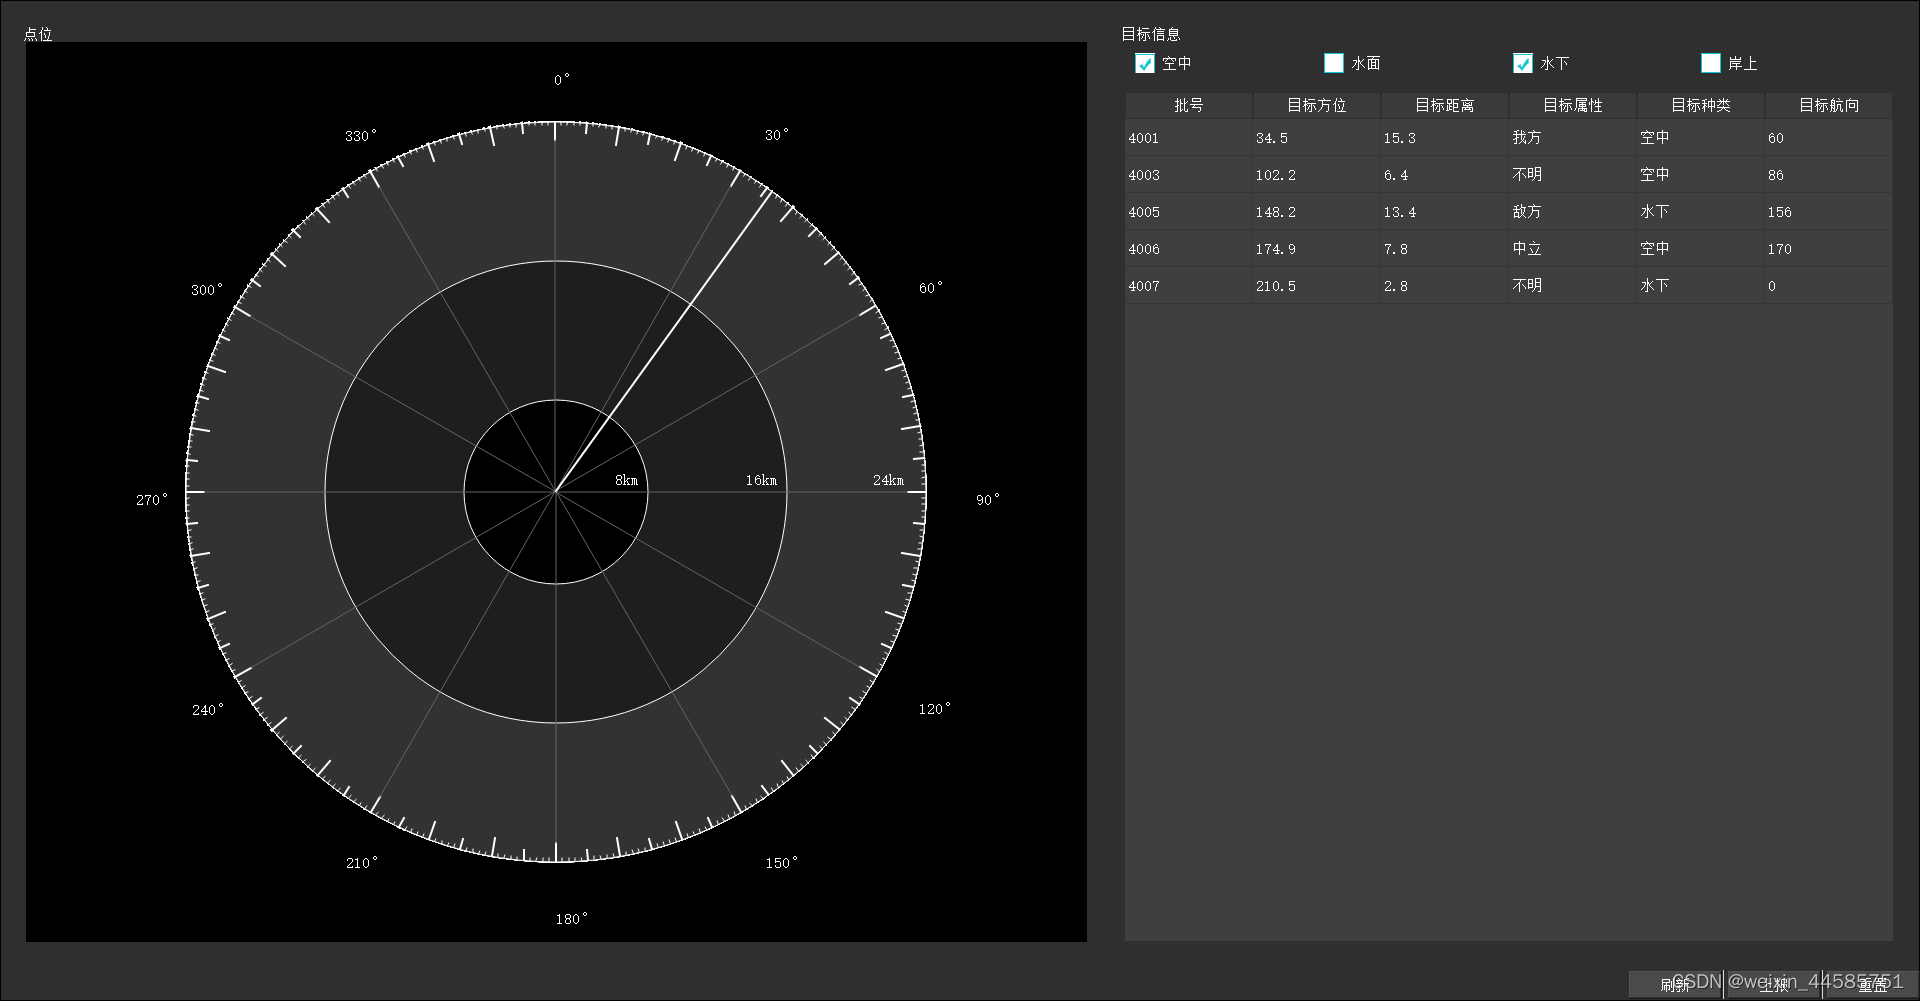
介绍:罗盘指针以30°角旋转巡逻,扫描航海范围内的点位,并绘制点云。字段信息在表格中显示,该数据都存储在数据库中。选择不同的范围,显示该范围内的点位。
#include "mainwindow.h"
#include "ui_mainwindow.h"MainWindow::MainWindow(QWidget *parent): QMainWindow(parent), ui(new Ui::MainWindow)
{ui->setupUi(this);initSystem();initQTableView();initQCheckBox();initDataBase();
}MainWindow::~MainWindow()
{delete ui;m_myDatabase.close();
}void MainWindow::initSystem()
{sourceDataList.clear();m_RefreshBtn    = new QPushButton("刷新",this);m_EscalationBtn = new QPushButton("上报",this);m_ResettingBtn  = new QPushButton("重置",this);m_model       = new QStandardItemModel(2,FixedColumnCount,this);m_selectModel = new QItemSelectionModel(m_model,this);ui->statusbar->addPermanentWidget(m_RefreshBtn);ui->statusbar->addPermanentWidget(m_EscalationBtn);ui->statusbar->addPermanentWidget(m_ResettingBtn);ui->statusbar->setSizeGripEnabled(false);//去掉状态栏右下角的三角ui->tableViewTarget->setModel(m_model);ui->tableViewTarget->setSelectionModel(m_selectModel);ui->tableViewTarget->setSelectionMode(QAbstractItemView::ExtendedSelection);ui->tableViewTarget->setSelectionBehavior(QAbstractItemView::SelectItems);ui->tableViewTarget->verticalHeader()->hide();ui->tableViewTarget->setEditTriggers(QAbstractItemView::NoEditTriggers);// 设置行表头自适应调整大小ui->tableViewTarget->horizontalHeader()->setSectionResizeMode(QHeaderView::Stretch);
}void MainWindow::initQTableView()
{QStringList headerList;headerList<<"批号"<<"目标方位"<<"目标距离"<<"目标属性"<<"目标种类"<<"目标航向";m_model->setHorizontalHeaderLabels(headerList);
}void MainWindow::initQCheckBox()
{m_InTheAir       = new QCheckBox(INDEXAIRSTR);m_SurfaceOfWater = new QCheckBox(INDEXSURFACEWATER);m_underwater     = new QCheckBox(INDEXUNDEXWATER);m_Shore          = new QCheckBox(INDEXSHORE);//开启三态选择m_InTheAir->setTristate(true);m_SurfaceOfWater->setTristate(true);m_underwater->setTristate(true);m_Shore->setTristate(true);//设置初始状态m_InTheAir->setCheckState(Qt::Checked);m_SurfaceOfWater->setCheckState(Qt::Checked);m_underwater->setCheckState(Qt::Checked);m_Shore->setCheckState(Qt::Checked);QString styleSheet ="QCheckBox::indicator:indeterminate {""border-image: url(:/checkbox_dark_normal.png);"  // 半选中状态的图片"}""QCheckBox::indicator:unchecked {""border-image: url(:/checkbox_dark_hover.png);"  // 未选中状态的图片"}""QCheckBox::indicator:checked {""    background-image: url(:/checkbox_dark_pressed.png);"  // 选中状态的图片"}""QCheckBox::indicator {""    width: 20px;"  // 设置复选框宽度"    height: 20px;"  // 设置复选框高度"}";// 设置样式表,使用本地图片作为背景m_InTheAir->setStyleSheet(styleSheet);m_SurfaceOfWater->setStyleSheet(styleSheet);m_underwater->setStyleSheet(styleSheet);m_Shore->setStyleSheet(styleSheet);QHBoxLayout *alayout = new QHBoxLayout;alayout->addWidget(m_InTheAir);alayout->addWidget(m_SurfaceOfWater);alayout->addWidget(m_underwater);alayout->addWidget(m_Shore);ui->widgetInsertCheckBox-> setLayout(alayout);connect(m_InTheAir,&QCheckBox:: stateChanged,this, &MainWindow::do_checkBoxAirSlot);connect(m_SurfaceOfWater,&QCheckBox:: stateChanged,this, &MainWindow::do_checkBoxSurfaceWaterSlot);connect(m_underwater,&QCheckBox:: stateChanged,this, &MainWindow::do_checkBoxUnderWaterSlot);connect(m_Shore,&QCheckBox:: stateChanged,this, &MainWindow::do_checkBoxShoreSlot);
}void MainWindow::setQtableViewIndex(QString indexName, int &state)
{if(state == Qt::Checked){//选中int rowTotal = sourceDataList.size();for (int row = 0; row < rowTotal ; row++) {QString aLineText = sourceDataList.at(row);//获取一行数据QStringList tempList = aLineText.split(" ");//把一行数据,用空格隔开if(aLineText.contains(indexName) == true){m_model->insertRow(m_model->rowCount(), QList<QStandardItem*>()<< new QStandardItem(tempList.at(0))<< new QStandardItem(tempList.at(1))<< new QStandardItem(tempList.at(2))<< new QStandardItem(tempList.at(3))<< new QStandardItem(tempList.at(4))<< new QStandardItem(tempList.at(5)));}}//创建排序和过滤代理QSortFilterProxyModel*   proxyModel = new QSortFilterProxyModel(this);// 创建过滤器proxyModel->setSourceModel(m_model);proxyModel->setFilterKeyColumn(0);proxyModel->sort(0, Qt::AscendingOrder);// 设置表格视图的模型为过滤器ui->tableViewTarget->setModel(proxyModel);}else if(state == Qt::Unchecked){//未选择// 删除满足条件的行for (int row = 0; row < m_model->rowCount(); ++row) {if (m_model->item(row, 4)->text() == indexName) {m_model->removeRow(row);// 因为删除了一行,所以需要重新检查当前行--row;}}}else if(state == Qt::PartiallyChecked){//半选中//no deal with}undatePointClouds();
}void MainWindow::do_checkBoxAirSlot(int state)
{setQtableViewIndex(INDEXAIRSTR,state);
}void MainWindow::do_checkBoxSurfaceWaterSlot(int state)
{setQtableViewIndex(INDEXSURFACEWATER,state);
}void MainWindow::do_checkBoxUnderWaterSlot(int state)
{setQtableViewIndex(INDEXUNDEXWATER,state);
}void MainWindow::do_checkBoxShoreSlot(int state)
{setQtableViewIndex(INDEXSHORE,state);
}void MainWindow::initDataBase()
{//安装驱动m_myDatabase = QSqlDatabase::addDatabase("QSQLITE");//给数据库取名字m_myDatabase.setDatabaseName("situation.db");//打开数据库if(!m_myDatabase.open()){qDebug() << "Error to open database" << m_myDatabase.lastError();return;}createDataBase();
}//创建数据库
void MainWindow::createDataBase()
{QSqlQuery query;if(!query.exec("create table if not exists situation(batchNumber int, targetBeare double ,""targetDistance double, targetProperties text, targetType text, targetCourse int);")){qDebug() << "Create Table is error" << m_myDatabase.lastError();return;}serchDataBase();
}//插入数据库数据  【如果后期需要插入数据,可以调用此接口】
void MainWindow::insertDataBase(int &batchNum,double &targetBear,double &targetDist,QString &targetPro,QString &targetType,int & targetCourse)
{QSqlQuery query = QSqlQuery(m_myDatabase);QString cmd = QString("insert into situation values(\"%1\",\"%2\",\"%3\",\"%4\",\"%5\",\"%6\");").arg(batchNum).arg(targetBear).arg(targetDist).arg(targetPro).arg(targetType).arg(targetCourse);if(!query.exec(cmd)){qDebug() << "Error to Insert Into Database " << m_myDatabase.lastError();return;}
}void MainWindow::undatePointClouds()
{m_X.clear();m_Y.clear();for (int row = 0; row < m_model->rowCount(); ++row) {QModelIndex index1 = m_model->index(row, 1, QModelIndex()); // 第2列QModelIndex index2 = m_model->index(row, 2, QModelIndex()); // 第3列QVariant data1 = m_model->data(index1, Qt::DisplayRole);QVariant data2 = m_model->data(index2, Qt::DisplayRole);m_X.push_back(data1.toDouble());m_Y.push_back(data2.toDouble());}ui->widget->initQCustomPlot(ui->widget,m_X,m_Y);
}//查询数据库成员
void MainWindow::serchDataBase()
{QSqlQuery query = QSqlQuery(m_myDatabase);QString cmd = QString("select * from situation");//查询数据库if(!query.exec(cmd))//判断数据库是否为空{qDebug() << "Error Select to Database" << m_myDatabase.lastError();return;}QSqlRecord record = query.record();//获取当前记录QStandardItem *aItem;int i = 0;//在表格中显示信息while (query.next()){QString aLine = "";aLine.clear();for (int j = 0; j < record.count(); ++j) {aItem = new QStandardItem(query.value(j).toString());m_model->setItem(i,j,aItem);aLine.append(query.value(j).toString());aLine.append(" ");}sourceDataList.append(aLine);i++;}undatePointClouds();
}