一、注册阿里云账户
打开https://www.aliyun.com/,申请阿里云账户并完成实名认证(个人)。这种情况就是完成了:

二、开通OSS服务


点击立即开通即可。
三、创建Bucket
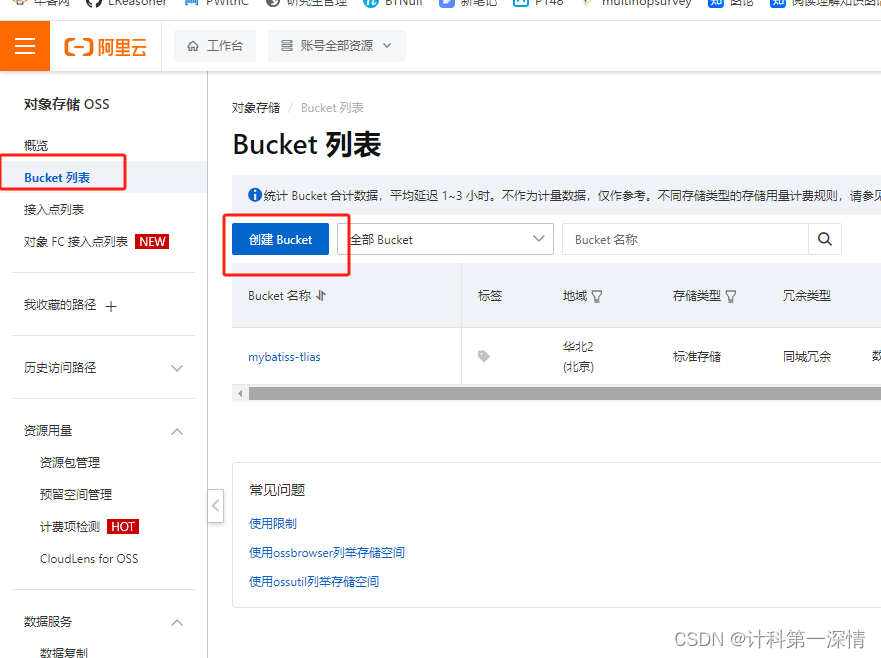
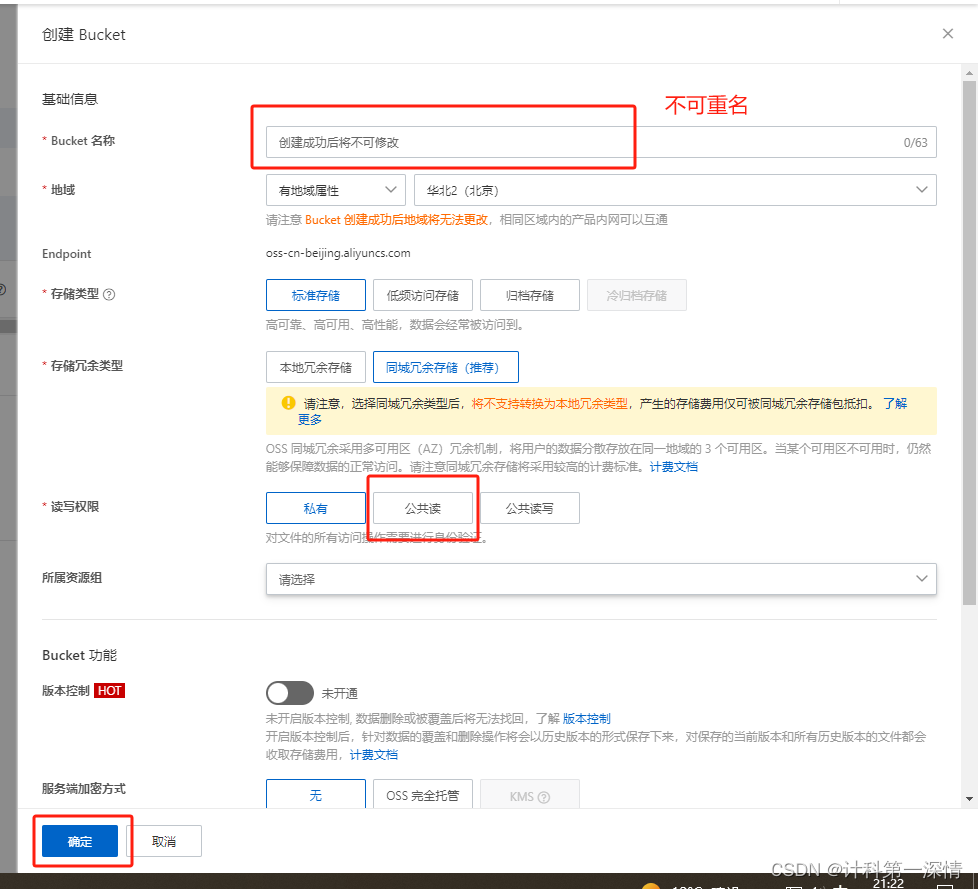
申请id和secert:
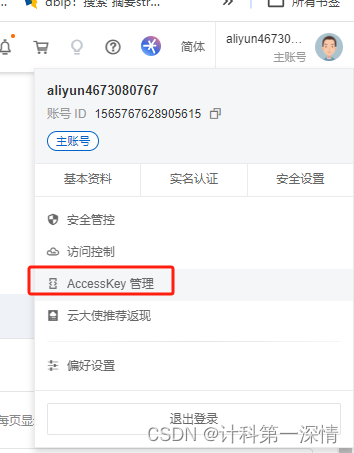
进去创建一个Accesskey就会出现以下信息:

这里的accesskeyid和secret需要填入到五的Demo代码中。 记得保存
四、引入依赖
在pom.xml引入阿里云oss的依赖:
<dependency><groupId>com.aliyun.oss</groupId><artifactId>aliyun-sdk-oss</artifactId><version>3.15.1</version></dependency>如果是java9以及之后的版本,则需要多引入几个依赖:
<dependency><groupId>javax.xml.bind</groupId><artifactId>jaxb-api</artifactId><version>2.3.1</version></dependency><dependency><groupId>javax.activation</groupId><artifactId>activation</artifactId><version>1.1.1</version></dependency><!-- no more than 2.3.3--><dependency><groupId>org.glassfish.jaxb</groupId><artifactId>jaxb-runtime</artifactId><version>2.3.3</version></dependency>之后点击maven图标进行更新 :

五、测试
新建一个测试类Demo:
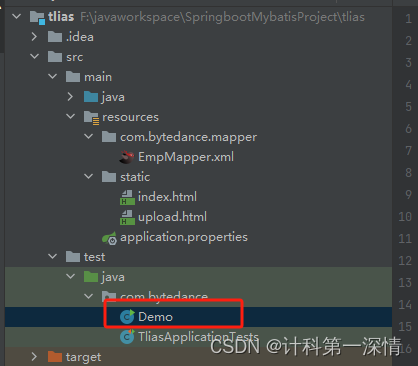
在Demo类中输入以下代码:
package com.bytedance; // 这里修改自己的包名
import com.aliyun.oss.ClientException;
import com.aliyun.oss.OSS;
import com.aliyun.oss.common.auth.*;
import com.aliyun.oss.OSSClientBuilder;
import com.aliyun.oss.OSSException;
import com.aliyun.oss.model.PutObjectRequest;
import com.aliyun.oss.model.PutObjectResult;
import java.io.File;
public class Demo {public static void main(String[] args) throws Exception {// Endpoint以华东1(杭州)为例,其它Region请按实际情况填写。String endpoint = "https://oss-cn-beijing.aliyuncs.com";String accessKeyId = "LTAl5tQbQfs63bRv8Ru4nKgM";String accessKeySecret = "ek5VsOfXdNmKVE0uYH809C1YWcB0yt";// 填写Bucket名称,例如examplebucket。String bucketName = "mybatiss-tlias";// 填写Object完整路径,完整路径中不能包含Bucket名称,例如exampledir/exampleobject.txt。String objectName = "clippers.png";// 填写本地文件的完整路径,例如D:\\localpath\\examplefile.txt。// 如果未指定本地路径,则默认从示例程序所属项目对应本地路径中上传文件。String filePath= "C:\\Users\\Wyyy\\Desktop\\220\\v2-f71dc37e2c4f2d2b01dd7d19862e637a_720w.png";// 创建OSSClient实例。OSS ossClient = new OSSClientBuilder().build(endpoint,accessKeyId,accessKeySecret);try {// 创建PutObjectRequest对象。PutObjectRequest putObjectRequest = new PutObjectRequest(bucketName, objectName, new File(filePath));// 如果需要上传时设置存储类型和访问权限,请参考以下示例代码。// ObjectMetadata metadata = new ObjectMetadata();// metadata.setHeader(OSSHeaders.OSS_STORAGE_CLASS, StorageClass.Standard.toString());// metadata.setObjectAcl(CannedAccessControlList.Private);// putObjectRequest.setMetadata(metadata);// 上传文件。PutObjectResult result = ossClient.putObject(putObjectRequest);} catch (OSSException oe) {System.out.println("Caught an OSSException, which means your request made it to OSS, "+ "but was rejected with an error response for some reason.");System.out.println("Error Message:" + oe.getErrorMessage());System.out.println("Error Code:" + oe.getErrorCode());System.out.println("Request ID:" + oe.getRequestId());System.out.println("Host ID:" + oe.getHostId());} catch (ClientException ce) {System.out.println("Caught an ClientException, which means the client encountered "+ "a serious internal problem while trying to communicate with OSS, "+ "such as not being able to access the network.");System.out.println("Error Message:" + ce.getMessage());} finally {if (ossClient != null) {ossClient.shutdown();}}}
}
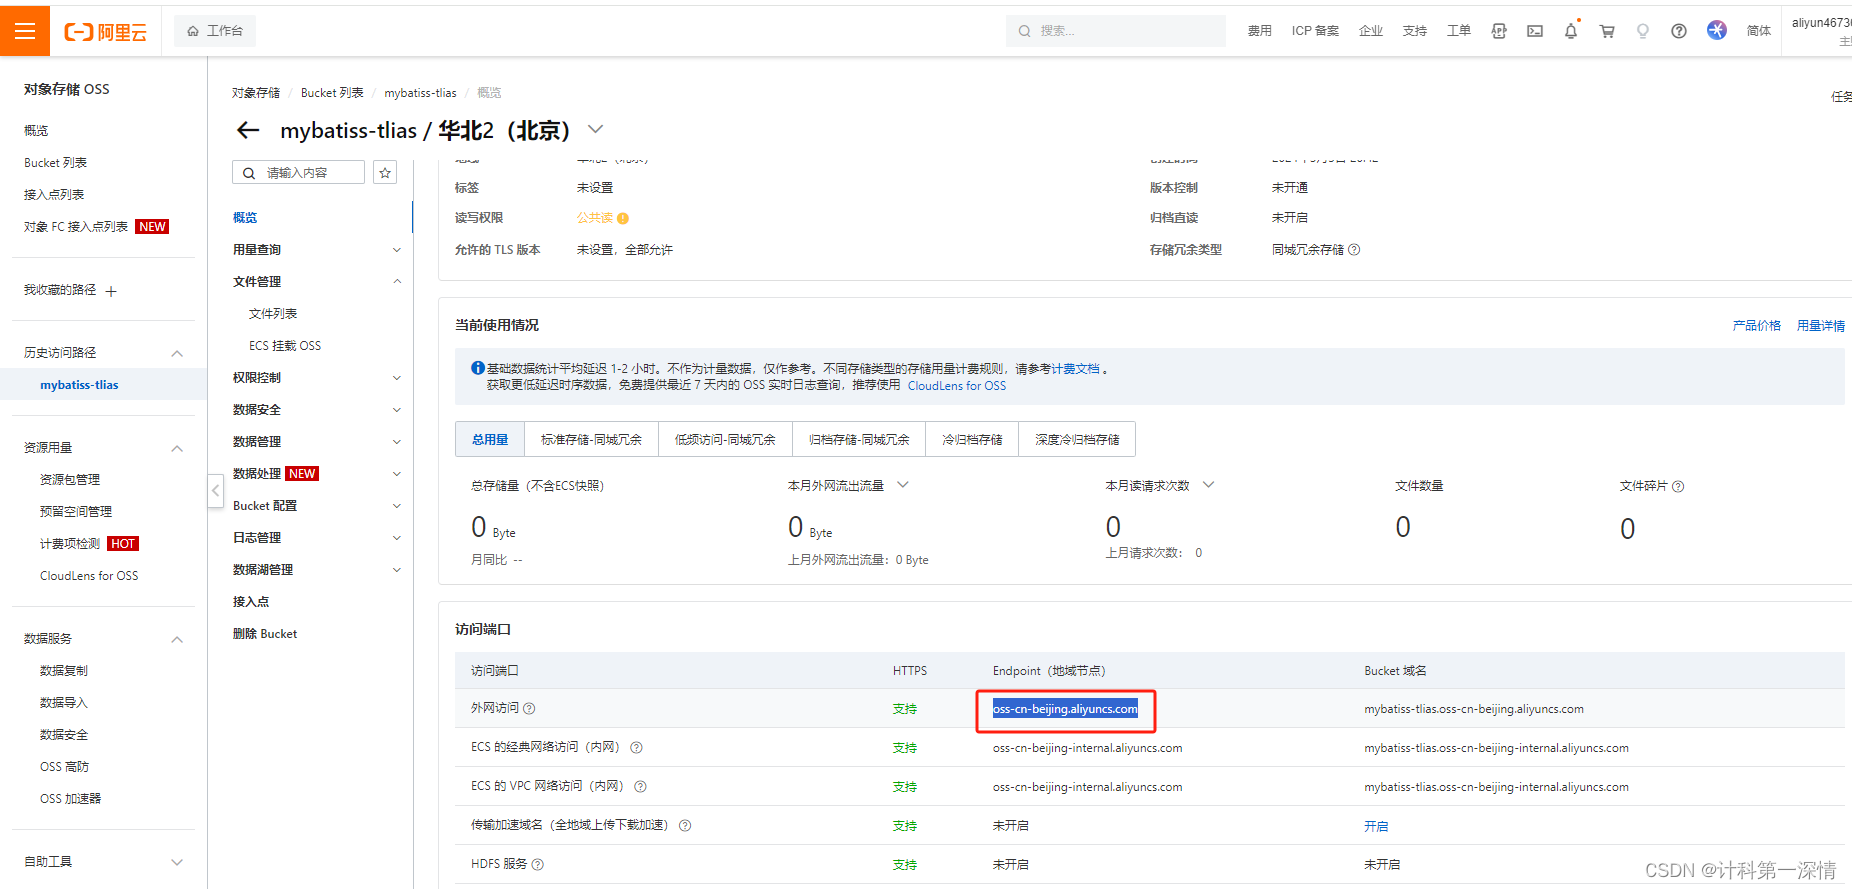
代码中的endpoint在这里查看:
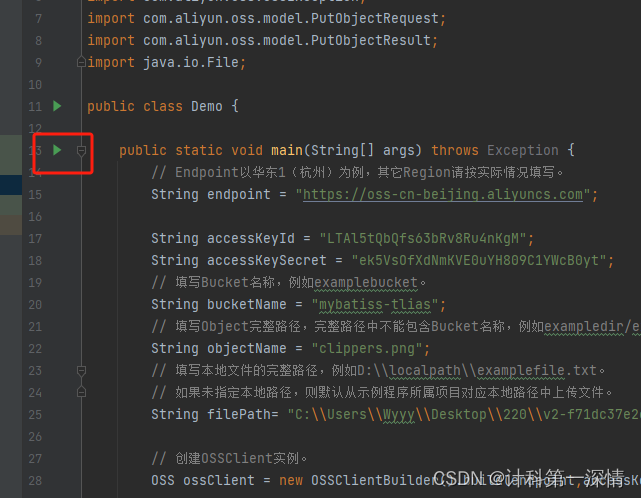
objectname是上传之后的图片名字,filepath是需要上传的照片在本地的存储位置。
点击运行测试:
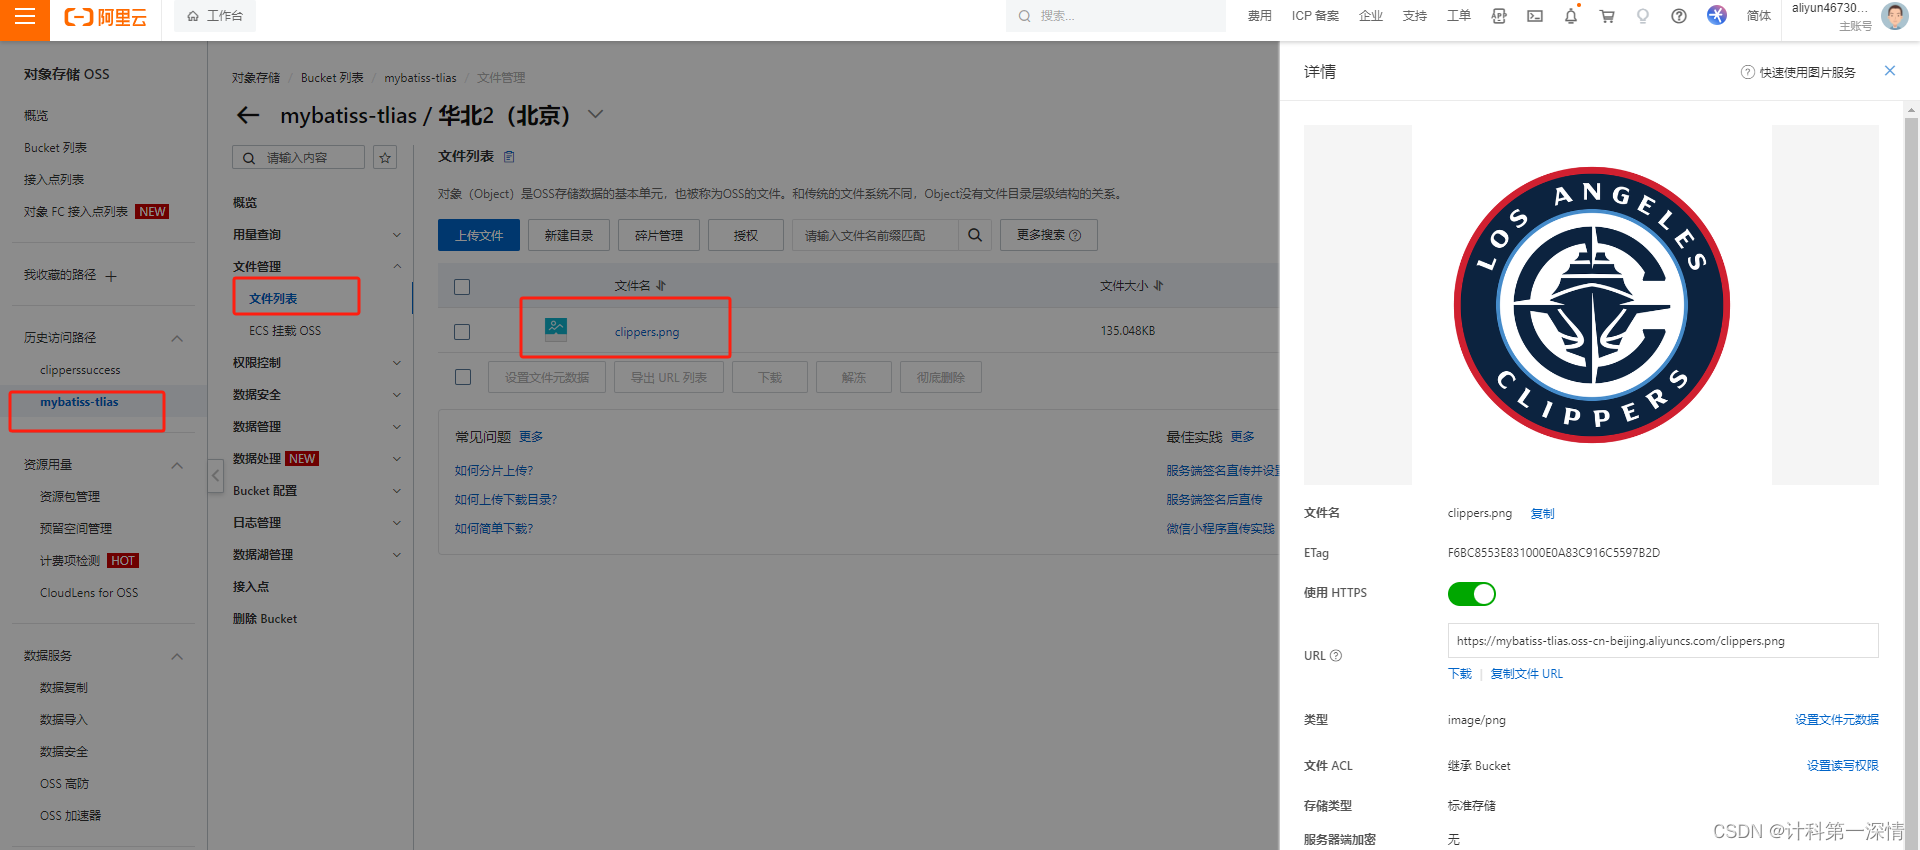 最后我们发现需要传的图片已经传上去啦~
PS:快船总冠军!
小案例:基于阿里云OSS上传图片实战案例-CSDN博客

