目录
- 前言
- 1. yolox导出
- 2. yolox推理
- 3. 补充知识
- 3.1 知识点
- 3.2 mmdetection
- 总结
前言
杜老师推出的 tensorRT从零起步高性能部署 课程,之前有看过一遍,但是没有做笔记,很多东西也忘了。这次重新撸一遍,顺便记记笔记。
本次课程学习 tensorRT 高级-mmdetection 框架下 yolox 模型导出并推理
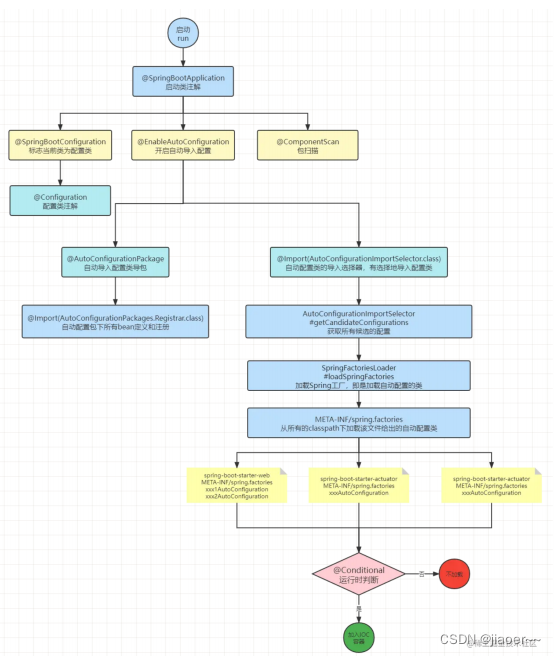
课程大纲可看下面的思维导图

1. yolox导出
这节课我们主要学习 mmdetection 案例
这节课的主要目的是:通过调试分析 mmdet 代码,把 yolox 模型导出,并在 tensorrt 上推理得到结果
其中涉及到调试和分析的方法技巧
mmdetection 导出 onnx 还是比较费尽的,封装得太死了,但是你习惯了之后问题总是可以解决的,不至于说束手无策,代码下载于 2023/3/27日,mmdetection-2.21.0,代码相对来说比较老了,最新版本的 yolox 导出可能略有差别
Note:博主为了配合该案例的成功,配置了一个相关的虚拟环境,其中 mmcv-full-1.4.8、torch-1.9.0,大家直接按照目前的 mmdetection 配置即可,直接可导出 master 中的 yolox 就行,关于相关环境配置可参考 mmdetecion环境安装
先验证下整个项目是否能成功,新建一个 predict.py 文件,内容如下:
from mmdet.apis import init_detector, inference_detectorconfig_file = 'configs/faster_rcnn/faster_rcnn_r50_fpn_1x_coco.py'
# download the checkpoint from model zoo and put it in `checkpoints/`
# url: https://download.openmmlab.com/mmdetection/v2.0/faster_rcnn/faster_rcnn_r50_fpn_1x_coco/faster_rcnn_r50_fpn_1x_coco_20200130-047c8118.pth
checkpoint_file = 'checkpoints/faster_rcnn_r50_fpn_1x_coco_20200130-047c8118.pth'
device = 'cuda:0'
# init a detector
model = init_detector(config_file, checkpoint_file, device=device)
# inference the demo image
inference_detector(model, 'demo/demo.jpg')
二话不说,先去执行 predict.py 遇到如下问题:

创建 checkpoints 文件夹然后通过提供的 url 链接下载权重就行,再执行下 predict.py 如下所示:

执行成功了,我们把它换成 yolox 的模型试试,首先下载 yolox 的模型(选择的是tiny模型),在 https://github.com/open-mmlab/mmdetection/tree/v2.21.0/configs/yolox 可以找到模型,注意这是2.21.0版本的模型,下载完成后放入到 checkpoints 文件夹中
然后选择下 yolox 的 config 文件,它是一个 py 文件,用于描述模型的组成部分,包括 backbone、neck 等

修改下 predict.py 文件,重新指定 config 和 checkpoint 文件,如下所示:
from mmdet.apis import init_detector, inference_detectorconfig_file = 'configs/yolox/yolox_tiny_8x8_300e_coco.py'
# download the checkpoint from model zoo and put it in `checkpoints/`
# url: https://download.openmmlab.com/mmdetection/v2.0/faster_rcnn/faster_rcnn_r50_fpn_1x_coco/faster_rcnn_r50_fpn_1x_coco_20200130-047c8118.pth
checkpoint_file = 'checkpoints/yolox_tiny_8x8_300e_coco_20211124_171234-b4047906.pth'
device = 'cuda:0'
# init a detector
model = init_detector(config_file, checkpoint_file, device=device)
# inference the demo image
inference_detector(model, 'demo/demo.jpg')
再去执行下 predict.py 文件,如下图所示:

执行成功了,接下来我们就要去分析它,导出我们想要的 onnx,它的 model 是一个正常的 torch.model 的模型,因此我们直接导出看能不能成功,代码如下:
from mmdet.apis import init_detector, inference_detector
import torchconfig_file = 'configs/yolox/yolox_tiny_8x8_300e_coco.py'
# download the checkpoint from model zoo and put it in `checkpoints/`
# url: https://download.openmmlab.com/mmdetection/v2.0/faster_rcnn/faster_rcnn_r50_fpn_1x_coco/faster_rcnn_r50_fpn_1x_coco_20200130-047c8118.pth
checkpoint_file = 'checkpoints/yolox_tiny_8x8_300e_coco_20211124_171234-b4047906.pth'
device = 'cuda:0'
# init a detector
model = init_detector(config_file, checkpoint_file, device=device)
# inference the demo image
# inference_detector(model, 'demo/demo.jpg')torch.onnx.export(model, (torch.zeros(1, 3, 416, 416),), "out.onnx", opset_version=11
)
执行后出现如下问题:

可以看到提示需要一个 img_metas 的参数,img_metas 是什么呢?不清楚,很烦,这玩意没那么容易导出来,所以需要我们来进行分析,
经过一顿调试分析(具体参照视频😄),我们知道模型中是需要 self.backbone、self.neck、self.bbox_head 这三项来完成推理的,所以我们完全可以自己来构建网络嘛,具体代码如下:
from mmdet.apis import init_detector, inference_detector
import torchconfig_file = 'configs/yolox/yolox_tiny_8x8_300e_coco.py'
# download the checkpoint from model zoo and put it in `checkpoints/`
# url: https://download.openmmlab.com/mmdetection/v2.0/faster_rcnn/faster_rcnn_r50_fpn_1x_coco/faster_rcnn_r50_fpn_1x_coco_20200130-047c8118.pth
checkpoint_file = 'checkpoints/yolox_tiny_8x8_300e_coco_20211124_171234-b4047906.pth'
device = 'cuda:0'
# init a detector
model = init_detector(config_file, checkpoint_file, device=device)
x = torch.zeros(1, 3, 416, 416, device=device)
x = model.backbone(x)
x = model.neck(x)
x = model.bbox_head(x)
print(type(x))# inference the demo image
# inference_detector(model, 'demo/demo.jpg')# torch.onnx.export(
#     model, (torch.zeros(1, 3, 416, 416),), "out.onnx", opset_version=11
# )
运行如下:

x 是一个 tuple,其实就是三个特征层的输出,到这里我们就可以考虑写一个 class 导出 onnx 了,具体代码如下:
from mmdet.apis import init_detector, inference_detector
import torchconfig_file = 'configs/yolox/yolox_tiny_8x8_300e_coco.py'
# download the checkpoint from model zoo and put it in `checkpoints/`
# url: https://download.openmmlab.com/mmdetection/v2.0/faster_rcnn/faster_rcnn_r50_fpn_1x_coco/faster_rcnn_r50_fpn_1x_coco_20200130-047c8118.pth
checkpoint_file = 'checkpoints/yolox_tiny_8x8_300e_coco_20211124_171234-b4047906.pth'
device = 'cuda:0'
# init a detector
# model = init_detector(config_file, checkpoint_file, device=device)class MyModel(torch.nn.Module):def __init__(self):super().__init__()self.model = init_detector(config_file, checkpoint_file, device=device)def forward(self, x):x = self.model.backbone(x)x = self.model.neck(x)x = self.model.bbox_head(x)return x     model = MyModel().eval()x = torch.zeros(1, 3, 416, 416, device=device)
# inference the demo image
# inference_detector(model, 'demo/demo.jpg')torch.onnx.export(model, (x,), "out.onnx", opset_version=11
)
导出的 onnx 如下所示:

可以看到输入只有一个,而输出存在多个,这不是我们想要的结果,我们希望将后处理放到 onnx 中,输入输出都只有一个,这样可以让问题更简单
经过调试分析(具体参照视频)我们知道在 yolox_head.py 文件中的 get_bboxes() 函数完成了我们想要的后处理,如处理 anchor 的 grid,对输出乘以 anchor,对输出进行拼接,恢复成 cx、cy、w、h,代码需要我们去解读它,然后按照自己的理解去实现它,实现代码如下:
from mmdet.apis import init_detector, inference_detector
import torchconfig_file = 'configs/yolox/yolox_tiny_8x8_300e_coco.py'
# download the checkpoint from model zoo and put it in `checkpoints/`
# url: https://download.openmmlab.com/mmdetection/v2.0/faster_rcnn/faster_rcnn_r50_fpn_1x_coco/faster_rcnn_r50_fpn_1x_coco_20200130-047c8118.pth
checkpoint_file = 'checkpoints/yolox_tiny_8x8_300e_coco_20211124_171234-b4047906.pth'
device = 'cuda:0'
# init a detector
# model = init_detector(config_file, checkpoint_file, device=device)class MyModel(torch.nn.Module):def __init__(self):super().__init__()self.model = init_detector(config_file, checkpoint_file, device=device)def forward(self, x):ib, ic, ih, iw = map(int, x.shape)x = self.model.backbone(x)x = self.model.neck(x)clas, bbox, objness = self.model.bbox_head(x)output_x = []for class_item, bbox_item, objness_item in zip(clas, bbox, objness):hm_b, hm_c, hm_h, hm_w = map(int, class_item.shape)stride_h, stride_w = ih / hm_h, iw / hm_wstrides = torch.tensor([stride_w, stride_h], device=device).view(-1, 1, 2)prior_y, prior_x = torch.meshgrid(torch.arange(hm_h), torch.arange(hm_w))prior_x = prior_x.reshape(hm_h * hm_w, 1).to(device)prior_y = prior_y.reshape(hm_h * hm_w, 1).to(device)prior_xy = torch.cat([prior_x, prior_y], dim=-1)class_item = class_item.permute(0, 2, 3, 1).reshape(-1, hm_h * hm_w, hm_c)bbox_item  = bbox_item.permute(0, 2, 3, 1).reshape(-1, hm_h * hm_w, 4)objness_item = objness_item.reshape(-1, hm_h * hm_w, 1)pred_xy = (bbox_item[..., :2] + prior_xy) * stridespred_wh = bbox_item[..., 2:4].exp() * stridespred_class = torch.cat([objness_item, class_item], dim=-1).sigmoid()output_x.append(torch.cat([pred_xy, pred_wh, pred_class], dim=-1))return torch.cat(output_x, dim=1)     model = MyModel().eval()x = torch.zeros(1, 3, 416, 416, device=device)
# inference the demo image
# inference_detector(model, 'demo/demo.jpg')torch.onnx.export(model, (x,), "out.onnx", opset_version=11
)
重新执行导出 onnx,如下所示:

可以看到此刻的 onnx 输入输出都只有一个了,符合我们的预期,整个模型的导出还剩下动态 batch 需要设置一下,完整的 onnx 导出代码如下:
import torch
from mmdet.apis import init_detector, inference_detectorconfig_file = 'configs/yolox/yolox_tiny_8x8_300e_coco.py'
# 从 model zoo 下载 checkpoint 并放在 `checkpoints/` 文件下
# 网址为: http://download.openmmlab.com/mmdetection/v2.0/faster_rcnn/faster_rcnn_r50_fpn_1x_coco/faster_rcnn_r50_fpn_1x_coco_20200130-047c8118.pth
checkpoint_file = 'checkpoints/yolox_tiny_8x8_300e_coco_20211124_171234-b4047906.pth'
device = 'cuda:0'
#初始化检测器
# model = init_detector(config_file, checkpoint_file, device=device)
# # 推理演示图像
# print(inference_detector(model, 'demo/demo.jpg'))class Model(torch.nn.Module):def __init__(self):super().__init__()self.model = init_detector(config_file, checkpoint_file, device=device)def forward(self, x):ib, ic, ih, iw = map(int, x.shape)x = self.model.backbone(x)x = self.model.neck(x)clas, bbox, objness = self.model.bbox_head(x)output_x = []for class_item, bbox_item, objness_item in zip(clas, bbox, objness):hm_b, hm_c, hm_h, hm_w = map(int, class_item.shape)stride_h, stride_w = ih / hm_h, iw / hm_wstrides = torch.tensor([stride_w, stride_h], device=device).view(-1, 1, 2)prior_y, prior_x = torch.meshgrid(torch.arange(hm_h), torch.arange(hm_w))prior_x = prior_x.reshape(hm_h * hm_w, 1).to(device)prior_y = prior_y.reshape(hm_h * hm_w, 1).to(device)prior_xy = torch.cat([prior_x, prior_y], dim=-1)class_item = class_item.permute(0, 2, 3, 1).reshape(-1, hm_h * hm_w, hm_c)bbox_item  = bbox_item.permute(0, 2, 3, 1).reshape(-1, hm_h * hm_w, 4)objness_item = objness_item.reshape(-1, hm_h * hm_w, 1)pred_xy = (bbox_item[..., :2] + prior_xy) * stridespred_wh = bbox_item[..., 2:4].exp() * stridespred_class = torch.cat([objness_item, class_item], dim=-1).sigmoid()output_x.append(torch.cat([pred_xy, pred_wh, pred_class], dim=-1))return torch.cat(output_x, dim=1)m = Model().eval()
image = torch.zeros(1, 3, 416, 416, device=device)
torch.onnx.export(m, (image,), "yolox.onnx",opset_version=11, input_names=["images"],output_names=["output"],dynamic_axes={"images": {0: "batch"},"output": {0: "batch"}}
)
print("Done.!")
导出的 onnx 如下所示:

可以看到 batch 动态,输出是框的 85 个维度,一切准备就绪,yolox 的前处理和 yolov5 有些许差别,其它包括后处理和 yolov5 完全一样,
那有人可能会有疑问,为什么要这么麻烦还要去解读代码,自己写代码去实现导出呢?其实这种解决问题的方式有一个好处,那就是无论你的框架有多复杂,无论你的模型是什么乱七八糟的东西,我都有一个通用的思路去解决你,这个通用的思路就是分析代码并理解然后找到我所需要的部分,而把不需要的部分全部干掉,什么 image_metas、get_bboxes 全部干掉,把模型的 onnx 导出来,导出来后再想办法把前后处理加进去,使得模型更加简洁,达到我们的目的
另外你可能好奇 mmdetection 本身没有提供 onnx 导出的脚本吗?其实是有的,只不过它的 onnx 导出是非常非常不完善的 (截止至2022/3/27,目前不知道是否完善)
onnx 导出成功了,我们可以去 C++ 上进行推理了
2. yolox推理
预处理部分和 yolov5 一样,只是没有除以 255.0,所以这个需要去掉,同时 bgr 也没有调换顺序,后处理直接没动,照搬 yolov5
因此,我们尽量遵循一个原则,那就是如果你已经实现了一个任务,对于同类的任务我们尽量采用之前已实现的方式,这样工作量就会减少很多,流程也会标准化,节省时间
我们直接执行下 make run,运行如下:

yolox 预处理后的图片如下:

模型推理的效果如下:

整个 yolox 模型的导出和推理我们都实现了,我们还是需要具备一定的 pytorch 功底,否则像后处理的修改还是存在困难的,首先你需要对模型有一定的了解,其次你需要对代码做一定的解读
针对 mmdetection 框架还是比较复杂的,它的 onnx 导出十分不完善,你想要灵活的导出 onnx 比较困难,通过自己在 mmdeteciton 练手可以极大的锻炼你的动手能力
3. 补充知识
3.1 知识点
1. yolox 的预处理部分,使用了仿射变换,请参照仿射变换原理,使用仿射变换实现 letterbox 的理由是
- 便于操作,得到变换矩阵即可
- 便于逆操作,实则是逆矩阵映射即可
- 便于 cuda 加速,cuda 版本的加速已经在 cuda 系列中提到了 warpaffine 实现
- 该加速可以允许 warpaffine、normalize、除以 255、减均值除以标准差、变换 RB 通道等等在一个核中实现,性能最好
2. 后处理部分,反算到图像坐标,实际上是乘以逆矩阵
- 而由于逆矩阵实际上有效自由度是 3,也就是 d2i 中只有 3 个数是不同的,其他都一样。也因此你看到的是 d2i[0]、d2i[2]、d2i[5] 在作用
3.2 mmdetection
MMDetection 是由香港中文大学和商汤针对目标检测任务推出的一个开源项目,它基于 Pytorch 实现了大量的目标检测算法,把数据集构建、模型搭建、训练策略等过程都封装成了一个个模块,通过模块调用的方式,我们能够以很少的代码量实现一个新算法,大大提高了代码复用率
MMDetection 包含了丰富的目标检测、实例分割、全景分割算法以及相关组件和模块。它由 7 个主要部分组成,apis、structures、datasets、models、engine、evaluation 和 visualization
- apis 为模型推理提供高级 API
- structures 提供 bbox、mask 和 DecDataSample 等数据结构
- datasets 支持用于目标检测、实例分割和全景分割的各种数据集
- models 是检测器最重要的部分,包含检测器的不同组件
- engine 是运行时组件的一部分
- evaluation 为评估模型性能提供不同的指标
- visualization 用于可视化检测结果
Github:https://github.com/open-mmlab/mmdetection
官方文档:https://mmdetection.readthedocs.io/zh_CN/dev-3.x/overview.html
总结
本次课程学习了 yolox 模型的导出和推理,我们在一个复杂的框架 mmdetection 中通过代码分析、解读以及结合自己的理解成功完成了 yolox 模型的导出,因此,无论遇到多么复杂的框架、代码,我们首先需要对模型有一定了解,同时具备一定的代码功底,能完成解读、按照自己的理解重写,这样将大大锻炼你的动手能力。


