01-初识动画和过渡
<!DOCTYPE html>
<html lang="en"><head><meta charset="UTF-8" /><meta name="viewport" content="width=device-width, initial-scale=1.0" /><title>使用vue实现css过渡和动画</title></head><body><script src="https://unpkg.com/vue"></script><div id="root"></div><script>const app = Vue.createApp({template: `<div>hello world</div>`,});const vm = app.mount('#root')</script></body>
</html>
过渡和动画的区别:
动画:
<style>@keyframes move {0% {transform: translateX(100px);}50% {transform: translateX(50px);}100% {transform: translateX(0);}}.animation {animation: move 2s;}
</style>const app = Vue.createApp({template: `<div class="animation">hello world</div>`,
});
const vm = app.mount('#root')
效果:
通过点击触发:
<script>const app = Vue.createApp({data() {return {animate: {animation: false}}},methods: {handleClick() {this.animate.animation = !this.animate.animation}},template: `<div :class="animate">hello world</div><button @click="handleClick">按钮</button>`,});const vm = app.mount('#root')
</script>
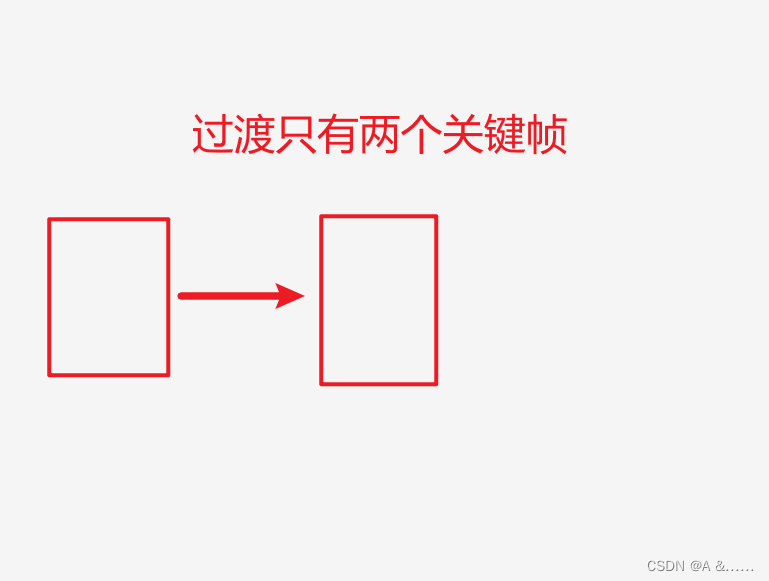
过渡
<style>
.pink {background-color: pink;
}
.green {background-color: green;
}
.transition {transition: 2s ease;
}
</style>
const app = Vue.createApp({data() {return {animate: {transition: true,green: true,pink: false}}},methods: {handleClick() {this.animate.green = !this.animate.greenthis.animate.pink = !this.animate.pink}},template: `<div :class="animate">hello world</div><button @click="handleClick">按钮</button>`,
});
const vm = app.mount('#root')
效果:

02-单元素/组件的入场和出场动画
过渡
基本使用:
入场过渡:
<style>/* 进入,开始 */.v-enter-from {opacity: 0;}/* 开始,结束规定动画的效果,这个必须要有,否则不生效 */.v-enter-active {transition: opacity 2s ease;}/* 出去,结束 */.v-enter-to {opacity: 1;}
</style>
const app = Vue.createApp({data() {return {show: false}},methods: {handleClick() {this.show = !this.show}},template: `<transition><div v-if="show">hello world</div></transition><button @click="handleClick">按钮</button>`,
});
const vm = app.mount('#root')
入场过渡效果:
出场过渡:
<style>
/* 出场的开始 */
.v-leave-from {opacity: 1;
}
.v-leave-active {transition: opacity 2s ease;
}
/* 出场的结束 */
.v-leave-to {opacity: 0;
}
</style>
出场过渡效果:

动画
<style>
@keyframes move {0% {transform: translateX(-100px);}50% {transform: translateX(-50px);}75% {transform: translateX(50px);}100% {transform: translateX(0);}
}
// 只需要 v-enter-active v-leave-active 即可
.v-enter-active {animation: move 2s ease-in;
}
.v-leave-active {animation: move 2s ease-in;
}
</style>

可以使用别名:
<style>
.yunmu-enter-active,
.yunmu-leave-active {animation: move 2s ease-in;
}
</style>
template: `
<transition name="yunmu"><div v-if="show">hello world</div>
</transition>
<button @click="handleClick">按钮</button>
`
也可以使用enter-active-class leave-active-class起别名
<style>
.hello,
.bye {animation: move 2s ease-in;
}
</style>
template: `
<transition name="yunmu"enter-active-class="hello"leave-active-class="bye"
><div v-if="show">hello world</div>
</transition>
<button @click="handleClick">按钮</button>
起别名的好处,引入第三方组件库,直接添加name属性就可以完成对应的动画,比如第三方的animate.css
引入第三方动画库:
<linkrel="stylesheet"href="https://cdnjs.cloudflare.com/ajax/libs/animate.css/4.1.1/animate.min.css"
/>
js中直接使用animate__animated animate__bounce
template: `
<transition name="yunmu"enter-active-class="animate__animated animate__bounce"leave-active-class="animate__animated animate__bounce"
><div v-if="show">hello world</div>
</transition>
<button @click="handleClick">按钮</button>
`
下面再来看这种场景:
<style>
@keyframes move {0% {transform: translateX(100px);}50% {transform: translateX(50px);}100% {transform: translateX(0);}
}
.v-enter-from {color: red;
}.v-enter-active,
.v-leave-active {animation: move 10s ease-in;transition: all 3s ease;
}
.v-leave-active {color: red;
}
</style>
template: `
<transition><div v-if="show">hello world</div>
</transition>
<button @click="handleClick">按钮</button>
`
动画10s,过渡3s;
可以看到,由于动画的时间比较长,所以过渡完了之后,动画依旧还在进行,如果我们想要达到两者相同的时间的效果的话,就需要制定一个标准:比如以时间短的为结束。可以使用下面的方法:
template: `
<transition type="transition"><div v-if="show">hello world</div>
</transition>
<button @click="handleClick">按钮</button>
`
给transition增加一个type,表示时间以哪个为准。

也可以使用duration属性,表示过渡和动画的时间
也可以使用js进行控制
// 动画进入之前
handleBeforeEnter(el) {el.style.color = 'red'
},
// 执行过程中
handleEnterActive(el, done) {const timer = setInterval(() => {const color = el.style.color;if(color === 'red') {el.style.color = 'green'} else {el.style.color = 'red'}}, 1000);setTimeout(() => {clearInterval(timer)done()}, 4000);
},
// 动画结束之后的钩子 只有 handleEnterActive 中的done执行完之后,该钩子才会执行
handleAfterEnter() {alert(22222)
}template: `
<transition :css="false"@before-enter="handleBeforeEnter"@enter="handleEnterActive"@after-enter="handleAfterEnter"
><div v-if="show">hello world</div>
</transition>
<button @click="handleClick">按钮</button>
`,

另外离开的时候,也有对应的钩子before-leave leave after-leave
03-组件和元素切换动画的实现
<style>
.v-enter-from {opacity: 0;
}
.v-enter-active,
.v-leave-active {transition: opacity 1s;
}
.v-enter-to,
.v-leave-from{opacity: 1;
}
.v-leave-to {opacity: 0;
}
</style>
template: `
<transition
><div v-if="show">hello world</div><div v-else>Bye world</div>
</transition>
<button @click="handleClick">按钮</button>
`,
有个问题:两个标签都是慢慢消失,慢慢出来,不是我们想要的效果
在transition标签上面增加mode="out-in"属性,表示先出场,再进场。
对比一下in-out

这样动画就不是一个同步的了。上面的if else标签也可以改成组件。
另外列表组件可以使用transition-group标签进行动画渲染,和transition标签使用差不多。
vue.js的过渡和动画 (更新完成)