基于官方团队发布的预训练模型,使用SuperPoint与SuperGlue实现图像配准,可以参考https://blog.csdn.net/a486259/article/details/129093084
基于官方团队发布的代码训练自己的模型,可以参考https://blog.csdn.net/a486259/article/details/135425673进行实现,训练出的模型不能直接参考上述博客进行部署,为此发布使用代码。
本博文实现基于https://github.com/magicleap/SuperGluePretrainedNetwork进行改进。
1、已训练模型提取
1.1 superpoint模型
参考https://blog.csdn.net/a486259/article/details/135425673训练出的superpoint模型可以在logs目录中找到,具体如下所示。
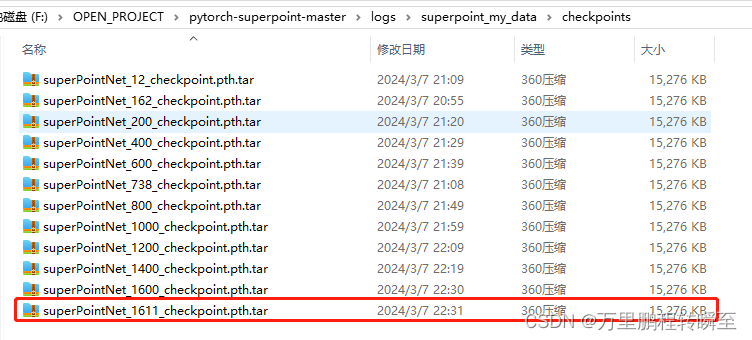
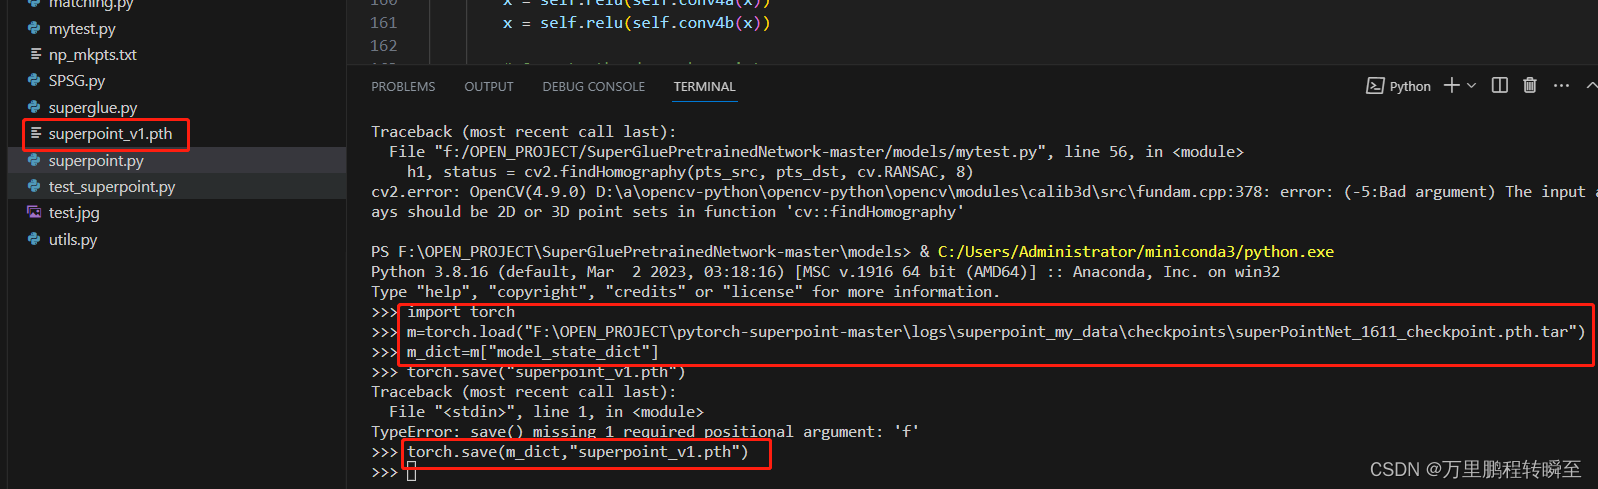
使用以下代码,可以将训练出的superpoint模型参数提取出,保存为SuperGluePretrainedNetwork所需的格式,模型文件名为superpoint_v1.pth
>>> import torch
>>> m=torch.load("F:\OPEN_PROJECT\pytorch-superpoint-master\logs\superpoint_my_data\checkpoints\superPointNet_1611_checkpoint.pth.tar")
>>> m_dict=m["model_state_dict"]
>>> torch.save(m_dict,"superpoint_v1.pth")
代码执行效果如下所示
1.2 superglue模型
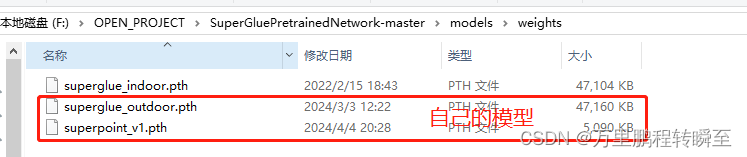
参考https://blog.csdn.net/a486259/article/details/135425673训练出的SuperGlue模型存储路径如下所示,将目标模型复制一份,重命名为superglue_outdoor.pth

2、SuperGluePretrainedNetwork修改
2.1 代码修改
SuperGluePretrainedNetwork代码修改完全参考https://blog.csdn.net/a486259/article/details/129093084?中章节1、前置操作进行修改
2.2 创建SPSG
这个与2.1章节中链接的博客操作是一模一样的。
import torch
from superglue import SuperGlue
from superpoint import SuperPoint
import torch
import torch.nn as nn
import torch.nn.functional as F
class SPSG(nn.Module):#def __init__(self):super(SPSG, self).__init__()self.sp_model = SuperPoint({'max_keypoints':700})self.sg_model = SuperGlue({'weights': 'outdoor'})def forward(self,x1,x2):keypoints1,scores1,descriptors1=self.sp_model(x1)keypoints2,scores2,descriptors2=self.sp_model(x2)#print(scores1.shape,keypoints1.shape,descriptors1.shape)#example=(descriptors1.unsqueeze(0),descriptors2.unsqueeze(0),keypoints1.unsqueeze(0),keypoints2.unsqueeze(0),scores1.unsqueeze(0),scores2.unsqueeze(0))example=(descriptors1,descriptors2,keypoints1,keypoints2,scores1,scores2)indices0,  indices1,  mscores0,  mscores1=self.sg_model(*example)#return indices0,  indices1,  mscores0,  mscores1matches = indices0[0]valid = torch.nonzero(matches > -1).squeeze().detach()mkpts0 = keypoints1[0].index_select(0, valid);mkpts1 = keypoints2[0].index_select(0, matches.index_select(0, valid));confidence = mscores0[0].index_select(0, valid);return mkpts0, mkpts1, confidence
2.3 替换预训练模型
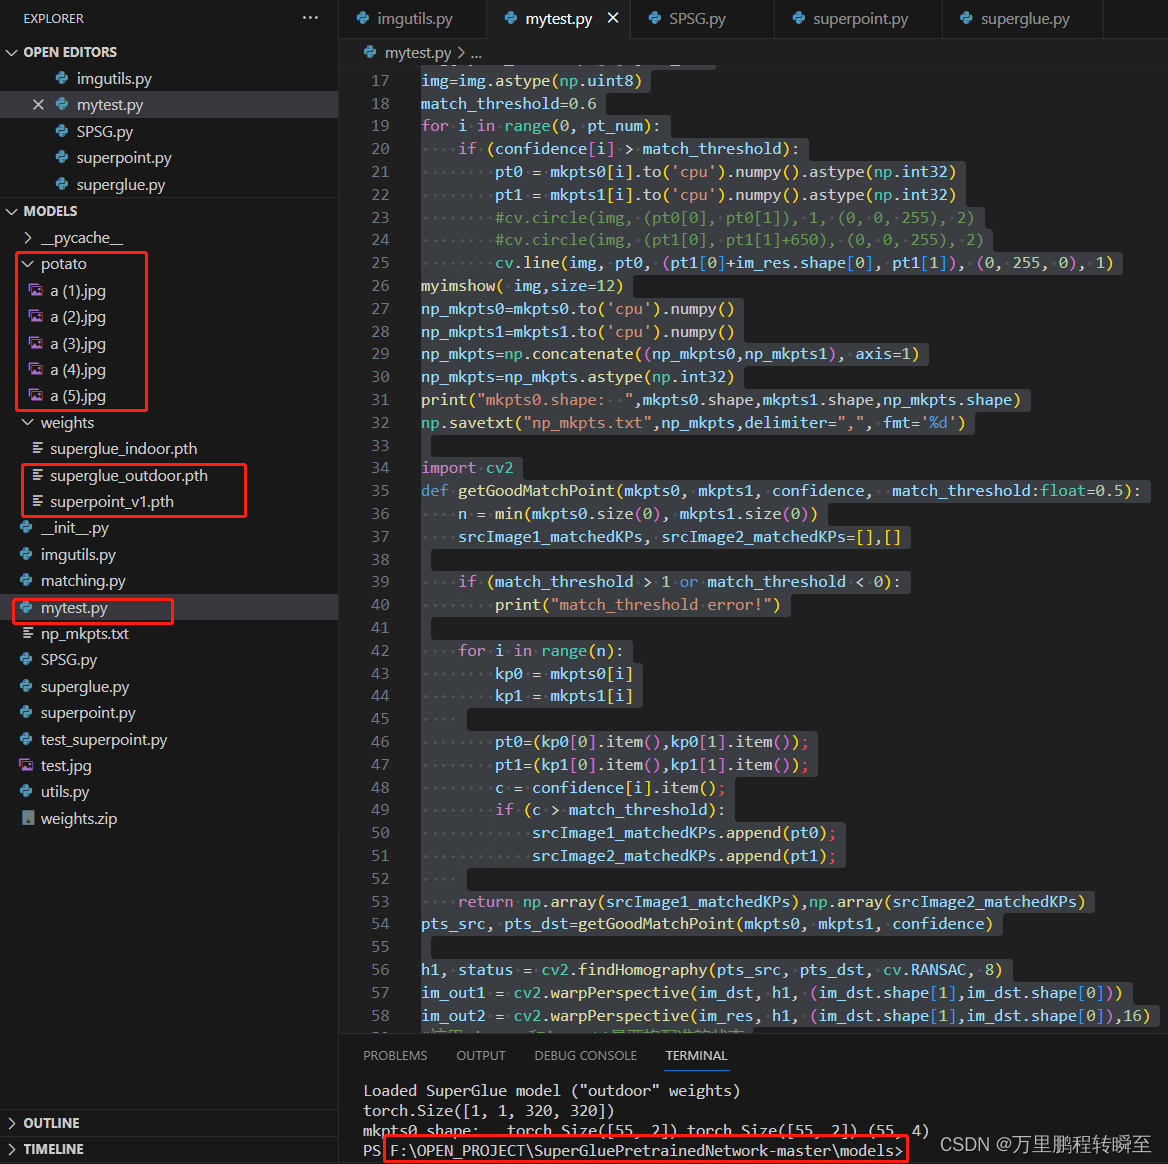
使用章节一种生成的superglue_outdoor.pth与superpoint_v1.pth替换掉原有的模型,具体如下所示
3、对自己的数据进行配准
使用以下代码,可以基于自行训练的模型对自己的数据进行配准。
进行图像读取、图像显示操作的代码被封装为imgutils库,具体可以查阅https://hpg123.blog.csdn.net/article/details/124824892
from imgutils import *
import torch
from SPSG import SPSG
model=SPSG().to('cuda')
tensor2a,img2a=read_img_as_tensor(r"potato\a (1).jpg",(320,320),device='cuda')
tensor2b,img2b=read_img_as_tensor(r"potato\a (2).jpg",(320,320),device='cuda')
print(tensor2a.shape)
mkpts0, mkpts1, confidence=model(tensor2a,tensor2b)
#myimshows( [img2a,img2b],size=12)import cv2 as cv
pt_num = mkpts0.shape[0]
im_dst,im_res=img2a,img2b
img = np.zeros((max(im_dst.shape[0], im_res.shape[0]), im_dst.shape[1]+im_res.shape[1]+10,3))
img[:,:im_res.shape[0],]=im_dst
img[:,-im_res.shape[0]:]=im_res
img=img.astype(np.uint8)
match_threshold=0.6
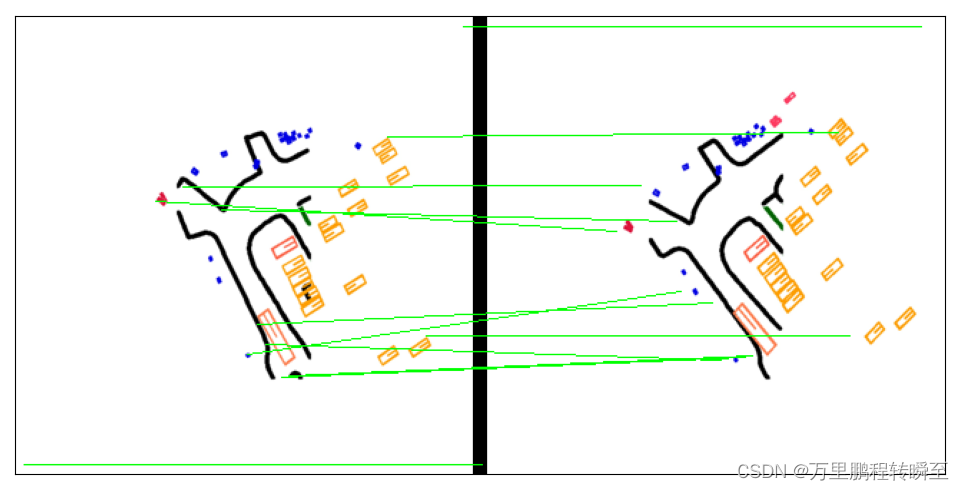
for i in range(0, pt_num):if (confidence[i] > match_threshold):pt0 = mkpts0[i].to('cpu').numpy().astype(np.int32)pt1 = mkpts1[i].to('cpu').numpy().astype(np.int32)#cv.circle(img, (pt0[0], pt0[1]), 1, (0, 0, 255), 2)#cv.circle(img, (pt1[0], pt1[1]+650), (0, 0, 255), 2)cv.line(img, pt0, (pt1[0]+im_res.shape[0], pt1[1]), (0, 255, 0), 1)
myimshow( img,size=12)import cv2
def getGoodMatchPoint(mkpts0, mkpts1, confidence, match_threshold:float=0.5):n = min(mkpts0.size(0), mkpts1.size(0))srcImage1_matchedKPs, srcImage2_matchedKPs=[],[]if (match_threshold > 1 or match_threshold < 0):print("match_threshold error!")for i in range(n):kp0 = mkpts0[i]kp1 = mkpts1[i]pt0=(kp0[0].item(),kp0[1].item());pt1=(kp1[0].item(),kp1[1].item());c = confidence[i].item();if (c > match_threshold):srcImage1_matchedKPs.append(pt0);srcImage2_matchedKPs.append(pt1);return np.array(srcImage1_matchedKPs),np.array(srcImage2_matchedKPs)
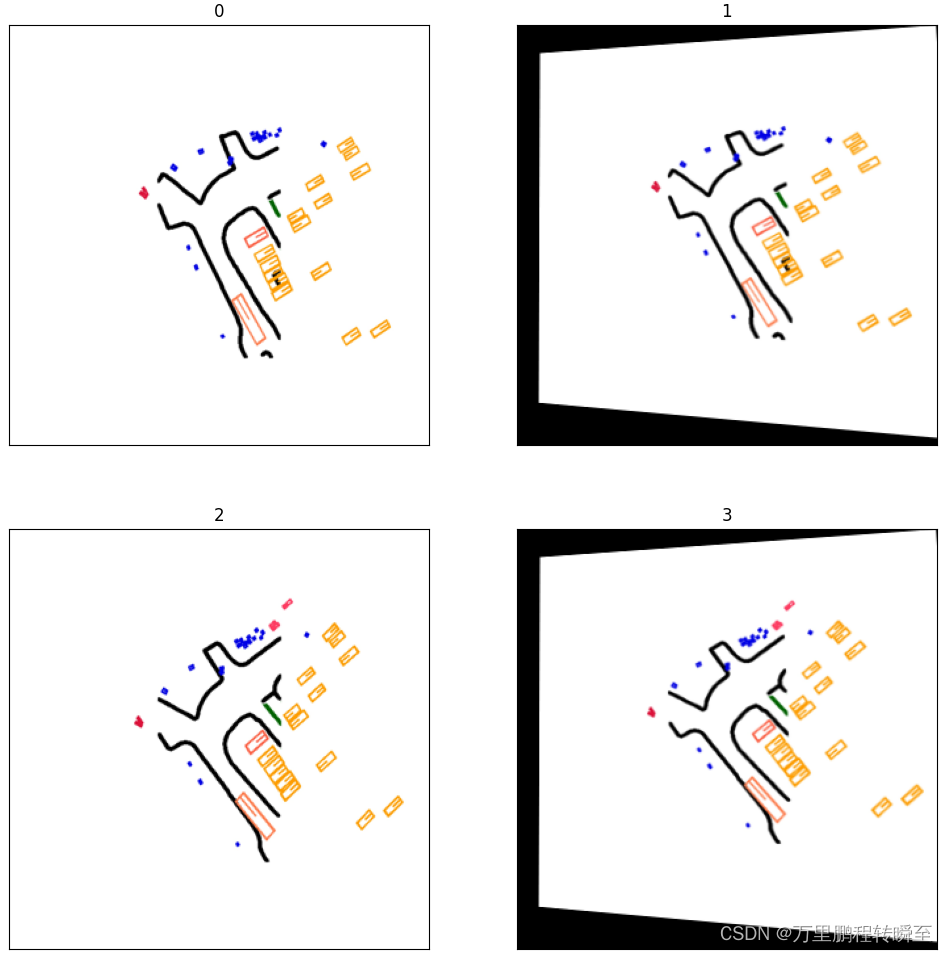
pts_src, pts_dst=getGoodMatchPoint(mkpts0, mkpts1, confidence)h1, status = cv2.findHomography(pts_src, pts_dst, cv.RANSAC, 8)
im_out1 = cv2.warpPerspective(im_dst, h1, (im_dst.shape[1],im_dst.shape[0]))
im_out2 = cv2.warpPerspective(im_res, h1, (im_dst.shape[1],im_dst.shape[0]),16)
#这里 im_res和im_out1是严格配准的状态
myimshowsCL([im_dst,im_out1,im_res,im_out2],rows=2,cols=2, size=6)代码、数据、模型的关系如下所示
代码运行效果如下所示