一、双向链表简介
上一篇文章我介绍了单向链表的实现,单向链表的特点是:可以根据上一个节点访问下一个节点!但是,它有个缺点,无法通过下一个节点访问上一个节点!这也是它称为单向链表的原因。
那么,可不可以实现这样一种链表,它既可以通过一个节点,访问其上一个节点和下一个节点,也是可以的!它就是我接下来要介绍的双向链表!
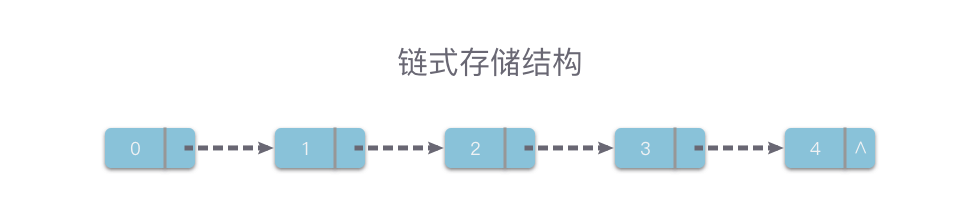
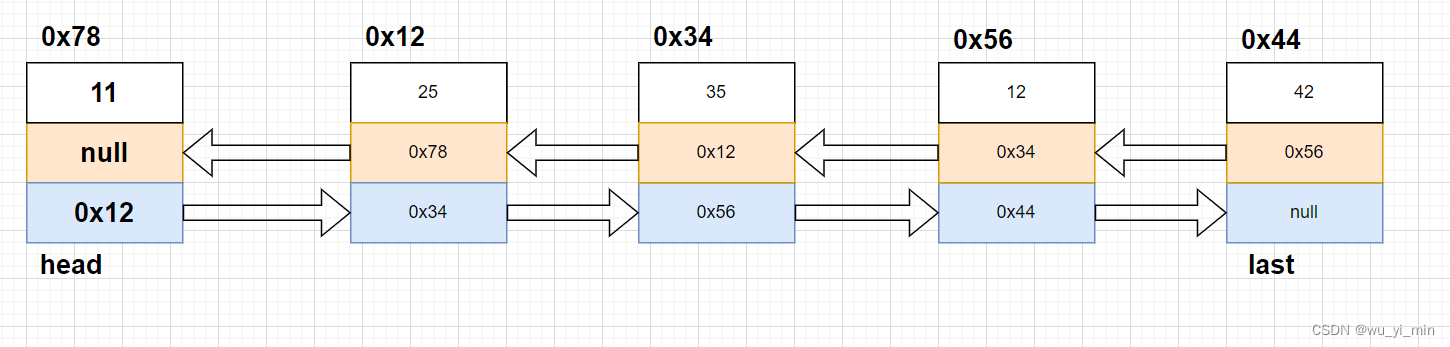
如图:与单向链表不同的是,双向链表的每个节点包含三个域:val、pre、next,分别代表当前节点的值、上一个节点的地址、下一个节点的地址。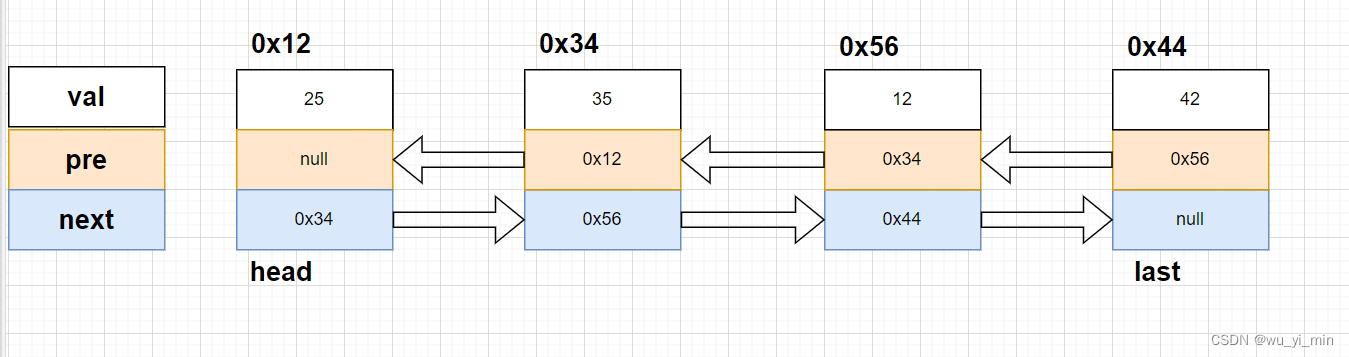
二、双向链表的实现
双向链表实现的全部代码:
类文件:

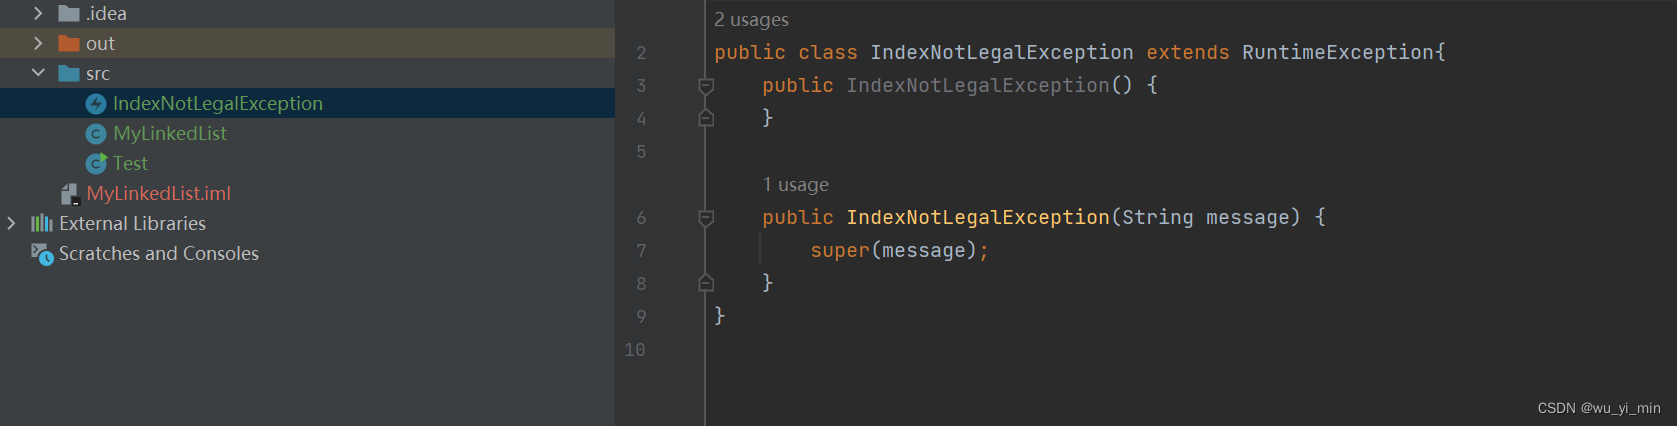
异常类代码:(IndexNotLegalException)
//自定义异常类:
public class IndexNotLegalException extends RuntimeException{public IndexNotLegalException() {}public IndexNotLegalException(String message) {super(message);}
}
双向链表实现代码:(MyLinkedList)
import javax.management.ListenerNotFoundException;
import java.util.List;public class MyLinkedList {//创建ListNode内部类class ListNode {public int val;public ListNode pre;//前驱public ListNode next;//后继public ListNode(int val) {this.val = val;}}public ListNode head;//标志头节点public ListNode last;//标志尾节点//返回链表长度的方法:public int size() {int count = 0;ListNode cur = head;while (cur != null) {cur = cur.next;count++;}return count;}//打印链表的方法;public void display() {ListNode cur = head;while (cur != null) {System.out.print(cur.val + " ");cur = cur.next;}System.out.println();}//查看是否波包含key关键字的方法:public boolean contains(int key) {ListNode cur = head;while (cur != null) {if (cur.val == key) {return true;}cur = cur.next;}return false;}//头部插入的方法public void addFirst(int data) {ListNode node = new ListNode(data);//如果head为nullif (head == null) {head = last = node;} else {head.pre = node;node.next = head;head = node;}}//尾部插入的方法:public void addLast(int data) {ListNode node = new ListNode(data);//如果head==nullif (head == null) {head = last = node;} else {last.next = node;node.pre = last;last = node;}}//指定位置插入的方法:public void addIndex(int index, int data) {//1、判断index是否合法try {checkIndex(index);} catch (IndexNotLegalException e) {e.printStackTrace();}//index==0,相当于头部插入if (index == 0) {addFirst(data);return;}//index==size(),相当于尾部插入if (index == size()) {addLast(data);return;}//0<index<size()if (index > 0 && index < size()) {//找到下标为index的节点ListNode cur = findIndex(index);//连接节点ListNode node = new ListNode(data);node.next = cur;node.pre = cur.pre;cur.pre.next = node;cur.pre = node;return;}}//找到index节点的方法:public ListNode findIndex(int index) {int count = index;ListNode cur = head;while (count != 0) {cur = cur.next;count--;}return cur;}//检查index是否合法的方法private void checkIndex(int index) {if (index < 0 || index > size()) {throw new IndexNotLegalException("Index 不合法!" + index);}}//删除第一次出现关键字key的节点public void remove(int key) {//使用cur寻找关键字所在的节点ListNode cur = head;while (cur != null) {if (cur.val == key) {if (cur == head) {//关键字在头节点head = head.next;//判断链表是否只有一个节点!if(head!=null){head.pre = null;}else{last=null;}} else { //关键字在尾节点if (cur == last) {cur.pre.next = cur.next;last = last.pre;} else {  //关键字在中间节点cur.pre.next = cur.next;cur.next.pre = cur.pre;}}return;}cur = cur.next;}}//删除所有值为key的节点public void removeAllKey(int key){//使用cur寻找关键字所在的节点ListNode cur = head;while (cur != null) {if (cur.val == key) {if (cur == head) {//关键字在头节点head = head.next;//判断链表是否只有一个节点!if(head!=null){head.pre = null;}else{last=null;}} else { //关键字在尾节点if (cur == last) {cur.pre.next = cur.next;last = last.pre;} else {  //关键字在中间节点cur.pre.next = cur.next;cur.next.pre = cur.pre;}}//return;注释该语句,使其多次删除关键字为key的节点}cur = cur.next;}}//删除列表public void clear(){ListNode cur=head;while(cur!=null){ListNode curN=cur.next;cur.pre=null;cur.next=null;cur=curN;}head=last=null;}
}
详细讲解:
首先创建一个class文件:MyLinkedList类和一个Test类,前者用来实现双向链表,后者用来使用链表!

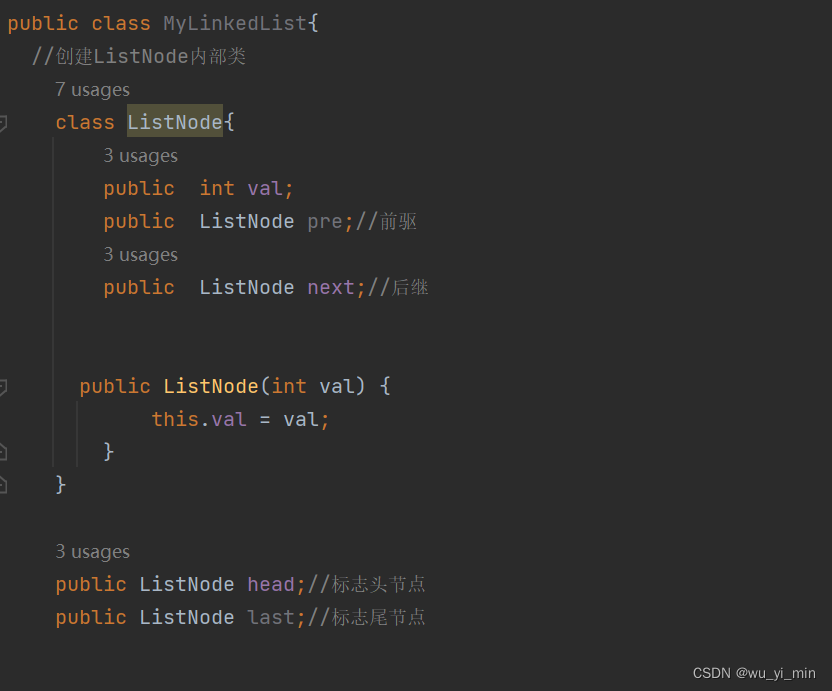
在这个MyLinkedList类中,我们需要定义一个内部类:ListNode类,表示节点类!这个节点类应该包含val、pre、next三个成员变量和val的构造方法!
创建好内部类后,就可以定义MyLinkedList类中的成员变量!它应该包括头节点head和尾节点last!
1、一些简单的方法:
通过前面单向链表的学习,一些简单的方法就不再过多详细介绍,大家看着代码就能懂其中的意思。
//返回链表长度的方法:public int size(){int count =0;ListNode cur=head;while(cur!=null){cur=cur.next;count++;}return count;}//打印链表的方法;public void display(){ListNode cur=head;while(cur!=null){System.out.print(cur.val+" ");cur=cur.next;}System.out.println();}//查看是否包含key关键字的方法:public boolean contains(int key){ListNode cur=head;while(cur!=null){if(cur.val==key){return true;}cur=cur.next;}return false;}2、头部插入的方法:
头部插入前,首先需要实例化应该ListNode类的节点!
头部插入的时候,需要分为两种情况:head==null 或 head!=null
i>当head==null时:
此时链表没有节点,此时head和last应该指向同一个节点node

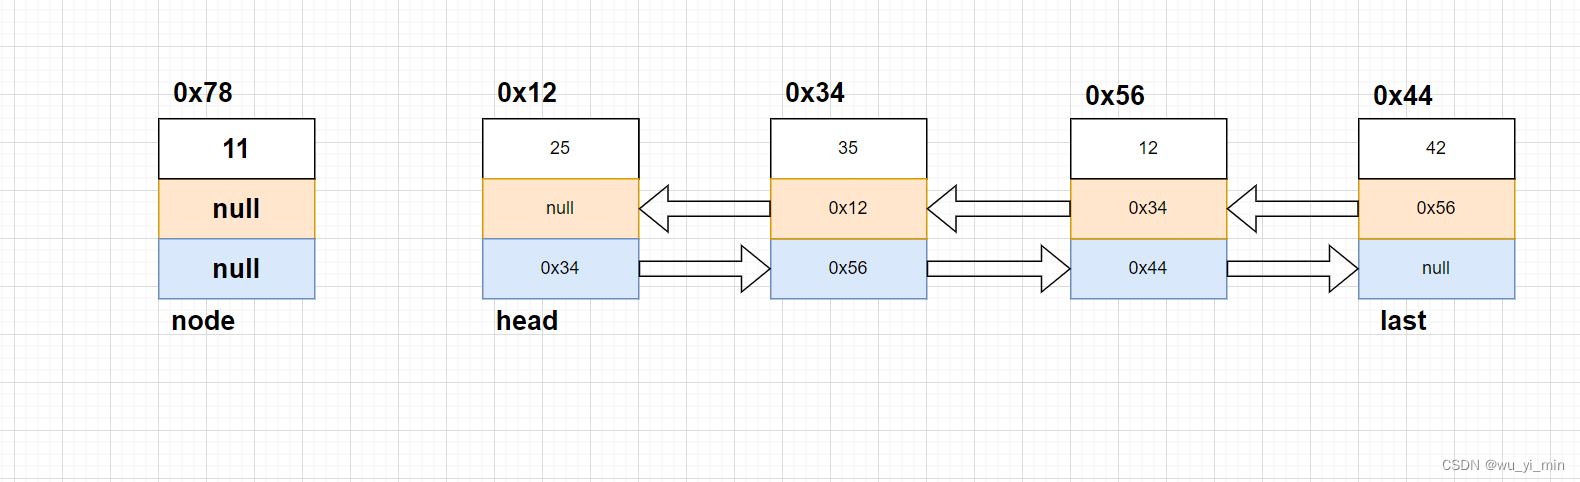
ii>当head!=null时:
第一步:将head.next的null修改为新节点的地址0x78
第二步:将node.next修改为head的地址0x12
第三步: 修改头节点,head=node
修改前:
修改后:
代码实现:
//头部插入的方法public void addFirst(int data){ListNode node=new ListNode(data);//如果head为nullif(head==null){head=last=node;}else{head.pre=node;node.next=head;head=node;}}3、尾部插入的方法:
尾部插入的方法与头部插入的方法逻辑上是一样的,也分为两种情况:head==null 或 head!=null
//尾部插入的方法:public void addLast(int data){ListNode node=new ListNode(data);//如果head==nullif(head==null){head=last=node;}else{last.next=node;node.pre=last;last=node;}}4、指定位置插入的方法:
指定位置插入方法全部代码:
//指定位置插入的方法:public void addIndex(int index, int data) {//1、判断index是否合法try {checkIndex(index);//调用了checkIndex方法,方法实现在下面} catch (IndexNotLegalException e) {e.printStackTrace();}//index==0,相当于头部插入if (index == 0) {addFirst(data);return;}//index==size(),相当于尾部插入if(index==size()){addLast(data);return;}//0<index<size()if(index>0&&index<size()){//找到下标为index的节点ListNode cur=findIndex(index);//调用了findIndex方法,方法实现在下面//连接节点ListNode node=new ListNode(data);node.next=cur;node.pre=cur.pre;cur.pre.next=node;cur.pre=node;return;}}//调用方法的实现://找到index节点的方法:public ListNode findIndex(int index){int count=index;ListNode cur=head;while(count!=0){cur=cur.next;count--;}return cur;}//检查index是否合法的方法private void checkIndex(int index){if(index<0||index>size()){throw new IndexNotLegalException("Index 不合法!"+index);}}详细介绍;
指定插入的方法需要传入一个下标,在指定下标的节点之前插入一个节点!
那么,根据下标的值可以分为四种情况:
i>下标不合法
此时先自定义一个异常类:
另外,需要在MyLinkedList类中创建一个方法,用来判断下标是否合法,如果不合法,抛出该异常类
//检查index是否合法的方法private void checkIndex(int index){if(index<0||index>size()){throw new IndexNotLegalException("Index 不合法!"+index);}}此时,就可以在指定位置插入的方法中写下标不合法的代码:

ii>index==0
当index==0,相当于头插,此时调用头部插入的方法即可
iii>index==size()
当index==size(),相当于尾部插入,此时调用尾部插入的方法即可
iiii>index>0&&index<size()
这种情况属于指定位置插入的正常情况,它既不是头部插入,也不是尾部插入,而是在两个节点中间插入!
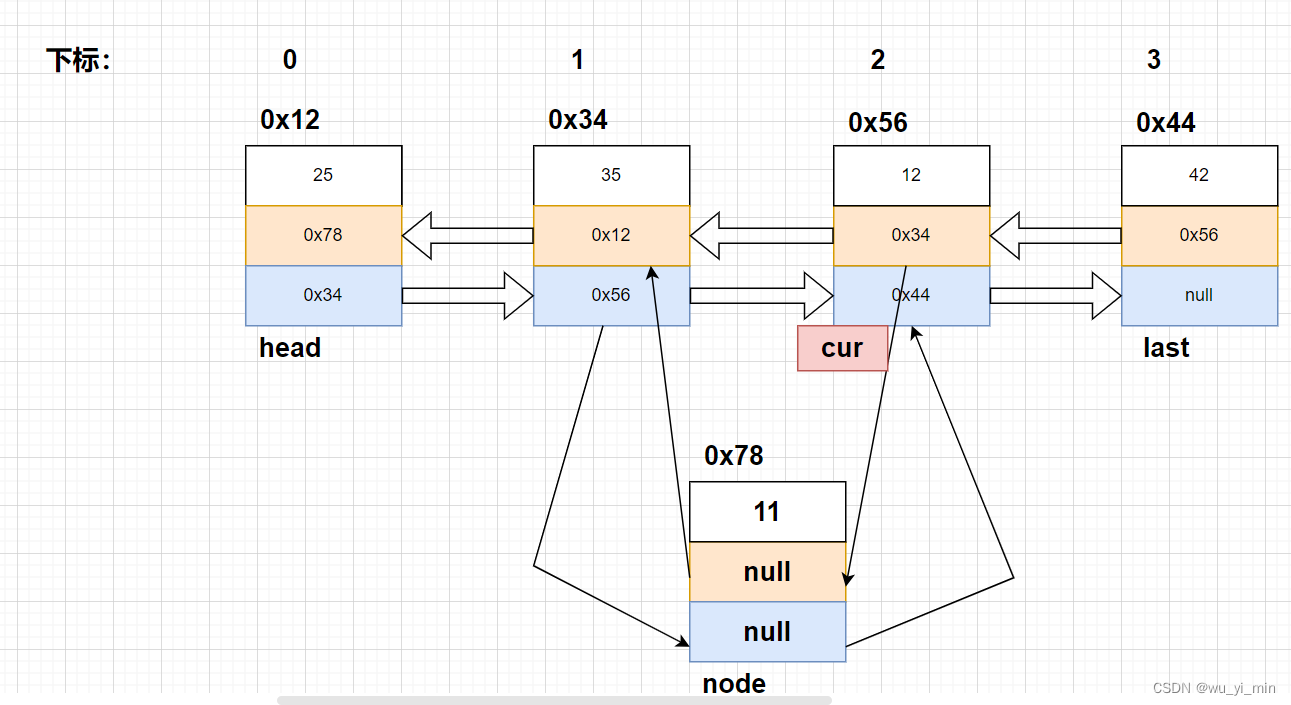
首先,需要使用创建cur找到下标为index的节点,以图为例子:我们要在下标为2的节点前插入node新节点!
那么,实例化node之后,我们就得根据如图中的箭头将新节点连接到链表中。可以看到,要修改四个引用的内容!
node.pre=cur.pre;
node.next=cur;
cur.pre.next=node;
cur.pre=node;
修改后:
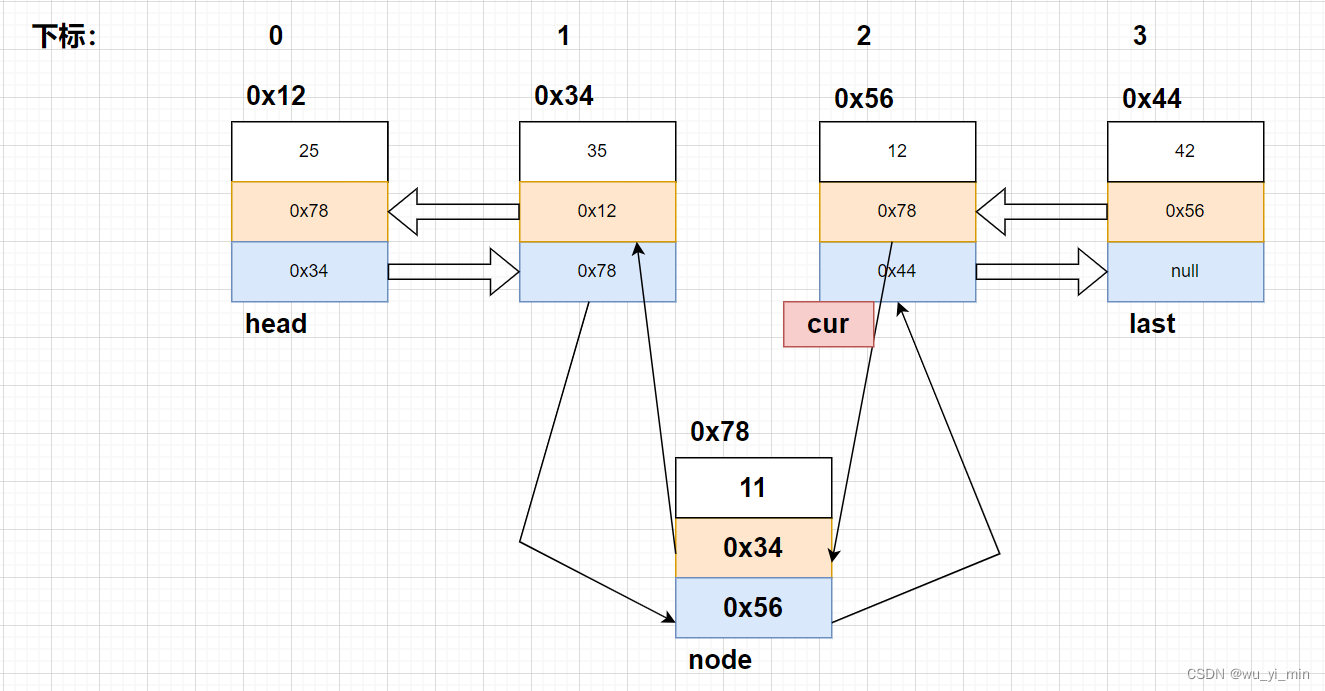
代码实现:
//0<index<size()if(index>0&&index<size()){//找到下标为index的节点ListNode cur=findIndex(index);//调用findIndex方法//连接节点ListNode node=new ListNode(data);node.next=cur;node.pre=cur.pre;cur.pre.next=node;cur.pre=node;return;}调用的findIndex方法:
也是写在MyLinkedList类内部:
//找到index节点的方法:public ListNode findIndex(int index){int count=index;ListNode cur=head;while(count!=0){cur=cur.next;count--;}return cur;}5、删除第一次出现关键字key的节点的方法:
删除第一次出现关键字key的节点,首先,先实例化一个cur帮助我们找到想要删除的节点!
然后再执行删除操作,cur所在节点的位置不同,所要执行的操作也不同,这里分为三种情况:
1、cur所在节点为中间节点
2、cur==head
3、cur==last
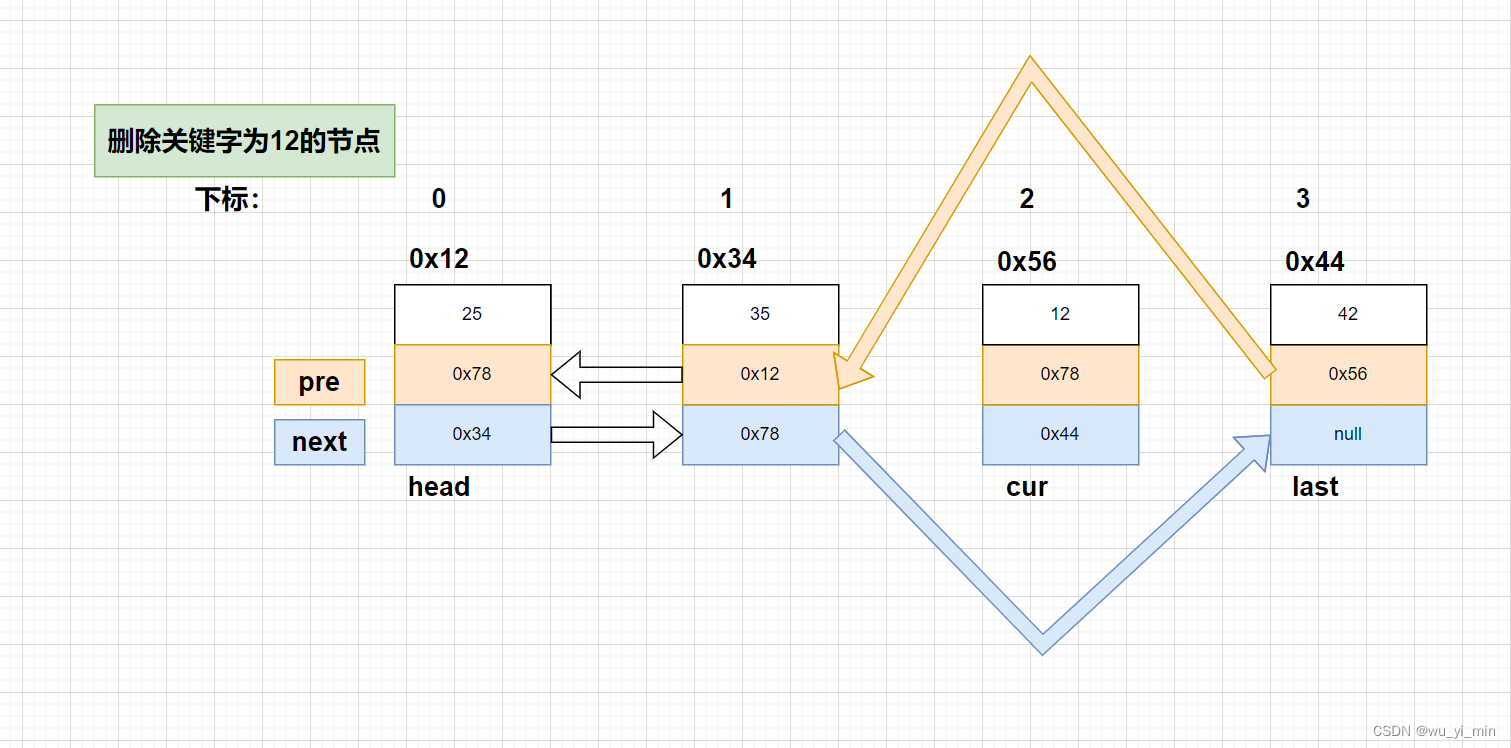
先来说说第一种情况:cur所在节点为中间节点
首先,我们使用cur找到了关键字为12所在的节点!然后,执行删除操作!
这里只需要将cur所在的前后节点依照如图箭头方向连接即可!
cur.pre.next=cur.next;
cur.next.pre=cur.pre;
第二种情况:cur==head
这种情况下,我们会发现,如果照搬第一种情况的代码
cur.pre.next=cur.next;//由于head.pre==null,因此会报错
cur.next.pre=cur.pre;
所以,此时,我们只需要将这么写
head=head.next; //头节点换到下一个节点
head.pre=null; //将新的头节点的pre修改为null
特殊情况:
如果链表中只有一个节点!
那么执行完语句head=head.next后,head==null,因此语句head.pre=null(相当于null.pre=null)会报错!
所以,在cur==head的情况下,我们还要解决链表只有一个节点的特殊情况:
if (cur == head) {//关键字在头节点head = head.next;//判断链表是否只有一个节点!if(head!=null){head.pre = null;}else{//只有一个节点的情况:last=null;}}第三种情况:cur==last
此时,这种情况下,代码这么写:
cur.pre.next=cur.next; //将前一个节点的next置为null(cur.next==null)
last=last.pre; //last向前移动一个节点
代码实现:
//删除第一次出现关键字key的节点public void remove(int key) {//使用cur寻找关键字所在的节点ListNode cur = head;while (cur != null) {if (cur.val == key) {if (cur == head) {//关键字在头节点head = head.next;//判断链表是否只有一个节点!if(head!=null){head.pre = null;}else{last=null;}} else { //关键字在尾节点if (cur == last) {cur.pre.next = cur.next;last = last.pre;} else { //关键字在中间节点cur.pre.next = cur.next;cur.next.pre = cur.pre;}}return;//删完一个就走}cur = cur.next;}}6、删除所有值为key的节点的方法:
有了上一个方法的学习,这个方法那就很简单了,只需要注释掉return语句即可,我们可以回头看看上述代码,它的整体逻辑是删除第一个关键字为key的节点就结束循环,那么,我们是不是就可以在删除完一个节点后选择不结束该方法,让它继续删除呢。当然可以!
//删除所有值为key的节点public void removeAllKey(int key){//使用cur寻找关键字所在的节点ListNode cur = head;while (cur != null) {if (cur.val == key) {if (cur == head) {//关键字在头节点head = head.next;//判断链表是否只有一个节点!if(head!=null){head.pre = null;}else{last=null;}} else { //关键字在尾节点if (cur == last) {cur.pre.next = cur.next;last = last.pre;} else { //关键字在中间节点cur.pre.next = cur.next;cur.next.pre = cur.pre;}}//return;注释该语句,使其多次删除关键字为key的节点}cur = cur.next;}}7、清空链表方法:
这里清空链表的主要逻辑是将每一个节点的pre和next置为null,最后将head和last置为null
//删除列表public void clear(){ListNode cur=head;while(cur!=null){ListNode curN=cur.next;cur.pre=null;cur.next=null;cur=curN;}head=last=null;}
三、LinkedList的使用
上面我们讲解了如何实现双向链表,这其实是Java自带的LinkedList的底层实现,接下来让我们来学习Java自带的LinkedList吧!
1、LinkedList的构造
LinkedList有两个构造方法,在使用LinkedList之前,我们需要调用构造方法实例化一个对象。
方法:                                                解释:
LinkedList()                                       无参构造
public LinkedList(Collection<? extends E> c)         使用其他集合容器中元素构造List
第一个无参构造就不多解释了,因为比较好懂,那么我们来解释一下第二个构造方法可以传入那些参数?
首先,我们需要知道的是:
1、Collection是传入参数的类型
2、?表示:Collection<>中传入的类型
3、<? extends E>表示:?代表的这个类型要么继承E这个类型,要么继承E这个类型的子类
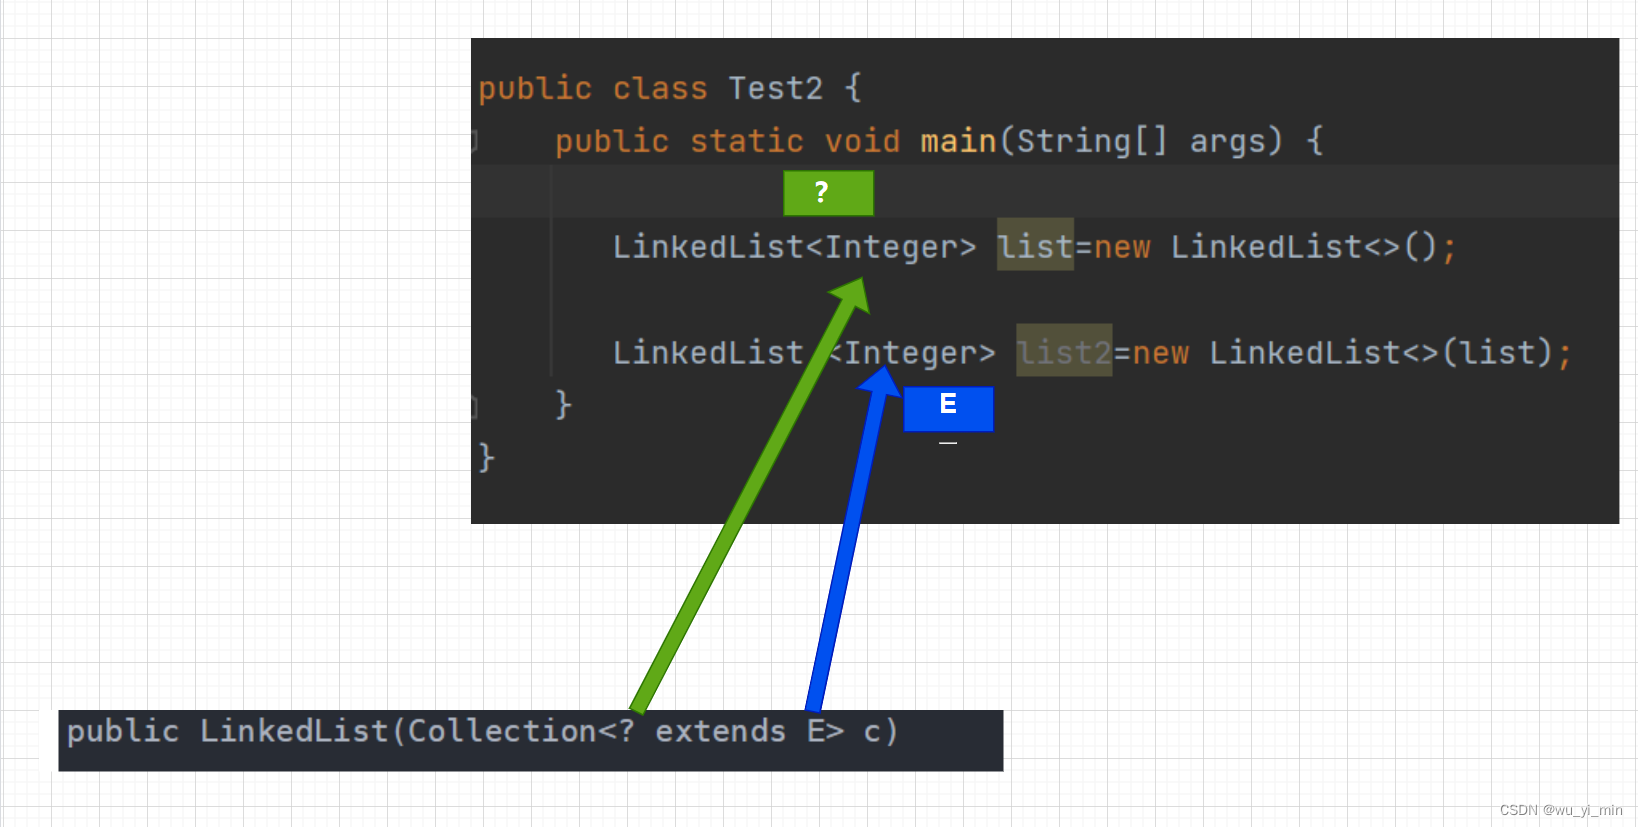
可以看到,第二个构造方法可以传入参数list,此时可能有以下疑问:
1、传入的参数类型是Collection类型的,那么为什么可以传入LinkedList类型的list呢?
答:LinkedList类型实现了Collection接口!
2、如何解释list符合<? extends E>
答:在实例化list的时候,LinkedList传入的参数类型是Integer,此时这个Integer代表 ?
在实例化list2的时候,LinkedList传入的参数类型是Integer,此时这个Integr代表 E
也即是说:? 继承了 E 这个类型,所以这个传入参数list是符合<? extends E>的
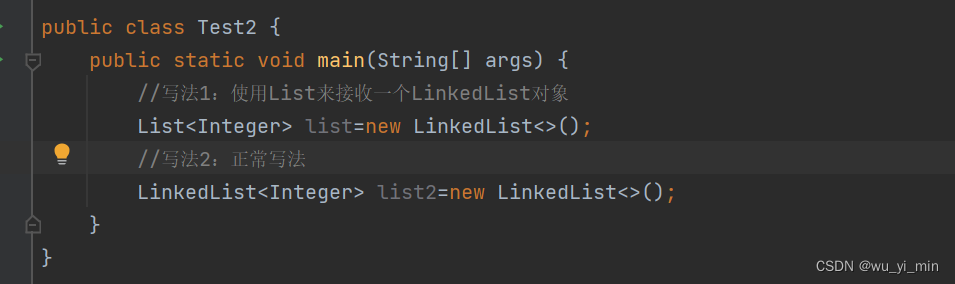
另外在实例化LinkedList的时候,因为LinkedList实现了List接口,因此在实例化的时候有两种写法: