定时任务的实现方式有很多,比如XXL-Job等。但是其实核心功能和概念都是类似的,很多情况下只是调用的API不同而已。
这里就先用SpringBoot为我们提供的定时任务的API来实现一个简单的定时任务,让大家先对定时任务里面的一些核心概念有个大致的了解。
实现步骤
① 使用@EnableScheduling注解开启定时任务功能
我们可以在配置类上加上@EnableScheduling
@SpringBootApplication
@MapperScan("com.sangeng.mapper")
@EnableScheduling
public class SanGengBlogApplication {public static void main(String[] args) {SpringApplication.run(SanGengBlogApplication.class,args);}
}
② 确定定时任务执行代码,并配置任务执行时间
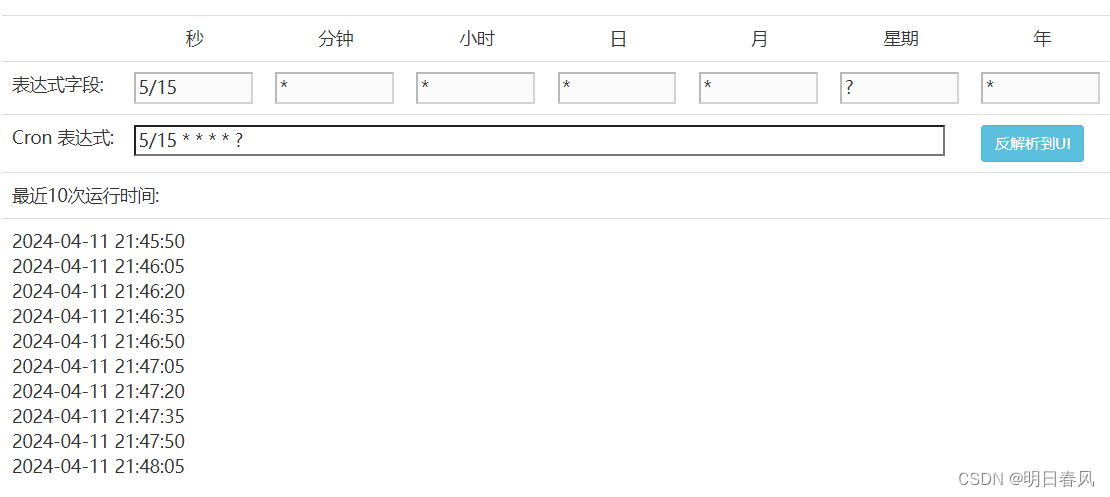
使用@Scheduled注解标识需要定时执行的代码。注解的cron属性相当于是任务的执行时间。目前可以使用 0/5 * * * * ? 进行测试,代表从0秒开始,每隔5秒执行一次。
注意:对应的bean要注入容器,否则不会生效。
@Component
public class TestJob {@Scheduled(cron = "0/5 * * * * ?")public void testJob(){//要执行的代码System.out.println("定时任务执行了");}
}
从 5 秒开始,每15 秒执行一次“