文章目录
- 嫌啰嗦直接看源码
- Q5 :PyTorch on CIFAR-10
- three_layer_convnet
- 题面
- 解析
- 代码
- 输出
- Training a ConvNet
- 题面
- 解析
- 代码
- 输出
- ThreeLayerConvNet
- 题面
- 解析
- 代码
- 输出
- Train a Three-Layer ConvNet
- 题面
- 解析
- 代码
- 输出
- Sequential API: Three-Layer ConvNet
- 题面
- 解析
- 代码
- 输出
- CIFAR-10 open-ended challenge
- 题面
- 解析
- 代码
- 输出
嫌啰嗦直接看源码
Q5 :PyTorch on CIFAR-10
three_layer_convnet
题面
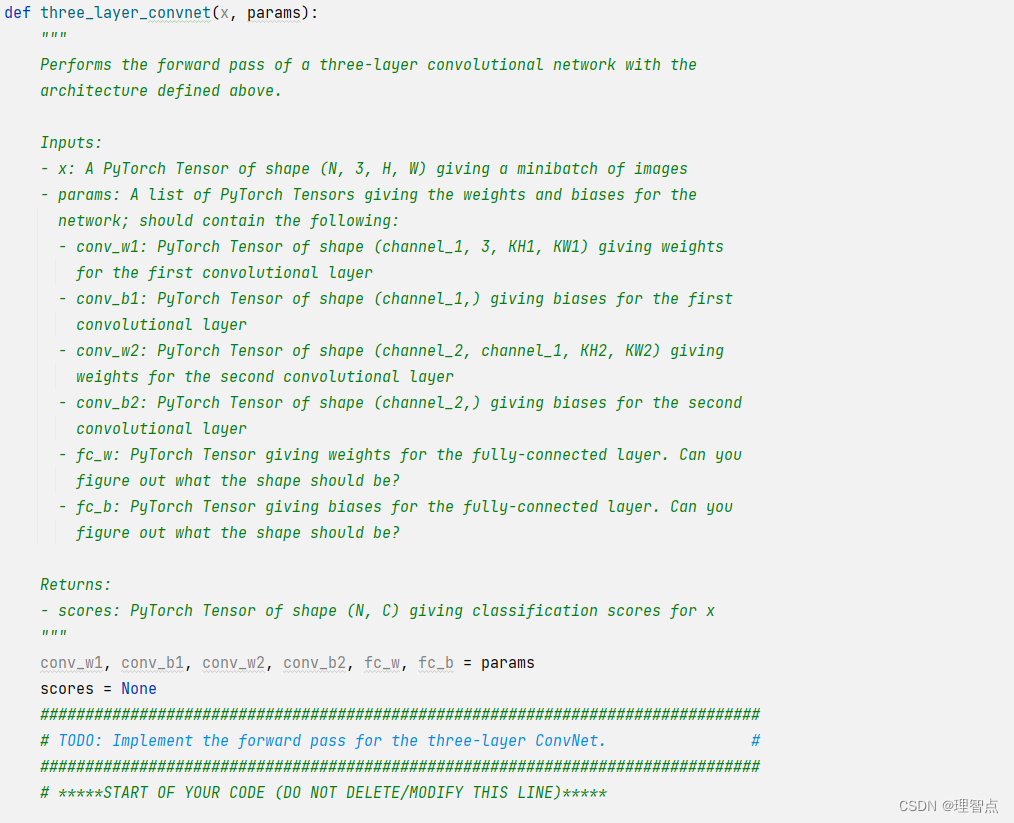

让我们使用Pytorch来实现一个三层神经网络
解析
看下pytorch是怎么用的,原理我们其实都清楚了,自己去查下文档就好了
具体的可以看上一个cell上面给出的文档地址
For convolutions: http://pytorch.org/docs/stable/nn.html#torch.nn.functional.conv2d; pay attention to the shapes of convolutional filters!
代码
def three_layer_convnet(x, params):"""Performs the forward pass of a three-layer convolutional network with thearchitecture defined above.Inputs:- x: A PyTorch Tensor of shape (N, 3, H, W) giving a minibatch of images- params: A list of PyTorch Tensors giving the weights and biases for thenetwork; should contain the following:- conv_w1: PyTorch Tensor of shape (channel_1, 3, KH1, KW1) giving weightsfor the first convolutional layer- conv_b1: PyTorch Tensor of shape (channel_1,) giving biases for the firstconvolutional layer- conv_w2: PyTorch Tensor of shape (channel_2, channel_1, KH2, KW2) givingweights for the second convolutional layer- conv_b2: PyTorch Tensor of shape (channel_2,) giving biases for the secondconvolutional layer- fc_w: PyTorch Tensor giving weights for the fully-connected layer. Can youfigure out what the shape should be?- fc_b: PyTorch Tensor giving biases for the fully-connected layer. Can youfigure out what the shape should be?Returns:- scores: PyTorch Tensor of shape (N, C) giving classification scores for x"""conv_w1, conv_b1, conv_w2, conv_b2, fc_w, fc_b = paramsscores = None################################################################################# TODO: Implement the forward pass for the three-layer ConvNet. ################################################################################## *****START OF YOUR CODE (DO NOT DELETE/MODIFY THIS LINE)*****x = F.conv2d(x, conv_w1, bias=conv_b1, padding=2)x = F.relu(x)x = F.conv2d(x, conv_w2, bias=conv_b2, padding=1)x = F.relu(x)x = flatten(x)scores = x.mm(fc_w) + fc_b# *****END OF YOUR CODE (DO NOT DELETE/MODIFY THIS LINE)*****################################################################################# END OF YOUR CODE #################################################################################return scores
输出
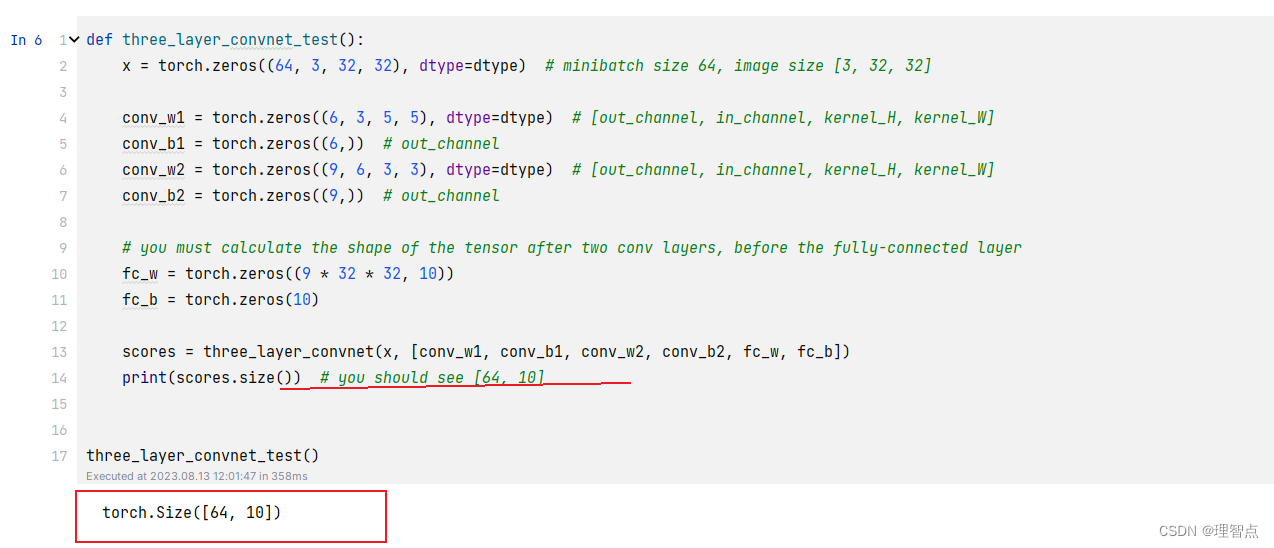

注意这里需要注意有没有使用Gpu版本的pytorch,我就是在这里发现我的pytorch没有cuda
Training a ConvNet
题面

解析
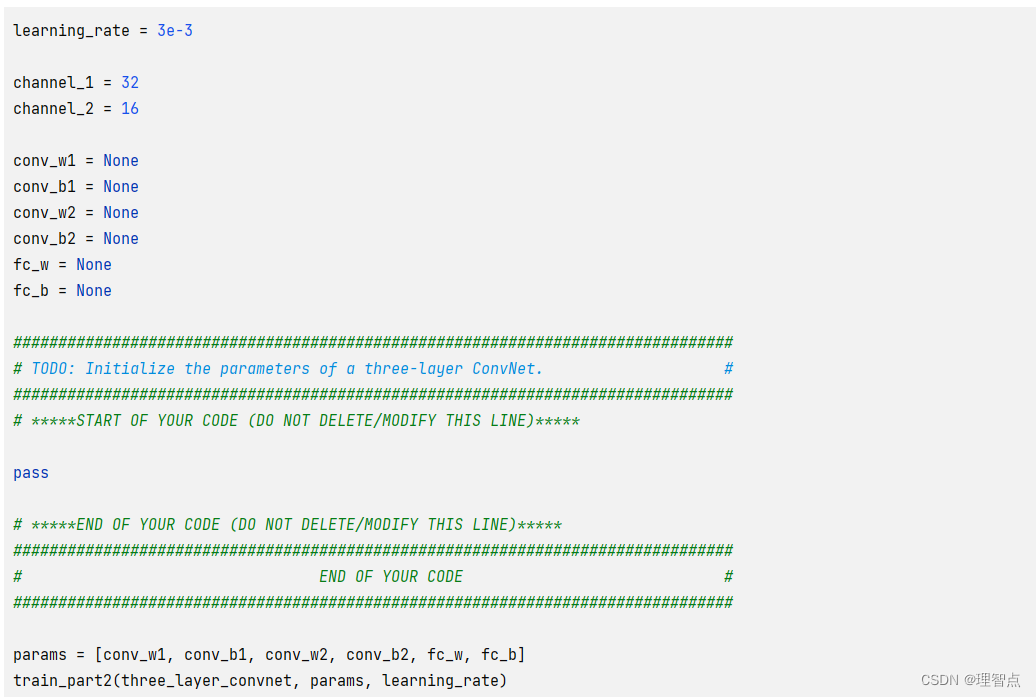
按照题面意思来就好了
代码
learning_rate = 3e-3channel_1 = 32
channel_2 = 16conv_w1 = None
conv_b1 = None
conv_w2 = None
conv_b2 = None
fc_w = None
fc_b = None################################################################################
# TODO: Initialize the parameters of a three-layer ConvNet.                    #
################################################################################
# *****START OF YOUR CODE (DO NOT DELETE/MODIFY THIS LINE)*****conv_w1 = random_weight((channel_1, 3, 5, 5))
conv_b1 = zero_weight(channel_1)
conv_w2 = random_weight((channel_2, channel_1, 3, 3))
conv_b2 = zero_weight(channel_2)
fc_w = random_weight((channel_2 * 32 * 32, 10))
fc_b = zero_weight(10)# *****END OF YOUR CODE (DO NOT DELETE/MODIFY THIS LINE)*****
################################################################################
#                                 END OF YOUR CODE                             #
################################################################################params = [conv_w1, conv_b1, conv_w2, conv_b2, fc_w, fc_b]
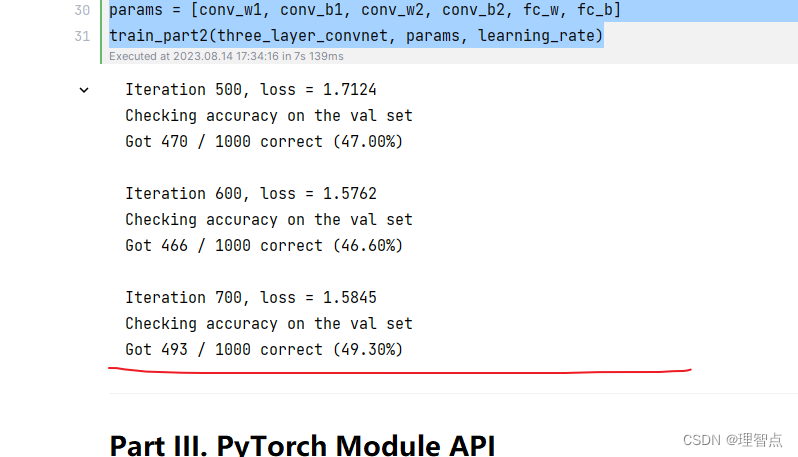
train_part2(three_layer_convnet, params, learning_rate)
输出
ThreeLayerConvNet
题面
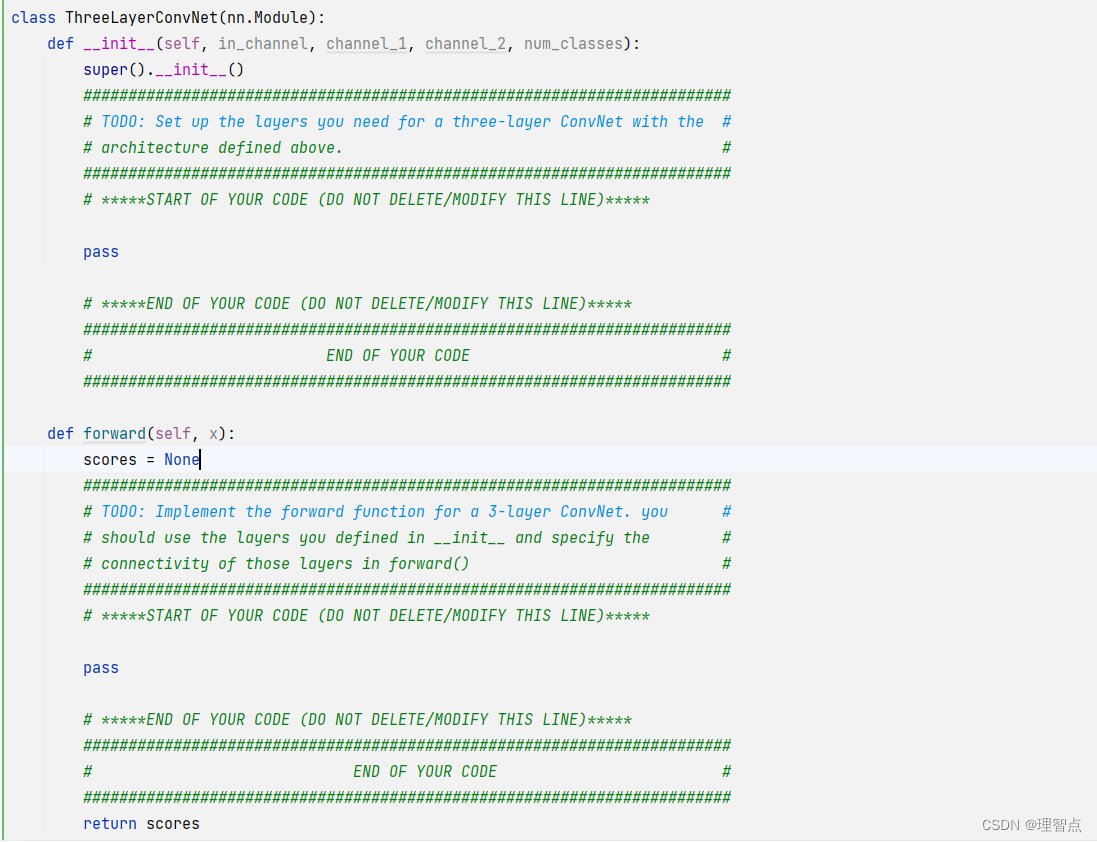
解析
就是让我们熟悉一下几个api
代码
class ThreeLayerConvNet(nn.Module):def __init__(self, in_channel, channel_1, channel_2, num_classes):super().__init__()######################################################################### TODO: Set up the layers you need for a three-layer ConvNet with the ## architecture defined above. ########################################################################## *****START OF YOUR CODE (DO NOT DELETE/MODIFY THIS LINE)*****self.conv1 = nn.Conv2d(in_channel, channel_1, kernel_size=5, padding=2)self.conv2 = nn.Conv2d(channel_1, channel_2, kernel_size=3, padding=1)self.fc3 = nn.Linear(channel_2 * 32 * 32, num_classes)nn.init.kaiming_normal_(self.conv1.weight)nn.init.kaiming_normal_(self.conv2.weight)nn.init.kaiming_normal_(self.fc3.weight)# *****END OF YOUR CODE (DO NOT DELETE/MODIFY THIS LINE)*****######################################################################### END OF YOUR CODE #########################################################################def forward(self, x):scores = None######################################################################### TODO: Implement the forward function for a 3-layer ConvNet. you ## should use the layers you defined in __init__ and specify the ## connectivity of those layers in forward() ########################################################################## *****START OF YOUR CODE (DO NOT DELETE/MODIFY THIS LINE)*****x = F.relu(self.conv1(x))x = F.relu(self.conv2(x))scores = self.fc3(flatten(x))# *****END OF YOUR CODE (DO NOT DELETE/MODIFY THIS LINE)*****######################################################################### END OF YOUR CODE #########################################################################return scores
输出
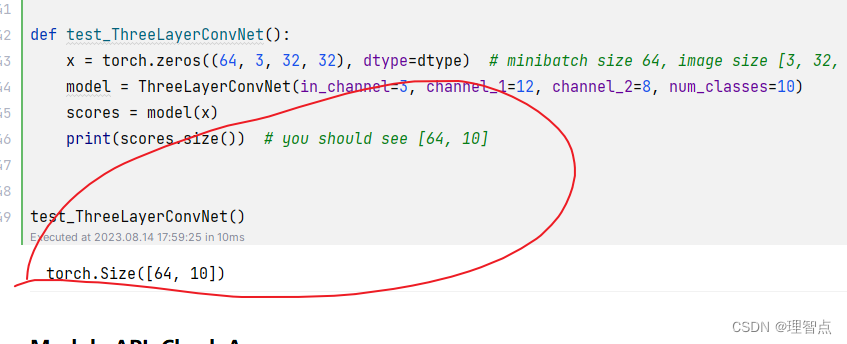
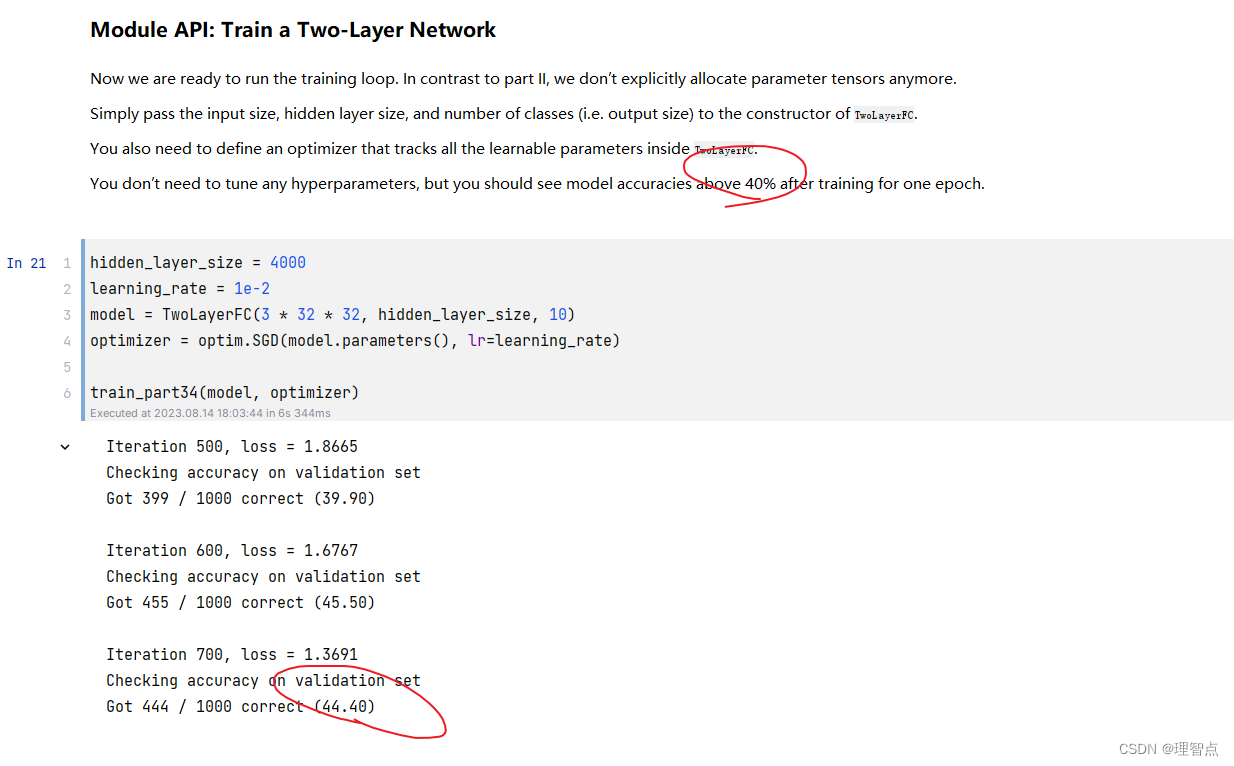
Train a Three-Layer ConvNet
题面
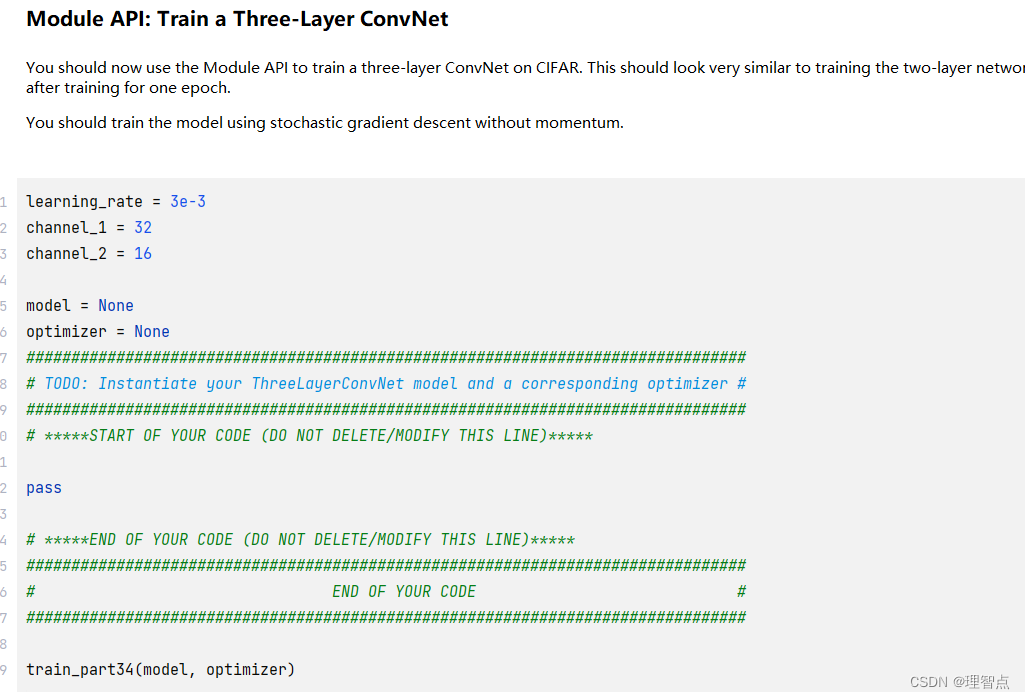
解析
就仿照上面的两层全连接改写就好了
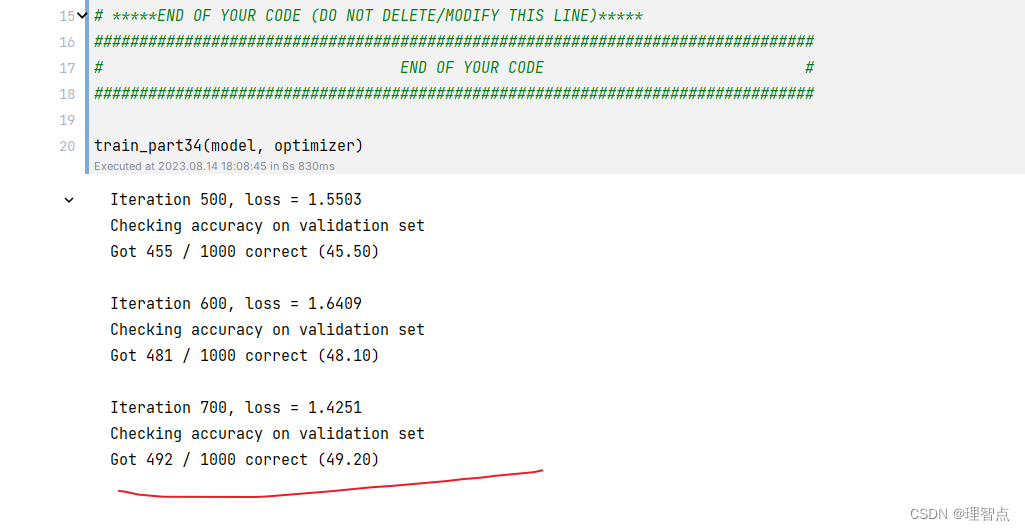
关于optim ,我试过sgd 和 adam,但是我发现还是sgd效果对于这个样本好一点。。。。
代码
learning_rate = 3e-3
channel_1 = 32
channel_2 = 16model = None
optimizer = None
################################################################################
# TODO: Instantiate your ThreeLayerConvNet model and a corresponding optimizer #
################################################################################
# *****START OF YOUR CODE (DO NOT DELETE/MODIFY THIS LINE)*****model = ThreeLayerConvNet(in_channel=3, channel_1=channel_1, channel_2=channel_2, num_classes=10)
optimizer = optim.SGD(model.parameters(), lr=learning_rate)# *****END OF YOUR CODE (DO NOT DELETE/MODIFY THIS LINE)*****
################################################################################
#                                 END OF YOUR CODE                             #
################################################################################train_part34(model, optimizer)
输出
Sequential API: Three-Layer ConvNet
题面
解析
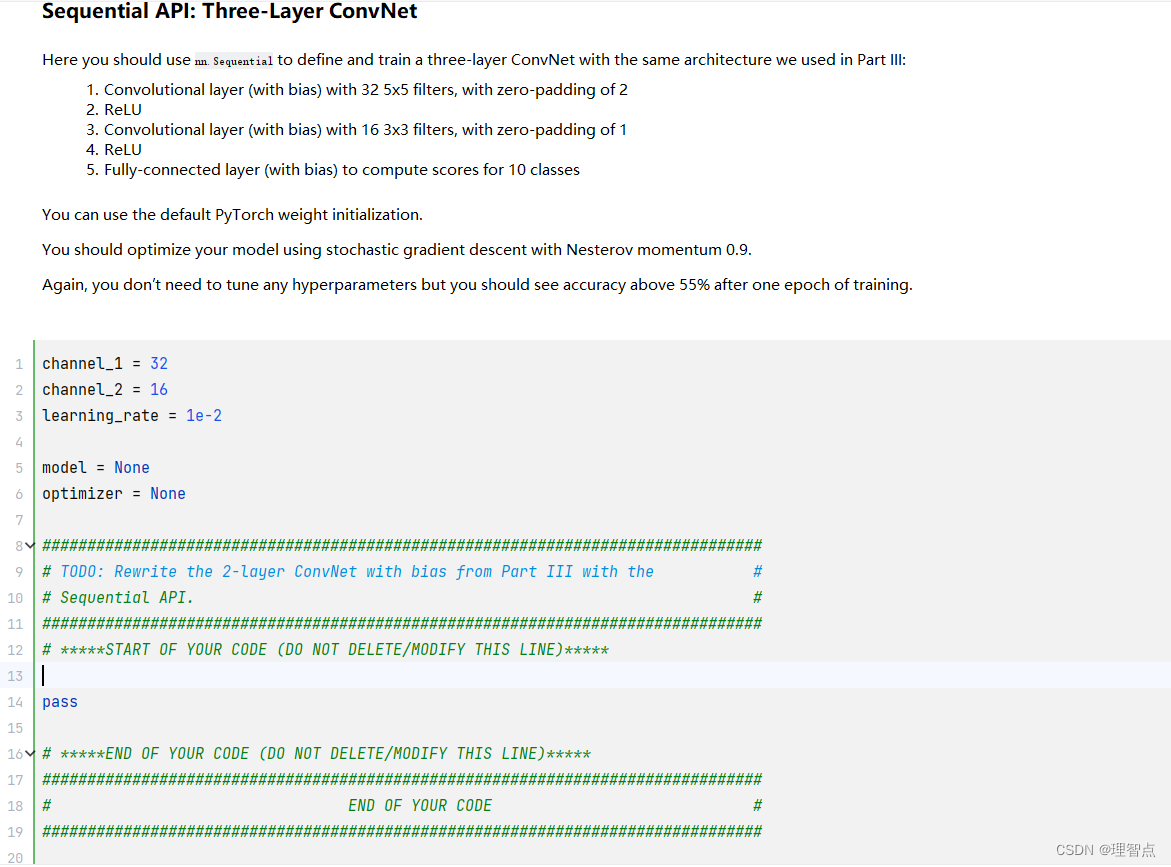
也是仿照上面写就好了
代码
channel_1 = 32
channel_2 = 16
learning_rate = 1e-2model = None
optimizer = None################################################################################
# TODO: Rewrite the 2-layer ConvNet with bias from Part III with the           #
# Sequential API.                                                              #
################################################################################
# *****START OF YOUR CODE (DO NOT DELETE/MODIFY THIS LINE)*****model = nn.Sequential(nn.Conv2d(in_channels=3, out_channels=channel_1, kernel_size=5, padding=2),nn.ReLU(),nn.Conv2d(in_channels=channel_1, out_channels=channel_2, kernel_size=3, padding=1),nn.ReLU(),Flatten(),nn.Linear(channel_2 * 32 * 32, 10)
)
optimizer = optim.SGD(model.parameters(), lr=learning_rate, momentum=0.9, nesterov=True)# *****END OF YOUR CODE (DO NOT DELETE/MODIFY THIS LINE)*****
################################################################################
#                                 END OF YOUR CODE                             #
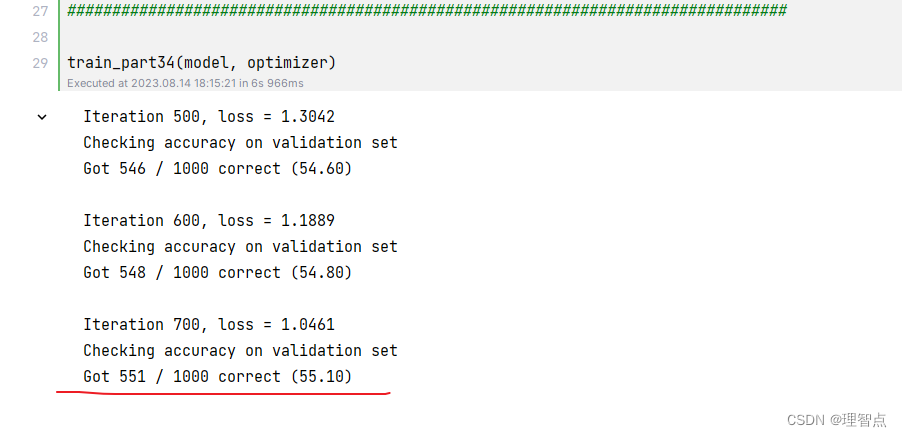
################################################################################train_part34(model, optimizer)
输出
CIFAR-10 open-ended challenge
题面
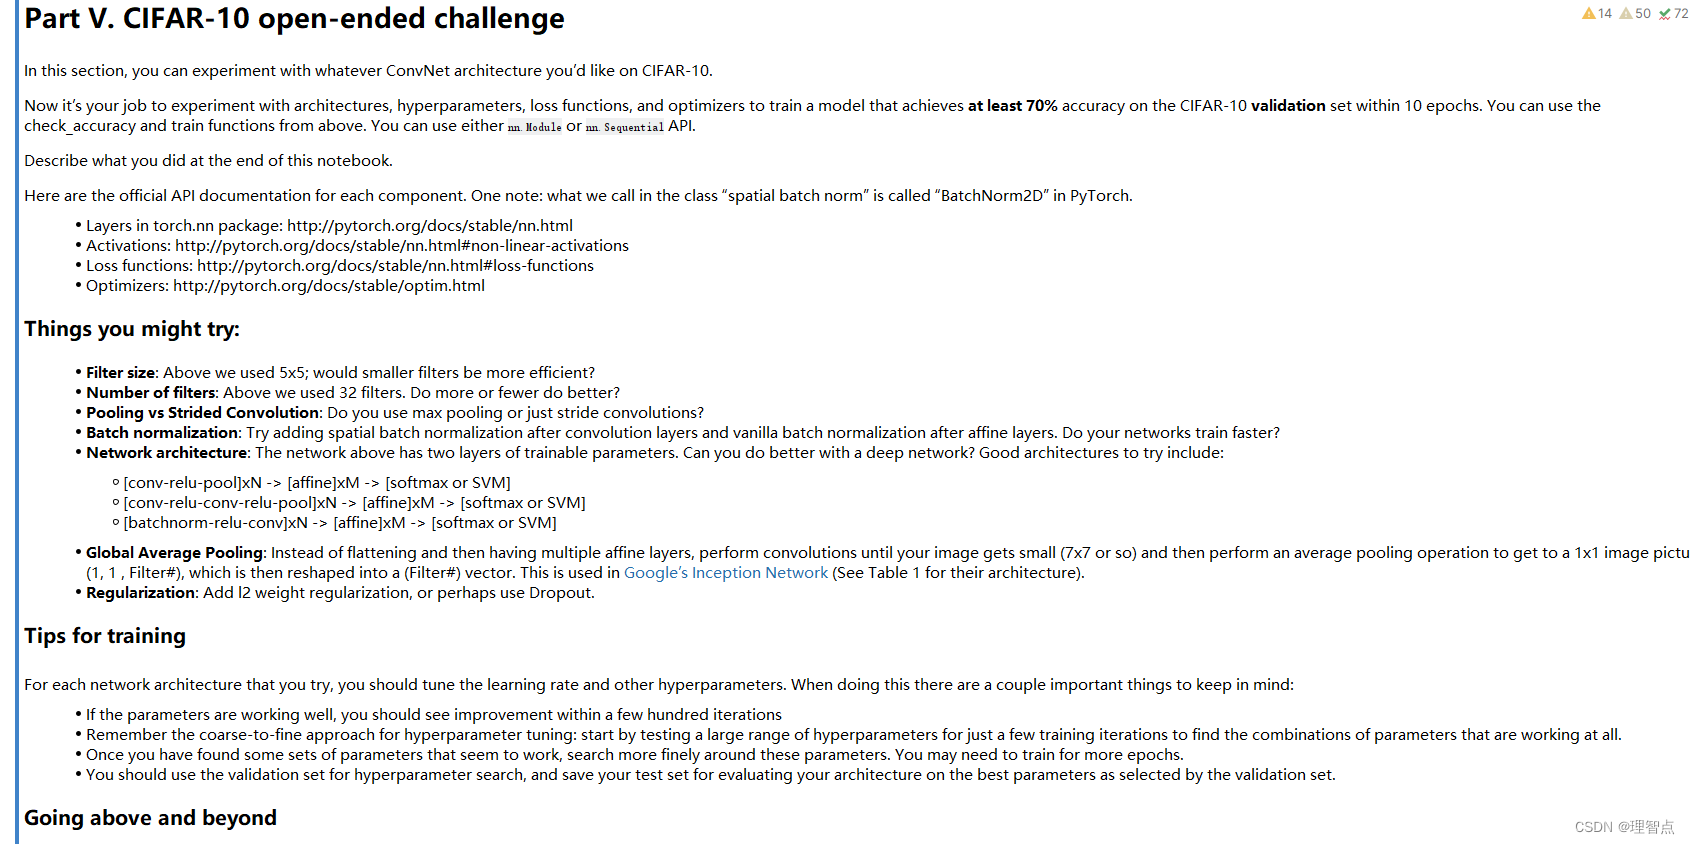
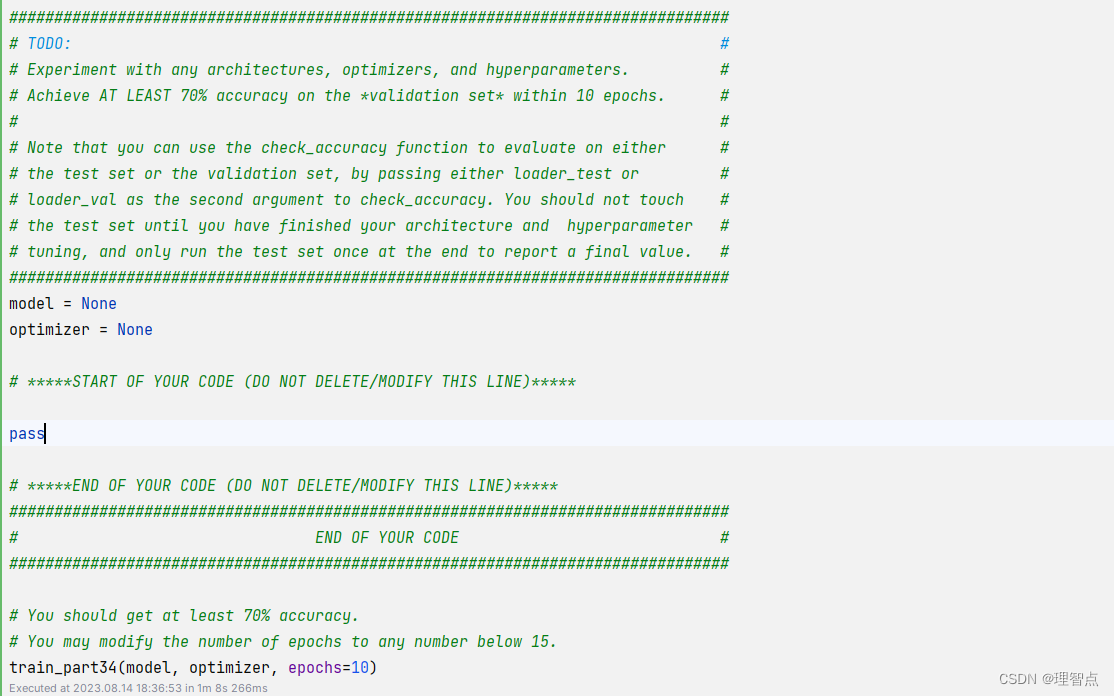
就是让我们自己尝试搭建一种网络结构使其准确率大于70%
解析
自己试吧
代码
################################################################################
# TODO:                                                                        #
# Experiment with any architectures, optimizers, and hyperparameters.          #
# Achieve AT LEAST 70% accuracy on the *validation set* within 10 epochs.      #
#                                                                              #
# Note that you can use the check_accuracy function to evaluate on either      #
# the test set or the validation set, by passing either loader_test or         #
# loader_val as the second argument to check_accuracy. You should not touch    #
# the test set until you have finished your architecture and  hyperparameter   #
# tuning, and only run the test set once at the end to report a final value.   #
################################################################################
model = None
optimizer = None# *****START OF YOUR CODE (DO NOT DELETE/MODIFY THIS LINE)*****model = nn.Sequential(nn.Conv2d(3, 32, kernel_size=3, stride=1, padding=1),nn.ReLU(),nn.MaxPool2d(kernel_size=2, stride=2),nn.Conv2d(32, 64, kernel_size=3, stride=1, padding=1),nn.ReLU(),nn.MaxPool2d(kernel_size=2, stride=2),nn.Conv2d(64, 128, kernel_size=3, stride=1, padding=1),nn.ReLU(),nn.MaxPool2d(kernel_size=2, stride=2),Flatten(),nn.Linear(128 * 4 * 4, 1024),
)
optimizer = optim.Adam(model.parameters(), lr=1e-3)# *****END OF YOUR CODE (DO NOT DELETE/MODIFY THIS LINE)*****
################################################################################
#                                 END OF YOUR CODE                             #
################################################################################# You should get at least 70% accuracy.
# You may modify the number of epochs to any number below 15.
train_part34(model, optimizer, epochs=10)
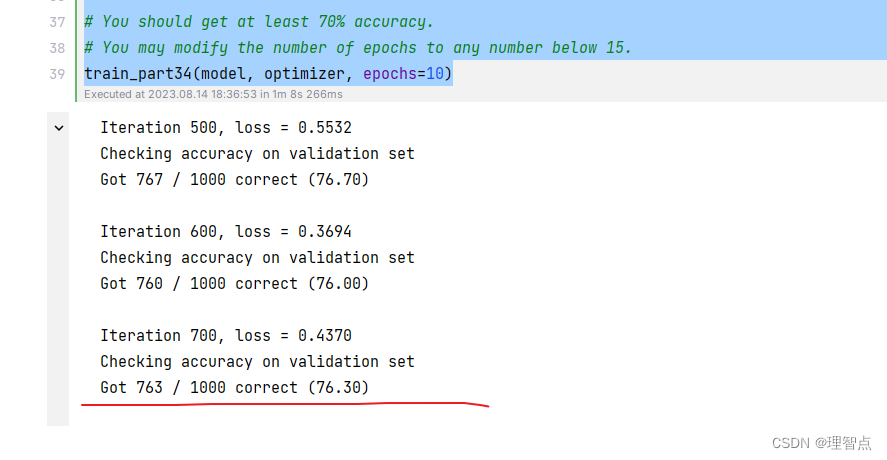
输出


![Kubernetes pod调度约束[亲和性 污点] 生命阶段 排障手段](https://img-blog.csdnimg.cn/6f088c56456341a997a940efd0df442e.png)

