一、环境搭建
参考上一章环境
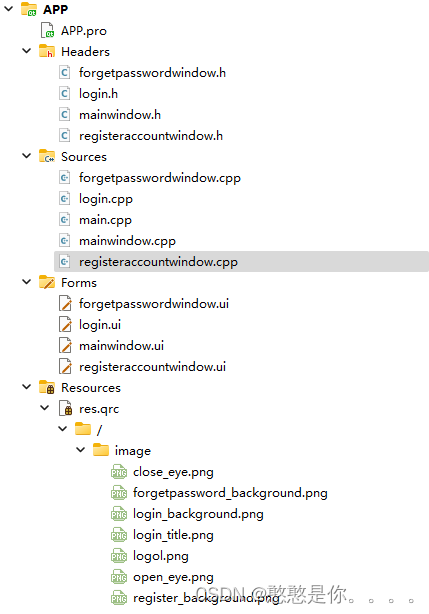
二、项目工程目录
三、主要源程序如下:
registeraccountwindow.cpp
窗口初始化:
void registeraccountWindow::reginit()
{//去掉?号this->setWindowFlags(windowFlags() & ~Qt::WindowContextHelpButtonHint);//更改名称this->setWindowTitle("register");//更换左上角图标this->setWindowIcon(QIcon(":/image/logol.png"));//生成窗口图标//禁止改变窗口大小 固定大小this->setFixedSize(408,270);//设置样式ui->lineEdit_registeraccount->setStyleSheet("QLineEdit{border-width:1px;border-radius:4px;font-size:12px;color:black;border:1px solid gray;}""QLineEdit:hover{border-width:1px;border-radius:4px;font-size:16px;color:black;border:1px solid rgb(204,38,200);}");//边框宽度 边框圆角 字体大小 ...   选中边框颜色ui->lineEdit_registerpassword->setStyleSheet("QLineEdit{border-width:1px;border-radius:4px;font-size:12px;color:black;border:1px solid gray;}""QLineEdit:hover{border-width:1px;border-radius:4px;font-size:12px;color:black;border:1px solid rgb(70,200,50);}");ui->lineEdit_regosterpassword_ok->setStyleSheet("QLineEdit{border-width:1px;border-radius:4px;font-size:12px;color:black;border:1px solid gray;}""QLineEdit:hover{border-width:1px;border-radius:4px;font-size:12px;color:black;border:1px solid rgb(0,18,154);}");//设置密码框-密文登录ui->lineEdit_registerpassword->setEchoMode(QLineEdit::Password);ui->lineEdit_regosterpassword_ok->setEchoMode(QLineEdit::Password);//密码的隐藏和显示// 设置样式表(图片为眼睛样式)ui->checkBox_eye1->setStyleSheet("QCheckBox {spacing: 5px;border: none;background-color: transparent;}""QCheckBox::indicator {width: 20px;height: 20px;border: none;image: url(:/image/close_eye.png);}""QCheckBox::indicator:checked {image: url(:/image/open_eye.png);}");ui->checkBox_eye2->setStyleSheet("QCheckBox {spacing: 5px;border: none;background-color: transparent;}""QCheckBox::indicator {width: 20px;height: 20px;border: none;image: url(:/image/close_eye.png);}""QCheckBox::indicator:checked {image: url(:/image/open_eye.png);}");//提示信息ui->lineEdit_registeraccount->setPlaceholderText("请输入设置的用户名 格式10位以内的数字");ui->lineEdit_registerpassword->setPlaceholderText("请输入设置的密码 格式15位以内的数字") ;ui->lineEdit_regosterpassword_ok->setPlaceholderText("请再次输入设置的密码 格式15位以内的数字");ui->lineEdit_checkcode->setPlaceholderText("请输入验证码");//返回主界面按钮样式  背景透明等ui->pushButton_back->setStyleSheet("QPushButton {""  background-color: transparent;""  border: none;""  color:rgb(255, 255, 255)""}""QPushButton:hover{color:rgb(15, 23, 253)}""QPushButton:pressed{color:rgb(255, 44, 221)}");//验证码按键样式ui->pushButton_checkcode->setStyleSheet("QPushButton {""  background-color: transparent;""  border: none;""}""QPushButton:pressed { background-color: none; }"  // 移除按键被按下时的视觉效果"QPushButton:hover { background-color: none; }"   // 移除鼠标悬停时的视觉效果);//获取验证码m_captcha = getCaptcha();//生成随机颜色m_color = generateRandomColor();}
返回登录页面:
void registeraccountWindow::on_pushButton_back_clicked()
{this->close();lo->show();
}
注册按钮及其相关函数:
void registeraccountWindow::on_pushButton_register_clicked()
{lo->connent_mysql();//获取内容QString reg_account = ui->lineEdit_registeraccount->text();QString reg_password = ui->lineEdit_registerpassword->text();QString reg_password_ok = ui->lineEdit_regosterpassword_ok->text();QString check_code = ui->lineEdit_checkcode->text().replace(" "," ");//去除空格QSqlQuery query;//查询数据库的所有账户 避免重复QString qs_temp = QString("select * from os_user where account = '%1'").arg(reg_account);
//    qDebug() << query.next();query.exec(qs_temp);if(query.next()){          //获取查询结果集QMessageBox::information(this,"注册","账号已经被注册");}else{if(reg_password_ok==reg_password)  //两次输入的密码一致{if(check_code.toLower() == m_captcha.toLower())  //用户输入的验证码与生成的验证码比较{QString qs = QString("insert into os_user(account,pwd)""values(%1, %2)").arg(reg_account).arg(reg_password);if(!query.exec(qs)){          //获取查询结果集QMessageBox::information(this,"注册","注册失败");}else{QMessageBox::information(this,"注册","注册成功");}}else{QMessageBox::warning(this, "Warning", "验证码输入错误");}}else{QMessageBox::warning(this, "Warning", "两次输入的密码不一致");}}
}QColor registeraccountWindow::generateRandomColor()
{int red = QRandomGenerator::global()->bounded(256);// 生成0到255之间的随机整数作为红色通道的值int green = QRandomGenerator::global()->bounded(256);// 生成0到255之间的随机整数作为绿色通道的值int blue = QRandomGenerator::global()->bounded(256);// 生成0到255之间的随机整数作为蓝色通道的值return QColor(red, green, blue);// 使用生成的RGB值创建并返回一个QColor对象}
void registeraccountWindow::paintEvent(QPaintEvent *event)
{QPainter painter(this);//直接绘制在该窗口上// 填充背景为白色painter.fillRect(ui->label_checkcode->x()+ui->widget->x(), ui->label_checkcode->y()+ui->widget->y(), ui->label_checkcode->width(), ui->label_checkcode->height(), Qt::white);// 设置字体样式painter.setFont(QFont("Lucida Console", 18,QFont::Bold));// 绘制验证码字符for(int i = 0; i < 4; i++){QColor color = generateRandomColor();// 生成随机颜色QPen pen(color);pen.setWidth(1);  //画笔宽度painter.setPen(pen);//相当于将画笔交给画家painter.drawText(ui->label_checkcode->x() +ui->widget->x()+ 30*i, ui->label_checkcode->y()+ui->widget->y(), 30, ui->label_checkcode->height(), Qt::AlignCenter,QString(m_captcha[i]));//1,2,3,4绘制文本的矩形区域 文本的对齐方式 文本内容// 绘制验证码字符}// 绘制噪点for(int i=0; i<1500; i++){QColor color = generateRandomColor();// 生成随机颜色QPen pen(color);pen.setWidth(1);painter.setPen(pen);painter.drawPoint(ui->label_checkcode->x()+ui->widget->x()+ (qrand() % ui->label_checkcode->width()), ui->label_checkcode->y()+ui->widget->y() + (qrand() % ui->label_checkcode->height()));//保证随机数的坐标在矩形区域内}//           // 绘制干扰线
//           for(int i = 0;i < 10;++i)
//           {
//               painter.drawLine(ui->label_checkcode->x()+ui->widget->x()+qrand()%ui->label_checkcode->width(),ui->label_checkcode->y()+ui->widget->y()+qrand()%ui->label_checkcode->height(),
//                                ui->label_checkcode->x()+ui->widget->x()+qrand()%ui->label_checkcode->width(),ui->label_checkcode->y()+ui->widget->y()+qrand()%ui->label_checkcode->height());
//           }}QString registeraccountWindow::getCaptcha()
{const QString possibleCharacters = "ABCDEFGHIJKLMNOPQRSTUVWXYZabcdefghijklmnopqrstuvwxyz0123456789";const int captchaLength = 4;QString result = "";// 生成验证码字符串for (int i = 0; i < captchaLength; ++i) {   //控制生成4位的字符串int index = QRandomGenerator::global()->bounded(possibleCharacters.length());  //QRandomGenerator随机数生成器 QRandomGenerator::global()指针变量 返回创建的随机数指针 bounded(给定随机数生成的范围)// 生成一个0到possibleCharacters长度之间的随机整数result.append(possibleCharacters.at(index));// 将随机位置的字符添加到结果字符串中}return result; // 返回生成的验证码字符串}
registeraccontwindow.h
#ifndef REGISTERACCOUNTWINDOW_H
#define REGISTERACCOUNTWINDOW_H
#include "login.h"
#include <QDialog>namespace Ui {
class registeraccountWindow;
}class registeraccountWindow : public QDialog
{Q_OBJECTpublic:explicit registeraccountWindow(QWidget *parent = nullptr);~registeraccountWindow();QString m_captcha;QColor m_color;login *lo = new login;void reginit();void paintEvent(QPaintEvent *event);QColor generateRandomColor();QString getCaptcha();private slots:void on_pushButton_back_clicked();void on_pushButton_register_clicked();void on_pushButton_checkcode_clicked();void on_checkBox_eye1_stateChanged(int arg1);void on_checkBox_eye2_stateChanged(int arg1);private:Ui::registeraccountWindow *ui;
};#endif // REGISTERACCOUNTWINDOW_H
forgetpasswordwindow.cpp
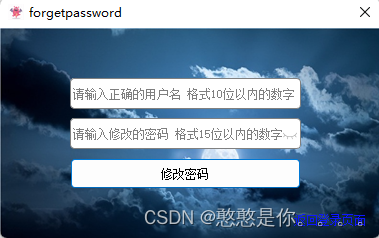
修改密码功能:
void forgetpasswordwindow::on_pushButton_forget_clicked()
{lo_forget->connent_mysql();//获取内容QString forget_account = ui->lineEdit_forgetaccount->text();QString forget_password = ui->lineEdit_forgetpassword->text();QSqlQuery query;//查询数据库的所有账户 是否有该账号QString qs = QString("select * from os_user where account = '%1'").arg(forget_account);query.exec(qs);//执行SQL语句if(query.next()){          //获取查询结果集QString qs = QString("UPDATE os_user SET pwd = '%1' WHERE account = '%2'" ).arg(forget_password).arg(forget_account);query.exec(qs);//执行SQL语句if(!query.exec(qs)){QMessageBox::information(this,"修改","修改密码失败");}elseQMessageBox::information(this,"修改","修改密码成功");}else{QMessageBox::information(this,"修改","该账号不存在");}
}
四、实现效果
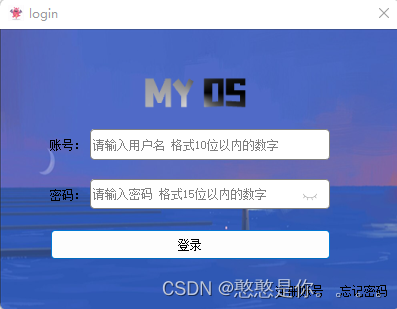
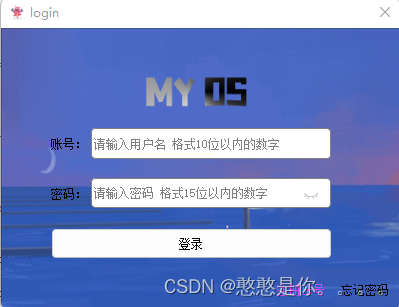
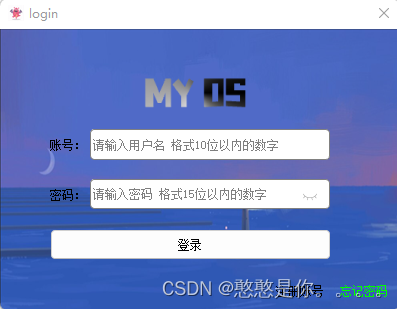
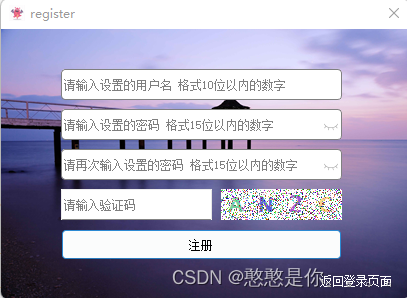
注意:点击验证码的位置即可刷新验证码

