1.Gateway介绍
1.是spring cloud官方推出的响应式的API网关框架,旨在为微服务架构提供一种简单有效的API路由的管理方式,并基于Filter的方式提供网关的基本功能,例如:安全认证,监控,限流等等。
2.功能特征:动态路由:能够匹配任何请求属性。支持路径重写可集成Naocs,Sentinel。可以对路由指定易于编写的predicate(断言)和Filter(过滤器)。
3.核心概念:路由(route):路由是网关中最基础的部分,路由信息包括一个ID,一个目的URL,一组断言工厂,一组Filter组成。如果断言为真,则说明请求的url和配置的路由匹配。断言(predicates):断言函数允许开发者去定义匹配Http request中的任何信息,比如请求头和参数等。过滤器(Filter):分为Gateway filter和Global filter。filter可以对请求和响应进行处理。
2.整合Gateway
1.引入依赖
<!--查看是否引入SpringCloud 版本依赖-->
<dependencyManagement><dependencies><!-- SpringCloud 版本依赖 --><dependency><groupId>org.springframework.cloud</groupId><artifactId>spring-cloud-dependencies</artifactId><version>${spring-cloud.version}</version><type>pom</type><scope>import</scope></dependency></dependencies>
</dependencyManagement><dependencies><!--spring cloud gateway--><dependency><groupId>org.springframework.cloud</groupId><artifactId>spring-cloud-starter-gateway</artifactId></dependency>
</dependencies>
2.yml配置
路由规则:id:路由唯一标识,不要使用  -uri:需要转发的地址predicates:断言规则,用于路由规则的匹配filters:过滤器
# 开发环境配置
server:# 服务器的HTTP端口,默认为8080port: 9005##注册到nacos的服务名
spring:application:name: @artifactId@profiles:active: ${profiles.active}cloud:#gateway配置gateway:#路由规则routes:- id: auth_route #路由唯一标识,不要使用  -uri: http://localhost:9000 #需要转发的地址predicates: #断言规则,用于路由规则的匹配- Path=/initialAuth/** #如果请求路径中存在initialAuth 则自动匹配到auth服务filters:- StripPrefix=1 #转发之前去除第一层路径,将断言规则中的initialAuth去除
验证测试结果:
通过访问路由端口拼接断言规则,访问auth服务的testUser接口
由此可见通过以上路由配置:成功转发到:http://localhost:9000/testUser

3.Gateway集成Naocs
1.引入Nacos依赖(nacos版本以及SpringCloud Alibaba 微服务 版本管理)这里不多赘述,之前的文档里都有。
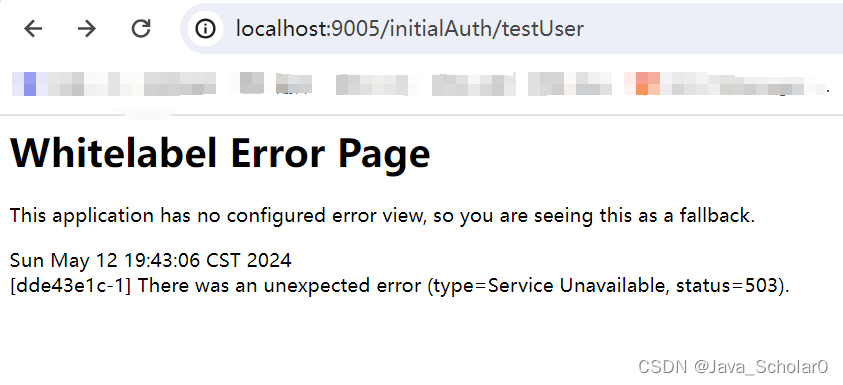
2.springcloud在Hoxton.M2 RELEASED版本之后舍弃Ribbon。需手动引入spring-cloud-loadbalancer
如果不引入spring-cloud-loadbalancer 。则uri: lb://initial-auth 请求时使用负载均衡策略会报 503。
<!-- SpringCloud Alibaba Nacos -->
<dependency><groupId>com.alibaba.cloud</groupId><artifactId>spring-cloud-starter-alibaba-nacos-discovery</artifactId>
</dependency><!-- SpringCloud Alibaba Nacos Config -->
<dependency><groupId>com.alibaba.cloud</groupId><artifactId>spring-cloud-starter-alibaba-nacos-config</artifactId>
</dependency><dependency><groupId>org.springframework.cloud</groupId><artifactId>spring-cloud-starter-loadbalancer</artifactId>
</dependency>
2.yml修改(加入nacos配置)
# 开发环境配置
server:# 服务器的HTTP端口,默认为8080port: 9005##注册到nacos的服务名
spring:application:name: @artifactId@profiles:active: ${profiles.active}cloud:nacos:discovery:server-addr: 127.0.0.1:8848config:server-addr: ${spring.cloud.nacos.discovery.server-addr}#gateway配置gateway:#路由规则routes:- id: auth_route #路由唯一标识,不要使用  -uri: lb://initial-auth #需要转发的已注册到nacos的服务名 lb:使用nacos的负载均衡策略predicates: #断言规则,用于路由规则的匹配- Path=/initialAuth/** #如果请求路径中存在initialAuth 则自动匹配到auth服务filters:- StripPrefix=1 #转发之前去除第一层路径,将断言规则中的initialAuth去除config:import:- optional:nacos:initial-stage-common.yml- optional:nacos:initial-stage-openFeign-${profiles.active}.yml- optional:nacos:initial-stage-${profiles.active}.yml
验证测试结果:
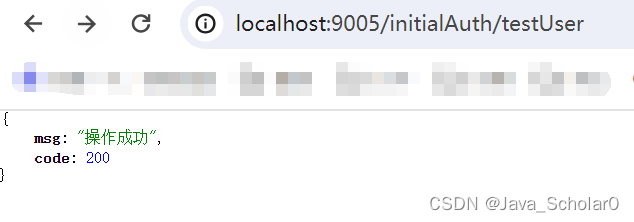
3.路由断言工厂配置
作用:当请求gateway的时候,使用断言对请求进行匹配,如果匹配成功就路由转发,如果匹配失败就返回404。
类型:内置。自定义。
3.1)内置路由断言工厂
官网地址:https://cloud.spring.io/spring-cloud-static/spring-cloud-gateway/2.1.0.RELEASE/single/spring-cloud-gateway.html#gateway-request-predicates-factories
3.1.1)时间断言:
AfterRouterPredicateFactory:接收一个日期参数,判断请求日期是否晚于指定日期。BeforeRouterPredicateFactory:接收一个日期参数,判断请求日期是否早于指定日期。BetweenRouterPredicateFactory:接收两个日期参数,判断请求日期是否在指定时间断内。
#AfterRouterPredicateFactory
spring:cloud:gateway:routes:- id: after_routeuri: http://example.orgpredicates:- After=2017-01-20T17:42:47.789-07:00[America/Denver]
#BeforeRouterPredicateFactory
spring:cloud:gateway:routes:- id: before_routeuri: http://example.orgpredicates:- Before=2017-01-20T17:42:47.789-07:00[America/Denver]
#BetweenRouterPredicateFactory
spring:cloud:gateway:routes:- id: between_routeuri: http://example.orgpredicates:- Between=2017-01-20T17:42:47.789-07:00[America/Denver], 2017-01-21T17:42:47.789-07:00[America/Denver]
3.1.2)Cookie断言:
CookieRouterPredicateFactory:两个参数 第一个代表Cookie中的一个key,第二个代表这个key的值(可以是正则表达式)。
spring:cloud:gateway:routes:- id: cookie_routeuri: http://example.orgpredicates:- Cookie=chocolate, ch.p
3.1.3)请求头断言:
HeaderRouterPredicateFactory:根据请求头里的某个参数进行匹配,第一个代表请求头里的某个参数,第二个代表这个参数的值(可以是正则表达式)。
spring:cloud:gateway:routes:- id: header_routeuri: http://example.orgpredicates:- Header=X-Request-Id, \d+
3.1.4)域名断言:
HostRouterPredicateFactory:根据域名进行匹配
spring:cloud:gateway:routes:- id: host_routeuri: http://example.orgpredicates:- Host=**.somehost.org,**.anotherhost.org
3.1.5)请求方式断言:
MethodRouterPredicateFactory:根据请求方式进行匹配,多个用逗号分开
spring:cloud:gateway:routes:- id: method_routeuri: http://example.orgpredicates:- Method=GET
3.1.6)请求路径断言:
PathRouterPredicateFactory:根据请求路径进行匹配,{segment}占位符
spring:cloud:gateway:routes:- id: host_routeuri: http://example.orgpredicates:- Path=/foo/{segment},/bar/{segment}
3.1.7)查询参数断言:
QueryRouterPredicateFactory:根据查询参数进行断言
请求地址的参数中要包含baz这个参数。
请求地址的参数中要包含foo这个参数,并且值等于ba。
spring:cloud:gateway:routes:- id: query_routeuri: http://example.orgpredicates:- Query=bazspring:cloud:gateway:routes:- id: query_routeuri: http://example.orgpredicates:- Query=foo, ba.
3.1.8)客户端ip断言:
RemoteAddrRouterPredicateFactory:根据客户端ip进行断言。
spring:cloud:gateway:routes:- id: remoteaddr_routeuri: http://example.orgpredicates:- RemoteAddr=192.168.1.1
3.2)自定义路由断言工厂
可以模仿内置路由断言工厂
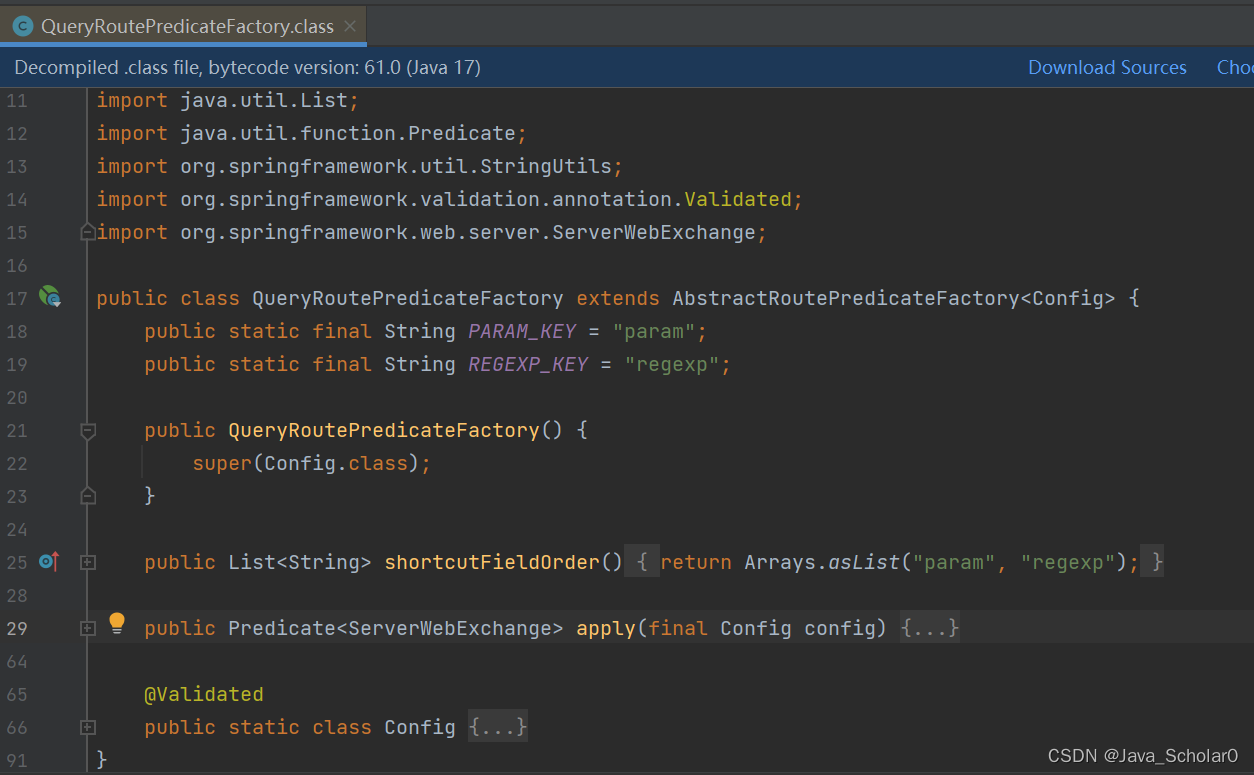
1.必须是Spring组件bean (类上面添加@Component)
2.类名必须加上RoutePredicateFactory作为结尾
3.必须继承AbstractRoutePredicateFactory
4.在类中必须声明静态内部类(Config),声明属性来接收yml配置文件中对应的断言信息(yml几个参数,Config就声明几个属性)
5.需要结合shortcutFieldOrder方法进行绑定
6.通过apply进行逻辑判断, true匹配成功,false匹配失败。
package com.initial.gateway.predicate;import jakarta.validation.constraints.NotEmpty;
import org.springframework.cloud.gateway.handler.predicate.AbstractRoutePredicateFactory;
import org.springframework.cloud.gateway.handler.predicate.GatewayPredicate;
import org.springframework.stereotype.Component;
import org.springframework.util.StringUtils;
import org.springframework.validation.annotation.Validated;
import org.springframework.web.server.ServerWebExchange;import java.util.Arrays;
import java.util.Iterator;
import java.util.List;
import java.util.function.Predicate;@Component
public class CheckSignRoutePredicateFactory extends AbstractRoutePredicateFactory<CheckSignRoutePredicateFactory.Config> {public CheckSignRoutePredicateFactory() {super(Config.class);}@Overridepublic List<String> shortcutFieldOrder() {return Arrays.asList("param");}@Overridepublic Predicate<ServerWebExchange> apply(final Config config) {return new GatewayPredicate() {public boolean test(ServerWebExchange exchange) {if (config.getParam().equals("sign")) {return true;}return false;}public Object getConfig() {return config;}};}@Validatedpublic static class Config {private @NotEmpty String param;public Config() {}public String getParam() {return this.param;}public void setParam(String param) {this.param = param;}}
}
测试结果:
正常加入CheckSign断言:CheckSign=sign

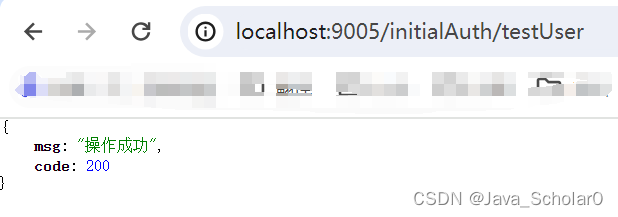
加入任意CheckSign断言的值:CheckSign=sign1111

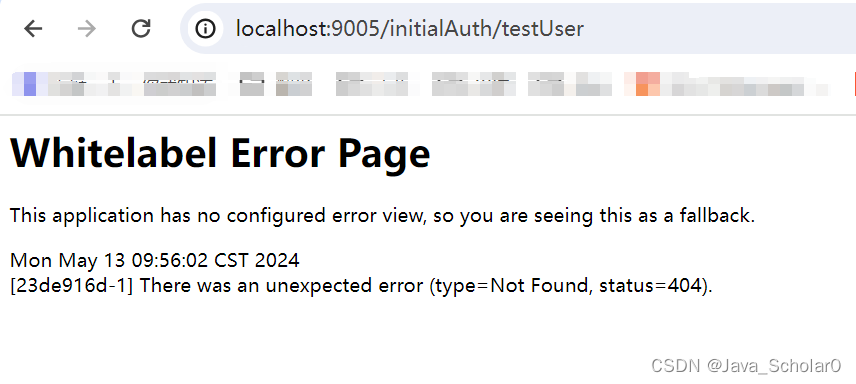
4.过滤器工厂配置
作用:当请求gateway的时候,使用过滤器工厂可以进行一些业务逻辑处理,比如去除请求某几层路径。
官网地址:https://cloud.spring.io/spring-cloud-static/spring-cloud-gateway/2.1.0.RELEASE/single/spring-cloud-gateway.html#_gatewayfilter_factories
因为有很多,这里就不全做整理了,	可以在官网中查看用法。
4.1)内置过滤器工厂
4.1.1)AddRequestHeader:在请求头中添加X-Request-Foo属性,值为Bar
spring:cloud:gateway:routes:- id: add_request_header_routeuri: http://example.orgfilters:- AddRequestHeader=X-Request-Foo, Bar
4.1.2)PrefixPath:为匹配的路由添加前缀,对应服务需要配置context-path
相对应的服务yml中配置
server:servlet:context-path: /mypath
spring:cloud:gateway:routes:- id: prefixpath_routeuri: http://example.orgfilters:- PrefixPath=/mypath
4.1.3)AddRequestParameter:为匹配的路由添加foo参数,值为bar
spring:cloud:gateway:routes:- id: add_request_parameter_routeuri: http://example.orgfilters:- AddRequestParameter=foo, bar
4.2)自定义过滤器工厂
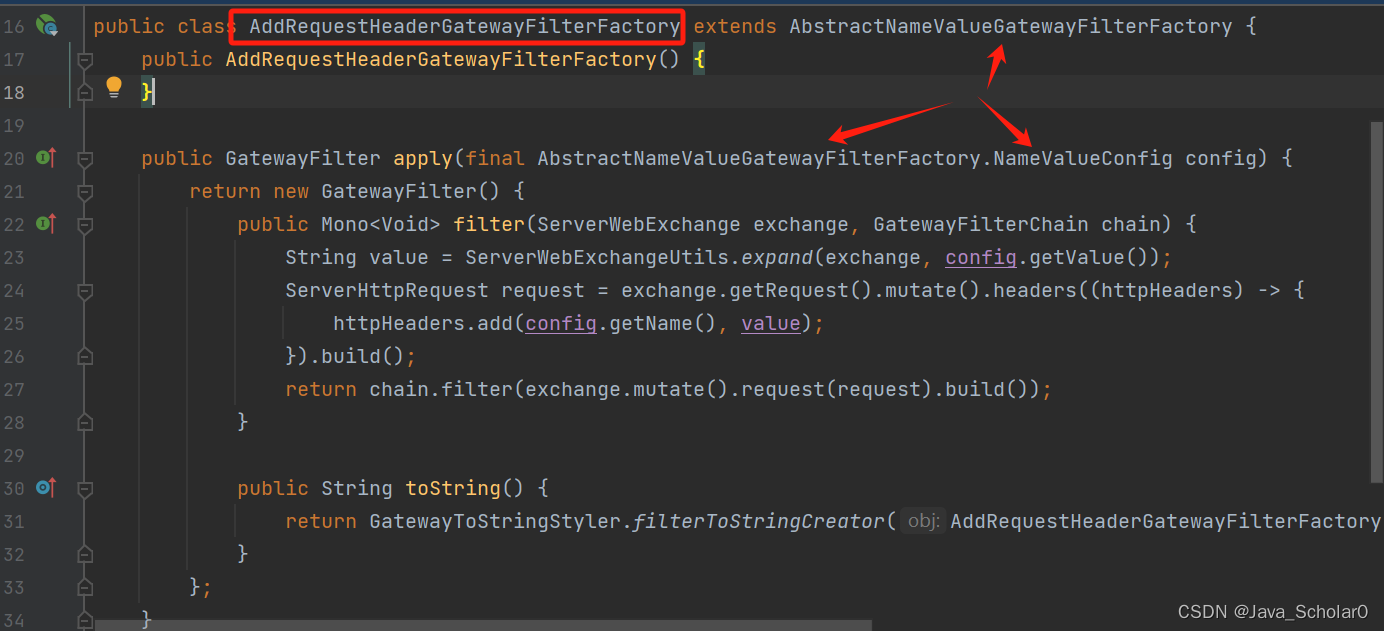
可以模仿 AddRequestHeaderGatewayFilterFactory 继承了AbstractNameValueGatewayFilterFactory 继承了AbstractGatewayFilterFactory
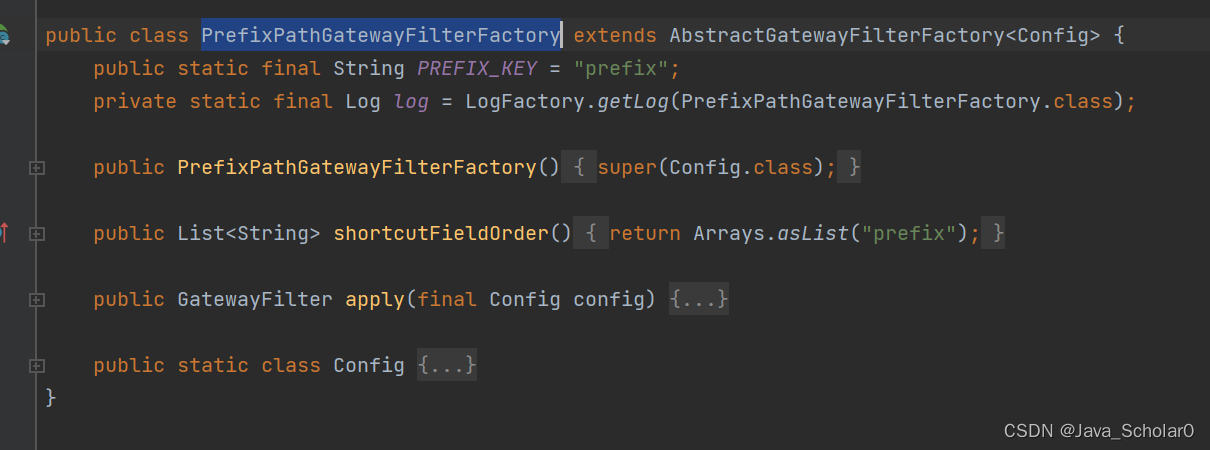
可以模仿 PrefixPathGatewayFilterFactory
1.必须是Spring组件bean (类上面添加@Component)
2.类名必须加上GatewayFilterFactory作为结尾
3.必须继承AbstractGatewayFilterFactory
4.在类中必须声明静态内部类(Config),声明属性来接收yml配置文件中对应的断言信息(yml几个参数,Config就声明几个属性)
5.需要结合shortcutFieldOrder方法进行绑定
6.通过apply进行逻辑判断。
5.全局过滤器配置
对所有配置的路由进行过滤。
在全局过滤器中,过滤的类需要去实现GlobalFilter接口。
package com.initial.gateway.filter;import org.slf4j.Logger;
import org.slf4j.LoggerFactory;
import org.springframework.cloud.gateway.filter.GatewayFilterChain;
import org.springframework.cloud.gateway.filter.GlobalFilter;
import org.springframework.stereotype.Component;
import org.springframework.web.server.ServerWebExchange;
import reactor.core.publisher.Mono;@Component
public class LogFilter implements GlobalFilter {Logger logger = LoggerFactory.getLogger(LogFilter.class);@Overridepublic Mono<Void> filter(ServerWebExchange exchange, GatewayFilterChain chain) {logger.info(exchange.getRequest().toString());return chain.filter(exchange);}
}
测试结果:请求进入过滤器断点。

6.Gateway跨域处理
spring:application:name: @artifactId@profiles:active: ${profiles.active}cloud:#gateway配置gateway:#路由规则routes:- id: auth_route #路由唯一标识,不要使用  -uri: lb://initial-auth #需要转发的已注册到nacos的服务名 lb:使用nacos的负载均衡策略predicates: #断言规则,用于路由规则的匹配- Path=/initialAuth/** #如果请求路径中存在initialAuth 则自动匹配到auth服务- CheckSign=signfilters:- StripPrefix=1 #转发之前去除第一层路径,将断言规则中的initialAuth去除#跨域配置globalcors: # 全局的跨域处理add-to-simple-url-handler-mapping: true # 解决浏览器向服务器发options请求被拦截问题,这样网关就不拦截这个请求了corsConfigurations:'[/**]': # 拦截一切请求
#            allowedOrigins: # 允许哪些网站的跨域请求
#              - "http://localhost:8090"allowedOrigins: '*'allowedMethods: # 允许的跨域ajax的请求方式- "GET"- "POST"- "DELETE"- "PUT"- "OPTIONS"allowedHeaders: "*" # 允许在请求中携带的头信息,这里是允许所有的请求头maxAge: 360000 # 这次跨域检测的有效期
7.Gateway整合sentinel流控降级
网关层的限流可以简单的针对不同路由进行限流,也可针对业务的接口进行限流,或者根据接口的特征分组限流。1.gateway项目pom.xml添加依赖:
<!--sentinel整合gateway--><dependency><groupId>com.alibaba.cloud</groupId><artifactId>spring-cloud-alibaba-sentinel-gateway</artifactId></dependency><dependency><groupId>com.alibaba.cloud</groupId><artifactId>spring-cloud-starter-alibaba-sentinel</artifactId></dependency>
2.gateway项目yml文件添加:
spring:application:name: @artifactId@profiles:active: ${profiles.active}cloud:sentinel:transport:#添加sentinel控制台地址dashboard: 127.0.0.1:8088
3.通过网关访问接口:
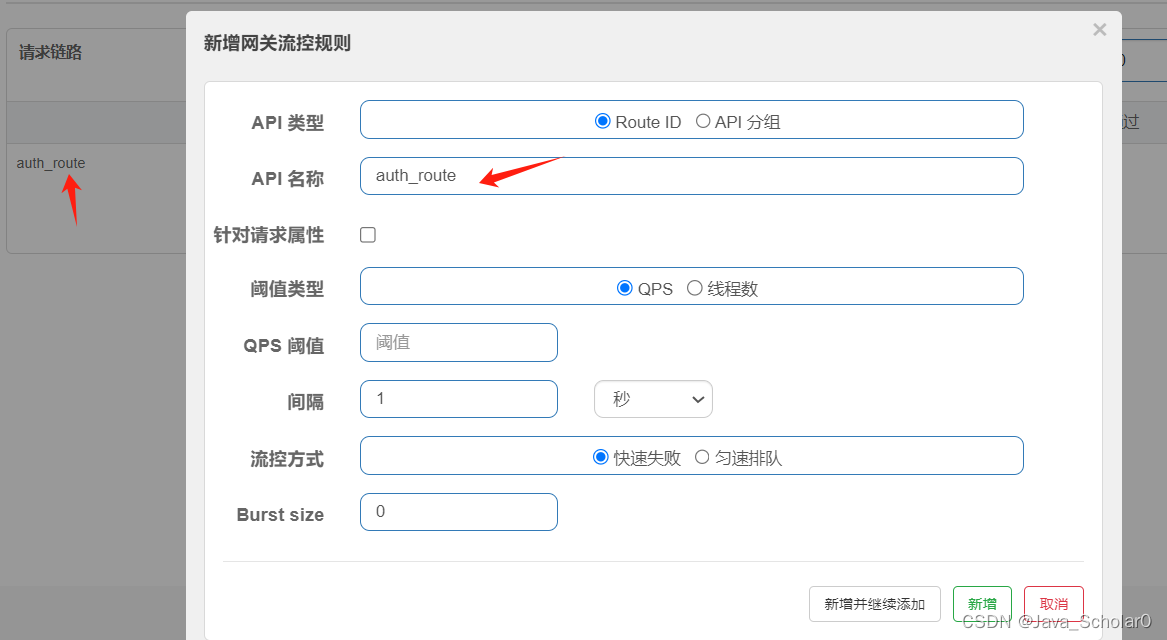
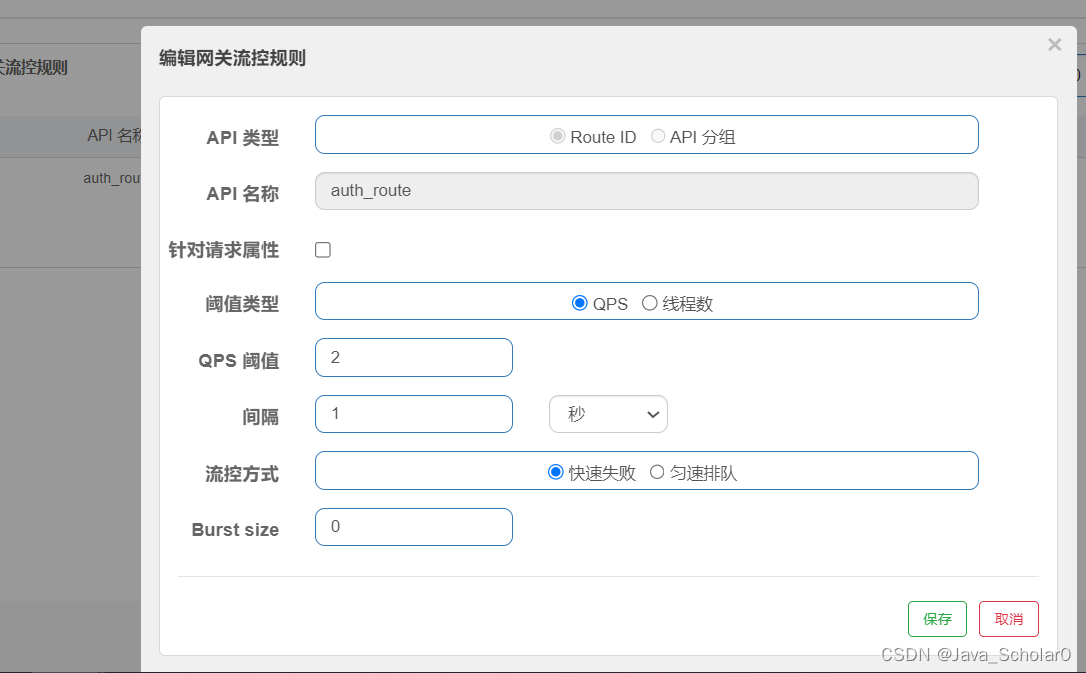
sentinel会将访问的路由注册进去:auth_routeRoute ID:根据选择的路由id进行流控。
API 分组 :在api管理中维护api分组,然后选择api分组进行流控。

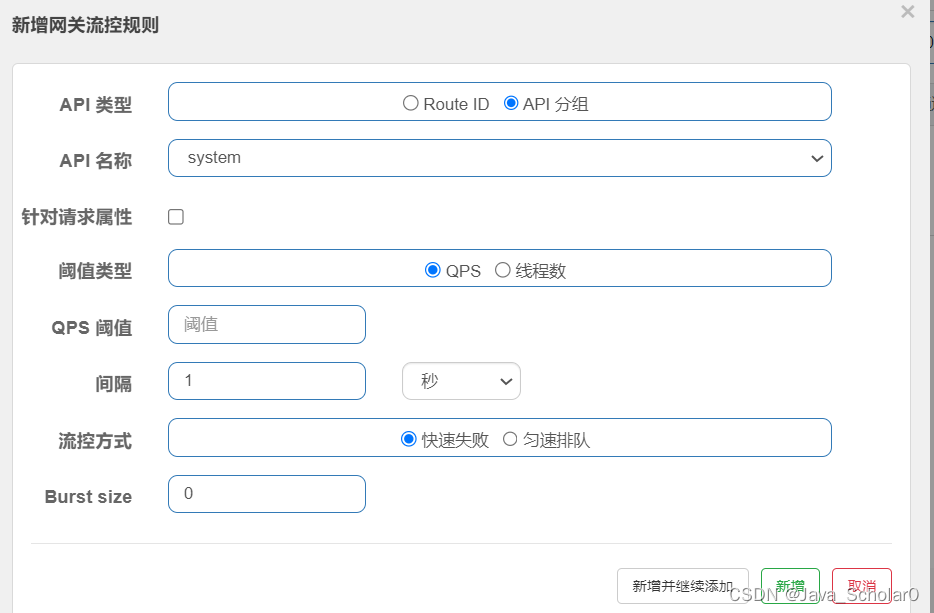
间隔: QPS按每秒请求量,比如1秒请求2次。这里的间隔设置为 当前QPS 1秒钟请求2次,当间隔为2秒则为当前QPS 2秒中请求2次。
Burst size:宽容次数。如果设置为1,则QPS阈值+1。
针对请求属性:参数属性:Client IP:根据id进行限流Remote Host:域名Header:请求头。Header 名称 :对请求头中含有某个key-value的进行限流。比如Header 名称:sign,匹配模式:精确 匹配串:1当一个请求头中含有sign并且这个值等1的进行流控。URL 参数:请求地址参数。URL 参数名称:对请求地址中含有某个参数的进行限流。比如URL 参数名称:name,匹配模式:精确 匹配串:1当一个请求连接的参数中含有name并且这个值等1的进行流控。Cookie:Cookie。Cookie 名称:对Coolie中含有某个key-value的进行限流。属性值匹配:匹配模式:精确: 一个具体的值。 比如设置为127.0.0.1 则对127.0.0.1这个ip访问进行限流子串:模糊匹配正则: 正则表达式4.测试流控:根据路由id进行流控。
5.gateway项目中自定义全局限流信息。
package com.initial.gateway.config;import com.alibaba.csp.sentinel.adapter.gateway.sc.callback.BlockRequestHandler;
import com.alibaba.csp.sentinel.adapter.gateway.sc.callback.GatewayCallbackManager;
import jakarta.annotation.PostConstruct;
import org.springframework.context.annotation.Configuration;
import org.springframework.http.HttpStatus;
import org.springframework.http.MediaType;
import org.springframework.web.reactive.function.BodyInserters;
import org.springframework.web.reactive.function.server.ServerResponse;
import org.springframework.web.server.ServerWebExchange;
import reactor.core.publisher.Mono;@Configuration
public class GatewaySentinelConfig {@PostConstructpublic void init(){BlockRequestHandler blockRequestHandler = new BlockRequestHandler() {@Overridepublic Mono<ServerResponse> handleRequest(ServerWebExchange serverWebExchange, Throwable throwable) {Map<String,String> map = new HashMap<>();map.put("code",HttpStatus.TOO_MANY_REQUESTS.toString());map.put("msg","服务器繁忙,请稍后再试");return ServerResponse.status(HttpStatus.OK).contentType(MediaType.APPLICATION_JSON).body(BodyInserters.fromValue(map));}};GatewayCallbackManager.setBlockHandler(blockRequestHandler);}}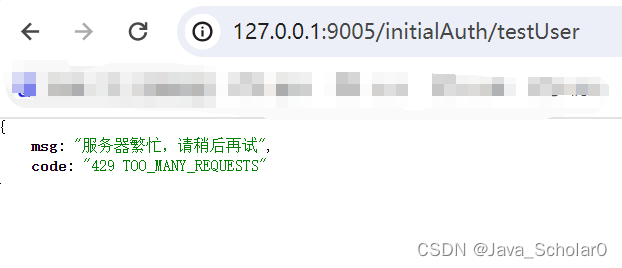


![[QNX] BSP 网络性能优化:调优io-pkt和ClockPeriod提升网速](https://img-blog.csdnimg.cn/direct/ceea3a7d8b03458ab3ac9f7527922b48.png)

