【一】盒子模型和浮动
【1】盒子模型
- 盒子模型(Box Model)是指在网页设计中,用于描述和布局元素的一种模型。
- 它将每个元素看作是一个具有四个边界的矩形盒子,包括内容区域(content)、内边距(padding)、边框(border)和外边距(margin)。
【2】组成部分
-
内容区域(Content):
-
- 盒子的实际内容,如文本、图像等。
-
内边距(Padding):
-
- 内容区域与边框之间的空间,用于控制内容与边框之间的距离。
-
边框(Border):
-
- 围绕内容区域和内边距的线条,用于给元素添加外观和样式。
-
外边距(Margin):
-
- 边框与其他元素之间的空间,用于控制元素与周围元素之间的距离。
【3】代码概述
<!DOCTYPE html>
<html lang="en">
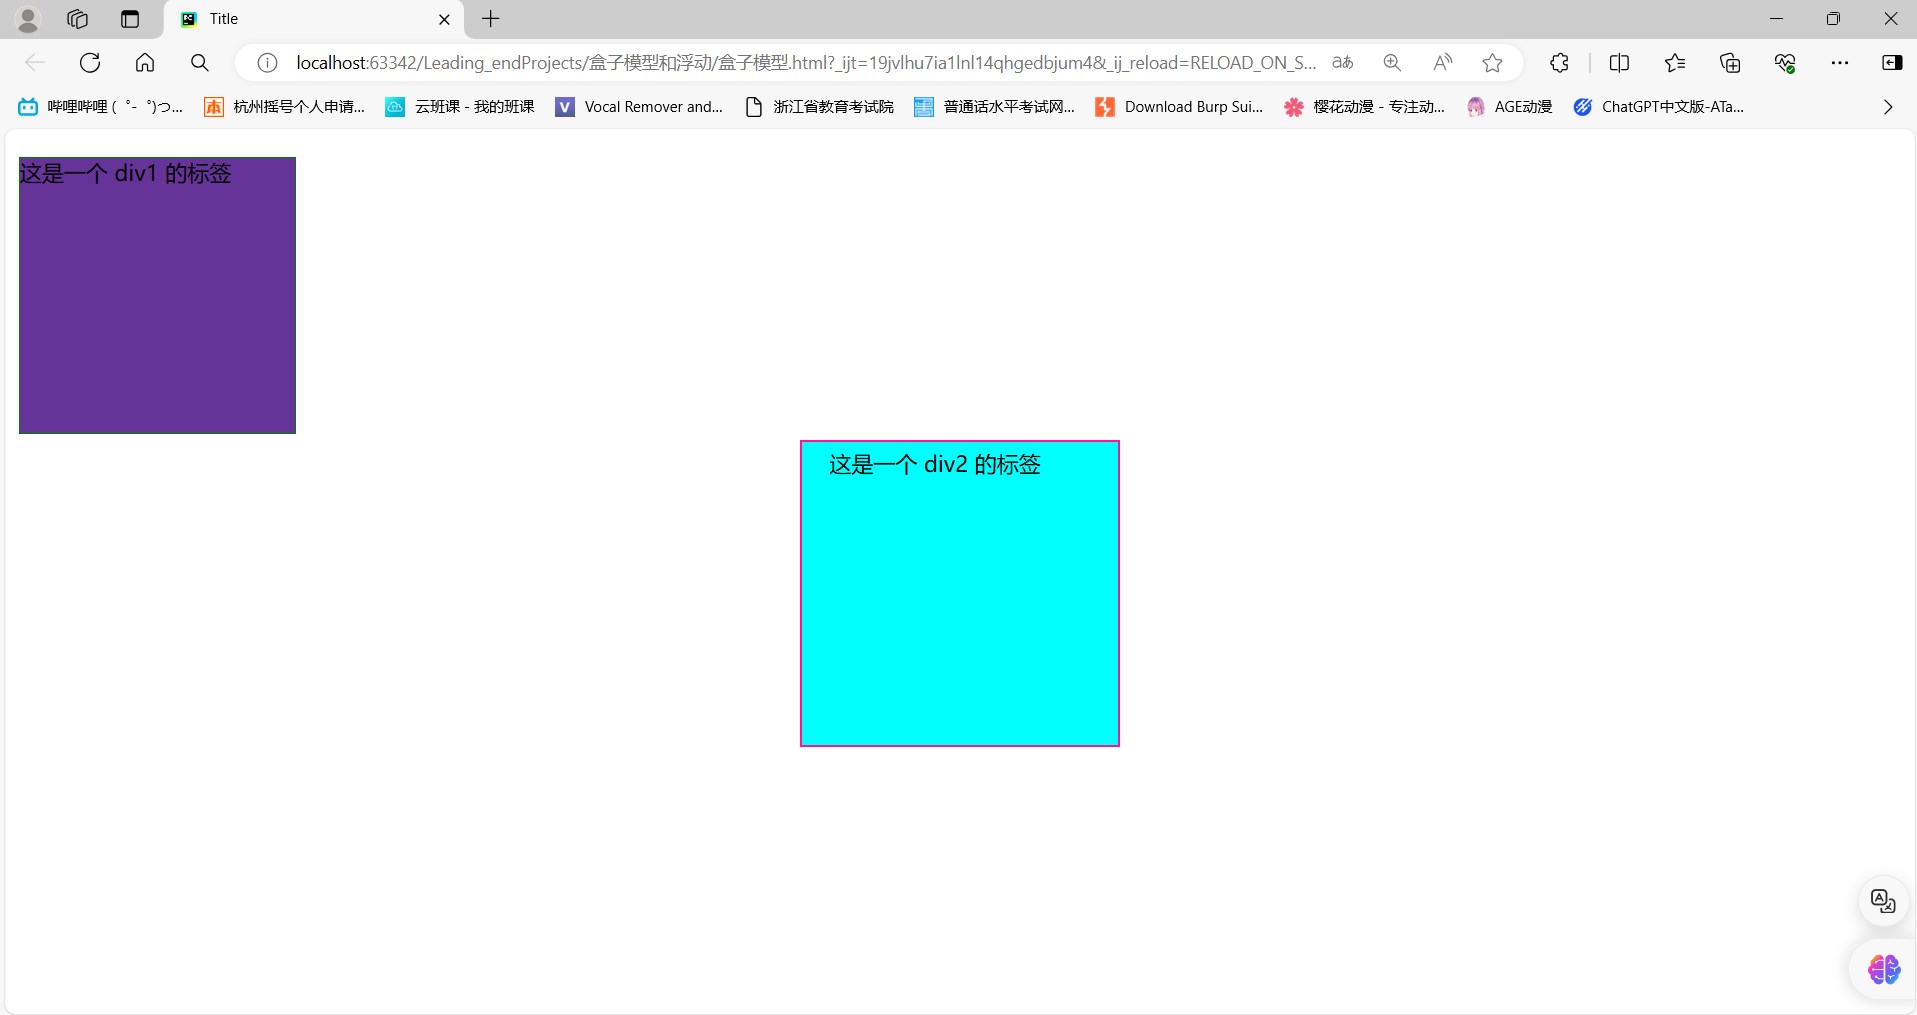
<head><meta charset="UTF-8"><title>Title</title><style>#d1 {width: 200px;height: 200px;background-color: rebeccapurple;border: 1px solid green;margin-bottom: 5px; /* 与下面的元素间距5px */margin-left: 10px; /* 与左边元素间距10px */margin-right: 15px; /* 与右边元素间距15px */margin-top: 20px; /* 与上部元素间距20px */}#d2 {width: 200px;height: 200px;background-color: aqua;border: 2px solid deeppink;/*margin: 5px 10px 15px 20px; !* 与数字对应的是 上 右 下 左 顺时针 *!*/margin: 0 auto; /* 居中显示 */padding: 5px 10px 15px 20px; /* 内边距 上 右 下 左 顺时针 */}</style>
</head>
<body><div id="d1">这是一个 div1 的标签
</div><div id="d2">这是一个 div2 的标签
</div></body>
</html>
【二】浮动
【1】浮动的作用
-
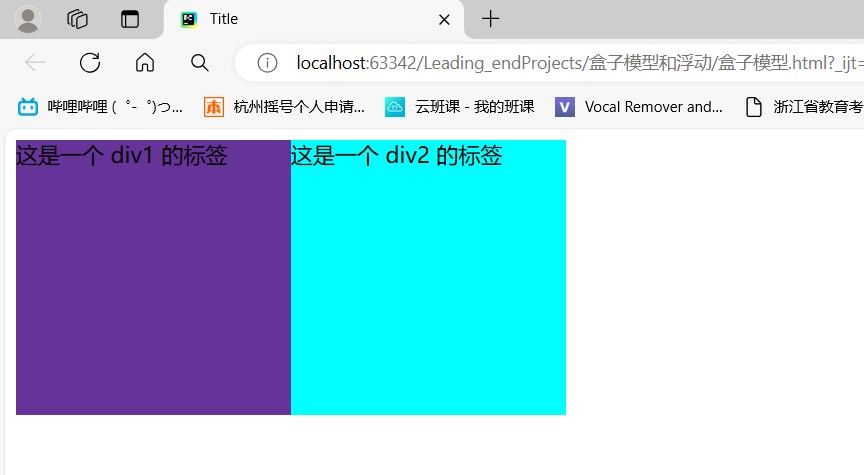
可以将块级标签浮动起来脱离正常的文档流
-
是多个块儿级标签可以在一行显示(全部飘在了空中)
-
脱离页面,浮动在页面之上
-
- 没有块级一说,本身多大,浮起来之后就只能占多大。
-
只要涉及到页面的布局,一般都是用浮动提前规划好
【2】示例
<!DOCTYPE html>
<html lang="en">
<head><meta charset="UTF-8"><title>Title</title><style>#d1 {width: 200px;height: 200px;background-color: rebeccapurple;float: left;}#d2 {width: 200px;height: 200px;background-color: aqua;float: left;}</style>
</head>
<body><div id="d3"><div id="d1">这是一个 div1 的标签</div><div id="d2">这是一个 div2 的标签</div>
</div></body>
</html>
<!DOCTYPE html>
<html lang="en">
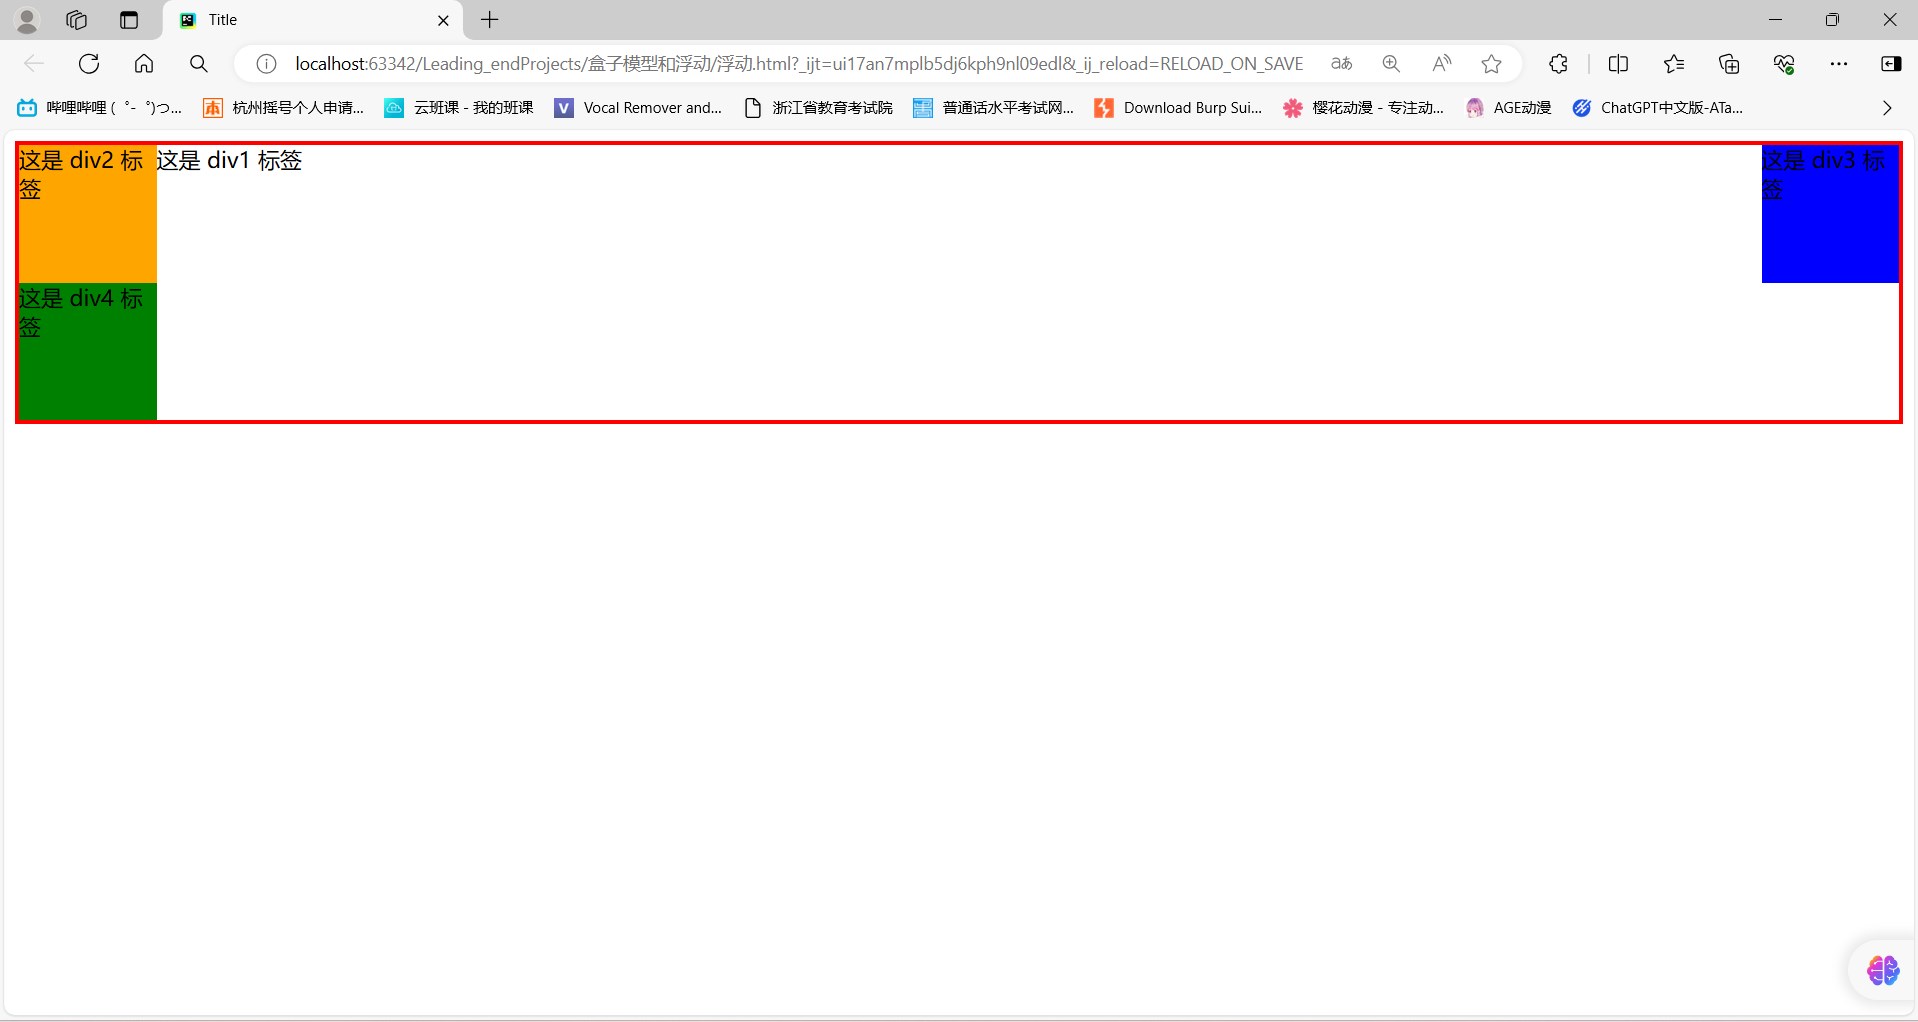
<head><meta charset="UTF-8"><title>Title</title><style>#d1 {border: 3px solid red;}#d2 {width: 100px;height: 100px;background-color: orange;float: left;/*clear: both;*/}#d3 {width: 100px;height: 100px;background-color: blue;float: right;/*clear: both;*/}#d4 {width: 100px;height: 100px;background-color: green;/*clear: both;*//*clear: left;*//*clear: right;*/}.clear {/* 因为有的标签是行内标签 所以为了解决这个问题 转成块级标签*/display: block;clear: both;}</style>
</head>
<body><div id="d1">这是 div1 标签<div id="d2"> 这是 div2 标签</div><div id="d3">这是 div3 标签</div><div class="clear" id="d4">这是 div4 标签</div>
</div></body>
</html>
【三】溢出属性
【1】介绍
-
visible:
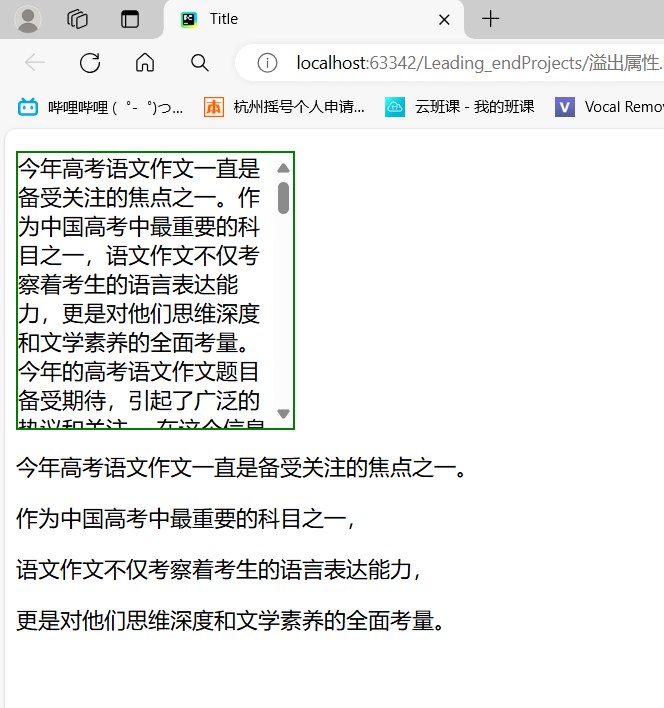
对溢出内容不做处理,内容可能会超出容器。
-
hidden:
隐藏溢出容器的内容且不出现滚动条。
-
scroll:
隐藏溢出容器的内容,溢出的内容可以通过滚动呈现。
-
auto:
当内容没有溢出容器时不出现滚动条,当内容溢出容器时出现滚动条,按需出现滚动条。
textarea元素的overflow默认值就是auto。 -
clip:
与
hidden一样,clip也被用来隐藏溢出容器的内容且不出现滚动条。不同的地方在于,clip是一个完全禁止滚动的容器,而hidden仍然可以通过编程机制让内容可以滚动。
【2】代码示例
<!DOCTYPE html>
<html lang="en">
<head><meta charset="UTF-8"><title>Title</title><style>#p1 {height: 200px;width: 200px;border: 2px solid green;/* 属性可见,但是超出的内容还是会超出 *//*overflow: visible;*//* 超出范围的内容全部被隐藏起来 *//*overflow: hidden;*//* 超出的内容会提供一个可以滑动的滑动条 *//*overflow: scroll;*//* 如果内容超出则会自动添加滑动条 */overflow: auto;}</style>
</head>
<body><p id="p1">今年高考语文作文一直是备受关注的焦点之一。作为中国高考中最重要的科目之一,语文作文不仅考察着考生的语言表达能力,更是对他们思维深度和文学素养的全面考量。今年的高考语文作文题目备受期待,引起了广泛的热议和关注....
</p>
<p>今年高考语文作文一直是备受关注的焦点之一。</p>
<p>作为中国高考中最重要的科目之一,</p>
<p>语文作文不仅考察着考生的语言表达能力,</p>
<p>更是对他们思维深度和文学素养的全面考量。</p>
</body>
</html>
【四】案例-圆形头像
<!DOCTYPE html>
<html lang="en">
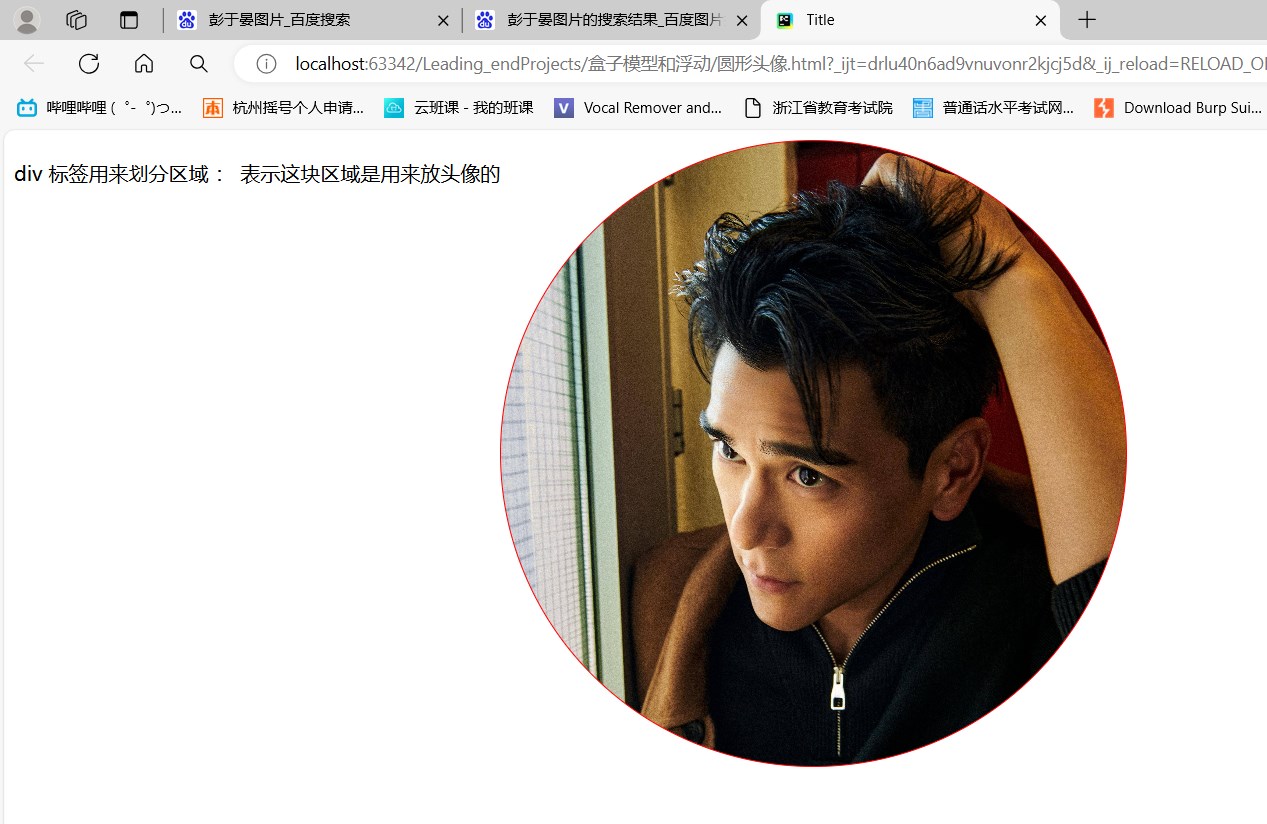
<head><meta charset="UTF-8"><title>Title</title><style>#p1 {float: left;}#d1 {height: 500px;width: 500px;border:1px solid red;background-image: url("https://p1.itc.cn/q_70/images01/20231210/182fa3bee24242408136e412504a8bc6.jpeg");background-size: cover;background-repeat: no-repeat;border-radius: 50%;float: left;}</style>
</head>
<body><p id="p1">div 标签用来划分区域 : 表示这块区域是用来放头像的</p>
<div id="d1">
<!--    <img src="https://p1.itc.cn/q_70/images01/20231210/182fa3bee24242408136e412504a8bc6.jpeg" alt="">-->
</div></body>
</html>
【五】定位
【1】四种定位方式介绍
-
静态定位(static):
对象遵循常规流。此时4个定位偏移属性不会被应用。
-
相对定位(relative):
对象遵循常规流,并且参照自身在常规流中的位置通过top,right,bottom,left这4个定位偏移属性进行偏移时不会影响常规流中的任何元素。
-
绝对定位(absolute):
对象脱离常规流,此时偏移属性参照的是离自身最近的定位祖先元素,如果没有定位的祖先元素,则一直回溯到
body元素。盒子的偏移位置不影响常规流中的任何元素,其margin不与其他任何margin折叠。 -
固定定位(fixed):
与
absolute一致,但偏移定位是以窗口为参考。当出现滚动条时,对象不会随着滚动。
【2】小结
-
相对定位
-
- 相对于标签原来的位置移动 relative
-
绝对定位(常用)
-
- 相对于已经定位过的父标签做移动,如果没有父标签那么就以body为父标签
- 当你不知道页面其他标签的位置和参数,只给了你一个父标签的参数,让你基于该标签做定位
-
固定定位(常用)
-
- 相对于浏览器窗口固定在某个位置
【3】示例
<!DOCTYPE html>
<html lang="en">
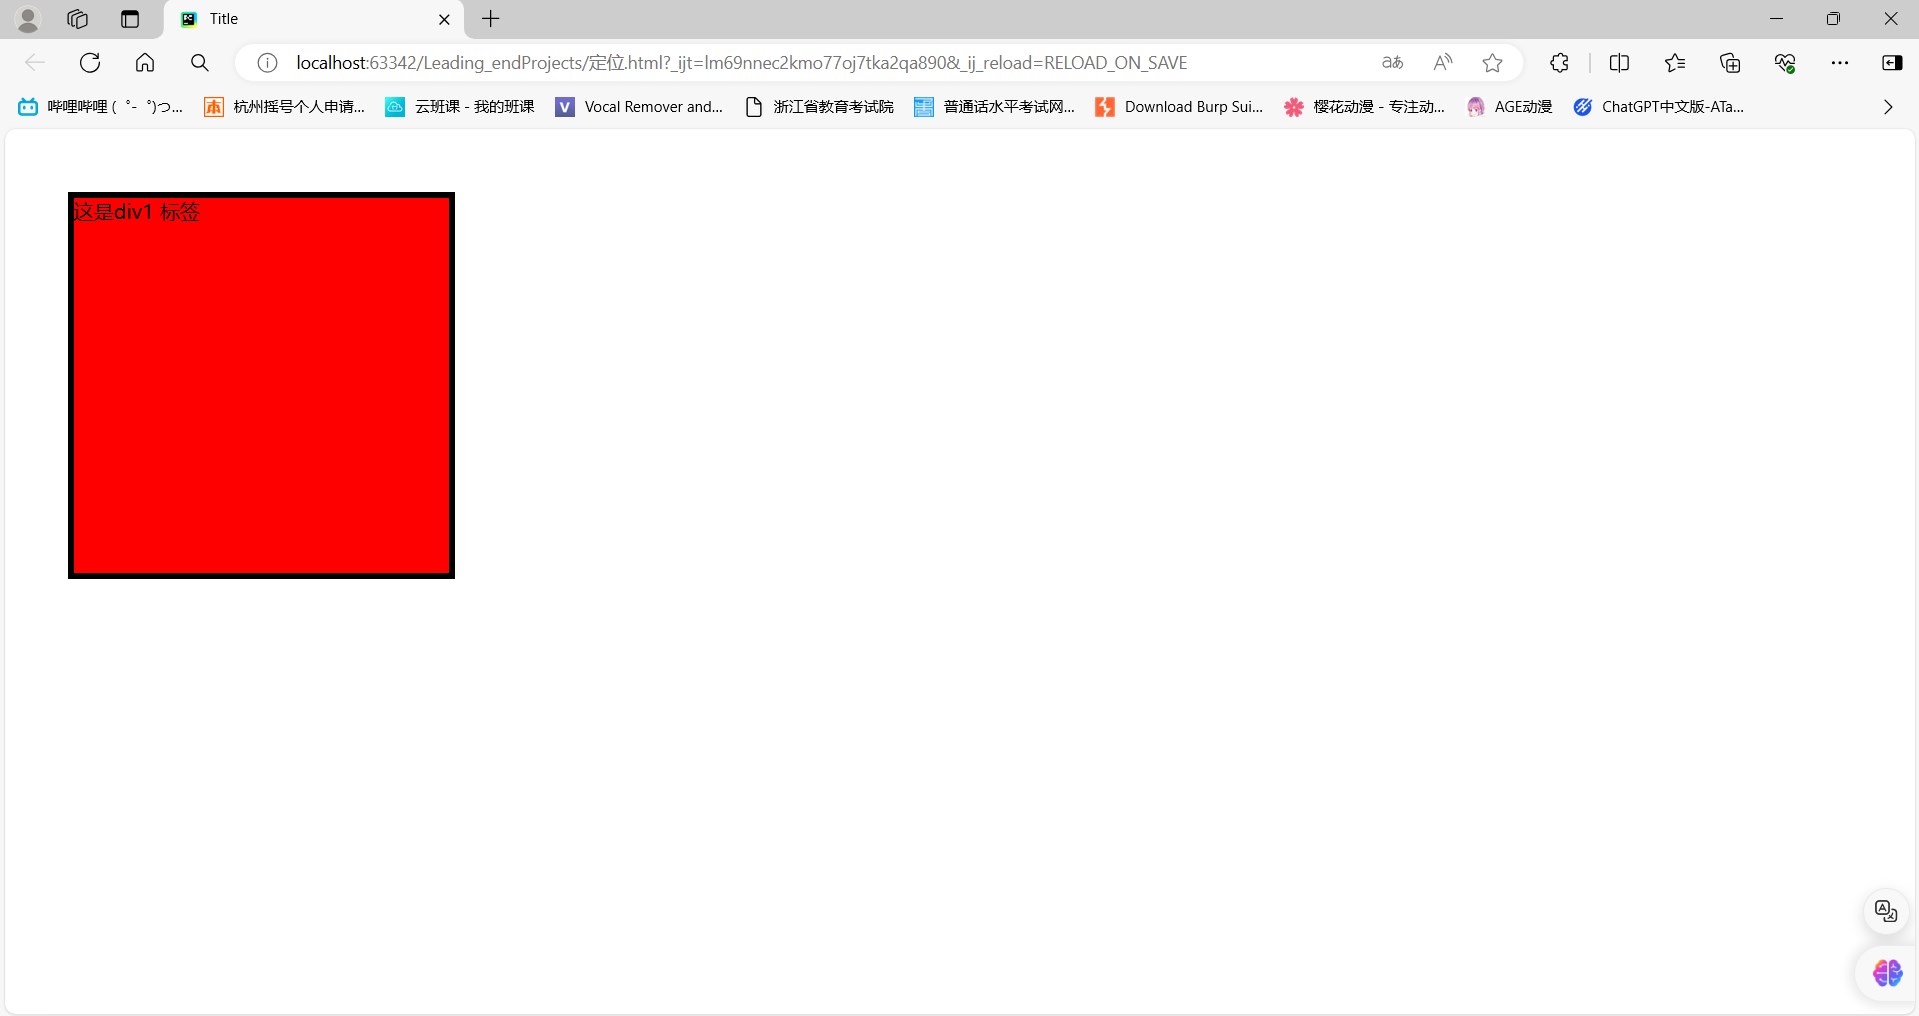
<head><meta charset="UTF-8"><title>Title</title><style>#d1{height: 300px;width: 300px;background-color: red;border: 5px solid black;position: fixed;left: 50px;top: 50px;}</style>
</head>
<body><div id="d1"> 这是div1 标签 </div></body>
</html>
【六】模态框z-index
【1】引入
- 前端界面其实是一个三维坐标系 z轴指向用户
- 动态弹出的分层界面 我们也称之为叫模态框
【2】百度的模态框
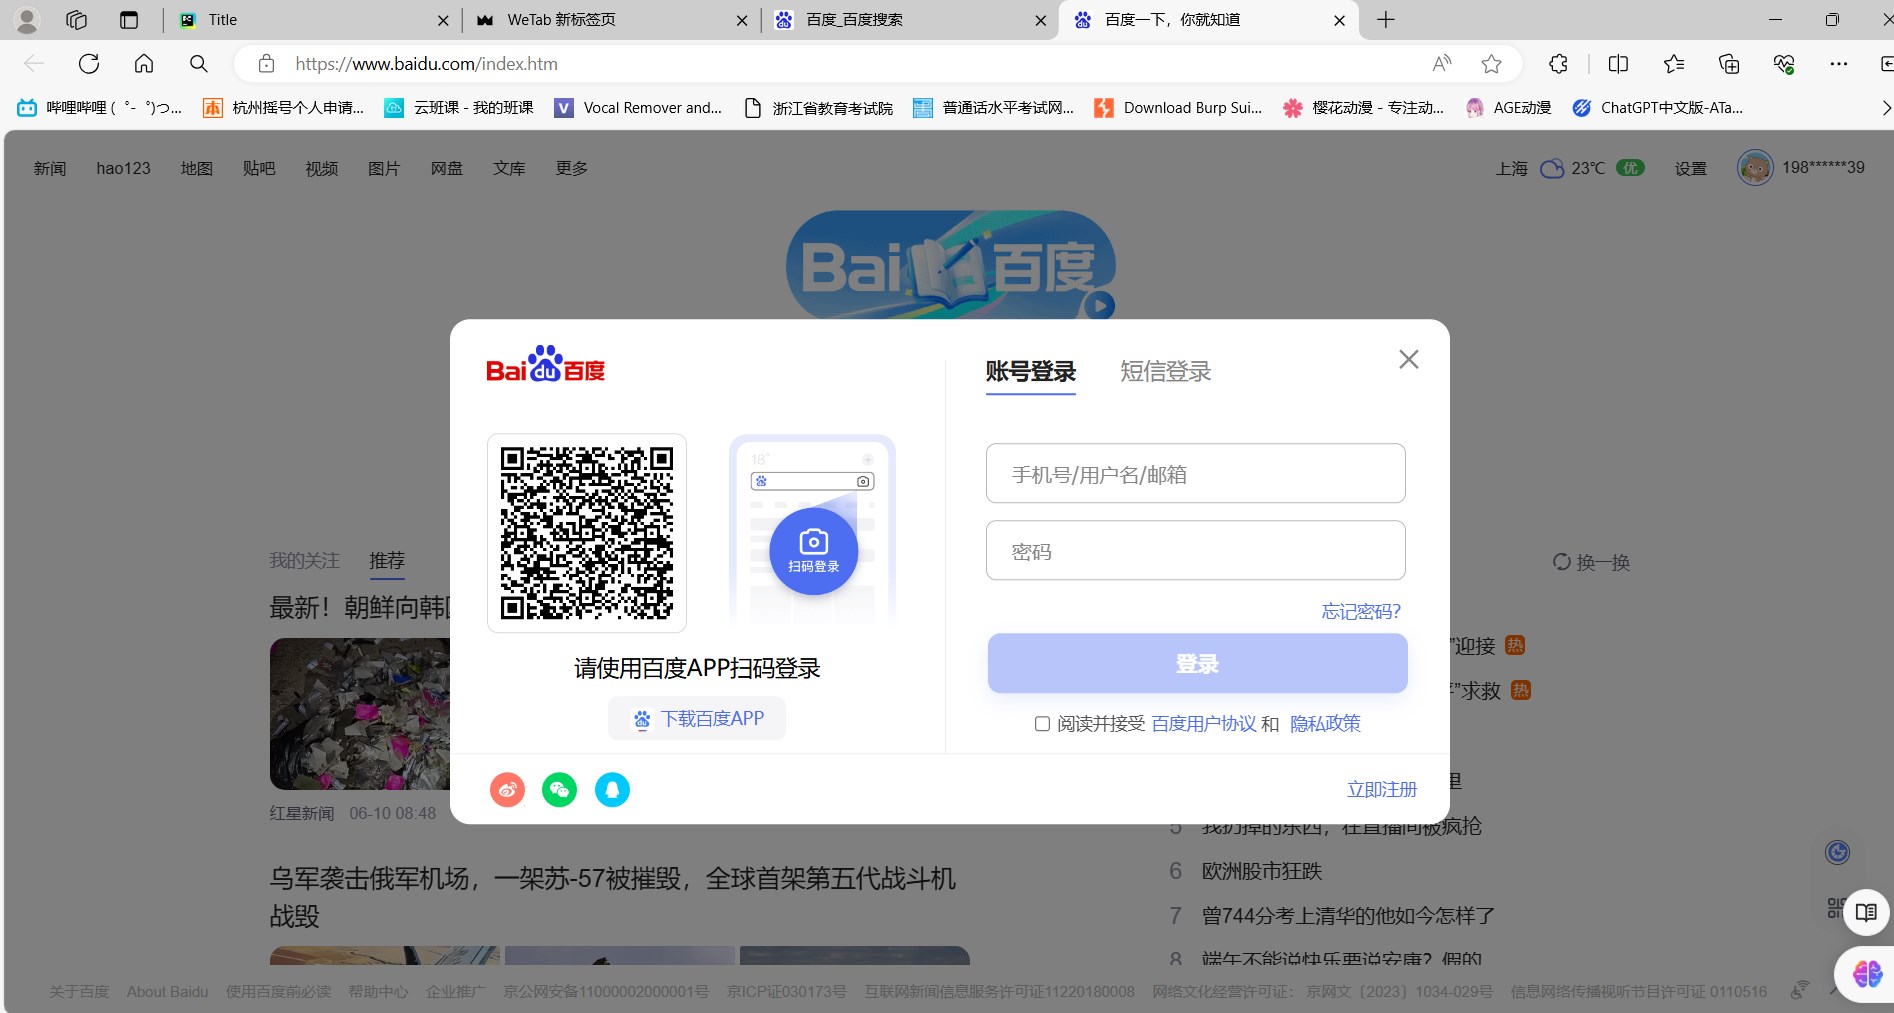
- 层级
- 百度登录页面一共三层
- 最底部是正常内容(a=0)- 最远的
- 接着是黑色的透明区(a=99)- 中间的
- 最后是白色的登陆注册区(a=100)- 最远的
- 百度登录页面一共三层
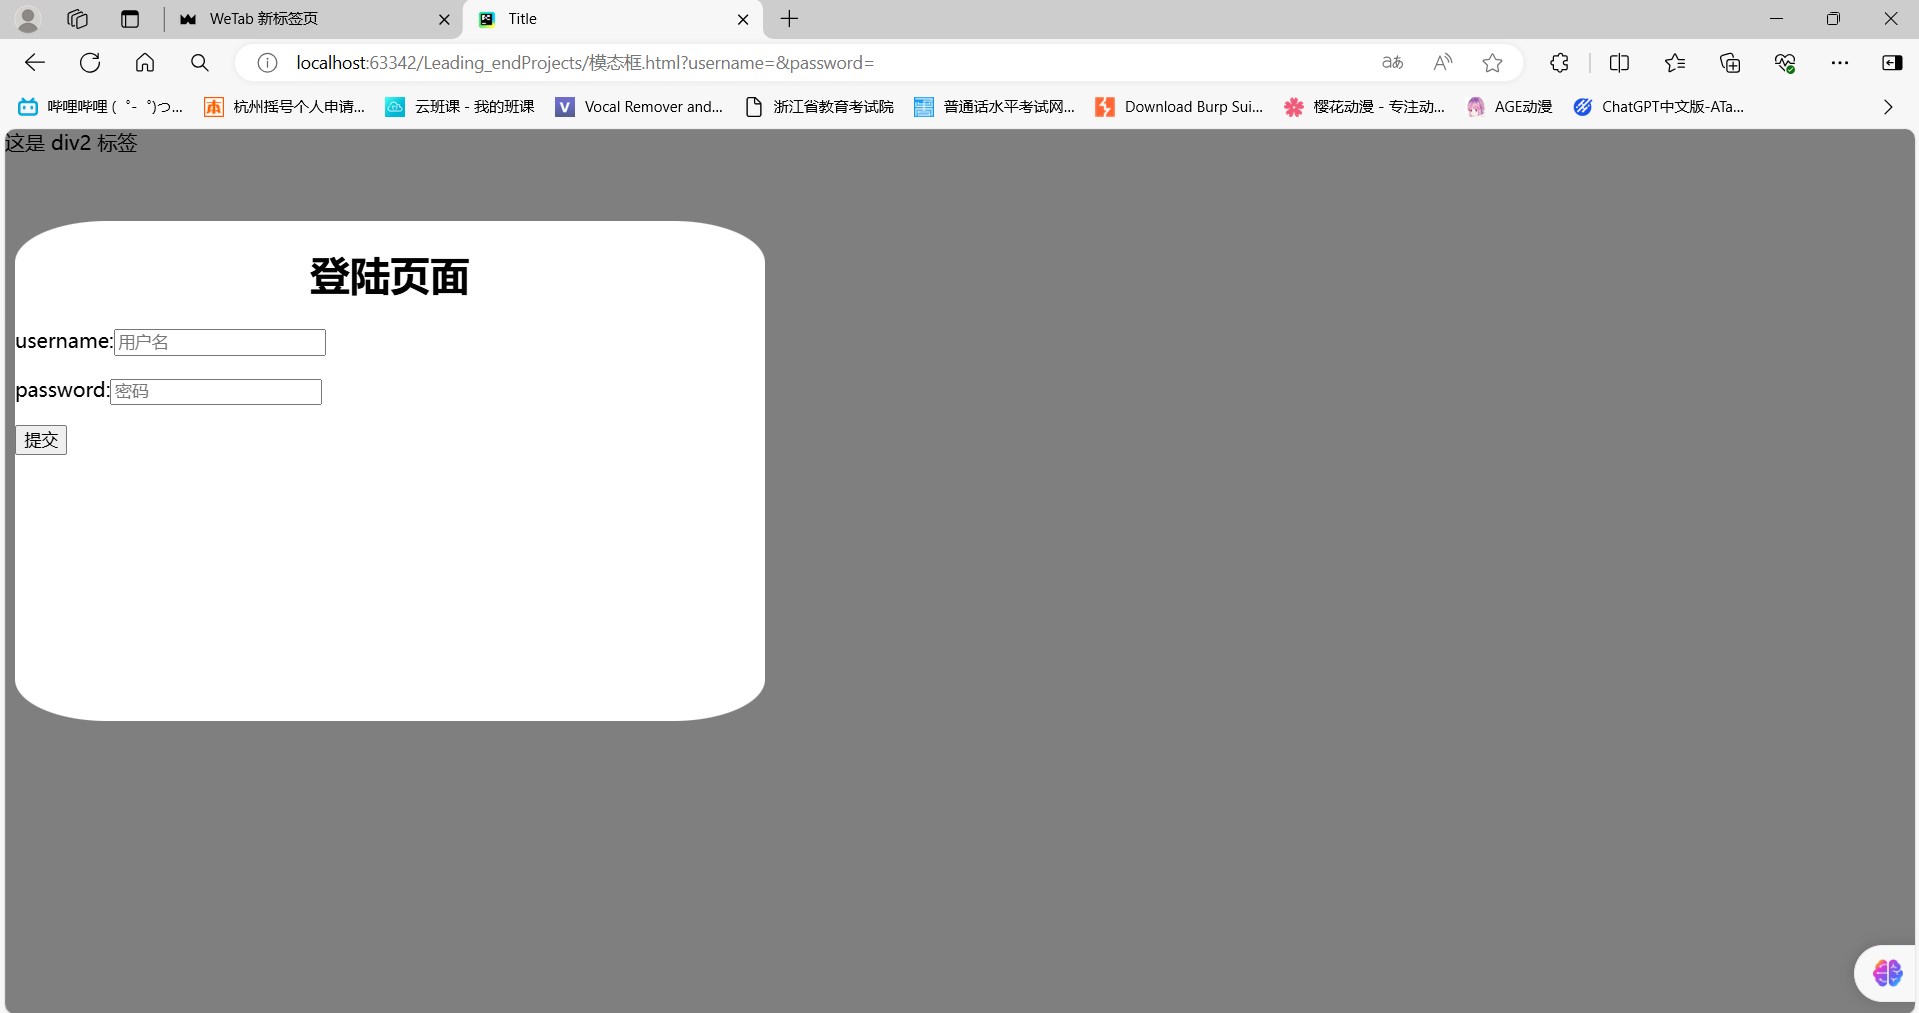
【3】示例
<!DOCTYPE html>
<html lang="en">
<head><meta charset="UTF-8"><title>Title</title><style>.index{background-color: green;}.over{position: fixed;left: 0;right: 0;top: 0;bottom: 0;background-color: rgb(127,127,127);z-index: 99;}.modal{background-color: white;height: 400px;width: 600px;position: fixed;margin: 0 auto;/*left: 50%;*//*right: 50%;*//*top: 50%;*//*bottom: 50%;*/z-index: 100;border-top-left-radius: 55pt 25pt;border-top-right-radius: 55pt 25pt;border-bottom-right-radius: 55pt 25pt;border-bottom-left-radius: 55pt 25pt;}</style>
</head>
<body><p>z-index : 控制当前页面的权重数字越大权重越高
</p>
<div class="index"> 这是 div1 标签 </div>
<div class="over"> 这是 div2 标签 </div>
<div class="modal"><h1 style="text-align: center">登陆页面</h1><form action=""><p>username:<input type="text" name="username" placeholder="用户名"></p><p>password:<input type="text" name="password" placeholder="密码"></p><p><input type="submit"></p></form>
</div></body>
</html>
【七】透明度修改
【1】引入
- 不单单可以修改颜色的透明度还可以修改字体的透明度
- rgba 只能修改颜色的透明度
- opacity 不只是能修改颜色还能修改字体的透明度
【2】示例
<!DOCTYPE html>
<html lang="en">
<head><meta charset="UTF-8"><title>Title</title>
</head>
<body>
<!DOCTYPE html>
<html lang="en">
<head><meta charset="UTF-8"><title>Title</title><style>.font_both {font-size: 40px;font-weight: bold;}#p1 {/* 可以修改颜色的透明度 但是他不能让字体变透明 */background-color: rgba(255, 255, 255, 0.2);}#p2 {background-color: rgb(255, 255, 255);/* 既让颜色 又让字体都变透明 */opacity: 0.4;}</style>
</head>
<body><p class="font_both" id="p1"> 0000 </p>
<p class="font_both" id="p2"> 1111 </p>
</body>
</html>
</body>
</html>
