Docker 介绍
Docker 是一个强大的工具,用于高效开发、打包和部署应用程序。Docker 是一种容器管理服务。Docker 于 2013 年发布。它是开源的,可用于 Windows、macOS 和 Linux 等不同平台。Docker 正在快速交付、测试和部署代码。这样可以减少编写代码和在生产环境中运行代码之间的延迟。您可以创建称为容器的自包含环境。它可以在不同的平台上一致地运行。
Docker 是一组平台即服务 (PaaS) 产品,它使用操作系统级虚拟化以称为容器的包的形式交付软件。容器彼此隔离,并捆绑自己的软件、库和配置文件;他们可以通过定义明确的渠道相互通信。所有容器都由单个操作系统内核运行,因此使用的资源比虚拟机少。
Docker 是一个开源 容器化 平台,通过该平台,您可以将应用程序及其所有依赖项打包到一个称为容器的标准化单元中。容器重量轻,这使得它们具有可移植性,并且它们与底层基础设施和其他容器隔离。您可以在任何安装了 docker 的计算机上将 docker 镜像 作为 docker 容器运行,而无需依赖 操作系统。
为什么 Docker 很受欢迎?
Docker 因其对软件开发和部署的影响而广受欢迎。以下是 docker 流行的一些主要原因:
- 可移植性: Docker 有助于开发人员将其应用程序与所有依赖项打包到单个轻量级容器中。它有助于确保不同计算环境中的性能一致。
- 可重复性: 通过将应用程序及其依赖项封装在一个容器中,它可以确保软件设置在开发、测试和生产环境中保持一致。
- 效率: Docker 通过其基于容器的架构优化了资源利用率。它允许开发人员在单个主机系统上运行多个隔离的应用程序。
- 可扩展性: Docker 的可扩展性功能有助于开发人员在工作负载增加时更轻松地处理他们的应用程序。
Docker 的关键组件
以下是 Docker 的一些关键组件:
- Docker Engine: 它是 Docker 的核心部分,用于处理容器的创建和管理。
- Docker Image: 它是一个只读模板,用于创建容器,包含应用程序代码和依赖项。
- Docker Hub: 它是一个基于云的存储库,用于查找和共享容器映像。
- Dockerfile: 这是一个脚本,其中包含构建 docker 镜像的说明。
- Docker Registry :它是 docker 镜像的存储分发系统,您可以在其中以公共和私有模式存储镜像。
Docker 架构以及 Docker 的工作原理?
Docker 使用客户端-服务器架构。Docker 客户端与 docker 守护程序通信,这有助于构建、运行和分发 docker 容器。Docker 客户端与守护程序在同一系统上运行,或者我们可以远程将 Docker 客户端与 Docker 守护程序连接。在 UNIX 套接字或网络上的 REST API 的帮助下,docker 客户端和守护程序可以相互交互。

Docker Daemon
Docker 守护程序通过与其他守护程序通信来管理所有服务。它借助 Docker 的 API 请求管理 Docker 对象,例如映像、容器、网络和卷。
Docker Client
在 docker 客户端的帮助下,docker 用户可以与 docker 交互。docker 命令使用 Docker API。Docker 客户端可以与多个守护程序通信。当 docker 客户端在 docker 终端上运行任何 docker 命令时,终端会向守护进程发送指令。Docker 守护程序从命令形状和 REST API 请求内的 docker 客户端获取这些指令。
docker 客户端的主要目标是提供一种方法来指导从 docker 注册表中提取镜像并在 docker 主机上运行它们。客户端使用的常用命令是 docker build、docker pull 和 docker run。
Docker Host
Docker 主机是一种负责运行多个容器的机器。它包括 Docker 守护程序、映像、容器、网络和存储。
Docker Registry
所有 docker 镜像都存储在 docker 注册表中。有一个公共注册表,称为 docker hub,任何人都可以使用。我们也可以运行我们的私有注册表。在 docker run 或 docker pull 命令的帮助下,我们可以从配置的注册表中提取所需的镜像。在 docker push 命令的帮助下,镜像被推送到配置的注册表中。
Docker Objects
每当我们使用 docker 时,我们都会创建和使用镜像、容器、卷、网络和其他对象。现在,我们将讨论 docker 对象:-

Docker Images
镜像包含创建 Docker 容器的说明。它只是一个只读模板。它用于存储和交付应用程序。映像是 docker 体验的重要组成部分,因为它们以以前无法实现的任何方式支持开发人员之间的协作。
Docker Containers
容器是从 docker 镜像创建的,因为它们是现成的应用程序。在 Docker API 或 CLI 的帮助下,我们可以启动、停止、删除或移动容器。容器只能访问映像中定义的那些资源,除非在容器中构建映像期间定义了其他访问权限。
Docker Storage
我们可以将数据存储在容器的可写层中,但它需要一个存储驱动程序。存储驱动程序控制和管理 Docker 主机上的镜像和容器。
以下是 Docker 中常见的数据持久化方法:
- 数据卷(Volumes):数据卷是一种特殊的目录,可以绕过容器文件系统并将数据存储在宿主机上。数据卷可以被一个或多个容器共享,并且在容器之间持久存在。使用数据卷可以方便地备份、恢复和迁移数据。
- 绑定挂载(Bind Mounts):绑定挂载允许将宿主机上的文件或目录直接挂载到容器中。这样,容器可以访问宿主机文件系统中的数据,并且对数据的修改也会反映到宿主机上。
- 命名卷(Named Volumes):命名卷是一种具有名称的数据卷,可以在多个容器之间共享,并且可以方便地管理和使用。通过为卷指定名称,可以在创建容器时直接引用该名称,并且 Docker 会自动创建和管理卷。
- 数据卷容器(Data Volume Containers):数据卷容器是一种特殊类型的容器,用于存储和管理数据卷。其他容器可以通过 --volumes-from 选项挂载这些数据卷容器,从而实现数据的共享和持久化。
Docker 网络
Docker 网络为 Docker 容器提供完全隔离。这意味着用户可以将 docker 容器链接到多个网络。它需要的操作系统实例非常少来运行工作负载。
网络模式说明
| 网络模式 | 配置 | 说明 |
|---|---|---|
| bridge | --network=bridge | 为每个容器分配 IP 。并将容器连接到 docker0 虚拟网桥上,这种模式是默认模式 |
| host | --network=host | 容器不会创建自己的网卡,配置 IP 等,而是使用宿主机的 IP 和端口 |
| none | --network=none | 容器关闭网络功能,不进行任何网路设置 |
| container | --network=container | 容器不会创建自己的网卡和IP,而是和一个指定的容器共享 IP 和端口 |
| custom | --network=new_bridge | 为每个容器分配 IP 。并将容器连接到自定义的虚拟网桥上 |
Docker 安装方式
准备环境
系统要求:Docker 支持 64 位版本 CentOS 7/8,并且要求内核版本不低于 3.10。 CentOS 7 满足最低内核的要求,但由于内核版本比较低,部分功能(如 overlay2 存储层驱动)无法使用,并且部分功能可能不太稳定。
如需升级 Linux 内核参考《CentOS 7 内核升级最新记录(yum及编译)》
[root@localhost ~]# cat /etc/redhat-release
CentOS Linux release 7.9.2009 (Core)
[root@localhost ~]# uname -r
3.10.0-1160.el7.x86_64[root@localhost ~]# setenforce 0
[root@localhost ~]# sed -i.bak '7s/enforcing/disabled/' /etc/selinux/config[root@localhost ~]# swapoff -a
[root@localhost ~]# sed -ri.bak 's/.*swap.*/#&/' /etc/fstab[root@localhost ~]# systemctl stop firewalld && systemctl disable firewalld
[root@localhost ~]# firewall-cmd --state
not running# 更换阿里源
[root@localhost ~]# mv /etc/yum.repos.d/CentOS-Base.repo /etc/yum.repos.d/CentOS-Base.repo.backup
[root@localhost ~]# curl -o /etc/yum.repos.d/CentOS-Base.repo http://mirrors.aliyun.com/repo/Centos-7.repo
[root@localhost ~]# curl -o /etc/yum.repos.d/epel.repo http://mirrors.aliyun.com/repo/epel-7.repo
在线 YUM 安装
时间:2024-09
# 卸载旧版本
[root@localhost ~]# yum remove docker docker-client docker-client-latest docker-common docker-latest \
docker-latest-logrotate docker-logrotate docker-selinux docker-engine-selinux docker-engine# 安装所需的软件包。yum-utils 提供了 yum-config-manager
[root@localhost ~]# yum install -y yum-utils# 添加 yum 软件源(三选一)
[root@localhost ~]# yum-config-manager --add-repo https://mirrors.aliyun.com/docker-ce/linux/centos/docker-ce.repo  # 阿里源yum-config-manager --add-repo https://mirrors.tuna.tsinghua.edu.cn/docker-ce/linux/centos/docker-ce.repo  # 清华大学源yum-config-manager --add-repo https://download.docker.com/linux/centos/docker-ce.repo   # 官方源(较慢)# 列出存储库中可用的版本。按版本号(从高到低)
[root@localhost ~]# yum list docker-ce --showduplicates | sort -r* updates: mirrors.aliyun.com
Loading mirror speeds from cached hostfile
Loaded plugins: fastestmirror* extras: mirrors.aliyun.com
docker-ce.x86_64            3:26.1.4-1.el7                      docker-ce-stable
docker-ce.x86_64            3:26.1.3-1.el7                      docker-ce-stable
docker-ce.x86_64            3:26.1.2-1.el7                      docker-ce-stable
docker-ce.x86_64            3:26.1.1-1.el7                      docker-ce-stable
docker-ce.x86_64            3:26.1.0-1.el7                      docker-ce-stable
docker-ce.x86_64            3:26.0.2-1.el7                      docker-ce-stable
docker-ce.x86_64            3:26.0.1-1.el7                      docker-ce-stable
docker-ce.x86_64            3:26.0.0-1.el7                      docker-ce-stable
docker-ce.x86_64            3:25.0.5-1.el7                      docker-ce-stable
docker-ce.x86_64            3:25.0.4-1.el7                      docker-ce-stable
docker-ce.x86_64            3:25.0.3-1.el7                      docker-ce-stable
docker-ce.x86_64            3:25.0.2-1.el7                      docker-ce-stable
docker-ce.x86_64            3:25.0.1-1.el7                      docker-ce-stable
docker-ce.x86_64            3:25.0.0-1.el7                      docker-ce-stable
docker-ce.x86_64            3:24.0.9-1.el7                      docker-ce-stable
docker-ce.x86_64            3:24.0.8-1.el7                      docker-ce-stable# 安装最新版本
[root@localhost ~]# yum install docker-ce docker-ce-cli containerd.io# 若选择版本安装 例如docker-ce-24.0.9
yum install docker-ce-<VERSION_STRING> docker-ce-cli-<VERSION_STRING> containerd.io# 若选择测试版本的 Docker 请执行以下命令
yum-config-manager --enable docker-ce-test# 验证
[root@localhost ~]# docker -v
Docker version 26.1.4, build 5650f9b# 添加国内镜像加速(每次修改需重启 docker)
[root@localhost ~]# cat > /etc/docker/daemon.json <<EOF
{"registry-mirrors": ["https://mirror.baidubce.com","https://mirror.ccs.tencentyun.com","https://wxvmh7l6.mirror.aliyuncs.com","https://hub.atomgit.com","https://registry.docker-cn.com","https://mirrors.tuna.tsinghua.edu.cn","http://hub-mirror.c.163.com","https://docker.mirrors.ustc.edu.cn"]
}
EOF# 启动
[root@localhost ~]# systemctl daemon-reload && systemctl start docker# 测试 Docker 是否安装正确
[root@localhost ~]# docker run --rm hello-world
Unable to find image 'hello-world:latest' locally
latest: Pulling from library/hello-world
d195baed67eb: Pull complete
Digest: sha256:be06e3c4ce8780c0f87fbf66ec9b34623ba2fd14caa5559be5b593653821b814
Status: Downloaded newer image for hello-world:latestHello from Docker!
This message shows that your installation appears to be working correctly.To generate this message, Docker took the following steps:1. The Docker client contacted the Docker daemon.2. The Docker daemon pulled the "hello-world" image from the Docker Hub.(amd64)3. The Docker daemon created a new container from that image which runs theexecutable that produces the output you are currently reading.4. The Docker daemon streamed that output to the Docker client, which sent itto your terminal.To try something more ambitious, you can run an Ubuntu container with:$ docker run -it ubuntu bashShare images, automate workflows, and more with a free Docker ID:https://hub.docker.com/For more examples and ideas, visit:https://docs.docker.com/get-started/若能正常输出以上信息,则说明安装成功。
二进制离线安装
时间:2024-09
下载 Docker 地址
- 阿里地址【https://mirrors.aliyun.com/docker-ce 】
- 清华大学地址【https://mirrors.tuna.tsinghua.edu.cn/docker-ce 】
- 官方地址【https://download.docker.com 】
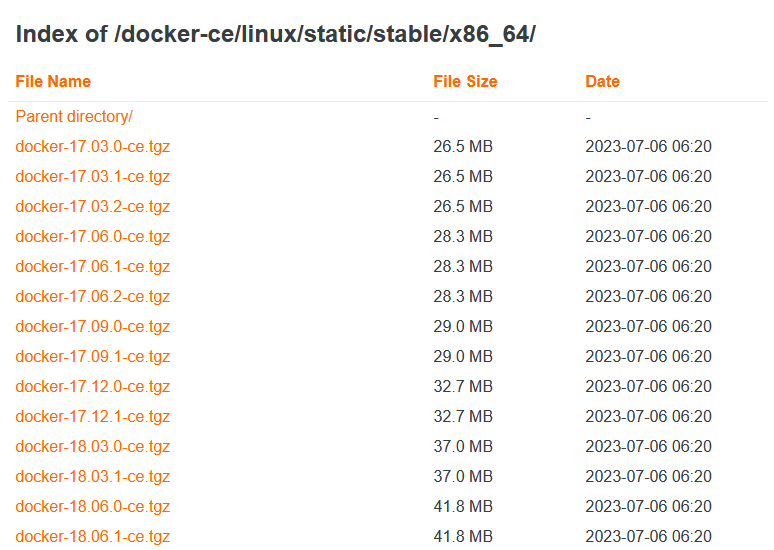
# 下载 Docker docker-23.0.6.tgz 为例 (当前最新版本 docker-27.2.0.tgz)
[root@localhost ~]# wget https://mirrors.aliyun.com/docker-ce/linux/static/stable/x86_64/docker-23.0.6.tgz
[root@localhost ~]# tar -xf docker-23.0.6.tgz
[root@localhost ~]# cp docker/* /usr/bin/[root@localhost ~]# docker -v
Docker version 23.0.6, build ef23cbc
[root@localhost ~]# docker -h# 将docker注册为 Systemd 的 service
[root@localhost ~]# cat > /etc/systemd/system/docker.service <<EOF
[Unit]
Description=Docker Application Container Engine
Documentation=https://docs.docker.com
After=network-online.target firewalld.service
Wants=network-online.target[Service]
Type=notify
# the default is not to use systemd for cgroups because the delegate issues still
# exists and systemd currently does not support the cgroup feature set required
# for containers run by docker
ExecStart=/usr/bin/dockerd -H unix:///var/run/docker.sock --selinux-enabled=false --default-ulimit nofile=65536:65536
ExecReload=/bin/kill -s HUP $MAINPID
# Having non-zero Limit*s causes performance problems due to accounting overhead
# in the kernel. We recommend using cgroups to do container-local accounting.
LimitNOFILE=infinity
LimitNPROC=infinity
LimitCORE=infinity
# Uncomment TasksMax if your systemd version supports it.
# Only systemd 226 and above support this version.
#TasksMax=infinity
TimeoutStartSec=0
# set delegate yes so that systemd does not reset the cgroups of docker containers
Delegate=yes
# kill only the docker process, not all processes in the cgroup
KillMode=process
# restart the docker process if it exits prematurely
Restart=on-failure
StartLimitBurst=3
StartLimitInterval=60s[Install]
WantedBy=multi-user.targetEOF# 如果需要开启远程服务ExecStart属性修改为以下命令:
ExecStart=/usr/bin/dockerd -H tcp://0.0.0.0:2375 -H unix:///var/run/docker.sock --selinux-enabled=false --default-ulimit nofile=65536:65536
# -H tcp://0.0.0.0:2375 开启远程连接命令# 添加文件可执行权限
[root@localhost ~]# chmod +x /etc/systemd/system/docker.service# 添加国内镜像加速(每次修改需重启 docker)
[root@localhost ~]# mkdir /etc/docker
[root@localhost ~]# cat > /etc/docker/daemon.json <<EOF
{"registry-mirrors": ["https://mirror.baidubce.com","https://mirror.ccs.tencentyun.com","https://wxvmh7l6.mirror.aliyuncs.com","https://hub.atomgit.com","https://registry.docker-cn.com","https://mirrors.tuna.tsinghua.edu.cn","http://hub-mirror.c.163.com","https://docker.mirrors.ustc.edu.cn"]
}
EOF# 启动
[root@localhost ~]# systemctl daemon-reload && systemctl start docker# 测试 Docker 是否安装正确
[root@localhost ~]# docker run --rm hello-world
Unable to find image 'hello-world:latest' locally
latest: Pulling from library/hello-world
d195baed67eb: Pull complete
Digest: sha256:be06e3c4ce8780c0f87fbf66ec9b34623ba2fd14caa5559be5b593653821b814
Status: Downloaded newer image for hello-world:latestHello from Docker!
This message shows that your installation appears to be working correctly.To generate this message, Docker took the following steps:1. The Docker client contacted the Docker daemon.2. The Docker daemon pulled the "hello-world" image from the Docker Hub.(amd64)3. The Docker daemon created a new container from that image which runs theexecutable that produces the output you are currently reading.4. The Docker daemon streamed that output to the Docker client, which sent itto your terminal.To try something more ambitious, you can run an Ubuntu container with:$ docker run -it ubuntu bashShare images, automate workflows, and more with a free Docker ID:https://hub.docker.com/For more examples and ideas, visit:https://docs.docker.com/get-started/若能正常输出以上信息,则说明安装成功。
Docker 常用命令