Accelerate Your Development Environment with Docker & WSL2
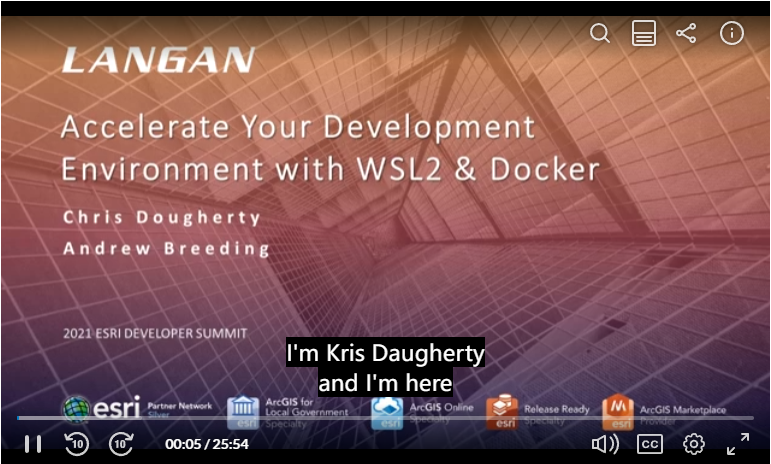
Welcome to accelerate your development environment with WSL to and darker.
I'm Kris Daugherty and I'm here today with my colleague, Andrew breeding.
We're from the GIS solutions and development team at laying in engineering.
Login is in every business partner.
And as an international full-service engineering firm spread across 33 offices.
In addition to core engineering or technical services include GIS, Survey, BIM, and software development.
Andrew and I wear a lot of hats which span from software development to Sys, Admin and DevOps, while also working across different stacks like dotnet, web, and mobile.
We wanted to share with you some of the latest tech that's been making a difference for us.
Wsl and Docker had been steadily growing part of our toolbox.
And there are also a lot of fun to play with.
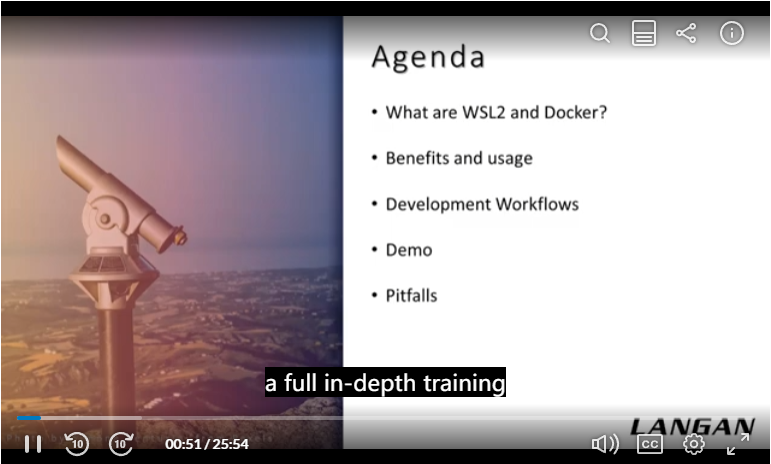
Here's an overview of what we're going to cover today.
Well, we clearly don't have time to do a full in-depth training on both Docker and WSL.
We do want to show you a bit about what they are, why we found them useful, and some workflows were using in our current projects.
As we go through the presentation, I'd like you to be able to walk away with some ideas on how you can use this to solve problems and you're new and existing projects.
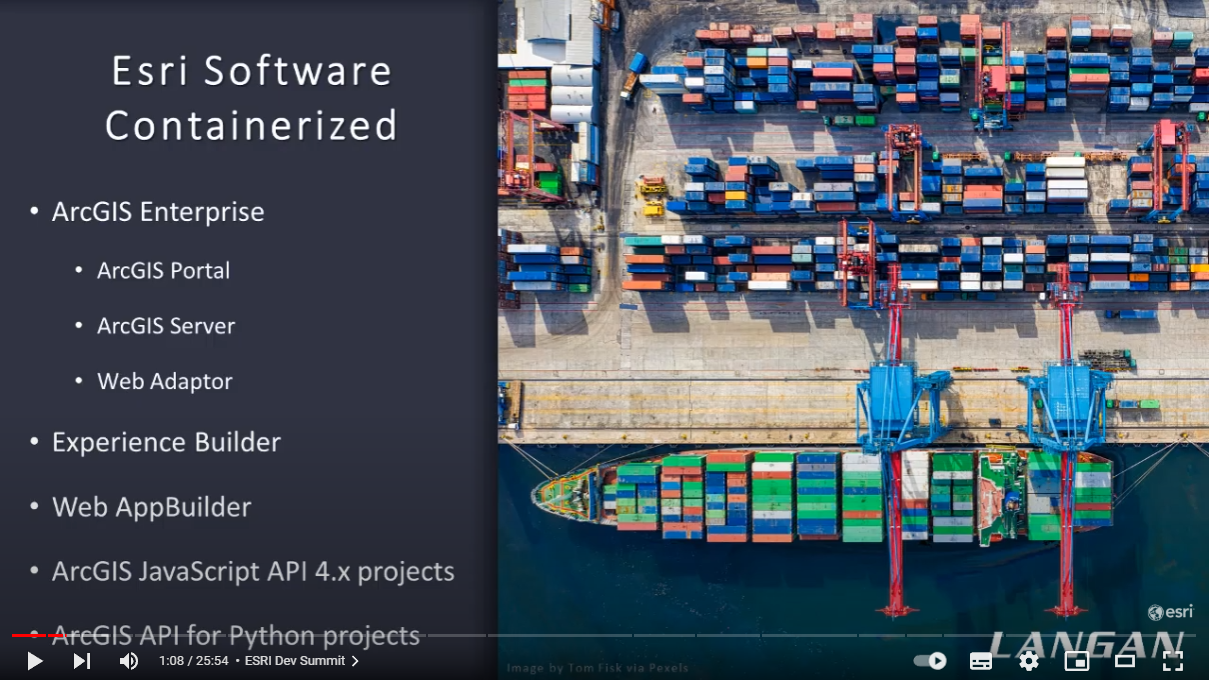
While these tools can be useful to any type of developer, this is of course, the Ezri Dev Summit.
And they do have a place in the Ezri stack.
So far, we have successfully containerized arcgis Enterprise, experienced builder and other GIS development workflows.
We'll be doing a deeper dive on some of these a bit later on and how we accomplish that.
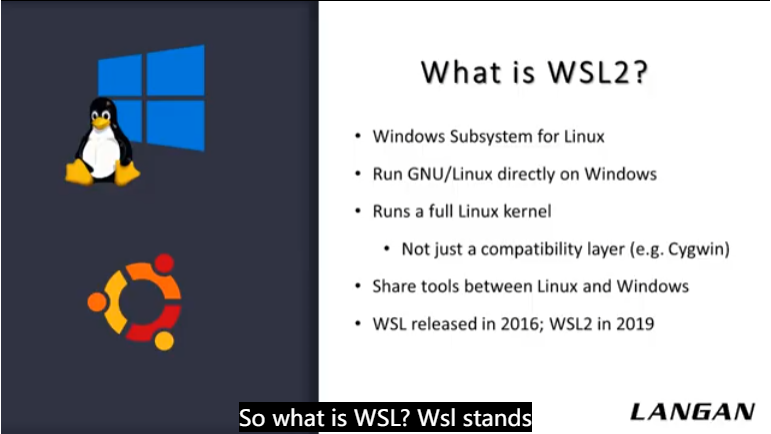
So what is WSL?
Wsl stands for the Windows Subsystem for Linux.
This lets you run Linux directly on Windows, and that's running a full Linux Kernel, not just a compatibility layer, like many other tools.
You can download it and install full Linux distributions like Ubuntu from the Windows Store.
It also has a near instance startup time compared to running traditional VMs.
Just like opening a PowerShell prompt.
One advantage of a setup like this is that it enables sharing commands and software between the two platforms.
For instance, you can launch a Windows program from Bash were utilized Linux's grep command in PowerShell.
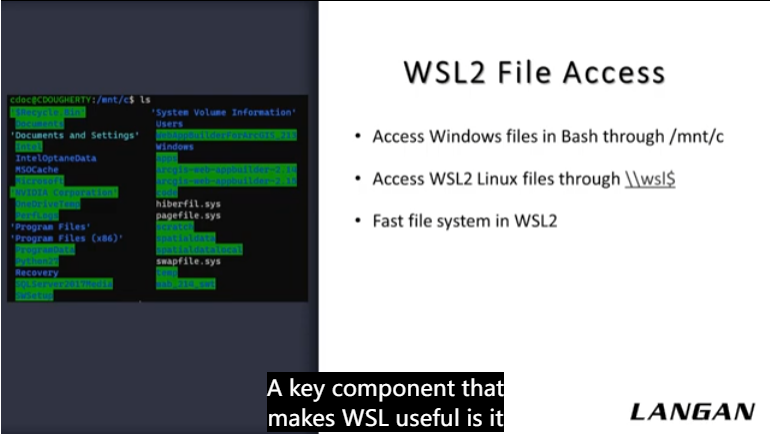
A key component that makes WSL useful is it allows for easy cross-platform file system access.
For instance, you can always access your Windows drives in Linux through the mount folder.
While the Linux file system as accessible through a network share.
He changed that Microsoft made from the first WSL is that they overhauled the file system.
It's quite fast now, which is part of what makes many of the development workflows we're talking about today possible.
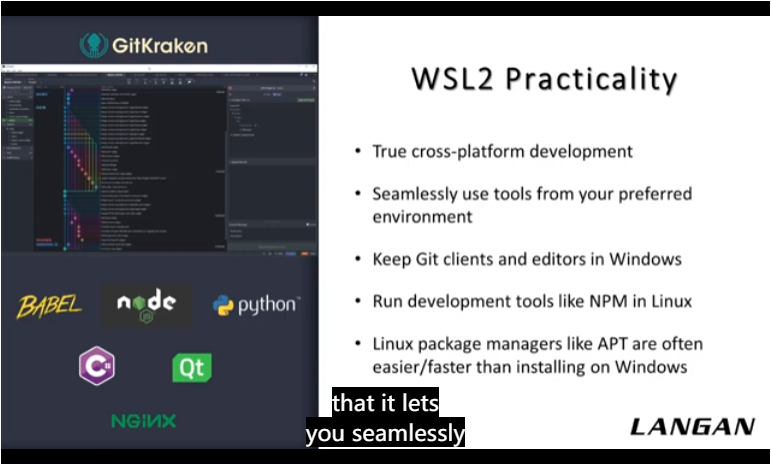
So why do we like WSL so much?
One main reason is that it lets you seamlessly use the tools you need from your preferred environment.
The file system access I described allows software to use your files regardless of the platform they're on.
For instance, we keep our graphical get clients and code editors and Windows simultaneously get to leverage bash and run our developer tooling in Linux.
It's often way easier to set up tools on a Linux command line than Windows, partially due to the prevalence of package managers like apt and Yum.
Additionally, open-source software like Apache projects and many big data packages are much easier to configure and Linux, having true Linux available in Windows can also be a big help if your production servers run Linux.
Now over to Andrew.
Thanks Chris.
It's great to see all the new features and WSL, especially for developers who have an affinity for Linux but are stuck on the Windows platform.
Another exciting piece of this as Docker.
Docker is an open source containerization platform that enables developers to package applications into containers and standardized executable components that combine application source code with all of the operating system libraries and dependencies required to run code in any environment.
In a nutshell, it's a toolkit that enables us to build, deploy, run, update, and stopped containers using simple commands and work saving automation.
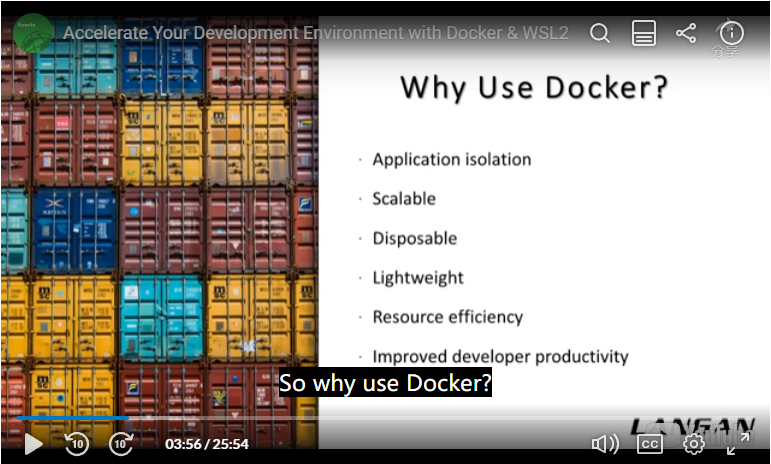
So why use Docker?
Well, it improves portability.
Docker containers can run without modification across multiple environments.
It's lightweight and there's automated container creation.
Docker can automatically build a container based on application source code.
There's container versioning.
Docker can track versions of container images, roll back to previous versions and trace who built a version and how there's container reuse.
Existing containers can be used as base images, essentially like templates for building new containers.
Then there's shared container libraries.
Developers can access an open source registry containing thousands of user contributed containers.
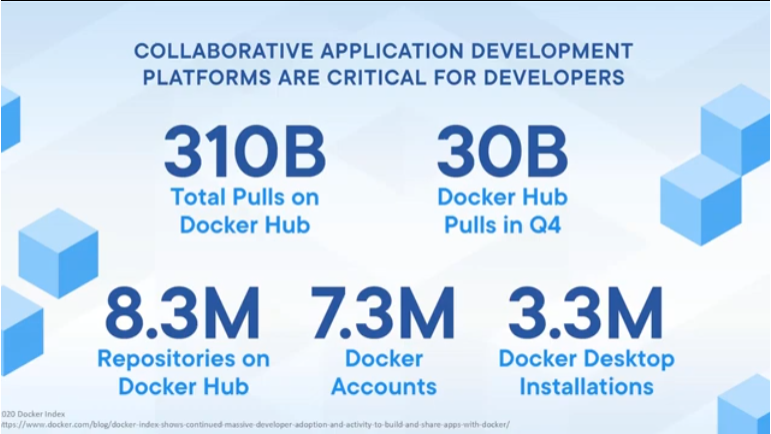
And it's growing fast.
Based on the 2020 Stack Overflow Developer Survey, seventy-three point six percent of respondents said they loved darker, and 24.5% said they wanted to add it to their stack.
I've pulled up some information from the darker index which Dr.
produces yearly and provide some stats on their platform.
As you can see, 310 billion total pulls on Docker Hub.
30 billion Docker Hub pulls in cute for 20.328 million repositories on Docker Hub and 7.3 million darker accounts.
Also, there were 3.3 million Docker desktop installations.
So they're growing at a rapid pace and being adopted within the industry.
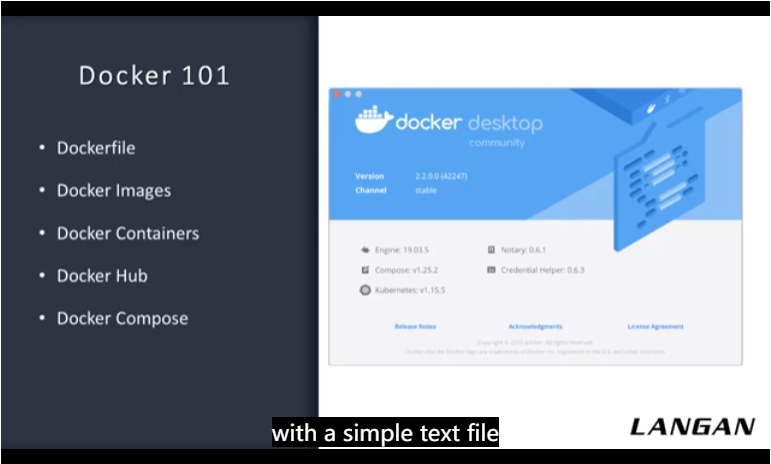
Working with Docker is actually pretty straightforward.
Every Docker container starts with a simple text file containing instructions for how to build the Docker container image.
The Docker file automates the process of Docker image creation.
It's essentially a list of commands that Docker Engine will run in order to assemble the image.
The Docker images contain executable application source code, as well as all the tools, libraries, and dependencies that the application code needs to run as a container.
When you run the Docker image, it becomes one instance of the container.
On the other hand, Docker containers are the live running instances of Docker images.
While Docker images are read-only files, containers are live, a femoral executable content.
Users can interact with them and administrators can adjust their settings and conditions.
Docker Hub is the public repository of Docker images.
It holds over a 100 thousand container images source from commercial software vendors, open-source projects, and individual developers.
It includes images that have been produced by Docker, certified images belonging to Docker, trusted registries and many thousands of other images.
While we're reviewing, I wanted to touch on Docker Compose.
If you're building an application out of processes and multiple containers that all reside on the same host.
You can use docker-compose to manage the applications architecture.
Docker-compose creates a YAML file that specifies which services are included in the application.
You can deploy and run containers with a single command.
Using Docker compose, you can also define persistent volumes for storage, specify base nodes and document and configure service dependencies.
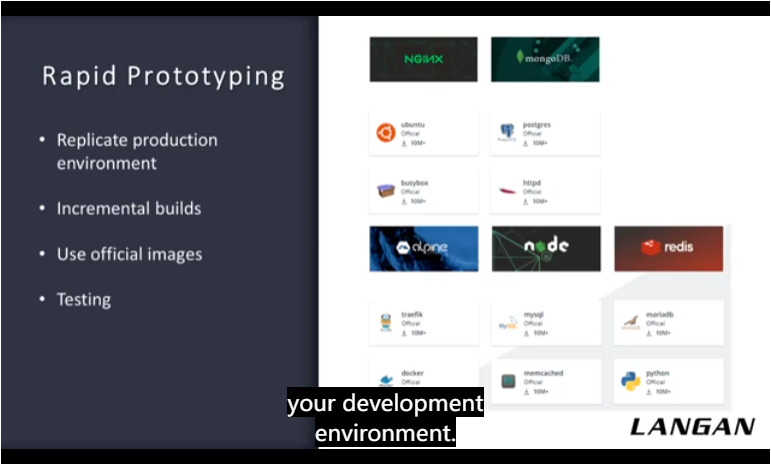
One thing we use Docker a lot for as rapid prototyping.
You can replicate your production environment, but you can also Sandbox your development environment.
On the right, you will see the most widely downloaded images from Docker.
Now these are official images, but they have unofficial images as well.
And you can also test these images out.
For example, you can pull a Python image and you can pull multiple versions of that.
So you don't have to install multiple versions of Python on your development machine.
Chris has some examples of this coming up.
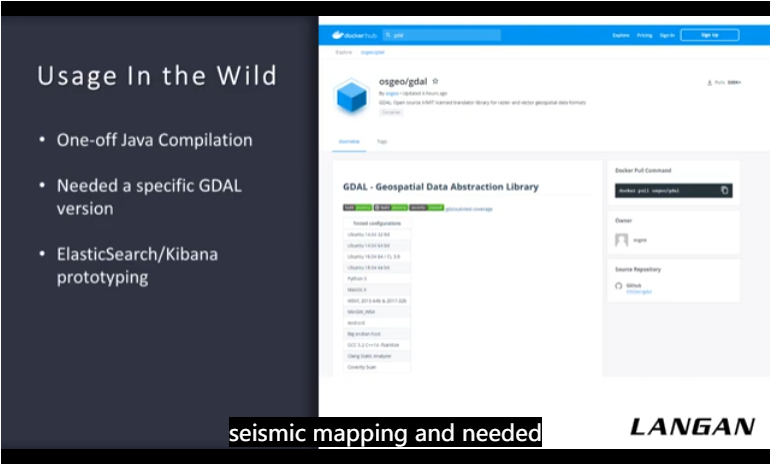
There have been many times recently where Docker saved me a bunch of time, especially for one-off needs.
One such time was when our geotechnical group was working on seismic mapping and needed a Java program compiled.
I don't typically work with Java, so I didn't have the JDK installed.
I pulled down an official JDK Docker image in about two minutes later I was up and running without ever needing to install Java set environment variables or anything like that.
When I was done, I just deleted the Docker image off my system and it was all cleaned up.
Similarly, another time I was working on a project and needed to use a newer feature in a very recent version of g tau.
Although I do have GDAL on my system, it wasn't the right version.
And upgrading took me down a rabbit hole of system dependencies and other packages.
At that point, I realized there's probably a Jie Dao Docker image and sure enough, there was one for each version.
Another case in point relevant to the rapid prototyping that Andrew was just describing is I was doing some R&D with Elastic Search.
I was able to get containers of Elasticsearch and Kibana up and running and talking to each other within minutes, despite not having that much experience with either.
Later, I went and did a full install of Elasticsearch and Kibana on one of our servers.
And it was a whole lot more work and configuration to get it running right.
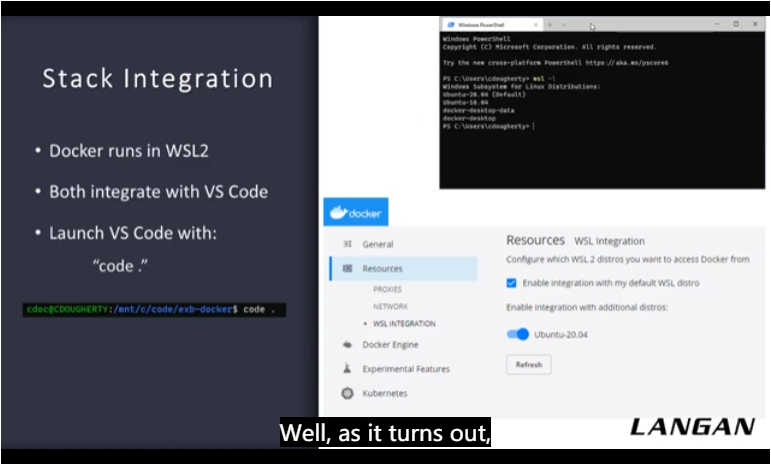
You may be wondering why we're talking about both WSL and darker specifically.
Well, as it turns out, they integrate together quite well.
Docker will actually install and run directly in WSL if you haven't set up.
What I'm showing here on the top right is my list of Linux distributions I've installed in my WSL.
These are all available to run, and you can see that Docker has made its own.
There are some options for this integration in the Docker desktop settings.
Those allowed Docker to integrate into any of your existing Linux environments.
This means that the Docker command line commands actually worked both from windows and from your Linux shell.
I prefer the Linux shell, so I like being able to control everything from there.
Beyond that, both WSL and Docker integrate very well with Visual Studio Code.
You can launch VS Code from a given project or folder just by running code dot as I'm showing on the command line there.
That even works directly from within the WSL Linux shell.
In official extension for Docker lets you control your Docker containers right from within VS Code as well.
Another extension called remote lets your WSL or Docker project open directly within the app.
Andrew is going to tell you more about that.
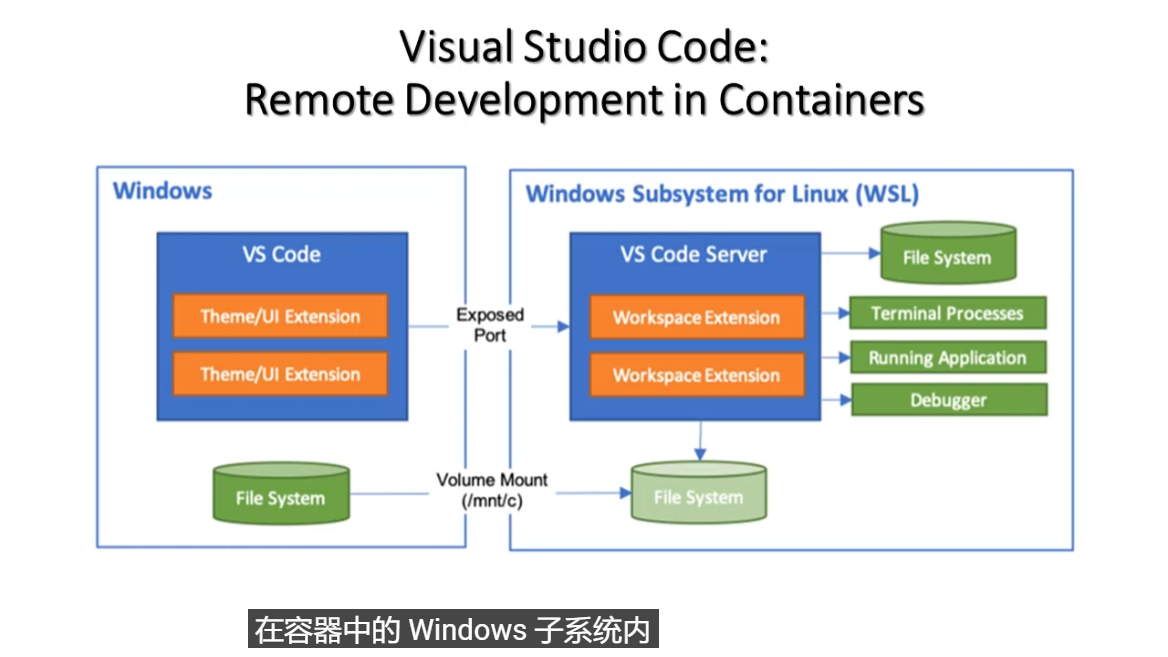
We've reviewed WSL and darker.
You can also use Visual Studio Code with this.
As you can see, you can develop in Visual Studio code inside of Windows Subsystem for Linux in a container.
This will expose the file system terminal processes, the running application and the debugger.
And you can also mount a Windows file system to this.
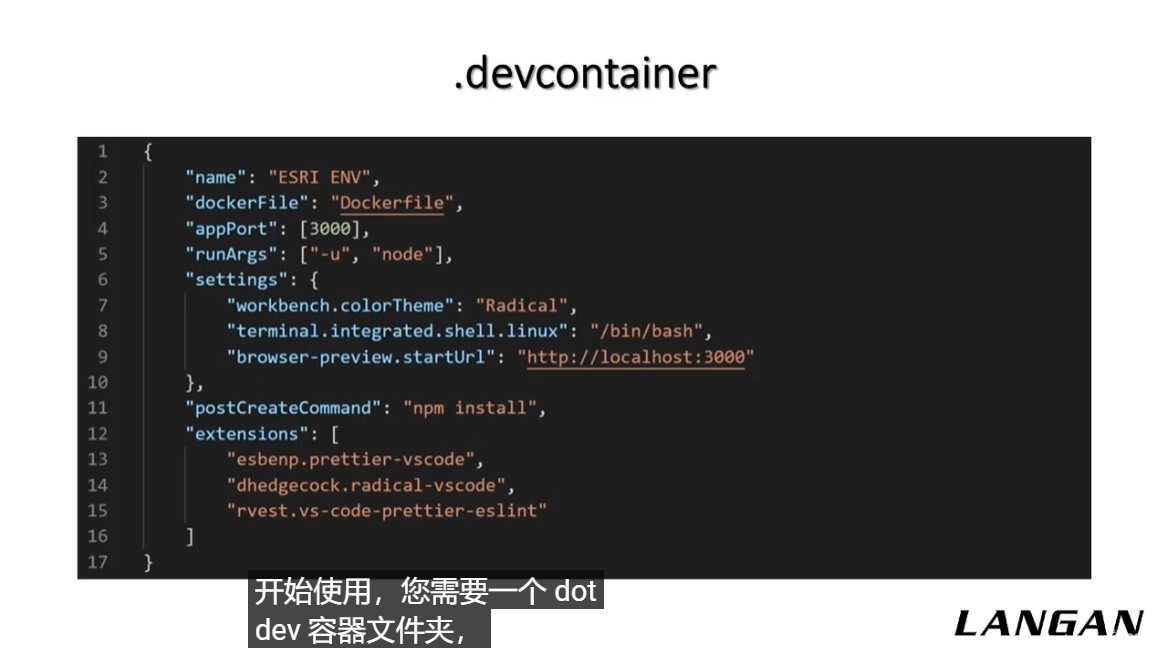
To get started, you'll need a dev container folder.
Within that, you'll need to create a dev container dot json file, which is what you'll use to configure your remote container.
You'll also need a Docker file.
So with that, let's jump into the code.
演示
Now that I have Windows Terminal open, I'm going to access WSL.
From here.
I can run a variety of bash commands, but I'm just going to open up Visual Studio Code.
And I'm gonna path to my project.
And this will open up Visual Studio code locally.
So before I go into the dot dev container folder, I'm going to go into the extensions marketplace and show you the Remote Containers extension.
Because this is what you'll need to actually run Visual Studio in remote container.
You'll also need Docker and WSL.
So I've created the dev container folder, and I've created the dev container json within it.
Now, a lot of this stuff isn't necessary, but I just wanted to add different themes so you could see a change as it opened up.
I wanted to add the browser preview extension and just change that so it's pathing to localhost.
And port 3 thousand.
I wanted to proxy that so that we could view it in the Docker file itself, which is referenced here.
I'm using a base node image, and then I'm installing prettier and ArcGIS core.
So from here, you can come down here, there's a few ways to do this.
Butt come down to the bottom left and then you'll see this drop-down.
And you can click reopened and container.
And what this will do is containerize your Visual Studio.
So now Visual Studio is running containerized within Docker on WSL.
So now one of the really cool things about this is all of the code here is actually living on my Windows file system.
So if you recall back to the diagram that I showed at the very beginning, you can expose a Windows folder location to the container.
And that's just a Git repository that I have and I can push that to get an another developer can pull that down in a very short amount of time, have the exact same developers experience that I have.
And now I'm going to hand it back over to Chris to walk you through some additional examples.
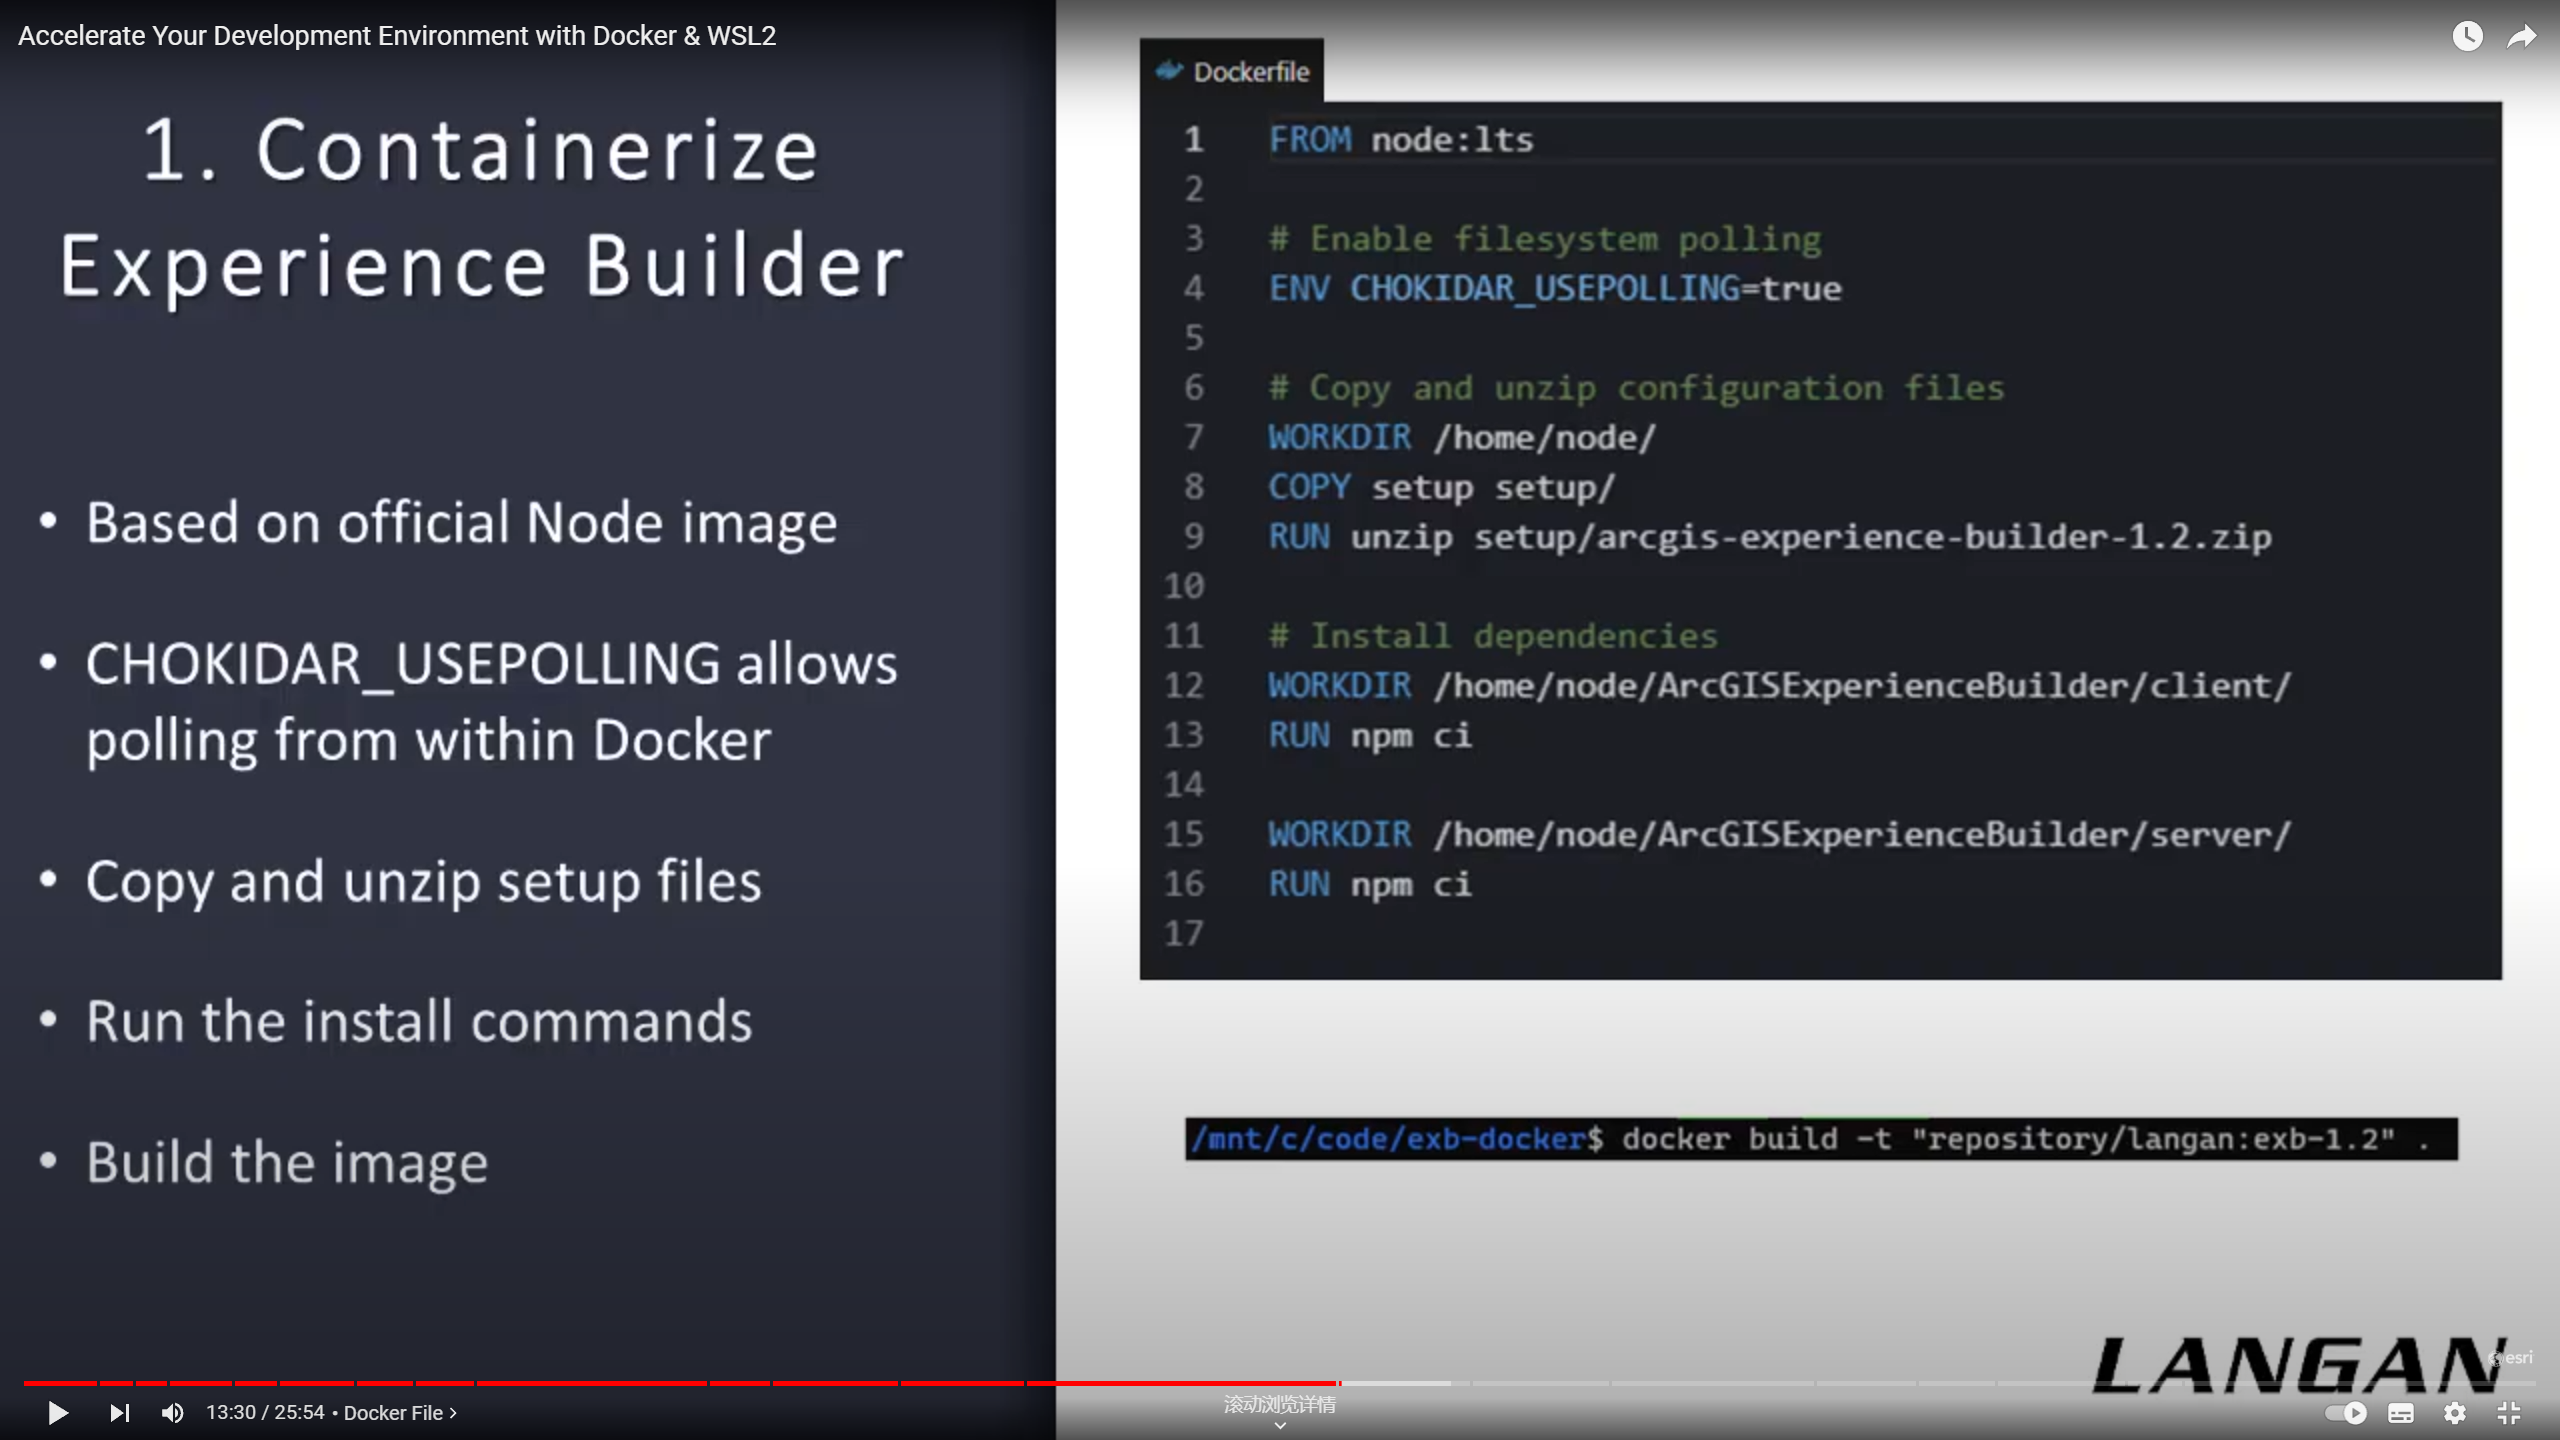
This is the Docker file.
The Docker file is what builds the actual image that the developers will later use.
We only need to build this once and then push it to a Container Repository like Docker Hub, where all the developers can access it.
You can also host your own repository or user images locally.
On line one, we set the base image we want to use.
In this case, we're using the official node image since we'll need to use it to run experienced builder.
Line four sets an environment variable to allow file system pulling within Docker.
Without this, it won't pick up our code at apps from the Windows side.
This is more of a quirk of darker than an experienced builder thing.
Lines seven to nine copy the setup files into the image and unzip.
Lines 1316 install experienced builders dependencies the same way you would normally if you're setting it up on your local system.
Note that although these use npm, we didn't have to explicitly install it since we started with the node image.
In fact, our developers using this wouldn't even need to have node or NPM installed on their system to develop using this image.
It all comes pre-packaged in the Docker image they'll use.
When we're ready, we build the image using the docker build command.
Now the image is built and ready to use on our system.
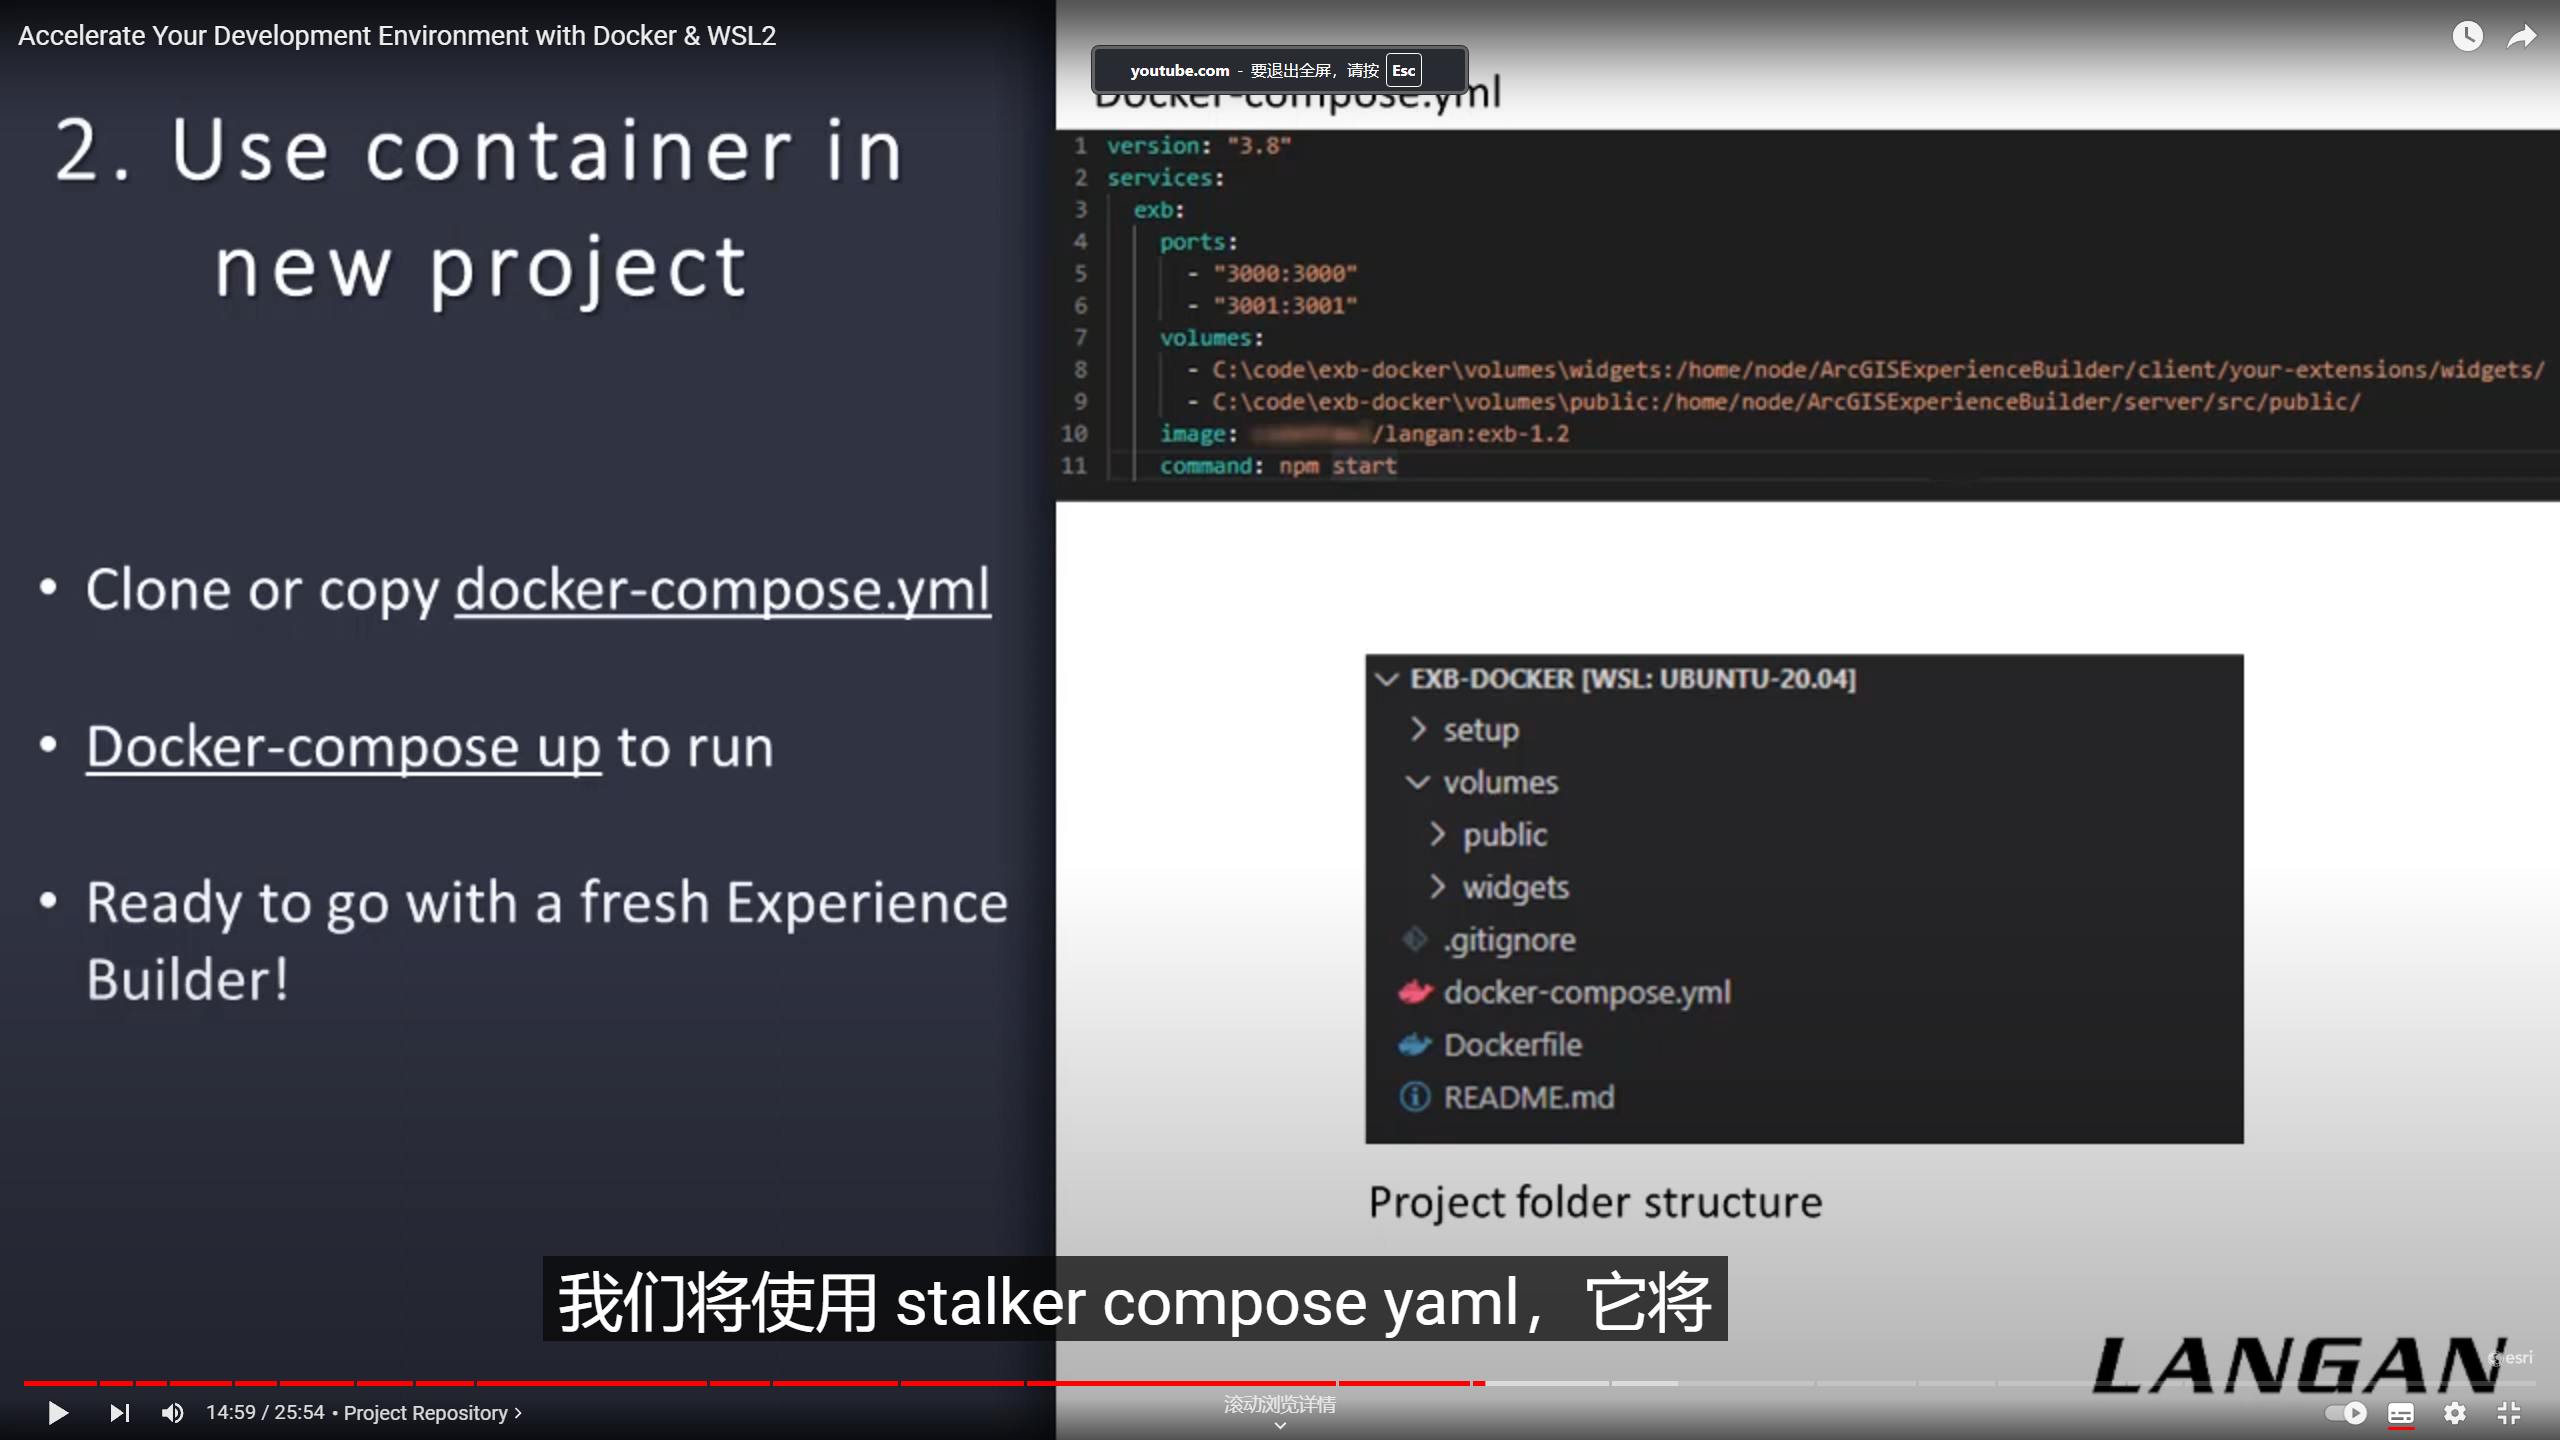
Next, we set up the project repository itself, will use this Docker compose YAML, which will be checked into get along with the code.
The Docker compose file uses the image we just built in the previous step and add some extra configuration on top of it.
This is useful in case you have significantly different requirements for each project.
You can make adjustments to the compose file, but still use the same base image with experienced builder pre-installed.
We referenced the image we built on line ten, specifying the tag.
Note that I've included the version of experience builder as a part of the tag.
This means that for future release of experienced builder, all we'd have to do is build a new image and then update this project's tag when we're ready to upgrade.
The next time the developers pull the changes and run it.
They'll all be on the upgraded version.
Lines 456 define the ports to expose from the container to our Windows host so that we can load experienced builder in our browser.
Line seven through nine, define the past that were mounting.
As I previously mentioned, these are the folders that you need to track in order to keep all of your work and get any changes in these mountains.
Folders from either side are immediately available in each environment, no sinking is necessary.
Finally, on line 11, we set the default command which will automatically startup experienced builder when the container starts.
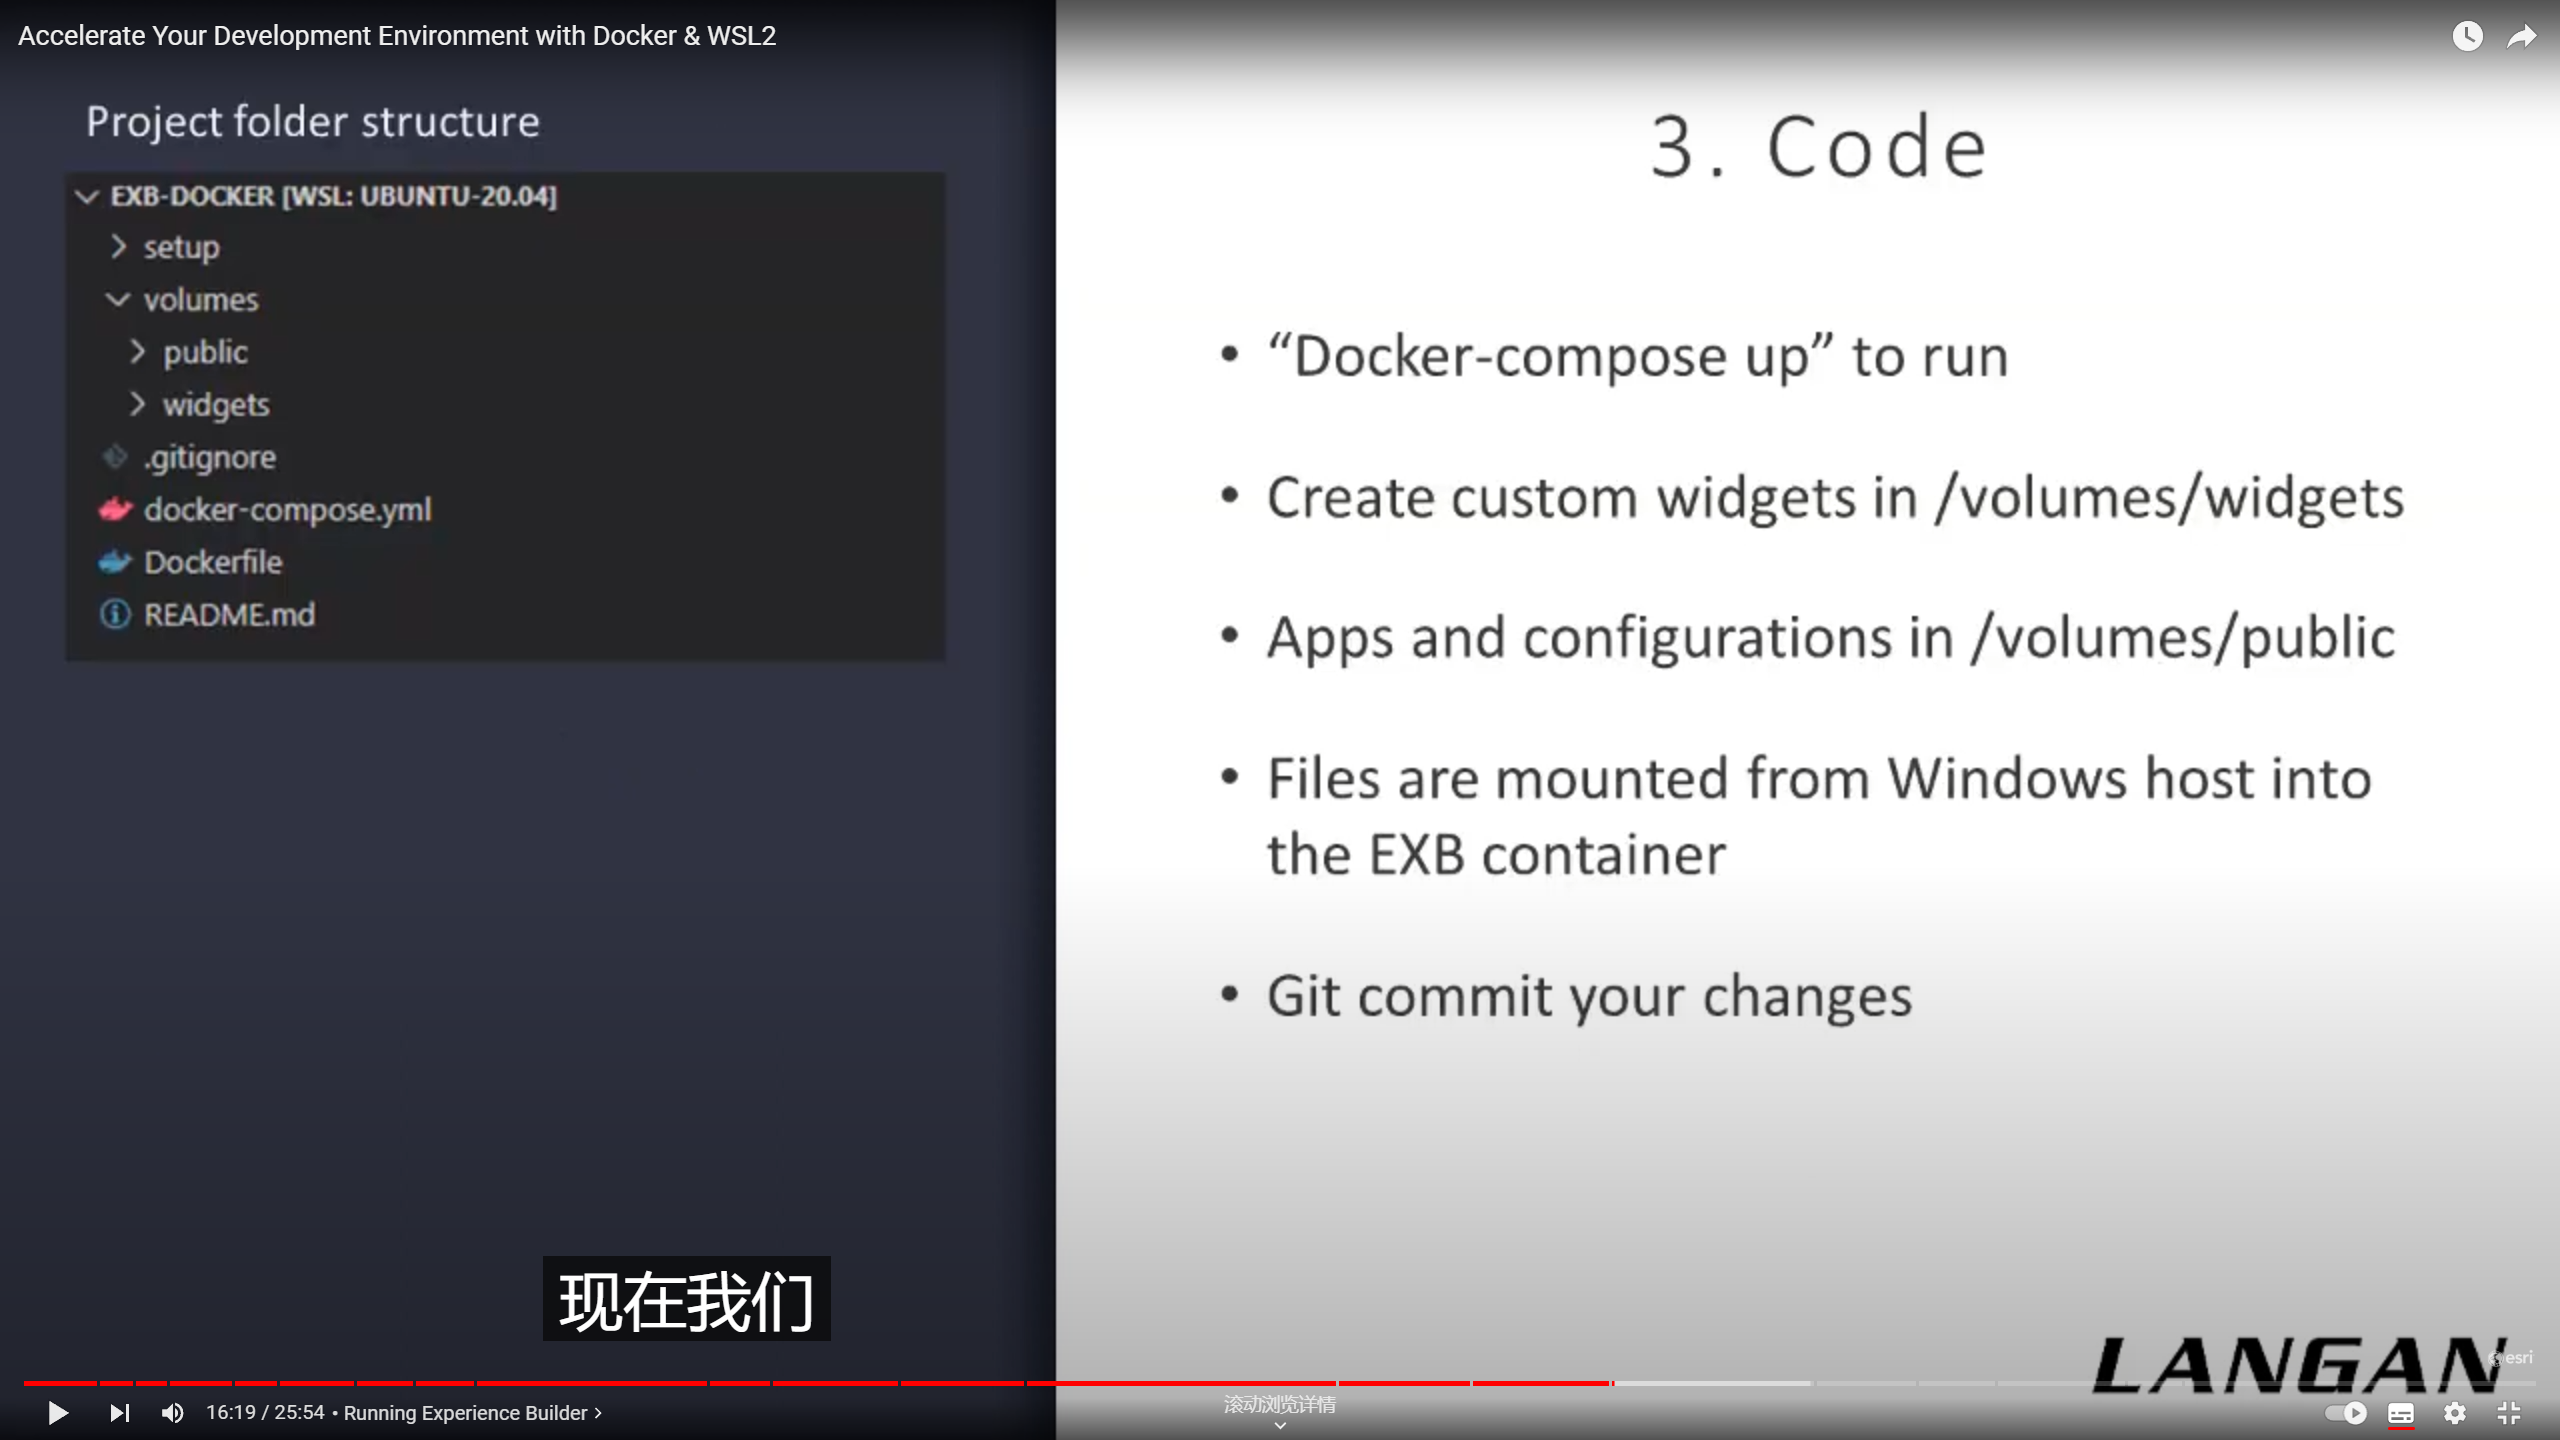
Now we can run the container and write some code.
All we need to do to start experienced builder is run Docker Compose up.
That will read the compose file that we created in the last step and launched the container.
Each developer can just run that one command.
And they've got experienced builder running and ready to develop in the previously mentioned folders are right here in the repository and ready to create widgets and write code.
演示
I have opened here my Visual Studio Code Project with the experience builder Docker repository that we're working off of.
Here is my Docker file and the Docker compose file that we just went through.
And now we're going to actually build the image with experienced builder in it.
So I open up my terminal here.
You can see that this terminal opened in WO cells Linux.
And it opened right to the path of my project, even though I'm running Visual Studio Code and Windows.
So here I'm going to enter my docker build command with the tag including what I'm building and the version, and the experimental squash flag, which reduces the overall output size of the final image.
I'm going to run that.
And we're going to see that this whole thing takes about 40 seconds.
And I'm going to speed it up a little bit just for the sake of the demo.
But in the meantime, you can see that it's outputting a lot of different content, including each step that it's running exactly what it's downloading if it needs to download anything.
And it gives you a pretty good idea what's going on.
Or if there's any errors.
There we go.
We can see it finished with no errors.
And we can just check our darker here in the Docker extension in Visual Studio Code.
And we can see that the image finished and is ready to go.
We can also open up my Docker Desktop and see that the image is also available in here.
That's the same image, but basically it just showing you that Docker is the same regardless of which interface you view it from.
Now we're going to run experienced builder with the image that we just created.
I have open here a demo project.
As you would check out from Git.
It's come with pre-set up with the public folder with an app already in it.
The widgets folder with some widgets we're developing.
We can run it just by opening the terminal and going Docker Compose up.
And that launches very quickly.
And now we can switch to Chrome.
Because we've also checked in our sign-in info file.
We don't have to retype this information every time.
And we can see that it successfully pulled down our demo app.
So that's how with just one command, multiple developers can collaborate on widgets and apps using docker with ArcGIS experienced builder.
Containerizing ArcGIS Enterprise
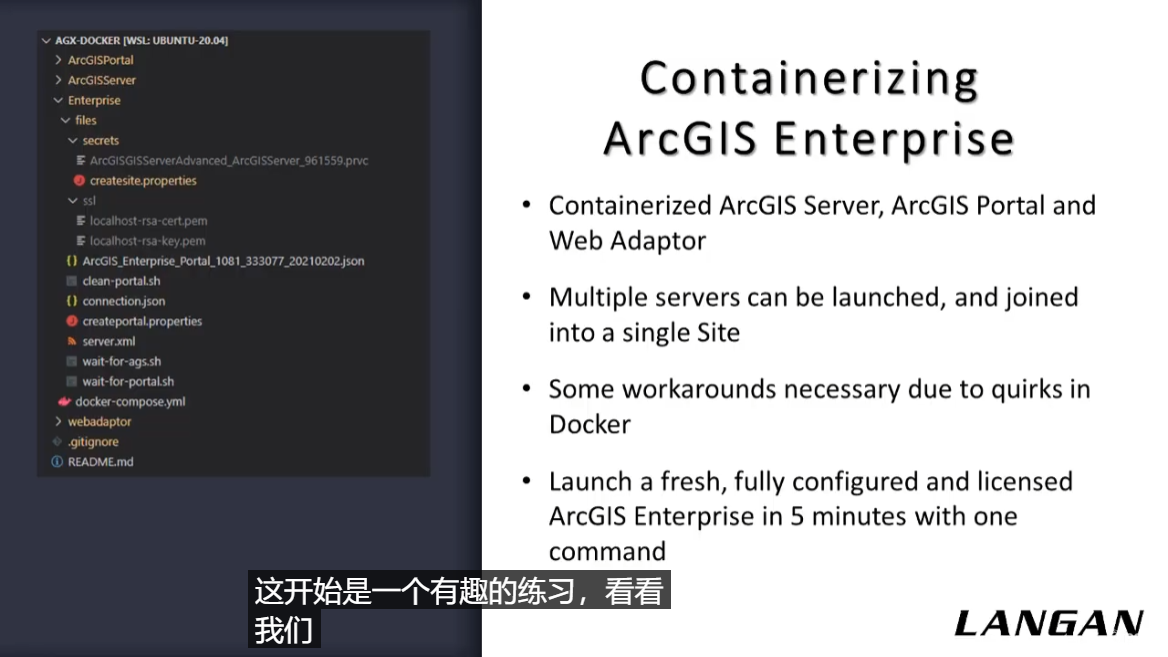
This started as a fun exercise to see what we'd actually be able to containerize and darker, but pretty quickly we realized how useful this could be.
It took a bit of work, but I was able to completely containerized ArcGIS server and ArcGIS portal.
I even have the compose file setup to launch multiple ArcGIS servers and join them together in the same server site.
With this, you can provision and launch a fully configured ArcGIS Enterprise and about five-minutes flat with just one command, docker compose f.
This is going to be useful for testing our apps against new versions of enterprise or for rapid prototyping.
This would also allow you to save your entire apps testing environment, right, with your Git repository just by including the Compose File, which frankly, I think is pretty cool.
What I did was create a base image for each component of ArcGIS Enterprise.
These images have it installed but not licensed or configured.
That way you're leaving the exact settings up to the developer as they're likely different for each project.
Also, you probably wouldn't want to bake in your license file for a bunch of different reasons.
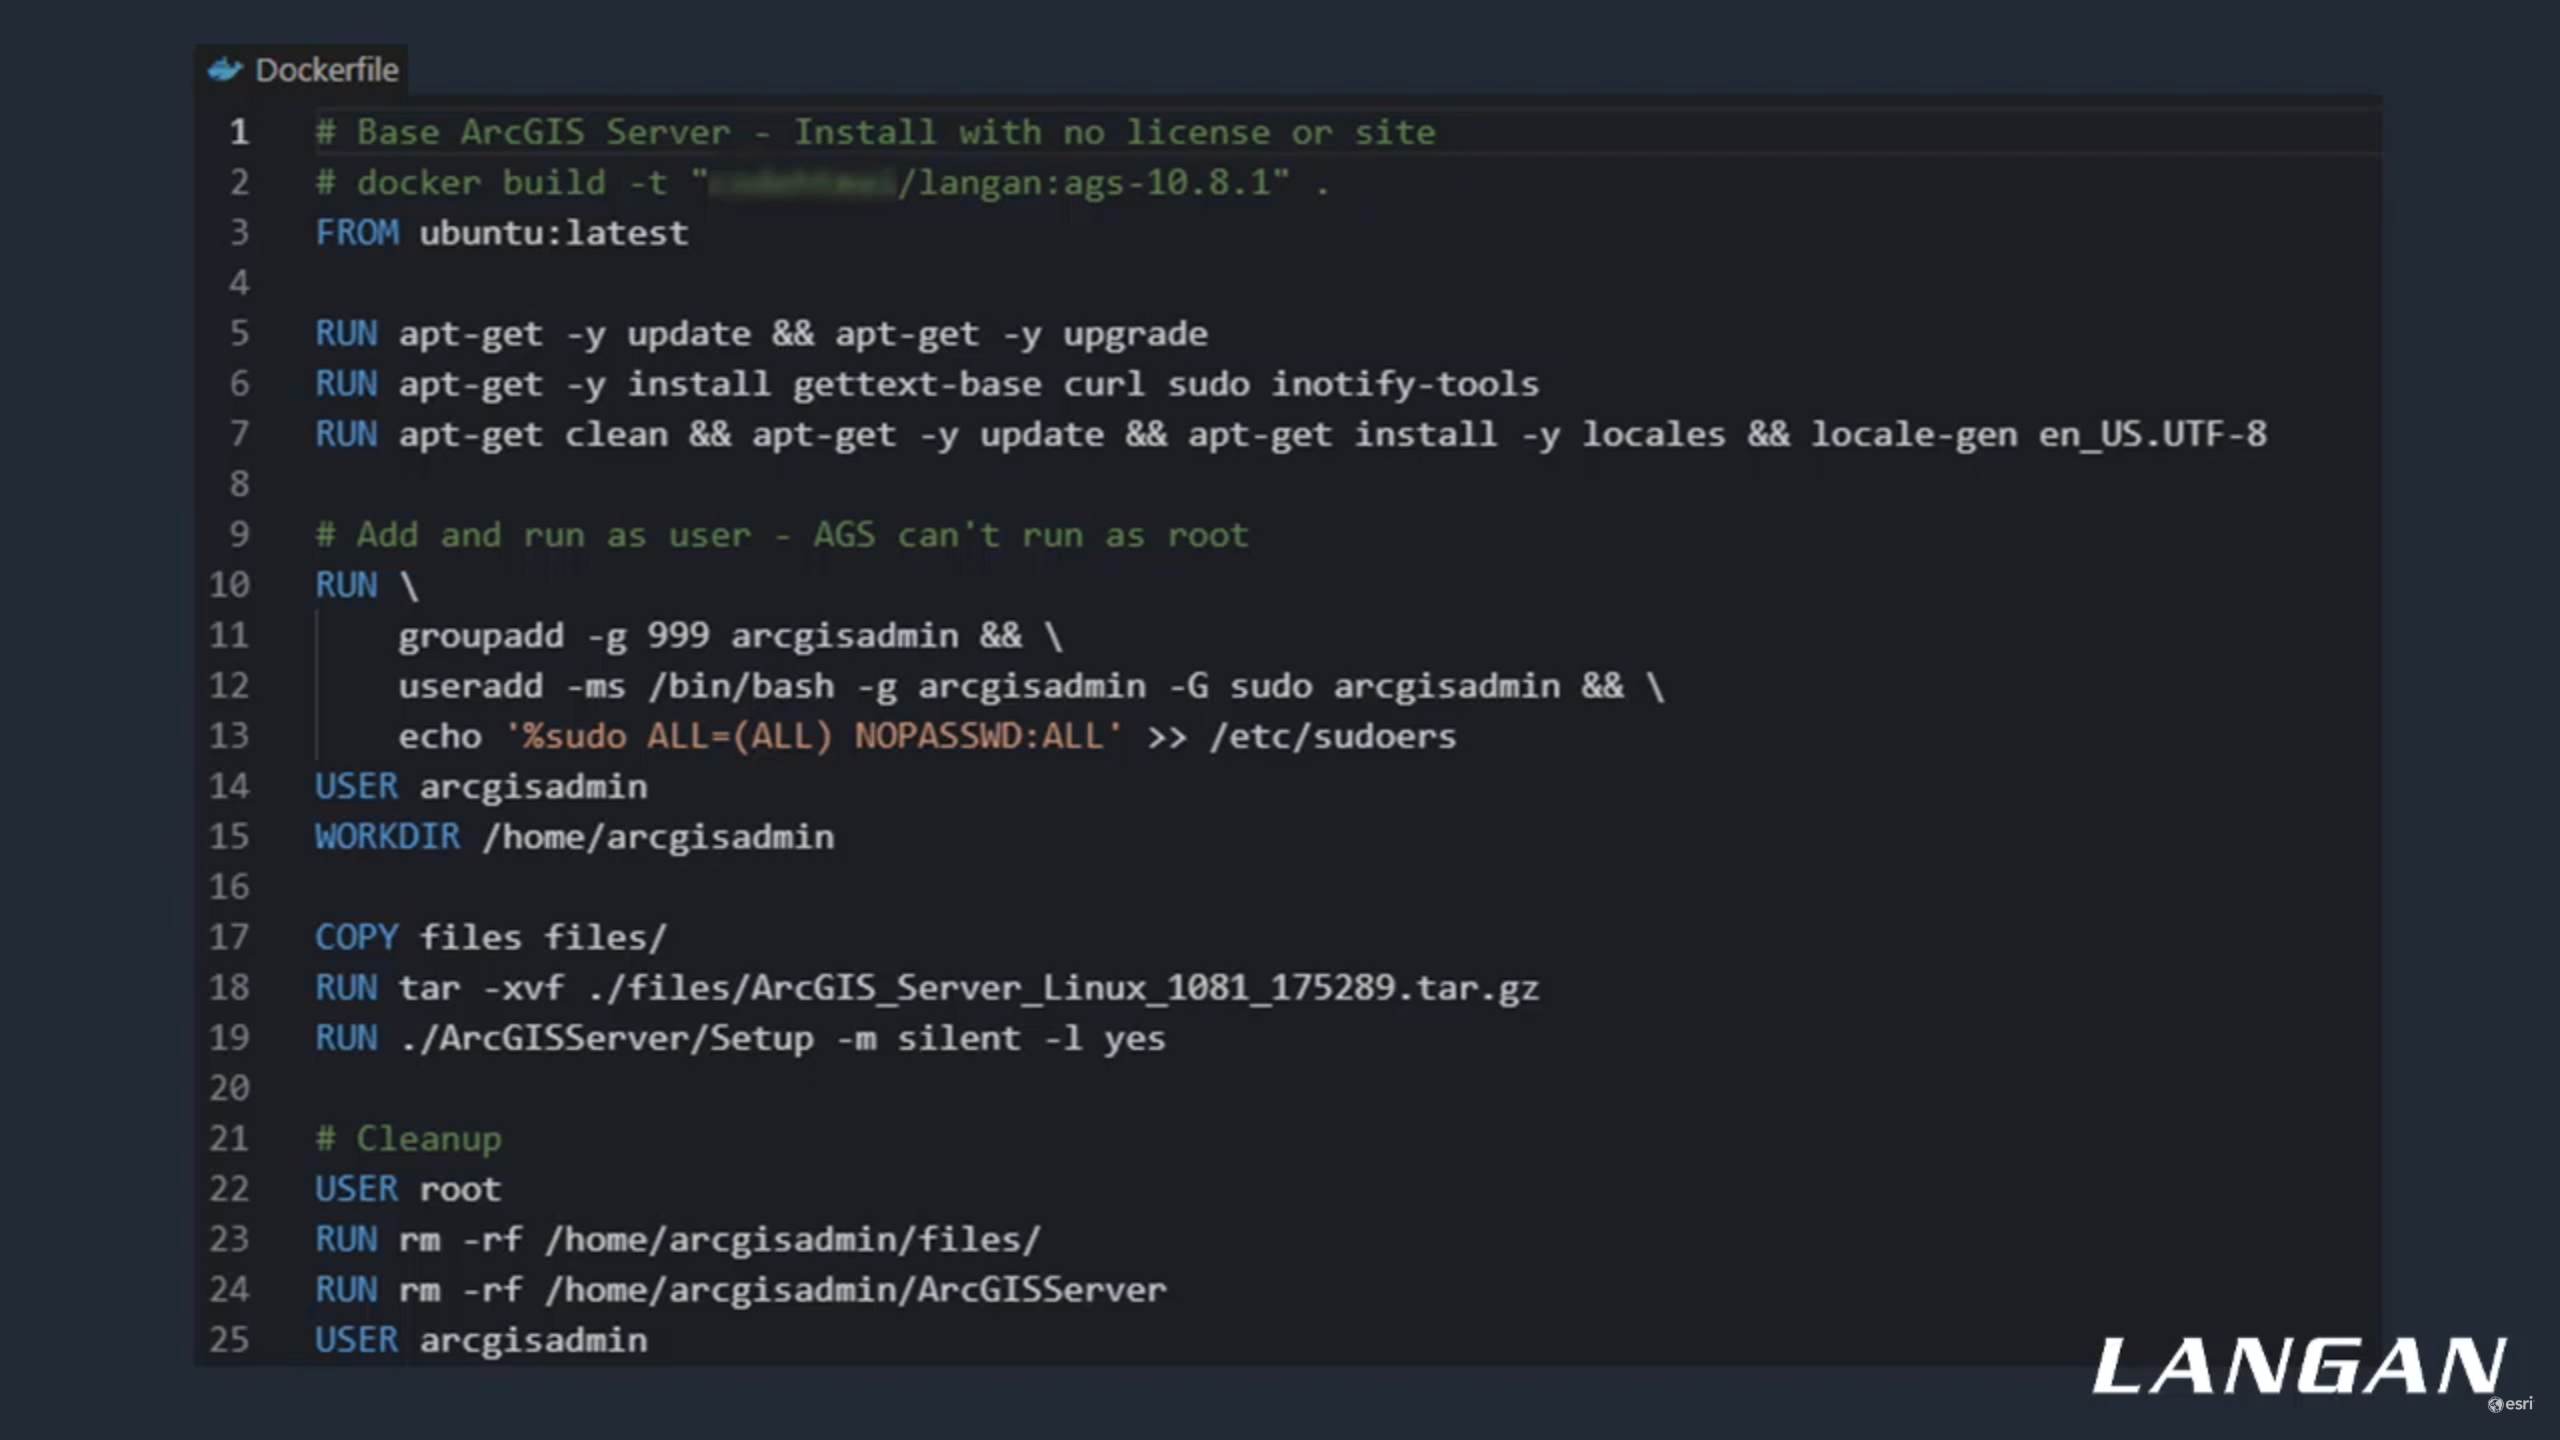
This is the Docker file for the ArcGIS server base image.
As you can see at the top, we start with an Ubuntu container and then move into installing packages.
Most of these packages are required dependencies for ArcGIS server, but a few are utilities I needed.
In the next section, we create a new ArcGIS admin user, since server can't run as root.
One problem I came across was that in darker mountain volumes always mountain as root.
This cause an issue as the arches admin user couldn't get permissions to write the config store there.
The workaround is to have ArcGIS admin shown the directory.
In order to allow that, we have to add the ArcGIS admin user to the suitors group and file.
And since it's automated, we have to set it up as passwordless.
And that's what's happening on lines 12 and 13.
Beyond that, we run the installer in silent mode and then clean up our install files to keep the final image size down.
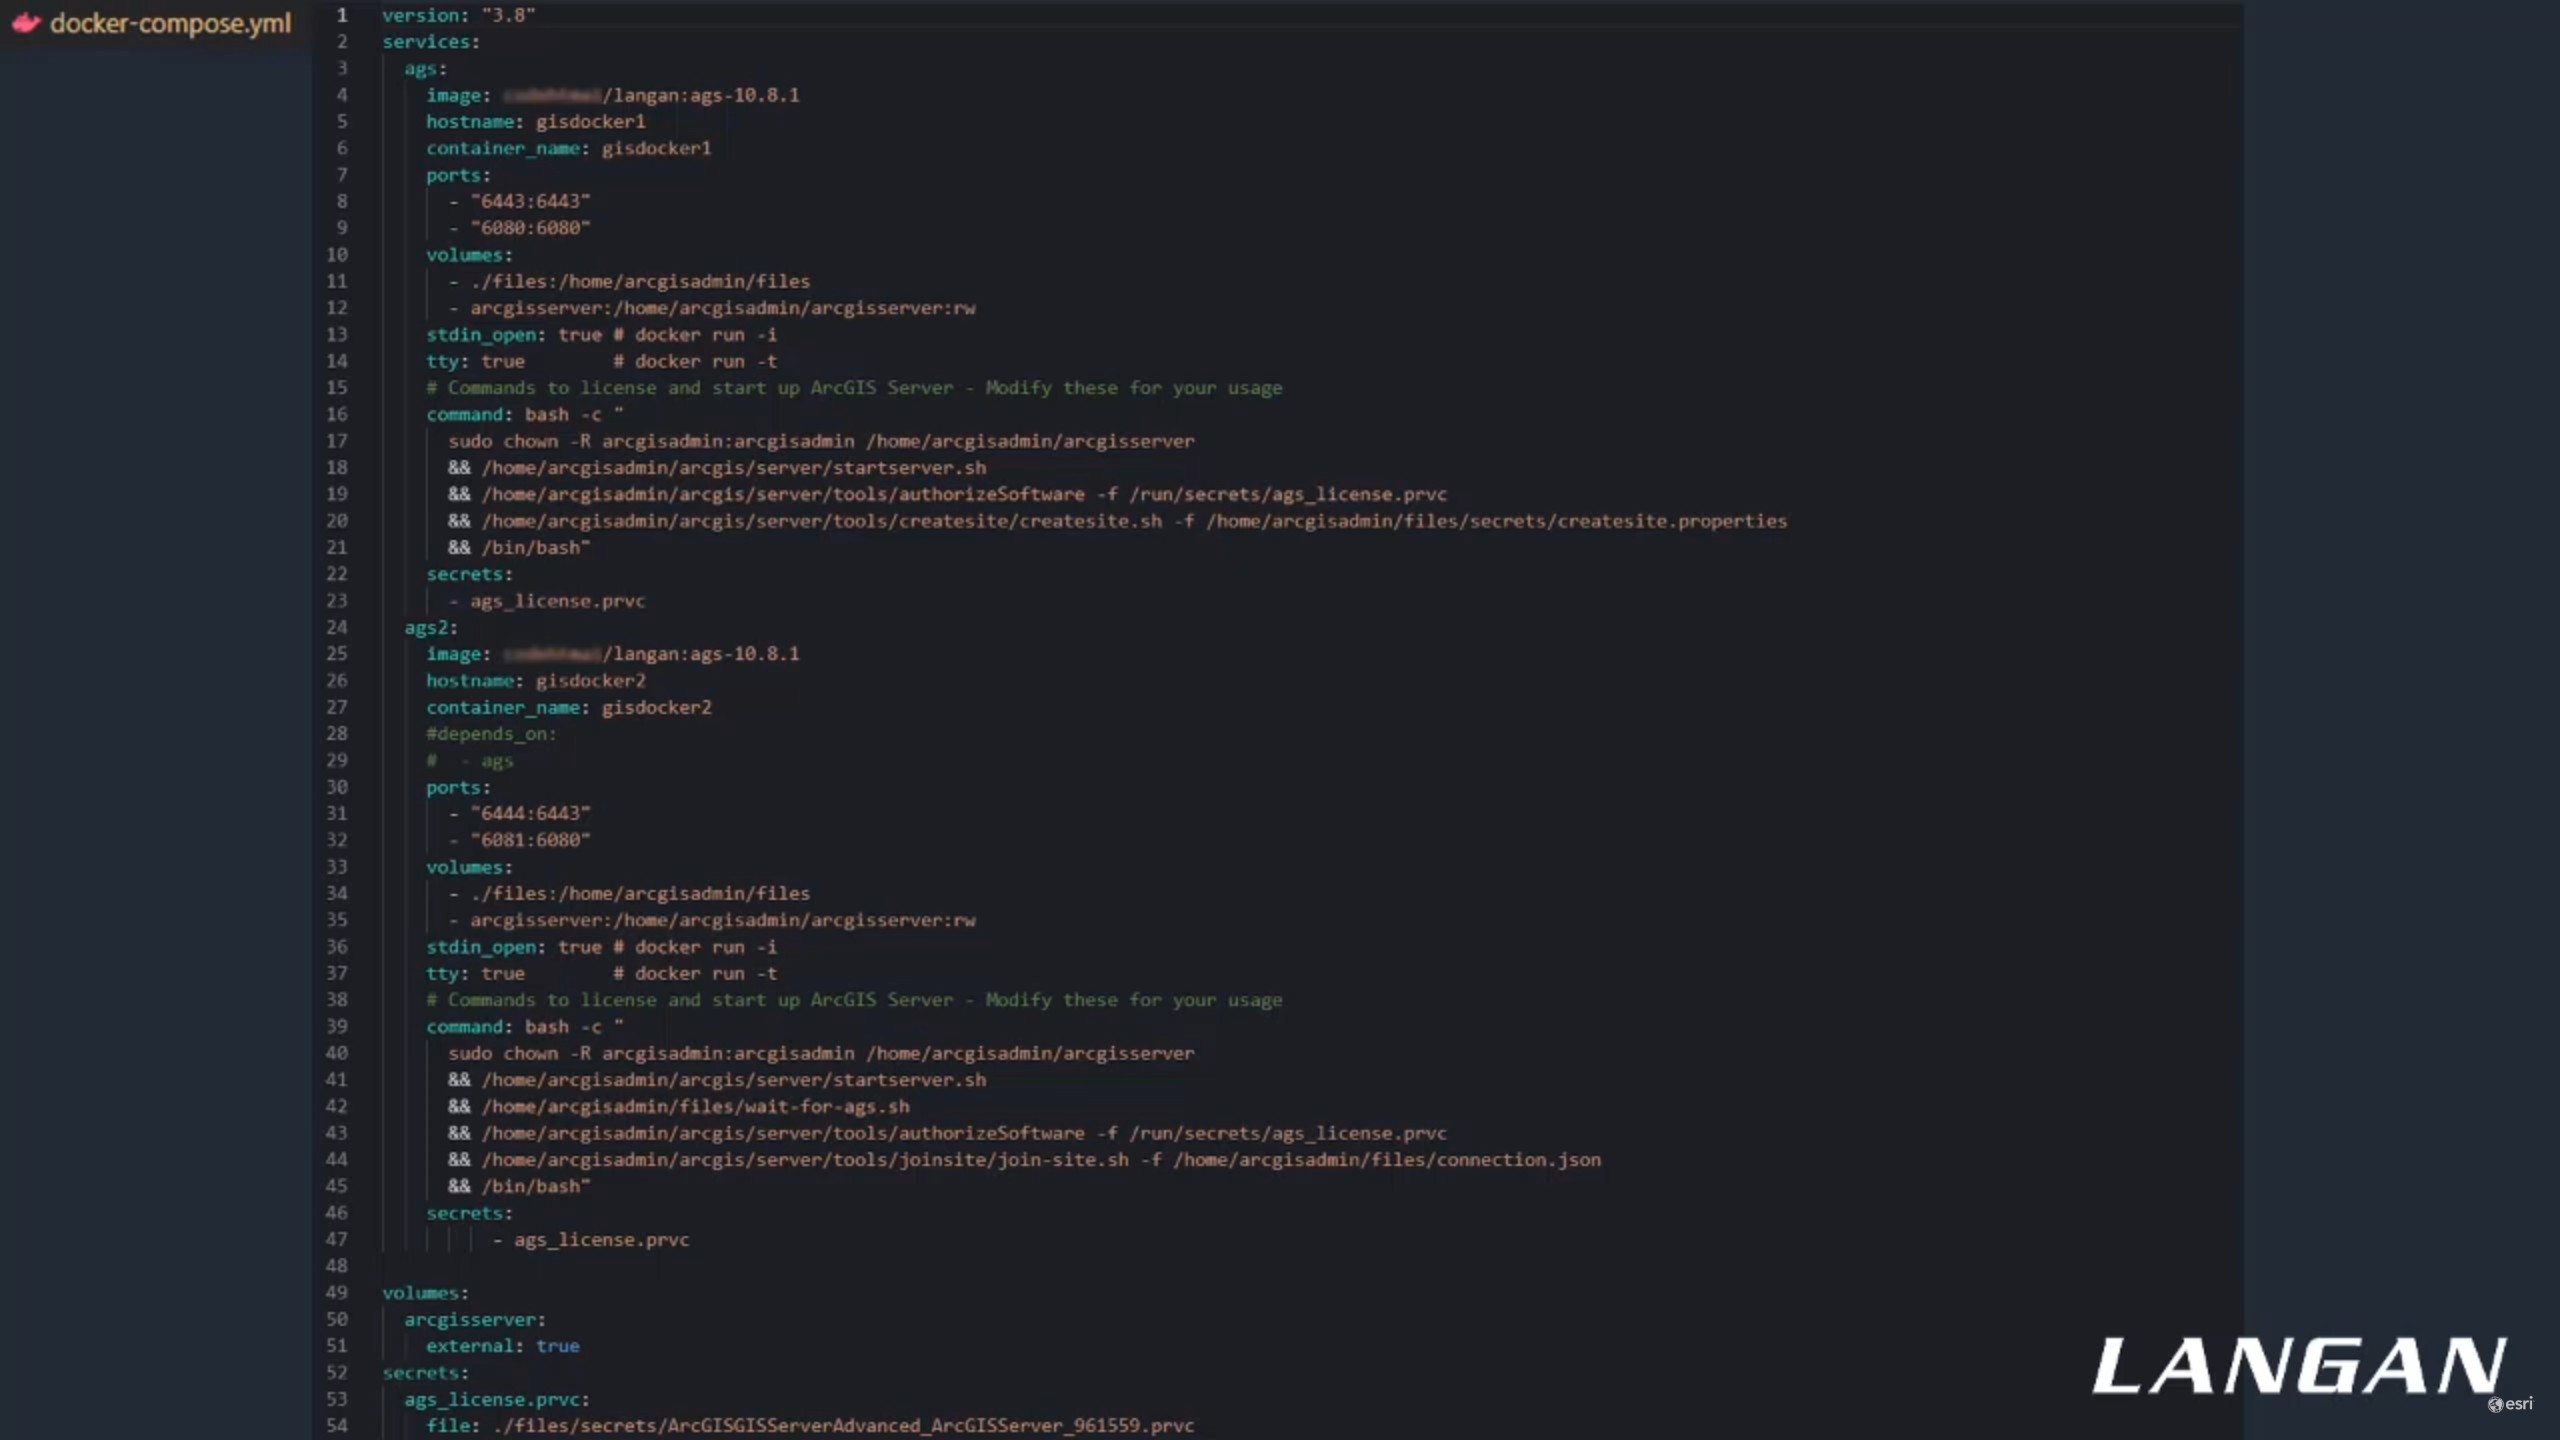
This is the compose file that launches and joins multiple ArcGIS servers together.
Hopefully this isn't too small to read, but there's a lot going on here.
Some of the commands you see are starting server, authorizing it and creating a site.
There are also some custom scripts I wrote that pulled the health check endpoints.
So actions like joining the site don't happen until it's ready.
The version of this that combined server with Portal has some more advanced logic as well, such as not creating a new site if one already exists.
Now I'm going to show you how fast and easy it is to get up and going with our ArcGIS Server Docker image.
First we're going to launch the container and we can see it, start to create it and start to authorize our first server.
This whole thing tastes less than two minutes to start.
Both servers license them and create a site.
But I'm going to speed it up a little bit just for the sake of time.
Here we can see the second ArcGIS server is sleeping, waiting for the first one to be ready before it tries to join the site.
Does that by pulling the health check endpoint.
Now it's ready, getting authorized and his joining the existing site.
Now we'll switch over to Chrome and login to Server Manager.
Login with the credentials we supplied in a config file to the composed script.
Now we can see that ArcGIS server is successfully up and running.
Let's check the site config and we can see that both machines also successfully joined the site.
So in about two minutes flat, you've got ArcGIS server provisioned and ready for development or testing in your project.
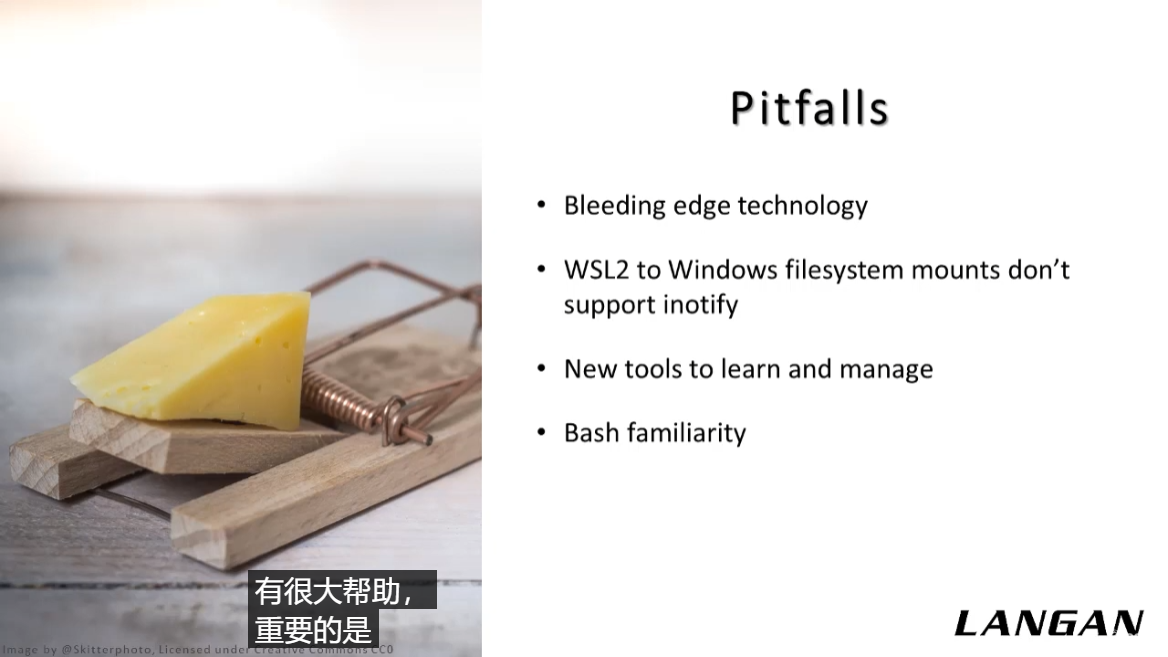
While we found Docker and WSL to overall be a big help, it's important to note that this is bleeding edge tech.
Wsl two is only a little over a year old and requires fairly recent builds on Windows tend to run.
Likewise, Docker Desktop for Windows has gone through several iterations, and it's only relatively recently that it runs on WSL two.
That means that both products are undergoing active development and have many open tickets and issues.
While containerizing the history stack, I encountered numerous roadblocks that I had to work around, some of which I've already mentioned.
One key area that needs improvement as the file system bridge between Windows and Linux.
Currently it doesn't support I notify events, which means that changes to files aren't easily picked up when reading them between environments.
This affects things like webpack watch, and hot module reloading, which automatically recompile your code and update your app as you work.
There open issues on GitHub tracking this with a lot of activity.
So hopefully Microsoft is working on a solution soon.
Another issue I came across was that darker on Windows can't resolve the containers host names.You can access them all very well through local host and the port.
If you've set up software like ArcGIS portal before, you know that it likes to redirect you to its fully qualified domain name, which in this case, Windows can't resolve.
I was able to work around this by setting up web adapter and setting the portals contexts URL to my local systems name.
But I think this highlights the type of unexpected issues you may run across.
Beyond those sorts of specific problems.
There's of course the aspect to it that these are new tools to learn and manage, each with their own idiosyncrasies.
Well, I do think it's worth the time investment.
It's still another new thing to learn.
And finally, some of the usefulness around WSL that we've covered today is certainly centered around you actually liking Linux and the shell.
If you're a hardcore Windows Developer and do everything in PowerShell already, this all may be somewhat less appealing to you.
That said, you can still leverage Docker to run Windows-based containers.
That wraps up our presentation.
Thank you for watching and I hope you found these tools as interesting as we do.
Our contact information is here, including the spatial Community Slack.
If you have any questions or comments, please don't hesitate to reach out.
Thank you.
