任务需求
1.部署一台web服务器,提供静态网页的展示,该网站的html等静态资源远程存储在NFS服务器。
2.部署NFS服务器,创建共享文件夹(提供静态文件),发布该共享目录,提供给web服务器使用。
主机列表
# 外网地址                内网地址          主机名
192.168.122.207   172.16.1.207  web-test-209
192.168.122.231  172.16.1.231  nfs-test-231
192.168.122.241  172.16.1.241  rsync-test-241
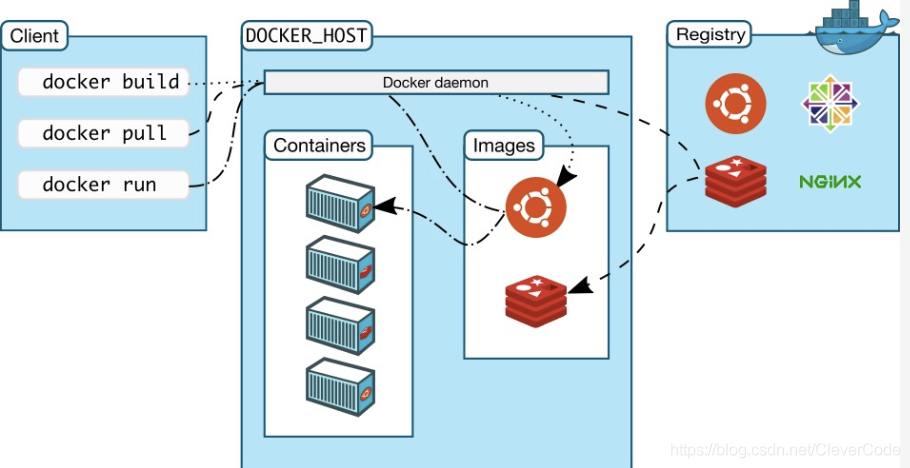
架构图


开始实操
1.在nfs-test-231服务器部署nfs服务端
1.1.安装nfs及rpcbind服务
[root@nfs-test-231 ~]# yum install nfs-utils rpcbind -y1.2.启动rpcbind服务
[root@nfs-test-231 ~]# systemctl start rpcbind1.3.创建共享目录/nfs-web-share,以及创建共享的文件
[root@nfs-test-231 ~]# mkdir -p /nfs-web-share/
[root@nfs-test-231 ~]# echo '<meta charset=utf8> 这是一个网页' > /nfs-web-share/index.html
[root@nfs-test-231 ~]# ls /nfs-web-share/
index.html
1.4.修改目录权限
[root@nfs-test-231 ~]# chown -R nfsnobody.nfsnobody /nfs-web-share/index.html
[root@nfs-test-231 ~]# ls -l /nfs-web-share/
总用量 4
-rw-r--r-- 1 nfsnobody nfsnobody 39 11月 15 09:55 index.html
1.5.查看该用户信息
[root@nfs-test-231 ~]# grep nfsnobody /etc/passwd
nfsnobody:x:65534:65534:Anonymous NFS User:/var/lib/nfs:/sbin/nologin
1.6.修改nfs配置文件,设置共享文件的规则
insecure 是客户端从大于1024的端口发送链接
all_squash 不管是root还是其他普通用户创建的文件的属主和属组都是nfsnobody
rw  允许读写
sync 数据同步到磁盘
[root@nfs-test-231 ~]# vim /etc/exports
[root@nfs-test-231 ~]# cat /etc/exports
/nfs-web-share  172.16.1.0/24(all_squash,insecure,rw,sync)
1.7.重新加载nfs服务,查看rpcbind进程,是否出现了111端口
[root@nfs-test-231 ~]# systemctl restart nfs
[root@nfs-test-231 ~]# netstat -tnlp|grep rpc
tcp        0      0 0.0.0.0:111             0.0.0.0:*               LISTEN      11060/rpcbind
tcp        0      0 0.0.0.0:20048           0.0.0.0:*               LISTEN      11243/rpc.mountd
tcp        0      0 0.0.0.0:44823           0.0.0.0:*               LISTEN      11220/rpc.statd
tcp6       0      0 :::111                  :::*                    LISTEN      11060/rpcbind
tcp6       0      0 :::20048                :::*                    LISTEN      11243/rpc.mountd
tcp6       0      0 :::46427                :::*                    LISTEN      11220/rpc.statd
1.8.查看nfs服务端共享情况
[root@nfs-test-231 ~]# showmount -e
Export list for nfs-test-231:
/nfs-web-share 172.16.1.0/24
1.9.查看nfs服务端远程共享的所有参数
是系统自动生成的,以及我们配置文件里定义的,都是默认的不需要了解太多
cat /var/lib/nfs/etab
/nfs-web-share  172.16.1.0/24(rw,sync,wdelay,hide,nocrossmnt,insecure,root_squash,all_squash,no_subtree_check,secure_locks,acl,no_pnfs,anonuid=65534,anongid=65534,sec=sys,rw,insecure,root_squash,all_squash)
[root@nfs-test-231 ~]#
1.10.把nfs服务端本地当做一个客户端,本地挂载该共享目录访问试试
挂载后,的确访问到了该共享目录的数据。
[root@nfs-test-231 ~]# mount -t nfs 172.16.1.231:/nfs-web-share /mnt
[root@nfs-test-231 ~]# ls /mnt
index.html
[root@nfs-test-231 ~]# cat /mnt/index.html
<meta charset=utf8> 这是一个网页
1.11.取消挂载,也就看不到数据了。
[root@nfs-test-231 ~]# umount /mnt
[root@nfs-test-231 ~]# cat /mnt/index.html
cat: /mnt/index.html: 没有那个文件或目录
[root@nfs-test-231 ~]#
至此,nfs服务端就搞定了
注意:
/etc/exports文件的语法不要写错,细心
修改/etc/exports文件后,只需systemctl reload nfs或是exportfs -r重新加载配置,无需重启
2.在web-test-207服务器部署nfs客户端
2.1.安装nfs及rpcbind服务
[root@web-test-207 ~]# yum install nfs-utils rpcbind -y
2.2.确保rpc服务正常
[root@web-test-207 ~]# systemctl start rpcbind
[root@web-test-207 ~]# systemctl status rpcbind
● rpcbind.service - RPC bind serviceLoaded: loaded (/usr/lib/systemd/system/rpcbind.service; enabled; vendor preset: enabled)Active: active (running) since 五 2024-11-15 10:50:35 CST; 2s agoProcess: 1904 ExecStart=/sbin/rpcbind -w $RPCBIND_ARGS (code=exited, status=0/SUCCESS)Main PID: 1905 (rpcbind)CGroup: /system.slice/rpcbind.service└─1905 /sbin/rpcbind -w11月 15 10:50:35 web-test-207 systemd[1]: Starting RPC bind service...
11月 15 10:50:35 web-test-207 systemd[1]: Started RPC bind service.
[root@web-test-207 ~]#
2.3.远程查看共享文件信息
[root@web-test-207 ~]#  showmount -e 172.16.1.231
Export list for 172.16.1.231:
/nfs-web-share 172.16.1.0/24
2.4.进行挂载测试
[root@web-test-207 ~]# mount -t  nfs 172.16.1.231:/nfs-web-share/ /mnt
[root@web-test-207 ~]# mount -l |grep mnt
172.16.1.231:/nfs-web-share on /mnt type nfs4 (rw,relatime,vers=4.1,rsize=262144,wsize=262144,namlen=255,hard,proto=tcp,timeo=600,retrans=2,sec=sys,clientaddr=172.16.1.207,local_lock=none,addr=172.16.1.231)
[root@web-test-207 ~]#
2.5.进入共享文件夹,读写操作
[root@web-test-207 ~]# cd /mnt
[root@web-test-207 mnt]# ll
总用量 4
-rw-r--r-- 1 nfsnobody nfsnobody 51 11月 15 10:56 index.html
[root@web-test-207 mnt]# cat index.html
<meta charset=utf8> 这是一个网页
[root@web-test-207 mnt]# echo 'hello world' >> index.html
[root@web-test-207 mnt]# cat index.html
<meta charset=utf8> 这是一个网页
hello world
[root@web-test-207 mnt]#
切换到nfs-test-231机器查看目录和文件
[root@nfs-test-231 ~]# cd /nfs-web-share/
[root@nfs-test-231 nfs-web-share]# ll
总用量 4
-rw-r--r-- 1 nfsnobody nfsnobody 51 11月 15 10:56 index.html
[root@nfs-test-231 nfs-web-share]# cat index.html
<meta charset=utf8> 这是一个网页
hello world
3.在web-test-205部署nginx网站服务
3.1.安装nginx软件
[root@web-test-207 ~]# yum install -y nginx
3.2.查看nginx网页目录的默认文件
[root@web-test-207 ~]# ls /usr/share/nginx/html/
404.html  50x.html  index.html  nginx-logo.png  poweredby.png
3.3.挂载nfs共享文件夹到nginx的网页目录,让nginx可以读取到nfs的共享数据
执行mount挂载后,文件夹的内容会被隐藏,显示nfs共享的数据。
[root@web-test-207 ~]# mount -t nfs 172.16.1.231:/nfs-web-share /usr/share/nginx/html/
[root@web-test-207 ~]# mount -l | grep nfs
172.16.1.231:/nfs-web-share on /usr/share/nginx/html type nfs4 (rw,relatime,vers=4.1,rsize=262144,wsize=262144,namlen=255,hard,proto=tcp,timeo=600,retrans=2,sec=sys,clientaddr=172.16.1.207,local_lock=none,addr=172.16.1.231)[root@web-test-207 ~]# ls /usr/share/nginx/html/
index.html
3.4.启动nginx,查看网页
[root@web-test-207 ~]# systemctl start nginx
3.5.查看nginx端口,进程
[root@web-test-207 ~]#  ps -ef|grep nginx
root      2485     1  0 12:12 ?        00:00:00 nginx: master process /usr/sbin/nginx
nginx     2486  2485  0 12:12 ?        00:00:00 nginx: worker process
nginx     2487  2485  0 12:12 ?        00:00:00 nginx: worker process
root      2572  1692  0 12:29 pts/0    00:00:00 grep --color=auto nginx
[root@web-test-207 ~]# netstat -tnlp|grep nginx
tcp        0      0 0.0.0.0:80              0.0.0.0:*               LISTEN      2485/nginx: master
tcp6       0      0 :::80                   :::*                    LISTEN      2485/nginx: master
3.6.用浏览器访问该机器的ip:80端口

4.更新网页内容
我们客户端的nginx页面,是来自于nfs服务端的
4.1.修改nfs服务端文件
[root@nfs-test-231 ~]# echo '<h1>其实我来自nfs服务端</h1>' >> /nfs-web-share/index.html
[root@nfs-test-231 ~]# cat /nfs-web-share/index.html
<meta charset=utf8> 这是一个网页
hello world
<h1>其实我来自nfs服务端</h1>
[root@nfs-test-231 ~]#
4.2.再次访问客户端的nginx网页


