一、AFL++
这里我们主要使用AFL++ Fuzzing 测试IOT的二进制文件,当我们解压提取一个固件时,能够获得大量的IOT二进制应用 ,如果要进行漏洞挖掘则需要将二进制文件进行逆向分析,然后查找危险函数以及输入接口,对于一个大型的应用,直接进行二进制分析会大大降低我们的效率,所以可以使用Fuzzing技术对IOT的二进制文件进行模糊测试,提高漏洞挖掘效率。
对于IOT的二进制文件通常由于架构的不同,不能直接进行Fuzzing, AFL++可以使用Qemu、Unicorn或Frida 三种模式进行Fuzzing,虽然不如有源码进行Fuzzing高效,但是其适用面广,并且同样能提高漏洞挖掘效率。
AFL++使用qemu用户模式模拟仿真来运行二进制文件,其使用的qemu是进行修改的版本,在程序执行时检测基本块,根据收集的信息生成测试用例,通过生成的大量测试用例触发不同的代码路径,从而提高代码的覆盖率,提高触发Crash的概率。
AFL++和其他的类似的Fuzzing工具(AFL,hongfuzz等)一样,仅适用于文件输入的Fuzzing,不支持从套接字输入的程序,对于套接字的Fuzzing测试在下篇进行讲解,本篇文件将重点落在环境的搭建及文件输入相关的二进制应用的Fuzzing
二、AFL++环境搭建
系统环境:任何Linux系统上编译
测试固件:TP-Link SR20、Cisco RV130X
$ sudo apt update
$ sudo apt install git make build-essential clang ninja-build pkg-config libglib2.0-dev libpixman-1-dev
$ git clone https://github.com/AFLplusplus/AFLplusplus.git
$ cd AFLplusplus
$ make all
$ cd qemu_mode
$ CPU_TARGET=arm ./build_qemu_support.sh # 这里编译ARM架构的
三、AFL++案例
3.1、AFL++测试TP-Link SR20路由器固件
固件的下载地址如下: https://static.tp-link.com/2018/201806/20180611/SR20(US)_V1_180518.zip
使用Binwalk提取固件:
$ binwalk -Me tpra_sr20v1_us-up-ver1-2-1-P522_20180518-rel77140_2018-05-21_08.42.04.bin解包后结果:

接下来我们查找来自文件输入的程序进行Fuzzing测试: 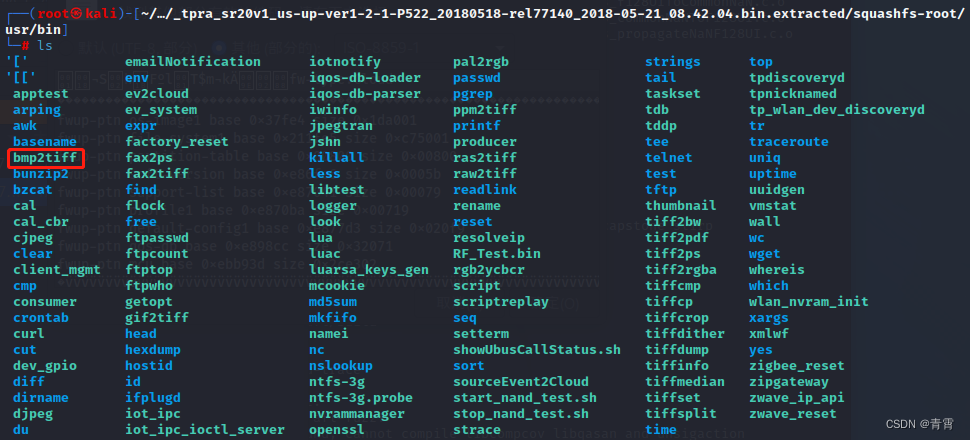
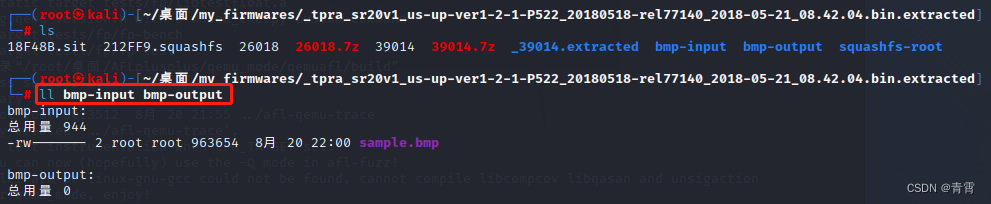
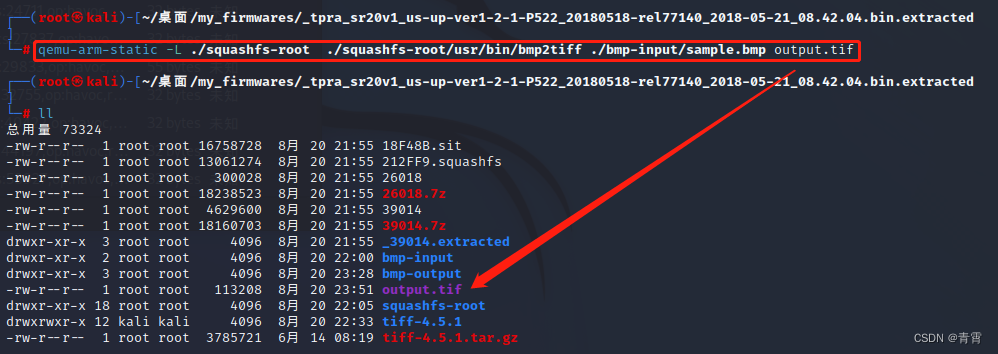
这里可以看到大家耳熟能详的bmp2tiff应用,那么我们就拿bmp2tiff进行Fuzzing测试,生成一个bmp的测试用例,将测试用例放到创建的bmp-input文件夹中,同时创建bmp-output Fuzzing输出文件夹
查看bmp2tiff指令的使用方法:
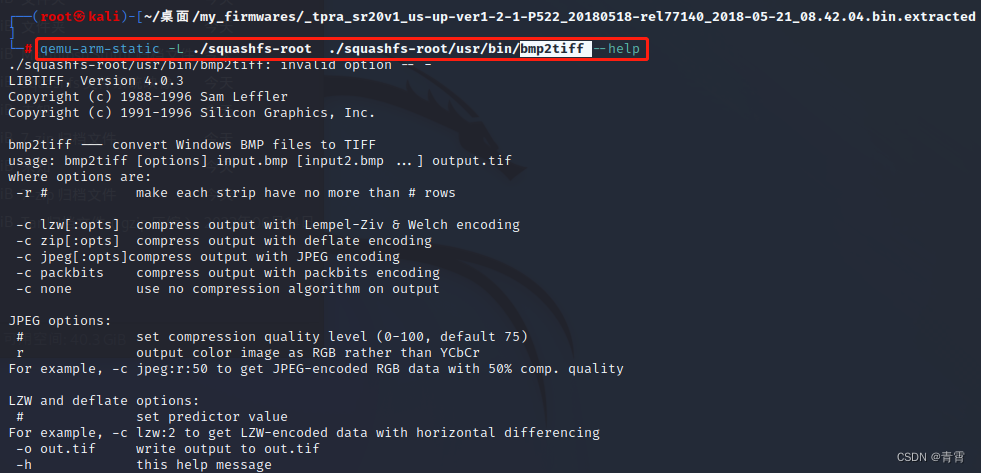
执行bmp2tiff:
接下来, root权限下执行以下命令进行Fuzzing测试:
$ QEMU_LD_PREFIX=./squashfs-root/   /root/桌面/AFLplusplus/afl-fuzz  \-Q \-i bmp-input \-o bmp-output \-- ./squashfs-root/usr/bin/bmp2tiff @@ /dev/null-Q:适用qemu模式
-i:输入文件夹
-o:输出文件夹
@@:表示将用来替换的样本
/dev/null:忽略错误信息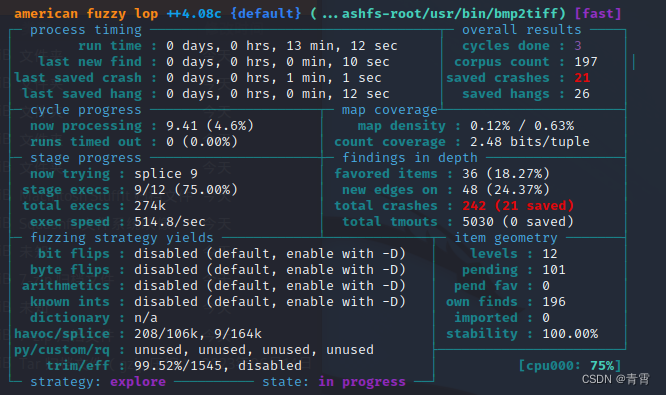
可以看到在Fuzzing期间触发了21个crash。
这里使用程序直接解析生成的crash文件:


3.2、AFL++测试Cisco RV130X路由器的固件
固件下载地址如下: 可以从 https://software.cisco.com/download/home/285026141/type/282465789/release/1.0.3.55?i=!pp 下载。该文件名为 RV130X_FW_1.0.3.55.bin
binwalk提取固件,提取后的文件系统如下:
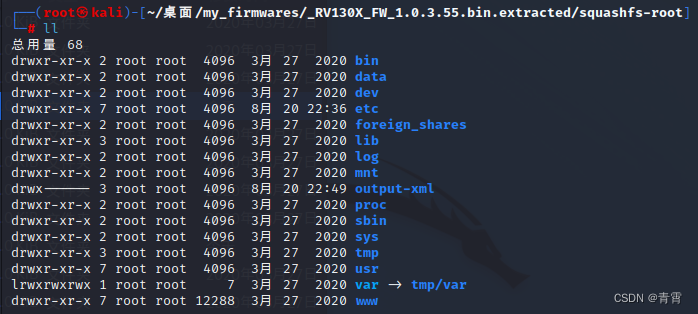
我们将研究对 /usr/sbin/ 中的 jsonparse 和 xmlparser1 二进制文件进行模糊测试。 这些程序接受来自文件的输入,非常适合模糊测试。 我们没有可用的源代码,因此我们必须使用 Qemu 模式。

3.2.1、模糊测试xmlparser1
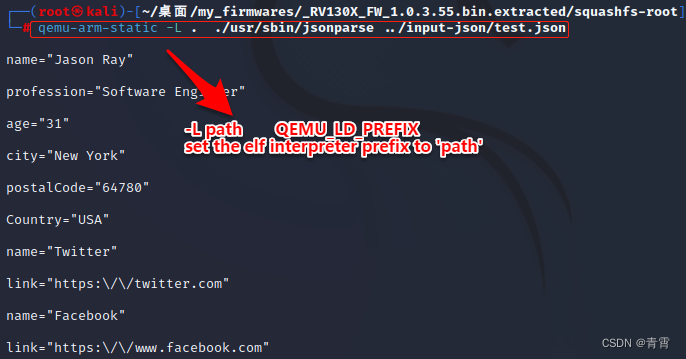
在模糊测试之前,我们需要知道程序如何接受输入。使用 –help 参数使用 qemu-arm-static 运行 xmlparser1 会显示使用情况。它接受带有 -f 参数的文件名。-d 参数代表调试。
qemu-arm-static -L . ./usr/sbin/ xmlparser1 --help # -L path EMU_LD_PREFIX set the elf interpreter prefix to 'path'

我们可以创建一个 测试 XML 文件并运行 xmlparser1: test.xml
<?xml version="1.0" encoding="UTF-8"?><shiporder orderid="889923" xmlns:xsi="http://www.w3.org/2001/XMLSchema-instance"
xsi:noNamespaceSchemaLocation="shiporder.xsd"><orderperson>John Smith</orderperson><shipto><name>Ola Nordmann</name><address>Langgt 23</address><city>4000 Stavanger</city><country>Norway</country></shipto><item><title>Empire Burlesque</title><note>Special Edition</note><quantity>1</quantity><price>10.90</price></item><item><title>Hide your heart</title><quantity>1</quantity><price>9.90</price></item></shiporder>
创建两个目录 input-xml 和 output-xml 并将 test.xml 文件移动到 input-xml,如图所示。
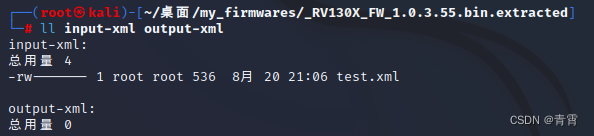
运行 xmlparser1:

xmlparser1 显示 test.xml 文件的解析内容。 我们现在可以继续进行模糊测试。 要运行模糊器,我们需要提供一个输入文件,模糊器将使用该文件生成进一步的测试用例。 我们将指定 test.xml 作为我们的输入文件。
我们现在可以启动 afl-fuzz:
$ /root/桌面/my_firmwares/_RV130X_FW_1.0.3.55.bin.extracted/
$ QEMU_LD_PREFIX=./squashfs-root/ /root/桌面/AFLplusplus/afl-fuzz \-Q \-i input-xml/ \-o output-xml/ \-- ./squashfs-root/usr/sbin/xmlparser1 -f @@-Q:在 Qemu 模式下使用 AFL++
-i:输入目录的路径
-o:输出目录的路径。此目录将包含触发二进制文件上有趣行为的文件,例如崩溃或挂起
在运行时,AFL++ 会将@@ 参数替换为输入文件的名称 
3.2.2、模糊测试 jsonparse
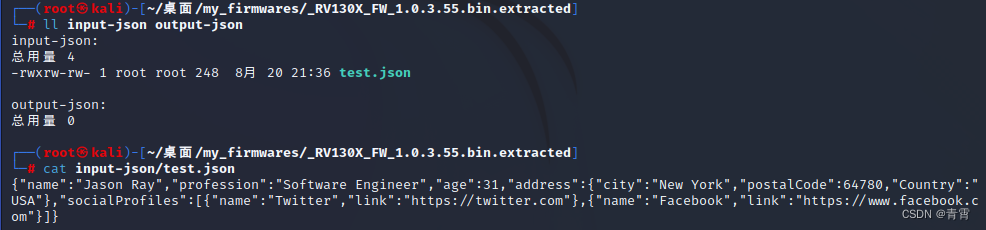
创建一个 测试JSON文件 并在其上运行jsonparser:test.json
{"name":"Jason Ray","profession":"Software Engineer","age":31,"address":{"city":"New York","postalCode":64780,"Country":"USA"},"socialProfiles":[{"name":"Twitter","link":"https://twitter.com"},{"name":"Facebook","link":"https://www.facebook.com"}]}创建两个目录 input-json 和 output-json 并将 test.json 文件移动到 input-json:
运行jsonparser:
root权限下执行如下命令进行Fuzzing测试:
$ /root/桌面/my_firmwares/_RV130X_FW_1.0.3.55.bin.extracted/
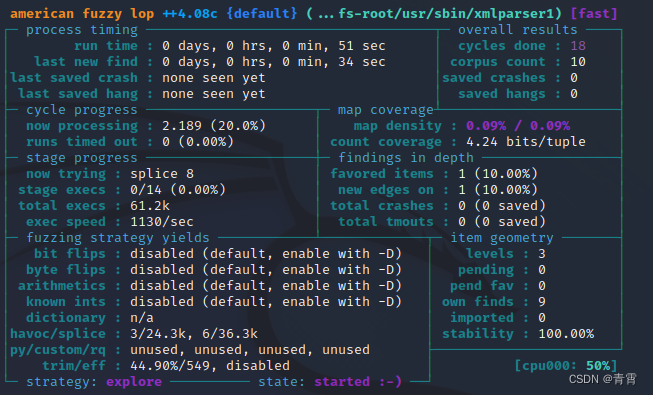
QEMU_LD_PREFIX=./squashfs-root/ /root/桌面/AFLplusplus/afl-fuzz \-Q \-i input-json \-o output-json \-- ./squashfs-root/usr/sbin/jsonparse @@
可以看到也出现了crash,这里使用程序直接解析生成的crash文件:
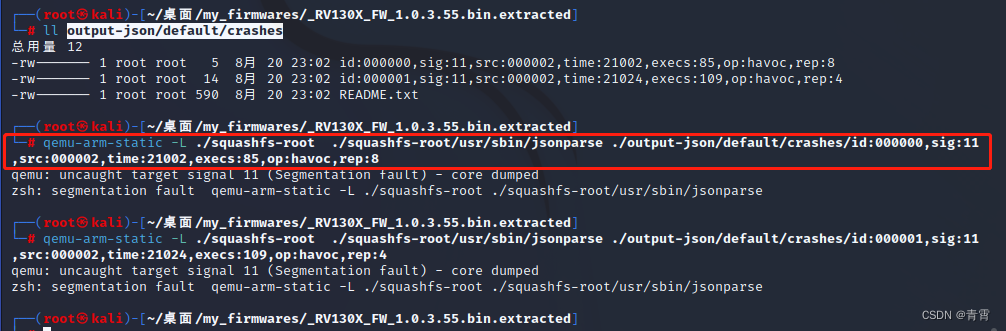
这里可以看到触发段错误。
四、参考
GitHub - AFLplusplus/AFLplusplus: The fuzzer afl++ is afl with community patches, qemu 5.1 upgrade, collision-free coverage, enhanced laf-intel & redqueen, AFLfast++ power schedules, MOpt mutators, unicorn_mode, and a lot more!
Fuzzing IoT binaries with AFL++ - Part I (attify.com)
Fuzzing IoT binaries with AFL++ - Part II (attify.com)
IOT Fuzzing框架AFL++ (上)-安全客 - 安全资讯平台 (anquanke.com)