目录
五、域对象共享数据
1、使用 ServletAPI 向 request 域对象共享数据
2、使用 ModelAndView 向 request 域对象共享数据
3、使用 Model、Map、ModelMap 向 request 域对象共享数据
4、向 session 域和 application 域共享数据
六、SpringMVC 的视图
1、ThymeleafView
2、转发视图(InternalResourceView)
3、重定向视图(RedirectView)
4、视图控制器 view-controller
七、RESTful
1、RESTful 简介
2、RESTful 书写格式
3、请求方式
4、实现简单的查询、添加功能
5、实现简单的修改、删除功能(HiddenHttpMethodFilter)
八、RESTful 实体类的增删改查
1、查询所有信息(列表)
2、处理静态资源
3、添加用户信息
4、修改用户信息
5、删除用户信息
五、域对象共享数据
在 jsp 中,有 4 个域对象:pageContext、request、session、application。
现在我们使用 Thymeleaf,仅有后 3 个域对象:request、session、application。
1、使用 ServletAPI 向 request 域对象共享数据
这种方法看一下即可,实际开发中不会使用。
其中 HttpServletRequest 是由 DispatcherServlet 传递下来的。
@RequestMapping
public String servletAPI(HttpServletRequest req) {// 参数名是 req 还是 request 呢?其实都可以req.setAttribute("requestScope", "request object");return "success";
}
2、使用 ModelAndView 向 request 域对象共享数据
这个方法是 Spring 官方推荐使用的。
ModelAndView 有 Model 和 View 的功能:
- Model 只能向 request 域共享数据,addObject,同 setAttribute;
- View 主要用于设置视图,实现页面跳转,setViewName,参数为逻辑视图("success");
- 方法的返回值必须为 ModelAndView;
(1)示例代码
(1-1)java
@RequestMapping("/object/mav")
public ModelAndView mav() {ModelAndView modelAndView = new ModelAndView();modelAndView.addObject("requestScope", "ModelAndView");modelAndView.setViewName("success");return modelAndView;
}
(1-2)index.html
<h1> index 页面 </h1>
<a th:href="@{/object/mav}">通过 ModelAndView 设置域对象</a>
(1-3)success.html
<h1> 登录成功 </h1>
这是 request 域中 requestScope 的属性值: <p th:text="${ requestScope }"></p>
(2)输出结果

(3)为什么可以这么用(原理)
在前面的学习中,我们知道 SpringMVC 的实现原理,其中有一步,就是将 ModelAndView 返回给 DispatcherServlet,最后再用 ModelAndView 去渲染页面。
因此,返回一个 ModelAndView,就相当于自定义了一个渲染行为。
3、使用 Model、Map、ModelMap 向 request 域对象共享数据
(1)Model
前面说到,Model 的功能就是向 request 域共享数据,因此 Model 是可以独立使用的。
又因为单独使用 Model,因此在设置逻辑视图方面,还需要返回 String 类型的逻辑视图。
(1-1)那么如何获取 mode 对象呢?
后面再说。
(1-2)java 代码
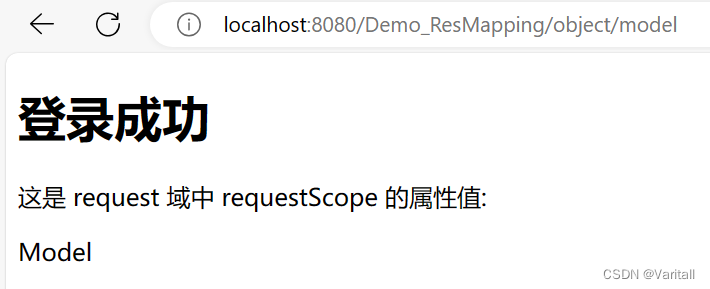
@RequestMapping("/object/model")
public String model(Model model) {model.addAttribute("requestScope", "Model");return "success";
}
(1-3)输出结果
(2)ModelMap
使用方法与 Model 一模一样。
@RequestMapping("/object/modelMap")
public String modelMap(ModelMap modelMap) {modelMap.addAttribute("requestScope", "ModelMap");return "success";
} 
(3)Map
使用 map,其实就是相当于设置一个请求域,都是键值对。
(3-1)java 代码
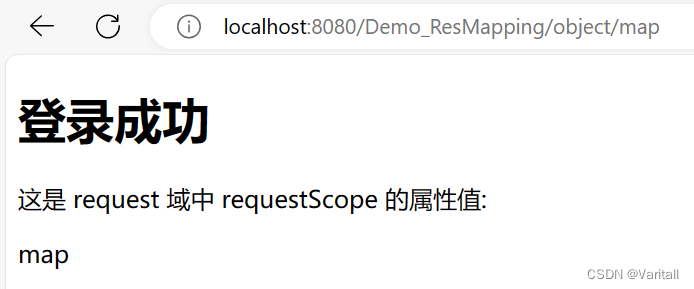
@RequestMapping("/object/map")
public String modelMap(Map<String, Object> map) {map.put("requestScope", "map");return "success";
}
(3-2)输出结果
(4)Model、Map、ModelMap 的关系
我们现在一定有一个疑问,在之前的学习中,方法参数都是请求信息中的属性,可以由请求信息进行注入。
但是现在这 3 个东西,在请求信息中并没有体现,为什么却可以作为对象实例来使用?
实际上,这 3 个东西都会被 Spring 实例化为 BindingAwareModelMap 类型的对象,因为在底层中:
- ModelMap 继承自 LinkedHashMap;
- Model 是一个接口,其实现类被 BindingAwareModelMap 继承;
- Map 是一个接口,其实现类被 BindingAwareModelMap 继承;
(4-1)测试代码
依次访问这三个 servlet,观察他们输出的类名是什么
@RequestMapping("/object/model")
public String model(Model model) {System.out.println(model.getClass().getName());model.addAttribute("requestScope", "Model");return "success";
}@RequestMapping("/object/modelMap")
public String modelMap(ModelMap modelMap) {System.out.println(modelMap.getClass().getName());modelMap.addAttribute("requestScope", "ModelMap");return "success";
}@RequestMapping("/object/map")
public String modelMap(Map<String, Object> map) {System.out.println(map.getClass().getName());map.put("requestScope", "map");return "success";
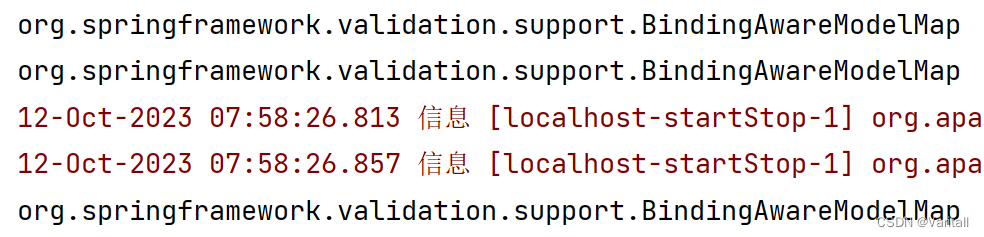
}(4-2)输出结果
显然,他们都是 Spring 在底层通过 BindingAwareModelMap 来实例化对象的。
4、向 session 域和 application 域共享数据
对于这 2 个域对象,建议使用 ServletAPI 的方式,因为 SpringMVC 提供的方式更加麻烦。
其中需要注意的是,在 html 页面中,对 session、application 域对象的访问,需要加上 session. 和 application.
(1)session
直接用 HttpSession 可以,用 HttpServletRequest 也可以。
@RequestMapping("/object/session")
public String session(HttpSession session) {session.setAttribute("sessionScope", "session");return "success";
}
(2)application
同上。
@RequestMapping("/object/application")
public String application(HttpSession session) {ServletContext servletContext = session.getServletContext();servletContext.setAttribute("applicationScope", "application");return "success";
}
(3)success.html
这是 session 域中 sessionScope 的属性值:
<p th:text="${ session.sessionScope }"></p> <br/>这是 application 域中 applicationScope 的属性值:
<p th:text="${ application.applicationScope }"></p> <br/>
六、SpringMVC 的视图
SpringMVC 中的视图是 View 接口,视图的作用渲染数据,将模型 Model 中的数据展示给用户。
SpringMVC 视图的种类很多,默认有转发视图(InternalResourceView)和重定向视图(RedirectView):
- 当工程引入 jstl 的依赖,转发视图会自动转换为 JstlView;
- 若使用的视图技术为 Thymeleaf,并在 SpringMVC 的配置文件中配置了 Thymeleaf 的视图解析器,那么视图解析器解析之后所得到的是 ThymeleafView;
1、ThymeleafView
当控制器方法的返回值为 String 时,这个逻辑视图会被 SpringMVC 配置文件中所配置的视图解析器解析,形成最终的转发地址。
(1)示例代码
(1-1)java 代码
@RequestMapping("/view/thymeleaf")
public String thymeleaf() {return "hello";
}
(1-2)配置文件
<bean id="viewResolver" class="org.thymeleaf.spring5.view.ThymeleafViewResolver"><property name="characterEncoding" value="UTF-8"/><property name="templateEngine"> <!-- 模板引擎 --><bean class="org.thymeleaf.spring5.SpringTemplateEngine"><property name="templateResolver"> <!-- 模板解析器 --><bean class="org.thymeleaf.spring5.templateresolver.SpringResourceTemplateResolver"><!-- 视图前缀 --><property name="prefix" value="/WEB-INF/templates/"/><!-- 视图后缀 --><property name="suffix" value=".html"/><!-- 以 html5 作为模板 --><property name="templateMode" value="HTML5"/><property name="characterEncoding" value="UTF-8" /><property name="order" value="1"/> <!-- 优先级 --><property name="cacheable" value="false"/></bean></property></bean></property>
</bean>
2、转发视图(InternalResourceView)
前面我们一直在用的都是基于 Thymeleaf 的视图解析,需要配置出 Thymeleaf 的视图解析器,这样包含 thymeleaf 语法的 html 页面就可以被 thymeleaf 渲染。
(1)InternalResourceView 简介
InternalResourceView 是基于 JSP 的视图解析器,它将 JSP 作为模板引擎来解析和渲染视图。它依赖于 Servlet 容器来执行 JSP,并且需要在 web.xml 文件中进行配置。
总的来说,InternalResourceView 适用于传统的 JSP 开发,而 ThymeleafView 适用于更加灵活和独立的模板引擎开发。
(2)用法
相比于 Thymeleaf 只能转发逻辑视图(目标页面名)的地址,InternalResource 还可以转发 @RequestMapping 的地址。
(2-1)用法一:转发至设置 model 域对象的 @RequestMapping 的地址
这个例子没有任何意义(因为可以直接访问 /object/model),只是举个用法例子。
@RequestMapping("/view/internal")
public String internal() {return "forward:/object/model";
}
(2-2)用法二:类似 Thymeleaf 的逻辑视图
这种逻辑视图的使用,都需要设置视图解析器,效果类似前面的 Thymeleaf。如何设置自行搜索即可。
(2-3)需要注意的是:
- 通过 InternalResourceView 转发的页面,不能解析 Thymeleaf 的语法;
- 转发之后,地址不变(不会变成 return 的值,这点 Thymeleaf 也一样);
3、重定向视图(RedirectView)
一般情况下,业务逻辑处理失败时,使用请求转发;业务逻辑处理成功时,使用重定向。
(1)RedirectView 简介
将请求重定向,地址会发生改变。
(2)用法
在 SpringMVC 中,不需要担心 / 被浏览器解析成 http://ip:port/,而没有工程名。重定向在解析时,会判断是否以 / 开头,如果是,则 Spring 会自动加上工程名。
@RequestMapping("/view/redirect")
public String redirect() {return "redirect:/object/model";
}
(3)三者发起请求后的地址栏


显然,只有重定向的地址栏发生了改变。
4、视图控制器 view-controller
当控制器方法仅仅用来进行页面跳转时,可以将控制器方法用 view-controller 标签来替换。
在 Spring 的配置文件中写上:
<mvc:view-controller path="/view/thymeleaf" view-name="hello"/>就可以替换掉:
@RequestMapping("/view/thymeleaf")
public String thymeleaf() {return "hello";
}
但是仅仅这样写,就会发现,除了 /view/thymeleaf 可以访问,其他的 @RequestMapping 都不能访问了,因为设置 view-controller 后,其他的请求就不会被 DispatcherServlet 处理了。
这时候需要在 Spring 的配置文件中加上:
<mvc:annotation-driven/>其功能有:
- 开启 mvc 的注解驱动;
- 处理 Ajax、Json 等数据;
七、RESTful
1、RESTful 简介
RESTful 是一种设计风格,目前市面上使用较为广泛。
REST:Representational State Transfer,表现层资源状态转移。
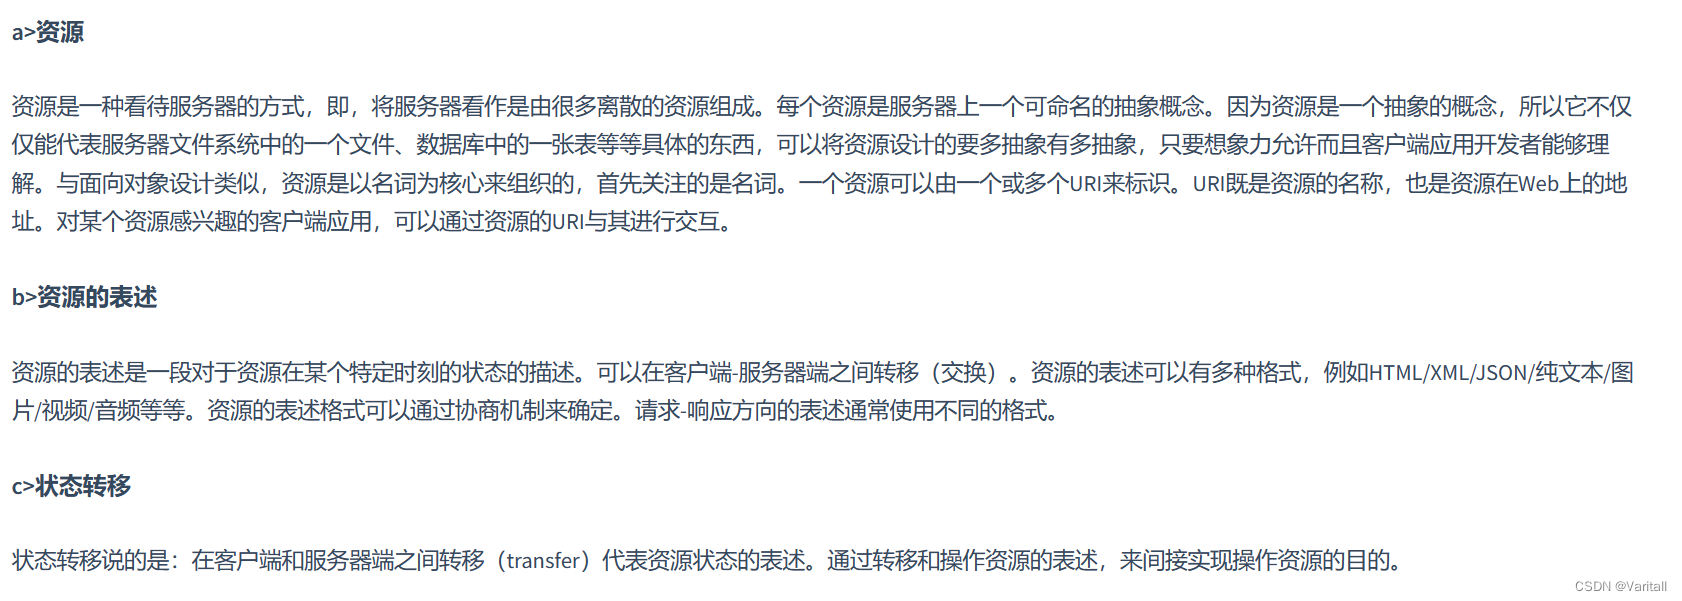
2、RESTful 书写格式
我们先看一下,百度百科是怎么访问服务器的:
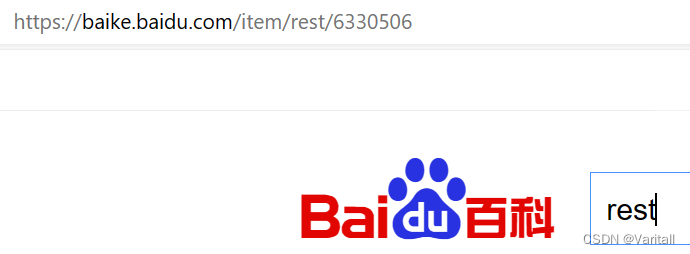
当我们查询 rest 时,这个 url 其实就是 REST 设计风格。
REST 风格提倡 URL 地址使用统一的风格设计,从前到后各个单词使用斜杠分开,不使用问号键值对方式携带请求参数,而是将要发送给服务器的数据作为 URL 地址的一部分,以保证整体风格的一致性。
当然这只是一种风格,并不是说所有的数据都要拼接到 url 中。
3、请求方式
HTTP 协议里面,四个表示操作方式的动词:GET、POST、PUT、DELETE。它们分别对应四种基本操作:
- GET 用来获取资源;
- POST 用来新建资源;
- PUT 用来更新资源;
- DELETE 用来删除资源;

4、实现简单的查询、添加功能
- 查询所有用户信息;
- 根据 id 查询用户信息;
- 添加用户信息;
(1)代码
(1-1)java 代码
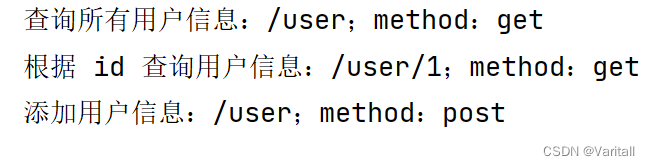
@RequestMapping(value = "/user", method = RequestMethod.GET)
public String queryForAllUsers() {System.out.println("查询所有用户信息:/user;method:get");return "success";
}@RequestMapping(value = "/user/{id}", method = RequestMethod.GET)
public String queryForAllUsers(@PathVariable("id") Integer id) {System.out.println("根据 id 查询用户信息:/user/" + id + ";method:get");return "success";
}@RequestMapping(value = "/user", method = RequestMethod.POST)
public String addUser() {System.out.println("添加用户信息:/user;method:post");return "success";
}
(1-2)index.html
<!DOCTYPE html>
<html lang="en" xmlns:th="http://www.thymeleaf.org">
<head><meta charset="UTF-8"><title>Title</title>
</head>
<body><h1>index 页面</h1><a th:href="@{/user}"> 查询所有用户 </a> <br/><a th:href="@{/user/1}"> 查询 id = 1 的用户 </a> <br/><form th:action="@{/user}" method="post"><input type="submit" value="添加用户"/></form>
</body>
</html>
(1-3)success.html
<body><h1>success 页面</h1>
</body>
(2)输出结果
5、实现简单的修改、删除功能(HiddenHttpMethodFilter)
- 修改用户信息 PUT;
- 删除用户信息 DELETE;
(1)由于浏览器只支持发送 get 和 post 方式的请求,那么该如何发送 put 和 delete 请求呢?
SpringMVC 提供了 HiddenHttpMethodFilter,它可以将 POST 请求转换为 DELETE 或 PUT 请求。HiddenHttpMethodFilter 处理 put 和 delete 请求的条件:
- 当前请求的请求方式必须为 post;
- 当前请求必须传输请求参数 _method;
- _method 的值 value 设置为 put 或 delete;
满足以上条件,HiddenHttpMethodFilter 过滤器就会将当前请求的请求方式转换为请求参数_method 的值,因此请求参数 _method 的值才是最终的请求方式。
(2)代码
(2-1)index.html
<form th:action="@{/user}" method="post"><input type="hidden" name="_method" value="put"/><input type="submit" value="更新用户 "/>
</form> <br/><form th:action="@{/user/1}" method="post"><input type="hidden" name="_method" value="delete"/><input type="submit" value="删除用户 "/>
</form> <br/>
(2-2)java 代码
@RequestMapping(value = "/user", method = RequestMethod.PUT)
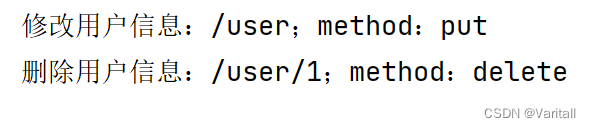
public String updateUser() {System.out.println("修改用户信息:/user;method:put");return "success";
}@RequestMapping(value = "/user/{id}", method = RequestMethod.DELETE)
public String deleteUser(@PathVariable Integer id) {System.out.println("删除用户信息:/user/" + id + ";method:delete");return "success";
}(2-3) 处理请求方式过滤器 HiddenHttpMethodFilter
<filter><filter-name>HiddenHttpMethodFilter</filter-name><filter-class>org.springframework.web.filter.HiddenHttpMethodFilter</filter-class>
</filter>
<filter-mapping><filter-name>HiddenHttpMethodFilter</filter-name><url-pattern>/*</url-pattern>
</filter-mapping>
(3)输出结果
八、RESTful 实体类的增删改查
1、查询所有信息(列表)
(1)创建实体类
package com.demo.pojo;public class Employee {private Integer id;private String name;private Integer gender;private String email;public Employee() {}@Overridepublic String toString() {return "Employee{" +"id=" + id +", name='" + name + '\'' +", gender=" + gender +", email='" + email + '\'' +'}';}public Integer getId() {return id;}public void setId(Integer id) {this.id = id;}public String getName() {return name;}public void setName(String name) {this.name = name;}public Integer getGender() {return gender;}public void setGender(Integer gender) {this.gender = gender;}public String getEmail() {return email;}public void setEmail(String email) {this.email = email;}public Employee(Integer id, String name, Integer gender, String email) {this.id = id;this.name = name;this.gender = gender;this.email = email;}
}
(2)创建 EmployeeService 类
假设已经从 EmployeeDao 中获取到表信息,用 Map 保存起来。
注意,这里使用了 @Service 注解,记得将 Spring 配置文件中的组件扫描修改一下。
package com.demo.service;import com.demo.pojo.Employee;
import org.springframework.stereotype.Repository;import java.util.*;@Service
public class EmployeeService {private static Map<Integer, Employee> employees;private static Integer totalNum;static {employees = new HashMap<Integer, Employee>();employees.put(1, new Employee(1, "001", 0, "???"));employees.put(2, new Employee(2, "002", 1, "???"));employees.put(3, new Employee(3, "003", 0, "???"));employees.put(4, new Employee(4, "004", 1, "???"));totalNum = 4;}public Collection<Employee> queryForAllEmployees() {return employees.values();}}
(3)创建 EmployeeController 控制类
自动配置 EmployeeService 实例。
查询所有用户信息,GET 请求。
用 model 将用户列表信息保存到 request 域。
最后将视图模型转发至 employee.html。
package com.demo.controller;import com.demo.pojo.Employee;
import com.demo.service.EmployeeService;
import org.springframework.beans.factory.annotation.Autowired;
import org.springframework.stereotype.Controller;
import org.springframework.ui.Model;
import org.springframework.web.bind.annotation.RequestMapping;
import org.springframework.web.bind.annotation.RequestMethod;import java.util.Collection;@Controller
public class EmployeeController {@Autowiredprivate EmployeeService employeeService;@RequestMapping(value = "/employee", method = RequestMethod.GET)public String queryForAllEmployees(Model model) {Collection<Employee> employees = employeeService.queryForAllEmployees();model.addAttribute("employeeList", employees);return "employee";}
}
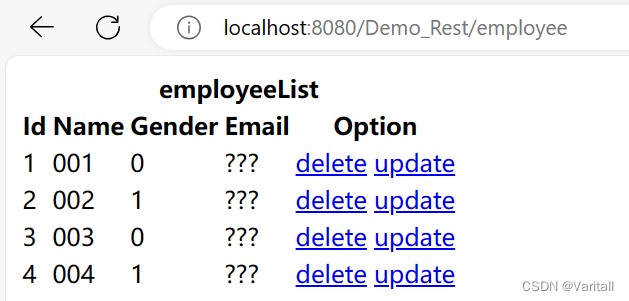
(4)前端页面 employee.html
使用 Thymeleaf 的 each 属性,将保存到 request 域的列表信息遍历展示。
(注意,<a> 的 href 不能留空,无论是写 th:href 还是 href,否则只能显示第一个数据 )
<!DOCTYPE html>
<html lang="en" xmlns:th="http://www.thymeleaf.org">
<head><meta charset="UTF-8"><title>Title</title>
</head>
<body><table class="employeeTable"><tr><th colspan="5">employeeList</th></tr><tr><th>Id</th><th>Name</th><th>Gender</th><th>Email</th><th>Option</th></tr><tr th:each="employee : ${employeeList}"><td th:text="${employee.id}"></td><td th:text="${employee.name}"></td><td th:text="${employee.gender}"></td><td th:text="${employee.email}"></td><td><a th:href="@{#}">delete</a><a th:href="@{#}">update</a></td></tr></table></body>
</html>
(5)输出结果
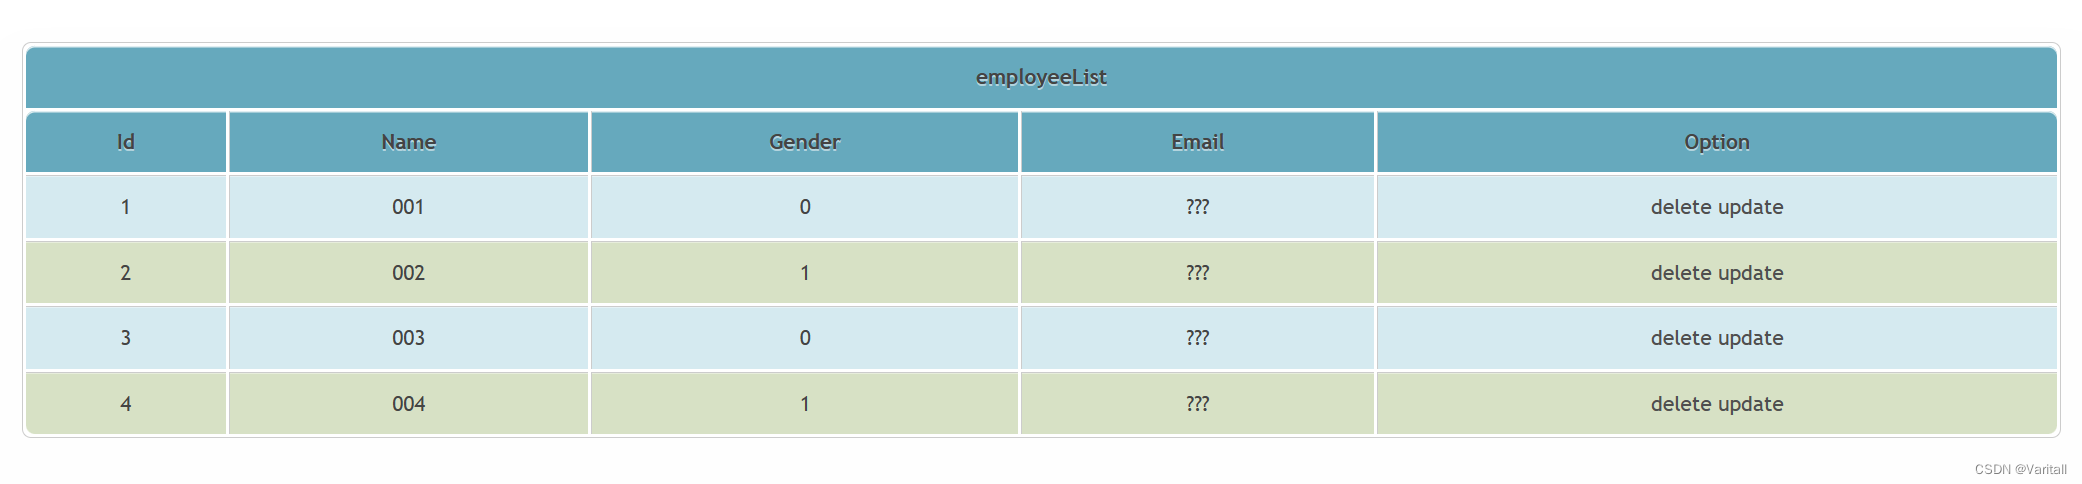
2、处理静态资源
前面的 employee 列表没有添加样式,非常难看,如果我们想要为其添加外部 CSS,使用 <link> 标签后,就会发现报错 404。
<link rel="stylesheet" th:href="@{/static/css/index_work.css}"/>(1)问题原因
这是因为,处理静态资源所需要的 Servlet 不是我们在 web.xml 中配置的 DispatcherServlet,而是 DefaultServlet。
而 DefaultServlet 是在 Tomcat 的 web.xml 中配置的,其 url-pattern 也是 /。
这就导致了 DispatcherServlet 会取代 DefaultServlet 处理路径为 / 的请求,从而无法处理静态资源。
(2)解决方法
使用 mvc 配置默认 Servlet 处理静态资源:
<!-- 开启 mvc 注解驱动 -->
<mvc:annotation-driven/>
<!-- 配置默认 servlet 处理静态资源 -->
<mvc:default-servlet-handler/>
需要注意的是,它的使用与 <mvc:view-controller> 一样,都会导致所有资源都被他们对应的 servlet/controller 处理,所以都需要加上 <mvc:annotation-driven/>。
这样无法被 DispatcherServlet 处理的请求,就会交给 DefaultServlet 进行处理。
(2-1)index_work.css
@charset "UTF-8";form {margin: 0px;
}img {border: medium none;margin: 0;padding: 0;
} /* img elements 图片元素 */
/** 设置默认字体 **/
body,button,input,select,textarea {font-size: 12px;font: 12px/1.5 ’宋体’, Arial, tahoma, Srial, helvetica, sans-serif;
}h1,h2,h3,h4,h5,h6 {font-size: 100%;
}em {font-style: normal;
}
/** 重置列表元素 **/
ul,ol {list-style: none;
}
/** 重置超链接元素 **/
a {text-decoration: none;color: #4f4f4f;
}a:hover {text-decoration: underline;color: #F40;
}
/** 重置图片元素 **/
img {border: 0px;margin-bottom: -7px;
}body {width: 80%;margin: 40px auto;font-family: 'trebuchet MS', 'Lucida sans', Arial;font-size: 14px;color: #444;background: url(../css/img/body1.jpg);background-repeat: no-repeat;background-size: 100% auto;/* background: #F5F5F5; */
}table {border: solid #ccc 1px;-webkit-border-radius: 6px;border-radius: 6px;/* -webkit-box-shadow: 0 1px 1px #ccc;box-shadow: 0 1px 1px #ccc; */-webkit-box-shadow:  0px 2px 1px 5px rgba(242, 242, 242, 0.1);box-shadow:  5px 20px 30px 30px rgba(242, 242, 242, 0.1);width: 100%;
}table thead th {background:url(../css/img/zebratable.png);background-repeat:no-repeat;background-position: 0px center;
}table tr {background: #D5EAF0;-webkit-box-shadow: 0 1px 0 rgba(255, 255, 255, .8) inset;box-shadow: 0 1px 0 rgba(255, 255, 255, .8) inset;
}table tr:nth-child(even) {background: #D7E1C5;-webkit-box-shadow: 0 1px 0 rgba(255, 255, 255, .8) inset;box-shadow: 0 1px 0 rgba(255, 255, 255, .8) inset;
}table tr:hover {background: #91C5D4;-o-transition: all 0.1s ease-in-out;-webkit-transition: all 0.1s ease-in-out;-ms-transition: all 0.1s ease-in-out;transition: all 3s ease-in-out;background-image: -webkit-gradient(linear, left top, left bottom, from(#151515), to(#404040)) !important;background-image: -webkit-linear-gradient(top, #151515, #404040) !important;background-image:    -moz-linear-gradient(top, #151515, #404040) !important;background-image:     -ms-linear-gradient(top, #151515, #404040) !important;background-image:      -o-linear-gradient(top, #151515, #404040) !important;background-image:         linear-gradient(top, #151515, #404040) !important;color:#fff !important;
}table td,table th {border-left: 1px solid #ccc;border-top: 1px solid #ccc;padding: 10px;text-align: center;
}table th {background-color: #66a9bd;background-image: -moz-linear-gradient(top, #dce9f9, #66a9bd);-webkit-box-shadow: 0 1px 0 rgba(255, 255, 255, .8) inset;box-shadow: 0 1px 0 rgba(255, 255, 255, .8) inset;border-top: none;text-shadow: 0 1px 0 rgba(255, 255, 255, .5);
}table td:first-child,table th:first-child {border-left: none;
}table th:first-child {-webkit-border-radius: 6px 0 0 0;border-radius: 6px 0 0 0;
}table th:last-child {-webkit-border-radius: 0 6px 0 0;border-radius: 0 6px 0 0;
}table th:only-child {-webkit-border-radius: 6px 6px 0 0;border-radius: 6px 6px 0 0;
}table tr:last-child td:first-child {-webkit-border-radius: 0 0 0 6px;border-radius: 0 0 0 6px;
}table tr:last-child td:last-child {-webkit-border-radius: 0 0 6px 0;border-radius: 0 0 6px 0;
}input[type="button"],input[type="submit"],input[type="reset"] {border: solid #ccc 1px;-webkit-border-radius: 6px;border-radius: 6px;-webkit-box-shadow: 0 1px 1px #ccc;box-shadow: 0 1px 1px #ccc;background: #B0CC7F;margin: 0 2px 0;
}input[type="text"],input[type="password"] {border: solid #ccc 2px;-webkit-border-radius: 6px;border-radius: 6px;-webkit-box-shadow: 0 1px 1px #ccc;box-shadow: 0 1px 1px #ccc;background: #efefef;margin: 0 2px 0;text-indent: 5px;
}
select {width:200px;border: solid #ccc 2px;-webkit-border-radius: 6px;border-radius: 6px;-webkit-box-shadow: 0 1px 1px #ccc;background: #efefef;margin: 0 2px 0;text-indent: 5px;
}
option {width:180px;border: solid #ccc 2px;-webkit-border-radius: 6px;border-radius: 6px;-webkit-box-shadow: 0 1px 1px #ccc;background: #efefef;margin: 0 2px 0;text-indent: 5px;
}input[name="page.now"] {border: solid #ccc 1px;-webkit-border-radius: 6px;border-radius: 6px;-webkit-box-shadow: 0 1px 1px #ccc;box-shadow: 0px 0px 0px #CEB754;background: #D5EAF0;margin: 0px 10px 0px 0px;padding-bottom: 0px;padding-top: 5px; width: 24px; line-height:10px; height: 12xp;
}
(3)输出结果
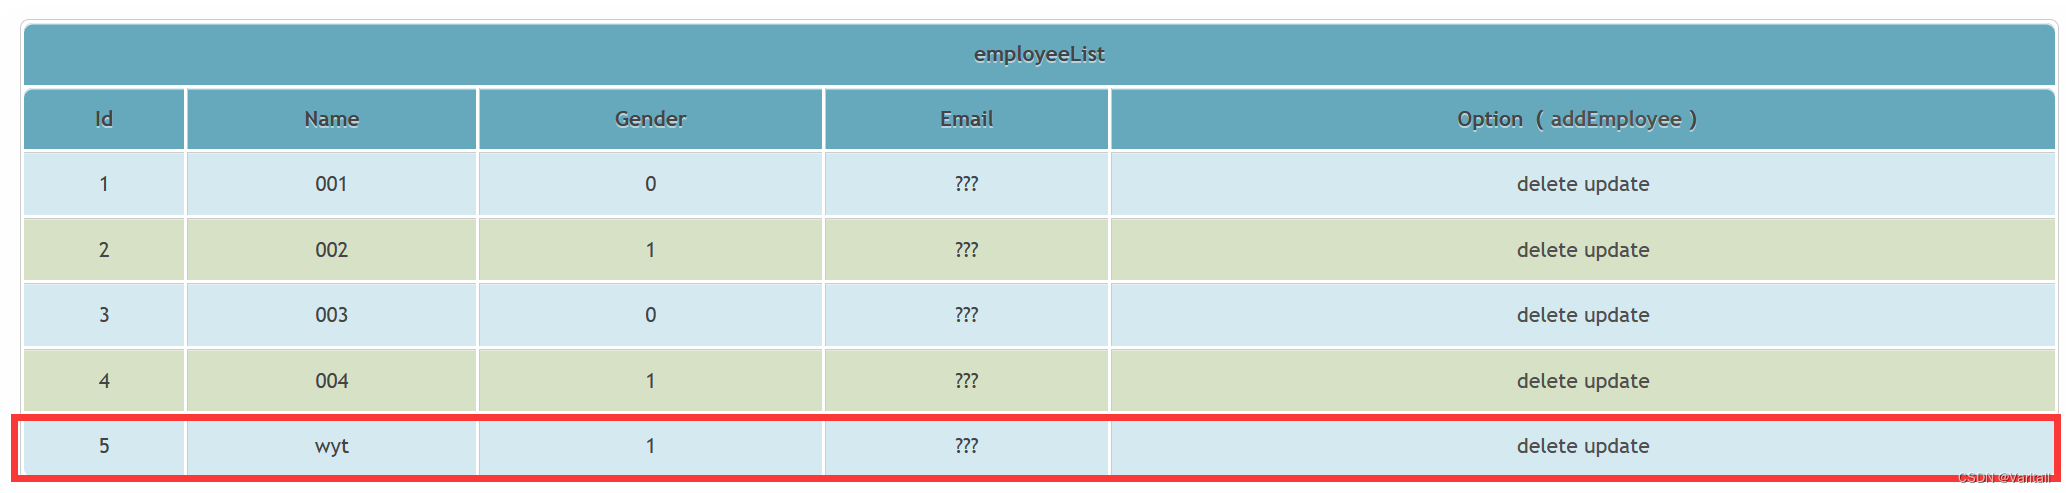
3、添加用户信息
(1)为 index 添加 addEmployee 选项
跳转至添加用户页面。
<th>Id</th>
<th>Name</th>
<th>Gender</th>
<th>Email</th>
<th>Option(<a th:href="@{/addEmployee.html}"> addEmployee </a>)
</th>
(2)为 addEmployee.html 添加视图控制器
也可以选择写一个 Controller 的方法转发。
<!-- 配置 addEmployee 页面的视图控制器 -->
<mvc:view-controller path="/addEmployee.html" view-name="addEmployee"/>
(3)addEmployee.html 页面
随便写写即可。
<!DOCTYPE html>
<html lang="en" xmlns:th="http://www.thymeleaf.org">
<head><meta charset="UTF-8"><title>Title</title><link rel="stylesheet" th:href="@{/static/css/index_work.css}"/>
</head>
<body><form th:action="@{/addEmployee}" method="post"><table><tr><th colspan="2"> addEmployee </th></tr><tr><td>name</td><td><input type="text" name="name"/></td></tr><tr><td>gender</td><td><input type="radio" value="1" name="gender"/> male<input type="radio" value="0" name="gender"/> female</td></tr><tr><td>email</td><td><input type="text" name="email"/></td></tr><tr><td colspan="2"><input type="submit" value="添加"/></td></tr></table></form></body>
</html>
(4)给 EmployeeService 添加一个 addEmployee 方法
因为参数没有 id,所以可以自增 id。
public void addEmployee(Employee employee) {if (employee.getId() == null ) {employee.setId(++ totalNum);}employees.put(totalNum, employee);
}
(5)在 EmployeeController 中处理请求的方法
添加用户信息,我们规定使用 POST 方法。
参数列表直接使用 POJO 类,Spring 会自动将请求参数注入到 POJO 类中。
最后重定向回 employee 列表。
@RequestMapping(value = "/addEmployee", method = RequestMethod.POST)
public String addEmployee(Employee employee) {employeeService.addEmployee(employee);return "redirect:/employee";
}
(6)测试结果
4、修改用户信息
修改用户,需要先将首页的用户信息,通过 GET 请求传递到修改页面。然后修改页面再发出 PUT 请求。
因此需要 2 个 Controller 来完成修改操作。
(1)新增的 Service 方法
public Employee getEmployeeById(Integer id) {return employees.get(id);
}public void updateEmployee(Employee employee) {employees.put(employee.getId(), employee);
}
(2)编写 toUpdatePage 方法
根据 id 获取对应 employee;
将 employee 信息放到 request 域;
最后转发至 updateEmployee.html;
@RequestMapping(value = "/employee/{id}", method = RequestMethod.GET)
public String toUpdatePage(@PathVariable("id") Integer id, Model model) {Employee employee = employeeService.getEmployeeById(id);model.addAttribute("employee", employee);return "updateEmployee";
}(3)编写 updateEmployee 方法
接收 updateEmployee.html 传递来的 POJO 数据;
更新 employee 信息;
重定向至 employee.html;(防止再次发送请求)
stMapping(value = "/updateEmployee", method = RequestMethod.PUT)
public String updateEmployee(Employee employee) {employeeService.updateEmployee(employee);return "redirect:/employee";
}
(4)updateEmployee.html
两个隐藏域:employee.id 的值、put 请求;
<!DOCTYPE html>
<html lang="en" xmlns:th="http://www.thymeleaf.org">
<head><meta charset="UTF-8"><title>Title</title><link rel="stylesheet" th:href="@{/static/css/index_work.css}"/>
</head>
<body><form th:action="@{/updateEmployee}" method="post"><input type="hidden" name="_method" value="put"/><input type="hidden" name="id" th:value="${employee.id}"/><table><tr><th colspan="2">update Employee</th></tr><tr><td>name</td><td><input type="text" name="name" th:value="${employee.name}"/></td></tr><tr><td>gender</td><td><input type="radio" name="gender" th:value="1" th:field="${employee.gender}"/> male<input type="radio" name="gender" th:value="0" th:field="${employee.gender}"/> female</td></tr><tr><td>email</td><td><input type="text" name="email" th:value="${employee.email}"/></td></tr><tr><td colspan="2"><input type="submit" value="修改"/></td></tr></table></form>
</body>
</html>(5)为 index 添加 updateEmployee 选项
<a th:href="@{'/employee/' + ${employee.id} }">update</a>5、删除用户信息
由于我们使用了超链接的方式发起请求(GET),并且 delete 也没有像 update 一样有一个新的页面可以提交表单,无法发出 DELETE 请求。
因此我们可以为 delete 的超链接添加点击事件,在事件中将 href 赋值给一个表单的 action,再让表单提交 DELETE 请求即可。
(1)index.html
添加 JQuery 的 js 文件;
添加一个没有设置 action 属性的表单,其发出 DELETE 请求;
添加处理超链接的点击事件;
<!DOCTYPE html>
<html lang="en" xmlns:th="http://www.thymeleaf.org">
<head><meta charset="UTF-8"><title>Title</title><link rel="stylesheet" th:href="@{/static/css/index_work.css}"/><script type="text/javascript" th:src="@{/static/js/JQuery-3.7.0.js}"></script>
</head>
<body><table class="employeeTable"><tr><th colspan="5">employeeList</th></tr><tr><th>Id</th><th>Name</th><th>Gender</th><th>Email</th><th>Option(<a th:href="@{/addEmployee.html}"> addEmployee </a>)</th></tr><tr th:each="employee : ${employeeList}"><td th:text="${employee.id}"></td><td th:text="${employee.name}"></td><td th:text="${employee.gender}"></td><td th:text="${employee.email}"></td><td><a class="deleteEmployee" th:href="@{'/deleteEmployee/' + ${employee.id}}">delete</a><a th:href="@{'/employee/' + ${employee.id}}">update</a></td></tr></table><form method="post" id="deleteEmployeeForm"><input type="hidden" name="_method" value="delete"/></form><script type="text/javascript">$(".deleteEmployee").click(function() {var form = $("#deleteEmployeeForm");form.attr("action", this.href); /* 不能用 .action 直接等于 this.href */form.submit();return false;});</script></body>
</html>
(2)编写 deleteEmployee 的控制器方法
equestMapping(value = "/deleteEmployee/{id}", method = RequestMethod.DELETE)
public String deleteEmployee(@PathVariable("id") Integer id) {employeeService.deleteEmployeeById(id);return "redirect:/employee";
}