相关地址
代码:
https://github.com/facebookresearch/segment-anything
在线网站:
https://segment-anything.com/demo
环境配置
建议可以clone下来学习相关代码,安装可以不依赖与这个库
git clone https://github.com/facebookresearch/segment-anything.git
1.创建environment.yaml
name: sam
channels:- pytorch- conda-forge
dependencies:- python=3.8- pytorch=1.9.0- torchvision=0.10.0- cudatoolkit=11.1- pip
conda env create -f environment.yaml
conda activate raptor
2.安装
pip install git+https://github.com/facebookresearch/segment-anything.git
3.其他库
pip install opencv-python pycocotools matplotlib onnxruntime onnx
目前安装的版本
Successfully installed coloredlogs-15.0.1 contourpy-1.1.1
cycler-0.12.1 flatbuffers-23.5.26 fonttools-4.43.1 humanfriendly-10.0
importlib-resources-6.1.0 kiwisolver-1.4.5 matplotlib-3.7.3
mpmath-1.3.0 numpy-1.24.4 onnx-1.15.0 onnxruntime-1.16.1
opencv-python-4.8.1.78 packaging-23.2 protobuf-4.24.4
pycocotools-2.0.7 pyparsing-3.1.1 python-dateutil-2.8.2 six-1.16.0
sympy-1.12 zipp-3.17.0
初阶测试
1.下载模型
https://github.com/facebookresearch/segment-anything#model-checkpoints
2.测试代码
import numpy as np
import torch
import matplotlib.pyplot as plt
import cv2import sys
sys.path.append("..")
from segment_anything import sam_model_registry, SamAutomaticMaskGenerator, SamPredictordef show_anns(anns):if len(anns) == 0:returnsorted_anns = sorted(anns, key=(lambda x: x['area']), reverse=True)ax = plt.gca()ax.set_autoscale_on(False)img = np.ones((sorted_anns[0]['segmentation'].shape[0], sorted_anns[0]['segmentation'].shape[1], 4))img[:,:,3] = 0for ann in sorted_anns:m = ann['segmentation']color_mask = np.concatenate([np.random.random(3), [0.35]])img[m] = color_maskax.imshow(img)sam_checkpoint = "./checkpoints/sam_vit_h_4b8939.pth"
model_type = "vit_h"device = "cuda"sam = sam_model_registry[model_type](checkpoint=sam_checkpoint)
sam.to(device=device)mask_generator = SamAutomaticMaskGenerator(sam)img_path = '/data/qinl/code/segment-anything/notebooks/images/dog.jpg'
image = cv2.imread(img_path)
image = cv2.cvtColor(image, cv2.COLOR_BGR2RGB)masks = mask_generator.generate(image)'''
Mask generation returns a list over masks, where each mask is a dictionary containing various data about the mask. These keys are:
* `segmentation` : the mask
* `area` : the area of the mask in pixels
* `bbox` : the boundary box of the mask in XYWH format
* `predicted_iou` : the model's own prediction for the quality of the mask
* `point_coords` : the sampled input point that generated this mask
* `stability_score` : an additional measure of mask quality
* `crop_box` : the crop of the image used to generate this mask in XYWH format
'''print(len(masks))
print(masks[0].keys())plt.figure(figsize=(20,20))
plt.imshow(image)
show_anns(masks)
plt.axis('off')
plt.show()
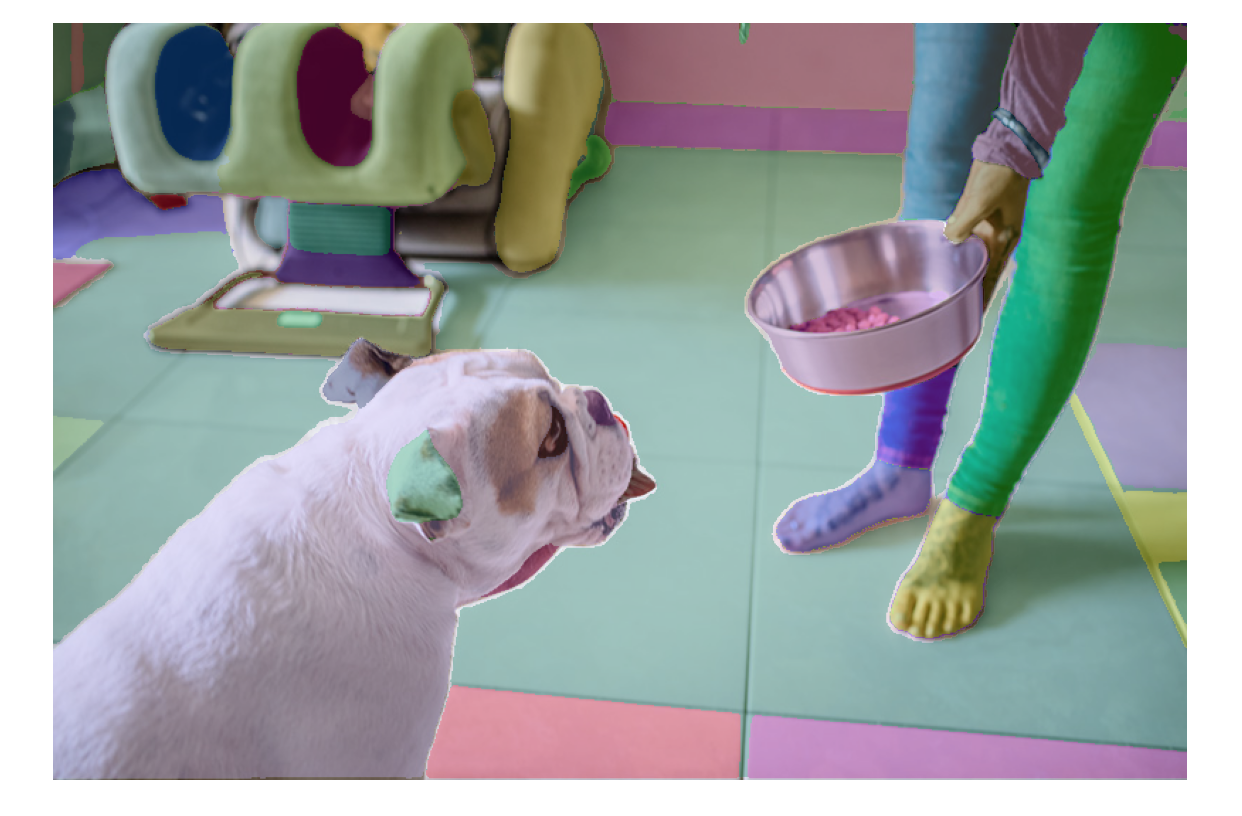
3.输出
65
dict_keys(['segmentation', 'area', 'bbox', 'predicted_iou', 'point_coords', 'stability_score', 'crop_box'])
进阶测试
图片预处理部分
其他instruction,都是在这个基础上进行处理
import numpy as np
import torch
import matplotlib.pyplot as plt
import cv2import sys
sys.path.append("..")
from segment_anything import sam_model_registry, SamPredictordef show_mask(mask, ax, random_color=False):if random_color:color = np.concatenate([np.random.random(3), np.array([0.6])], axis=0)else:color = np.array([30/255, 144/255, 255/255, 0.6])h, w = mask.shape[-2:]mask_image = mask.reshape(h, w, 1) * color.reshape(1, 1, -1)ax.imshow(mask_image)def show_points(coords, labels, ax, marker_size=375):pos_points = coords[labels==1]neg_points = coords[labels==0]ax.scatter(pos_points[:, 0], pos_points[:, 1], color='green', marker='*', s=marker_size, edgecolor='white', linewidth=1.25)ax.scatter(neg_points[:, 0], neg_points[:, 1], color='red', marker='*', s=marker_size, edgecolor='white', linewidth=1.25)   def show_box(box, ax):x0, y0 = box[0], box[1]w, h = box[2] - box[0], box[3] - box[1]ax.add_patch(plt.Rectangle((x0, y0), w, h, edgecolor='green', facecolor=(0,0,0,0), lw=2))   sam_checkpoint = "./checkpoints/sam_vit_h_4b8939.pth"
model_type = "vit_h"device = "cuda"sam = sam_model_registry[model_type](checkpoint=sam_checkpoint)
sam.to(device=device)predictor = SamPredictor(sam)img_path = '/data/qinl/code/segment-anything/notebooks/images/truck.jpg'
image = cv2.imread(img_path)
image = cv2.cvtColor(image, cv2.COLOR_BGR2RGB)# 预处理输入图片
predictor.set_image(image)
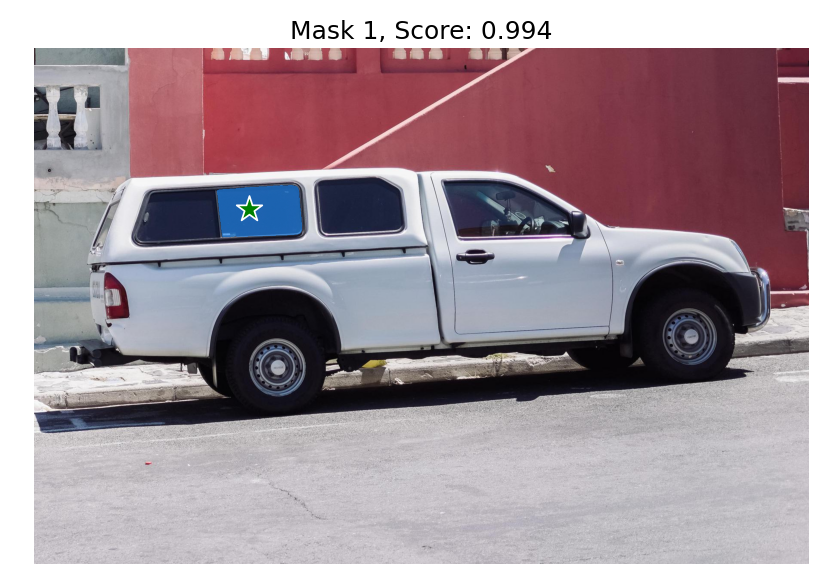
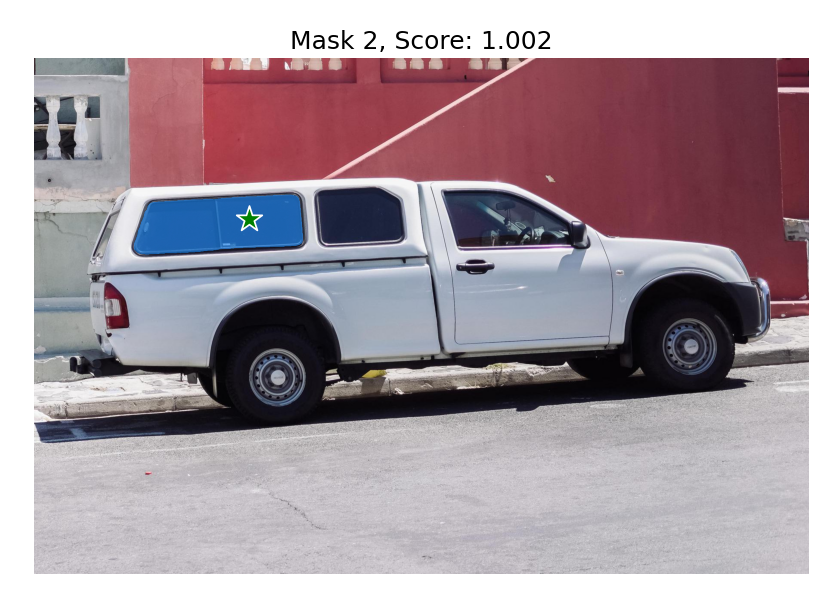
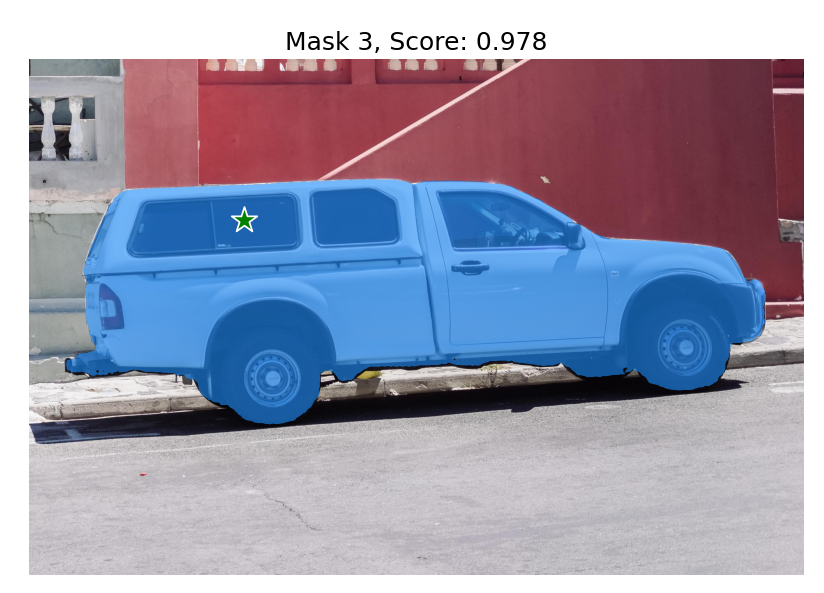
输入的instruction为point的情况
# 输入为point的情况input_point = np.array([[500, 375]])input_label = np.array([1])# 可以用来显示一下点的位置# plt.figure(figsize=(10,10))# plt.imshow(image)# show_points(input_point, input_label, plt.gca())# plt.axis('on')# plt.show() masks, scores, logits = predictor.predict(point_coords=input_point,point_labels=input_label,multimask_output=True,)print('masks.shape',masks.shape) # (number_of_masks) x H x W# 输出3个mask,分别有不同的scorefor i, (mask, score) in enumerate(zip(masks, scores)):plt.figure(figsize=(10,10))plt.imshow(image)show_mask(mask, plt.gca())show_points(input_point, input_label, plt.gca())plt.title(f"Mask {i+1}, Score: {score:.3f}", fontsize=18)plt.axis('off')plt.show()
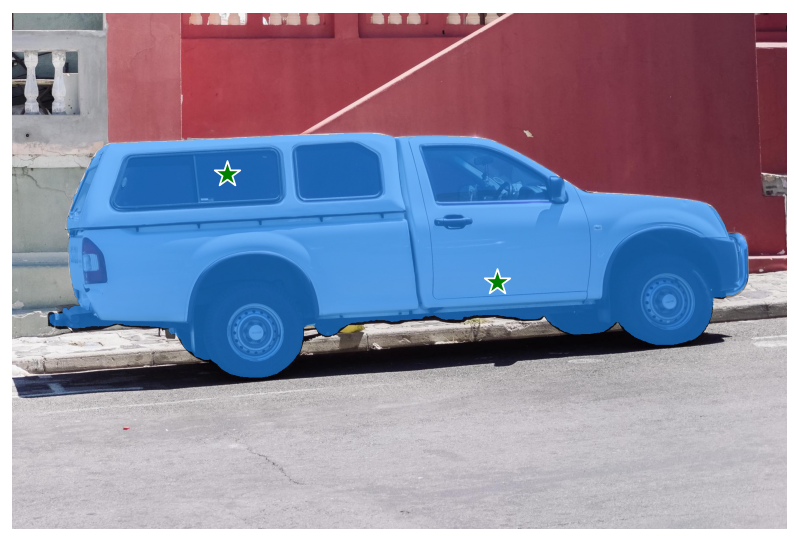
多点输入(都视为前景点)
# 输入为多个point的情况(前景点)input_point = np.array([[500, 375]])input_label = np.array([1])masks, scores, logits = predictor.predict(point_coords=input_point,point_labels=input_label,multimask_output=True,)# additional pointsinput_point = np.array([[500, 375], [1125, 625]])input_label = np.array([1, 1])mask_input = logits[np.argmax(scores), :, :] # Choose the model's best maskmasks, _, _ = predictor.predict(point_coords=input_point,point_labels=input_label,mask_input=mask_input[None, :, :],multimask_output=False,)print('masks.shape',masks.shape) # only 1 x H x Wplt.figure(figsize=(10,10))plt.imshow(image)show_mask(masks, plt.gca())show_points(input_point, input_label, plt.gca())plt.axis('off')plt.show()
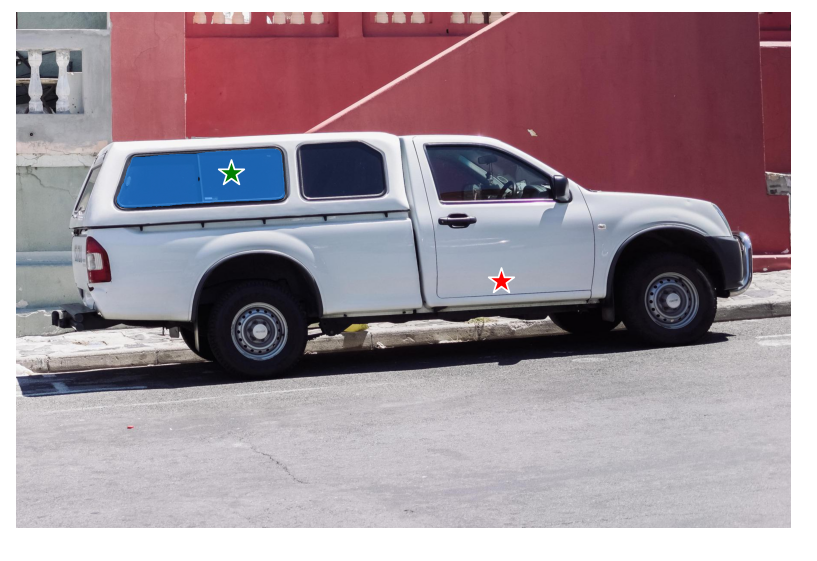
多点输入(前景点加后景点)
决定这个点是前景点还是后景点的就是label,0就是背景的意思
修改标签,得到不一样的结果
# input_point = np.array([[500, 375], [1125, 625]])# input_label = np.array([1, 1])input_point = np.array([[500, 375], [1125, 625]])input_label = np.array([1, 0])
使用box框具体物体
# 输入为additional pointsinput_box = np.array([425, 600, 700, 875])masks, _, _ = predictor.predict(point_coords=None,point_labels=None,box=input_box[None, :],multimask_output=False,)plt.figure(figsize=(10, 10))plt.imshow(image)show_mask(masks[0], plt.gca())show_box(input_box, plt.gca())plt.axis('off')plt.show()

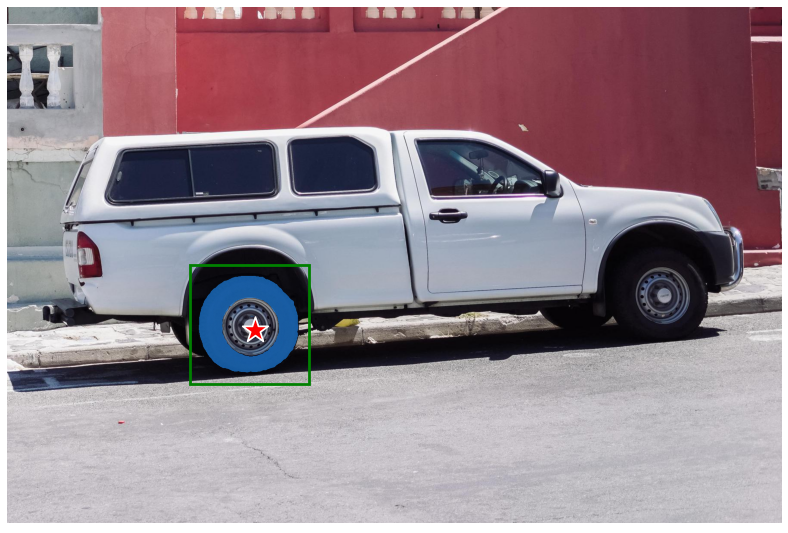
结合points和box
# 输入为point和boxinput_box = np.array([425, 600, 700, 875])input_point = np.array([[575, 750]])input_label = np.array([0])masks, _, _ = predictor.predict(point_coords=input_point,point_labels=input_label,box=input_box,multimask_output=False,)plt.figure(figsize=(10, 10))plt.imshow(image)show_mask(masks[0], plt.gca())show_box(input_box, plt.gca())show_points(input_point, input_label, plt.gca())plt.axis('off')plt.show()
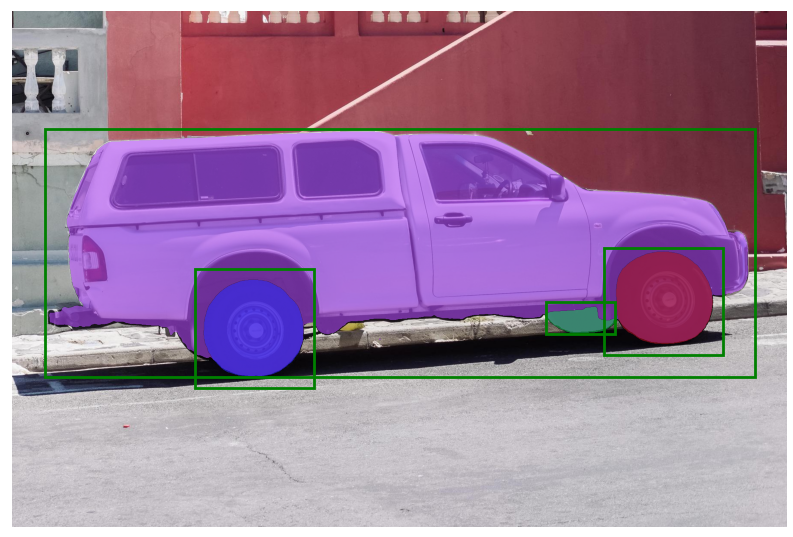
batch prompt inputs
# batch prompt inputsinput_boxes = torch.tensor([[75, 275, 1725, 850],[425, 600, 700, 875],[1375, 550, 1650, 800],[1240, 675, 1400, 750],], device=predictor.device)transformed_boxes = predictor.transform.apply_boxes_torch(input_boxes, image.shape[:2])masks, _, _ = predictor.predict_torch(point_coords=None,point_labels=None,boxes=transformed_boxes,multimask_output=False,)print(masks.shape) # (batch_size) x (num_predicted_masks_per_input) x H x Wplt.figure(figsize=(10, 10))plt.imshow(image)for mask in masks:show_mask(mask.cpu().numpy(), plt.gca(), random_color=True)for box in input_boxes:show_box(box.cpu().numpy(), plt.gca())plt.axis('off')plt.show()
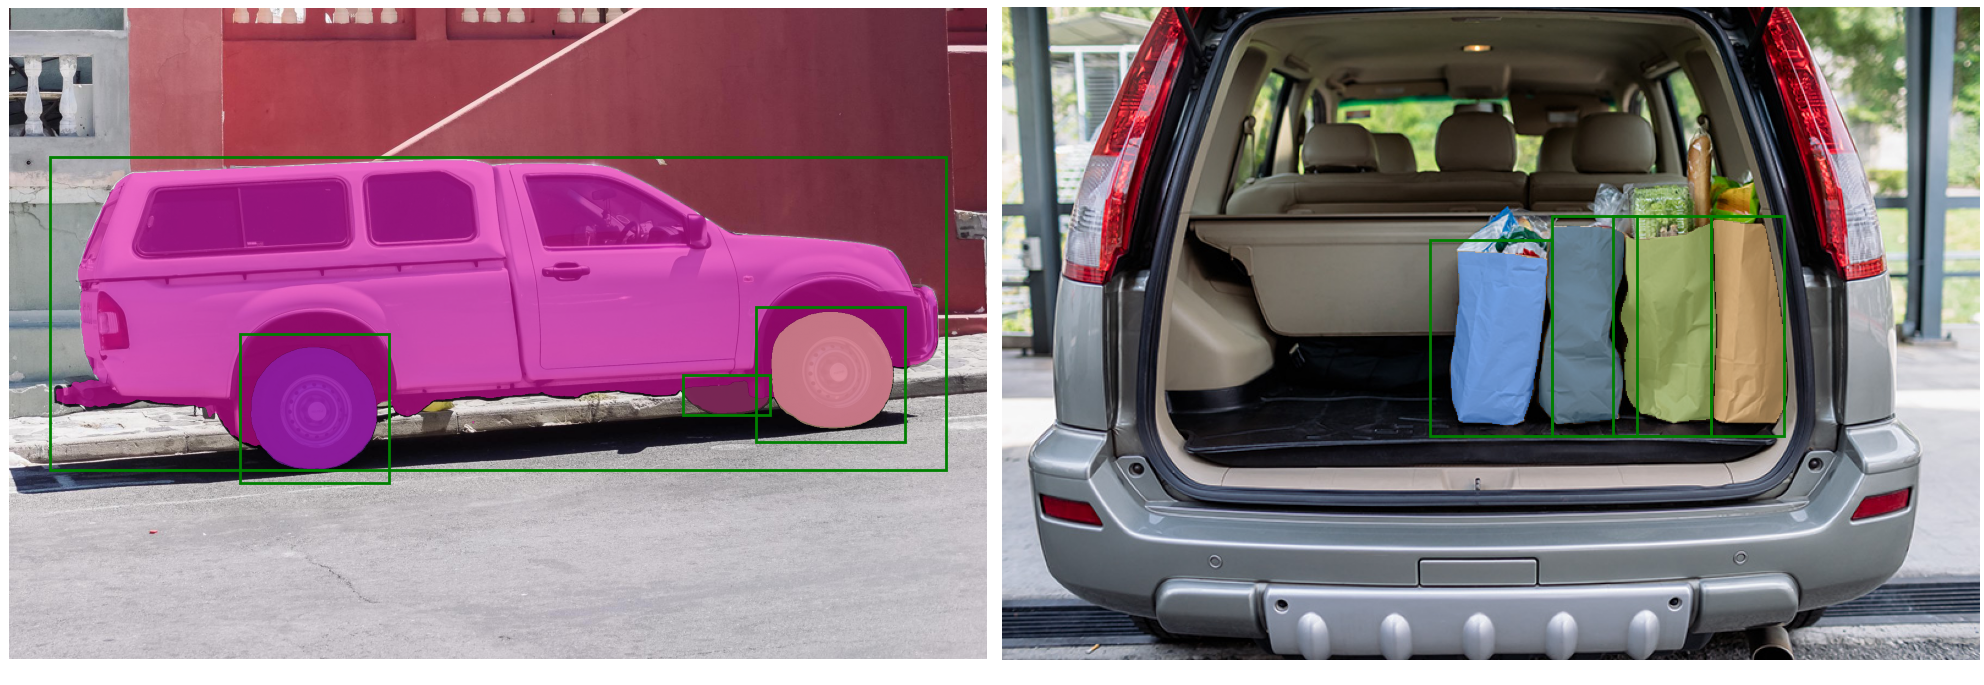
End-to-end batched inference
## End-to-end batched inferenceimage1 = image # truck.jpg from aboveimage1_boxes = torch.tensor([[75, 275, 1725, 850],[425, 600, 700, 875],[1375, 550, 1650, 800],[1240, 675, 1400, 750],], device=sam.device)image2 = cv2.imread('./notebooks/images/groceries.jpg')image2 = cv2.cvtColor(image2, cv2.COLOR_BGR2RGB)image2_boxes = torch.tensor([[450, 170, 520, 350],[350, 190, 450, 350],[500, 170, 580, 350],[580, 170, 640, 350],], device=sam.device)# Both images and prompts are input as PyTorch tensors that are already transformed to the correct frame. # Inputs are packaged as a list over images, which each element is a dict that takes the following keys:# * `image`: The input image as a PyTorch tensor in CHW format.# * `original_size`: The size of the image before transforming for input to SAM, in (H, W) format.# * `point_coords`: Batched coordinates of point prompts.# * `point_labels`: Batched labels of point prompts.# * `boxes`: Batched input boxes.# * `mask_inputs`: Batched input masks.from segment_anything.utils.transforms import ResizeLongestSideresize_transform = ResizeLongestSide(sam.image_encoder.img_size)def prepare_image(image, transform, device):image = transform.apply_image(image)image = torch.as_tensor(image, device=device.device) return image.permute(2, 0, 1).contiguous()batched_input = [{'image': prepare_image(image1, resize_transform, sam),'boxes': resize_transform.apply_boxes_torch(image1_boxes, image1.shape[:2]),'original_size': image1.shape[:2]},{'image': prepare_image(image2, resize_transform, sam),'boxes': resize_transform.apply_boxes_torch(image2_boxes, image2.shape[:2]),'original_size': image2.shape[:2]}]batched_output = sam(batched_input, multimask_output=False)# The output is a list over results for each input image, where list elements are dictionaries with the following keys:# * `masks`: A batched torch tensor of predicted binary masks, the size of the original image.# * `iou_predictions`: The model's prediction of the quality for each mask.# * `low_res_logits`: Low res logits for each mask, which can be passed back to the model as mask input on a later iteration.print('batched_output[0].keys()',batched_output[0].keys())fig, ax = plt.subplots(1, 2, figsize=(20, 20))ax[0].imshow(image1)for mask in batched_output[0]['masks']:show_mask(mask.cpu().numpy(), ax[0], random_color=True)for box in image1_boxes:show_box(box.cpu().numpy(), ax[0])ax[0].axis('off')ax[1].imshow(image2)for mask in batched_output[1]['masks']:show_mask(mask.cpu().numpy(), ax[1], random_color=True)for box in image2_boxes:show_box(box.cpu().numpy(), ax[1])ax[1].axis('off')plt.tight_layout()plt.show()
高阶测试
模型训练(waiting)