什么是webpack(去官网看详细的API)
本质上,webpack 是一个用于现代 JavaScript 应用程序的 静态模块打包工具。当 webpack 处理应用程序时,它会在内部从一个或多个入口点构建一个 依赖图(dependency graph),然后将你项目中所需的每一个模块组合成一个或多个 bundles,它们均为静态资源,用于展示你的内容
使用webpack完成简单的vue搭建:
1、新建vue项目(前提是node.js已经下载安装)
执行 npm init // 生成package.json文件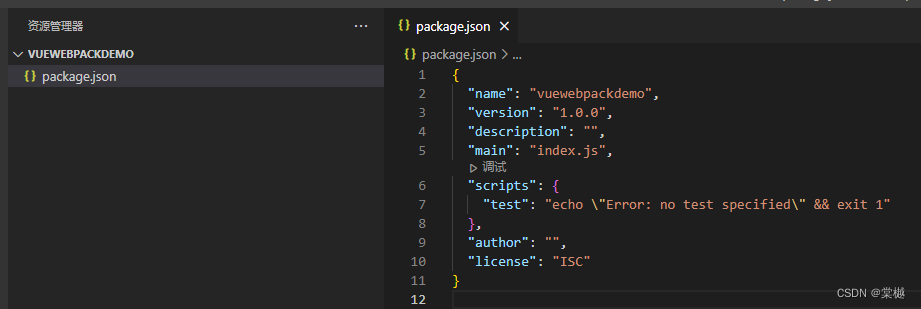
2、安装webpack webpack-cli和手动创建webpack.config.js文件
npm install webpack webpack-cli --save-dev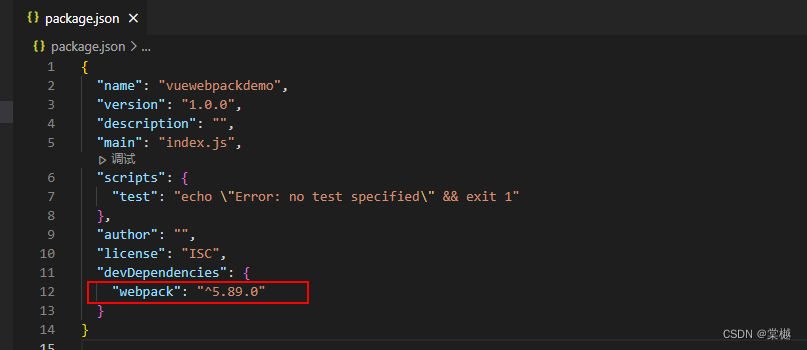 3、创建webpack.config.js文件
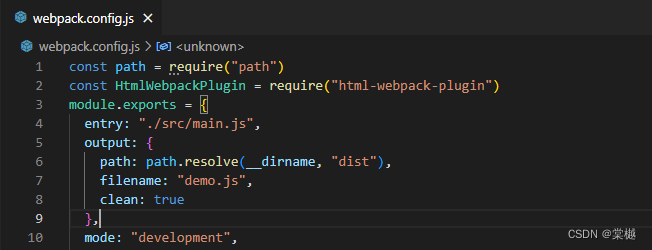
4、引入vue2 新建src/main.js 和index.html文件
npm install vue@2.7.14// src/main.js文件内容import Vue from 'vue'
var vm = new Vue({el:'#app',data:{msg:'hello vue'}
})// index.html文件内容<!DOCTYPE html>
<html lang="en">
<head><meta charset="UTF-8"><title>vueWebpackDemo</title>
</head>
<body><div id="app">{{msg}}</div>
</body>
</html>
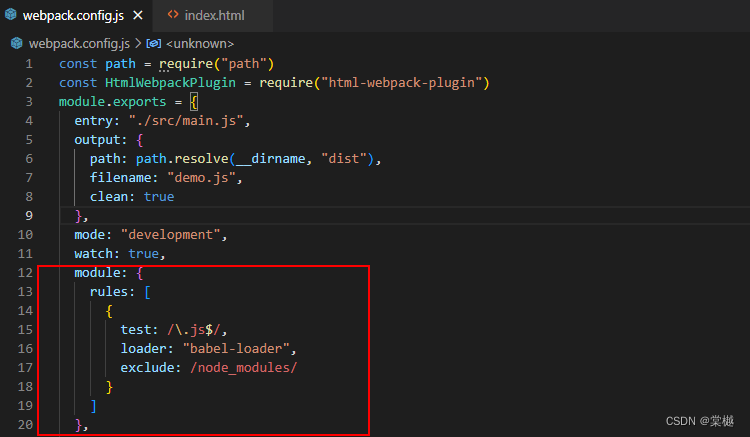
5、引入babel
npm install --save-dev babel-core babel-loader将babel加入到webpack.config.js配置文件中
module: {rules: [{test: /\.js$/,loader: "babel-loader",exclude: /node_modules/}]
}
6、执行webpack,就可以完成一次简单的使用webpack手动搭建vue项目
webpack的常用配置:
HtmlWebpackPlugin插件(复制index.html)。
作用:编译时自动在dist的目录中创建一个html文件并将Index.html中的内容复制过去
npm install --save-dev html-webpack-plugin在webpack.config.js文件中添加如下配置:
const HtmlWebpackPlugin = require('html-webpack-plugin')plugins:[new HtmlWebpackPlugin()
]
webpack-dev-server插件(实时加载):
作用:提供了一个简单的web服务器,能够实时重新加载。无须在浏览器中直接打开文件(我们实际开发中将代码部署在 server中,而不是在浏览器中直接打开文件)
npm install --save-dev webpack-dev-server在webpack.config.js文件中添加如下配置,以告知webpack-dev-server, 在localhost:xxx下建立服务,将 dist 目录下的文件,作为可访问文件。
devServer: {static: path.resolve(__dirname, "static"),hot: true, // 开启热加载open: true, // 直接打开浏览器port: 9000 // 端口号}在package.json中添加一个script脚本以直接运行开发服务器(dev server)
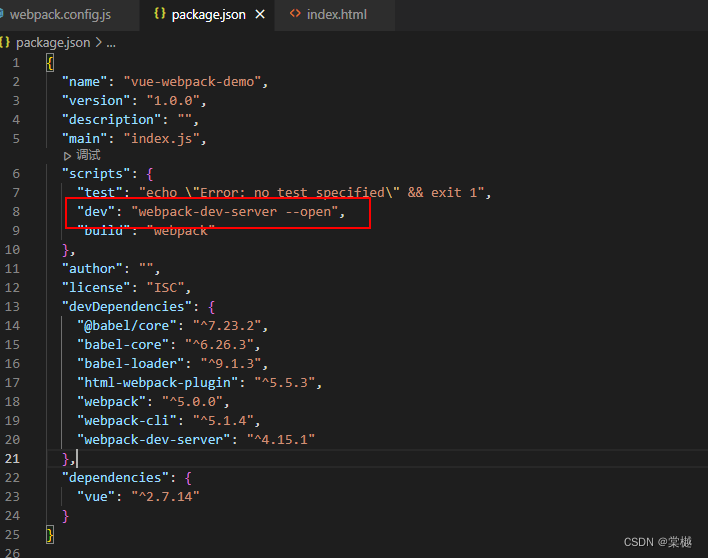
执行npm run dev命令,浏览器将会自动打开页面,成功启动服务。
css加载器(css-loader和style-loader):
npm install --save-dev css-loader style-loader在webpack.config.js中进行如下配置:
module: {rules: [{test: /\.css$/,use: ["style-loader", "css-loader"]}]},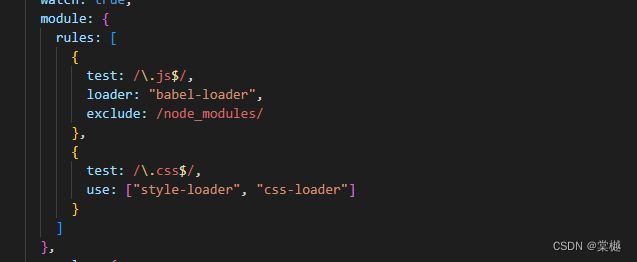
新建src/styles/index.css文件,并在main.js中引入
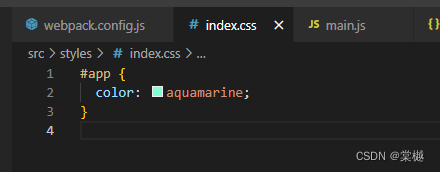

执行npm run dev 查看浏览器

图片资源和字体的加载
说明:
url-loader是基于file-loader的封装,故需引入file-loader。url-loader解决图片较多时过多http请求导致页面性能降低的问题,将引入的图片编码,生成dataURl。相当于把图片数据翻译成一串字符,再把这串字符打包到文件中,最终只需要引入这个文件就能访问图片了
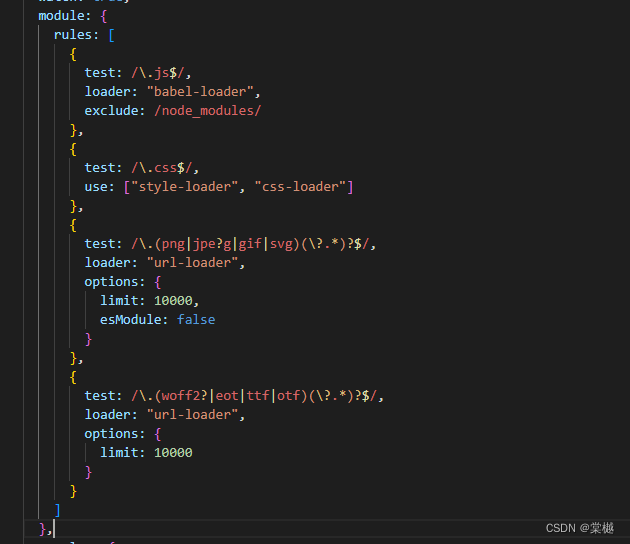
npm install --save-dev file-loader url-loader在webpack.config.js文件中添加如下配置:
{test:/\.(png|jpe?g|gif|svg)(\?.*)?$/,loader: 'url-loader',options: {limit: 10000,esModule: false}
},
{test: /\.(woff2?|eot|ttf|otf)(\?.*)?$/,loader: 'url-loader',options: {limit: 10000}
}
在src/images/中添加图片,并在main.js文件中引入:
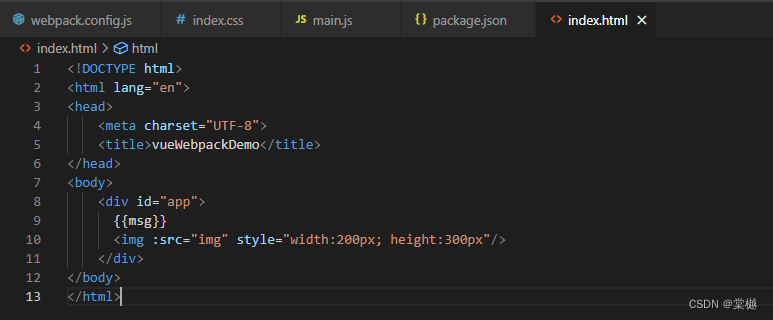
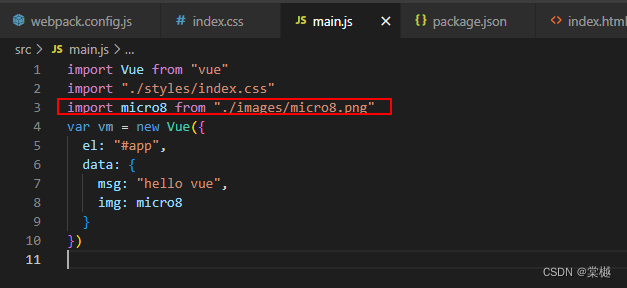
vue-loader
说明:在vue的开发过程中,通常我们需要写.vue结尾的文件即组件,这类文件需要通过 vue-loader 来加载,vue-template-compiler来编译
npm install --save-dev vue-loader@15.9.8 vue-template-compiler这里需要注意,vue的版本需要跟vue-template-compiler版本一致,否则会报错:TypeError: Cannot read property ‘parseComponent‘ of undefined
在webpack.config.js文件中添加:
const { VueLoaderPlugin } = require('vue-loader')
…
module: {rules: [{test: /\.vue$/,loader: 'vue-loader'}]
},…
plugins:[new VueLoaderPlugin()
]
创建app.vue,和修改main.js、index.html文件
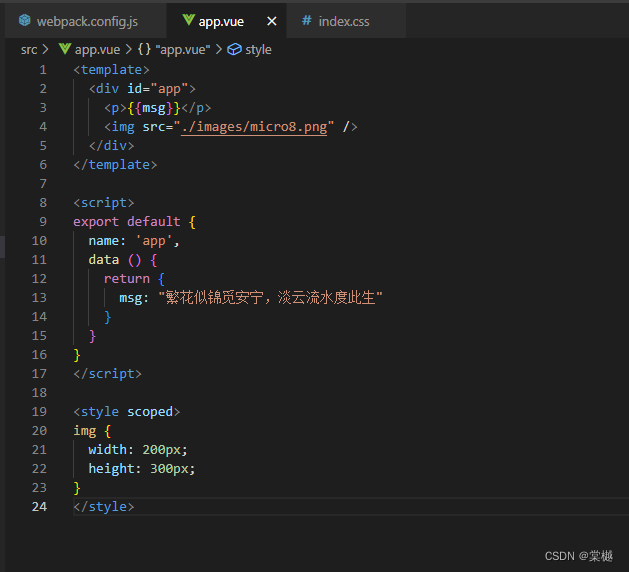
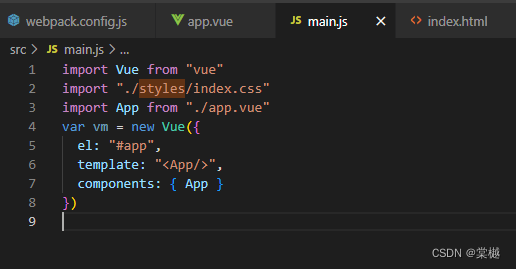
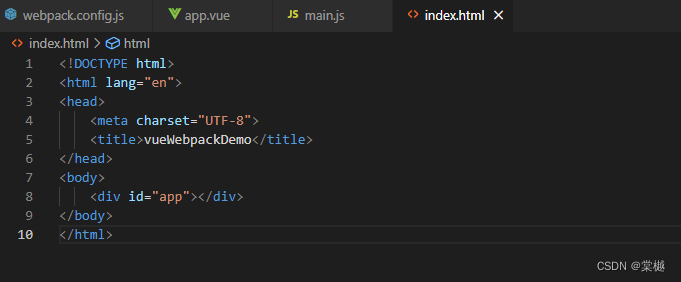

简单的完整的webpack.config.js文件内容:
const path = require("path")
const HtmlWebpackPlugin = require("html-webpack-plugin")
const { VueLoaderPlugin } = require("vue-loader")
module.exports = {entry: "./src/main.js",output: {path: path.resolve(__dirname, "dist"),filename: "demo.js",clean: true // 在生成文件之前清空 output 目录},mode: "development",watch: true, // watch监听文件变化,当它们修改后会重新编译module: {rules: [{test: /\.js$/,loader: "babel-loader",exclude: /node_modules/},{test: /\.css$/,use: ["style-loader", "css-loader"]},{test: /\.(png|jpe?g|gif|svg)(\?.*)?$/,loader: "url-loader",options: {limit: 10000,esModule: false}},{test: /\.(woff2?|eot|ttf|otf)(\?.*)?$/,loader: "url-loader",options: {limit: 10000}},{test: /\.vue$/,loader: "vue-loader"}]},resolve: {alias: {vue$: "vue/dist/vue.esm.js" // 'vue/dist/vue.common.js' for webpack 1}},plugins: [new HtmlWebpackPlugin({title: "vue demo",template: "index.html"}),new VueLoaderPlugin()],devServer: {static: path.resolve(__dirname, "static"),hot: true, // 热重载open: true, // 自动打开浏览器port: 9000 // 端口}
}





![[论文阅读]PV-RCNN++](https://img-blog.csdnimg.cn/c21f542c8a3f4031949e66cf43fa9c17.png)

