前言:在生产环境中由于一些不明原因,导致RabbitMQ重启的情况下,在RabbitMQ重启期间生产者投递消息失败,生产者发送的消息会丢失,那这时候就需要去想在极端的情况下,RabbitMQ集群不可用的时候,如果去处理投递失败的消息。
1、在config包里新建一个名为ConfirmConfig的类用于编写配置交换机、队列、routingkey的代码
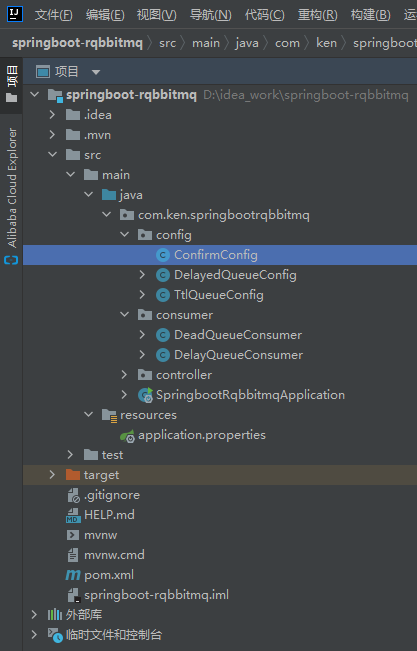
代码如下:
package com.ken.springbootrqbbitmq.config;import org.springframework.amqp.core.*;
import org.springframework.beans.factory.annotation.Qualifier;
import org.springframework.context.annotation.Bean;
import org.springframework.context.annotation.Configuration;@Configuration
public class ConfirmConfig {//交换机public static final String EXCHANGE_NAME = "confirm_exchange";//队列public static final String QUEUE_NAME = "confirm_queue";//routingkeypublic static final String ROUTING_KEY = "confirm";//声明交换机@Bean("confirmExchange")public DirectExchange confirmExchange() {return new DirectExchange(EXCHANGE_NAME);}//声明队列@Bean("confirmQueue")public Queue confirmQueue() {return QueueBuilder.durable(QUEUE_NAME).build();}//绑定交换机和队列@Beanpublic Binding queueBindingExchange(@Qualifier("confirmQueue") Queue confirmQueue,@Qualifier("confirmExchange") DirectExchange confirmExchange) {return BindingBuilder.bind(confirmQueue).to(confirmExchange).with(ROUTING_KEY);}}
2、在controller包里新建一个名为ProducerController的类用于编写充当生产者发送消息的代码
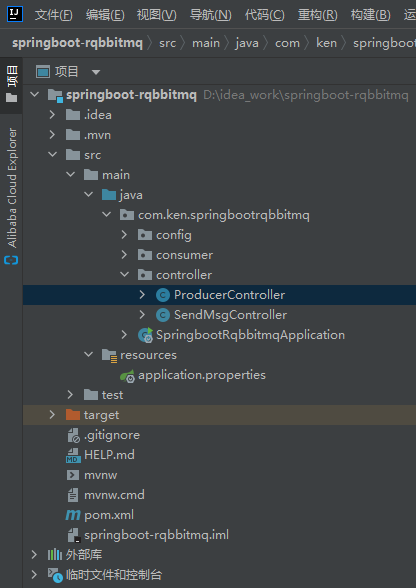
代码如下:
package com.ken.springbootrqbbitmq.controller;import com.ken.springbootrqbbitmq.config.ConfirmConfig;
import lombok.extern.slf4j.Slf4j;
import org.springframework.amqp.rabbit.core.RabbitTemplate;
import org.springframework.beans.factory.annotation.Autowired;
import org.springframework.web.bind.annotation.GetMapping;
import org.springframework.web.bind.annotation.PathVariable;
import org.springframework.web.bind.annotation.RequestMapping;
import org.springframework.web.bind.annotation.RestController;@Slf4j
@RestController
@RequestMapping("/confirm")
public class ProducerController {@Autowired(required = false)private RabbitTemplate rabbitTemplate;//发消息@GetMapping("/sendMessage/{message}")public void sendMessage(@PathVariable String message) {rabbitTemplate.convertAndSend(ConfirmConfig.EXCHANGE_NAME,ConfirmConfig.ROUTING_KEY,message);log.info("发送消息内容:{}",message);}}
3、在consumer包里新建一个名为Consumer的类用于编写充当消费者消费消息的代码
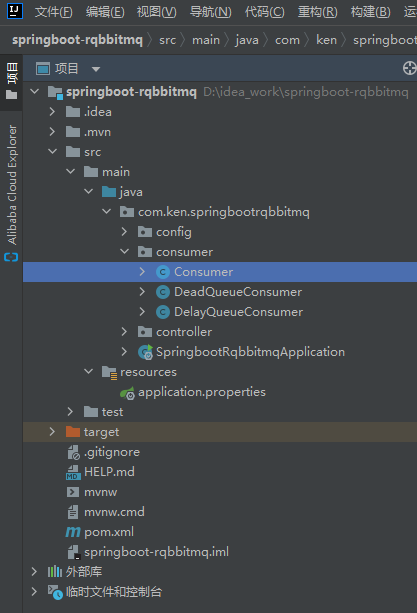
代码如下:
package com.ken.springbootrqbbitmq.consumer;import com.ken.springbootrqbbitmq.config.ConfirmConfig;
import lombok.extern.slf4j.Slf4j;
import org.springframework.amqp.core.Message;
import org.springframework.amqp.rabbit.annotation.RabbitListener;
import org.springframework.stereotype.Component;@Slf4j
@Component
public class Consumer {@RabbitListener(queues = ConfirmConfig.QUEUE_NAME)public void receiveConfirmMessage(Message message) {String msg = new String(message.getBody());log.info("接收到队列的消息为:{}",msg);}}
4、启动项目,在浏览器地址栏调用发送消息的接口,查看生产者是否运行成功并能发送消息http://localhost:8080/confirm/sendMessage/我是消息
例:
![]()
效果图: 
5、前言里我们说过,怎么在RabbitMQ宕机的情况下,保证生产者发送的消息不丢失呢,这时候就需要用到回调函数了,交换机本身收到消息后会确认消息,如果交换机没有确认或者确认消息失败,都视为发送消息失败,然后触发回调接口,告诉生产者消息发送失败,这样,消息接收成功与否我们都能通过回调方法返回的消息知道了
(1)在config包里新建一个名为MyCallBack的类用于编写交换机的确认回调方法
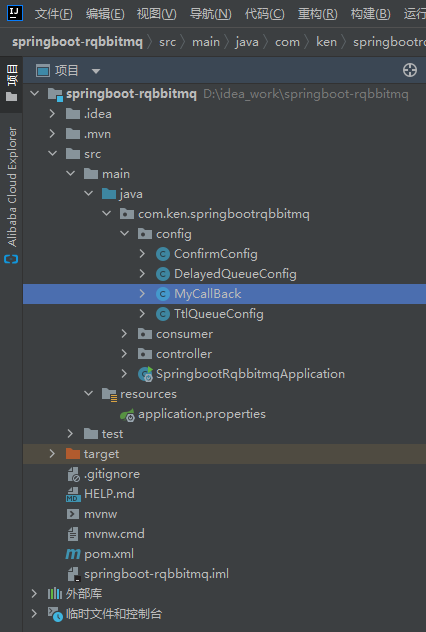
代码如下:
package com.ken.springbootrqbbitmq.config;import lombok.extern.slf4j.Slf4j;
import org.springframework.amqp.rabbit.connection.CorrelationData;
import org.springframework.amqp.rabbit.core.RabbitTemplate;
import org.springframework.beans.factory.annotation.Autowired;
import org.springframework.stereotype.Component;import javax.annotation.PostConstruct;@Slf4j
@Component
public class MyCallBack implements RabbitTemplate.ConfirmCallback {@Autowired(required = false)private RabbitTemplate rabbitTemplate;/*** @PostConstruct注解,在对象加载完依赖注入后执行,它通常都是一些初始化的操作,但初始化可能依赖于注入的其他组件,所以要等依赖全部加载完再执行*/@PostConstructpublic void init() {//把当前实现类MyCallBack注入到RabbitTemplate类的ConfirmCallback接口里面rabbitTemplate.setConfirmCallback(this);}/*** 交换机确认回调方法* 1、第一个参数:correlationData保存回调消息的ID以及相关信息* 2、第二个参数:交换机收到消息就返回true,否则返回false* 3、第三参数:原因(返回失败的原因,如果成功返回的是null)*/@Overridepublic void confirm(CorrelationData correlationData, boolean ack, String cause) {String id =  correlationData != null ? correlationData.getId() : "";if(ack) {log.info("交换机已经收到id为{}的消息",id);}else {log.info("交换机还未收到id为{}的消息,原因为{}",id,cause);}}
}
6、在上述步骤可得知confirm方法有一个类型为CorrelationData的参数correlationData,这个参数实际上是空的,并没有值,需要生产者发送,correlationData参数才会有值(connfirm方法的其余两个参数ack和cause默认有值)所以我们需要修改生产者的代码
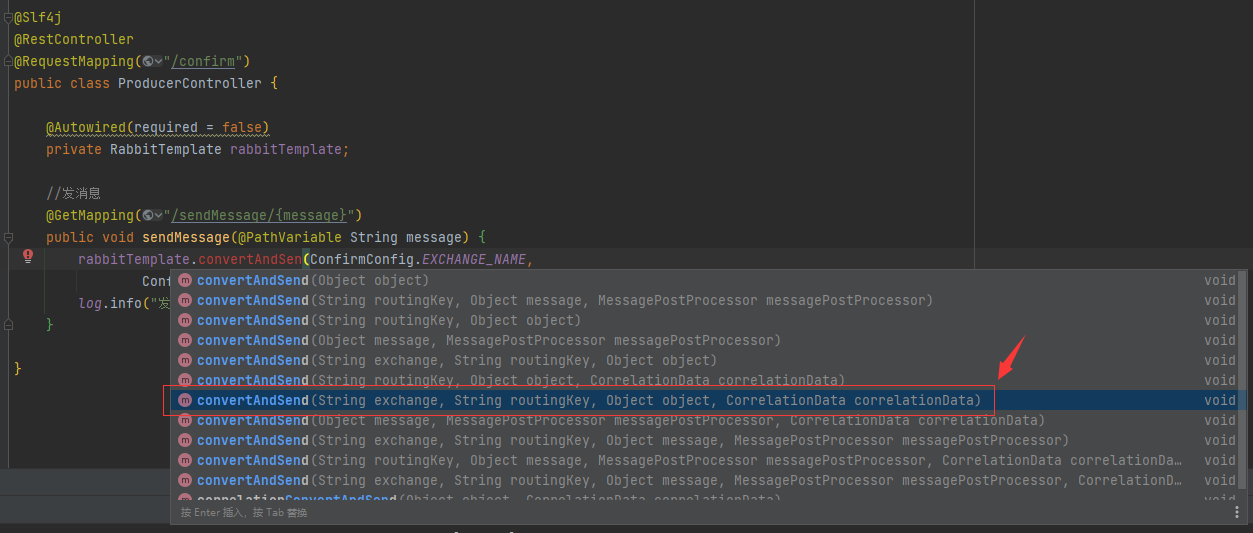
代码如下:
package com.ken.springbootrqbbitmq.controller;import com.ken.springbootrqbbitmq.config.ConfirmConfig;
import lombok.extern.slf4j.Slf4j;
import org.springframework.amqp.rabbit.connection.CorrelationData;
import org.springframework.amqp.rabbit.core.RabbitTemplate;
import org.springframework.beans.factory.annotation.Autowired;
import org.springframework.web.bind.annotation.GetMapping;
import org.springframework.web.bind.annotation.PathVariable;
import org.springframework.web.bind.annotation.RequestMapping;
import org.springframework.web.bind.annotation.RestController;@Slf4j
@RestController
@RequestMapping("/confirm")
public class ProducerController {@Autowired(required = false)private RabbitTemplate rabbitTemplate;//发消息@GetMapping("/sendMessage/{message}")public void sendMessage(@PathVariable String message) {CorrelationData correlationData = new CorrelationData("1");rabbitTemplate.convertAndSend(ConfirmConfig.EXCHANGE_NAME,ConfirmConfig.ROUTING_KEY,message,correlationData);log.info("发送消息内容:{}",message);}}
7、在配置文件加上以下配置开启交换机确认发布模式
spring.rabbitmq.publisher-confirm-type=correlated配置文件完整内容如下:
spring.rabbitmq.host=192.168.194.150
spring.rabbitmq.port=5672
spring.rabbitmq.username=admin
spring.rabbitmq.password=123456
#none(禁用发布确认模式,默认值)
#correlated(发布消息成功到交换机后会触发回调方法)
#simple(和correlated一样会触发回调方法,消息发布成功后使用rabbitTemplate调用waitForConfirms或waitForConfirmsOrDie方法,等待broker节点返回发送结果)
spring.rabbitmq.publisher-confirm-type=correlated
效果图:

8、启动项目,在浏览器地址栏调用发送消息的接口,可以看到生产者发送消息成功,交换机调用了回调接口,消费者成功消费消息
http://localhost:8080/confirm/sendMessage/我是消息
例:
![]()
效果图:

9、把生产者要发送到的交换机改成不存在的,用以模拟交换机出问题的情景
package com.ken.springbootrqbbitmq.controller;import com.ken.springbootrqbbitmq.config.ConfirmConfig;
import lombok.extern.slf4j.Slf4j;
import org.springframework.amqp.rabbit.connection.CorrelationData;
import org.springframework.amqp.rabbit.core.RabbitTemplate;
import org.springframework.beans.factory.annotation.Autowired;
import org.springframework.web.bind.annotation.GetMapping;
import org.springframework.web.bind.annotation.PathVariable;
import org.springframework.web.bind.annotation.RequestMapping;
import org.springframework.web.bind.annotation.RestController;@Slf4j
@RestController
@RequestMapping("/confirm")
public class ProducerController {@Autowired(required = false)private RabbitTemplate rabbitTemplate;//发消息@GetMapping("/sendMessage/{message}")public void sendMessage(@PathVariable String message) {CorrelationData correlationData = new CorrelationData("1");rabbitTemplate.convertAndSend(ConfirmConfig.EXCHANGE_NAME + "1",ConfirmConfig.ROUTING_KEY,message,correlationData);log.info("发送消息内容:{}",message);}}
效果图:
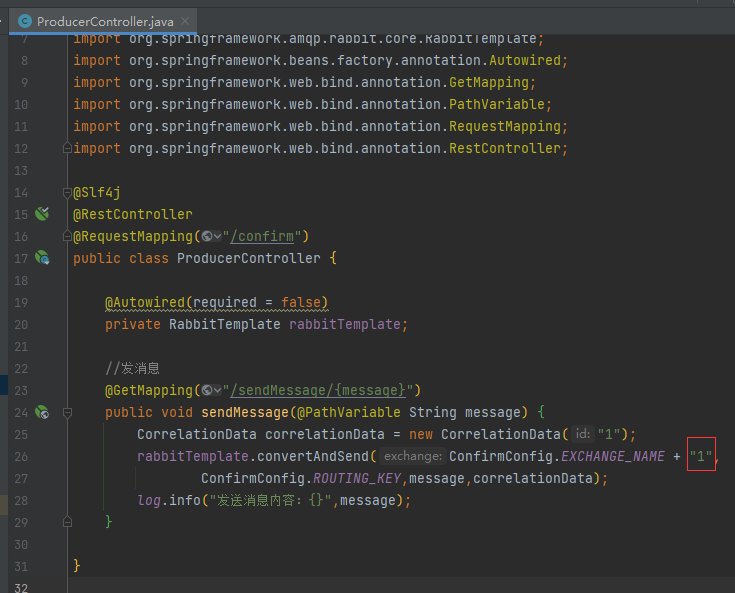
10、重新启动项目,在浏览器地址栏调用发送消息的接口,可以看到生产者发送消息成功,交换机调用了回调接口并打印出了交换机接收消息失败的原因
http://localhost:8080/confirm/sendMessage/我是消息
例:
![]()
效果图:

11、把RoutingKey改成不存在的,用以模拟队列出问题的情景
package com.ken.springbootrqbbitmq.controller;import com.ken.springbootrqbbitmq.config.ConfirmConfig;
import lombok.extern.slf4j.Slf4j;
import org.springframework.amqp.rabbit.connection.CorrelationData;
import org.springframework.amqp.rabbit.core.RabbitTemplate;
import org.springframework.beans.factory.annotation.Autowired;
import org.springframework.web.bind.annotation.GetMapping;
import org.springframework.web.bind.annotation.PathVariable;
import org.springframework.web.bind.annotation.RequestMapping;
import org.springframework.web.bind.annotation.RestController;@Slf4j
@RestController
@RequestMapping("/confirm")
public class ProducerController {@Autowired(required = false)private RabbitTemplate rabbitTemplate;//发消息@GetMapping("/sendMessage/{message}")public void sendMessage(@PathVariable String message) {CorrelationData correlationData = new CorrelationData("2");rabbitTemplate.convertAndSend(ConfirmConfig.EXCHANGE_NAME,ConfirmConfig.ROUTING_KEY + "2",message,correlationData);log.info("发送消息内容:{}",message);}}
效果图:
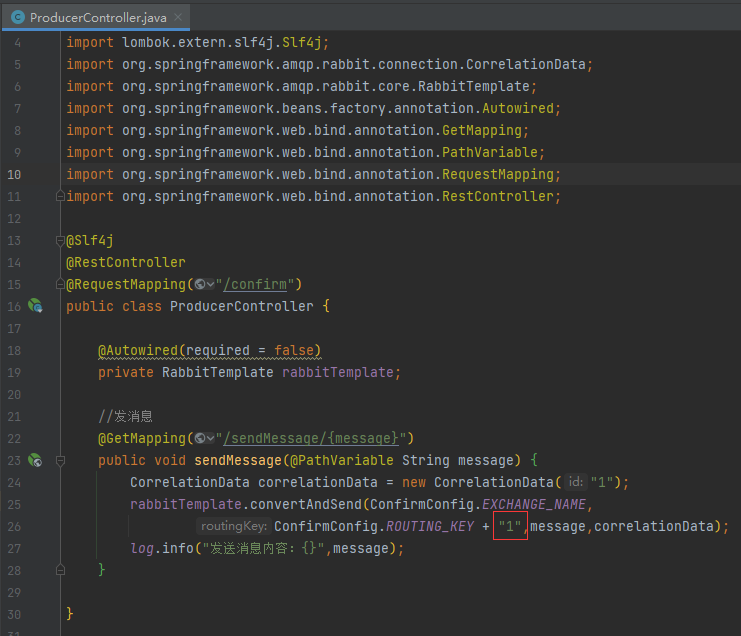
12、重新启动项目,在浏览器地址栏调用发送消息的接口,可以看到生产者发送消息成功,交换机调用了回调接口并打印出交换机接收消息成功,但消费者没有消费成功的日志输出,因为RoutingKey错了,交换机没有把消息发送到队列里,队列里没消息,自然消费者也就没有消费到消息了,但这个结果不符合我们的预期,因为这次丢失了消息,丢失消息却没有回馈消息丢失,实际上应该调用回调接口反馈消息丢失,所以我们需要继续往下改进代码。
http://localhost:8080/confirm/sendMessage/我是消息
例:
![]()
效果图:

13、给配置文件加上以下配置,用以回退消息
spring.rabbitmq.publisher-returns=true配置文件完整内容如下:
spring.rabbitmq.host=192.168.194.150
spring.rabbitmq.port=5672
spring.rabbitmq.username=admin
spring.rabbitmq.password=123456
#none(禁用发布确认模式,默认值)
#correlated(发布消息成功到交换机后会触发回调方法)
#simple(和correlated一样会触发回调方法,消息发布成功后使用rabbitTemplate调用waitForConfirms或waitForConfirmsOrDie方法,等待broker节点返回发送结果)
spring.rabbitmq.publisher-confirm-type=correlated
#一旦投递消息失败或者路由失败,是否回退消息给生产者
spring.rabbitmq.publisher-returns=true
14、使用RabbitTemplate的内置接口回退消息
代码如下:
package com.ken.springbootrqbbitmq.config;import lombok.extern.slf4j.Slf4j;
import org.springframework.amqp.core.Message;
import org.springframework.amqp.rabbit.connection.CorrelationData;
import org.springframework.amqp.rabbit.core.RabbitTemplate;
import org.springframework.beans.factory.annotation.Autowired;
import org.springframework.stereotype.Component;import javax.annotation.PostConstruct;@Slf4j
@Component
public class MyCallBack implements RabbitTemplate.ConfirmCallback,RabbitTemplate.ReturnCallback {@Autowired(required = false)private RabbitTemplate rabbitTemplate;/*** @PostConstruct注解,在对象加载完依赖注入后执行,它通常都是一些初始化的操作,但初始化可能依赖于注入的其他组件,所以要等依赖全部加载完再执行*/@PostConstructpublic void init() {//把当前实现类MyCallBack注入到RabbitTemplate类的ConfirmCallback接口里面rabbitTemplate.setConfirmCallback(this);//把当前实现类MyCallBack注入到RabbitTemplate类的ReturnCallback接口里面rabbitTemplate.setReturnCallback(this);}/*** 交换机确认回调方法* 1、第一个参数:correlationData保存回调消息的ID以及相关信息* 2、第二个参数:交换机收到消息就返回true,否则返回false* 3、第三参数:原因(返回失败的原因,如果成功返回的是null)*/@Overridepublic void confirm(CorrelationData correlationData, boolean ack, String cause) {String id =  correlationData != null ? correlationData.getId() : "";if(ack) {log.info("交换机已经收到id为{}的消息",id);}else {log.info("交换机还未收到id为{}的消息,原因为{}",id,cause);}}/*** 可以在当消息传递过程中不可达目的地时将消息返回给生产者* @param message* @param replyCode* @param replyText* @param exchange* @param routingKey*/@Overridepublic void returnedMessage(Message message, int replyCode, String replyText, String exchange, String routingKey) {log.error("消息{},被交换机{}退回,退回原因:{},路由routingkey:{}",new String(message.getBody()),exchange,replyText,routingKey);}}
15、重新启动项目,在浏览器地址栏调用发送消息的接口,可以看到生产者发送消息成功,交换机收到消息发不过去队列后把消息回退了,保证了消息不丢失。
http://localhost:8080/confirm/sendMessage/我是消息
例:
![]()
效果图:


