文章目录
- LNMP环境搭建
- LNMP部署之Nginx
- 编译安装nginx
- LNMP部署之MySQL
- RPM安装
- LNMP部署之PHP
- yum安装
- php连接数据库测试
LNMP环境搭建
LNMP是一种web服务器架构,与LAMP类似。它由Linux、Nginx、MySQL和PHP组成,这四个组合再一起提供了一个完整的Web服务器环境。
LNMP部署之Nginx
编译安装nginx
nginx源码包下载地址:http://nginx.org/download/
第一步:安装依赖环境
[root@localhost ~]# hostnamectl set-hostname lnmp-server
[root@localhost ~]# bash
[root@lnmp-server ~]# [root@lnmp-server ~]#  yum install -y make gcc-c++ pcre pcre-devel zlib-devel openssl openssl-devel
第二步:下载nginx源码包
这里使用的是nginx 1.16.0版本
[root@lnmp-server ~]#  mkdir /opt/mytools/
[root@lnmp-server ~]#  wget -O /opt/mytools/nginx-1.16.0.tar.gz http://nginx.org/download/nginx-1.16.0.tar.gz
第三步:解包
[root@lnmp-server ~]#  cd /opt/mytools/
[root@lnmp-server mytools]# tar -zxf nginx-1.16.0.tar.gz
[root@lnmp-server mytools]# ls
nginx-1.16.0  nginx-1.16.0.tar.gz
[root@lnmp-server mytools]# cd nginx-1.16.0
[root@lnmp-server nginx-1.16.0]# ls
auto  CHANGES  CHANGES.ru  conf  configure  contrib  html  LICENSE  man  README  src
第四步:创建nginx用户
[root@lnmp-server nginx-1.16.0]# useradd nginx -u 1160 -s /sbin/nologin -M
[root@lnmp-server nginx-1.16.0]# cat /etc/passwd |grep nginx
nginx:x:1160:1160::/home/nginx:/sbin/nologin
第五步:编译安装nginx
[root@lnmp-server nginx-1.16.0]# ./configure  --user=nginx --group=nginx  --prefix=/usr/local/nginx-1.16.0/ --with-http_stub_status_module --with-http_ssl_module[root@lnmp-server nginx-1.16.0]# ls
auto  CHANGES  CHANGES.ru  conf  configure  contrib  html  LICENSE  Makefile  man  objs  README  src
# 生成了Makefile
[root@nginx nginx-1.16.0]# make && make install
第六步:配置环境变量
[root@lnmp-server nginx-1.16.0]# echo "export  PATH=${PATH}:/usr/local/nginx-1.16.0/sbin/" >> /etc/profile
[root@lnmp-server nginx-1.16.0]# source /etc/profile
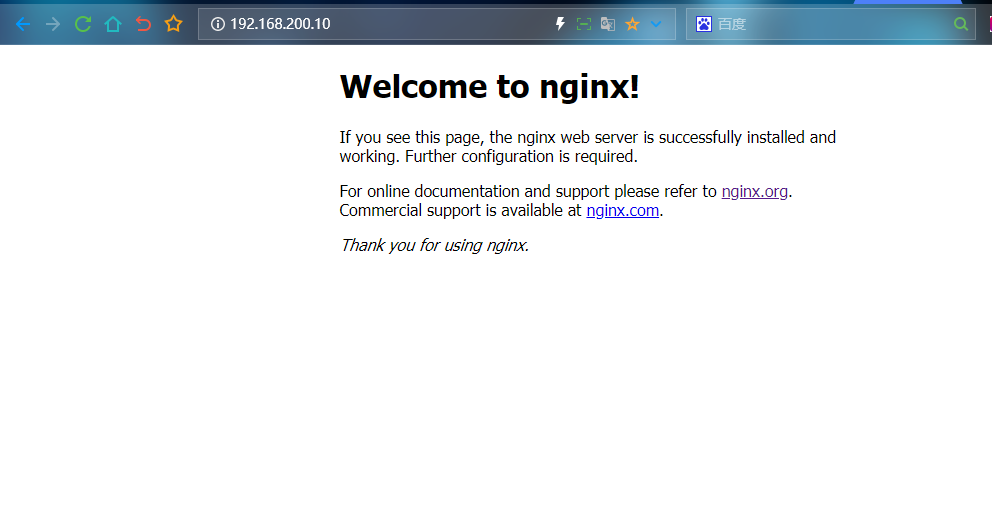
第七步:开启Nginx防火墙开放端口访问测试
[root@lnmp-server nginx-1.16.0]# nginx
[root@lnmp-server nginx-1.16.0]# netstat -tlnp |grep 80
tcp      0     0 0.0.0.0:80        0.0.0.0:*    LISTEN      55819/nginx: master
[root@lnmp-server nginx-1.16.0]# firewall-cmd --add-port=80/tcp --permanent
success
[root@lnmp-server nginx-1.16.0]# firewall-cmd --reload
success
LNMP部署之MySQL
RPM安装
第一步:下载安装
[root@lnmp-server ~]# wget http://repo.mysql.com/mysql-community-release-el7-5.noarch.rpm[root@lnmp-server ~]# rpm -ivh mysql-community-release-el7-5.noarch.rpm
[root@lnmp-server ~]# yum install -y mysql-server
第二步:启动服务
[root@lnmp-server ~]# systemctl start mysqld && systemctl enable mysqld
[root@lnmp-server ~]# netstat -tlnp |grep 3306
tcp6       0      0 :::3306           :::*         LISTEN      12019/mysqld

第三步:设置密码
[root@lnmp-server ~]# mysqladmin -uroot password "000000"
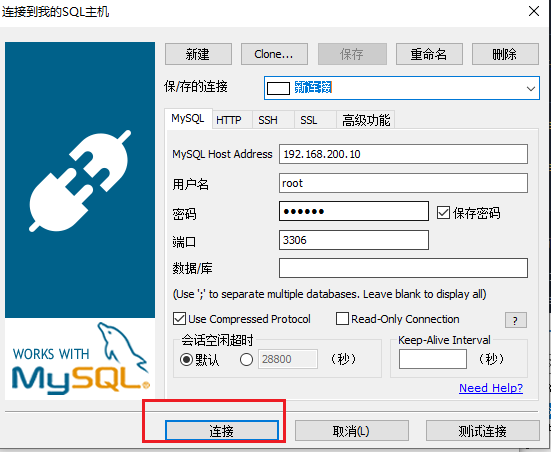
第四步:测试登录并设置所有用户都可以远程登录
[root@lnmp-server ~]# mysql -uroot -p
Enter password:
Welcome to the MySQL monitor.  Commands end with ; or \g.
Your MySQL connection id is 7
Server version: 5.6.51 MySQL Community Server (GPL)Copyright (c) 2000, 2021, Oracle and/or its affiliates. All rights reserved.Oracle is a registered trademark of Oracle Corporation and/or its
affiliates. Other names may be trademarks of their respective
owners.Type 'help;' or '\h' for help. Type '\c' to clear the current input statement.mysql> GRANT ALL PRIVILEGES ON *.* TO 'root'@'%' IDENTIFIED BY '000000';
Query OK, 0 rows affected (0.00 sec)
# root 用户授予所有数据库的所有权限,并设置密码为 '000000'
mysql> exit;
第五步:防火墙放行3306端口
[root@lnmp-server ~]# firewall-cmd --add-port=3306/tcp --permanent
success
[root@lnmp-server ~]# firewall-cmd --reload
success
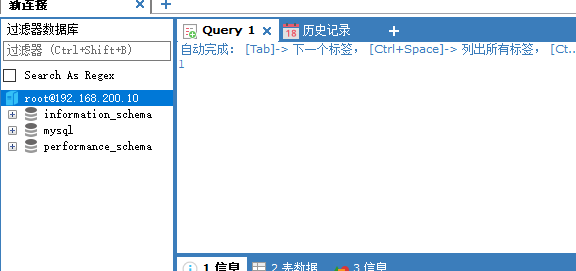
第六步:远程测试访问
LNMP部署之PHP
yum安装
第一步:安装php
[root@lnmp-server ~]# yum install -y php php-mysql php-fpm
第二步:更改nginx配置文件让它支持php文件
[root@lnmp-server ~]# vim /usr/local/nginx-1.16.0/conf/nginx.conf
# 在server添加如下内容location / {root   html;index  index.html index.htm;}location ~ .*\.(php|php5)?$ {root html/myphp;fastcgi_pass   127.0.0.1:9000;fastcgi_index  index.php;include        fastcgi.conf;}
第三步:创建站点文件检查是否支持php文件
[root@lnmp-server ~]# mkdir /usr/local/nginx-1.16.0/html/myphp
[root@lnmp-server ~]# echo "<?php phpinfo(); ?>" > /usr/local/nginx-1.16.0/html/myphp/index.php
第四步:重启php服务,重新读入nginx配置文件
[root@lnmp-server ~]# systemctl restart php-fpm && nginx -s reload
第五步:浏览器访问
ip:port/index.php
# 查看本机IP
[root@lnmp-server ~]# hostname -I
192.168.200.10
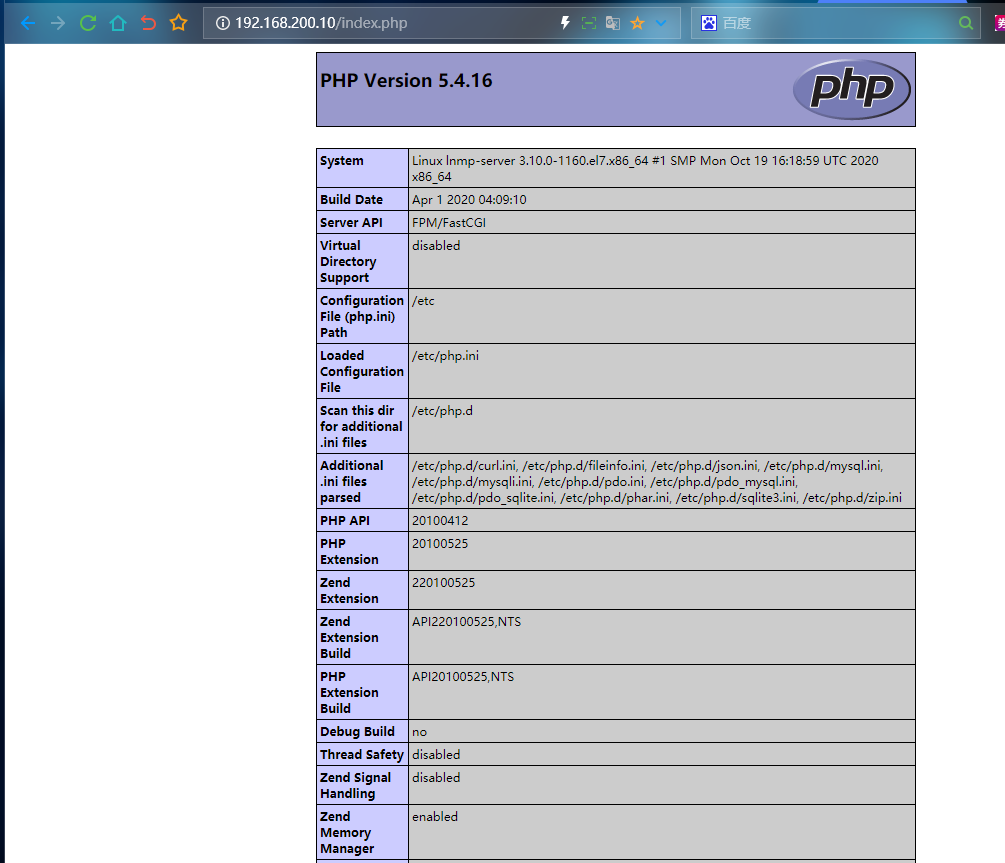
看到phpinfo的页面,表示lnmp环境搭建好了,nginx已经可以转发请求给php了
php连接数据库测试
[root@lnmp-server ~]# cd /usr/local/nginx-1.16.0/html/myphp/
[root@lnmp-server myphp]# ls
index.php[root@lnmp-server myphp]# vim php-mysql.php
<?php
header("content-type:text/html;charset=utf-8");
$servername = "localhost";
$username = "root";
$password = "000000";$conn = new mysqli($servername,$username,$password);if ($conn->connect_error) {die("连接失败:". $conn->connect_error);
}
echo "连接成功";
?>
访问测试




![常用数据分类算法原理介绍、优缺点分析与代码实现[LR/RF/DT/SVM/NavieBayes/GBDT/XGBoost/DNN/LightGBM等]](https://img-blog.csdnimg.cn/img_convert/efaea374885bff814a48b6cd39b6ac8e.png)
