文章目录
- 前言
- 一、我们对 Standard 的 PBR 的 GI 进行解析
- 1、我们先创建一个PBR的.cginc文件,用于整理用到的函数
- 2、然后在Standard的Shader中引用该cginc文件
- 二、依次整理函数到该cginc文件中
- 我们来看一下PBR中GI的镜面反射做了些什么
- 二、最终代码
- .cginc代码:
- Shader代码:
前言
Unity中Shader的Standard材质解析(二),对 Standard 的 PBR 的 GI 进行解析
- Unity中Shader的Standard材质解析(一)
一、我们对 Standard 的 PBR 的 GI 进行解析
1、我们先创建一个PBR的.cginc文件,用于整理用到的函数
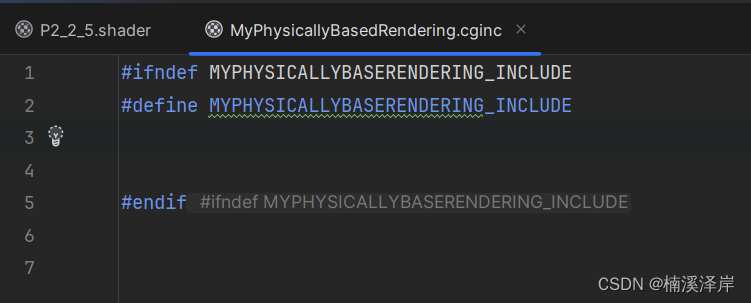
2、然后在Standard的Shader中引用该cginc文件
#include “CGInclude/MyPhysicallyBasedRendering.cginc”
二、依次整理函数到该cginc文件中
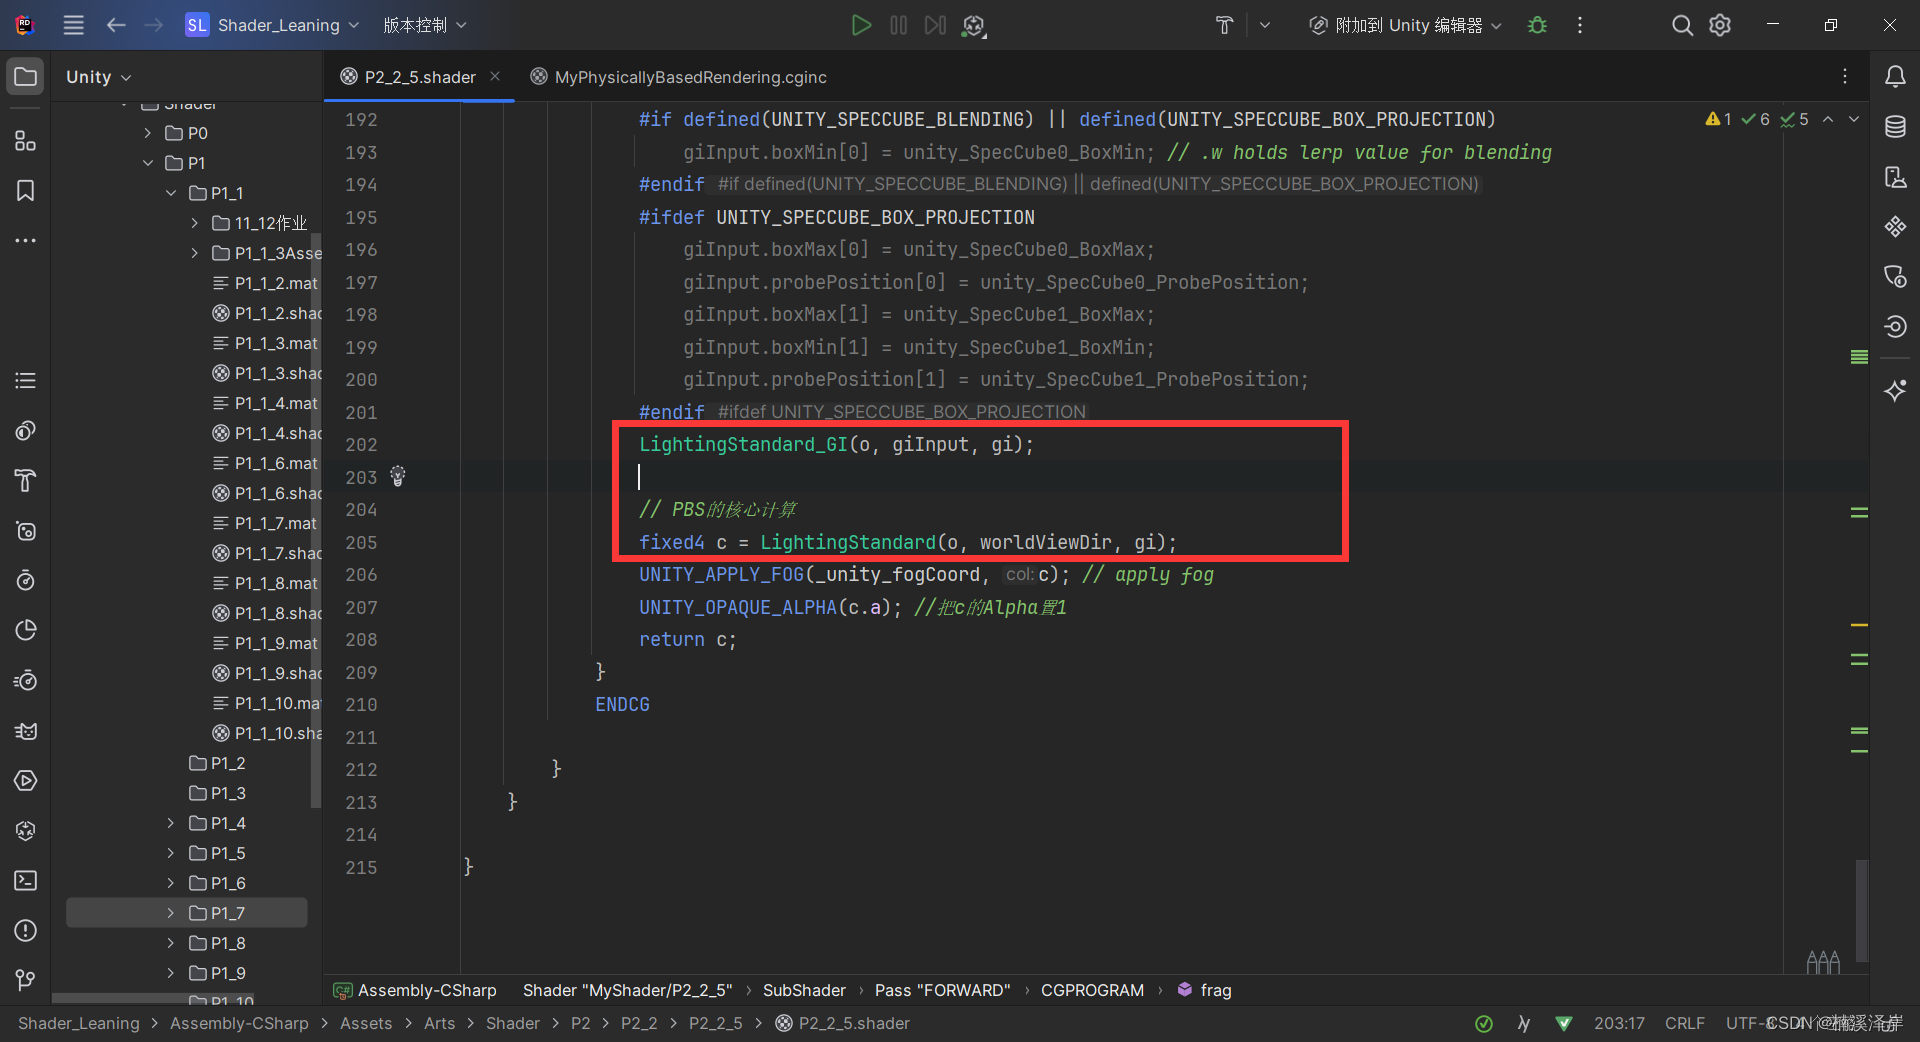
- 整理 LightingStandard_GI1(o, giInput, gi); 中的数据
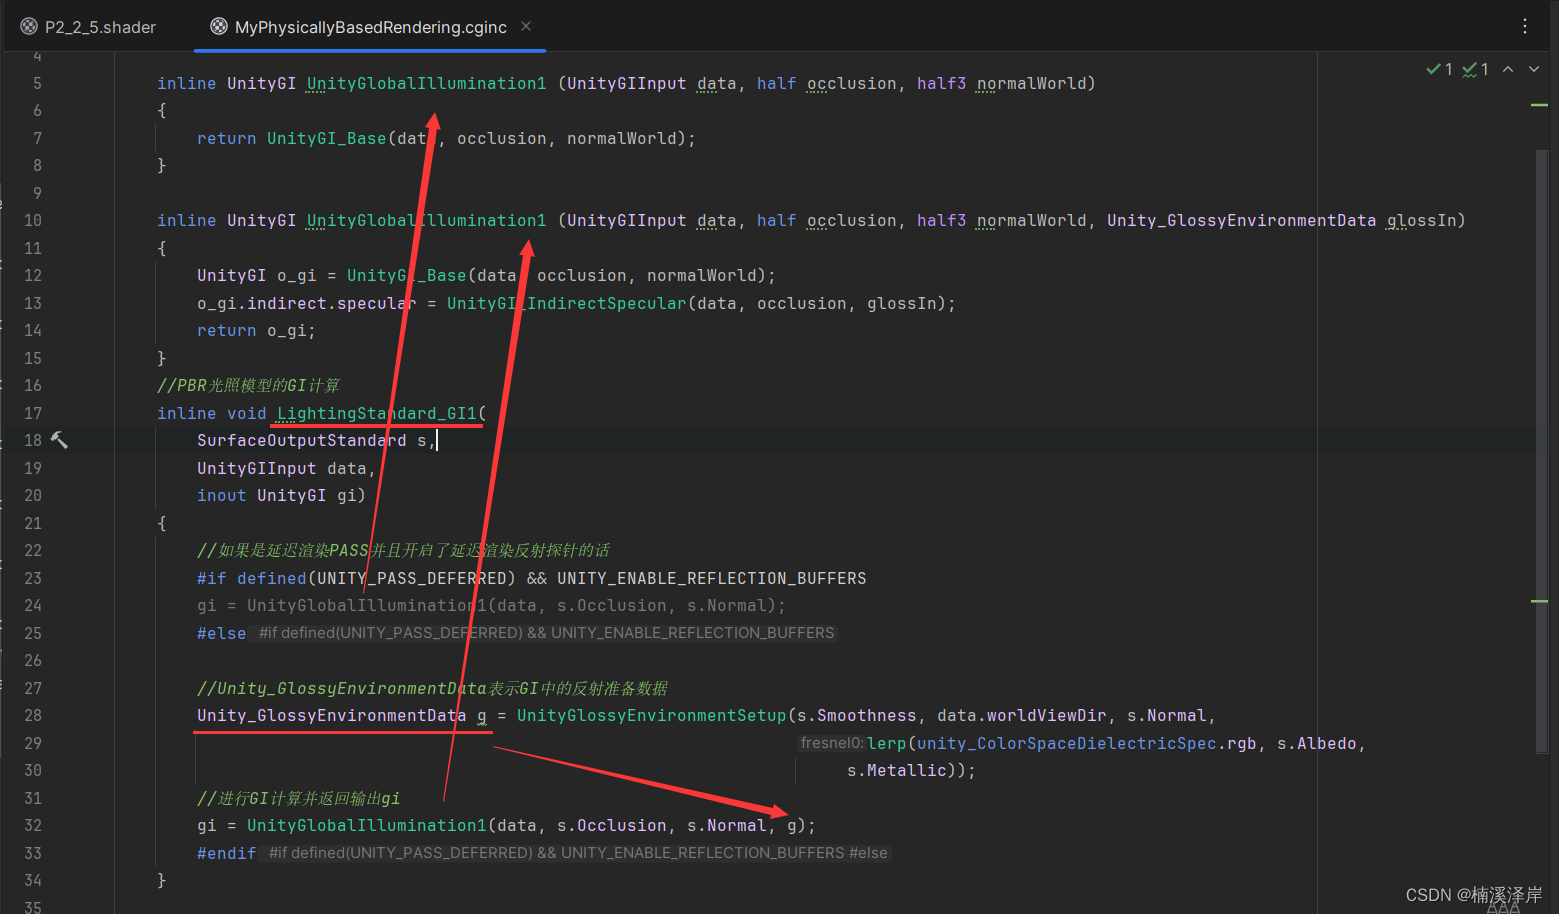
- Unity_GlossyEnvironmentData表示GI中的反射准备数据

- 准备好反射数据后,计算得出GI中的 漫反射 和 镜面反射

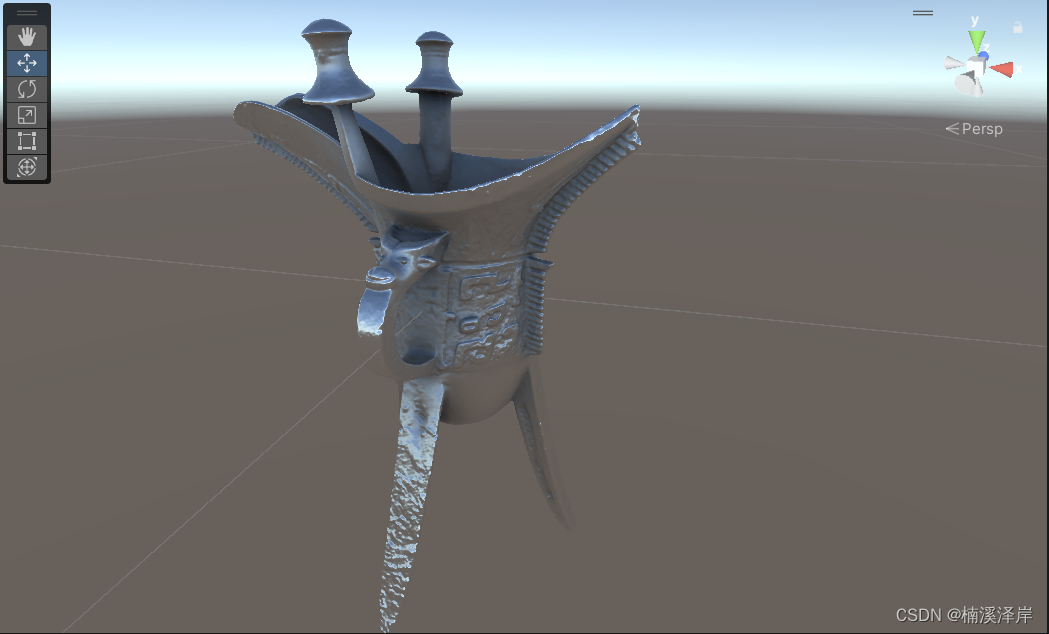
- 输出漫反射看看效果

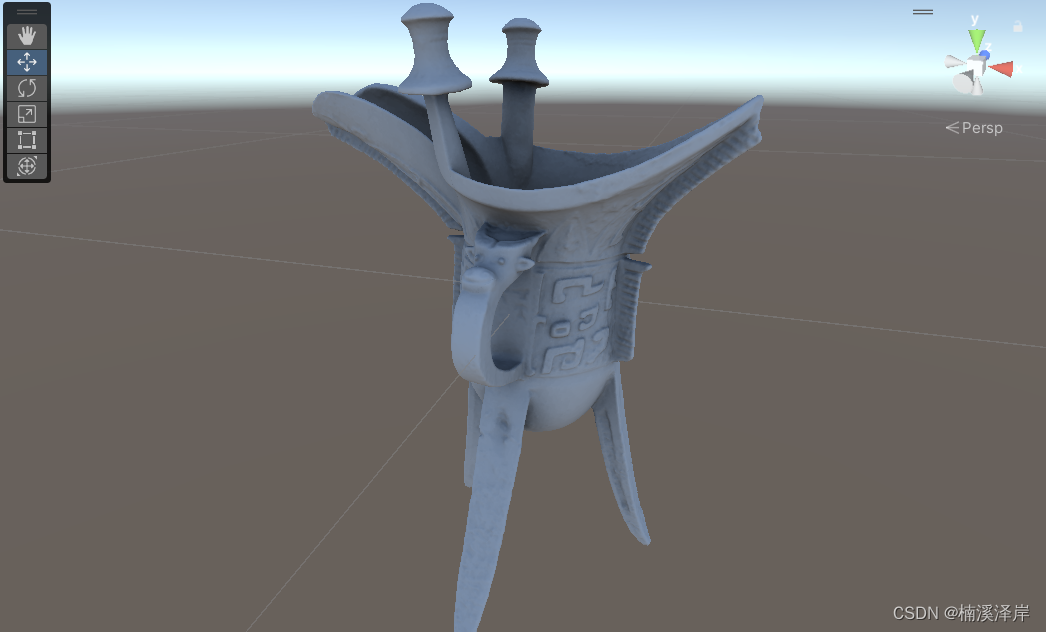
- 输出镜面反射看看效果

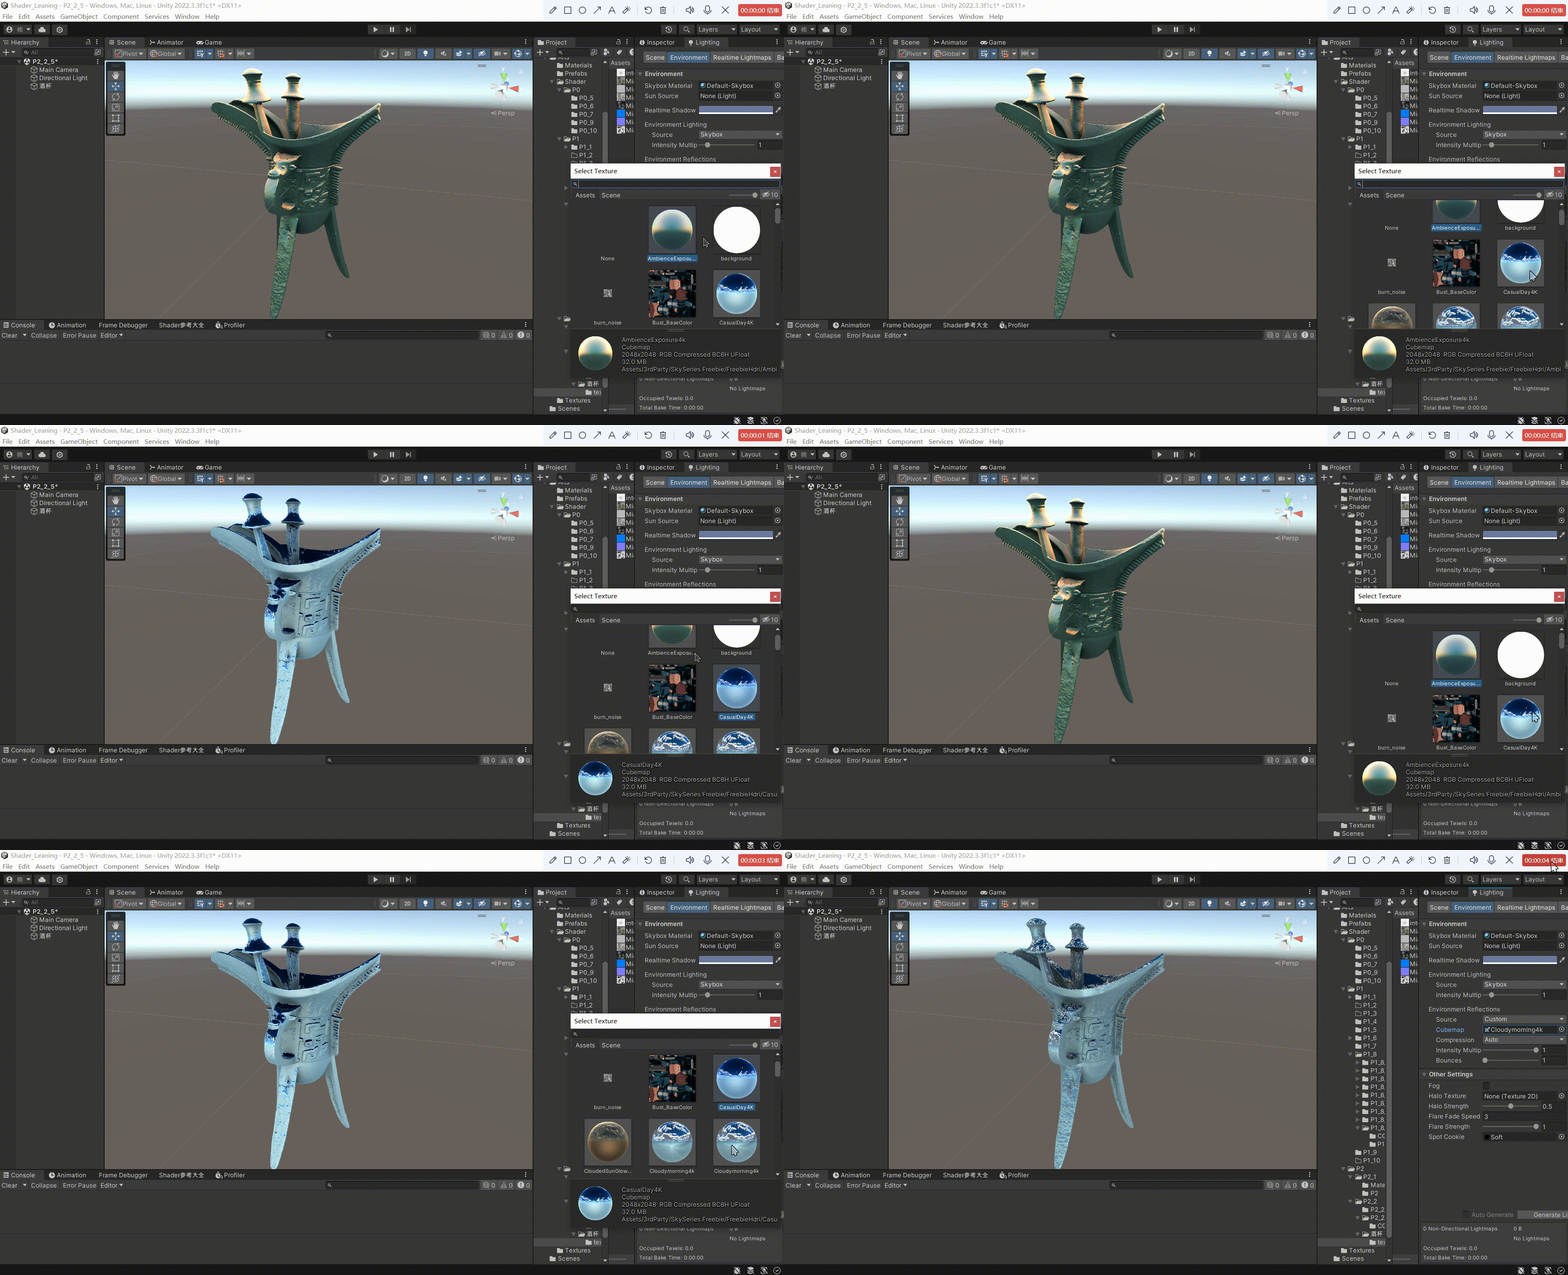
- 我们可以自定义一下Cubemap,看看不同的反射效果
(这就是PBR的优点,可以根据不同的环境,直接呈现效果,不用再根据环境调节参数)
我们来看一下PBR中GI的镜面反射做了些什么
- 这个程序块只会在,反射探针中开启Box Projection时,才会运行

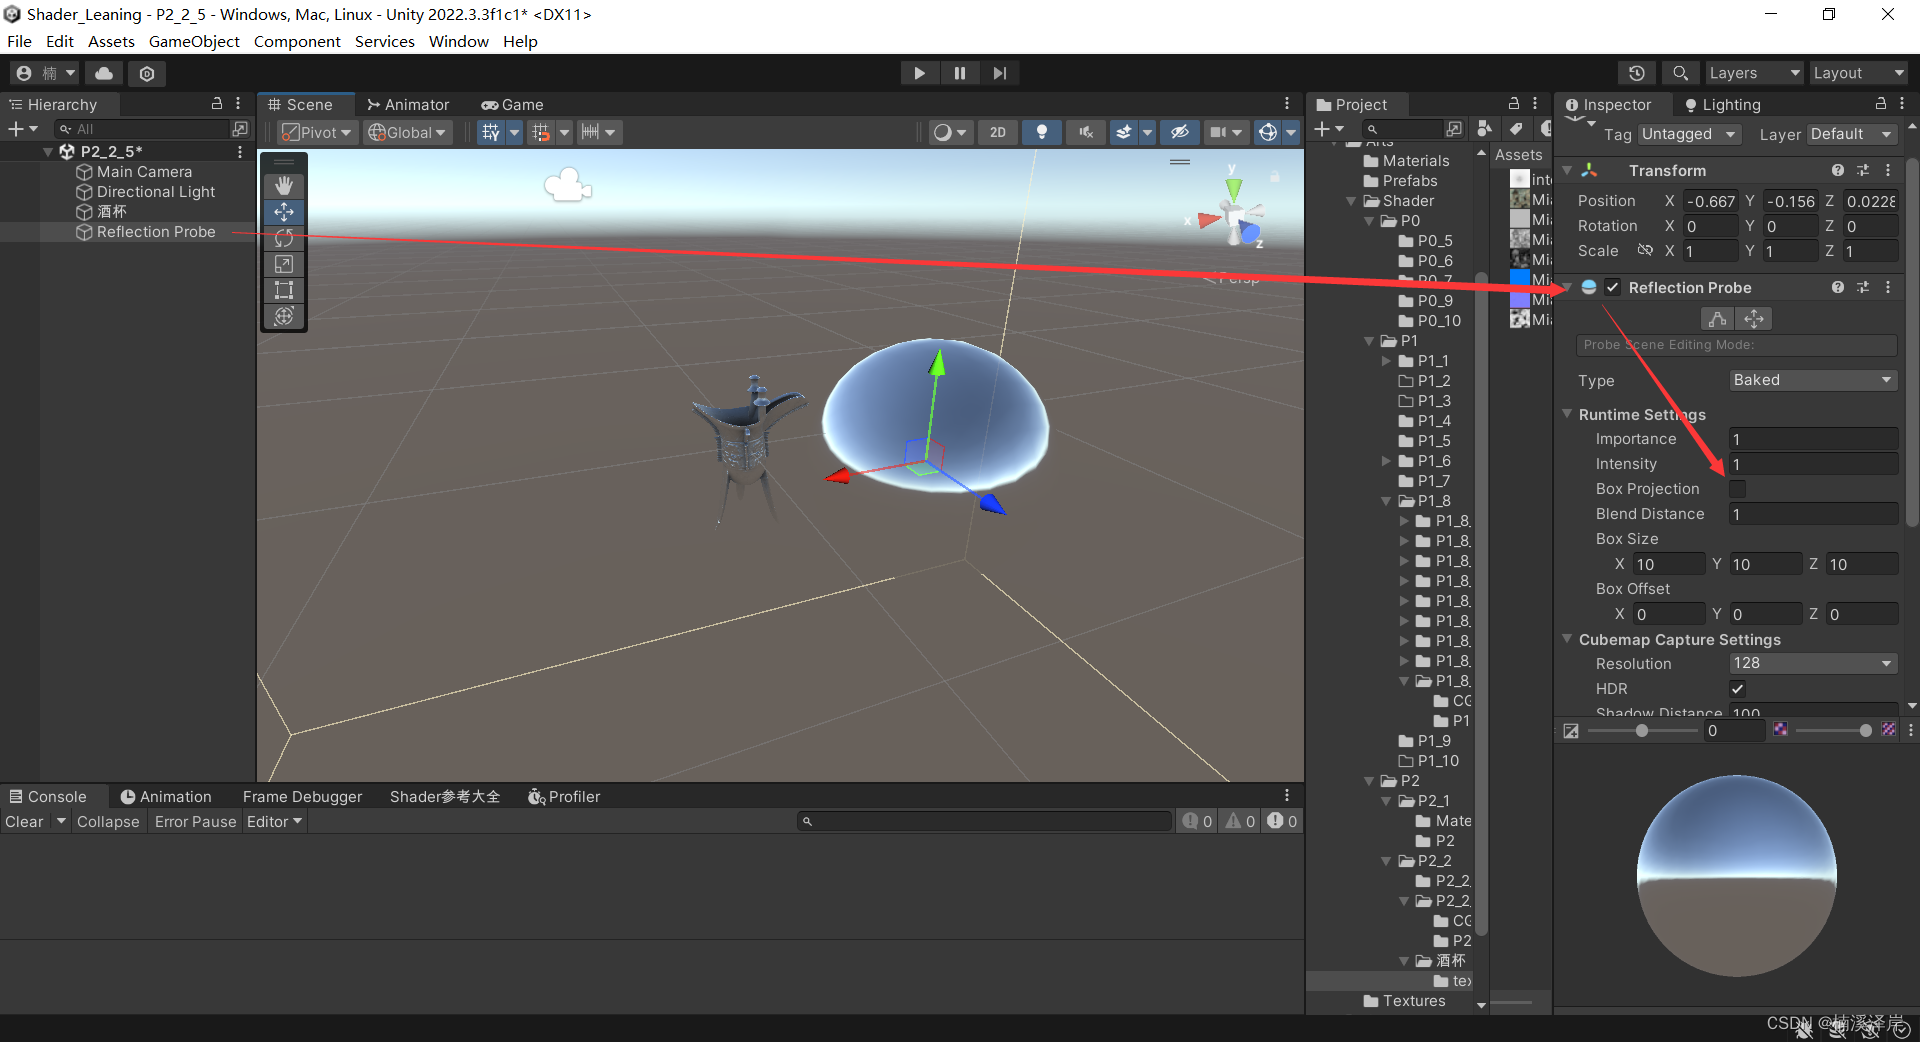
这选项的作用是:使用反射探针的物体在移动时,效果不会变,只有在摄像机方向变时,效果才会变化。那么,要让物体动时,反射效果同时改变的话,就需要开启该选项。
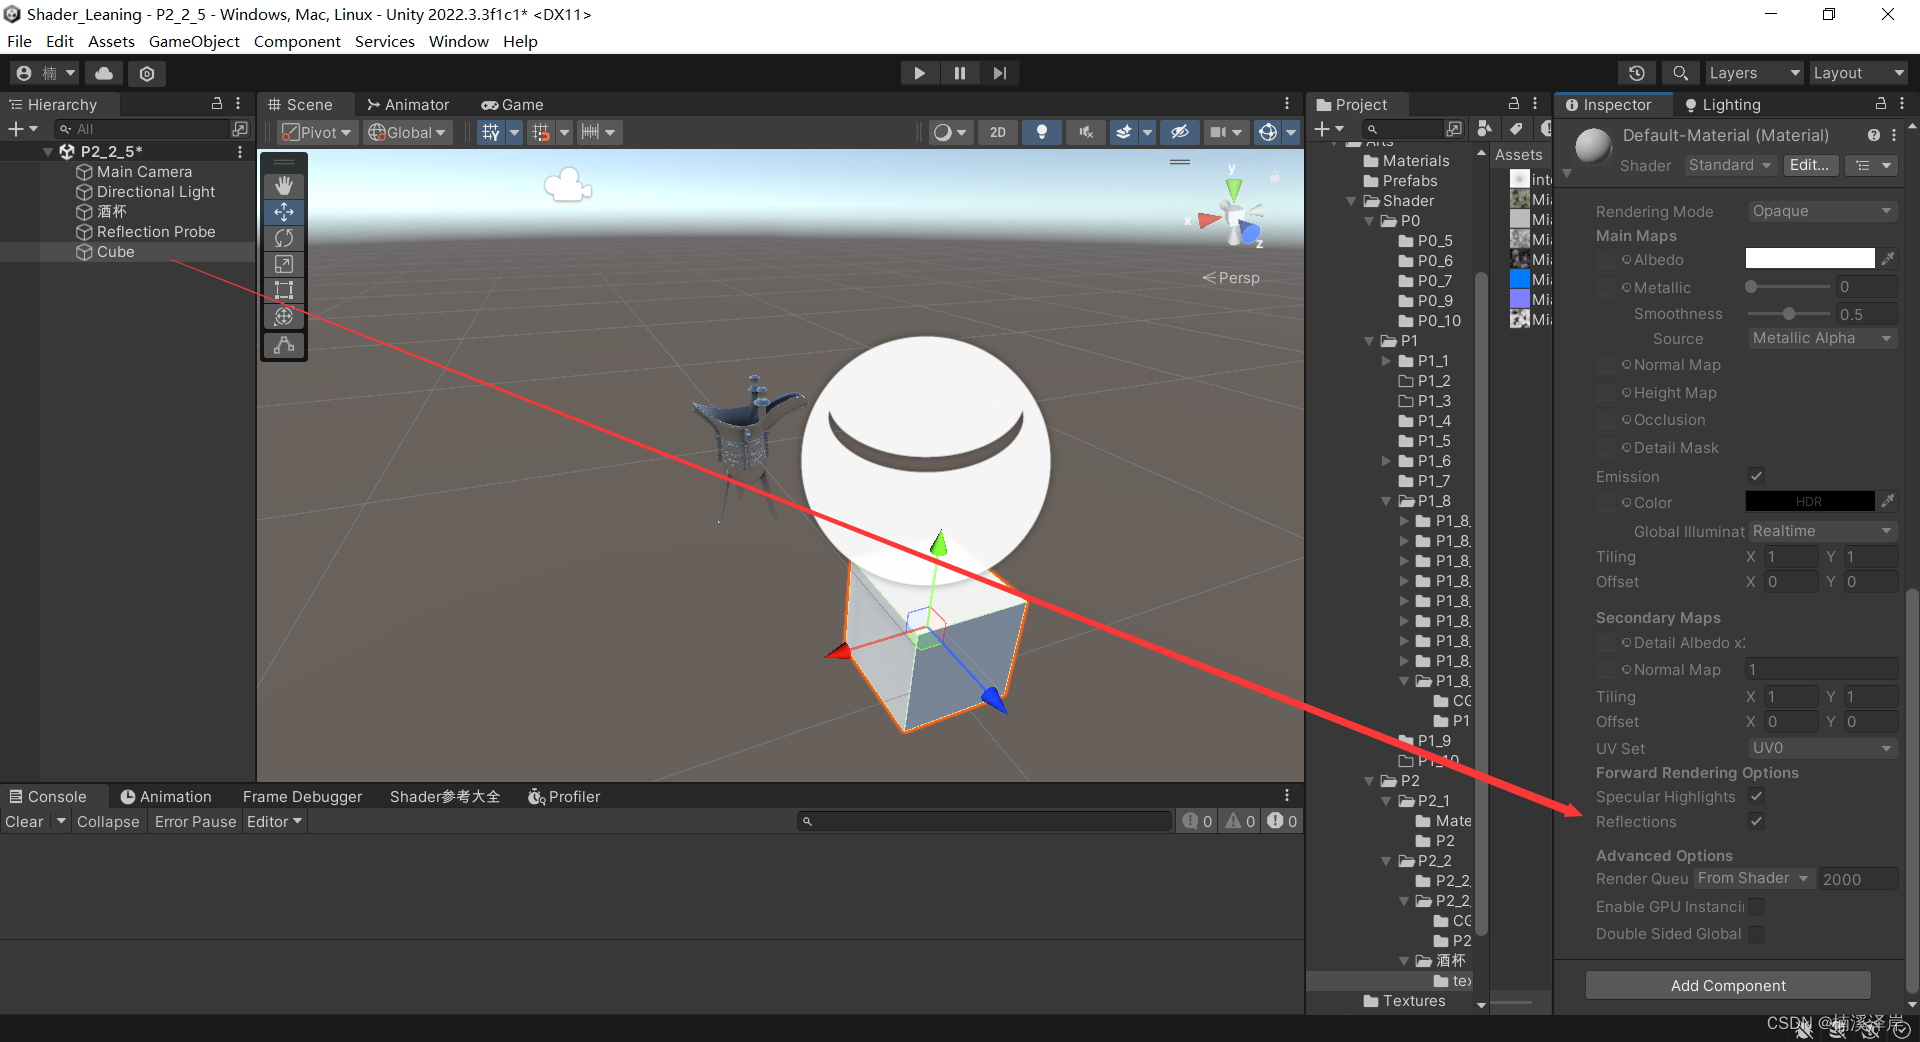
- 在取消了材质的Reflection后,会运行该程序块
- 反之,运行之后的部分
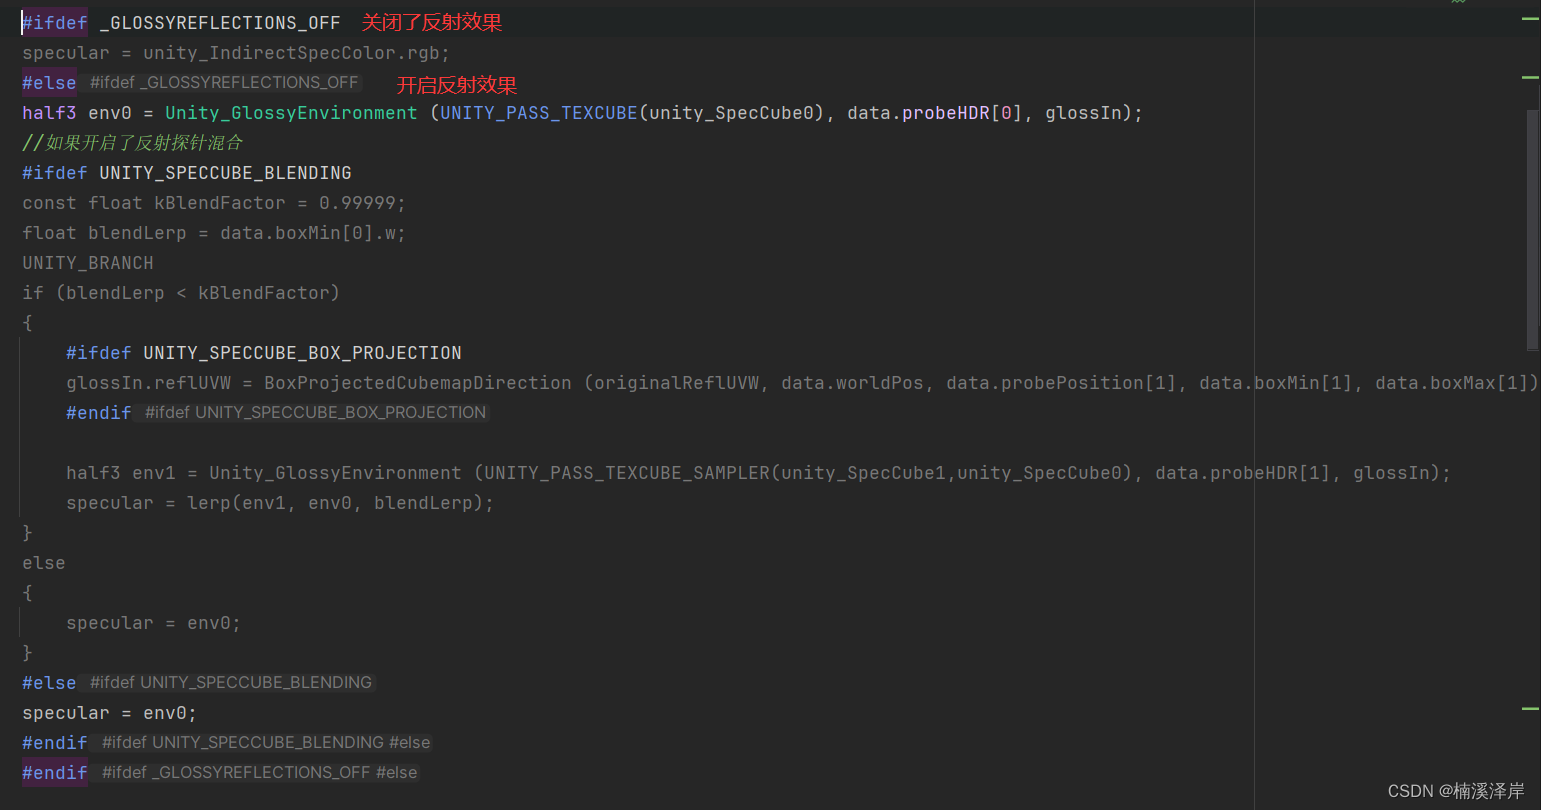
- 在开启反射效果后,对于感性粗糙度的计算。
- 在Unity中的粗糙度,使用分级贴图来模拟粗糙度(节省性能)
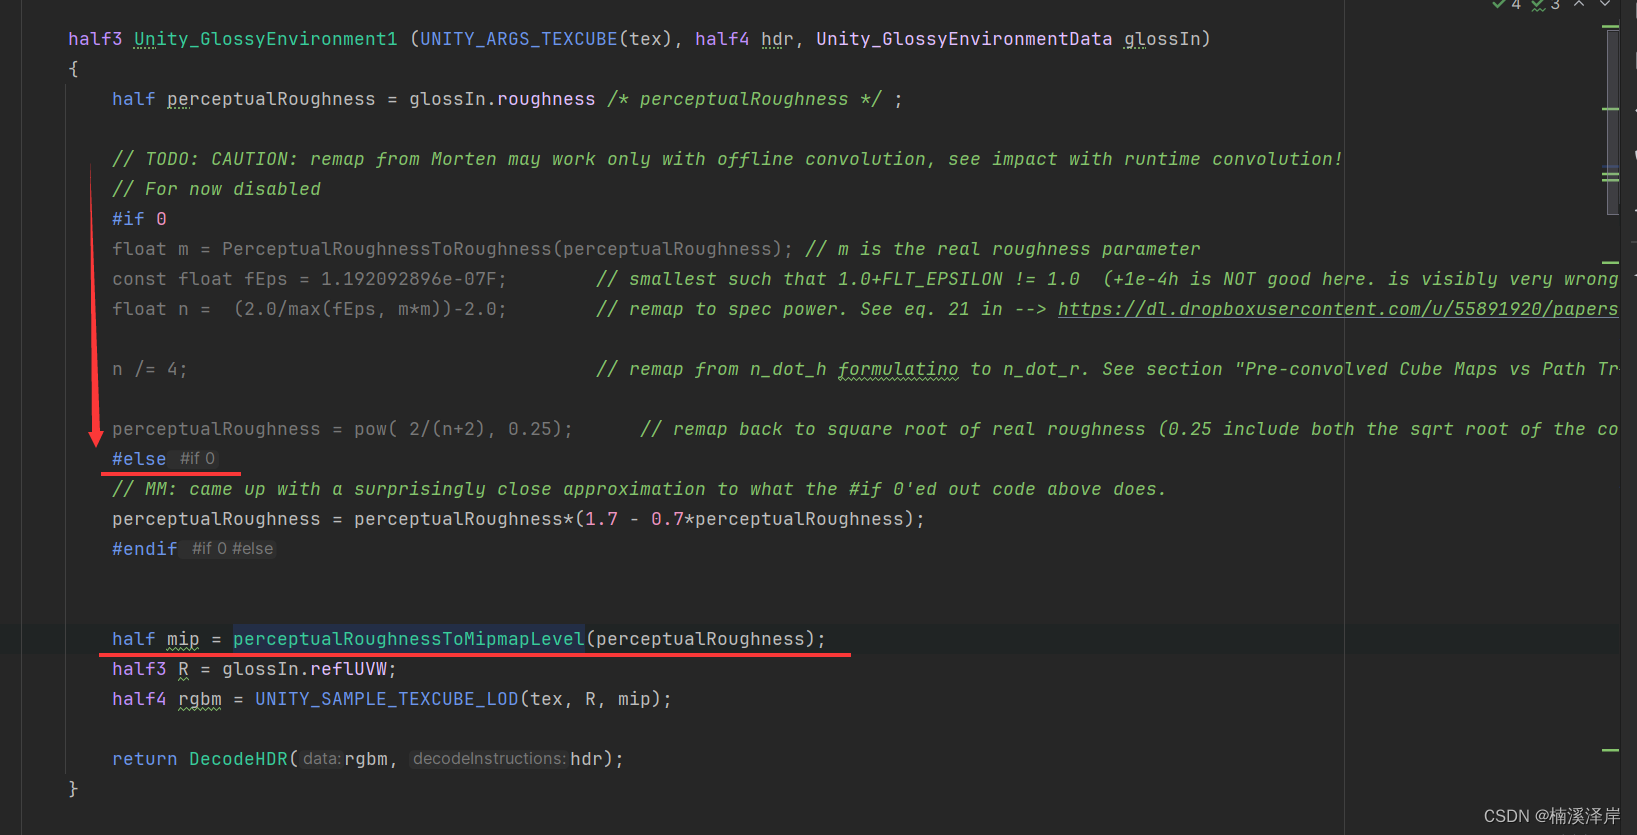
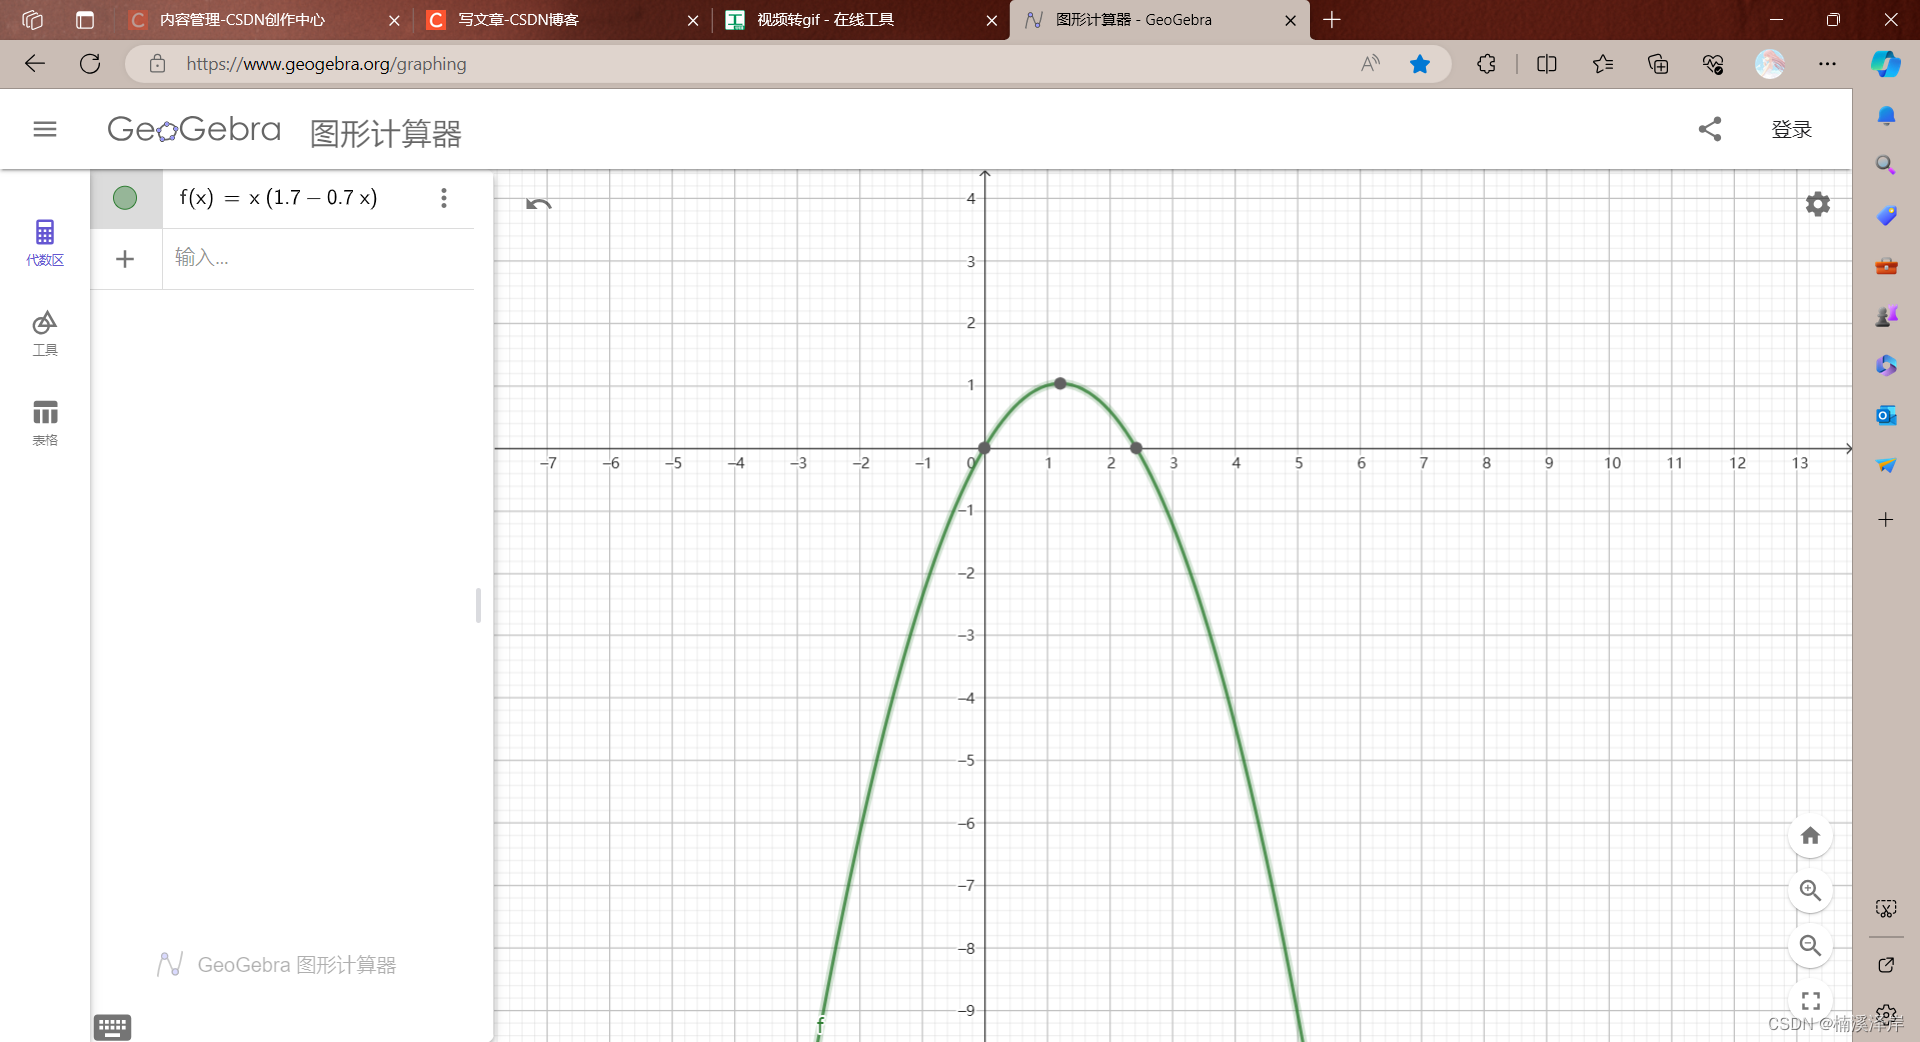
- 由于粗糙度与反射探针的mip变化不呈现线性正比,所以需要一个公式来改变
//r = r * (1.7 - 0.7r)
perceptualRoughness = perceptualRoughness(1.7 - 0.7*perceptualRoughness);
在Blender中,粗糙度是按数值改变的:
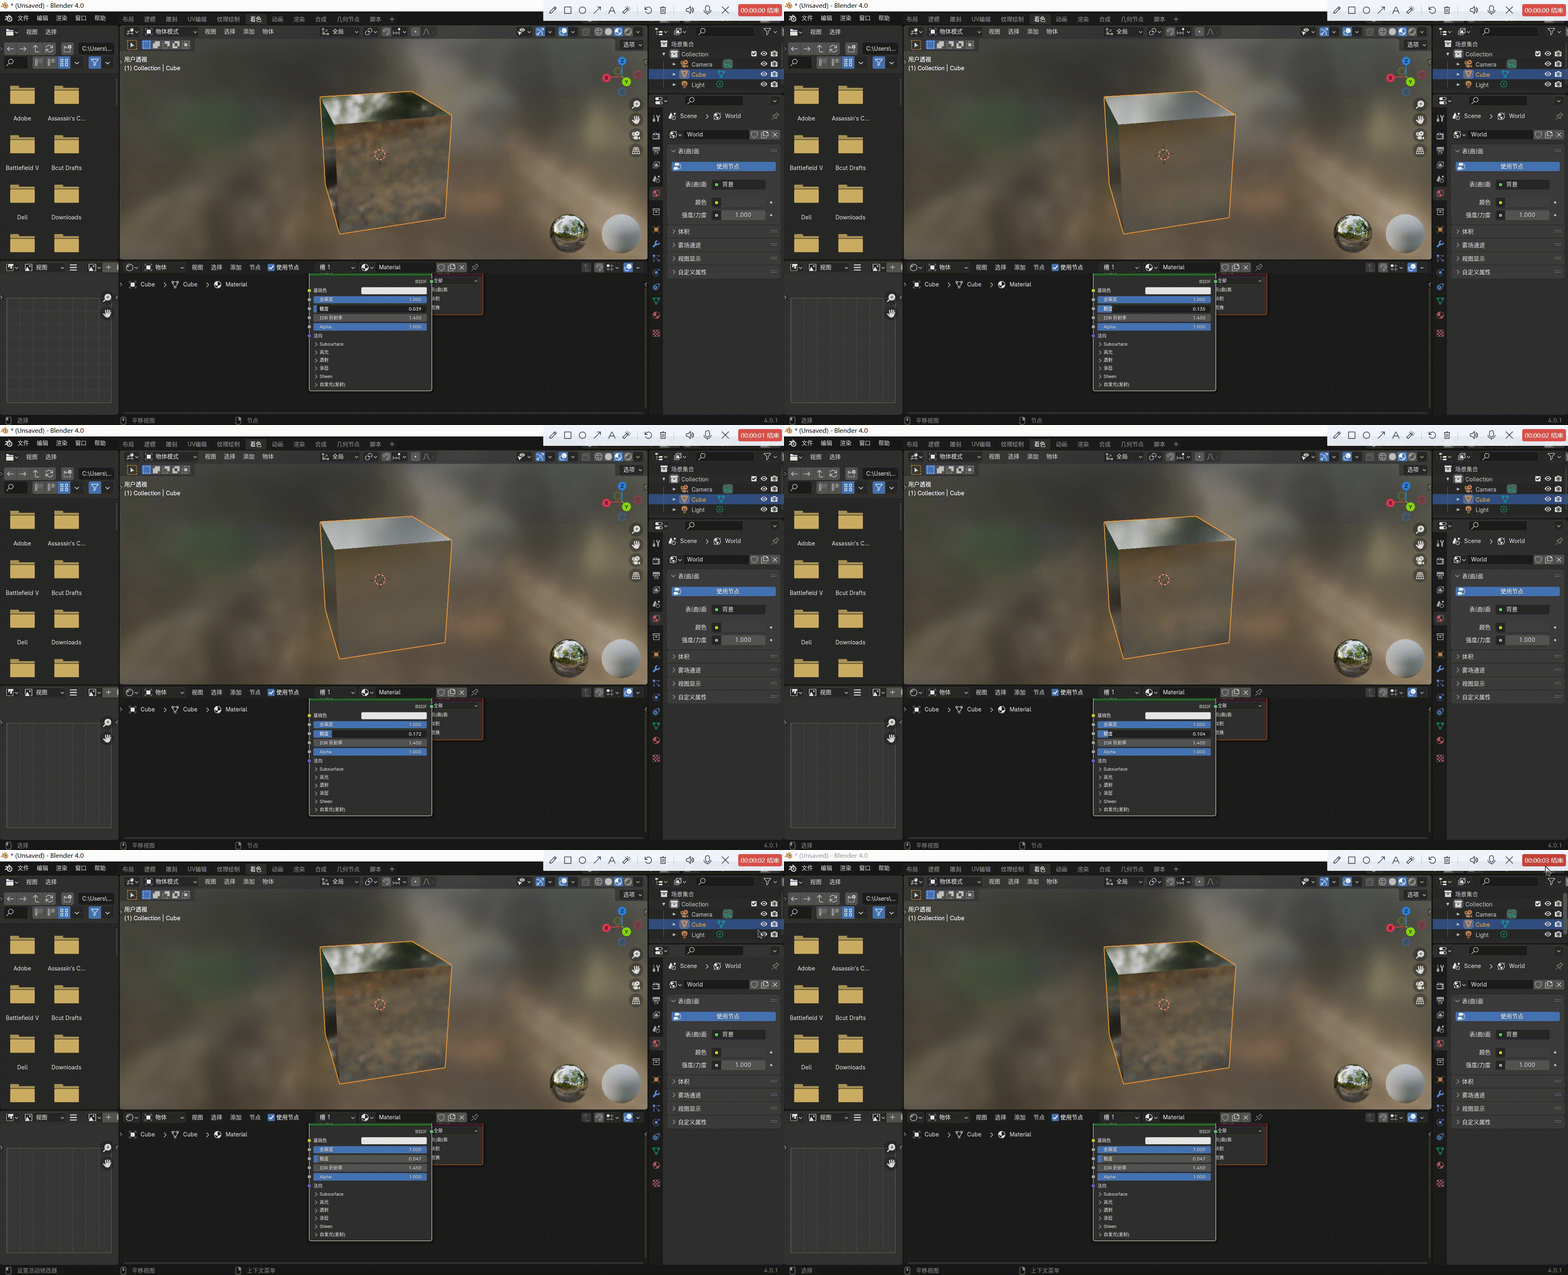
在Unity中,反射探针是按贴图分级来模拟的粗糙度:


二、最终代码
.cginc代码:
#ifndef MYPHYSICALLYBASERENDERING_INCLUDE#define MYPHYSICALLYBASERENDERING_INCLUDEhalf3 Unity_GlossyEnvironment1 (UNITY_ARGS_TEXCUBE(tex), half4 hdr, Unity_GlossyEnvironmentData glossIn){half perceptualRoughness = glossIn.roughness /* perceptualRoughness */ ;// TODO: CAUTION: remap from Morten may work only with offline convolution, see impact with runtime convolution!// For now disabled#if 0float m = PerceptualRoughnessToRoughness(perceptualRoughness); // m is the real roughness parameterconst float fEps = 1.192092896e-07F; // smallest such that 1.0+FLT_EPSILON != 1.0 (+1e-4h is NOT good here. is visibly very wrong)float n = (2.0/max(fEps, m*m))-2.0; // remap to spec power. See eq. 21 in --> https://dl.dropboxusercontent.com/u/55891920/papers/mm_brdf.pdfn /= 4; // remap from n_dot_h formulatino to n_dot_r. See section "Pre-convolved Cube Maps vs Path Tracers" --> https://s3.amazonaws.com/docs.knaldtech.com/knald/1.0.0/lys_power_drops.htmlperceptualRoughness = pow( 2/(n+2), 0.25); // remap back to square root of real roughness (0.25 include both the sqrt root of the conversion and sqrt for going from roughness to perceptualRoughness)#else// MM: came up with a surprisingly close approximation to what the #if 0'ed out code above does.//r = r * (1.7 - 0.7*r)//由于粗糙度与反射探针的mip变化不呈现线性正比,所以需要一个公式来改变perceptualRoughness = perceptualRoughness*(1.7 - 0.7*perceptualRoughness);#endif//UNITY_SPECCUBE_LOD_STEPS = 6,表示反射探针的mip级别有 6 档。粗糙度X6得到最终得mip级别half mip = perceptualRoughnessToMipmapLevel(perceptualRoughness);half3 R = glossIn.reflUVW;half4 rgbm = UNITY_SAMPLE_TEXCUBE_LOD(tex, R, mip);return DecodeHDR(rgbm, hdr);}//GI中的镜面反射inline half3 UnityGI_IndirectSpecular1(UnityGIInput data, half occlusion, Unity_GlossyEnvironmentData glossIn){half3 specular;//如果开启了反射探针的Box Projection#ifdef UNITY_SPECCUBE_BOX_PROJECTION// we will tweak reflUVW in glossIn directly (as we pass it to Unity_GlossyEnvironment twice for probe0 and probe1), so keep original to pass into BoxProjectedCubemapDirectionhalf3 originalReflUVW = glossIn.reflUVW;glossIn.reflUVW = BoxProjectedCubemapDirection (originalReflUVW, data.worldPos, data.probePosition[0], data.boxMin[0], data.boxMax[0]);#endif#ifdef _GLOSSYREFLECTIONS_OFFspecular = unity_IndirectSpecColor.rgb;#elsehalf3 env0 = Unity_GlossyEnvironment1 (UNITY_PASS_TEXCUBE(unity_SpecCube0), data.probeHDR[0], glossIn);//如果开启了反射探针混合#ifdef UNITY_SPECCUBE_BLENDINGconst float kBlendFactor = 0.99999;float blendLerp = data.boxMin[0].w;UNITY_BRANCHif (blendLerp < kBlendFactor){#ifdef UNITY_SPECCUBE_BOX_PROJECTIONglossIn.reflUVW = BoxProjectedCubemapDirection (originalReflUVW, data.worldPos, data.probePosition[1], data.boxMin[1], data.boxMax[1]);#endifhalf3 env1 = Unity_GlossyEnvironment (UNITY_PASS_TEXCUBE_SAMPLER(unity_SpecCube1,unity_SpecCube0), data.probeHDR[1], glossIn);specular = lerp(env1, env0, blendLerp);}else{specular = env0;}#elsespecular = env0;#endif#endifreturn specular * occlusion;}inline UnityGI UnityGlobalIllumination1 (UnityGIInput data, half occlusion, half3 normalWorld){return UnityGI_Base(data, occlusion, normalWorld);}//GI计算inline UnityGI UnityGlobalIllumination1 (UnityGIInput data, half occlusion, half3 normalWorld, Unity_GlossyEnvironmentData glossIn){//计算得出GI中的漫反射UnityGI o_gi = UnityGI_Base(data, occlusion, normalWorld);//计算得出GI中的镜面反射o_gi.indirect.specular = UnityGI_IndirectSpecular1(data, occlusion, glossIn);return o_gi;}float SmoothnessToPerceptualRoughness1(float smoothness){return (1 - smoothness);}Unity_GlossyEnvironmentData UnityGlossyEnvironmentSetup1(half Smoothness, half3 worldViewDir, half3 Normal, half3 fresnel0){Unity_GlossyEnvironmentData g;//粗糙度g.roughness /* perceptualRoughness */ = SmoothnessToPerceptualRoughness1(Smoothness);//反射球的采样坐标g.reflUVW = reflect(-worldViewDir, Normal);return g;}//PBR光照模型的GI计算inline void LightingStandard_GI1(SurfaceOutputStandard s,UnityGIInput data,inout UnityGI gi){//如果是延迟渲染PASS并且开启了延迟渲染反射探针的话#if defined(UNITY_PASS_DEFERRED) && UNITY_ENABLE_REFLECTION_BUFFERSgi = UnityGlobalIllumination1(data, s.Occlusion, s.Normal);#else//Unity_GlossyEnvironmentData表示GI中的反射准备数据Unity_GlossyEnvironmentData g = UnityGlossyEnvironmentSetup1(s.Smoothness, data.worldViewDir, s.Normal,lerp(unity_ColorSpaceDielectricSpec.rgb, s.Albedo,s.Metallic));//进行GI计算并返回输出gigi = UnityGlobalIllumination1(data, s.Occlusion, s.Normal, g);#endif}#endifShader代码:
//Standard材质
Shader "MyShader/P2_2_5"
{Properties{_Color ("Color", Color) = (1,1,1,1)_MainTex ("Albedo (RGB)", 2D) = "white" {}[NoScaleOffset]_MetallicTex("Metallic(R) Smoothness(G) AO(B)",2D) = "white" {}[NoScaleOffset][Normal]_NormalTex("NormalTex",2D) = "bump" {}_Glossiness ("Smoothness", Range(0,1)) = 0.0_Metallic ("Metallic", Range(0,1)) = 0.0_AO("AO",Range(0,1)) = 1.0}SubShader{Tags{"RenderType"="Opaque"}LOD 200// ---- forward rendering base pass:Pass{Name "FORWARD"Tags{"LightMode" = "ForwardBase"}CGPROGRAM// compile directives#pragma vertex vert#pragma fragment frag#pragma target 3.0#pragma multi_compile_instancing#pragma multi_compile_fog#pragma multi_compile_fwdbase#include "UnityCG.cginc"#include "Lighting.cginc"#include "UnityPBSLighting.cginc"#include "AutoLight.cginc"#include "CGInclude/MyPhysicallyBasedRendering.cginc"sampler2D _MainTex;float4 _MainTex_ST;half _Glossiness;half _Metallic;fixed4 _Color;sampler2D _MetallicTex;half _AO;sampler2D _NormalTex;struct appdata{float4 vertex : POSITION;float4 tangent : TANGENT;float3 normal : NORMAL;float4 texcoord : TEXCOORD0;float4 texcoord1 : TEXCOORD1;float4 texcoord2 : TEXCOORD2;float4 texcoord3 : TEXCOORD3;fixed4 color : COLOR;UNITY_VERTEX_INPUT_INSTANCE_ID};// vertex-to-fragment interpolation data// no lightmaps:struct v2f{float4 pos : SV_POSITION;float2 uv : TEXCOORD0; // _MainTexfloat3 worldNormal : TEXCOORD1;float3 worldPos : TEXCOORD2;#if UNITY_SHOULD_SAMPLE_SHhalf3 sh : TEXCOORD3; // SH#endif//切线空间需要使用的矩阵float3 tSpace0 : TEXCOORD4;float3 tSpace1 : TEXCOORD5;float3 tSpace2 : TEXCOORD6;UNITY_FOG_COORDS(7)UNITY_SHADOW_COORDS(8)};// vertex shaderv2f vert(appdata v){v2f o;o.pos = UnityObjectToClipPos(v.vertex);o.uv.xy = TRANSFORM_TEX(v.texcoord, _MainTex);float3 worldPos = mul(unity_ObjectToWorld, v.vertex).xyz;float3 worldNormal = UnityObjectToWorldNormal(v.normal);//世界空间下的切线half3 worldTangent = UnityObjectToWorldDir(v.tangent);//切线方向half tangentSign = v.tangent.w * unity_WorldTransformParams.w;//世界空间下的副切线half3 worldBinormal = cross(worldNormal, worldTangent) * tangentSign;//切线矩阵o.tSpace0 = float3(worldTangent.x, worldBinormal.x, worldNormal.x);o.tSpace1 = float3(worldTangent.y, worldBinormal.y, worldNormal.y);o.tSpace2 = float3(worldTangent.z, worldBinormal.z, worldNormal.z);o.worldPos.xyz = worldPos;o.worldNormal = worldNormal;// SH/ambient and vertex lights#if UNITY_SHOULD_SAMPLE_SH && !UNITY_SAMPLE_FULL_SH_PER_PIXELo.sh = 0;// Approximated illumination from non-important point lights#ifdef VERTEXLIGHT_ONo.sh += Shade4PointLights (unity_4LightPosX0, unity_4LightPosY0, unity_4LightPosZ0,unity_LightColor[0].rgb, unity_LightColor[1].rgb, unity_LightColor[2].rgb, unity_LightColor[3].rgb,unity_4LightAtten0, worldPos, worldNormal);#endifo.sh = ShadeSHPerVertex (worldNormal, o.sh);#endifUNITY_TRANSFER_LIGHTING(o, v.texcoord1.xy);UNITY_TRANSFER_FOG(o, o.pos); // pass fog coordinates to pixel shaderreturn o;}// fragment shaderfixed4 frag(v2f i) : SV_Target{UNITY_EXTRACT_FOG(i);float3 worldPos = i.worldPos.xyz;float3 worldViewDir = normalize(UnityWorldSpaceViewDir(worldPos));SurfaceOutputStandard o;UNITY_INITIALIZE_OUTPUT(SurfaceOutputStandard, o);fixed4 mainTex = tex2D(_MainTex, i.uv);o.Albedo = mainTex.rgb * _Color;o.Emission = 0.0;fixed4 metallicTex = tex2D(_MetallicTex, i.uv);o.Metallic = metallicTex.r * _Metallic;o.Smoothness = metallicTex.g * _Glossiness;o.Occlusion = metallicTex.b * _AO;o.Alpha = 1;half3 normalTex = UnpackNormal(tex2D(_NormalTex,i.uv));half3 worldNormal = half3(dot(i.tSpace0,normalTex),dot(i.tSpace1,normalTex),dot(i.tSpace2,normalTex));o.Normal = worldNormal;// compute lighting & shadowing factorUNITY_LIGHT_ATTENUATION(atten, i, worldPos)// Setup lighting environmentUnityGI gi;UNITY_INITIALIZE_OUTPUT(UnityGI, gi);gi.indirect.diffuse = 0;gi.indirect.specular = 0;gi.light.color = _LightColor0.rgb;gi.light.dir = _WorldSpaceLightPos0.xyz;// Call GI (lightmaps/SH/reflections) lighting functionUnityGIInput giInput;UNITY_INITIALIZE_OUTPUT(UnityGIInput, giInput);giInput.light = gi.light;giInput.worldPos = worldPos;giInput.worldViewDir = worldViewDir;giInput.atten = atten;#if defined(LIGHTMAP_ON) || defined(DYNAMICLIGHTMAP_ON)giInput.lightmapUV = IN.lmap;#elsegiInput.lightmapUV = 0.0;#endif#if UNITY_SHOULD_SAMPLE_SH && !UNITY_SAMPLE_FULL_SH_PER_PIXELgiInput.ambient = i.sh;#elsegiInput.ambient.rgb = 0.0;#endifgiInput.probeHDR[0] = unity_SpecCube0_HDR;giInput.probeHDR[1] = unity_SpecCube1_HDR;#if defined(UNITY_SPECCUBE_BLENDING) || defined(UNITY_SPECCUBE_BOX_PROJECTION)giInput.boxMin[0] = unity_SpecCube0_BoxMin; // .w holds lerp value for blending#endif#ifdef UNITY_SPECCUBE_BOX_PROJECTIONgiInput.boxMax[0] = unity_SpecCube0_BoxMax;giInput.probePosition[0] = unity_SpecCube0_ProbePosition;giInput.boxMax[1] = unity_SpecCube1_BoxMax;giInput.boxMin[1] = unity_SpecCube1_BoxMin;giInput.probePosition[1] = unity_SpecCube1_ProbePosition;#endifLightingStandard_GI1(o, giInput, gi);//return fixed4(gi.indirect.specular,1);// PBS的核心计算fixed4 c = LightingStandard(o, worldViewDir, gi);UNITY_APPLY_FOG(_unity_fogCoord, c); // apply fogUNITY_OPAQUE_ALPHA(c.a); //把c的Alpha置1return c;}ENDCG}}}

![[网鼎杯 2020 朱雀组]phpweb](https://img-blog.csdnimg.cn/c5045ade898a49b6b79e3f57fa5b5d31.png)




![uniapp适配微信隐私协议开发指南[uniapp+vue3+js]](https://img-blog.csdnimg.cn/9f58a375578643729c53dc4b0f088721.png)