欢迎===关注===点赞===评论,共同学习,共同进步!
你的点赞、关注、评论、是我创作的动力!
-------希望我的文章对你有所帮助--------
目录
一、前言
二、推荐开发及运行环境
三、项目基本结构
四、创建一个普通JAVAEE-WEB项目
五、搭建数据库
六、pom.xml引入依赖
七、创建实体类
八、创建三层架构对应模块的类和接口
九、Spring和Mybatis的整合
1、spring的配置文件:
2、Spring和Mybatis的整合配置
3、整合测试
4、测试结果
九、Spring和SpringMVC整合
1、Spring的配置
2、SpringMVC的配置
3、SSM框架整合测试
十、注意事项及其BUG反馈
1、控制台中文乱码解决办法:
2、Mysql数据库中文乱码解决办法:
3、服务器日志中文乱码解决办法:
4、出现no appropriate protocal 异常报错
5、出现java.lang.NoClassDefFoundError:javax/severlet/报错
十一、总结
一、前言
最快的提升自己的编程水平以及对某个方向的理解和运用,必然是需要动手实践,在不断的Debug中自我折磨,然后放弃!!!(玩笑)
本篇文章只是进行基础的SSM框架(Sping+SpringMVC+Mybatis)的整合的教程,以及其中可能遇到的问题的简单解决办法!因为刚开始起手一个项目,自然需要一个过渡阶段,否则前期将会异常艰难。
废话不多说,开始吧!
全程干货不累赘,开始发车!!
Final Test Result:

二、推荐开发及运行环境
1、系统:Windows10
2、IDE:Interilj ideal 2021.3
3、服务器:Tomacat-8(用高版本对应的Severlet-4.0会启动报错,注意!!)
4、数据库:MySQL5.7
5、浏览器:FireFox
6、JavaKit:JDK18
三、项目基本结构


四、创建一个普通JAVAEE-WEB项目
1、点击File,new,project

2、创建一个JavaEnterpri项目,选择对应JDK,命名为SSM,选择JavaEE8,然后Finish

五、搭建数据库
1、创建SSM数据库和tb_book数据表
create database SSM;
create table tb_book(
id int(11) primary key,
name varchar(20) not null,
press varchar(20) not null,
author varchar(20) not null);
2、插入数据
insert into tb_book(id,name,press,author) values(1,"Moving Earth","人民出版社","刘慈欣");六、pom.xml引入依赖
代码如下:(复制粘贴即可)
<?xml version="1.0" encoding="UTF-8"?>
<project xmlns="http://maven.apache.org/POM/4.0.0"xmlns:xsi="http://www.w3.org/2001/XMLSchema-instance"xsi:schemaLocation="http://maven.apache.org/POM/4.0.0 https://maven.apache.org/xsd/maven-4.0.0.xsd"><modelVersion>4.0.0</modelVersion><groupId>com.example</groupId><artifactId>SSM</artifactId><version>1.0-SNAPSHOT</version><name>SSM</name><packaging>war</packaging><properties><project.build.sourceEncoding>UTF-8</project.build.sourceEncoding><maven.compiler.target>1.8</maven.compiler.target><maven.compiler.source>1.8</maven.compiler.source><junit.version>5.8.1</junit.version></properties><dependencies><dependency><groupId>org.springframework</groupId><artifactId>spring-context</artifactId><version>5.2.8.RELEASE</version></dependency><!--Spring事务管理--><dependency><groupId>org.springframework</groupId><artifactId>spring-tx</artifactId><version>5.2.8.RELEASE</version></dependency><dependency><groupId>org.springframework</groupId><artifactId>spring-jdbc</artifactId><version>5.2.8.RELEASE</version></dependency><dependency><groupId>org.springframework</groupId><artifactId>spring-test</artifactId><version>5.2.8.RELEASE</version></dependency><!--Spring MVC的相关依赖--><dependency><groupId>org.springframework</groupId><artifactId>spring-webmvc</artifactId><version>5.2.8.RELEASE</version></dependency><!--MyBatis相关依赖--><dependency><groupId>org.mybatis</groupId><artifactId>mybatis</artifactId><version>3.5.2</version></dependency><!--MyBatis与Spring整合相关依赖--><dependency><groupId>org.mybatis</groupId><artifactId>mybatis-spring</artifactId><version>2.0.1</version></dependency><!--数据源--><dependency><groupId>com.alibaba</groupId><artifactId>druid</artifactId><version>1.1.20</version></dependency><dependency><groupId>javax.servlet</groupId><artifactId>javax.servlet-api</artifactId><version>4.0.1</version></dependency><dependency><groupId>org.apache.cxf</groupId><artifactId>cxf-rt-frontend-jaxrs</artifactId><version>3.4.5</version></dependency><dependency><groupId>org.junit.jupiter</groupId><artifactId>junit-jupiter-api</artifactId><version>${junit.version}</version><scope>test</scope></dependency><dependency><groupId>org.junit.jupiter</groupId><artifactId>junit-jupiter-engine</artifactId><version>${junit.version}</version><scope>test</scope></dependency><dependency><groupId>javax.servlet.jsp</groupId><artifactId>jsp-api</artifactId><version>2.2</version><scope>provided</scope></dependency><!-- 数据库驱动相关依赖--><dependency><groupId>mysql</groupId><artifactId>mysql-connector-java</artifactId><version>8.0.11</version></dependency><dependency><groupId>junit</groupId><artifactId>junit</artifactId><version>4.13</version><scope>test</scope></dependency></dependencies><build><finalName>SSM</finalName><pluginManagement><!-- lock down plugins versions to avoid using Maven defaults (may be moved to parent pom) --><plugins><plugin><artifactId>maven-clean-plugin</artifactId><version>3.1.0</version></plugin><!-- see http://maven.apache.org/ref/current/maven-core/default-bindings.html#Plugin_bindings_for_war_packaging --><plugin><artifactId>maven-resources-plugin</artifactId><version>3.0.2</version></plugin><plugin><artifactId>maven-compiler-plugin</artifactId><version>3.8.0</version></plugin><plugin><artifactId>maven-surefire-plugin</artifactId><version>2.22.1</version></plugin><plugin><artifactId>maven-war-plugin</artifactId><version>3.2.2</version></plugin><plugin><artifactId>maven-install-plugin</artifactId><version>2.5.2</version></plugin><plugin><artifactId>maven-deploy-plugin</artifactId><version>2.8.2</version></plugin></plugins></pluginManagement><plugins><plugin><groupId>org.apache.maven.plugins</groupId><artifactId>maven-war-plugin</artifactId><version>3.3.2</version></plugin></plugins><!-- 如果不添加此节点mybatis的mapper.xml文件都会被漏掉。 --><resources><resource><directory>src/main/java</directory><includes><include>**/*.properties</include><include>**/*.xml</include></includes><filtering>false</filtering></resource><resource><directory>src/main/resources</directory><includes><include>**/*.properties</include><include>**/*.xml</include></includes><filtering>false</filtering></resource></resources></build></project>
七、创建实体类
src/main/java下创建com.itheima.domain包,创建Book实体类
1-1Book.java
package com.itheima.domain;
public class Book {private Integer id;private String name;private  String press;private  String author;public Integer getId(){return id;}public void setId(Integer id){this.id=id;}public void setName(String name) {this.name = name;}public String getName() {return name;}public void setAuthor(String author) {this.author = author;}public String getAuthor() {return author;}public void setPress(String press) {this.press = press;}public String getPress() {return press;}
}
八、创建三层架构对应模块的类和接口
src/main/java下创建com.itheima.dao包,创建BookMapper接口
1-2 BookMapper.java
package com.itheima.dao;
import com.itheima.domain.Book;
public interface BookMapper {public Book findBookById(Integer id);
}
同目录下创建其映射文件
1-3BookMapper.xml
<?xml version="1.0" encoding="utf-8" ?>
<!DOCTYPE mapperPUBLIC "-//mybatis.org//DTD Mapper 3.0//EN""http://mybatis.org/dtd/mybatis-3-mapper.dtd">
<mapper namespace="com.itheima.dao.BookMapper"><!--根据id查询图书信息 --><select id="findBookById" parameterType="int"resultType="com.itheima.domain.Book">select * from tb_book where id = #{id}</select>
</mapper>
src/main/java下创建com.itheima.service包,创建BookService接口
1-4 BookService.java
package com.itheima.service;
import com.itheima.domain.Book;
public interface BookService {Book findBookById(Integer id);
}
src/main/java下创建com.itheima.service.Impl包,创建实现类BookServiceImpl
1-5 BookServiceImpl.java
package com.itheima.service.impl;
import com.itheima.dao.BookMapper;
import com.itheima.domain.Book;
import com.itheima.service.BookService;
import org.springframework.beans.factory.annotation.Autowired;
import org.springframework.stereotype.Service;
@Service
public class BookServiceImpl implements BookService {@Autowiredprivate BookMapper bookMapper;public Book findBookById (Integer id){return bookMapper.findBookById(id);}
}
src/main/java下创建com.itheima.controller包,创建BookController处理器类
1-5 BookController.java
package com.itheima.controller;
import com.itheima.domain.Book;
import com.itheima.service.BookService;
import org.springframework.beans.factory.annotation.Autowired;
import org.springframework.stereotype.Controller;
import org.springframework.web.bind.annotation.RequestMapping;
import org.springframework.web.servlet.ModelAndView;
@Controller
public class BookController {@Autowiredprivate BookService bookService;@RequestMapping("/book")public ModelAndView findBookById(Integer id){Book book=bookService.findBookById(id);ModelAndView modelAndView=new ModelAndView();modelAndView.setViewName("book.jsp");modelAndView.addObject("book",book);return modelAndView;}
}
九、Spring和Mybatis的整合
1、spring的配置文件:
src/main/resources目录下创建application-service.xml配置文件
2-1 application-service.xml
<?xml version="1.0" encoding="UTF-8"?>
<beans xmlns="http://www.springframework.org/schema/beans"xmlns:xsi="http://www.w3.org/2001/XMLSchema-instance"xmlns:context="http://www.springframework.org/schema/context"xsi:schemaLocation="http://www.springframework.org/schema/beanshttp://www.springframework.org/schema/beans/spring-beans.xsdhttp://www.springframework.org/schema/contexthttp://www.springframework.org/schema/context/spring-context.xsd"><context:component-scan base-package="com.itheima.service"/>
</beans>
2、Spring和Mybatis的整合配置
src/main/resources目录下创建属性源文件jdbc.properties,用于配置MySQL数据库
2-2 jdbc.properties
jdbc.driverClassName=com.mysql.cj.jdbc.Driver
jdbc.url=jdbc:mysql://localhost:3306/ssm?useUnicode=true\&characterEncoding=utf-8&serverTimezone=Asia/Shanghai
jdbc.username=root
jdbc.password=123456
src/main/resources目录下创建application-dao.xml配置信息
2-3 application-dao.xml
<?xml version="1.0" encoding="UTF-8"?>
<beans xmlns="http://www.springframework.org/schema/beans"xmlns:xsi="http://www.w3.org/2001/XMLSchema-instance"xmlns:context="http://www.springframework.org/schema/context"xsi:schemaLocation="http://www.springframework.org/schema/beanshttp://www.springframework.org/schema/beans/spring-beans.xsdhttp://www.springframework.org/schema/contexthttp://www.springframework.org/schema/context/spring-context.xsd"><context:property-placeholder location="classpath:jdbc.properties"/><bean id="dataSource" class="com.alibaba.druid.pool.DruidDataSource"><property name="driverClassName" value="${jdbc.driverClassName}"/><property name="url" value="${jdbc.url}"/><property name="username" value="${jdbc.username}"/><property name="password" value="${jdbc.password}"/></bean><bean id="sqlSessionFactory"class="org.mybatis.spring.SqlSessionFactoryBean"><property name="dataSource" ref="dataSource"/></bean><bean class="org.mybatis.spring.mapper.MapperScannerConfigurer"><property name="basePackage" value="com.itheima.dao"/></bean>
</beans>
3、整合测试
src/test/java中创建BookServiceTest类
2-4BookServiceTest.java
import com.itheima.domain.Book;
import com.itheima.service.BookService;
import org.junit.Test;
import org.junit.runner.RunWith;
import org.springframework.beans.factory.annotation.Autowired;
import org.springframework.test.context.ContextConfiguration;
import org.springframework.test.context.junit4.SpringJUnit4ClassRunner;
@RunWith(SpringJUnit4ClassRunner.class)
@ContextConfiguration(locations = {"classpath:application-service.xml","classpath:application-dao.xml"})
public class BookServiceTest {
@Autowiredprivate BookService bookService;
@Testpublic void findBookById()
{Book book=bookService.findBookById(2);System.out.println("id:"+book.getId());System.out.println("name:"+book.getName());System.out.println("author:"+book.getAuthor());System.out.println("press:"+book.getPress());
}
}
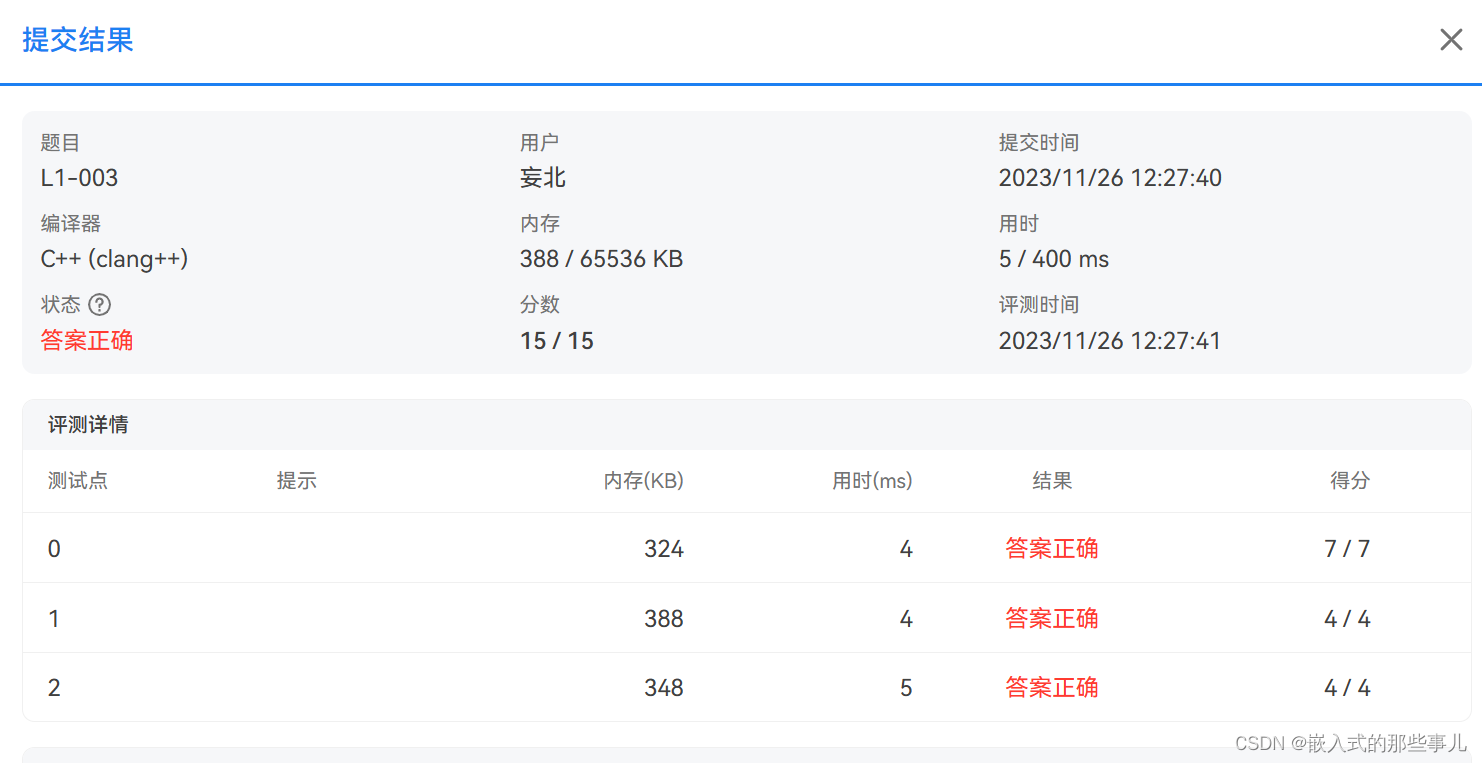
4、测试结果
测试成功:

九、Spring和SpringMVC整合
1、Spring的配置
在项目webapp/WEB-INF的web.xml中输入以下代码
3-1 web.xml
<?xml version="1.0" encoding="UTF-8"?>
<web-app xmlns="http://xmlns.jcp.org/xml/ns/javaee"xmlns:xsi="http://www.w3.org/2001/XMLSchema-instance"xsi:schemaLocation="http://xmlns.jcp.org/xml/ns/javaee http://xmlns.jcp.org/xml/ns/javaee/web-app_4_0.xsd"version="4.0"><context-param><param-name>contextConfigLocation</param-name><param-value>classpath:application-*.xml</param-value></context-param><listener><listener-class>org.springframework.web.context.ContextLoaderListener</listener-class></listener><servlet><servlet-name>DispatcherServlet</servlet-name><servlet-class>org.springframework.web.servlet.DispatcherServlet</servlet-class><init-param><param-name>contextConfigLocation</param-name><param-value>classpath:spring-mvc.xml</param-value></init-param><load-on-startup>1</load-on-startup></servlet><servlet-mapping><servlet-name>DispatcherServlet</servlet-name><url-pattern>/</url-pattern></servlet-mapping>
</web-app>
2、SpringMVC的配置
src/main/resources目录下创建Spring-mvc.xml配置信息
3-2 spring-mvc.xml
<?xml version="1.0" encoding="UTF-8"?>
<beans xmlns="http://www.springframework.org/schema/beans"xmlns:context="http://www.springframework.org/schema/context"xmlns:mvc="http://www.springframework.org/schema/mvc"xmlns:xsi="http://www.w3.org/2001/XMLSchema-instance"xsi:schemaLocation="http://www.springframework.org/schema/beanshttp://www.springframework.org/schema/beans/spring-beans.xsdhttp://www.springframework.org/schema/mvchttp://www.springframework.org/schema/mvc/spring-mvc.xsdhttp://www.springframework.org/schema/contexthttp://www.springframework.org/schema/context/spring-context.xsd"><context:component-scan base-package="com.itheima.controller"/><mvc:annotation-driven/>
</beans>
3、SSM框架整合测试
src/main/webapp下创建book.jsp文件
3-4 book.jsp
<%@ page contentType="text/html;charset=UTF-8" language="java" %>
<html>
<head><title>图书信息查询</title>
</head>
<body>
<table border="1">
<tr><th>图书id</th><th>图书名称</th><th>出版社</th><th>作者</th>
</tr>
<tr><td>${book.id}</td><td>${book.name}</td><td>${book.press}</td><td>${book.author}</td>
</tr>
</table>
</body>
</html>
启动Tomcat8,在浏览器输入
http://localhost:8082/SSM_war_exploded/book?id=1其中8082为端口号,我的填的是8082,默认是8080,根据自己的配置改就行!
结果:

十、注意事项及其BUG反馈
1、控制台中文乱码解决办法:
Settings->Editor->File Encodings->三个部分如图都改为GBK即可

2、Mysql数据库中文乱码解决办法:
修改数据库字符集 :
alter database SSM default convert to character set utf8;3、服务器日志中文乱码解决办法:
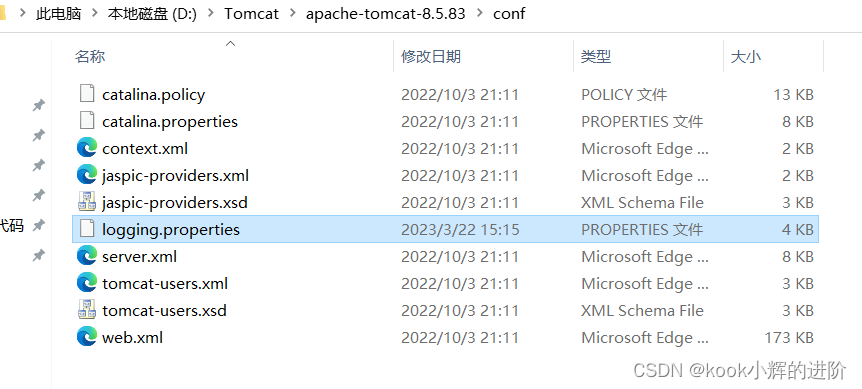
找到对应的Tomcat-8存储地址,在conf中找到
logging.properties文件,将全部GBk替换成UTF-8即可

4、出现no appropriate protocal 异常报错
找到对应位置jdk,把java.security中的
dk.tls.disabledAlgorithms=后的SSLv3,TLSv1,TLSv1.1删除,
如图大概在724行,删除后如图:


5、出现java.lang.NoClassDefFoundError:javax/severlet/报错
是由于Tomcat高版本不支持4.0版本的Sevrlet导致,更换低版本Tomcat即可
十一、总结
总体来说,当开始着手一个WEB项目时,总会由于各种原因导致各种BUG,需要花费大量的时间去排查和调试,才能一步步把最后的项目运行出来,因此需要考虑的方面有很多,重要的是必须看懂编译器报错的原因,从而分析出可行的解决办法。
只有不断的鞭策自己去实践和学习,积累Debug的能力和经验,才能慢慢获得进步!
发文不易,恳请大佬们高抬贵手!
点赞:随手点赞是种美德,是大佬们对于本人创作的认可!
评论:往来无白丁,是你我交流的的开始!
收藏:愿君多采撷,是大佬们对在下的赞赏!