- 👏作者简介:大家好,我是爱吃芝士的土豆倪,24届校招生Java选手,很高兴认识大家
- 📕系列专栏:Spring源码、JUC源码、Kafka原理、分布式技术原理
- 🔥如果感觉博主的文章还不错的话,请👍三连支持👍一下博主哦
- 🍂博主正在努力完成2023计划中:源码溯源,一探究竟
- 📝联系方式:nhs19990716,加我进群,大家一起学习,一起进步,一起对抗互联网寒冬👀
文章目录
- 流量控制
- 限流核心因素
- 并发线程数
- QPS
- 直接拒绝
- warm up(冷启动)
- 匀速排队
- 基于调用关系来做流量控制
- Sentinel控制台
- 动态限流规则
- Nacos DataSource(接口)
- 基于配置文件的动态限流
- 集群限流
- 熔断降级
- 熔断指标
- 熔断规则
- 熔断时间窗口
- 熔断实践
- sentinel的实现
- 分析sentinel源码实现
- 树的构建 NodeSelectorSlot
- 统计监控 StatisticSlot
- 流量控制 FlowSlot
流量控制
sentinel中有几个比较重要的东西:
- 资源 - 针对哪一个方法,可以在接口层面 ,也可以在类层面
- 规则 - 根据资源配置限流的规则
- Entry -> 请求
限流核心因素
- resource 资源
- count 阈值
- grade 限流的类型
- …
并发线程数
我们所有的请求它会去基于业务线程也好,容器分配的线程也好,其都是通过线程的分配来处理。(像dubbo就有默认200的线程大小,其实也就是服务端接收到线程以后,会分配一个业务线程去处理这个请求,其最大的线程数设置的是200。)在sentinel中,关于并发线程数的策略指的是对于并发请求的处理策略。这包括了对于同时处理的请求数量的限制、超时处理、以及资源的保护等方面的策略。这些策略旨在保证系统在高并发情况下能够正常运行,同时避免资源被过度消耗或者出现系统崩溃的情况。通过设置合适的并发线程数策略,可以有效地管理系统的资源和保证系统的稳定性。
QPS
在Sentinel中,关于QPS的策略指的是对于每秒查询次数的限制策略。这些策略可以用来控制系统的并发请求量,防止系统被过度压力而导致性能下降或系统崩溃。通过设置QPS的限制策略,可以限制系统在单位时间内能够处理的请求次数,从而保护系统免受过多请求的影响,确保系统在承受合理负载的情况下能够正常运行。这些策略可以根据系统的实际情况和需求来进行调整,以保证系统的稳定性和可靠性。
当触发了上述的两种限流,就会产生一种行为,也就是所谓流量控制的策略
- 直接拒绝
- warm up(冷启动)
- 匀速排队
这个策略主要是通过ControlBehavior属性来控制策略的
直接拒绝
flowRule.setControlBehavior(RuleConstant.CONTROL_BEHAVIOR_DEFAULT);
warm up(冷启动)

所谓冷启动,就是我们的系统在启动的时候长期处于低水位(整个系统的吞吐量非常低,并发量很低),当突然出现这种瞬时流量,系统有一个启动的过程,并不是一下子将所有的流量都放进来,而是逐步的拉伸整个系统的水位直到通过一个时间维度达到最高峰的阈值。(因为一下子将所有流量放进来,系统很可能在一瞬间被压垮,所以匀速提升整个系统的预热,可以在一定情况下逐渐增加处理上限)
匀速排队

总体来说,在限流里面,可分为比较重要的就是 资源 和 规则 ,我们可以通过配置不同的资源去设置不同的规则,从而控制整个请求流量的行为。
基于调用关系来做流量控制
在整个调用链路里面,针对不同请求来源去做(FlowRule.limitApp)
- 根据资源
基于资源的流量控制是指根据被调用的具体资源(比如接口、方法等)来进行流量控制。在Sentinel中,可以通过配置规则来限制不同资源的访问流量,比如可以设置某个接口的最大访问次数或者并发数。这种方式适用于对特定资源进行限流的场景,可以保护资源不被过度访问。
- 根据来源
基于来源的流量控制是指根据调用方的来源(比如IP地址、用户ID等)来进行流量控制。在Sentinel中,可以通过配置规则来限制不同来源的访问流量,比如可以设置某个IP地址的最大访问次数或者限制某个用户的访问频率。这种方式适用于对不同来源的调用方进行个性化的限流控制。
- 根据参数
基于参数的流量控制是指根据调用方传递的参数来进行流量控制。在Sentinel中,可以通过配置规则来限制不同参数组合的访问流量,比如可以设置某个接口某个参数的最大访问次数。这种方式适用于对特定参数组合进行限流的场景,可以根据业务需求对不同参数进行限流控制。
Sentinel控制台
java -Dserver.port=7777 -Dcsp.sentinel.dashboard.server=localhost:7777 -
Dproject.name=sentinel-dashboard-1.8.0 -jar sentinel-dashboard-1.8.0.jar


上图可以清晰的展示到sentinel可以提供哪些方向上的规则配置。
需要注意的一点就是,单机情况下,如果配置阈值的话,可以通过单机压测 压测出来。
动态限流规则

实际上就是动态的规则感知进行 (pull、push)
Nacos DataSource(接口)
对于整个Sentinel的动态数据源来说,必须要去做扩展。
这个接口提供了动态配置感知的能力 和 动态配置存储的能力。
// sentinel 提供的spi扩展
/*
SPI(Service Provider Interface)扩展是Java中一种用于扩展框架的机制。在SPI中,框架定义了一组接口(接口或抽象类),并允许外部的实现者按照这些接口的规范来提供具体的实现。这种机制允许系统的扩展功能可以通过在类路径下放置实现者提供的JAR包来实现,而无需修改框架的源代码。SPI扩展机制的优点是能够实现框架和扩展的解耦,框架可以在不修改代码的情况下,通过加载外部的实现类来扩展功能。同时,SPI扩展也提供了一种简单的插件机制,允许开发者通过编写实现类来扩展框架的功能。
*/// 扩展之后必须在 resource/META-INF/services/com.alibaba.csp.sentinel.init.initFunc 里面写入com.gupaoedu.example.springbootsentinel.FlowRuleInitFunc 对应的路径// 扩展之后,sentinel在初始化的时候,就会去加载这个方法public class FlowRuleInitFunc implements InitFunc{@Overridepublic void init() throws Exception {List<FlowRule> rules=new ArrayList<>();FlowRule flowRule=new FlowRule();flowRule.setResource("read"); //针对那个资源设置规则flowRule.setGrade(RuleConstant.FLOW_GRADE_QPS);//QPS或者并发数flowRule.setCount(5); //QPS=5//直接拒绝:flowRule.setControlBehavior(RuleConstant.CONTROL_BEHAVIOR_DEFAULT);rules.add(flowRule);FlowRuleManager.loadRules(rules);}}
# Sentinel 控制台地址 将当前的应用接入到控制台
spring.cloud.sentinel.transport.dashboard=192.168.216.128:7777
# 取消Sentinel控制台懒加载
# 默认情况下 Sentinel 会在客户端首次调用的时候进行初始化,开始向控制台发送心跳包
# 配置 sentinel.eager=true 时,取消Sentinel控制台懒加载功能
spring.cloud.sentinel.eager=true
@RestController
public class SentinelController {@AutowiredTestService testService;@GetMapping("/hello/{name}")public String sayHello(@PathVariable("name") String name){return testService.doTest(name);}
}@Service
public class TestService {@SentinelResource(value = "doTest") //声明限流的资源public String doTest(String name){return "hello , "+name;}}
此时我们已经将 sentinel 接入到 sentinel控制台了,然后我们使用jmeter来进行测试
配置http请求 和 线程数

此时就可以看到 在sentinel控制台中对应接口的 监控情况

在前面起到了,只要依赖了 sentinel这个包,那么项目就会自动的去集成流量的一个过滤,比如/hello/{name},因为没有设置规则,所以都能通过。
接下来做一个动态规则。
<dependency><groupId>com.alibaba.csp</groupId><artifactId>sentinel-datasource-nacos</artifactId><version>1.8.0</version></dependency>
public class FlowRuleInitFunc implements InitFunc{private final String nacosAddress="192.168.216.128:8848";private final String groupId="SENTINEL_GROUP";private final String dataId="-flow-rules";private final String appName="App-Test";@Overridepublic void init() throws Exception {registerFlowRule();}private void registerFlowRule(){// 从远程服务器上加载规则ReadableDataSource<String,List<FlowRule>> flowRuleDs=new NacosDataSource<List<FlowRule>>(nacosAddress,groupId,appName+dataId,// 当数据发生变化后,会回调这个方法source-> JSON.parseObject(source,new TypeReference<List<FlowRule>>(){}));// 这行代码将上面创建的数据源注册到中。是Sentinel中管理流控规则的组件,方法用于将提供的(属性)注册到。这样,每当Nacos中的配置发生变化时,会获取最新的规则,并通知更新内存中的流控规则。FlowRuleManager.register2Property(flowRuleDs.getProperty());}
}
此时在nacos中修改对应的配置,就能够监听到,然后更新到内存中的流控规则中

- 通过访问测试,即可看到被限流的效果。
- 也可以在 ${用户}/logs/csp/sentinel-record.log.2020-09-22 文件中看到sentinel启动过程中动态数据源的加载过程。
基于配置文件的动态限流
spring.cloud.sentinel.transport.clientIp=192.168.216.128:7777
spring.cloud.sentinel.datasource.nacos.nacos.serverAddr=192.168.216.128:8848
spring.cloud.sentinel.datasource.nacos.nacos.dataId=com.gupaoedu.sentinel.demo.flow.rule
spring.cloud.sentinel.datasource.nacos.nacos.groupId=SENTINEL_GROUP
spring.cloud.sentinel.datasource.nacos.nacos.dataType=json
spring.cloud.sentinel.datasource.nacos.nacos.ruleType=flow
spring.cloud.sentinel.datasource.nacos.nacos.username=nacos
spring.cloud.sentinel.datasource.nacos.nacos.password=nacos
在这里的配置会出现一个问题,就是修改 sentinel 控制台配置,和nacos上的配置不一致,这样的话最简单的就是修改sentinel的源码,当sentinel控制台变化的时候,动态去修改nacos上的配置即可。
集群限流
token-client代表我们的应用,当一个请求过来以后,经过token-client会进行一个动态的判断,token-server里面采用的是一个动态数据源,此时就能够实现集群限流的思想了,当来一个请求的时候,token-client先去token-server中去判断是否能够通过,如果通过才能执行,否则限流。
当token-server挂了之后,能够直接连接nacos配置中心的规则进行一个处理

token -server
public static void main(String[] args) throws Exception {ClusterTokenServer tokenServer=new SentinelDefaultTokenServer();//手动载入namespace和serverTransportConfig的配置到ClusterServerConfigManager//集群限流服务端通信相关配置ClusterServerConfigManager.loadGlobalTransportConfig(new ServerTransportConfig().setIdleSeconds(600).setPort(9999));//加载namespace集合列表() , namespace也可以放在配置中心ClusterServerConfigManager.loadServerNamespaceSet(Collections.singleton("App-Test"));tokenServer.start();//Token-client会上报自己的project.name到token-server。Token-server会根据namespace来统计连接数}// 主要作用是从 Nacos 配置中心获取流控规则,并将其应用到 Sentinel 中,以实现动态的流控规则管理。
public class FlowRuleInitFunc implements InitFunc{private final String nacosAddress="192.168.216.128:8848";private final String groupId="SENTINEL_GROUP";private String dataId="-flow-rules";@Overridepublic void init() throws Exception {ClusterFlowRuleManager.setPropertySupplier(namespace->{ReadableDataSource<String,List<FlowRule>> flowRuleDs=new NacosDataSource<List<FlowRule>>(nacosAddress,groupId,namespace+dataId,source-> JSON.parseObject(source,new TypeReference<List<FlowRule>>(){}));return flowRuleDs.getProperty();});}
}

token-client
public class FlowRuleInitFunc implements InitFunc{private final String nacosAddress="192.168.216.128:8848";private final String groupId="SENTINEL_GROUP";private final String dataId="-flow-rules";private final String clusterServerHost="localhost";private final int clusterServerPort=9999;private final int requestTimeOut=20000;private final String appName="App-Test";@Overridepublic void init() throws Exception {loadClusterConfig();registerFlowRule();}private void loadClusterConfig(){ClusterClientAssignConfig assignConfig=new ClusterClientAssignConfig();assignConfig.setServerHost(clusterServerHost); //放到配置中心assignConfig.setServerPort(clusterServerPort);ClusterClientConfigManager.applyNewAssignConfig(assignConfig);ClusterClientConfig clientConfig=new ClusterClientConfig();clientConfig.setRequestTimeout(requestTimeOut);  //放到配置中心ClusterClientConfigManager.applyNewConfig(clientConfig);}private void registerFlowRule(){ReadableDataSource<String,List<FlowRule>> flowRuleDs=new NacosDataSource<List<FlowRule>>(nacosAddress,groupId,appName+dataId,source-> JSON.parseObject(source,new TypeReference<List<FlowRule>>(){}));FlowRuleManager.register2Property(flowRuleDs.getProperty());}
}
以上就是一个集群流控的核心实现了。

总结:集群限流配置一个总的qps,多个节点可以配置权重,或者均摊的方式来起到限流的作用。
熔断降级
Sentinel的熔断降级是一种服务保护机制,用于在系统出现异常或超载时,自动限制对受影响服务的访问,防止其继续受到压力而导致系统崩溃。熔断降级可以通过设置阈值和规则来实现,一旦达到设定的条件,系统将自动停止对服务的访问,直到服务恢复正常或超载情况解除。这样可以保护系统免受过载和异常情况的影响,确保系统的稳定性和可靠性。
熔断指标
怎么判断这个服务是一个不稳定的状态?
异常数:
平均响应时间:
异常比例数:10s内,20次请求里面,有百分之五十及以上的错误率,就认为其要触发熔断,而hystrix只有这一种
熔断规则
规则,也就是要设计对应的指标,指标设计为多少才会熔断!
比如说:
- 1min内,异常数量超过50%,触发熔断
- 1s 5个请求,平均响应时间超过一个阈值(1000ms)
- 1min内,超过了多少个异常数量
熔断时间窗口
当处于熔断状态的时候,多长时间内,请求都不会发送到服务端,熔断窗口也是一个需要设置的阈值
熔断实践
public class DataSourceInitFunc implements InitFunc{public void init() throws Exception{List<DegradeRule> rules = new ArrayList<>();DegradeRule rule = new DegradeRule();rule.setResource("com.gupaodu.springcloud.dubbo.ISayHelloService");// 表示针对那个服务或者方法的熔断// 针对这个类下面所有的接口进行资源的判断,当这个类下面任何一个方法触发了熔断,那么调用这个类下面的任何一个接口都会自动触发降级。// 设置模式rule.setGrade(RuleConstant.Degrade.DEGRADE_CRADE_EXCEPTION_COUNT)// 错误数 超时时间 错误率 指标rule.setCount(3);// 阈值rule.setTimeWindow(100)// 时间窗口 100srules.add(rule);DegradeRuleManager.loadRules(rules);}
}public interface ISayHelloService{String sayHello(String msg);String exceptionTest();
}@DubboService
public class SayHelloServiceImpl implement ISayHelloService{public String sayHello(String msg){return "";}// 用来触发测试public String exceptionTest(){throw new RuntimeException("biz exception");}
}@RestController
public class SentinelController {@DubboReference(mock="......SayHelloServiceMock")ISayHelloService sayHelloService;@GetMapping("/say")public String say(){return sayHelloService.sayHello("");}@GetMapping("/exception")public String exception(){return sayHelloService.exceptionTest();}
}public class SayHelloServiceMock implements ISayHelloService{public String sayHello(String msg){return "触发了降级,返回默认数据";}// 用来触发测试public String exceptionTest(){return "触发了降级,返回默认数据"}
}
其实本质就是 当触发熔断之后,该接口下其他方法在时间窗口内 也不能访问,只能被降级。
sentinel的实现
构建一个资源
设置一个规则
指标范围:
- 当前的qps
- 当前的总的并发数线程数
- 当前失败请求数是多少?
- …

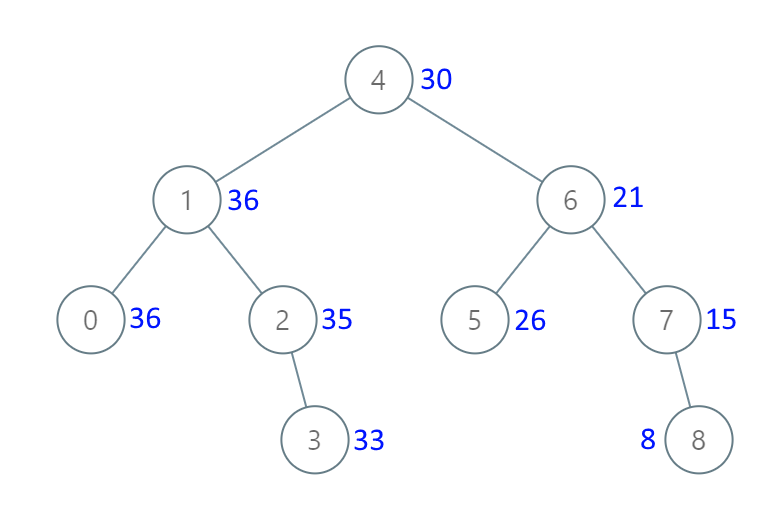
此图为官方提供的图,一个请求过来,它会在 调用链路构建处 构建一个 Invocation Tree结构,也就是将我们请求的资源构建成一个节点,以树形的方式去构建。然后就是针对某个节点进行监控统计,主要是以环形数组的方式哦存,其实也就是每一个node维护了一个滑动窗口,其统计了针对这个资源总的信息去进行指标统计,然后通过一个判断责任链去鉴别触发了那些规则。
分析sentinel源码实现
public static Entry entry(String name, int resourceType, EntryType trafficType) throws BlockException {return Env.sph.entryWithType(name, resourceType, trafficType, 1, OBJECTS0);}public Entry entryWithType(String name, int resourceType, EntryType entryType, int count, Object[] args) throws BlockException {return this.entryWithType(name, resourceType, entryType, count, false, args);}public Entry entryWithType(String name, int resourceType, EntryType entryType, int count, boolean prioritized, Object[] args) throws BlockException {StringResourceWrapper resource = new StringResourceWrapper(name, entryType, resourceType);return this.entryWithPriority(resource, count, prioritized, args);}private Entry entryWithPriority(ResourceWrapper resourceWrapper, int count, boolean prioritized, Object... args) throws BlockException {// 获取线程上下文Context context = ContextUtil.getContext();if (context instanceof NullContext) {return new CtEntry(resourceWrapper, (ProcessorSlot)null, context);} else {if (context == null) {context = CtSph.InternalContextUtil.internalEnter("sentinel_default_context");}// 是否开启或关闭流控if (!Constants.ON) {return new CtEntry(resourceWrapper, (ProcessorSlot)null, context);} else {// 构建了一个调用链ProcessorSlot<Object> chain = this.lookProcessChain(resourceWrapper);
------------------------------------------------------------------------------
ProcessorSlot<Object> lookProcessChain(ResourceWrapper resourceWrapper) {ProcessorSlotChain chain = (ProcessorSlotChain)chainMap.get(resourceWrapper);if (chain == null) {synchronized(LOCK) {chain = (ProcessorSlotChain)chainMap.get(resourceWrapper);if (chain == null) {// 超过阈值就直接返回nullif (chainMap.size() >= 6000) {return null;}// 单例模式创建调用链chain = SlotChainProvider.newSlotChain();Map<ResourceWrapper, ProcessorSlotChain> newMap = new HashMap(chainMap.size() + 1);newMap.putAll(chainMap);newMap.put(resourceWrapper, chain);chainMap = newMap;// 如果直接添加进去的话,涉及到扩容,所以采用创建之后赋值的方法}}}return chain;}public static ProcessorSlotChain newSlotChain() {if (slotChainBuilder != null) {return slotChainBuilder.build();} else {slotChainBuilder = (SlotChainBuilder)SpiLoader.of(SlotChainBuilder.class).loadFirstInstanceOrDefault();if (slotChainBuilder == null) {RecordLog.warn("[SlotChainProvider] Wrong state when resolving slot chain builder, using default", new Object[0]);slotChainBuilder = new DefaultSlotChainBuilder();} else {RecordLog.info("[SlotChainProvider] Global slot chain builder resolved: {}", new Object[]{slotChainBuilder.getClass().getCanonicalName()});}return slotChainBuilder.build();}}public ProcessorSlotChain build() {ProcessorSlotChain chain = new DefaultProcessorSlotChain();List<ProcessorSlot> sortedSlotList = SpiLoader.of(ProcessorSlot.class).loadInstanceListSorted();Iterator var3 = sortedSlotList.iterator();// 然后在这里进行一个遍历while(var3.hasNext()) {ProcessorSlot slot = (ProcessorSlot)var3.next();if (!(slot instanceof AbstractLinkedProcessorSlot)) {RecordLog.warn("The ProcessorSlot(" + slot.getClass().getCanonicalName() + ") is not an instance of AbstractLinkedProcessorSlot, can't be added into ProcessorSlotChain", new Object[0]);} else {chain.addLast((AbstractLinkedProcessorSlot)slot);}}return chain;}// 在这里面涉及到了SpiLoader
// 其实也就是在这个链路中,可以进入到我们自己的 自定义的slot 中


if (chain == null) {return new CtEntry(resourceWrapper, (ProcessorSlot)null, context);} else {CtEntry e = new CtEntry(resourceWrapper, chain, context);try {// 构建好以后然后通过链式去处理chain.entry(context, resourceWrapper, (Object)null, count, prioritized, args);} catch (BlockException var9) {e.exit(count, args);throw var9;} catch (Throwable var10) {RecordLog.info("Sentinel unexpected exception", var10);}return e;}}}}

这两个就是前面说的滑动窗口要去统计的东西
前面传进来的资源包装成一个 resourceWrapper对象

当我们打算进入 chain.entry 的时候,发现其实就是一系列的slot

树的构建 NodeSelectorSlot
public void entry(Context context, ResourceWrapper resourceWrapper, Object obj, int count, boolean prioritized, Object... args) throws Throwable {DefaultNode node = (DefaultNode)this.map.get(context.getName());// 双重检查锁 + 缓存if (node == null) {synchronized(this) {node = (DefaultNode)this.map.get(context.getName());if (node == null) {node = new DefaultNode(resourceWrapper, (ClusterNode)null);HashMap<String, DefaultNode> cacheMap = new HashMap(this.map.size());cacheMap.putAll(this.map);cacheMap.put(context.getName(), node);this.map = cacheMap;((DefaultNode)context.getLastNode()).addChild(node);}}}context.setCurNode(node);// 当上述构建操作完成后// 释放entrythis.fireEntry(context, resourceWrapper, node, count, prioritized, args);}
// 释放的本质其实就是执行下一个
public void fireEntry(Context context, ResourceWrapper resourceWrapper, Object obj, int count, boolean prioritized, Object... args) throws Throwable {if (this.next != null) {this.next.transformEntry(context, resourceWrapper, obj, count, prioritized, args);}}
统计监控 StatisticSlot
实际上是并发量比较大的情况下做数据统计
public void entry(Context context, ResourceWrapper resourceWrapper, DefaultNode node, int count, boolean prioritized, Object... args) throws Throwable {Iterator var8;ProcessorSlotEntryCallback handler;try {// 先交给后续的slot进行处理this.fireEntry(context, resourceWrapper, node, count, prioritized, args);// 然后开始统计资源// node代表当前传过来的资源node.increaseThreadNum();node.addPassRequest(count);
-----------------------------------------------------------------------------------
public void addPassRequest(int count) {super.addPassRequest(count);this.clusterNode.addPassRequest(count);}
public void addPassRequest(int count) {this.rollingCounterInSecond.addPass(count); // 秒级别的统计this.rollingCounterInMinute.addPass(count); // 分钟级别的统计}this.rollingCounterInSecond = new ArrayMetric(SampleCountProperty.SAMPLE_COUNT, IntervalProperty.INTERVAL);SampleCountProperty.SAMPLE_COUNT = 2;
IntervalProperty.INTERVAL = 1000;// 上面有点像滑动窗口的概念
public void addPass(int count) {WindowWrap<MetricBucket> wrap = this.data.currentWindow();// 根据某一个指标加进去 这里面的本质就是通过当前的时间去得到一个窗口,将其加进去// LongAdder的思想 其底层就是数组累加的思想 !!!((MetricBucket)wrap.value()).addPass(count);}// 当最终计数完成后,相当于形成了一开始的那个图的样子private final LeapArray<MetricBucket> data;public ArrayMetric(int sampleCount, int intervalInMs) {this.data = new OccupiableBucketLeapArray(sampleCount, intervalInMs);}public OccupiableBucketLeapArray(int sampleCount, int intervalInMs) {super(sampleCount, intervalInMs);this.borrowArray = new FutureBucketLeapArray(sampleCount, intervalInMs);}// super(sampleCount, intervalInMs);
public LeapArray(int sampleCount, int intervalInMs) {AssertUtil.isTrue(sampleCount > 0, "bucket count is invalid: " + sampleCount);AssertUtil.isTrue(intervalInMs > 0, "total time interval of the sliding window should be positive");AssertUtil.isTrue(intervalInMs % sampleCount == 0, "time span needs to be evenly divided");this.windowLengthInMs = intervalInMs / sampleCount; // 每个窗口的时间长度this.intervalInMs = intervalInMs;this.intervalInSecond = (double)intervalInMs / 1000.0D;this.sampleCount = sampleCount;this.array = new AtomicReferenceArray(sampleCount); // sampleCount = 2// 也就代表着窗口的大小是两个}protected final AtomicReferenceArray<WindowWrap<T>> array;

if (context.getCurEntry().getOriginNode() != null) {context.getCurEntry().getOriginNode().increaseThreadNum();context.getCurEntry().getOriginNode().addPassRequest(count);}if (resourceWrapper.getEntryType() == EntryType.IN) {Constants.ENTRY_NODE.increaseThreadNum();Constants.ENTRY_NODE.addPassRequest(count);}Iterator var13 = StatisticSlotCallbackRegistry.getEntryCallbacks().iterator();while(var13.hasNext()) {ProcessorSlotEntryCallback<DefaultNode> handler = (ProcessorSlotEntryCallback)var13.next();handler.onPass(context, resourceWrapper, node, count, args);}} catch (PriorityWaitException var10) {node.increaseThreadNum();if (context.getCurEntry().getOriginNode() != null) {context.getCurEntry().getOriginNode().increaseThreadNum();}if (resourceWrapper.getEntryType() == EntryType.IN) {Constants.ENTRY_NODE.increaseThreadNum();}var8 = StatisticSlotCallbackRegistry.getEntryCallbacks().iterator();while(var8.hasNext()) {handler = (ProcessorSlotEntryCallback)var8.next();handler.onPass(context, resourceWrapper, node, count, args);}} catch (BlockException var11) {BlockException e = var11;context.getCurEntry().setBlockError(var11);node.increaseBlockQps(count);if (context.getCurEntry().getOriginNode() != null) {context.getCurEntry().getOriginNode().increaseBlockQps(count);}if (resourceWrapper.getEntryType() == EntryType.IN) {Constants.ENTRY_NODE.increaseBlockQps(count);}var8 = StatisticSlotCallbackRegistry.getEntryCallbacks().iterator();while(var8.hasNext()) {handler = (ProcessorSlotEntryCallback)var8.next();handler.onBlocked(e, context, resourceWrapper, node, count, args);}throw e;} catch (Throwable var12) {context.getCurEntry().setError(var12);throw var12;}}
流量控制 FlowSlot
public void entry(Context context, ResourceWrapper resourceWrapper, DefaultNode node, int count, boolean prioritized, Object... args) throws Throwable {this.checkFlow(resourceWrapper, context, node, count, prioritized);this.fireEntry(context, resourceWrapper, node, count, prioritized, args);}void checkFlow(ResourceWrapper resource, Context context, DefaultNode node, int count, boolean prioritized) throws BlockException {this.checker.checkFlow(this.ruleProvider, resource, context, node, count, prioritized);}public void checkFlow(Function<String, Collection<FlowRule>> ruleProvider, ResourceWrapper resource, Context context, DefaultNode node, int count, boolean prioritized) throws BlockException {if (ruleProvider != null && resource != null) {// 获取针对这个资源的限流规则Collection<FlowRule> rules = (Collection)ruleProvider.apply(resource.getName());if (rules != null) {Iterator var8 = rules.iterator();while(var8.hasNext()) {FlowRule rule = (FlowRule)var8.next();if (!this.canPassCheck(rule, context, node, count, prioritized)) {throw new FlowException(rule.getLimitApp(), rule);}}}}}public boolean canPassCheck(FlowRule rule, Context context, DefaultNode node, int acquireCount, boolean prioritized) {String limitApp = rule.getLimitApp();if (limitApp == null) {return true;} else {return rule.isClusterMode() ? passClusterCheck(rule, context, node, acquireCount, prioritized) : passLocalCheck(rule, context, node, acquireCount, prioritized);}}private static boolean passLocalCheck(FlowRule rule, Context context, DefaultNode node, int acquireCount, boolean prioritized) {Node selectedNode = selectNodeByRequesterAndStrategy(rule, context, node);// 在这里再根据不同的策略去决定拒绝的要怎么办return selectedNode == null ? true : rule.getRater().canPass(selectedNode, acquireCount, prioritized);}static Node selectNodeByRequesterAndStrategy(FlowRule rule, Context context, DefaultNode node) {String limitApp = rule.getLimitApp();int strategy = rule.getStrategy();String origin = context.getOrigin();// 根据不同的来源进行限流if (limitApp.equals(origin) && filterOrigin(origin)) {return strategy == 0 ? context.getOriginNode() : selectReferenceNode(rule, context, node);} else if ("default".equals(limitApp)) {return (Node)(strategy == 0 ? node.getClusterNode() : selectReferenceNode(rule, context, node));} else if ("other".equals(limitApp) && FlowRuleManager.isOtherOrigin(origin, rule.getResource())) {return strategy == 0 ? context.getOriginNode() : selectReferenceNode(rule, context, node);} else {return null;}}public boolean canPass(Node node, int acquireCount, boolean prioritized) {// 根据资源获取当前的使用量int curCount = this.avgUsedTokens(node);// 如果当前使用量 + 请求 > 阈值 则按照策略进行限流if ((double)(curCount + acquireCount) > this.count) {if (prioritized && this.grade == 1) {long currentTime = TimeUtil.currentTimeMillis();long waitInMs = node.tryOccupyNext(currentTime, acquireCount, this.count);if (waitInMs < (long)OccupyTimeoutProperty.getOccupyTimeout()) {node.addWaitingRequest(currentTime + waitInMs, acquireCount);node.addOccupiedPass(acquireCount);this.sleep(waitInMs);throw new PriorityWaitException(waitInMs);}}return false;} else {return true;}}
