概念
- svg 可缩放矢量图形
- svg 使用xml格式定义图像
svg 形状
矩形 <rect>
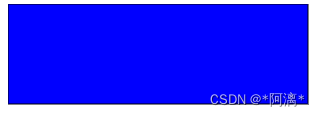
<?xml version="1.0" standalone="no"?><!DOCTYPE svg PUBLIC "-//W3C//DTD SVG 1.1//EN" "http://www.w3.org/Graphics/SVG/1.1/DTD/svg11.dtd"><svg width="100%" height="100%" version="1.1" xmlns="http://www.w3.org/2000/svg"><rect width="300" height="100" style="fill:rgb(0,0,255);stroke-width:1;stroke:rgb(0,0,0)" /></svg>代码解释:
- rect 元素的 width 和 height 属性可定义矩形的高度和宽度
- style 属性用来定义 CSS 属性
- CSS 的 fill 属性定义矩形的填充颜色(rgb 值、颜色名或者十六进制值)
- CSS 的 stroke-width 属性定义矩形边框的宽度
- CSS 的 stroke 属性定义矩形边框的颜色
- x 属性定义矩形的左侧位置(例如,x="0" 定义矩形到浏览器窗口左侧的距离是 0px)
- y 属性定义矩形的顶端位置(例如,y="0" 定义矩形到浏览器窗口顶端的距离是 0px)
- CSS 的 fill-opacity 属性定义填充颜色透明度(合法的范围是:0 - 1)
- CSS 的 stroke-opacity 属性定义笔触颜色的透明度(合法的范围是:0 - 1)
- CSS 的 opacity 属性定义整个元素的透明值(合法的范围是:0 - 1)
- rx 和 ry 属性可使矩形产生圆角。
例子:

<?xml version="1.0" standalone="no"?><!DOCTYPE svg PUBLIC "-//W3C//DTD SVG 1.1//EN" "http://www.w3.org/Graphics/SVG/1.1/DTD/svg11.dtd"><svg width="600" height="600" version="1.1" xmlns="http://www.w3.org/2000/svg"><rect x="20" y="20" width="250" rx="20" ry="20" height="250" style="fill:blue;stroke:pink;stroke-width:5;fill-opacity:0.1;stroke-opacity:0.9; " /></svg>圆形 <circle>
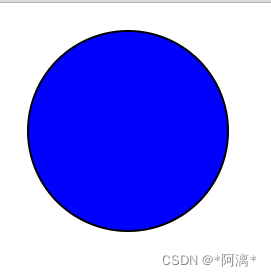
<?xml version="1.0" standalone="no"?><!DOCTYPE svg PUBLIC "-//W3C//DTD SVG 1.1//EN" "http://www.w3.org/Graphics/SVG/1.1/DTD/svg11.dtd"><svg width="600" height="600" version="1.1"xmlns="http://www.w3.org/2000/svg"><circle cx="120" cy="120" r="100" stroke="black"stroke-width="2" fill="blue"/></svg>代码解释:
-
cx 和 cy 属性定义圆点的 x 和 y 坐标。如果省略 cx 和 cy,圆的中心会被设置为 (0, 0)
-
r 属性定义圆的半径。
椭圆 <ellipse>

    <?xml version="1.0" standalone="no"?><!DOCTYPE svg PUBLIC "-//W3C//DTD SVG 1.1//EN" "http://www.w3.org/Graphics/SVG/1.1/DTD/svg11.dtd"><svg width="600" height="600" version="1.1" xmlns="http://www.w3.org/2000/svg"><ellipse cx="300" cy="150" rx="200" ry="80" style="fill:rgb(208, 229, 16);
stroke:rgb(195, 71, 29);stroke-width:5" /></svg>
代码解释:
- cx 属性定义圆点的 x 坐标
- cy 属性定义圆点的 y 坐标
- rx 属性定义水平半径
- ry 属性定义垂直半径

<body><p>下面的例子创建了三个累叠而上的椭圆</p><?xml version="1.0" standalone="no"?><!DOCTYPE svg PUBLIC "-//W3C//DTD SVG 1.1//EN" "http://www.w3.org/Graphics/SVG/1.1/DTD/svg11.dtd"><svg width="100%" height="100%" version="1.1" xmlns="http://www.w3.org/2000/svg"><ellipse cx="240" cy="100" rx="220" ry="30" style="fill:purple" /><ellipse cx="220" cy="70" rx="190" ry="20" style="fill:lime" /><ellipse cx="210" cy="45" rx="170" ry="15" style="fill:yellow" /></svg><p>下面的例子组合了两个椭圆(一个黄的和一个白的):</p><?xml version="1.0" standalone="no"?><!DOCTYPE svg PUBLIC "-//W3C//DTD SVG 1.1//EN" "http://www.w3.org/Graphics/SVG/1.1/DTD/svg11.dtd"><svg width="100%" height="100%" version="1.1" xmlns="http://www.w3.org/2000/svg"><ellipse cx="240" cy="100" rx="220" ry="30" style="fill:yellow" /><ellipse cx="220" cy="100" rx="190" ry="20" style="fill:white" /></svg>
</body>
线 <line>

<body><?xml version="1.0" standalone="no"?><!DOCTYPE svg PUBLIC "-//W3C//DTD SVG 1.1//EN" "http://www.w3.org/Graphics/SVG/1.1/DTD/svg11.dtd"><svg width="100%" height="100%" version="1.1"xmlns="http://www.w3.org/2000/svg"><line x1="0" y1="0" x2="300" y2="300"style="stroke:rgb(240, 23, 23);stroke-width:2"/></svg>
</body>
代码解释:
- x1 属性在 x 轴定义线条的开始
- y1 属性在 y 轴定义线条的开始
- x2 属性在 x 轴定义线条的结束
- y2 属性在 y 轴定义线条的结束
多边形 <polygon>
<body><?xml version="1.0" standalone="no"?><!DOCTYPE svg PUBLIC "-//W3C//DTD SVG 1.1//EN" "http://www.w3.org/Graphics/SVG/1.1/DTD/svg11.dtd"><svg width="600" height="600" version="1.1"xmlns="http://www.w3.org/2000/svg"><polygon points="220,100 300,210 170,250"style="fill:#dab3b3;stroke:#40d6ea;stroke-width:2"/></svg>
</body>
代码解释:
- points 属性定义多边形每个角的 x 和 y 坐标

<body><?xml version="1.0" standalone="no"?><!DOCTYPE svg PUBLIC "-//W3C//DTD SVG 1.1//EN" "http://www.w3.org/Graphics/SVG/1.1/DTD/svg11.dtd"><svg width="600" height="600" version="1.1"xmlns="http://www.w3.org/2000/svg"><polygon points="220,100 300,210 170,250 123,234"style="fill:#e76464;stroke:#000000;stroke-width:1"/></svg>
</body>
折线 <polyline>

<body><?xml version="1.0" standalone="no"?><!DOCTYPE svg PUBLIC "-//W3C//DTD SVG 1.1//EN" "http://www.w3.org/Graphics/SVG/1.1/DTD/svg11.dtd"><svg width="600" height="600" version="1.1" xmlns="http://www.w3.org/2000/svg"><polyline points="0,0 0,20 20,20 20,40 40,40 40,60" style="fill:white;stroke:red;stroke-width:2" /></svg>
</body>
路径 <path>

<body><?xml version="1.0" standalone="no"?><!DOCTYPE svg PUBLIC "-//W3C//DTD SVG 1.1//EN" "http://www.w3.org/Graphics/SVG/1.1/DTD/svg11.dtd"><svg width="600" height="600" version="1.1" xmlns="http://www.w3.org/2000/svg"><path d="M250 150 L150 350 L350 350 Z" /></svg>
</body>
代码解释:
- M = moveto
- L = lineto
- H = horizontal lineto
- V = vertical lineto
- C = curveto
- S = smooth curveto
- Q = quadratic Belzier curve
- T = smooth quadratic Belzier curveto
- A = elliptical Arc
- Z = closepath
注释:以上所有命令均允许小写字母。大写表示绝对定位,小写表示相对定位。

<body><?xml version="1.0" standalone="no"?><!DOCTYPE svg PUBLIC "-//W3C//DTD SVG 1.1//EN" "http://www.w3.org/Graphics/SVG/1.1/DTD/svg11.dtd"><svg width="600" height="600" version="1.1" xmlns="http://www.w3.org/2000/svg"><path d="M153 334C153 334 151 334 151 334C151 339 153 344 156 344C164 344 171 339 171 334C171 322 164 314 156 314C142 314 131 322 131 334C131 350 142 364 156 364C175 364 191 350 191 334C191 311 175 294 156 294C131 294 111 311 111 334C111 361 131 384 156 384C186 384 211 361 211 334C211 300 186 274 156 274" style="fill:white;stroke:red;stroke-width:2" /></svg>
</body>
SVG 滤镜
在 SVG 中,可用的滤镜有:
- feBlend
- feColorMatrix
- feComponentTransfer
- feComposite
- feConvolveMatrix
- feDiffuseLighting
- feDisplacementMap
- feFlood
- feGaussianBlur
- feImage
- feMerge
- feMorphology
- feOffset
- feSpecularLighting
- feTile
- feTurbulence
- feDistantLight
- fePointLight
- feSpotLight
SVG 高斯模糊
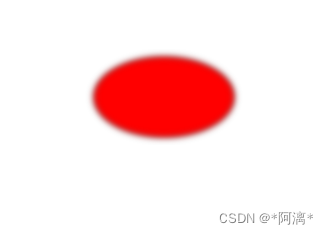
<body><?xml version="1.0" standalone="no"?><!DOCTYPE svg PUBLIC "-//W3C//DTD SVG 1.1//EN" "http://www.w3.org/Graphics/SVG/1.1/DTD/svg11.dtd"><svg width="600" height="600" version="1.1" xmlns="http://www.w3.org/2000/svg"><defs><filter id="Gaussian_Blur"><feGaussianBlur in="SourceGraphic" stdDeviation="3" /></filter></defs><ellipse cx="200" cy="150" rx="70" ry="40" style="fill:#ff0000;stroke:#000000;stroke-width:2;filter:url(#Gaussian_Blur)" /></svg>
</body>
代码解释:
- <filter> 标签的 id 属性可为滤镜定义一个唯一的名称(同一滤镜可被文档中的多个元素使用)
- filter:url 属性用来把元素链接到滤镜。当链接滤镜 id 时,必须使用 # 字符
- 滤镜效果是通过 <feGaussianBlur> 标签进行定义的。fe 后缀可用于所有的滤镜
- <feGaussianBlur> 标签的 stdDeviation 属性可定义模糊的程度
- in="SourceGraphic" 这个部分定义了由整个图像创建效果

<body><?xml version="1.0" standalone="no"?><!DOCTYPE svg PUBLIC "-//W3C//DTD SVG 1.1//EN" "http://www.w3.org/Graphics/SVG/1.1/DTD/svg11.dtd"><svg width="600" height="600" version="1.1" xmlns="http://www.w3.org/2000/svg"><defs><filter id="Gaussian_Blur"><feGaussianBlur in="SourceGraphic" stdDeviation="20" /></filter></defs><ellipse cx="200" cy="150" rx="70" ry="40" style="fill:#ff0000;stroke:#000000;stroke-width:2;filter:url(#Gaussian_Blur)" /></svg>
</body>
SVG 渐变
SVG 线性渐变

<body><?xml version="1.0" standalone="no"?><!DOCTYPE svg PUBLIC "-//W3C//DTD SVG 1.1//EN" "http://www.w3.org/Graphics/SVG/1.1/DTD/svg11.dtd"><svg width="600" height="600" version="1.1" xmlns="http://www.w3.org/2000/svg"><defs><linearGradient id="orange_red" x1="0%" y1="0%" x2="100%" y2="0%"><stop offset="0%" style="stop-color:rgb(255,255,0);stop-opacity:1" /><stop offset="100%" style="stop-color:rgb(255,0,0);stop-opacity:1" /></linearGradient></defs><ellipse cx="200" cy="190" rx="85" ry="55" style="fill:url(#orange_red)" /></svg>
</body>
代码解释:
- <linearGradient> 标签的 id 属性可为渐变定义一个唯一的名称
- fill:url(#orange_red) 属性把 ellipse 元素链接到此渐变
- <linearGradient> 标签的 x1、x2、y1、y2 属性可定义渐变的开始和结束位置
- 渐变的颜色范围可由两种或多种颜色组成。每种颜色通过一个 <stop> 标签来规定。offset 属性用来定义渐变的开始和结束位置。
<body><?xml version="1.0" standalone="no"?><!DOCTYPE svg PUBLIC "-//W3C//DTD SVG 1.1//EN" "http://www.w3.org/Graphics/SVG/1.1/DTD/svg11.dtd"><svg width="600" height="600" version="1.1" xmlns="http://www.w3.org/2000/svg"><defs><linearGradient id="orange_red" x1="0%" y1="0%" x2="0%" y2="100%"><stop offset="0%" style="stop-color:rgb(255,255,0);stop-opacity:1" /><stop offset="100%" style="stop-color:rgb(255,0,0);stop-opacity:1" /></linearGradient></defs><ellipse cx="200" cy="190" rx="85" ry="55" style="fill:url(#orange_red)" /></svg>
</body>
SVG 放射性渐变

<body><?xml version="1.0" standalone="no"?><!DOCTYPE svg PUBLIC "-//W3C//DTD SVG 1.1//EN" "http://www.w3.org/Graphics/SVG/1.1/DTD/svg11.dtd"><svg width="600" height="600" version="1.1" xmlns="http://www.w3.org/2000/svg"><defs><radialGradient id="grey_blue" cx="50%" cy="50%" r="50%" fx="50%" fy="50%"><stop offset="0%" style="stop-color:rgb(200,200,200);stop-opacity:0" /><stop offset="100%" style="stop-color:rgb(0,0,255);stop-opacity:1" /></radialGradient></defs><ellipse cx="230" cy="200" rx="110" ry="100" style="fill:url(#grey_blue)" /></svg>
</body>
代码解释:
- <radialGradient> 标签的 id 属性可为渐变定义一个唯一的名称;
- fill:url(#grey_blue) 属性把 ellipse 元素链接到此渐变,
- cx、cy 和 r 属性定义外圈,
- fx 和 fy 定义内圈 渐变的颜色范围可由两种或多种颜色组成。
- 每种颜色通过一个 <stop> 标签来规定。offset 属性用来定义渐变的开始和结束位置
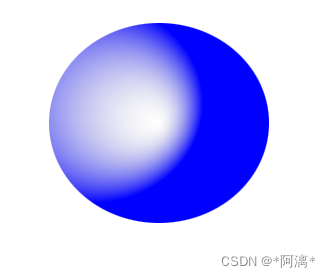
<body><?xml version="1.0" standalone="no"?><!DOCTYPE svg PUBLIC "-//W3C//DTD SVG 1.1//EN" "http://www.w3.org/Graphics/SVG/1.1/DTD/svg11.dtd"><svg width="600" height="600" version="1.1" xmlns="http://www.w3.org/2000/svg"><defs><radialGradient id="grey_blue" cx="20%" cy="40%" r="50%" fx="50%" fy="50%"><stop offset="0%" style="stop-color:rgb(200,200,200);stop-opacity:0" /><stop offset="100%" style="stop-color:rgb(0,0,255);stop-opacity:1" /></radialGradient></defs><ellipse cx="230" cy="200" rx="110" ry="100" style="fill:url(#grey_blue)" /></svg>
</body>


