1. 安装
npm install vite-plugin-svg-icons -D2. 在vite.config.js的plugins中添加配置项
import { createSvgIconsPlugin } from 'vite-plugin-svg-icons';createSvgIconsPlugin({iconDirs: [resolve(process.cwd(), 'src/components/svgIcon/svg')], // icon存放的目录,自定义symbolId: 'icon-[name]', // symbol的命名inject: 'body-last', // svg插入的位置customDomId: '__svg__icons__dom__' // svg的id
})
3. 封装svgIcon组件

组件vue文件,index.vue:
<template><svg :class="svgClass" aria-hidden="true"><use :xlink:href="iconName" /></svg>
</template><script setup lang="ts">import { computed } from 'vue';const props = defineProps({iconClass: {type: String,required: true},className: {type: String,default: () => ''}});const iconName = computed(() => {return `#icon-${props.iconClass}`;});const svgClass = computed(() => {return props.className ? `svg-icon ${props.className}` : 'svg-icon';});
</script><style scoped lang="less">.svg-icon {fill: currentColor;}
</style>
svgIcon全局组件,index.ts
import { App } from 'vue';
import SvgIcon from '@/components/svgIcon/index.vue';export default (app: App) => {app.component('SvgIcon', SvgIcon);
};
4. 全局注册组件
在main的ts中引入index.ts,用app.use注册,引入virtual:svg-icons-register
import 'virtual:svg-icons-register';
import initSvgIconfrom '@/components/svgIcon/index';app.use(initSvgIcon);
5. 使用
<a-menuv-model:selectedKeys="selectMenuId"v-model:openKeys="openKeys"style="height: calc(100% - 40px)"mode="inline"@click="handleSelect"><template v-for="item in siderMenus" :key="item.key"><a-menu-item v-if="!item?.children?.length" :key="item.key" :path="item.path"><template #icon><svg-icon :icon-class="item.icon" /></template>{{ item.label }}</a-menu-item><template v-else><a-sub-menu :key="item.key" :title="item.title"><template #icon><svg-icon :icon-class="item.icon" /></template><a-menu-item v-for="_item in item.children" :key="_item.key" :path="_item.path">{{ _item.label }}</a-menu-item></a-sub-menu></template></template></a-menu>6. 效果

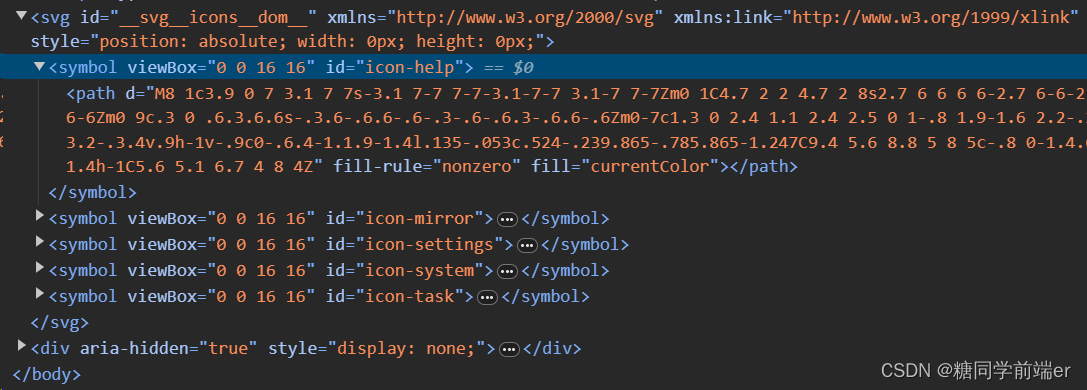
查看html,在body的后面生成了svg symbol元素,菜单使用的svg记得去色,不然没法继承菜单设置的color
