系列文章目录
TensorRT英伟达官方示例解析(一)
TensorRT英伟达官方示例解析(二)
TensorRT英伟达官方示例解析(三)
文章目录
- 系列文章目录
- 前言
- 一、参考资料
- 二、配置系统环境
- 三、00-MNISTData
- 四、01-SimpleDemo
- 4.1 Makefile
- 4.2 main.cpp
- 4.3 main.py
- 总结
前言
一、参考资料
官方示例:https://github.com/NVIDIA/trt-samples-for-hackathon-cn/tree/master
官方视频:https://www.bilibili.com/video/BV1jj411Z7wG/?spm_id_from=333.337.search-card.all.click&vd_source=ce674108fa2e19e5322d710724193487
MINST数据集下载地址:http://yann.lecun.com/exdb/mnist/
二、配置系统环境
先安装所需的依赖包,在cookbook下面
pip install -r requirements.txt
Linux–Tensorrt环境配置: https://blog.csdn.net/m0_70420861/article/details/135700049
Window–TensorRT环境配置: https://blog.csdn.net/m0_70420861/article/details/135658922?spm=1001.2014.3001.5502
1. 添加python环境变量–方法一
查看python环境变量:
echo $PYTHONPATH
如果没有找到 TensorRT 的安装路径,请将其添加到环境变量中。例如,在 Linux 或 macOS 中,您可以在命令行中执行以下命令:
export PYTHONPATH=$PYTHONPATH:/root/TensorRT-8.6.1.6
记得替换成自己TensorRT的安装路径

2. 添加python环境变量–方法二
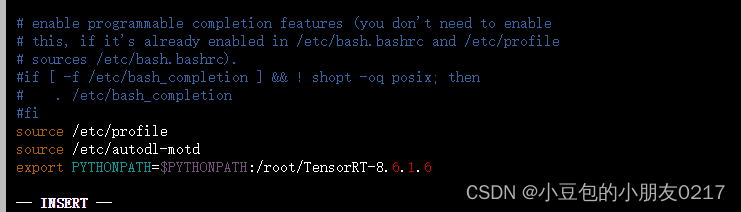
要将环境变量永久添加到 ~/.bashrc 或 ~/.bash_profile 文件中可以使用以下方法(推荐)
vi ~/.bashrc
编辑.bashrc文件,在文件末尾添加export PYTHONPATH=$PYTHONPATH:/root/TensorRT-8.6.1.6
在终端中执行以下命令使更改生效:
source ~/.bashrc
三、00-MNISTData
loadMnistData.py
#
# Copyright (c) 2021-2023, NVIDIA CORPORATION. All rights reserved.
#
# Licensed under the Apache License, Version 2.0 (the "License");
# you may not use this file except in compliance with the License.
# You may obtain a copy of the License at
#
#     http://www.apache.org/licenses/LICENSE-2.0
#
# Unless required by applicable law or agreed to in writing, software
# distributed under the License is distributed on an "AS IS" BASIS,
# WITHOUT WARRANTIES OR CONDITIONS OF ANY KIND, either express or implied.
# See the License for the specific language governing permissions and
# limitations under the License.
## http://yann.lecun.com/exdb/mnist/, https://storage.googleapis.com/cvdf-datasets/mnist/import gzipimport cv2
import numpy as npclass MnistData():def __init__(self, dataPath, isOneHot=False, randomSeed=97):with open(dataPath + "train-images-idx3-ubyte.gz", "rb") as f:self.trainImage = self.extractImage(f)with open(dataPath + "train-labels-idx1-ubyte.gz", "rb") as f:self.trainLabel = self.extractLabel(f)with open(dataPath + "t10k-images-idx3-ubyte.gz", "rb") as f:self.testImage = self.extractImage(f)with open(dataPath + "t10k-labels-idx1-ubyte.gz", "rb") as f:self.testLabel = self.extractLabel(f, isOneHot=isOneHot)self.isOneHot = isOneHotif self.isOneHot:self.trainLabel = self.convertToOneHot(self.trainLabel)self.testLabel = self.convertToOneHot(self.testLabel)else:self.trainLabel = self.trainLabel.astype(np.float32)self.testLabel = self.testLabel.astype(np.float32)np.random.seed(randomSeed)def getBatch(self, batchSize, isTrain):if isTrain:index = np.random.choice(len(self.trainImage), batchSize, True)return self.trainImage[index], self.trainLabel[index]else:index = np.random.choice(len(self.testImage), batchSize, True)return self.testImage[index], self.testLabel[index]def read4Byte(self, byteStream):dt = np.dtype(np.uint32).newbyteorder(">")return np.frombuffer(byteStream.read(4), dtype=dt)[0]def extractImage(self, f):print("Extracting", f.name)with gzip.GzipFile(fileobj=f) as byteStream:if self.read4Byte(byteStream) != 2051:raise ValueError("Failed reading file!")nImage = self.read4Byte(byteStream)rows = self.read4Byte(byteStream)cols = self.read4Byte(byteStream)buf = byteStream.read(rows * cols * nImage)return np.frombuffer(buf, dtype=np.uint8).astype(np.float32).reshape(nImage, rows, cols, 1) / 255def extractLabel(self, f, isOneHot=False, nClass=10):print("Extracting", f.name)with gzip.GzipFile(fileobj=f) as byteStream:if self.read4Byte(byteStream) != 2049:raise ValueError("Failed reading file!")nLabel = self.read4Byte(byteStream)buf = byteStream.read(nLabel)return np.frombuffer(buf, dtype=np.uint8)def convertToOneHot(self, labelIndex, nClass=10):nLabel = labelIndex.shape[0]res = np.zeros((nLabel, nClass), dtype=np.float32)offset = np.arange(nLabel) * nClassres.flat[offset + labelIndex] = 1return resdef saveImage(self, count, outputPath, isTrain):if self.isOneHot:returnimage, label = ([self.testImage, self.testLabel], [self.trainImage, self.trainLabel])[isTrain]for i in range(min(count, 10000)):cv2.imwrite(outputPath + str(i).zfill(5) + "-" + str(label[i]) + ".jpg", (image[i] * 255).astype(np.uint8))
用于处理MNIST数据集的类MnistData。加载MNIST数据集的图像和标签,并提供获取批量数据的方法。在初始化时,会读取训练集和测试集的图像和标签文件,并将它们存储在trainImage、trainLabel、testImage和testLabel属性中。如果指定了isOneHot为True,则标签将被转换为one-hot编码形式。
-
getBatch方法用于获取指定大小的批量数据。如果isTrain为True,则从训练集中随机选择指定数量的样本;否则从测试集中选择。
-
extractImage和extractLabel方法用于解析MNIST数据集文件。它们读取文件的魔数和其他元数据,然后解析图像和标签数据。
(对于图像数据文件(train-images-idx3-ubyte.gz和t10k-images-idx3-ubyte.gz),文件的前4个字节是魔数,用于验证文件类型。接下来的4个字节表示图像数量(nImage),接着的4个字节表示每张图像的行数(rows),再接着的4个字节表示每张图像的列数(cols)。之后的字节表示实际的图像数据。)
-
convertToOneHot方法用于将标签索引转换为one-hot编码形式。
-
saveImage方法用于将图像保存到指定路径。这个方法只在isOneHot为False时才有效,因为one-hot编码的标签无法直接保存为图像文件名。
extractMnistData.py
import sysimport loadMnistDatanTrain =int(sys.argv[1]) if len(sys.argv) > 1 and sys.argv[1].isdigit() else 3000
nTest = int(sys.argv[2]) if len(sys.argv) > 2 and sys.argv[2].isdigit() else 500mnist = loadMnistData.MnistData("./", isOneHot=False)
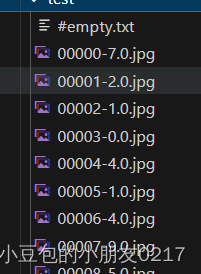
mnist.saveImage(nTrain, "./train/", True) # 60000 images in total
mnist.saveImage(nTest, "./test/", False) # 10000 images in total导入了loadMnistData模块并定义了两个变量nTrain和nTest用于指定训练和测试样本的数量。接下来,它使用loadMnistData.MnistData类加载MNIST数据集,并将数据保存为图像文件。saveImage方法用于将指定数量的图像保存到指定目录中,总共有60000张训练图像和10000张测试图像。
首先下载MINST数据集,放到该项目根目录下
MINST数据集下载地址:http://yann.lecun.com/exdb/mnist/
python extractMnistData.py

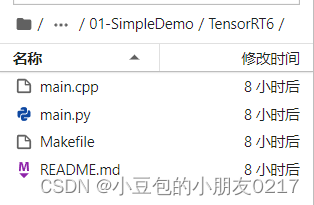
四、01-SimpleDemo
进入SimpleDemo,文件夹里有四个文件,逐个解释
4.1 Makefile
Makefile文件,用于管理C++和Python代码的编译和构建。
include ../../include/Makefile.incSOURCE_CPP  = $(shell find . -name '*.cpp' 2>/dev/null)
SOURCE_PY   = $(shell find . -name '*.py' 2>/dev/null)
OBJ         = $(shell find . -name *.o 2>/dev/null)
DEP         = $(OBJ:.o=.d)
TARGET_EXE  = $(SOURCE_CPP:.cpp=.exe)-include $(DEP)all: $(TARGET_EXE)%.exe: %.o$(NVCC) $(CCFLAG) $(LDFLAG) -o $@ $+%.o: %.cpp$(NVCC) $(CCFLAG) $(INCLUDE) -M -MT $@ -o $(@:.o=.d) $<$(NVCC) $(CCFLAG) $(INCLUDE) -Xcompiler -fPIC -o $@ -c $<.PHONY: test
test:make cleanmakepython3 $(SOURCE_PY)rm -rf ./*.plan./$(TARGET_EXE).PHONY: clean
clean:rm -rf ./*.d ./*.o ./*.so ./*.exe ./*.plan- include …/…/include/Makefile.inc:
包含一个名为Makefile.inc的文件,该文件位于上级目录的include子目录中。Makefile.inc通常包含一些全局配置和共享的变量和指令。
然后让我们查看一下Makefile.inc,定义了一些变量,用于指定编译和链接的相关选项。
CUDA_PATH       = /usr/local/cuda
NVCC            = $(CUDA_PATH)/bin/nvcc
TRT_INC_PATH    = /usr/include/x86_64-linux-gnu
TRT_LIB_PATH    = /usr/lib/x86_64-linux-gnu
GENCODE         = -gencode=arch=compute_60,code=sm_60 -gencode=arch=compute_61,code=sm_61 -gencode=arch=compute_70,code=sm_70 -gencode=arch=compute_75,code=sm_75 -gencode=arch=compute_80,code=sm_80 -gencode=arch=compute_86,code=sm_86 -gencode=arch=compute_89,code=sm_89
DEBUG_MACRO     = -UDEBUG
WARNING_MACRO   = -w
CUFLAG          = -std=c++14 -O3 $(DEBUG_MACRO) -Xcompiler -fPIC $(GENCODE)
CCFLAG          = -std=c++14 -O3 $(DEBUG_MACRO) -Xcompiler -fPIC -use_fast_math
SOFLAG          = -shared
INCLUDE         = -I. -I$(CUDA_PATH)/include -I$(TRT_INC_PATH)
INCLUDE        += -I../../include -I../../../include
LDFLAG          = -L$(CUDA_PATH)/lib64 -lcudart -L$(TRT_LIB_PATH) -lnvinfer
其中TRT_INC_PATH和TRT_LIB_PATH分别指定了TensorRT的头文件路径和库文件路径,可以在这里进行设置。如果安装TensorRT时使用默认路径,则上述设置应该是正确的。但是如果您安装TensorRT时使用了自定义路径,则需要相应地更改这些路径。
查询TensorRT路径
sudo find / -name 'libnvinfer.so*'

所以应该将TRT_INC_PATH设置为/root/TensorRT-8.6.1.6/targets/x86_64-linux-gnu/include,将TRT_LIB_PATH设置为/root/TensorRT-8.6.1.6/targets/x86_64-linux-gnu/lib

如果不确定自己的cuda安装路径是什么可以用下面的查询,一般就只要改TRT_INC_PATH、TRT_LIB_PATH和CUDA_PATH
which nvcc

-
SOURCE_CPP = $(shell find . -name ‘*.cpp’ 2>/dev/null):
使用shell命令查找当前目录及其子目录下的所有.cpp文件,并将它们的路径保存在变量SOURCE_CPP中。
-
SOURCE_PY = $(shell find . -name ‘*.py’ 2>/dev/null):
使用shell命令查找当前目录及其子目录下的所有.py文件,并将它们的路径保存在变量SOURCE_PY中。
-
OBJ = $(shell find . -name *.o 2>/dev/null):
使用shell命令查找当前目录及其子目录下的所有.o文件,并将它们的路径保存在变量OBJ中。
-
DEP = $(OBJ:.o=.d):
将OBJ中所有.o后缀的文件替换为.d后缀,生成依赖关系文件的路径列表,并将其保存在变量DEP中。
-
TARGET_EXE = $(SOURCE_CPP:.cpp=.exe):
将SOURCE_CPP中所有.cpp后缀的文件替换为.exe后缀,生成可执行文件的路径列表,并将其保存在变量TARGET_EXE中。
-
-include $(DEP):
包含所有依赖关系文件,如果某个依赖关系文件不存在,则忽略该文件而不产生错误。 -
all: $(TARGET_EXE):
all是一个伪目标,用于指定Makefile的默认目标。在本例中,all目标会构建所有的可执行文件$(TARGET_EXE)。
-
%.exe: %.o:
定义了一个模式规则,用于根据.o文件构建可执行文件。%表示通配符,可以匹配任何字符串,例如a.exe可以匹配a.o、b.exe可以匹配b.o等。
4.2 main.cpp
这是一个使用TensorRT API创建和执行推理引擎的示例程序
-
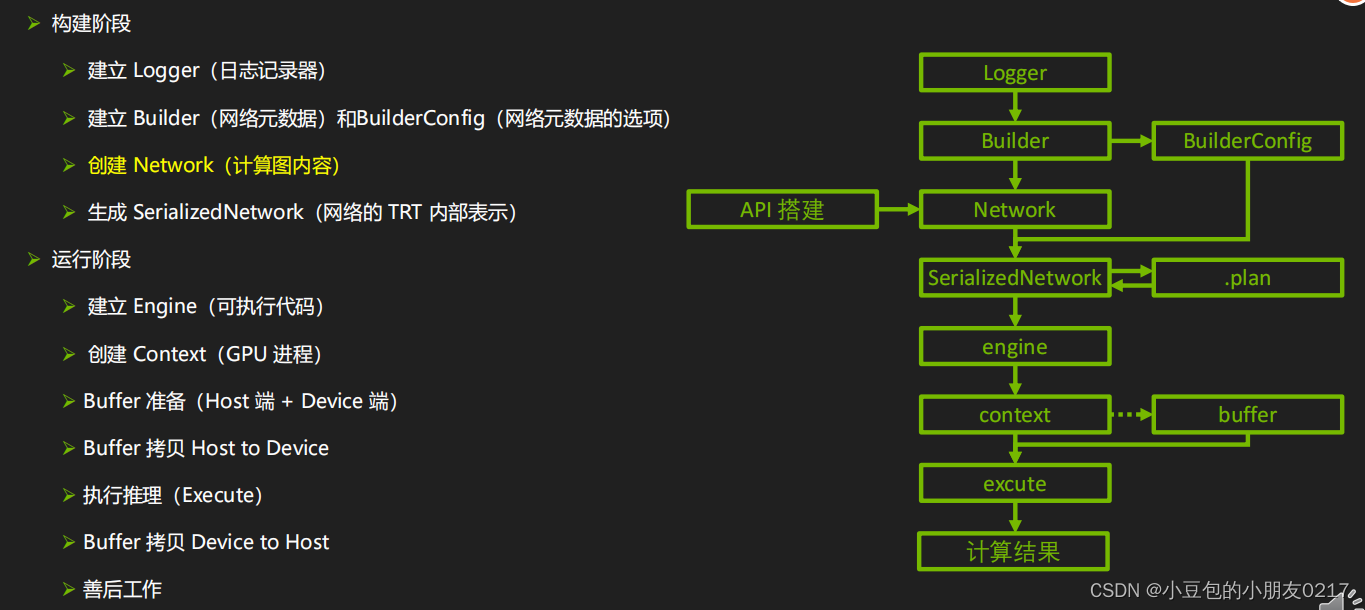
加载或创建推理引擎:
程序首先检查是否存在名为 “model.plan” 的序列化引擎文件,如果存在则加载该文件,否则创建新的引擎。如果创建了新的引擎,则将其序列化并保存到 “model.plan” 文件中。 -
创建执行上下文:
使用ICudaEngine::createExecutionContext()创建一个推理上下文对象,该对象可以用于执行推理。 -
设置输入数据:
为输入缓冲区分配内存,并将数据传输到设备(GPU)上。 -
执行推理:
调用IExecutionContext::enqueueV3()方法执行推理。 -
获取输出数据:
从设备(GPU)上复制输出数据,并打印输出结果。
/** Copyright (c) 2021-2023, NVIDIA CORPORATION. All rights reserved.** Licensed under the Apache License, Version 2.0 (the "License");* you may not use this file except in compliance with the License.* You may obtain a copy of the License at**     http://www.apache.org/licenses/LICENSE-2.0** Unless required by applicable law or agreed to in writing, software* distributed under the License is distributed on an "AS IS" BASIS,* WITHOUT WARRANTIES OR CONDITIONS OF ANY KIND, either express or implied.* See the License for the specific language governing permissions and* limitations under the License.*/#include "cookbookHelper.cuh"using namespace nvinfer1;const std::string trtFile {"./model.plan"};
static Logger     gLogger(ILogger::Severity::kERROR);void run()
{ICudaEngine *engine = nullptr;if (access(trtFile.c_str(), F_OK) == 0){std::ifstream engineFile(trtFile, std::ios::binary);long int      fsize = 0;engineFile.seekg(0, engineFile.end);fsize = engineFile.tellg();engineFile.seekg(0, engineFile.beg);std::vector<char> engineString(fsize);engineFile.read(engineString.data(), fsize);if (engineString.size() == 0){std::cout << "Failed getting serialized engine!" << std::endl;return;}std::cout << "Succeeded getting serialized engine!" << std::endl;IRuntime *runtime {createInferRuntime(gLogger)};engine = runtime->deserializeCudaEngine(engineString.data(), fsize);if (engine == nullptr){std::cout << "Failed loading engine!" << std::endl;return;}std::cout << "Succeeded loading engine!" << std::endl;}else{IBuilder             *builder = createInferBuilder(gLogger);INetworkDefinition   *network = builder->createNetworkV2(1U << int(NetworkDefinitionCreationFlag::kEXPLICIT_BATCH));IOptimizationProfile *profile = builder->createOptimizationProfile();IBuilderConfig       *config  = builder->createBuilderConfig();config->setMemoryPoolLimit(MemoryPoolType::kWORKSPACE, 1 << 30);ITensor *inputTensor = network->addInput("inputT0", DataType::kFLOAT, Dims32 {3, {-1, -1, -1}});profile->setDimensions(inputTensor->getName(), OptProfileSelector::kMIN, Dims32 {3, {1, 1, 1}});profile->setDimensions(inputTensor->getName(), OptProfileSelector::kOPT, Dims32 {3, {3, 4, 5}});profile->setDimensions(inputTensor->getName(), OptProfileSelector::kMAX, Dims32 {3, {6, 8, 10}});config->addOptimizationProfile(profile);IIdentityLayer *identityLayer = network->addIdentity(*inputTensor);network->markOutput(*identityLayer->getOutput(0));IHostMemory *engineString = builder->buildSerializedNetwork(*network, *config);if (engineString == nullptr || engineString->size() == 0){std::cout << "Failed building serialized engine!" << std::endl;return;}std::cout << "Succeeded building serialized engine!" << std::endl;IRuntime *runtime {createInferRuntime(gLogger)};engine = runtime->deserializeCudaEngine(engineString->data(), engineString->size());if (engine == nullptr){std::cout << "Failed building engine!" << std::endl;return;}std::cout << "Succeeded building engine!" << std::endl;std::ofstream engineFile(trtFile, std::ios::binary);if (!engineFile){std::cout << "Failed opening file to write" << std::endl;return;}engineFile.write(static_cast<char *>(engineString->data()), engineString->size());if (engineFile.fail()){std::cout << "Failed saving .plan file!" << std::endl;return;}std::cout << "Succeeded saving .plan file!" << std::endl;}long unsigned int        nIO     = engine->getNbIOTensors();long unsigned int        nInput  = 0;long unsigned int        nOutput = 0;std::vector<std::string> vTensorName(nIO);for (int i = 0; i < nIO; ++i){vTensorName[i] = std::string(engine->getIOTensorName(i));nInput += int(engine->getTensorIOMode(vTensorName[i].c_str()) == TensorIOMode::kINPUT);nOutput += int(engine->getTensorIOMode(vTensorName[i].c_str()) == TensorIOMode::kOUTPUT);}IExecutionContext *context = engine->createExecutionContext();context->setInputShape(vTensorName[0].c_str(), Dims32 {3, {3, 4, 5}});for (int i = 0; i < nIO; ++i){std::cout << std::string(i < nInput ? "Input [" : "Output[");std::cout << i << std::string("]-> ");std::cout << dataTypeToString(engine->getTensorDataType(vTensorName[i].c_str())) << std::string(" ");std::cout << shapeToString(engine->getTensorShape(vTensorName[i].c_str())) << std::string(" ");std::cout << shapeToString(context->getTensorShape(vTensorName[i].c_str())) << std::string(" ");std::cout << vTensorName[i] << std::endl;}std::vector<int> vTensorSize(nIO, 0);for (int i = 0; i < nIO; ++i){Dims32 dim  = context->getTensorShape(vTensorName[i].c_str());int    size = 1;for (int j = 0; j < dim.nbDims; ++j){size *= dim.d[j];}vTensorSize[i] = size * dataTypeToSize(engine->getTensorDataType(vTensorName[i].c_str()));}std::vector<void *>vBufferH {nIO, nullptr};std::vector<void *> vBufferD {nIO, nullptr};for (int i = 0; i < nIO; ++i){vBufferH[i] = (void *)new char[vTensorSize[i]];CHECK(cudaMalloc(&vBufferD[i], vTensorSize[i]));}float *pData = (float *)vBufferH[0];for (int i = 0; i < vTensorSize[0] / dataTypeToSize(engine->getTensorDataType(vTensorName[0].c_str())); ++i){pData[i] = float(i);}for (int i = 0; i < nInput; ++i){CHECK(cudaMemcpy(vBufferD[i], vBufferH[i], vTensorSize[i], cudaMemcpyHostToDevice));}for (int i = 0; i < nIO; ++i){context->setTensorAddress(vTensorName[i].c_str(), vBufferD[i]);}context->enqueueV3(0);for (int i = nInput; i < nIO; ++i){CHECK(cudaMemcpy(vBufferH[i], vBufferD[i], vTensorSize[i], cudaMemcpyDeviceToHost));}for (int i = 0; i < nIO; ++i){printArrayInformation((float *)vBufferH[i], context->getTensorShape(vTensorName[i].c_str()), vTensorName[i], true, true);}for (int i = 0; i < nIO; ++i){delete[] (char *)vBufferH[i];CHECK(cudaFree(vBufferD[i]));}return;
}int main()
{CHECK(cudaSetDevice(0));run();run();return 0;
}
make之后生成main.exe和main.d文件说明编译成功,再使用./main.exe直接运行。
make
./main.exe
输出如下

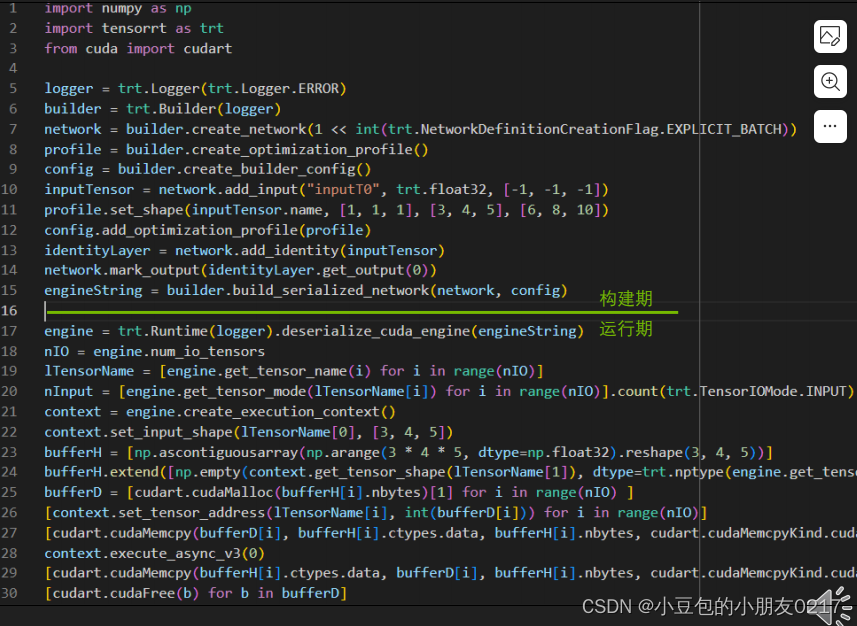
4.3 main.py
TensorRT C++ API 基础解析 https://blog.csdn.net/m0_70420861/article/details/135574423
ppt官方代码代码里面有下载地址
main.py
使用TensorRT进行推理的示例代码。它首先检查是否存在一个已序列化的网络文件,如果存在,则加载该文件并进行推理;如果不存在,则从头开始构建一个网络,并将其序列化保存到文件中,然后进行推理。
#
# Copyright (c) 2021-2023, NVIDIA CORPORATION. All rights reserved.
#
# Licensed under the Apache License, Version 2.0 (the "License");
# you may not use this file except in compliance with the License.
# You may obtain a copy of the License at
#
# http://www.apache.org/licenses/LICENSE-2.0
#
# Unless required by applicable law or agreed to in writing, software
# distributed under the License is distributed on an "AS IS" BASIS,
# WITHOUT WARRANTIES OR CONDITIONS OF ANY KIND, either express or implied.
# See the License for the specific language governing permissions and
# limitations under the License.
#import osimport numpy as np
import tensorrt as trt
from cuda import cudart# yapf:disabletrtFile = "./model.plan"
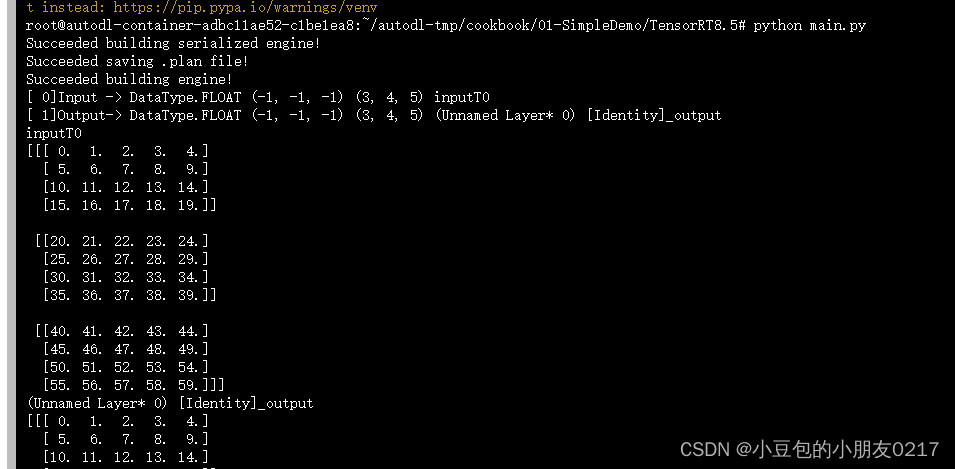
data = np.arange(3 * 4 * 5, dtype=np.float32).reshape(3, 4, 5) # input data for inferencedef run():logger = trt.Logger(trt.Logger.ERROR) # create Logger, avaiable level: VERBOSE, INFO, WARNING, ERRROR, INTERNAL_ERRORif os.path.isfile(trtFile): # load serialized network and skip building process if .plan file existedwith open(trtFile, "rb") as f:engineString = f.read()if engineString == None:print("Failed getting serialized engine!")returnprint("Succeeded getting serialized engine!")else: # build a serialized network from scratchbuilder = trt.Builder(logger) # create Buildernetwork = builder.create_network(1 << int(trt.NetworkDefinitionCreationFlag.EXPLICIT_BATCH)) # create Networkprofile = builder.create_optimization_profile() # create Optimization Profile if using Dynamic Shape modeconfig = builder.create_builder_config() # create BuidlerConfig to set meta data of the networkconfig.set_memory_pool_limit(trt.MemoryPoolType.WORKSPACE, 1 << 30) # set workspace for the optimization process (default value is total GPU memory)inputTensor = network.add_input("inputT0", trt.float32, [-1, -1, -1]) # set inpute tensor for the networkprofile.set_shape(inputTensor.name, [1, 1, 1], [3, 4, 5], [6, 8, 10]) # set danamic range of the input tensorconfig.add_optimization_profile(profile) # add the Optimization Profile into the BuilderConfigidentityLayer = network.add_identity(inputTensor) # here is only a identity transformation layer in our simple network, which the output is exactly equal to inputnetwork.mark_output(identityLayer.get_output(0)) # mark the output tensor of the networkengineString = builder.build_serialized_network(network, config) # create a serialized networkif engineString == None:print("Failed building serialized engine!")returnprint("Succeeded building serialized engine!")with open(trtFile, "wb") as f: # write the serialized netwok into a .plan filef.write(engineString)print("Succeeded saving .plan file!")engine = trt.Runtime(logger).deserialize_cuda_engine(engineString) # create inference Engine using Runtimeif engine == None:print("Failed building engine!")returnprint("Succeeded building engine!")nIO = engine.num_io_tensors # since TensorRT 8.5, the concept of Binding is replaced by I/O Tensor, all the APIs with "binding" in their name are deprecatedlTensorName = [engine.get_tensor_name(i) for i in range(nIO)] # get a list of I/O tensor names of the engine, because all I/O tensor in Engine and Excution Context are indexed by name, not binding number like TensorRT 8.4 or beforenInput = [engine.get_tensor_mode(lTensorName[i]) for i in range(nIO)].count(trt.TensorIOMode.INPUT) # get the count of input tensor#nOutput = [engine.get_tensor_mode(lTensorName[i]) for i in range(nIO)].count(trt.TensorIOMode.OUTPUT) # get the count of output tensorcontext = engine.create_execution_context() # create Excution Context from the engine (analogy to a GPU context, or a CPU process)context.set_input_shape(lTensorName[0], [3, 4, 5]) # set actual size of input tensor if using Dynamic Shape modefor i in range(nIO):print("[%2d]%s->" % (i, "Input " if i < nInput else "Output"), engine.get_tensor_dtype(lTensorName[i]), engine.get_tensor_shape(lTensorName[i]), context.get_tensor_shape(lTensorName[i]), lTensorName[i])bufferH = [] # prepare the memory buffer on host and devicebufferH.append(np.ascontiguousarray(data))for i in range(nInput, nIO):bufferH.append(np.empty(context.get_tensor_shape(lTensorName[i]), dtype=trt.nptype(engine.get_tensor_dtype(lTensorName[i]))))bufferD = []for i in range(nIO):bufferD.append(cudart.cudaMalloc(bufferH[i].nbytes)[1])for i in range(nInput): # copy input data from host buffer into device buffercudart.cudaMemcpy(bufferD[i], bufferH[i].ctypes.data, bufferH[i].nbytes, cudart.cudaMemcpyKind.cudaMemcpyHostToDevice)for i in range(nIO):context.set_tensor_address(lTensorName[i], int(bufferD[i])) # set address of all input and output data in device buffercontext.execute_async_v3(0) # do inference computationfor i in range(nInput, nIO): # copy output data from device buffer into host buffercudart.cudaMemcpy(bufferH[i].ctypes.data, bufferD[i], bufferH[i].nbytes, cudart.cudaMemcpyKind.cudaMemcpyDeviceToHost)for i in range(nIO):print(lTensorName[i])print(bufferH[i])for b in bufferD: # free the GPU memory buffer after all workcudart.cudaFree(b)if __name__ == "__main__":os.system("rm -rf ./*.plan")run() # create a serialized network of TensorRT and do inferencerun() # load a serialized network of TensorRT and do inferencepython main.py
如果报以下错误

pip install cuda-python -i https://mirrors.aliyun.com/pypi/simple/
输出结果
会生成一个model.plan文件
注意:安装 TensorRT Python 包是使用 TensorRT 的关键步骤之一,如果报tensorrt模块未找到就是没装。
可以用以下命令进行安装
pip install tensorrt
这个快一点
pip install -i https://pypi.tuna.tsinghua.edu.cn/simple tensorrt
总结
TensorRT英伟达官方示例解析 00 和 01 后续更新