本人硕士期间研究的方向就是三维目标点云跟踪,对点云和跟踪有着较为深入的理解,但一直忙于实习未进行梳理,今天趁着在家休息对点云的噪声进行梳理,因为预处理对于点云项目是至关重要的,所有代码都是近期重新复现过。
这篇之前写的,主要是对P2B点云跟踪进行复现以及学习记录,里面也包含了一些对点云的理解
P2B论文复现——点云学习记录_etw_pytorch_utils.git-CSDN博客
对PTT代码是更为熟悉的,几篇论文都是基于这个进行修改,等我今年毕业后会更新一次
目录
1、点云噪声是什么
2、点云噪声滤波技术
3、点云数据
4、统计滤波器
5、体素网格滤波
6、半径离群值移除
7、边缘保留滤波
8、将无组织的点云映射到二维图像
9、将无组织的点云转换为有组织的点云
1、点云噪声是什么
点云噪声是指在使用三维扫描设备(如激光扫描仪、立体视觉相机等)获取点云数据时,由于各种原因引入的误差或偏差。这些噪声可能来源于设备的精度限制、扫描环境的影响(如光照条件、反射表面)、或者是数据处理过程中的算法误差。点云噪声会影响数据的质量,进而影响后续的处理和分析,如三维重建、模型识别等。
噪声的表现形式多种多样,包括:
- 随机噪声:这是最常见的噪声类型,表现为点的位置存在随机偏差。
- 系统噪声:由扫描设备的固有特性引起,如畸变、校准错误等,导致点云数据整体偏移或变形。
- 环境噪声:由扫描环境引起,如由于表面反射特性不同,导致某些区域点云密度不均或缺失。
为了提供直观的理解,可以想象一个简单的场景:使用激光扫描仪扫描一个球体。理想情况下,扫描得到的点应该均匀分布在球体表面。然而,在实际情况中,扫描得到的点云数据可能会因为噪声的存在而出现以下问题:
- 球体表面的点不是完全均匀分布,而是有些区域点更密集,有些区域点更稀疏。
- 球体的形状看起来可能不是完全光滑的圆形,而是有些凹凸不平的地方。
- 在球体的边缘或特定区域可能会有一些离群点,这些点明显偏离了球体的真实表面。
2、点云噪声滤波技术
解决点云噪声的方法通常涉及多种滤波技术,旨在去除或减少噪声,同时尽量保留有用的数据信息。以下是一些常用的点云滤波技术:
统计滤波器(Statistical Outlier Removal, SOR):此方法基于统计分析,移除那些与其邻近点距离大幅偏离平均值的点。它假设点云的噪声是高斯分布的,通过计算每个点到其邻居的距离的平均值和标准差,然后根据这些统计数据移除离群点。
体素网格滤波(Voxel Grid Filter):该技术通过创建一个三维体素网格覆盖在整个点云上,然后在每个体素内部将所有点简化为一个代表点(例如,通过取平均位置),以减少点云中的点数。这种方法对于降低数据量和滤除噪声很有效。
半径离群值移除(Radius Outlier Removal):在这种方法中,对于每一个点,如果在给定的半径内找到的邻近点数少于某个阈值,这个点就被认为是离群值并被移除。这种方法对于去除孤立的噪声点很有效。
边缘保留滤波:这种方法尤其适用于在尽量保留数据特征边缘的同时去除噪声。例如,双边滤波器和引导滤波器能够在平滑数据的同时,保留边缘信息。
深度学习方法:最近,深度学习技术也被应用于点云噪声的去除。通过训练神经网络模型来识别和滤除噪声点,这种方法可以非常有效,尤其是在处理复杂数据和场景时。
选择合适的滤波技术时,需要考虑数据的特点、处理目标以及对结果质量的要求。在实际应用中,可能需要尝试多种方法或将几种方法组合使用,以达到最佳的去噪效果。
3、点云数据
一般是pcd和ply,这两个都可以互相转换
ply转pcd
#include <iostream>
#include <pcl/io/pcd_io.h>
#include <pcl/point_types.h>
#include <pcl/io/ply_io.h>int main(int argc, char** argv)
{pcl::PointCloud<pcl::PointXYZRGB>::Ptr cloud(new pcl::PointCloud<pcl::PointXYZRGB>);if (pcl::io::loadPLYFile<pcl::PointXYZRGB>(R"(D:\CPlusProject\PCL\pclTest\Data\Sparse.ply)", *cloud) == -1) //加载文件{PCL_ERROR("Couldn't read file Sparse.ply \n");system("PAUSE");return (-1);}//显示点云数量std::cout << "Loaded "<< cloud->width * cloud->height<< " data points from Sparse.ply with the following fields: "<< std::endl;//保存文件,包括颜色信息std::string filename("Sparse.pcd");pcl::PCDWriter writer;writer.write<pcl::PointXYZRGB>(R"(D:\CPlusProject\PCL\pclTest\Data\Sparse.pcd)", *cloud, true); // 第三个参数为true时表示保存为二进制格式,可以包含颜色信息system("PAUSE");return 0;
}
4、统计滤波器
#include <iostream>
#include <pcl/point_types.h>
#include <pcl/filters/statistical_outlier_removal.h>
#include <pcl/io/pcd_io.h>int main()
{// 创建点云指针pcl::PointCloud<pcl::PointXYZ>::Ptr cloud(new pcl::PointCloud<pcl::PointXYZ>);pcl::PointCloud<pcl::PointXYZ>::Ptr cloud_filtered(new pcl::PointCloud<pcl::PointXYZ>);// 读取点云文件if (pcl::io::loadPCDFile<pcl::PointXYZ>(R"(D:\CPlusProject\PCL\pclTest\Data\Sparse.pcd)", *cloud) == -1){PCL_ERROR("Couldn't read file Sparse.pcd \n");return (-1);}std::cout << "Loaded "<< cloud->width * cloud->height<< " data points from Sparse.pcd with the following fields: "<< std::endl;// 创建滤波器对象pcl::StatisticalOutlierRemoval<pcl::PointXYZ> sor;sor.setInputCloud(cloud);sor.setMeanK(50); // 设置在进行统计分析时考虑的临近点个数sor.setStddevMulThresh(1.0); // 设置标准差倍数阈值sor.filter(*cloud_filtered);// 保存过滤后的点云pcl::io::savePCDFile(R"(D:\CPlusProject\PCL\pclTest\Data\Sparse_Filter.pcd)", *cloud_filtered);std::cout << "Cloud after filtering: " << std::endl;std::cout << "Saved "<< cloud_filtered->width * cloud_filtered->height<< " data points to filtered_output.pcd."<< std::endl;return 0;
}
报错如下。解决方案:通过项目属性->C/C++->代码生成->启用增强指令集->选择AVX

原图
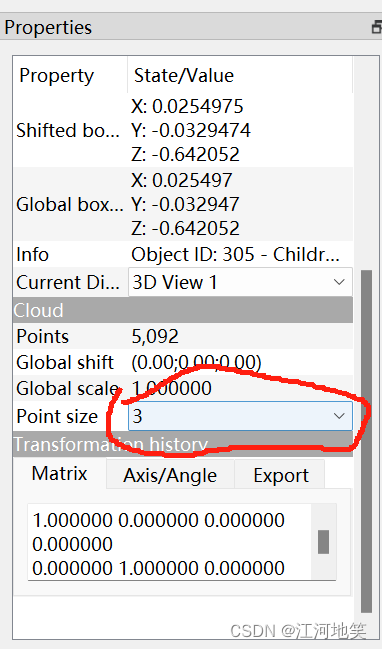 设置下点的大小
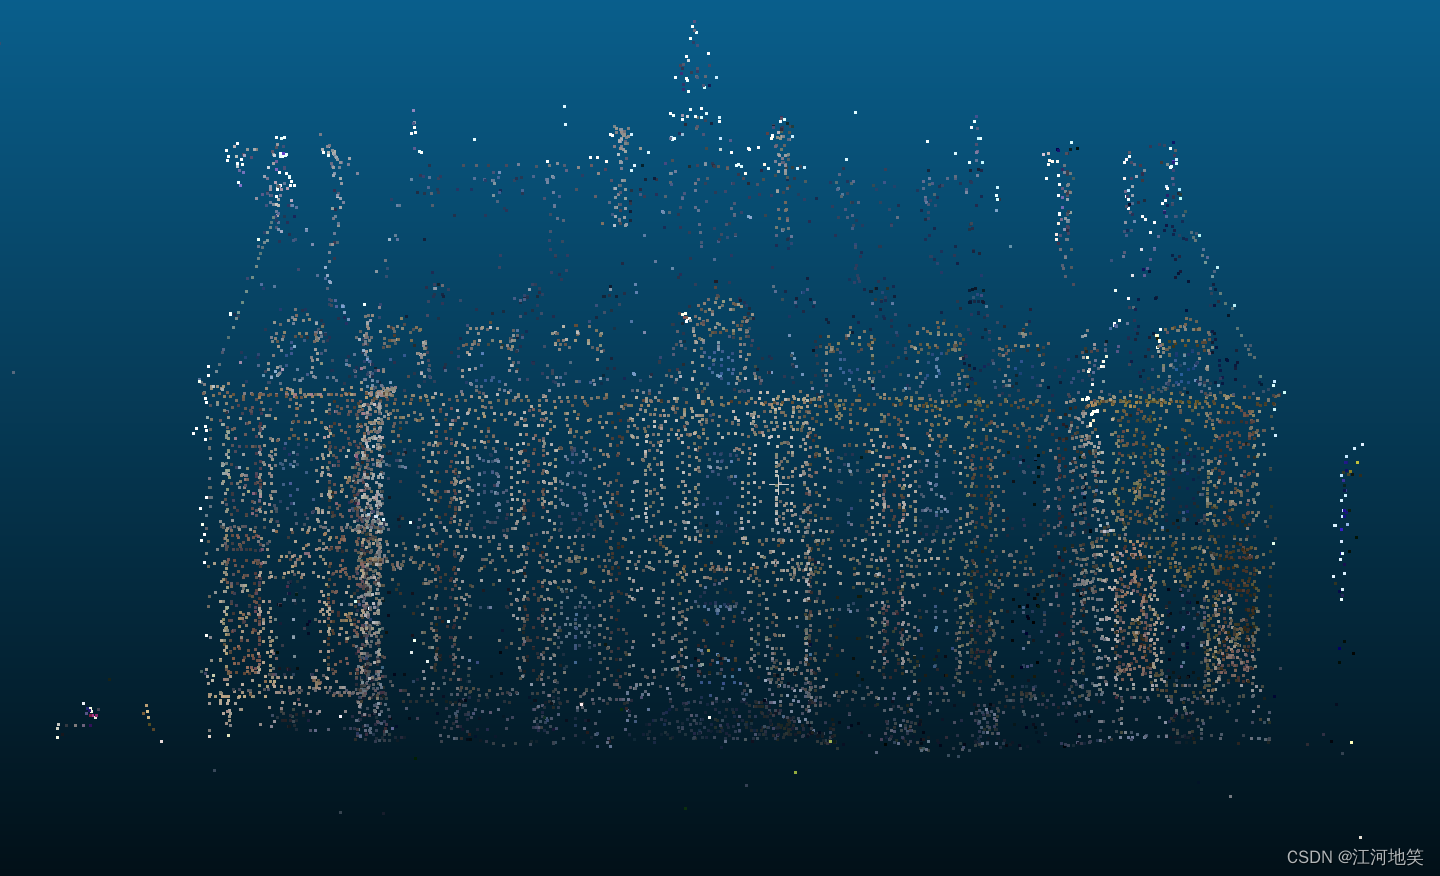
滤波后 ,看左下角,一些单个的离群点已经消除,算法滤波能力取决于参数
5、体素网格滤波
对于降低数据量和滤除噪声很有效
因此上一个点云数据有点太小了,建议换大点的,我换了一个点云是不带RGB颜色的,也就是把PointXYZRGB换成PointXYZ
#include <iostream>
#include <pcl/point_types.h>
#include <pcl/point_cloud.h>
#include <pcl/io/pcd_io.h>
#include <pcl/filters/voxel_grid.h>int main(int argc, char** argv)
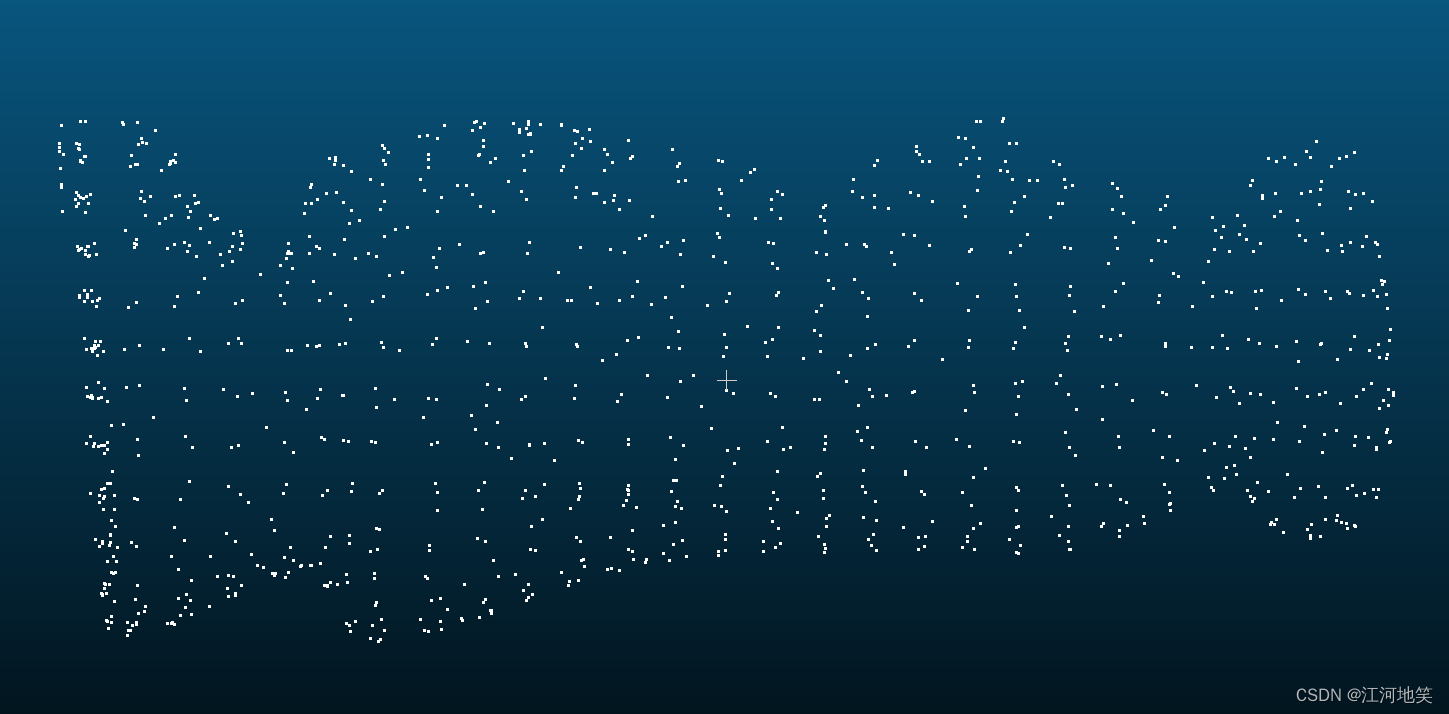
{// 定义点云对象指针pcl::PointCloud<pcl::PointXYZ>::Ptr cloud(new pcl::PointCloud<pcl::PointXYZ>);pcl::PointCloud<pcl::PointXYZ>::Ptr cloud_filtered(new pcl::PointCloud<pcl::PointXYZ>);// 读取PCD文件if (pcl::io::loadPCDFile<pcl::PointXYZ>(R"(D:\CPlusProject\PCL\pclTest\Data\chef.pcd)", *cloud) == -1) //* 打开点云文件{PCL_ERROR("Couldn't read file input_color.pcd \n");return (-1);}std::cout << "Loaded "<< cloud->width * cloud->height<< " data points from input_color.pcd with the following fields: "<< std::endl;// 创建体素网格滤波器对象pcl::VoxelGrid<pcl::PointXYZ> sor;sor.setInputCloud(cloud);sor.setLeafSize(0.01f, 0.01f, 0.01f); // 设置体素网格的大小sor.filter(*cloud_filtered);std::cout << "PointCloud after filtering: " << cloud_filtered->width * cloud_filtered->height<< " data points." << std::endl;// 保存过滤后的点云pcl::io::savePCDFile(R"(D:\CPlusProject\PCL\pclTest\Data\chef_VoxelGrid.pcd)", *cloud_filtered);return (0);
}
原图
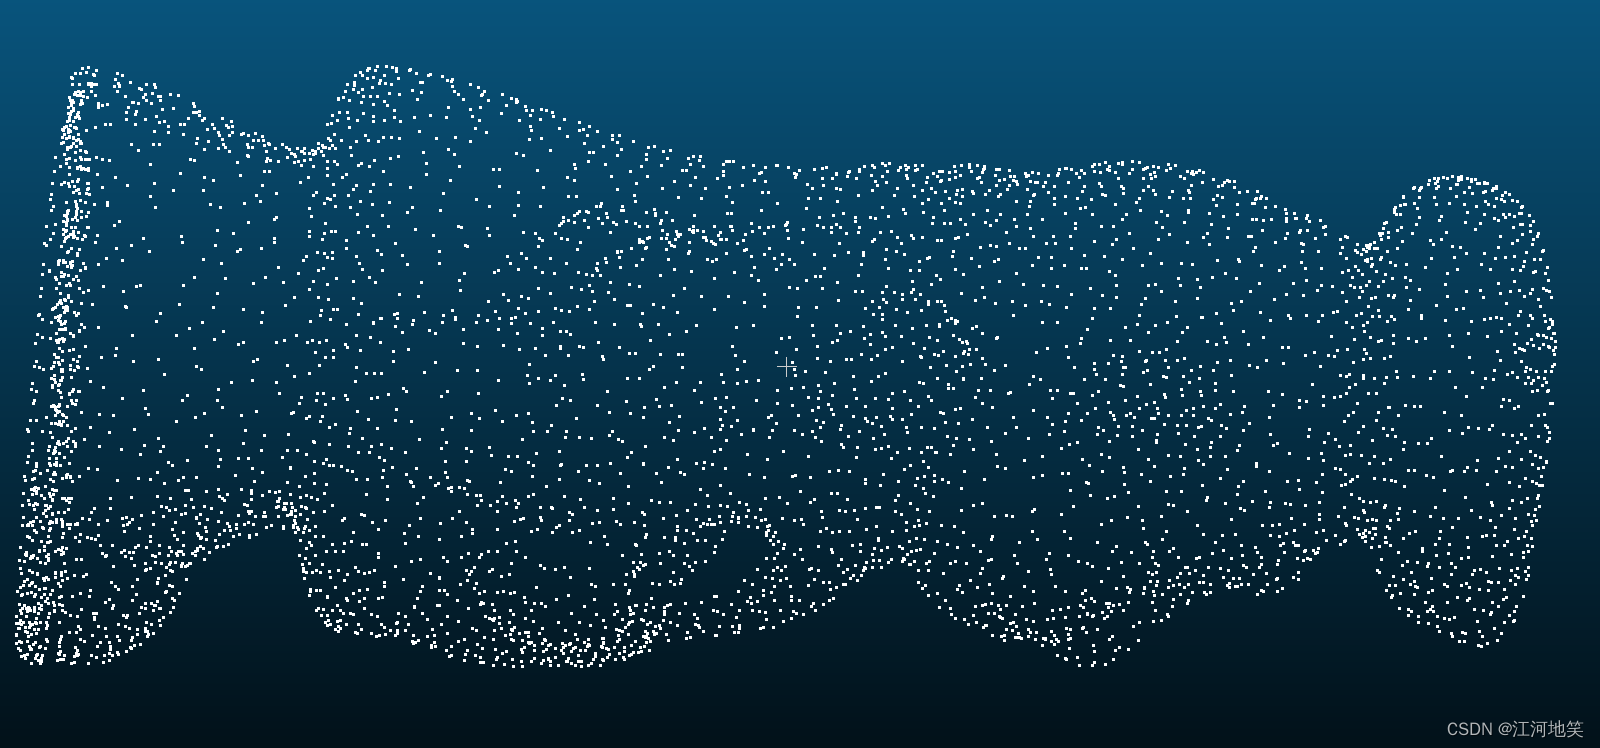
滤波后,很明显的数据量减少
6、半径离群值移除
这种方法对于去除孤立的噪声点很有效
#include <iostream>
#include <pcl/point_types.h>
#include <pcl/point_cloud.h>
#include <pcl/io/pcd_io.h>
#include <pcl/filters/radius_outlier_removal.h>int main(int argc, char** argv)
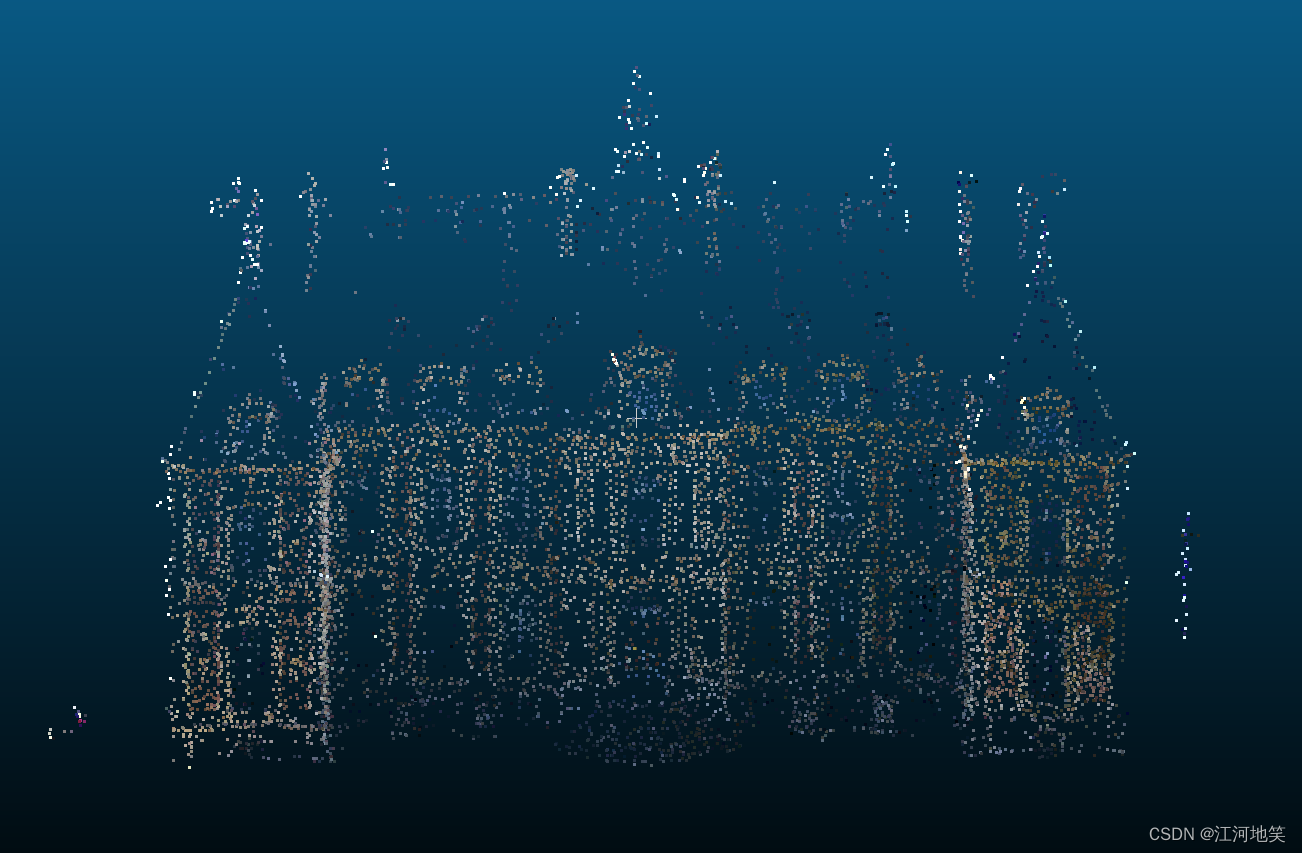
{// 创建点云指针pcl::PointCloud<pcl::PointXYZRGB>::Ptr cloud(new pcl::PointCloud<pcl::PointXYZRGB>);pcl::PointCloud<pcl::PointXYZRGB>::Ptr cloud_filtered(new pcl::PointCloud<pcl::PointXYZRGB>);// 读取点云文件if (pcl::io::loadPCDFile<pcl::PointXYZRGB>(R"(D:\CPlusProject\PCL\pclTest\Data\Sparse.pcd)", *cloud) == -1){PCL_ERROR("Couldn't read file input_color.pcd \n");return (-1);}std::cout << "Loaded "<< cloud->width * cloud->height<< " data points from input_color.pcd with the following fields: "<< std::endl;// 创建半径离群值移除滤波器pcl::RadiusOutlierRemoval<pcl::PointXYZRGB> outrem;outrem.setInputCloud(cloud);outrem.setRadiusSearch(0.2); // 设置搜索半径outrem.setMinNeighborsInRadius(5); // 设置半径内最小邻居数目// 应用滤波器outrem.filter(*cloud_filtered);std::cout << "PointCloud after filtering: " << cloud_filtered->width * cloud_filtered->height<< " data points." << std::endl;// 保存过滤后的点云pcl::io::savePCDFile(R"(D:\CPlusProject\PCL\pclTest\Data\Sparse_RadiusOutlierRemoval.pcd)", *cloud_filtered);return (0);
}
原图
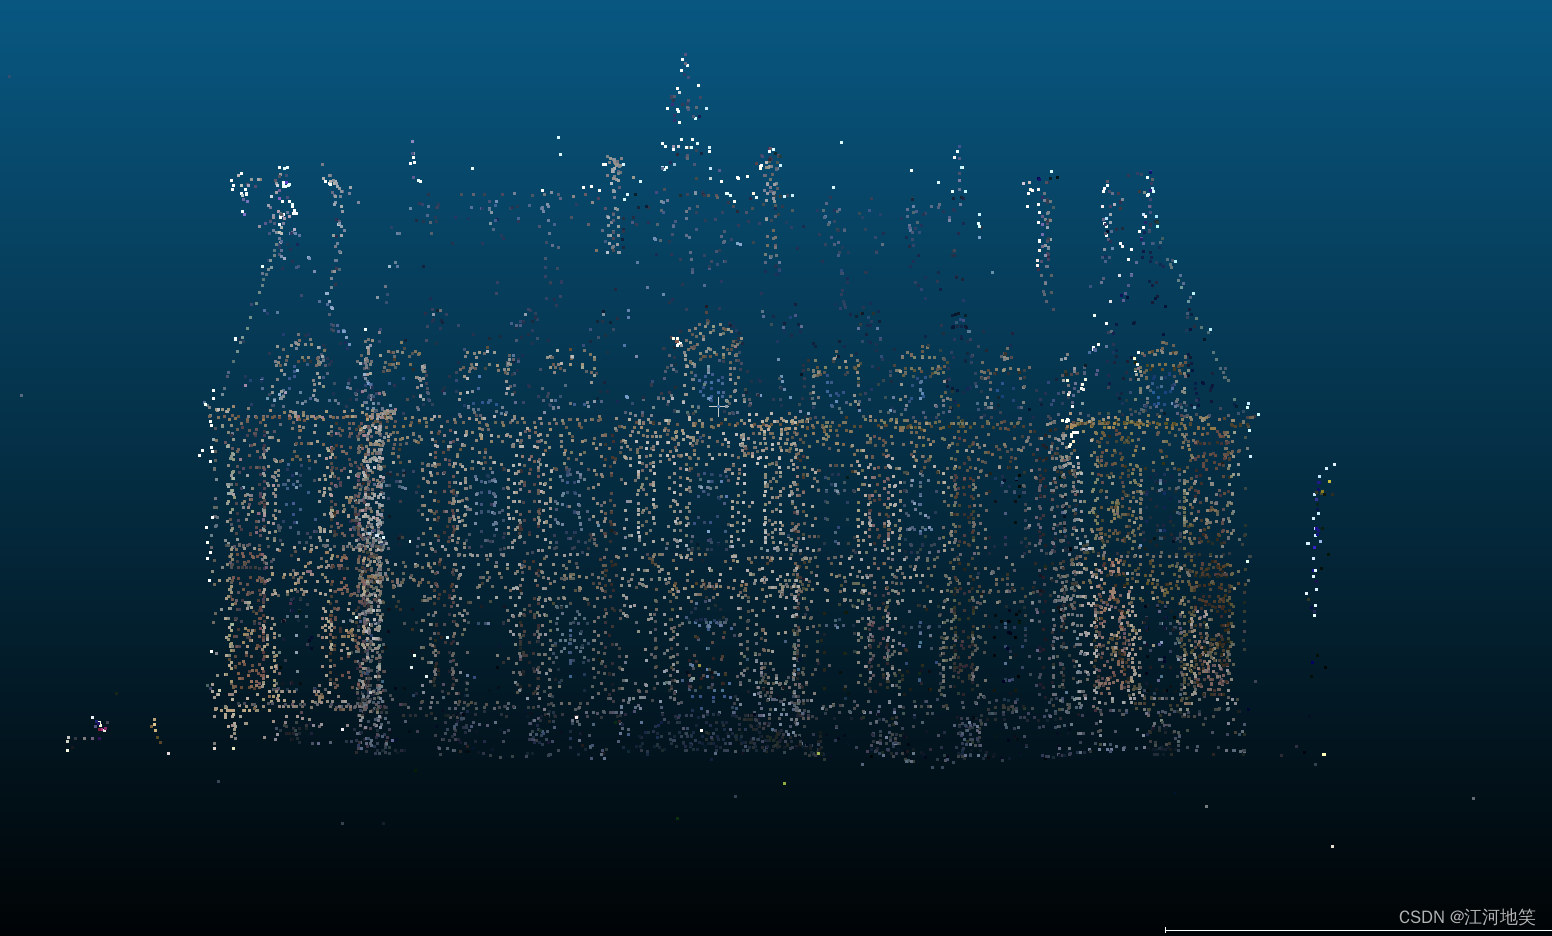
滤波后,还是比较明显的,离群点不见了
7、边缘保留滤波
旨在平滑数据的同时保留边缘特征,如物体边界。我们可以利用类似于图像处理中边缘保留技术的方法,例如双边滤波(Bilateral filter),来实现类似的效果。双边滤波是一种常见的边缘保留滤波方法,可以在平滑点云数据的同时保留其边缘信息。
#include <iostream>
#include <pcl/point_types.h>
#include <pcl/point_cloud.h>
#include <pcl/io/pcd_io.h>
#include <pcl/filters/fast_bilateral.h> // 注意:PCL版本可能影响这个头文件的可用性int main(int argc, char** argv)
{// 加载点云pcl::PointCloud<pcl::PointXYZ>::Ptr cloud(new pcl::PointCloud<pcl::PointXYZ>());pcl::PointCloud<pcl::PointXYZ>::Ptr cloud_filtered(new pcl::PointCloud<pcl::PointXYZ>());if (pcl::io::loadPCDFile<pcl::PointXYZ>(R"(D:\CPlusProject\PCL\pclTest\Data\chef.pcd)", *cloud) == -1) //* 打开点云文件{PCL_ERROR("Couldn't read file input.pcd \n");return (-1);}// 创建双边滤波对象pcl::FastBilateralFilter<pcl::PointXYZ> fbFilter;fbFilter.setInputCloud(cloud);fbFilter.setSigmaS(1.5); // 空间范围的标准差fbFilter.setSigmaR(0.05f); // 颜色或强度范围的标准差// 应用滤波器fbFilter.applyFilter(*cloud_filtered);// 保存过滤后的点云pcl::io::savePCDFile(R"(D:\CPlusProject\PCL\pclTest\Data\chef_organized_FastBilateralFilter.pcd)", *cloud_filtered);return 0;
}
报错
[pcl::FastBilateralFilter] Input cloud needs to be organized.
[pcl::PCDWriter::writeASCII] Input point cloud has no data!
输入的点云需要是有组织的(organized)。有组织的点云类似于图像数据,其中每个点都有明确的像素位置(即它们是按矩阵形式排列的),这通常是从深度相机(如Kinect或Realsense)直接获取的数据。如果你的点云是无组织的(unorganized),即简单的点云列表,那么
FastBilateralFilter无法直接应用。
如何将无组织的点云转换为有组织的点云?
将无组织的点云映射到二维图像->二维图像映射成三维点云
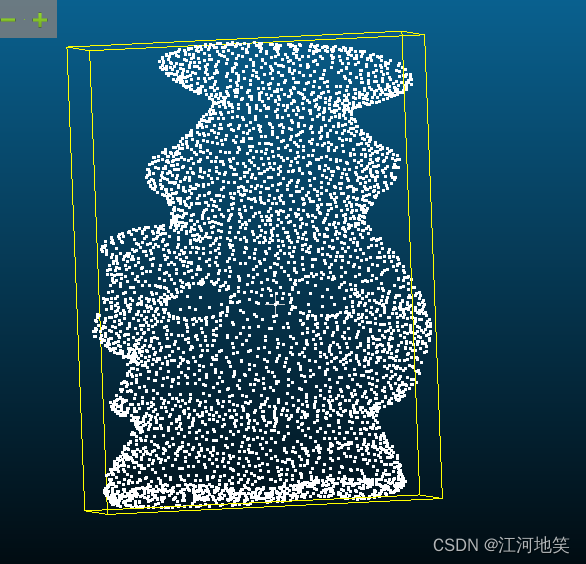
看完第8节和第9节应该可以得到如下图片,双边滤波的参数对z轴影响很大,注意参数调节
8、将无组织的点云映射到二维图像
要实现将无组织的点云映射到一个特定平面并为其分配一个固定分辨率的过程,我们需要考虑几个关键步骤:定义映射平面、选择分辨率、计算2D像素位置。这个示例不会涉及复杂的相机内参转换。深度信息直接用z来进行表示。
#include <iostream>
#include <vector>
#include <pcl/point_types.h>
#include <pcl/point_cloud.h>
#include <pcl/io/pcd_io.h>
#include <pcl/common/common.h> // 包含 getMinMax3D#include <opencv2/opencv.hpp> // 包含OpenCV库头文件
#include <opencv2/highgui/highgui.hpp>
#include <algorithm> // std::minmax_elementint main() {// 假设已经加载了点云数据到cloud变量pcl::PointCloud<pcl::PointXYZ>::Ptr cloud(new pcl::PointCloud<pcl::PointXYZ>);// 加载点云文件if (pcl::io::loadPCDFile<pcl::PointXYZ>(R"(D:\CPlusProject\PCL\pclTest\Data\chef.pcd)", *cloud) != 0) {return -1;}int imageWidth = 640;int imageHeight = 480;// 初始化深度图,使用-1表示该像素位置没有对应的点云数据std::vector<std::vector<float>> depthMap(imageHeight, std::vector<float>(imageWidth, -1));// 确定点云的边界pcl::PointXYZ minPt, maxPt;pcl::getMinMax3D(*cloud, minPt, maxPt);// 遍历点云中的每个点for (const auto& point : cloud->points) {// 将点云的坐标转换为2D图像的像素坐标// 这里使用简单的线性映射,假设点云完全覆盖图像平面int u = static_cast<int>((point.x - minPt.x) / (maxPt.x - minPt.x) * (imageWidth - 1));int v = static_cast<int>((point.y - minPt.y) / (maxPt.y - minPt.y) * (imageHeight - 1));// 选择z值作为深度信息float depth = point.z;// 更新深度图if (u >= 0 && u < imageWidth && v >= 0 && v < imageHeight) {// 这里简单地将点云的z值直接赋给像素,实际应用中可能需要其他处理方式depthMap[v][u] = depth;}}// 将depthMap转换为cv::Matint rows = depthMap.size();int cols = depthMap[0].size();cv::Mat depthImage(rows, cols, CV_32FC1); // 浮点单通道图像for (int i = 0; i < rows; ++i) {for (int j = 0; j < cols; ++j) {depthImage.at<float>(i, j) = depthMap[i][j];}}// 可视化处理// 为了更好地在图像中显示深度信息,我们可以对深度值进行归一化double minVal, maxVal;cv::minMaxIdx(depthImage, &minVal, &maxVal); // 查找深度图中的最小和最大值cv::Mat normalizedDepthImage;cv::convertScaleAbs(depthImage, normalizedDepthImage, 255 / (maxVal - minVal), -minVal * 255 / (maxVal - minVal));// 显示深度图cv::namedWindow("Depth Image", cv::WINDOW_AUTOSIZE);cv::imshow("Depth Image", normalizedDepthImage);cv::waitKey(0); // 等待按键// 保存深度图为图片cv::imwrite(R"(D:\CPlusProject\PCL\pclTest\Data\chef_depth_image.png)", normalizedDepthImage);return 0;
}
这段代码首先将深度图转换为OpenCV的
cv::Mat格式,然后使用cv::minMaxIdx查找深度图中的最小和最大深度值,以便对深度值进行归一化处理,使其范围在0到255之间。这样处理后的深度图更适合在屏幕上显示和保存为图片。
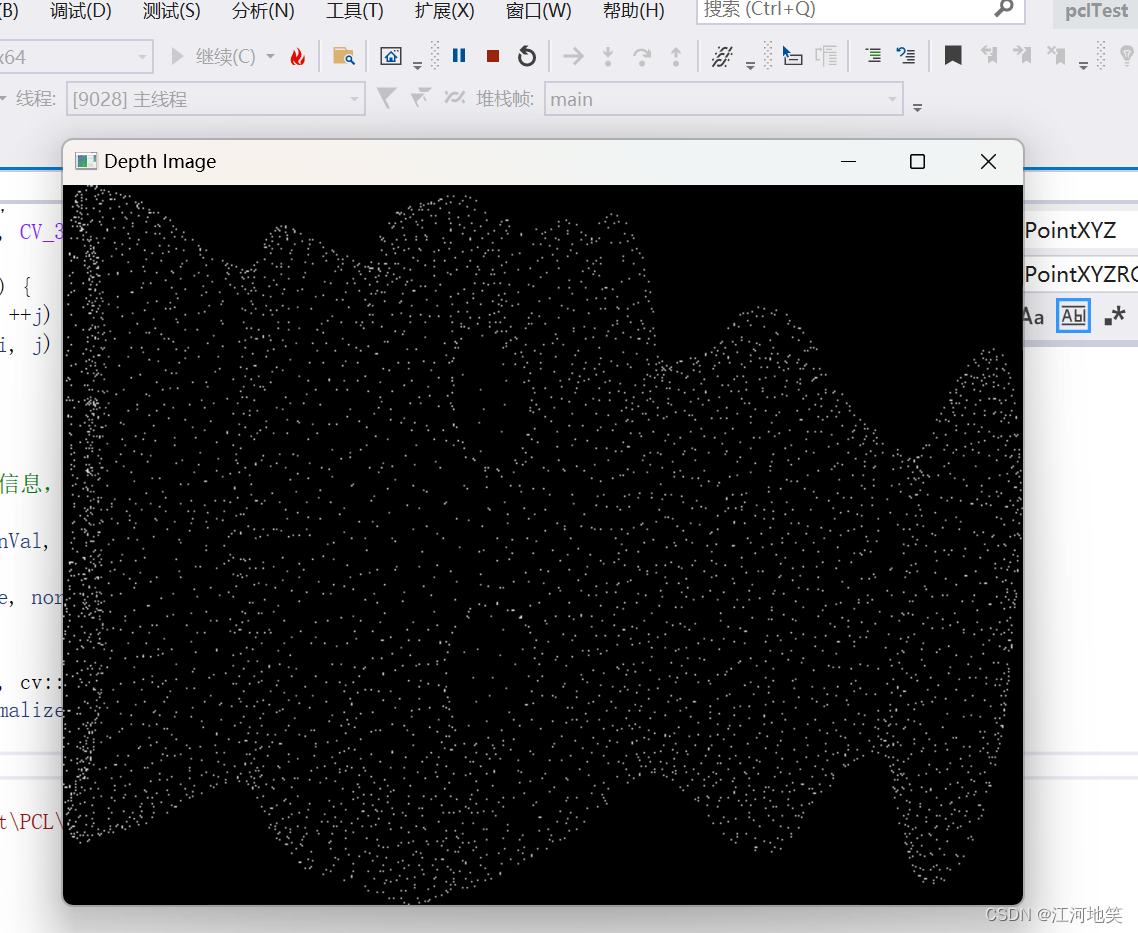
运行代码即可看到三维点云已经映射到二维图像上了
9、将无组织的点云转换为有组织的点云
前提是做了前一步,三维映射到二维得到深度图
这边的相机模型参数是简单的一种模拟
#include <iostream>
#include <vector>
#include <pcl/point_types.h>
#include <pcl/point_cloud.h>
#include <pcl/io/pcd_io.h>
#include <pcl/common/common.h> // 包含 getMinMax3Dint main() {// 假设已经加载了点云数据到cloud变量pcl::PointCloud<pcl::PointXYZ>::Ptr cloud(new pcl::PointCloud<pcl::PointXYZ>);// 加载点云文件if (pcl::io::loadPCDFile<pcl::PointXYZ>(R"(D:\CPlusProject\PCL\pclTest\Data\chef.pcd)", *cloud) != 0) {return -1;}int imageWidth = 640;int imageHeight = 480;// 初始化深度图,使用-1表示该像素位置没有对应的点云数据std::vector<std::vector<float>> depthMap(imageHeight, std::vector<float>(imageWidth, -1));// 确定点云的边界pcl::PointXYZ minPt, maxPt;pcl::getMinMax3D(*cloud, minPt, maxPt);// 遍历点云中的每个点for (const auto& point : cloud->points) {// 将点云的坐标转换为2D图像的像素坐标// 这里使用简单的线性映射,假设点云完全覆盖图像平面int u = static_cast<int>((point.x - minPt.x) / (maxPt.x - minPt.x) * (imageWidth - 1));int v = static_cast<int>((point.y - minPt.y) / (maxPt.y - minPt.y) * (imageHeight - 1));// 选择z值作为深度信息float depth = point.z;// 更新深度图if (u >= 0 && u < imageWidth && v >= 0 && v < imageHeight) {// 这里简单地将点云的z值直接赋给像素,实际应用中可能需要其他处理方式depthMap[v][u] = depth;}}// 有了深度图 depthMap 和对应的尺寸 imageWidth, imageHeightpcl::PointCloud<pcl::PointXYZ>::Ptr organizedCloud(new pcl::PointCloud<pcl::PointXYZ>);organizedCloud->width = imageWidth;organizedCloud->height = imageHeight;organizedCloud->is_dense = false; // 有组织的点云可能包含无效点organizedCloud->points.resize(organizedCloud->width * organizedCloud->height);// 假设的相机参数float focalLength = 1500.0; // 焦距,以某种单位表示float centerX = imageWidth / 2.0;float centerY = imageHeight / 2.0;float scalingFactor = 1; // 将深度值转换为相同单位的比例因子for (int i = 0; i < imageHeight; ++i) {for (int j = 0; j < imageWidth; ++j) {pcl::PointXYZ point;if (depthMap[i][j] != -1) {float z = depthMap[i][j] * scalingFactor; // 转换深度值float x = (j - centerX) * z / focalLength;float y = (i - centerY) * z / focalLength;point.x = x;point.y = y;point.z = z;}else {point.x = point.y = point.z = std::numeric_limits<float>::quiet_NaN();}organizedCloud->points[i * imageWidth + j] = point;}}//保存为有组织的三维点云if (pcl::io::savePCDFile(R"(D:\CPlusProject\PCL\pclTest\Data\chef_organized.pcd)", *organizedCloud) == -1) {PCL_ERROR("Couldn't save the organized point cloud file.\n");return -1;}return 0;
}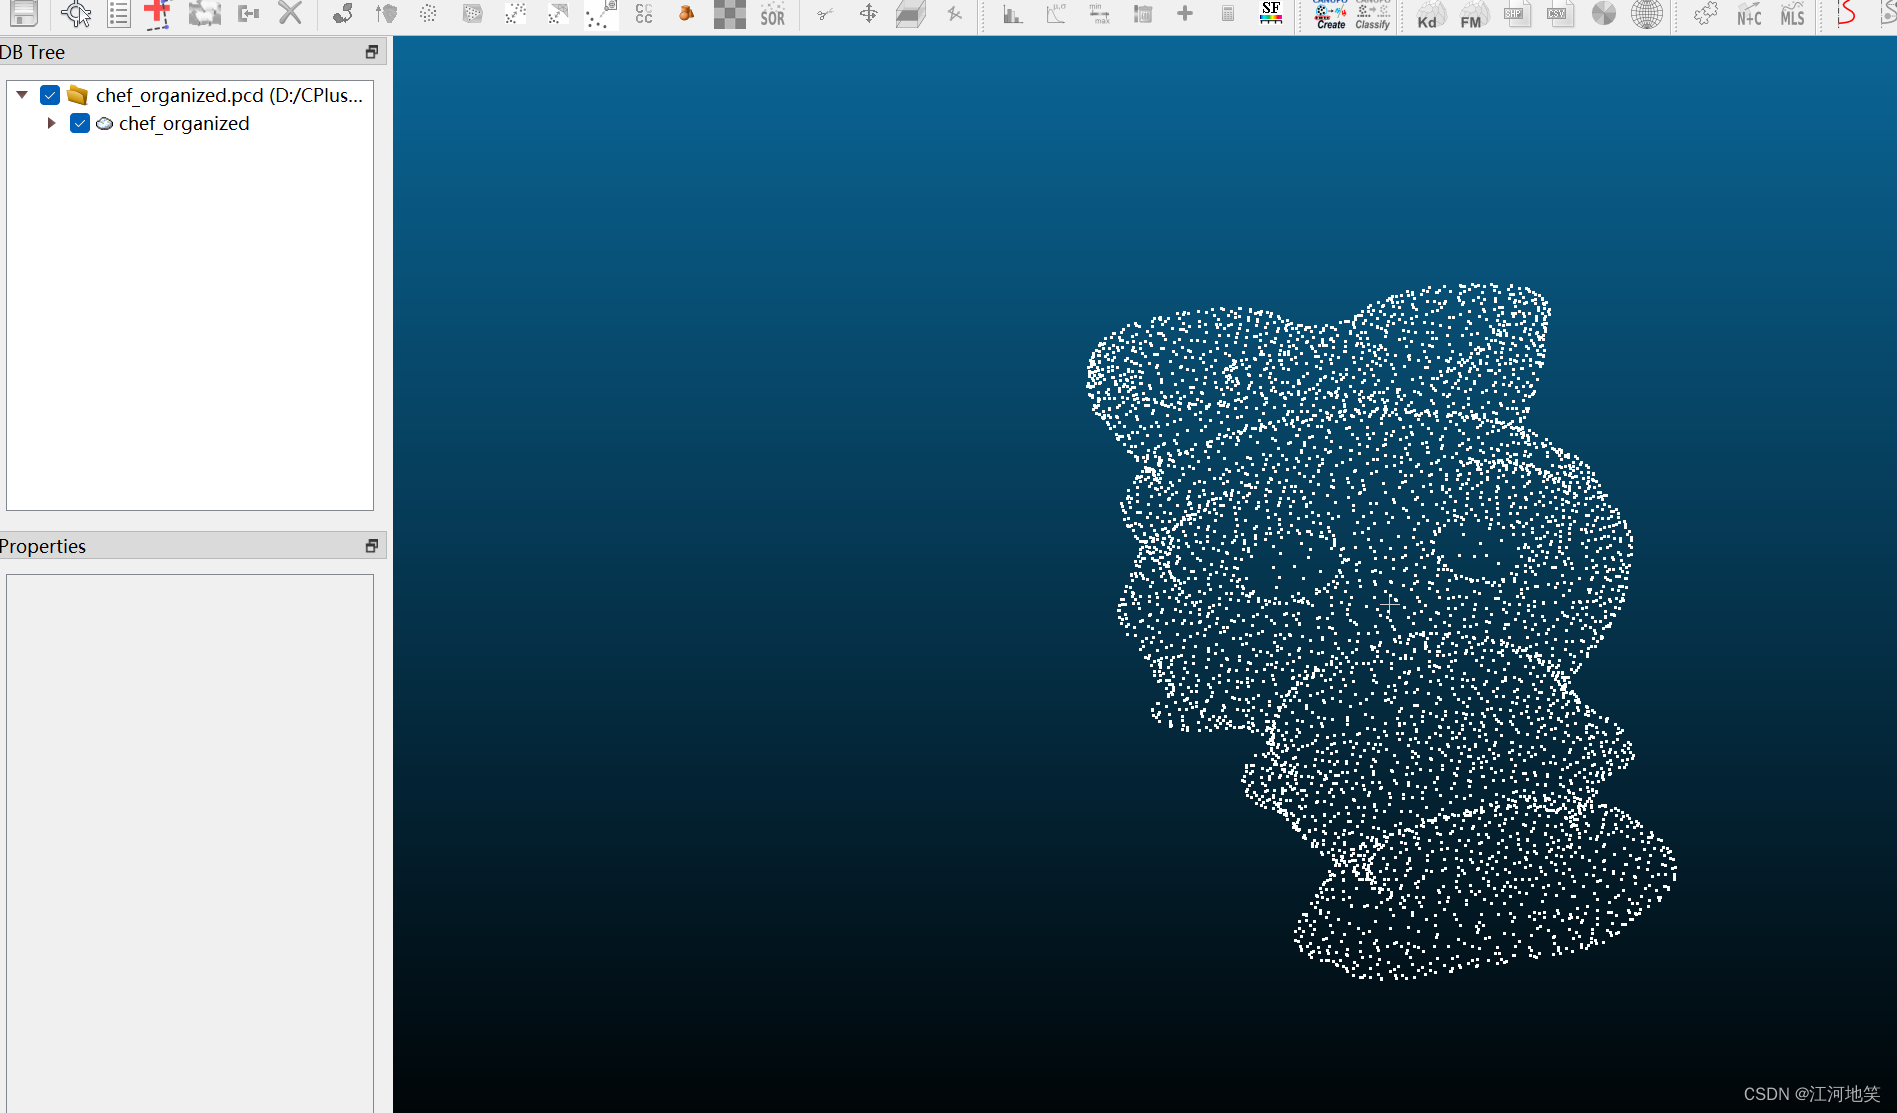
好的,大家可与拿这个有组织的点云数据跑双边滤波了,已经测过,不会报错了。


![[NISACTF 2022]easyssrf](https://img-blog.csdnimg.cn/direct/b51d706d87ad4a87af3d47c5044f1f45.png)
