Vue3+vite搭建基础架构(11)--- 菜单栏功能和Tab页功能实现
- 说明
- 删除项目中不需要的文件
- userStore全局属性代码
- 菜单栏代码
- Tab页代码
- 解决浏览器输入地址时不会打开tab页问题和切换tab页时参数丢失问题
说明
这里记录下自己在Vue3+vite的项目实现菜单栏功能和Tab页功能,不使用ts语法,方便以后直接使用。这里承接自己的博客Vue3+vite搭建基础架构(10)— 使用less和vite-plugin-vue-setup-extend这篇博客,在该博客项目的基础上增加菜单栏功能和Tab页功能实现。
删除项目中不需要的文件
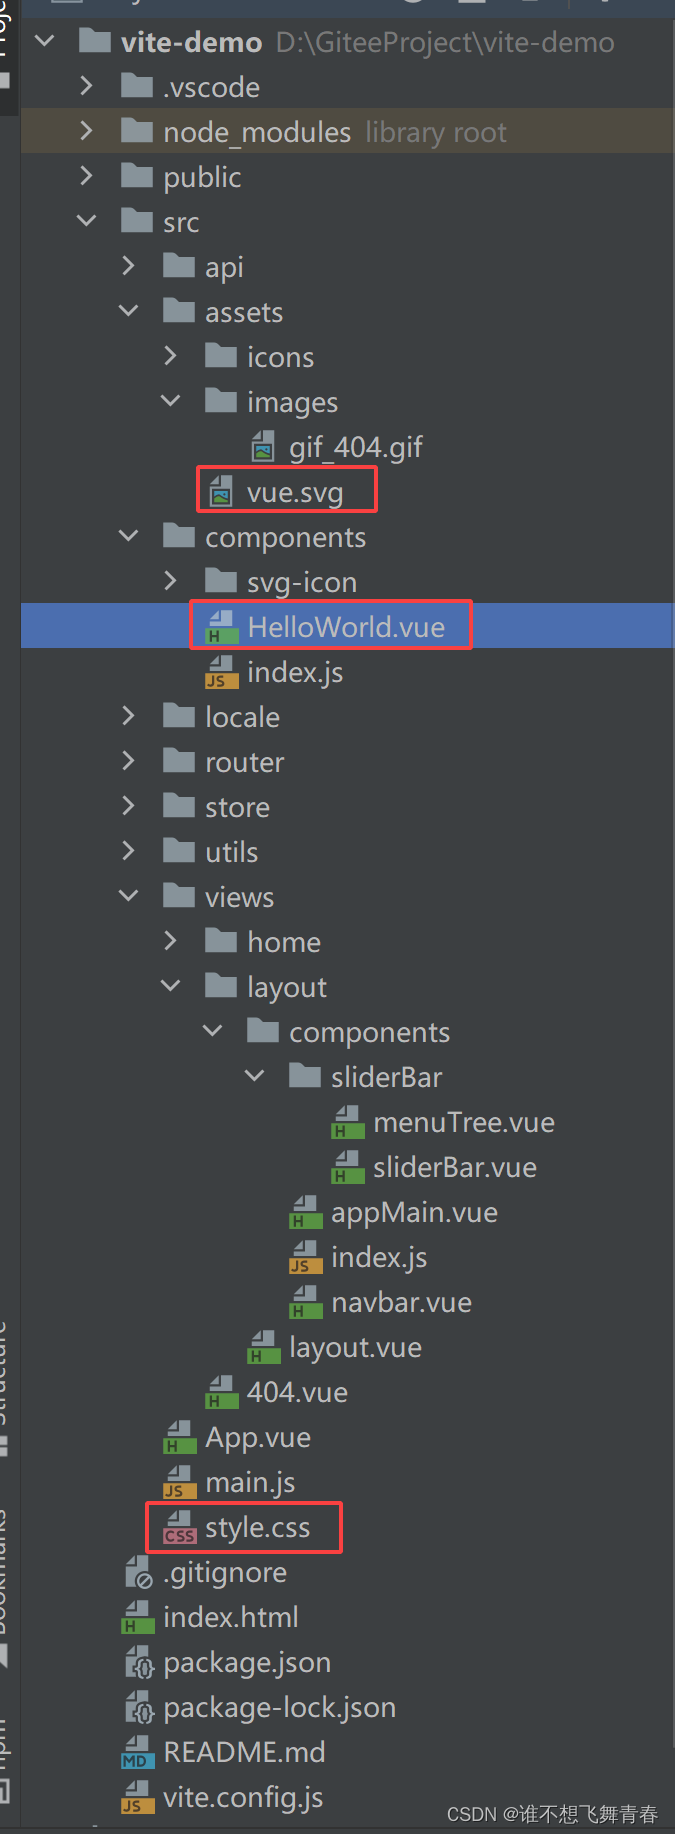
删除掉src文件夹下的style.css和compoments文件夹下的HelloWorld.vue以及assets文件夹下的vue.svg图片,这三个都是项目创建完成后自带的,因为用不到所以删除掉。
删除views下面home文件夹下的index.vue代码,因为这个里面代码是以前用来测试依赖的代码,所以把代码清空,保留为一个空文件。
代码如下:
<!--home首页代码-->
<template><div>我是首页</div>
</template><script setup name="home"></script><style lang="less" scoped></style>
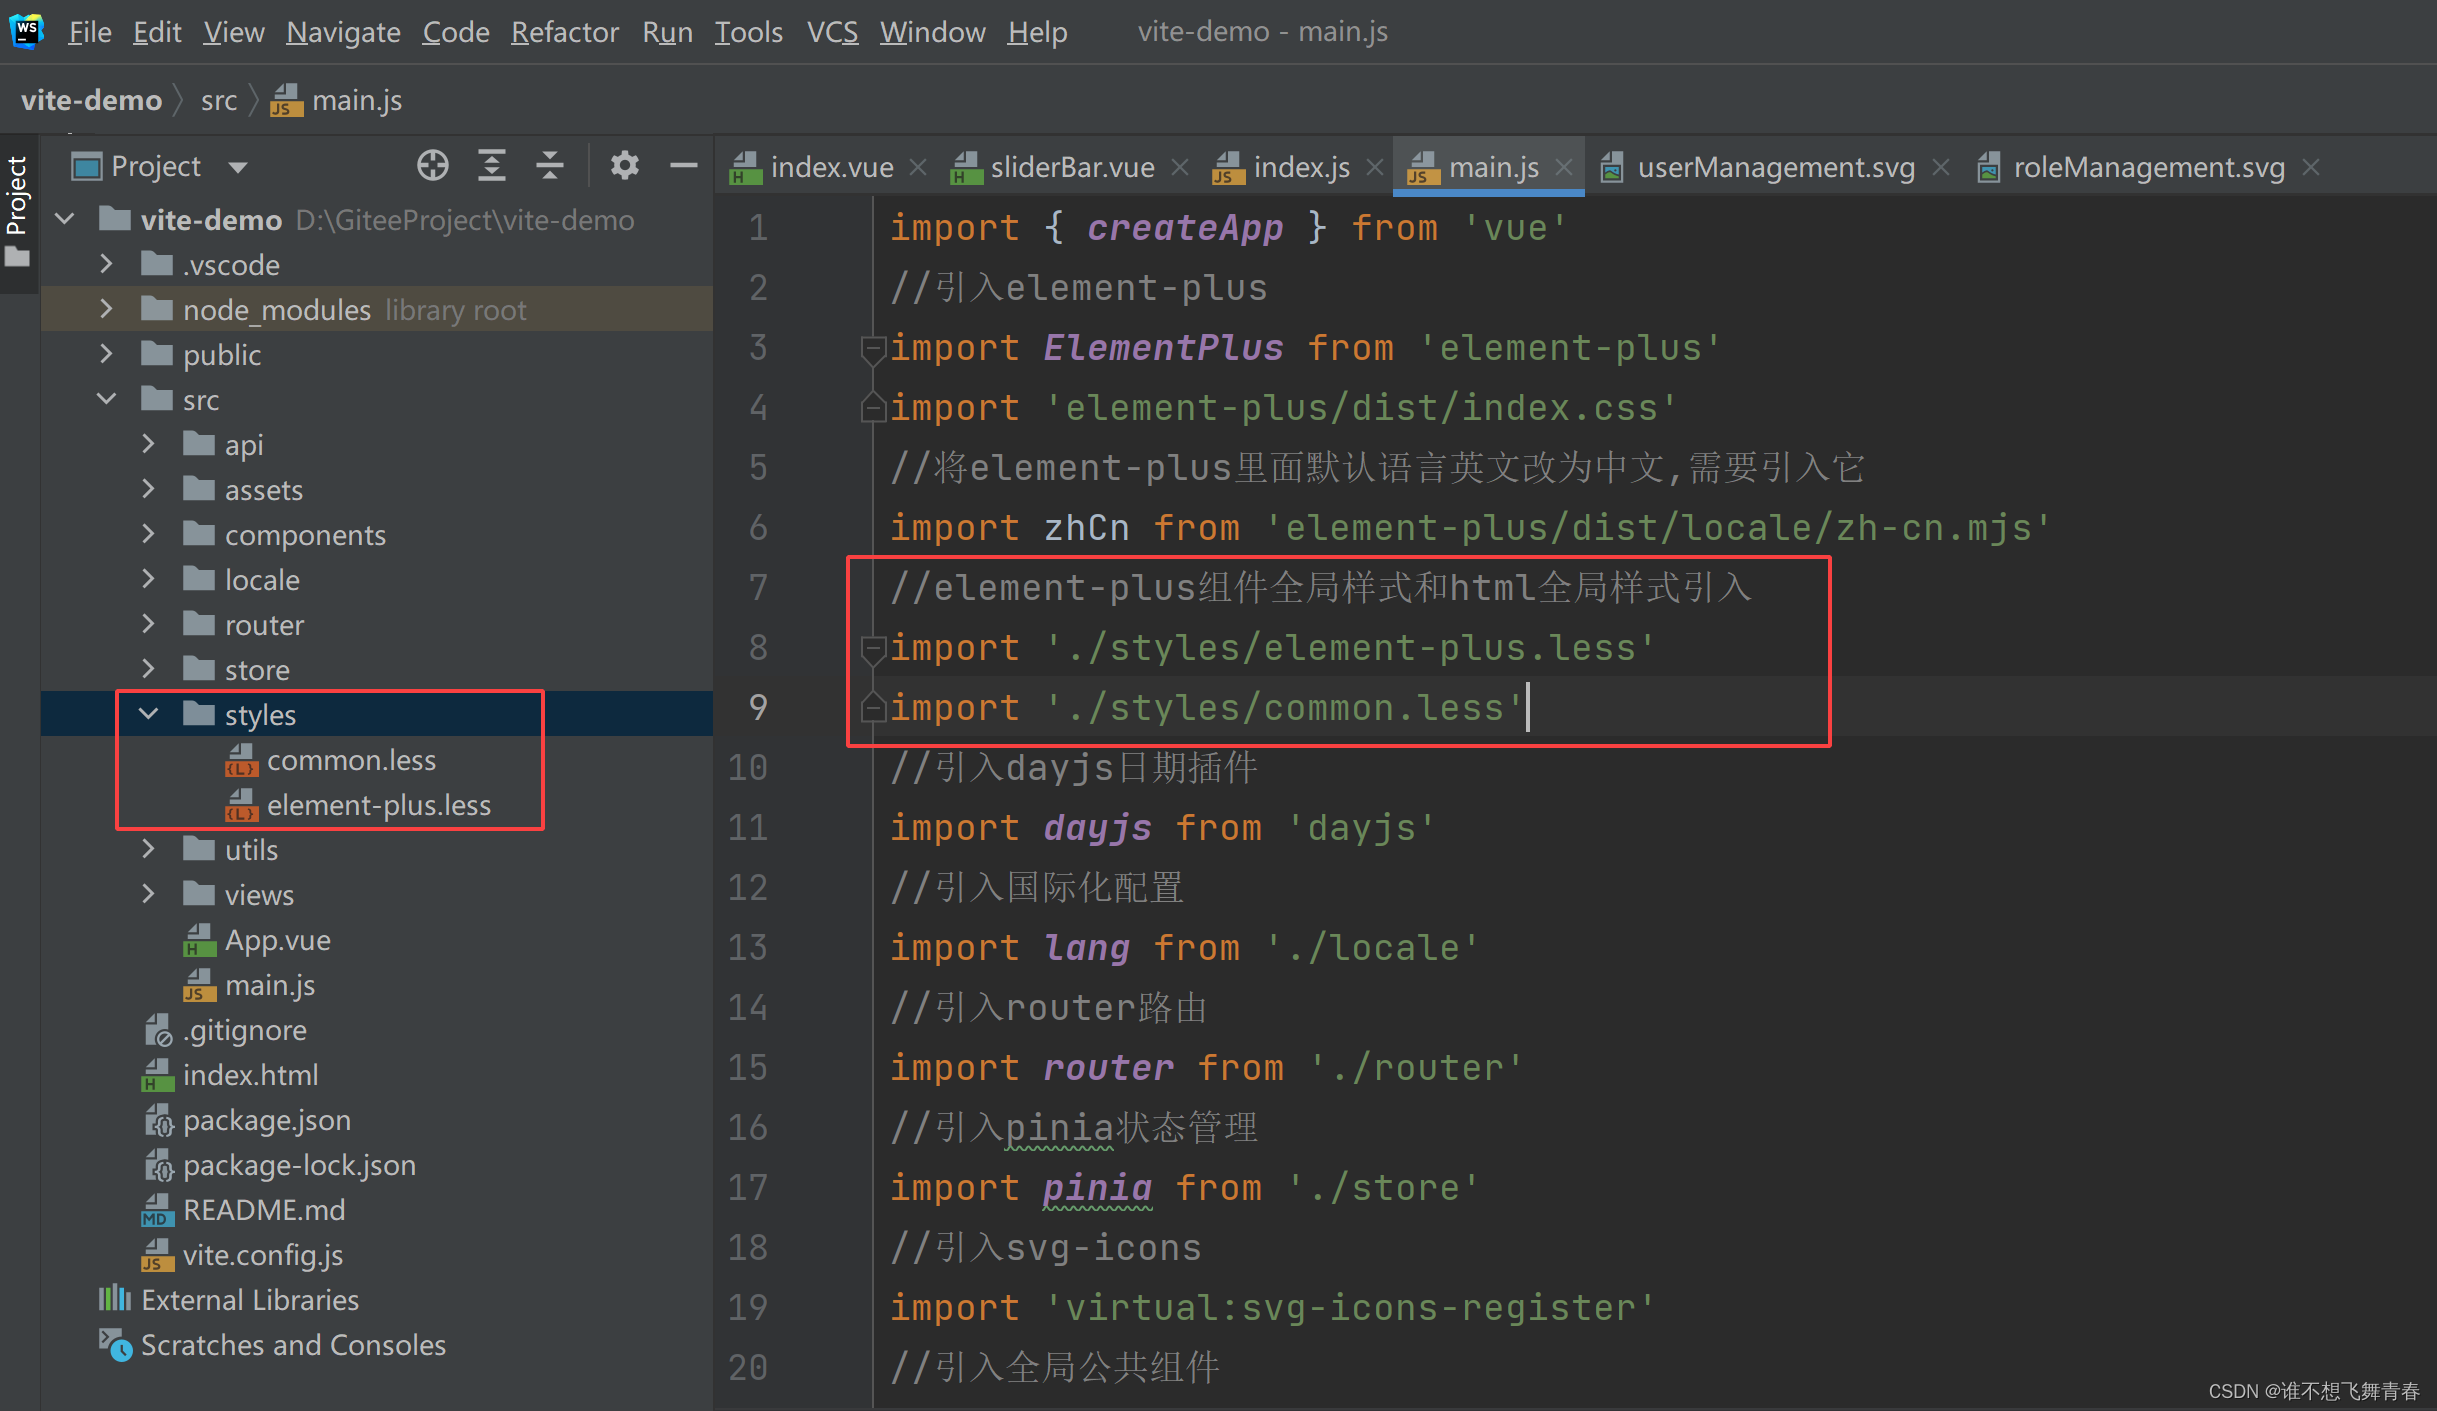
在src下面新建styles文件夹用来存放全局样式。common.less用来存放html标签样式。element-plus.less用来存放ElementPlus组件里面的标签样式。然后在main.js里面引入2个样式文件,让它们全局生效。
common.less里面代码如下:
//body全局样式设计
body{font-size: 14px;//字体大小margin: 0px;padding: 0px;
}//a标签全局样式
a {color: #1B68B6;//字体颜色text-decoration: none;//去掉下划线cursor: pointer;//鼠标放上去手型//鼠标放上去颜色/*&:hover {color: #1B68B6;}//鼠标点击时颜色&:active{color: #1B68B6;}//鼠标点击后获取焦点样式&:focus {color: #1B68B6;}*/
}
element-plus.less目前代码为空。
userStore全局属性代码
在store文件夹下的modules文件夹下的userStore.js文件修改代码为如下:
//使用pinia来管理全局状态
import { defineStore } from "pinia"/*defineStore 是需要传参数的,其中第一个参数是id,就是一个唯一的值,
简单点说就可以理解成是一个命名空间.
第二个参数就是一个对象,里面有三个模块需要处理,第一个是 state,
第二个是 getters,
第三个是 actions。
*/
//声明了一个useUserStore方法
const useUserStore = defineStore('user', {//准备state——用于存储数据state: () => {return {//当前激活菜单的indexactiveMenu: '',//绑定值,选中选项卡的nameeditableTabsValue: '',//tab标签选项卡内容editableTabs: [],//tab页路由地址及参数tabRouterList: []}},//使用persist插件对state里面属性进行缓存persist: {enabled: true,//开启缓存,默认缓存所有state里面的属性,默认key为defineStore里面的id值,这里id值为user,所以默认key为user//自定义持久化参数,指定以下state里面的属性进行缓存,未指定的不进行缓存strategies: [{// 自定义keykey: 'activeMenu',// 自定义存储方式,默认sessionStoragestorage: sessionStorage,// 指定要持久化的数据paths: ['activeMenu']},{key: 'editableTabsValue',storage: sessionStorage,paths: ['editableTabsValue']},{key: 'editableTabs',storage: sessionStorage,paths: ['editableTabs']},{key: 'tabRouterList',storage: sessionStorage,paths: ['tabRouterList']}]},getters: {},//准备actions——用于响应组件中的动作和用于操作数据(state),pinia中只有state、getter、action,抛弃了Vuex中的Mutationactions: {/*** 修改state中数据的方法* @param name 需要修改的属性名* @param value 修改值*/updateState([name, value]) {this[name] = value},//动态添加tab标签,item为当前点击的菜单项addTab(item) {const newTab = {title: item.meta.title,name: item.url,iconClass: item.meta.icon,}// 判断当前editableTabs中是否存在该tab标签if (this.editableTabs.findIndex(item => item.title === newTab.title) === -1) {this.editableTabs.push(newTab);this.editableTabsValue = newTab.name;this.activeMenu = newTab.name;}},//移除tab标签removeTab(targetName) {let tabs = this.editableTabslet activeName = this.editableTabsValueif (activeName === targetName) {tabs.forEach((tab, index) => {if (tab.name === targetName) {let nextTab = tabs[index + 1] || tabs[index - 1]if (nextTab) {activeName = nextTab.name}}})}this.activeMenu = activeNamethis.editableTabsValue = activeNamethis.editableTabs = tabs.filter(tab => tab.name !== targetName)this.tabRouterList = this.tabRouterList.filter(item => item.path !== targetName)}}
})export default useUserStore
菜单栏代码
views文件下layout文件夹下的layout.vue布局代码如下:
<template><div><el-container><!--侧边栏,height: 100vh;设置高度为视口高度--><el-aside style="width: 200px;height: 100vh;"><SliderBar></SliderBar></el-aside><el-container><!--头部--><el-header><Navbar></Navbar></el-header><!--主体内容--><el-main><!--主体内容--><AppMain></AppMain></el-main></el-container></el-container></div>
</template><script>import { Navbar, SliderBar, AppMain } from './components/index.js'export default {name: "layout",components: {Navbar,SliderBar,AppMain}}
</script><style scoped></style>
views文件下layout文件夹下的components文件夹下sliderBar文件夹下的sliderBar.vue代码如下:
<!--通用布局侧边栏内容-->
<template><el-row><el-col><div class="header"><!--系统logo,随便找一个图片示例用--><SvgIcon iconClass="systemManagement" /><span class="icon-text">后台管理系统</span></div><!--router表示为启动路由模式,路由模式下index为你的页面路由路径--><!--通过设置default-active属性点击tab页时,自动选中左边菜单栏选项--><div><el-menuactive-text-color="#1B68B6"background-color="#FFFFFF":default-active="store.activeMenu"text-color="#333333"@select="handleSelect":router="true"class="menu-items"><!--引用菜单树组件将路由的菜单栏循环显示出来--><MenuTree :menuList="menuTreeList"/></el-menu></div></el-col></el-row>
</template><script setup name="SliderBar">//引入菜单列表组件import MenuTree from "./menuTree.vue"//引入全局状态里面的关于菜单栏列表数据和相关方法import useUserStore from "@/store/modules/userStore"//使用useUserStore里面的属性const store = useUserStore()//菜单激活回调函数,当tab页已经打开的情况下,再次点击菜单项,对应的tab页也跟着切换function handleSelect(key) {store.updateState(["editableTabsValue", key])store.updateState(["activeMenu", key])}//菜单树列表,这里模拟后端接口请求返回的数据,示例数据如下:const menuTreeList = [{id: 1,url: "/test-management1",//该url要与路由文件里面的path值要一致level: 1,//菜单等级meta: { title: "测试管理1", icon: "systemManagement" },children: [] //子菜单},{id: 2,url: "/system-management",level: 1,meta: { title: "系统管理", icon: "systemManagement" },children: [{id: 3,url: "/user-management",level: 2,meta: { title: "用户管理", icon: "userManagement" },children: []},{id: 4,url: "/role-management",level: 2,meta: { title: "角色管理", icon: "roleManagement" },children: []},{id: 5,url: "/permission-management",level: 2,meta: { title: "权限管理", icon: "permissionManagement" },children: []},{id: 6,url: "/password-management",level: 2,meta: { title: "密码管理", icon: "systemManagement" },children: []},],},{id: 7,url: "/test-management2",level: 1,meta: { title: "测试管理2", icon: "systemManagement" },children: []},{id: 8,url: "/test-management3",level: 1,meta: { title: "测试管理3", icon: "systemManagement" },children: [{id: 9,url: "/test-management4",level: 2,meta: { title: "测试管理4", icon: "systemManagement" },children: [{id: 10,url: "/test-management5",level: 3,meta: { title: "测试管理5", icon: "systemManagement" },children: []}]}]}]
</script><style lang="less" scoped>
.header {height: 64px;display: flex;align-items: center; //垂直居中justify-content: left; //水平居左//logo样式.svg-icon {width: 64px;height: 32px;}.icon-text {font-size: 16px;color: #1b68b6;margin-left: -5px;}
}//普通菜单悬浮样式
:deep(.el-menu-item:hover) {background-color: #E8EFF7;//背景颜色color: #1B68B6;//字体颜色
}//子菜单悬浮样式,子菜单的图标颜色需要修改svg图片里面的fill值,由fill="#333333"改为fill="currentColor"后,图标悬浮样式颜色才会一起变化
:deep(.el-sub-menu__title:hover) {background-color: #E8EFF7;//背景颜色color: #1B68B6;//字体颜色
}//菜单被选中的样式
:deep(.el-menu .el-menu-item.is-active) {background-color: #E8EFF7; //背景颜色color: #1B68B6; //字体颜色border-right: 3px solid #1B68B6;//右边框颜色
}//子菜单被选中的样式
:deep(.el-sub-menu.is-active .el-sub-menu__title){color: #1B68B6; //字体颜色
}//菜单栏样式
.menu-items {height: 100%; //设置高度为父容器高度border-right: none;//去掉菜单栏右边框
}
</style>
views文件下layout文件夹下的components文件夹下sliderBar文件夹下的menuTree.vue代码如下:
<!--菜单树列表-->
<template><!--将菜单列表循环出来--><template v-for="item in menuList"><!--判断菜单里面是否有子菜单--><el-sub-menu:key="item.id":index="item.url"v-if="item.children.length"><template #title><el-icon><SvgIcon :iconClass="item.meta.icon"></SvgIcon></el-icon><span>{{ item.meta.title }}</span></template><!--调用自身循环显示子菜单--><MenuTree :menuList="item.children" /></el-sub-menu><!--菜单节点--><el-menu-itemv-else:key="item.id":index="item.url"@click="store.addTab(item)"><el-icon><SvgIcon :iconClass="item.meta.icon"></SvgIcon></el-icon><span>{{ item.meta.title }}</span></el-menu-item></template>
</template><script setup name="MenuTree">//引入全局状态里面的关于菜单栏列表数据和相关方法import useUserStore from "@/store/modules/userStore"const store = useUserStore()//定义属性给组件接收const props = defineProps({//菜单栏属性menuList: {type: Array,//类型为数组//默认值为空数组default() {return []}}})
</script><style scoped></style>
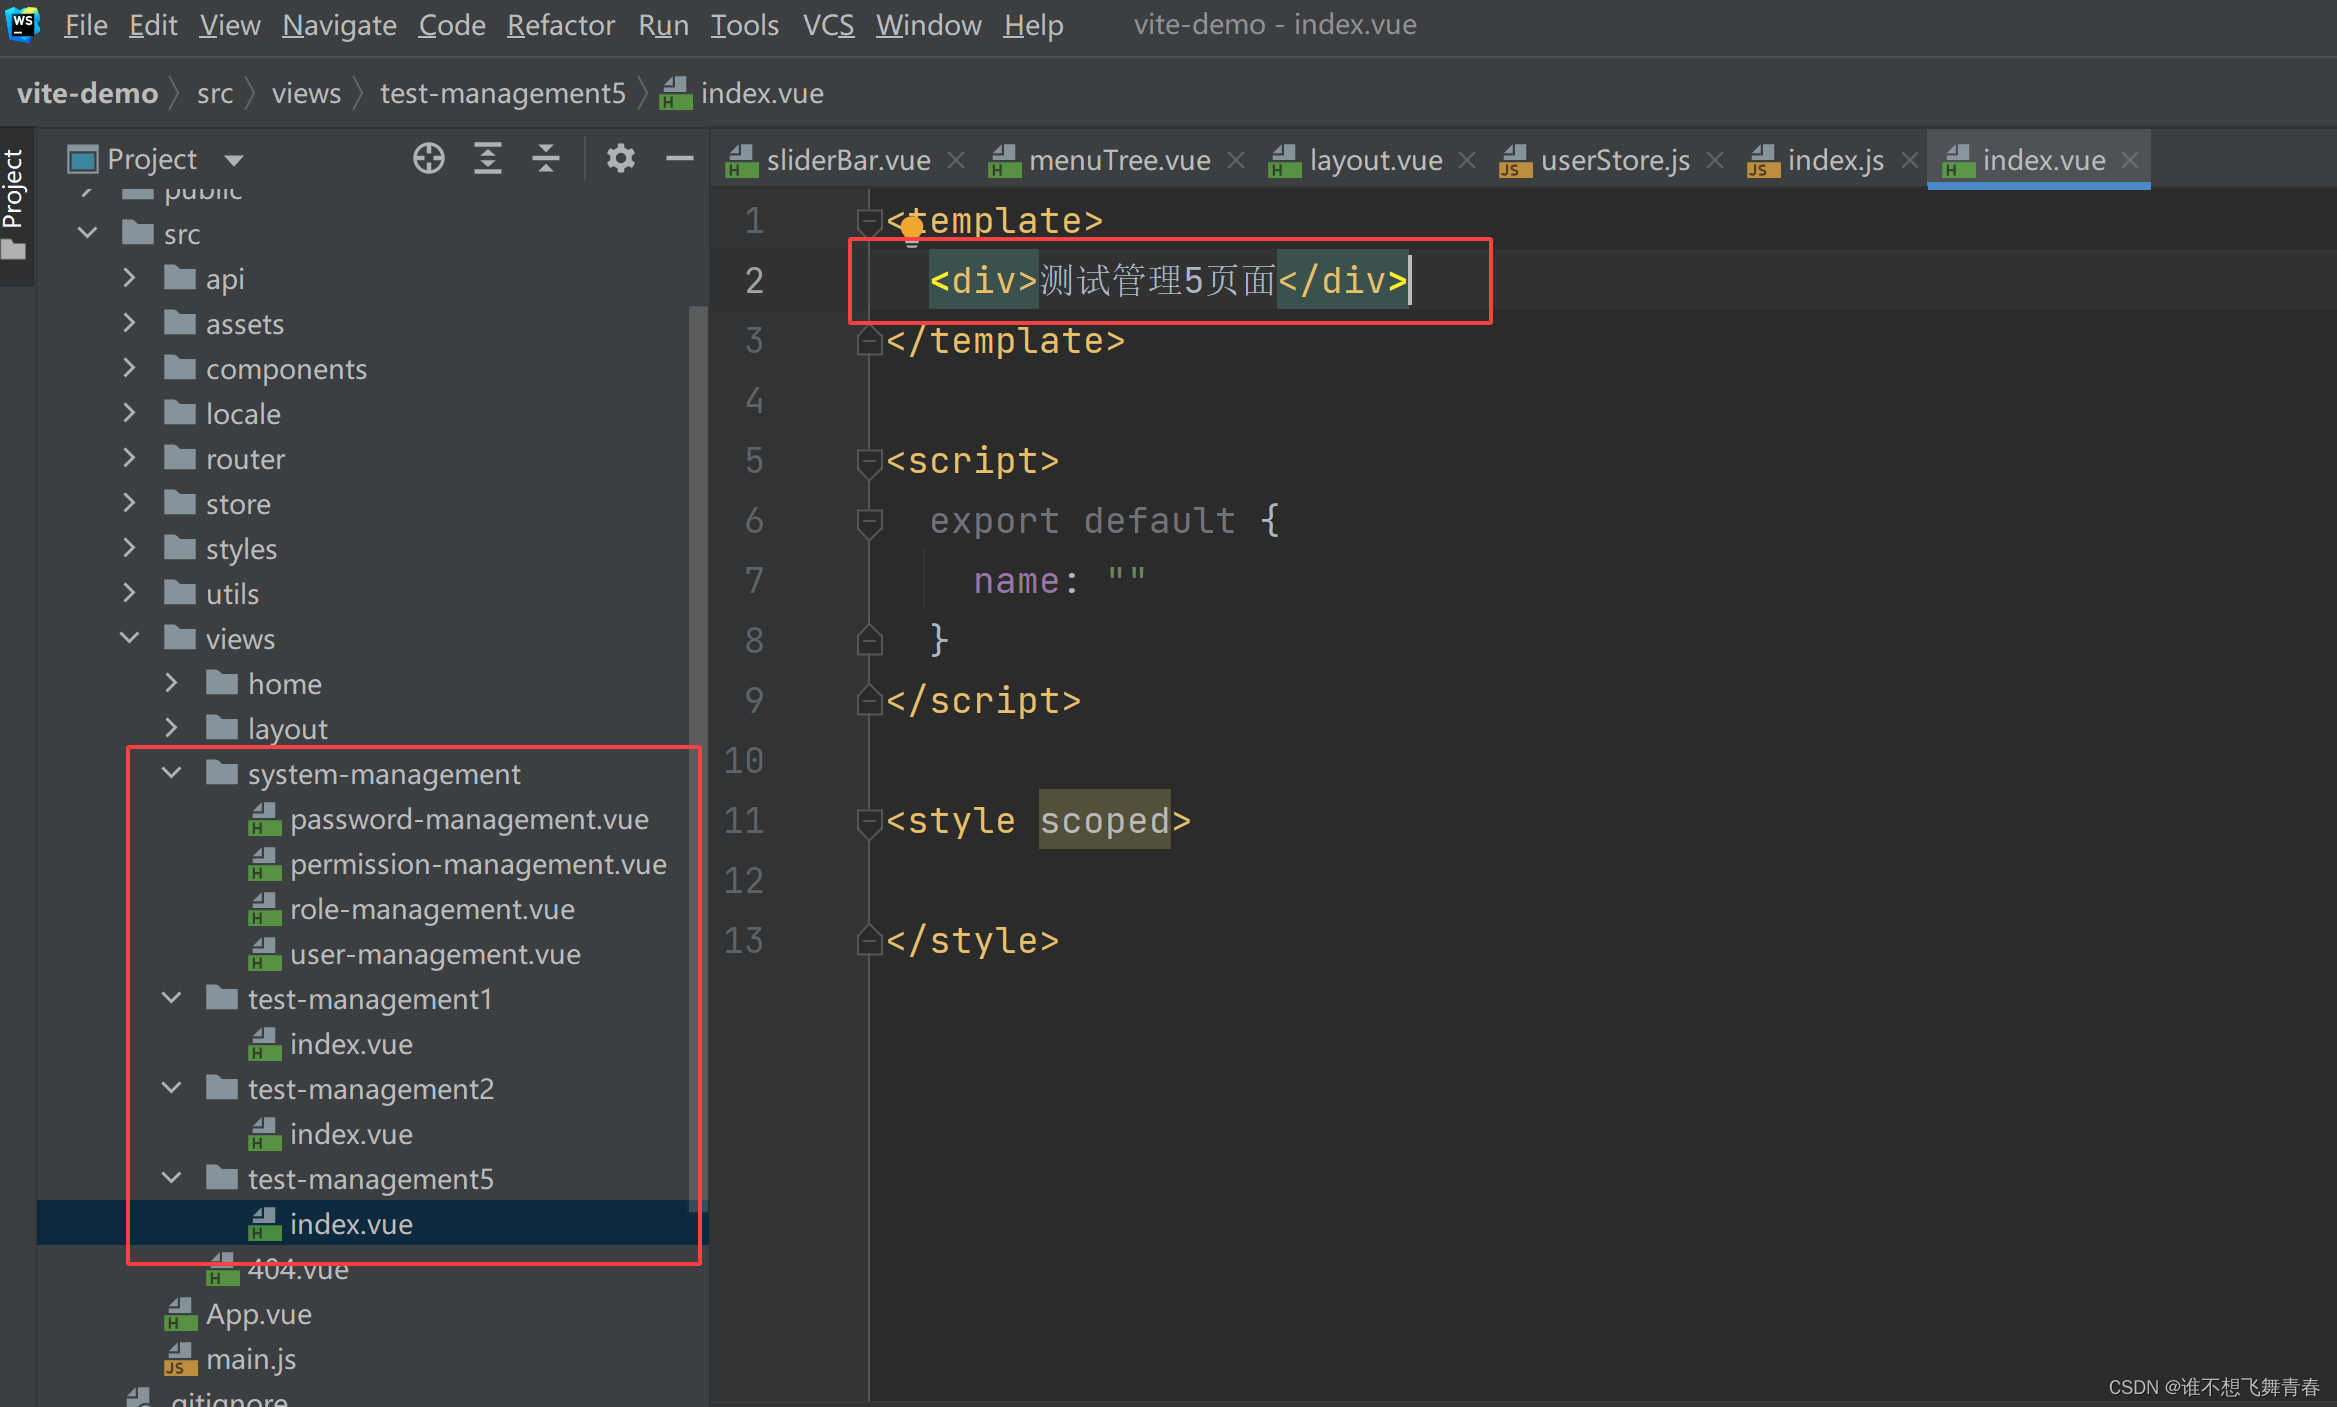
在views文件夹下新建菜单树列表里面对应的页面文件,每个页面文件加上如下一句代码,用来表示不同页面内容。
src文件下router文件夹下的index.js代码如下:
//引入router路由做页面请求
import { createRouter,createWebHashHistory } from 'vue-router'
/* Layout通用组件 */
import Layout from '../views/layout/layout'const routes = [{path: '/404', component: () => import('@/views/404')},//必须要把组件放在Layout的children里面,才能在侧边栏的右侧显示页面内容,否则不加载通用架构直接在当前空白页面渲染内容,如:404页面{path: '',component: Layout,redirect: '/home',children: [{path: 'home',name: 'home',component: () => import('@/views/home/index'),meta: {title: '首页', icon: 'home'}},{path: 'test-management1',name: 'test-management1',component: () => import('@/views/test-management1/index'),meta: {title: '测试管理1', icon: 'systemManagement'}},{path: 'user-management',name: 'user-management',component: () => import('@/views/system-management/user-management'),meta: {title: '用户管理', icon: 'userManagement'}},{path: 'role-management',name: 'role-management',component: () => import('@/views/system-management/role-management'),meta: {title: '角色管理', icon: 'roleManagement'}},{path: 'permission-management',name: 'permission-management',component: () => import('@/views/system-management/permission-management'),meta: {title: '权限管理', icon: 'permissionManagement'}},{path: 'password-management',name: 'password-management',component: () => import('@/views/system-management/password-management'),meta: {title: '密码管理', icon: 'systemManagement'}},{path: 'test-management2',name: 'test-management2',component: () => import('@/views/test-management2/index'),meta: {title: '测试管理2', icon: 'systemManagement'}},{path: 'test-management5',name: 'test-management5',component: () => import('@/views/test-management5/index'),meta: {title: '测试管理5', icon: 'systemManagement'}}]}
]// 3. 创建路由实例并传递 `routes` 配置
const router = createRouter({// 4. 内部提供了 history 模式的实现。为了简单起见,我们在这里使用 hash 模式。history: createWebHashHistory(),routes, // `routes: routes` 的缩写
})//路由前置守卫
router.beforeEach((to, from, next) => {//路由发生变化修改页面titleif (to.meta.title) {document.title = to.meta.title}next()
})//导出路由
export default router
启动项目后,浏览器结果如下:

点击不同的菜单栏选项,页面内容也会相应的变化,这种算是单页面,activeMenu也会相应的变化,之所以要把这个写到session storage里面,是为了防止页面刷新时,点击的高亮菜单选项消失问题。

Tab页代码
views文件下layout文件夹下的components文件夹下的navbar.vue代码如下:
<!--通用布局头部内容-->
<template><el-row><el-col :span="20"><el-tabsv-model="store.editableTabsValue"type="border-card"closable@tab-remove="handleTabRemove"@tab-click="handleTabClick"v-if="store.editableTabs.length !== 0"><el-tab-pane v-for="item in store.editableTabs" :key="item.name" :name="item.name" :label="item.title"><!-- 右键菜单开始:自定义标签页显示名称,保证每个标签页都能实现右键菜单 --><template #label><el-dropdowntrigger="contextmenu":id="item.name"@visible-change="handleChange($event, item.name)"ref="dropdownRef"><span style="font-size: 16px;color: #909399;":class="store.editableTabsValue === item.name ? 'label' : ''"><SvgIcon :iconClass="item.iconClass"></SvgIcon>{{ item.title }}</span><template #dropdown><el-dropdown-menu><el-dropdown-item @click="closeCurrent(item.name)"><el-icon><Close /></el-icon>关闭当前标签页</el-dropdown-item><el-dropdown-item @click="closeLeft(item.name)" v-if="show(item.name, 'left')"><el-icon><DArrowLeft /></el-icon>关闭左侧标签页</el-dropdown-item><el-dropdown-item @click="closeRight(item.name)" v-if="show(item.name, 'right')"><el-icon><DArrowRight /></el-icon>关闭右侧标签页</el-dropdown-item><el-dropdown-item @click="closeOther(item.name)" v-if="store.editableTabs.length > 1"><el-icon><Operation /></el-icon>关闭其他标签页</el-dropdown-item><el-dropdown-item @click="closeAll()"><el-icon><Minus /></el-icon>关闭全部标签页</el-dropdown-item></el-dropdown-menu></template></el-dropdown></template><!-- 右键菜单结束 --></el-tab-pane></el-tabs></el-col><el-col :span="4"><div class="header"><!-- 用户信息 --><!--trigger="click"通过点击下标触发--><div style="cursor: pointer;"><el-dropdown trigger="click"><span>{{ username }}<SvgIcon iconClass="arrowDown" /></span><template #dropdown><el-dropdown-menu><el-dropdown-item @click="logout">退出登录</el-dropdown-item></el-dropdown-menu></template></el-dropdown></div></div></el-col></el-row>
</template><script setup name="navbar">//引入全局状态里面的关于菜单栏列表数据和相关方法import useUserStore from '@/store/modules/userStore'import { useRouter, useRoute } from "vue-router"import { onMounted, ref, computed } from 'vue'import {Close,DArrowLeft,DArrowRight,Operation,Minus} from '@element-plus/icons-vue'//接手全局状态里面的属性和方法const store = useUserStore();//使用路由相当于$router,系统路由方法const router = useRouter()//使用路由相当于$route,点击菜单栏时当前点击的路由页面里面的属性值const route = useRoute()//用户名const username = '超级管理员'//触发右键菜单标签页为第一个时,不展示【关闭左侧标签页】//触发右键菜单标签页为最后一个时,不展示【关闭右侧标签页】const show = (name, type) => {const index = store.editableTabs.findIndex((item) => name === item.name)return type === 'left' ? index !== 0 : index !== store.editableTabs.length - 1}//右键菜单refconst dropdownRef = ref()//在触发右键菜单后,关闭其他tab页上的右键菜单const handleChange = (visible, name) => {if (!visible) returndropdownRef.value.forEach((item) => {if (item.id === name) returnitem.handleClose()})}//关闭当前tab页const closeCurrent = (targetName) => {handleTabRemove(targetName)}//关闭左侧tab页const closeLeft = (targetName) => {//查找当前点击的tab页所在位置let currentIndex = store.editableTabs.findIndex((item) => item.name === targetName)//查找当前激活标签页indexconst activeIndex = store.editableTabs.findIndex((item) => item.name === store.editableTabsValue)//关闭左侧tab页store.editableTabs.splice(0, currentIndex)//删除对应的左侧历史路由store.tabRouterList.splice(0, currentIndex)//如果当前关闭点击的tab页包含激活的tab页,则将激活tab页重置为当前点击的tabif (activeIndex < currentIndex) {//将当前激活的tab页改为当前点击的store.updateState(['editableTabsValue', targetName])//将激活菜单改为当前点击的store.updateState(['activeMenu', targetName])//路由跳转到当前点击的tab页//查询当前点击的tab页缓存路由参数let result = store.tabRouterList.find(item => item.path === targetName);//路由跳转且带上对应tab页的参数router.push({ path: targetName, query: result.query })}}//关闭右侧tab页const closeRight = (targetName) => {//查找当前点击的tab页所在位置let currentIndex = store.editableTabs.findIndex((item) => item.name === targetName)//查找当前激活标签页indexconst activeIndex = store.editableTabs.findIndex((item) => item.name === store.editableTabsValue)//关闭右侧tab页store.editableTabs.splice(currentIndex + 1)//删除对应的右侧历史路由store.tabRouterList.splice(currentIndex + 1)//如果当前关闭点击的tab页包含激活的tab页,则将激活tab页重置为当前点击的tabif (activeIndex > currentIndex) {//将当前激活的tab页改为当前点击的store.updateState(['editableTabsValue', targetName])//将激活菜单改为当前点击的store.updateState(['activeMenu', targetName])//路由跳转到当前点击的tab页//查询当前点击的tab页缓存路由参数let result = store.tabRouterList.find(item => item.path === targetName);//路由跳转且带上对应tab页的参数router.push({ path: targetName, query: result.query })}}//关闭其他tab页const closeOther = (targetName) => {//查找当前点击的tab页所在位置let currentIndex = store.editableTabs.findIndex((item) => item.name === targetName)//关闭其他标签页store.editableTabs = [store.editableTabs[currentIndex]]//删除除当前点击外的历史路由store.tabRouterList = [store.tabRouterList[currentIndex]]//如果当前点击的不等于当前激活的if (targetName !== store.editableTabsValue) {//将当前激活的tab页改为当前点击的store.updateState(['editableTabsValue', targetName])//将激活菜单改为当前点击的store.updateState(['activeMenu', targetName])//路由跳转到当前点击的tab页//查询当前点击的tab页缓存路由参数let result = store.tabRouterList.find(item => item.path === targetName);//路由跳转且带上对应tab页的参数router.push({ path: targetName, query: result.query })}}//关闭全部tab页const closeAll = () => {//清空tabs数组store.editableTabs.length = 0//清空历史路由store.tabRouterList.length = 0//当前选中tab页设置为空store.updateState(['editableTabsValue', ''])//当前激活菜单设置为空store.updateState(['activeMenu', ''])//跳转到首页router.push('home')}//处理tab标签x按钮的移除function handleTabRemove(targetName) {//如果editableTabs列表不为空数组if (store.editableTabs.length > 0) {//如果当前所在的tab页路由地址与移除的tab页名一样,则移到前面一个tab页且路由跳转if (route.path === targetName) {let tabs = store.editableTabstabs.forEach((tab, index) => {if (tab.name === targetName) {//获取当前tab的后一个或者前一个let nextTab = tabs[index + 1] || tabs[index - 1]//如果有值就移到它上面,没有就是最后一个跳转到首页if (nextTab) {//根据name属性进行查询当前tab页的缓存路由参数let result = store.tabRouterList.find(item => item.path === nextTab.name);//路由跳转且带上对应tab页的参数router.push({ path: nextTab.name, query: result.query })} else {// 更改tab标签绑定值,选中选项卡的namestore.updateState(['editableTabsValue', ''])// 更改当前激活的菜单store.updateState(['activeMenu', ''])//当删除的是最后一个tab页的时候,跳转到首页router.push('home')}}})//从editableTabs中移除当前tab标签store.removeTab(targetName)} else {//从editableTabs中移除当前tab标签store.removeTab(targetName)}}}//tab标签被选中时触发的事件function handleTabClick(tab) {store.updateState(['activeMenu', tab.props.name])store.updateState(['editableTabsValue', tab.props.name])// 判断当前url地址和即将跳转的是否一致,不一致进行跳转,防止跳转多次if (tab.props.name !== route.path) {// 根据name属性进行查询let result = store.tabRouterList.find(item => item.path === tab.props.name);//路由跳转且带上对应tab页的参数router.push({ path: tab.props.name, query: result.query })}}//退出登录方法function logout() {}
</script><style lang="less" scoped>//设置高度:deep(.el-tabs__nav-scroll) {height: 60px;}//去掉el-tabs的边框:deep(.el-tabs) {border: none;}.header {height: 62px;position: absolute;right: 30px;top: 0px;z-index: 1; //不设置这个,el-down点击出不来,被tab标签页长度挡住了display: flex;align-items: center; //垂直居中}//tab标签页里面字体设置.label {color: #1B68B6 !important; //激活标签页高亮font-size: 16px;}:deep(.el-tabs__item) {&:hover {span {color: #1B68B6 !important; //鼠标移到标签页高亮}}}
</style>
views文件下layout文件夹下的components文件夹下的appMain.vue代码如下:
<!--通用布局页面主体内容-->
<template><!-- 路由视图对象 --><router-view v-slot="{ Component }"><!--include主要解决关闭tab页时,同时销毁该组件,防止再次重新打开时数据还在的情况。注意:组件name名必须和路由name名一致,否则会导致组件不缓存的情况。--><keep-alive :include="tabsNames"><component :is="Component"></component></keep-alive></router-view>
</template><script setup name="AppMain">import useUserStore from "@/store/modules/userStore"import { computed } from "vue"const store = useUserStore()//将路由里面的name取出来作为一个数组const tabsNames = computed(() => store.tabRouterList.map((item) => item.name))
</script><style scoped></style>
这里之所以不把appMain.vue的路由视图对象写到navbar.vue里面的el-tabs里面,是因为写到el-tabs里面后,当你打开多个tab页的时候,当你向后端发送请求时,打开了多少个tab页,就会重复发送多少个后端接口请求,所以这里将它拆开写,el-tabs里面内容实际是个空的。
通过element-plus里面的样式让它内边距为0,看着内容像是放在了el-tabs里面。如下:
//让el-tabs__content不显示内容
.el-tabs--border-card>.el-tabs__content{padding: 0px;
}
styles文件夹下的element-plus.less样式代码如下:
//移除头部间距,让宽度100%占满
.el-header{--el-header-padding:0px;min-width: 1000px;
}
//未打开tab页右边背景色
.el-tabs__nav-scroll{background: #FFFFFF;
}
//设置内容背景颜色
.el-main{background: #F2F6FB;min-width: 1000px;
}
//让el-tabs__content不显示内容
.el-tabs--border-card>.el-tabs__content{padding: 0px;
}
//Tabs标签页全局样式
.el-tabs__item {height: 64px;font-size: 16px;background: #ffffff; //未选中Tabs页背景颜色
}
//Tabs标签页选中样式
.el-tabs--border-card > .el-tabs__header .el-tabs__item.is-active {color: #1b68b6; //选中Tabs标签页后字体颜色background-color: #e3edf7; //选中Tabs标签页后背景颜色
}
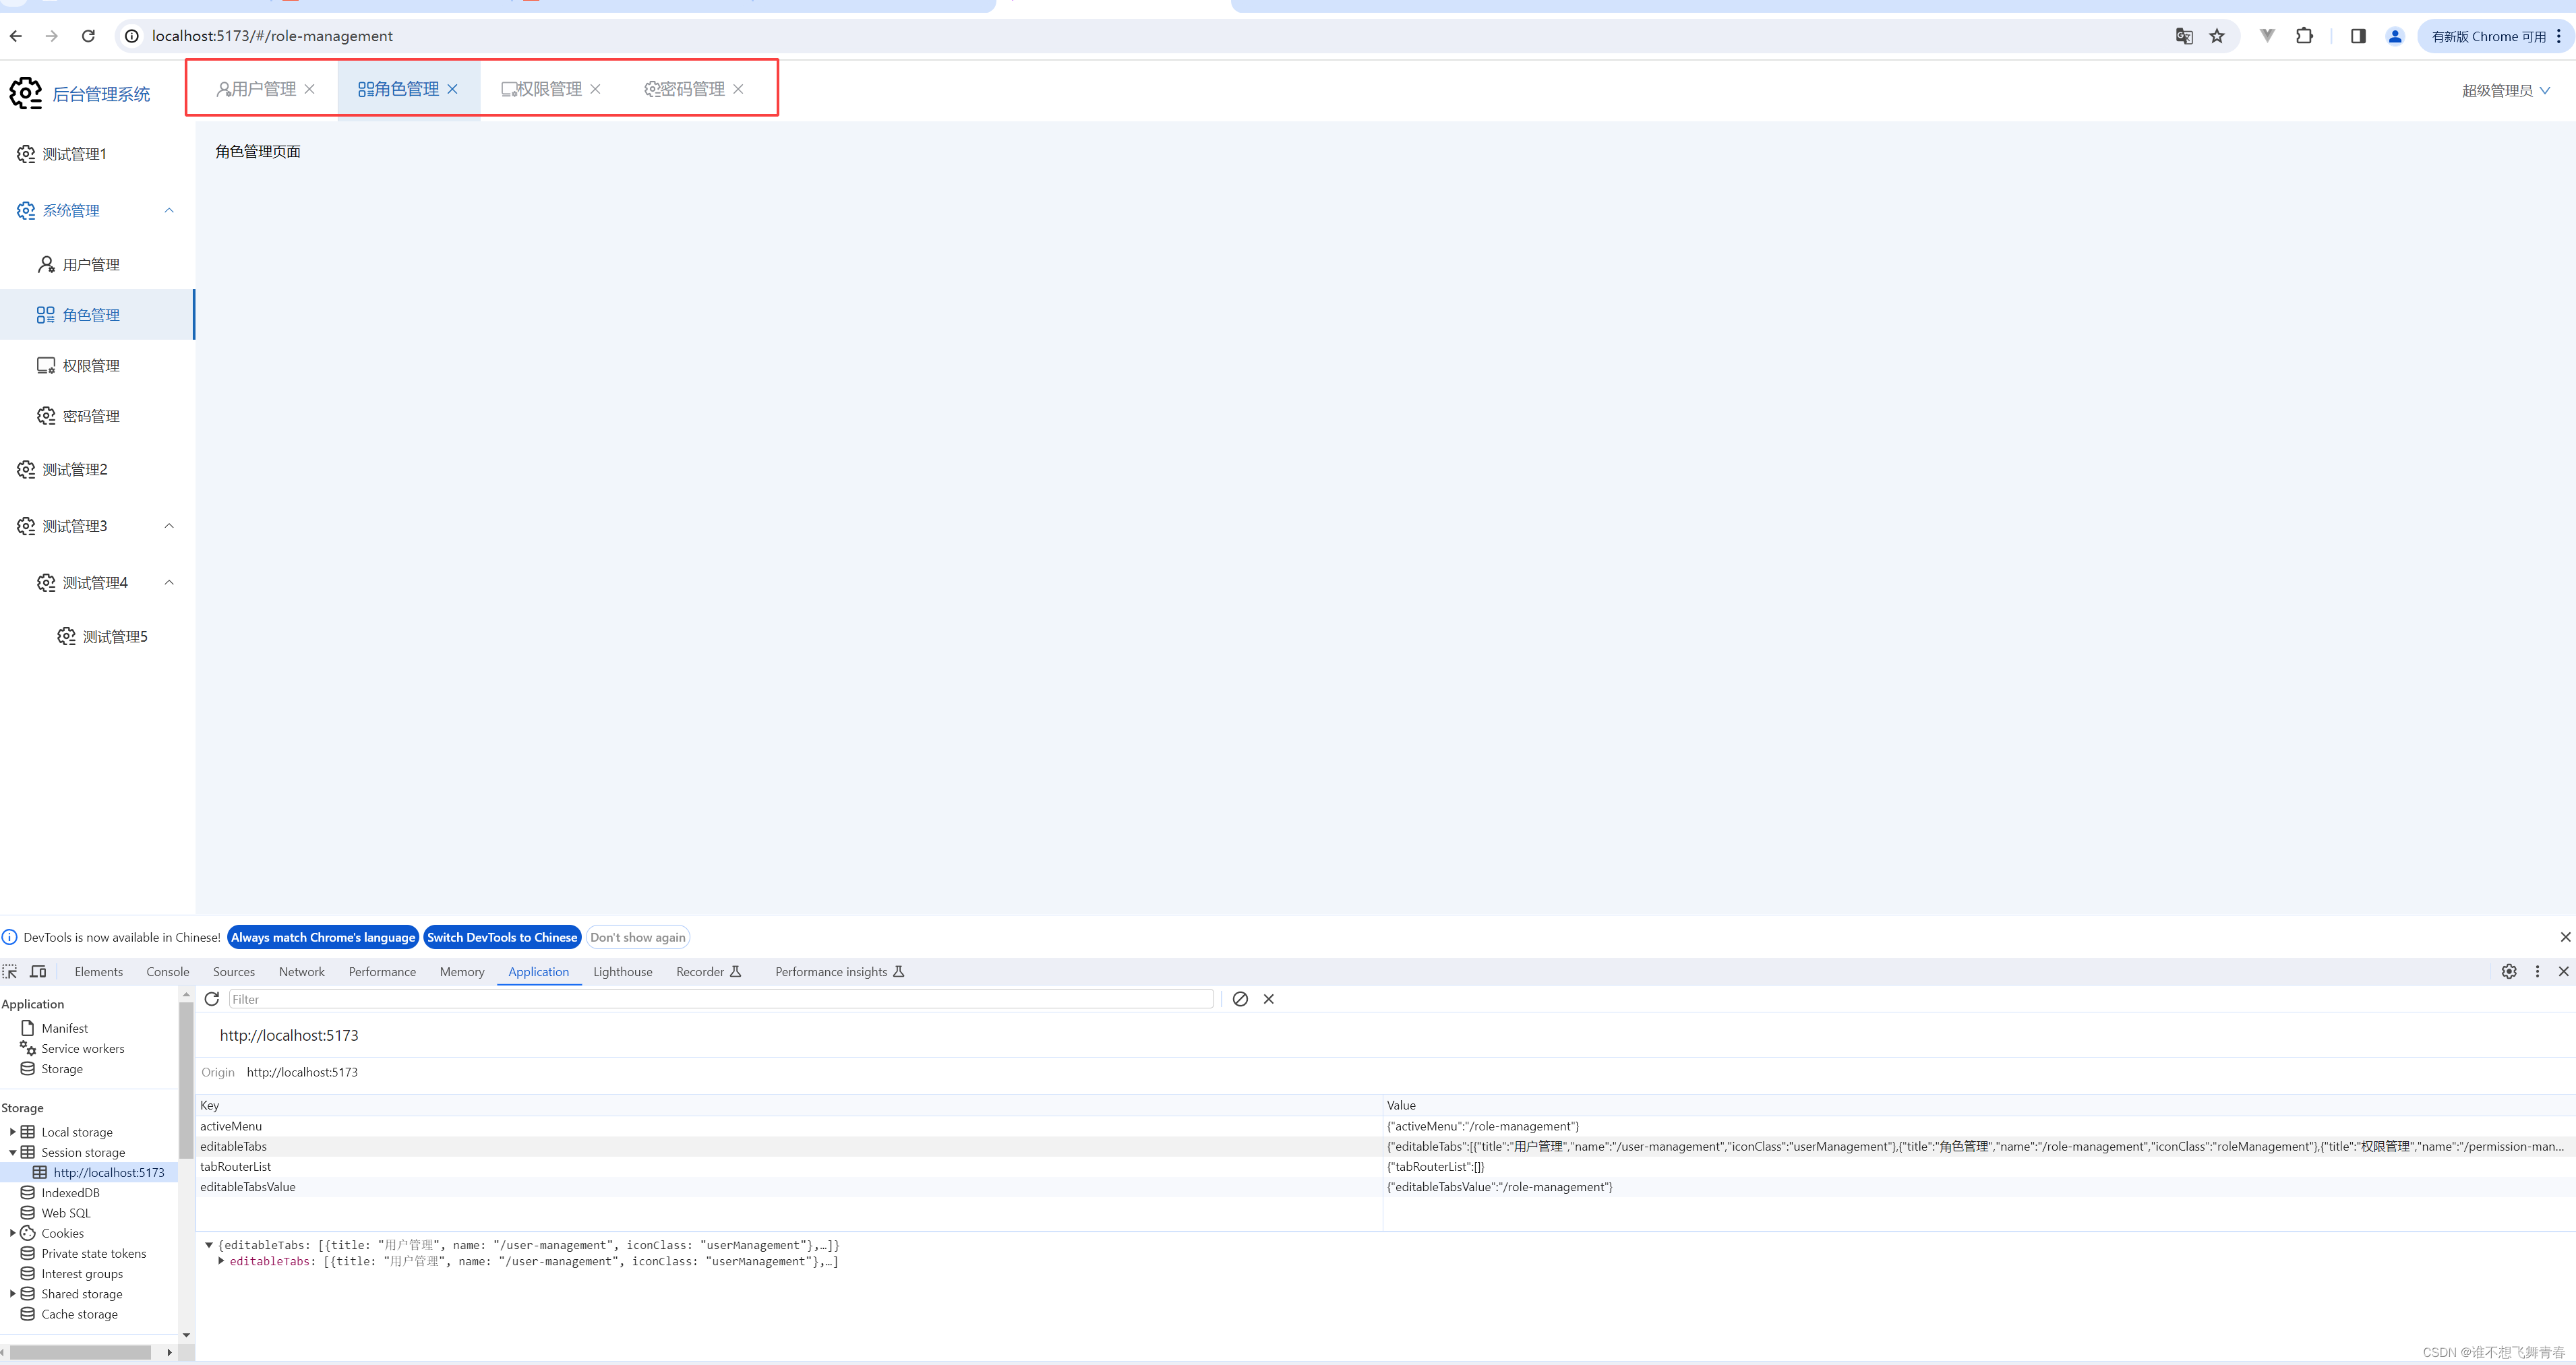
浏览器结果如下,点击多个菜单栏打开多个tab页结果:
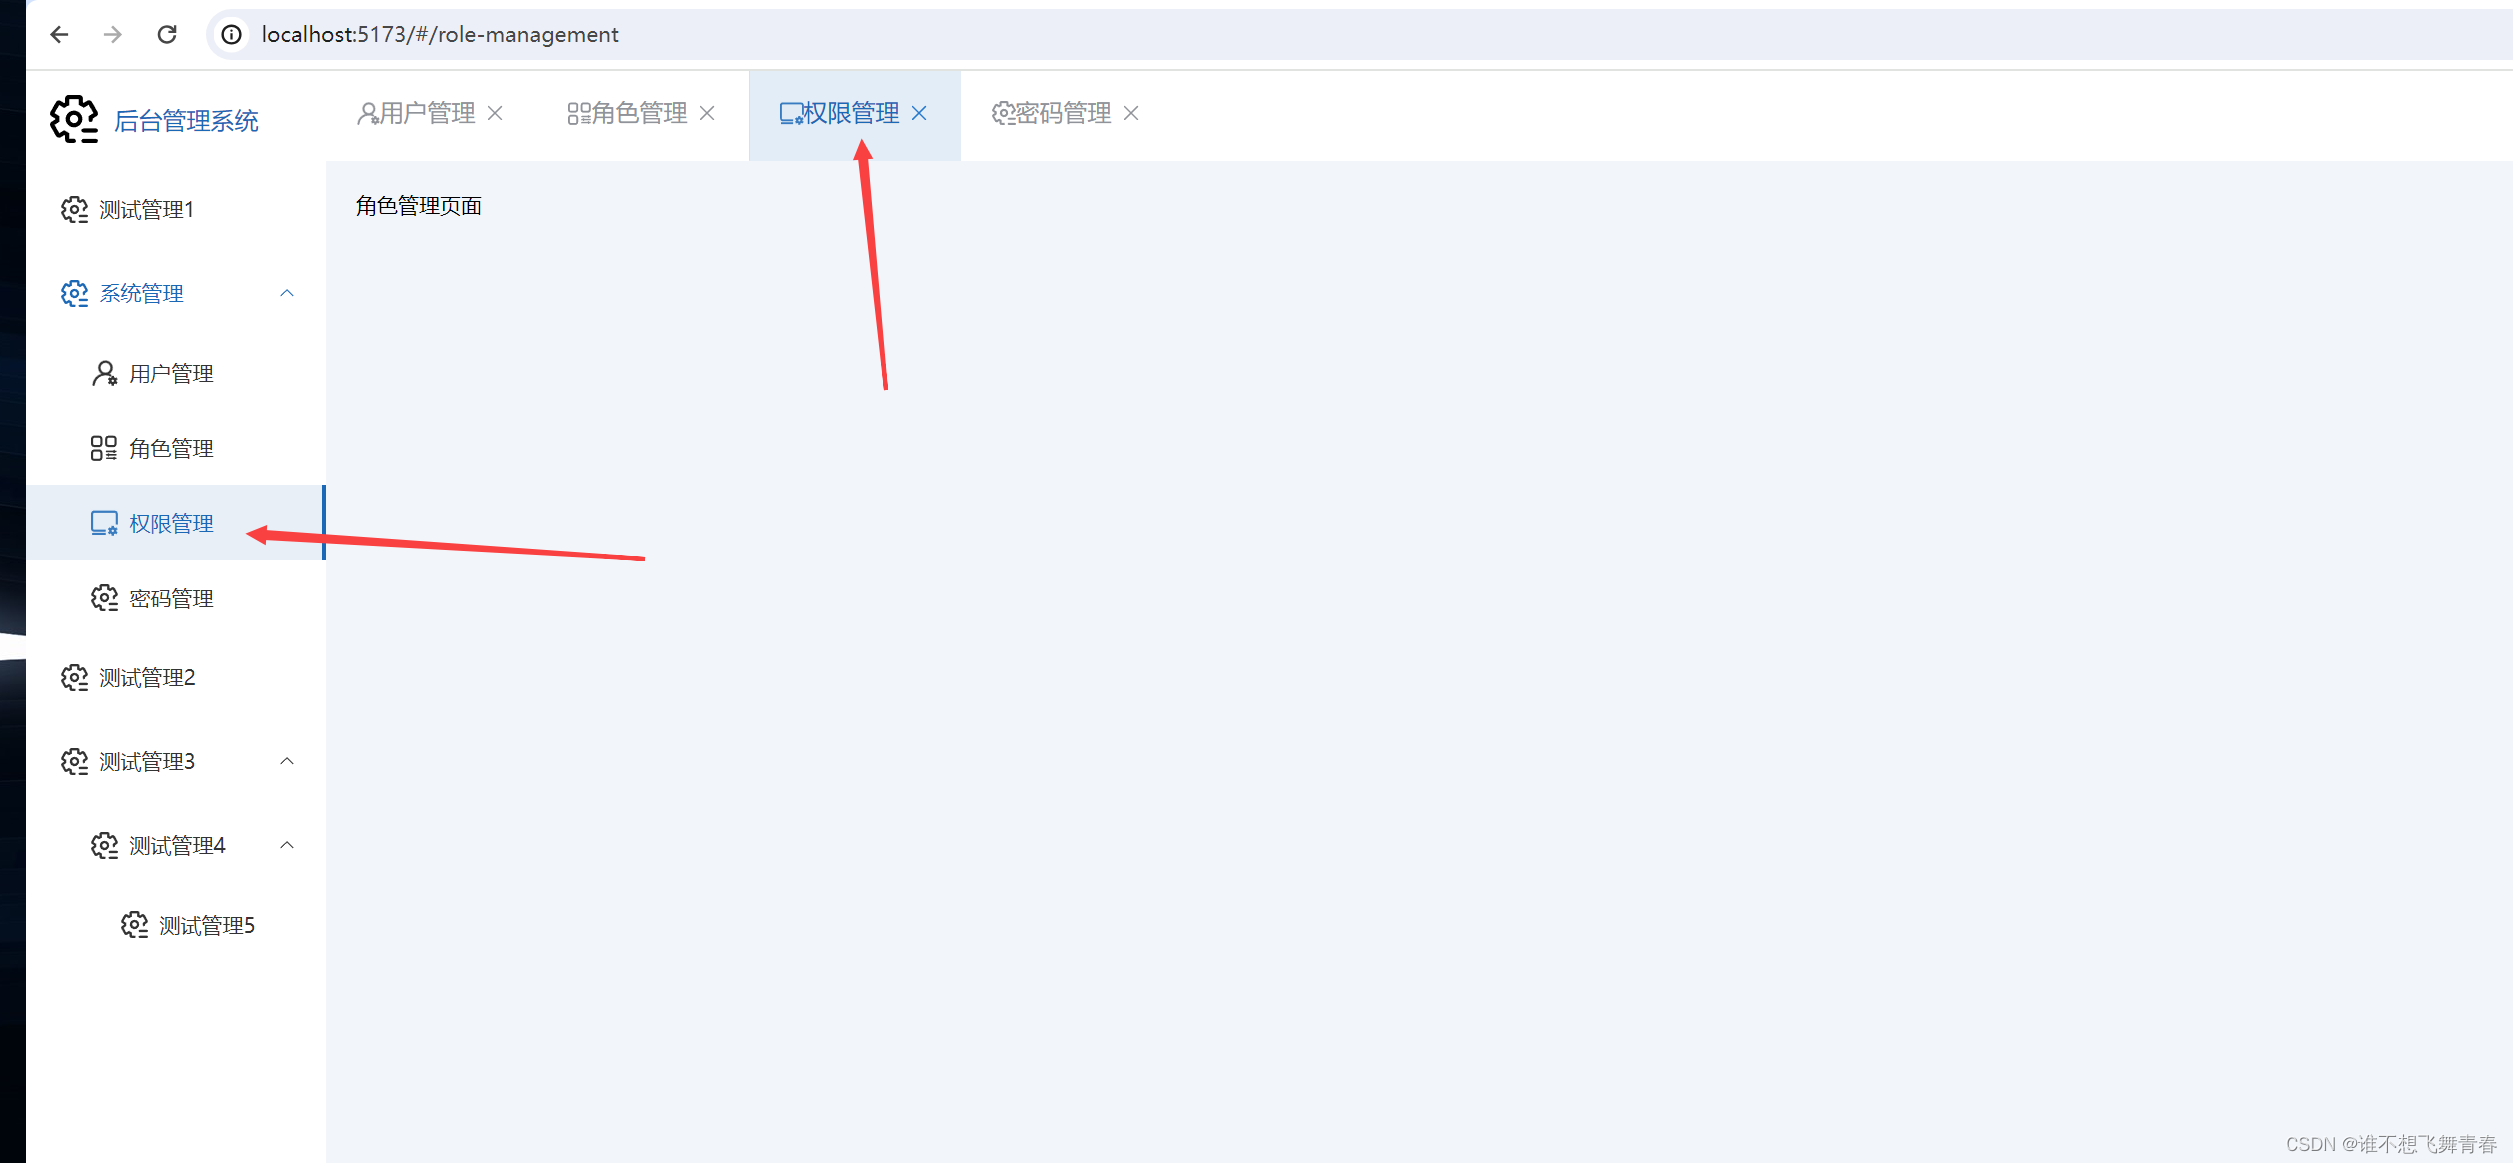
点击tab页的同时,菜单栏也来到对应的选项,如下:
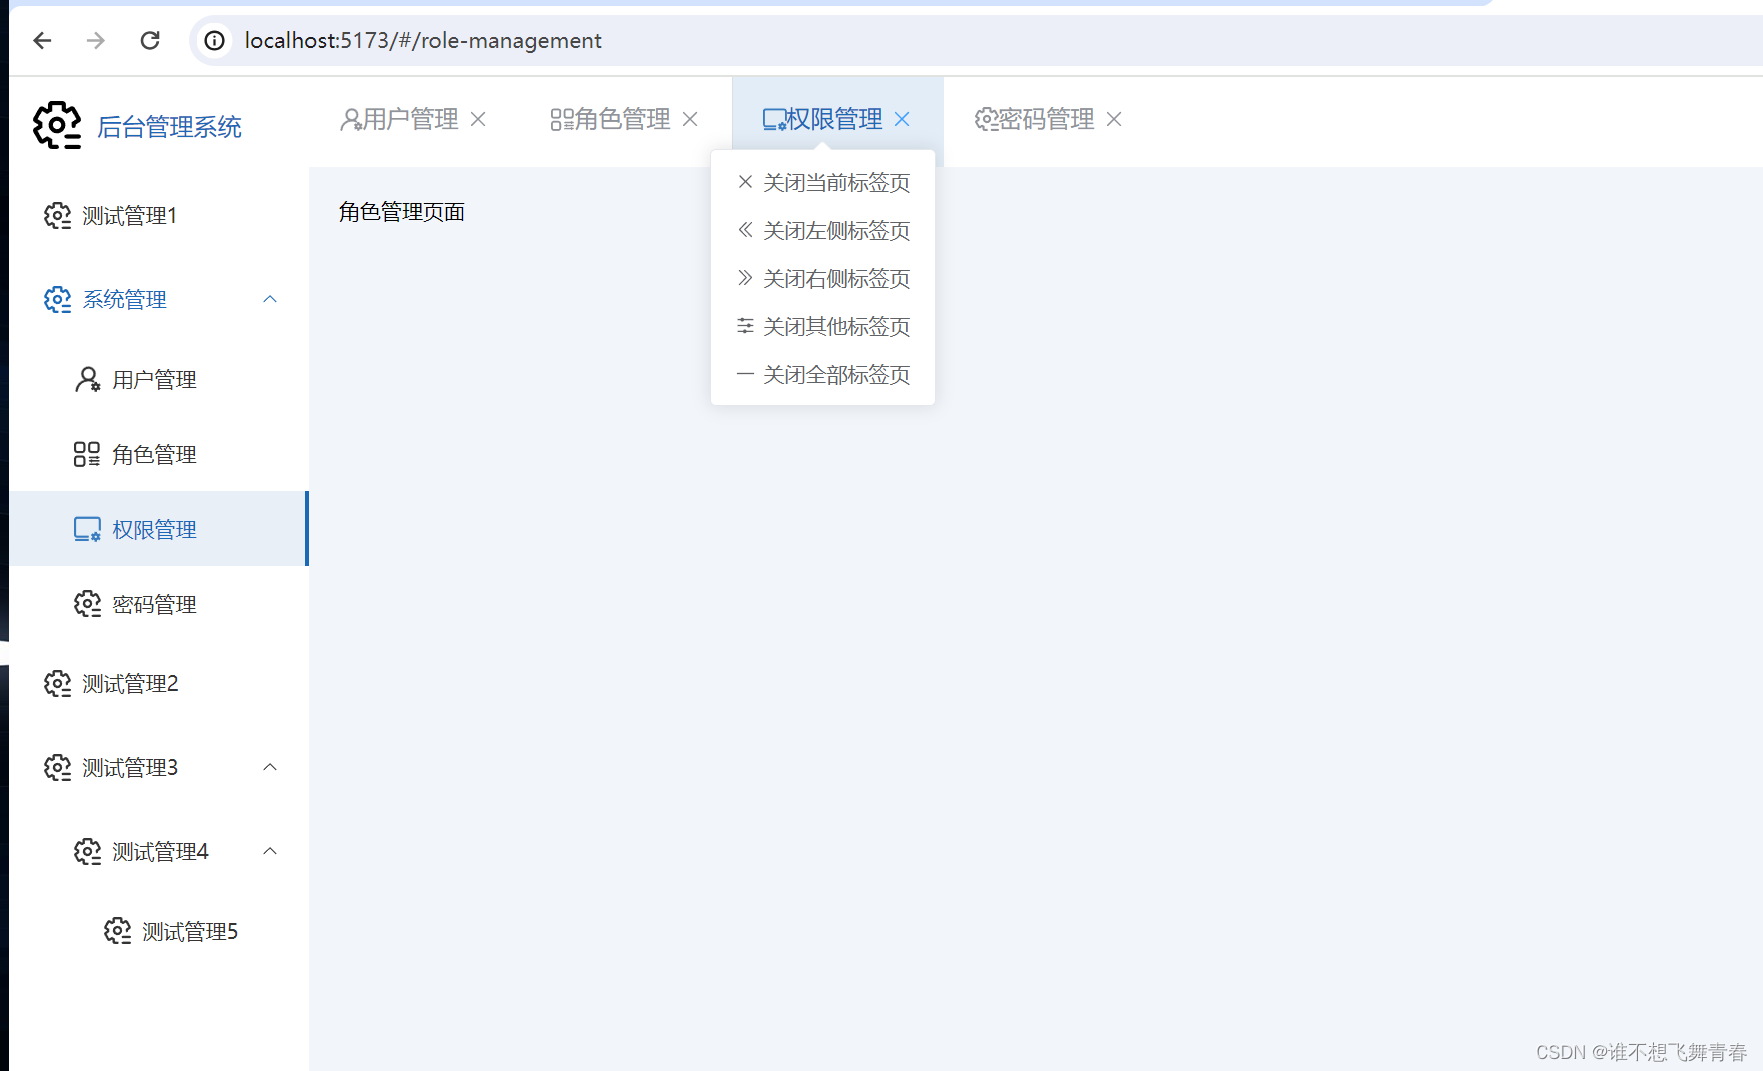
鼠标放到tab页上面的字体上面,然后鼠标右键菜单,会显示对应的关闭菜单下拉选项,如下:
到这里tab页相关的代码就写完了,但是有几个问题需要注意,第一个问题就是你在浏览器上面直接输入路由地址,它不会打开或者跳转到对应tab页上面。第2个问题就是在实际开发中,如果页面跳转需要携带参数过去,当你切换点击tab页的时候,参数会丢失问题。对于参数会丢失问题,所以才在userStore.js里面写了一个tabRouterList属性来存储历史路由及参数。
解决浏览器输入地址时不会打开tab页问题和切换tab页时参数丢失问题
在router文件夹下面的index.js文件,将代码修改为如下:
//引入router路由做页面请求
import { createRouter,createWebHashHistory } from 'vue-router'
/* Layout通用组件 */
import Layout from '../views/layout/layout'
//引入pinia里面的state属性和方法
import useUserStore from "@/store/modules/userStore"const routes = [{path: '/404', component: () => import('@/views/404')},//必须要把组件放在Layout的children里面,才能在侧边栏的右侧显示页面内容,否则不加载通用架构直接在当前空白页面渲染内容,如:404页面{path: '',component: Layout,redirect: '/home',children: [{path: 'home',name: 'home',component: () => import('@/views/home/index'),meta: {title: '首页', icon: 'home'}},{path: 'test-management1',name: 'test-management1',component: () => import('@/views/test-management1/index'),meta: {title: '测试管理1', icon: 'systemManagement'}},{path: 'user-management',name: 'user-management',component: () => import('@/views/system-management/user-management'),meta: {title: '用户管理', icon: 'userManagement'}},{path: 'role-management',name: 'role-management',component: () => import('@/views/system-management/role-management'),meta: {title: '角色管理', icon: 'roleManagement'}},{path: 'permission-management',name: 'permission-management',component: () => import('@/views/system-management/permission-management'),meta: {title: '权限管理', icon: 'permissionManagement'}},{path: 'password-management',name: 'password-management',component: () => import('@/views/system-management/password-management'),meta: {title: '密码管理', icon: 'systemManagement'}},{path: 'test-management2',name: 'test-management2',component: () => import('@/views/test-management2/index'),meta: {title: '测试管理2', icon: 'systemManagement'}},{path: 'test-management5',name: 'test-management5',component: () => import('@/views/test-management5/index'),meta: {title: '测试管理5', icon: 'systemManagement'}}]}
]// 3. 创建路由实例并传递 `routes` 配置
const router = createRouter({// 4. 内部提供了 history 模式的实现。为了简单起见,我们在这里使用 hash 模式。history: createWebHashHistory(),routes, // `routes: routes` 的缩写
})//黑名单,在该黑名单里面的路由将不会动态加载tab页
const blackList=['/404','/home']const handleToParams = (to) => {const route = {fullPath: to.fullPath,meta: to.meta,name: to.name,params: to.params,path: to.path,query: to.query,}return route
}function  handleRouteInEditableTabs(to,store) {//判断当前路由的标题是否已经在editableTabs里,如果不在则动态添加tab页const indexInEditableTabs = store.editableTabs.findIndex((item) => item.title === to.meta.title)//当前路由的标题已经在editableTabs里if (indexInEditableTabs !== -1) {//判断tabRouterList是否已经存在相同的路由const indexInTabRouterList = store.tabRouterList.findIndex((item) => item.name === to.name)//当前路由的name已经在tabRouterList里面if (indexInTabRouterList !== -1) {//根据当前路由名称找到对应的历史路由let result = store.tabRouterList.find(item => item.name === to.name)//在name相同但是路由的query参数不一样,则替换为这个最新的(将对象转为string字符串比较,即可判断2个对象属性与值是否完全一样)let queryMatched=JSON.stringify(result.query) === JSON.stringify(to.query)//如果为false,则替换当前路由参数if (!queryMatched) {//若存在,则从原始数组中移除该对象store.tabRouterList = store.tabRouterList.filter((item) => item.name !== to.name)//重新添加这个新路由store.tabRouterList.push(handleToParams(to))}} else {//点击菜单栏时,如果不在则添加该路由store.tabRouterList.push(handleToParams(to))}} else {//判断该路由是否在黑名单里面,不在则动态添加tab页if (!blackList.includes(to.path)) {//如果不在editableTabs里面,那么就在editableTabs里面添加这个tab页store.editableTabs.push({title: to.meta.title,name: to.path,iconClass: to.meta.icon,})//点击页面中的某个按钮进行页面跳转的时候,如果不在则添加该路由里面部分字段store.tabRouterList.push(handleToParams(to))}}
}//路由前置守卫
router.beforeEach((to, from, next) => {//如果没有匹配到路由,则跳转到404页面if (to.matched.length === 0) {next("/404")} else {//路由发生变化修改页面titledocument.title = to.meta.title//使用pinia里面的全局状态属性const store = useUserStore()//更改tab标签绑定值,选中选项卡的namestore.updateState(["editableTabsValue", to.path])//更改当前激活的菜单store.updateState(["activeMenu", to.path])//动态添加tab页及tab页切换时参数也跟着切换handleRouteInEditableTabs(to,store)next()}
})//导出路由
export default router
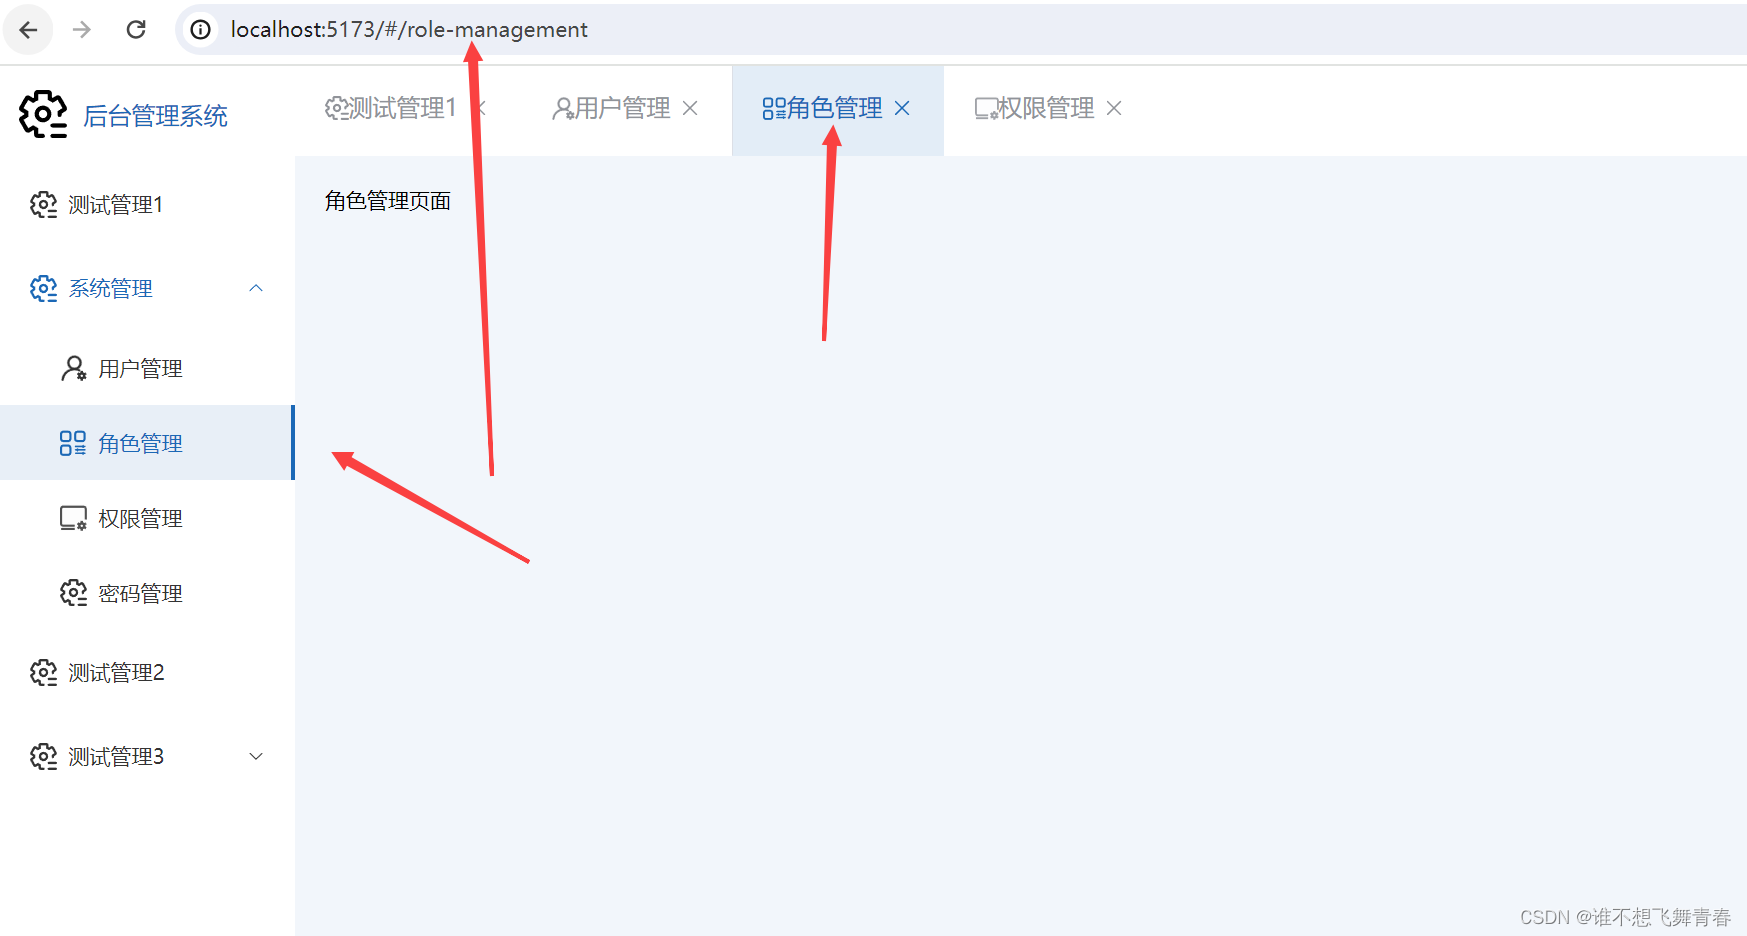
浏览器结果如下,在浏览器直接输入相应路由,会自动跳转到对应的tab,如下:
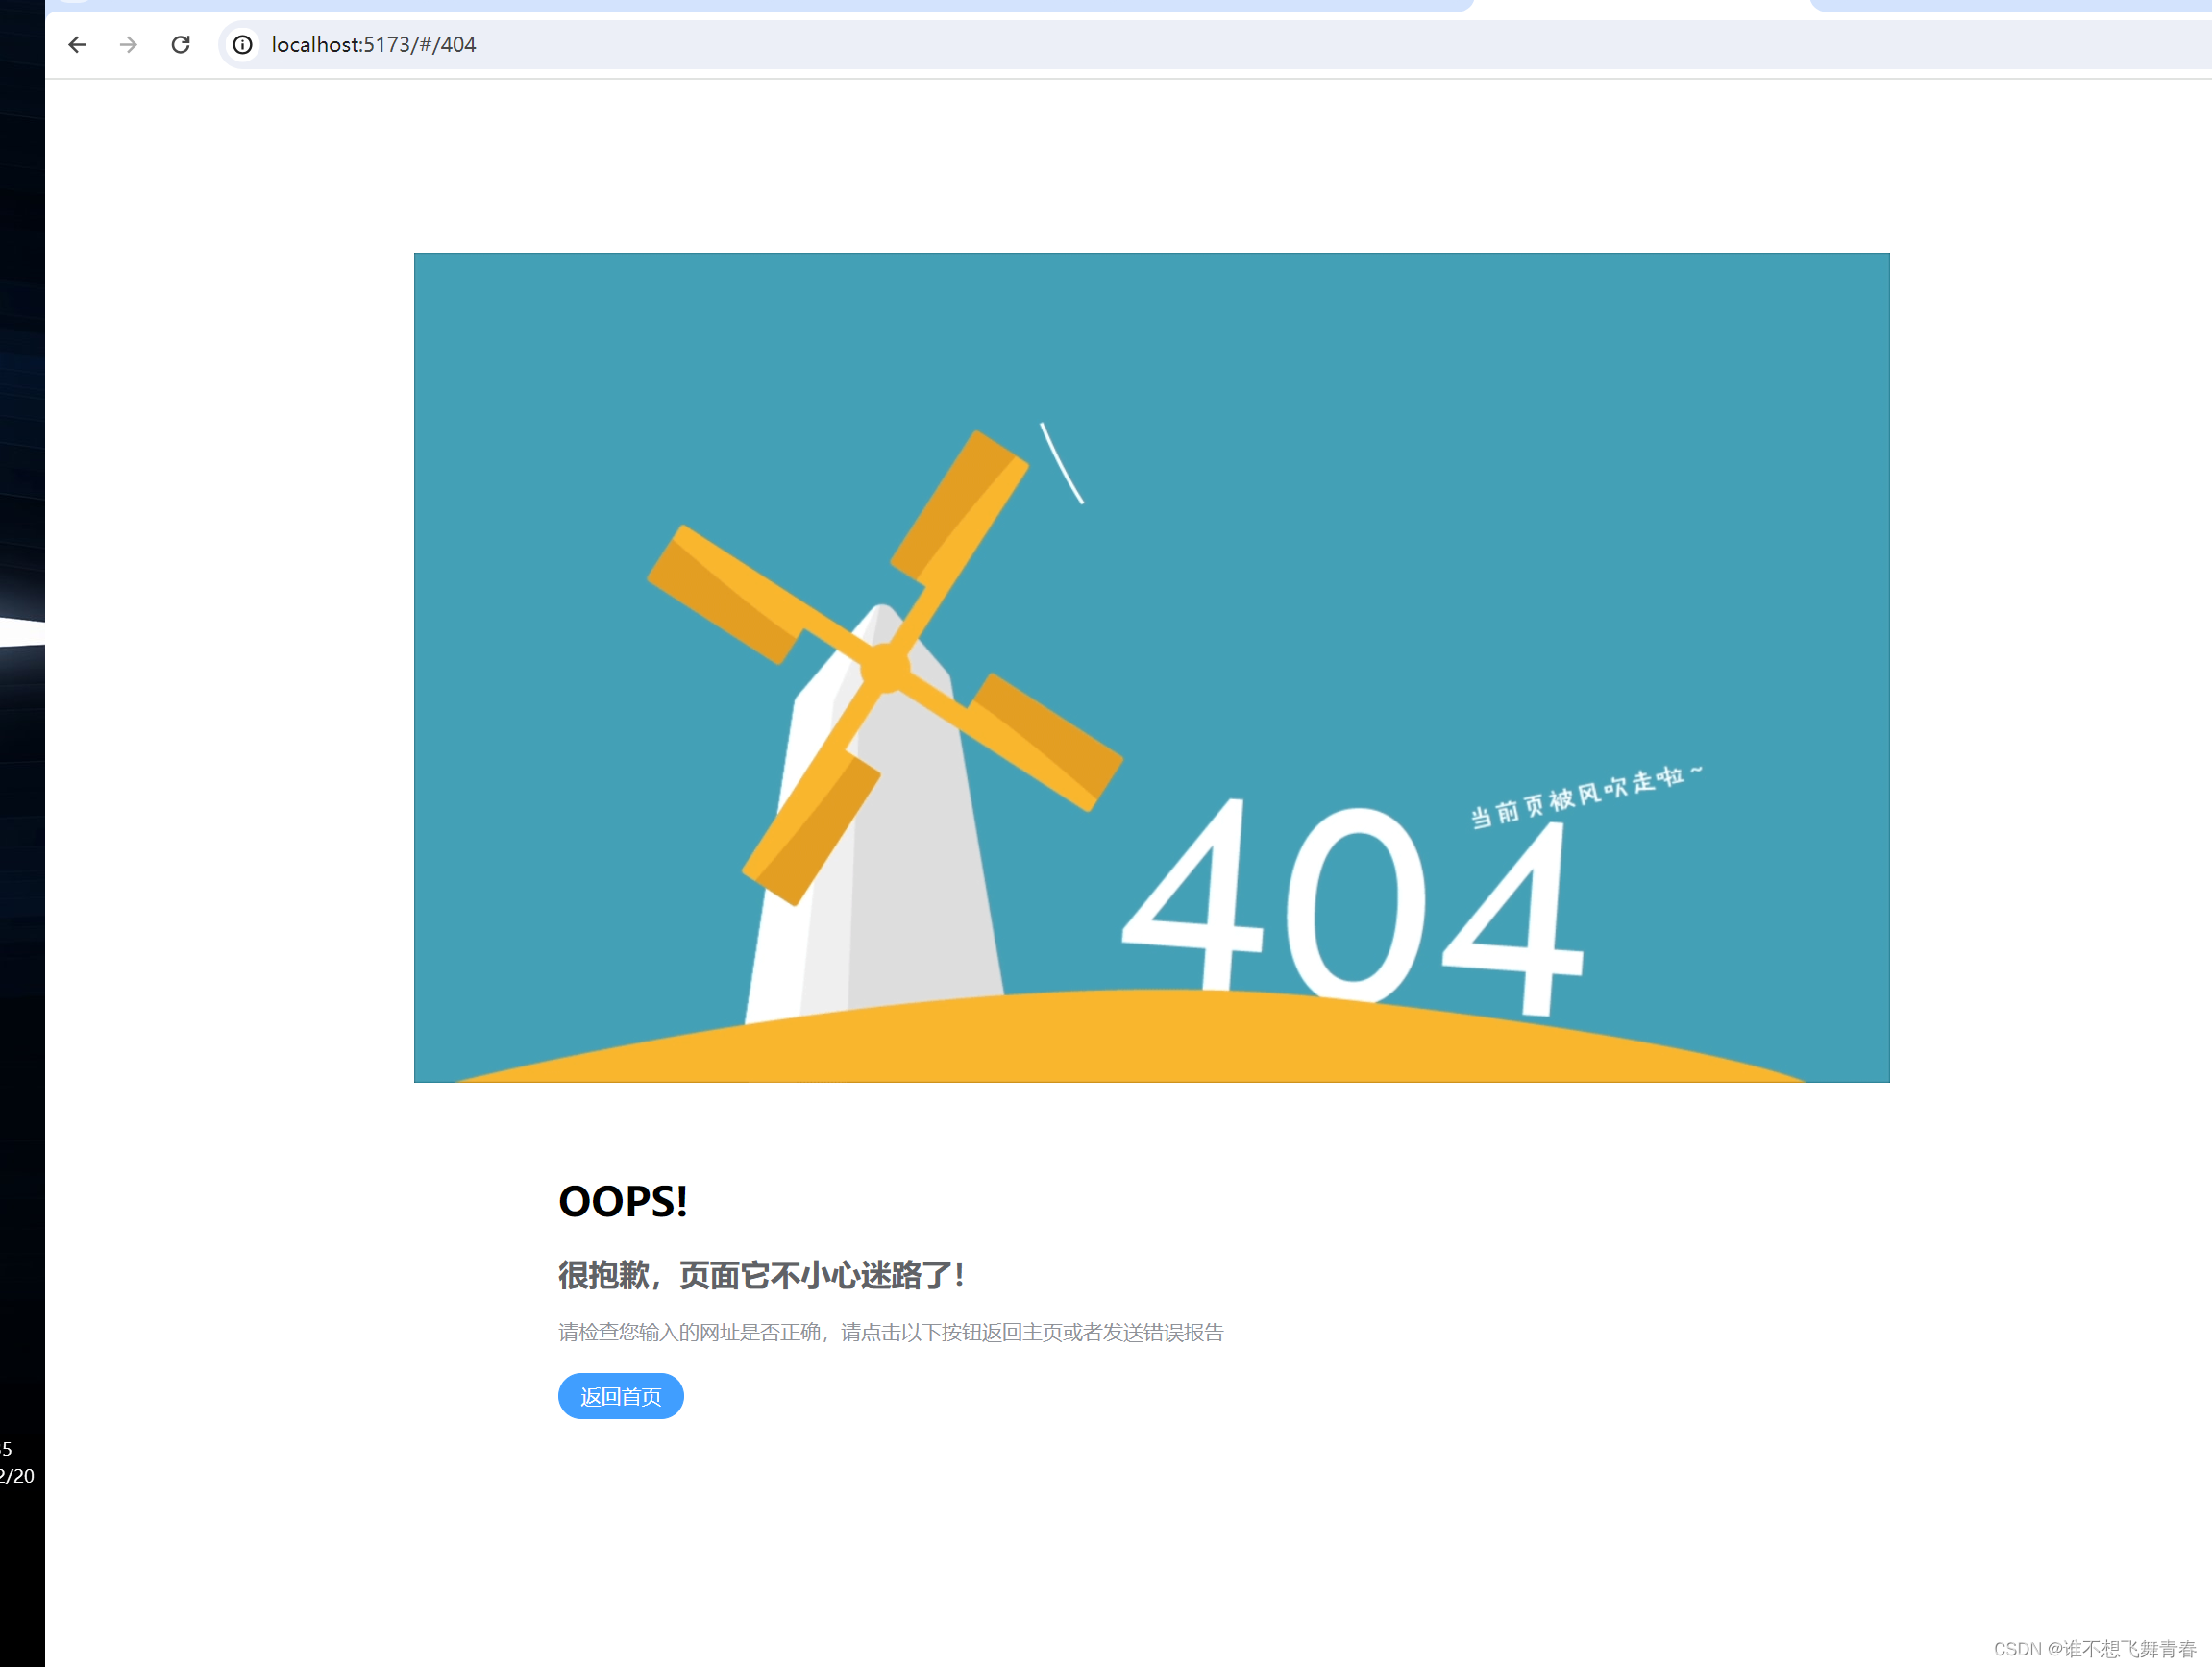
输入不存在的路由会直接跳转到404页面,如下:

从用户管理携带参数跳转到角色管理,测试如下:
views文件夹下面的system-management文件夹下的user-management.vue代码如下:
<template><div>用户管理页面<el-button type="primary"@click="toRoleManagement(1)">跳转到角色管理</el-button></div>
</template><script setup name="user-management">import { useRouter } from "vue-router"//使用router跳转路由const router=useRouter()const toRoleManagement = (id) => {//跳转到邮单详情里面router.push({ path: 'role-management', query: { id: id } })}
</script><style scoped></style>
views文件夹下面的system-management文件夹下的role-management.vue代码如下:
<template><div>角色管理页面</div>
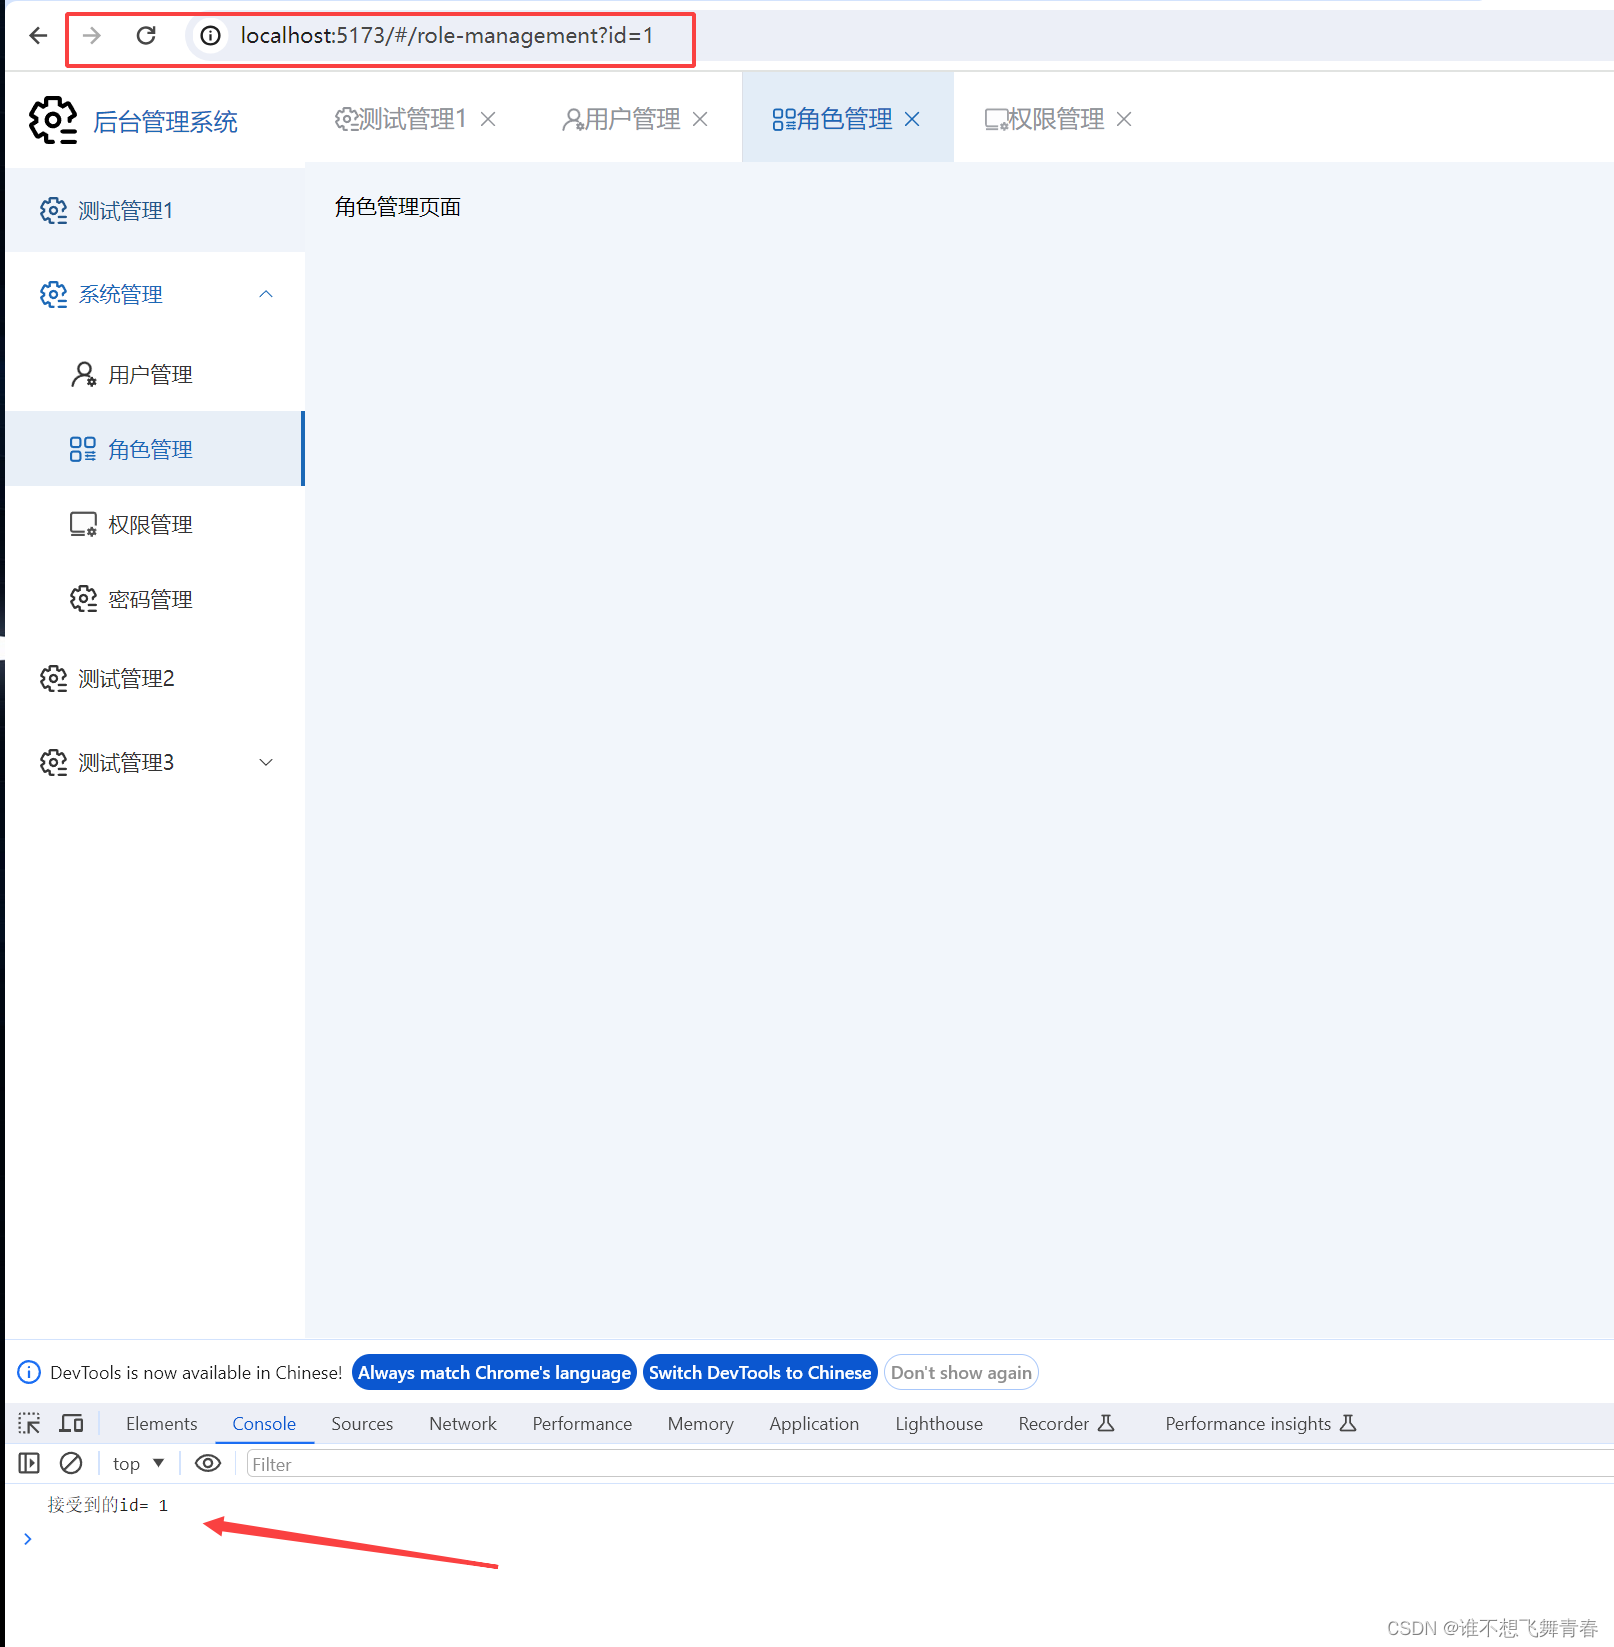
</template><script setup name="role-management">import {onActivated} from 'vue'import { useRoute } from "vue-router"//使用route接受路由传过来的参数const route=useRoute()//每次页面初始化时或者在邮件管理页面点击邮件详情时执行该方法onActivated(()=>{const id=route.query.idconsole.info("接受到的id=",id)})
</script><style scoped></style>
浏览器结果如下:
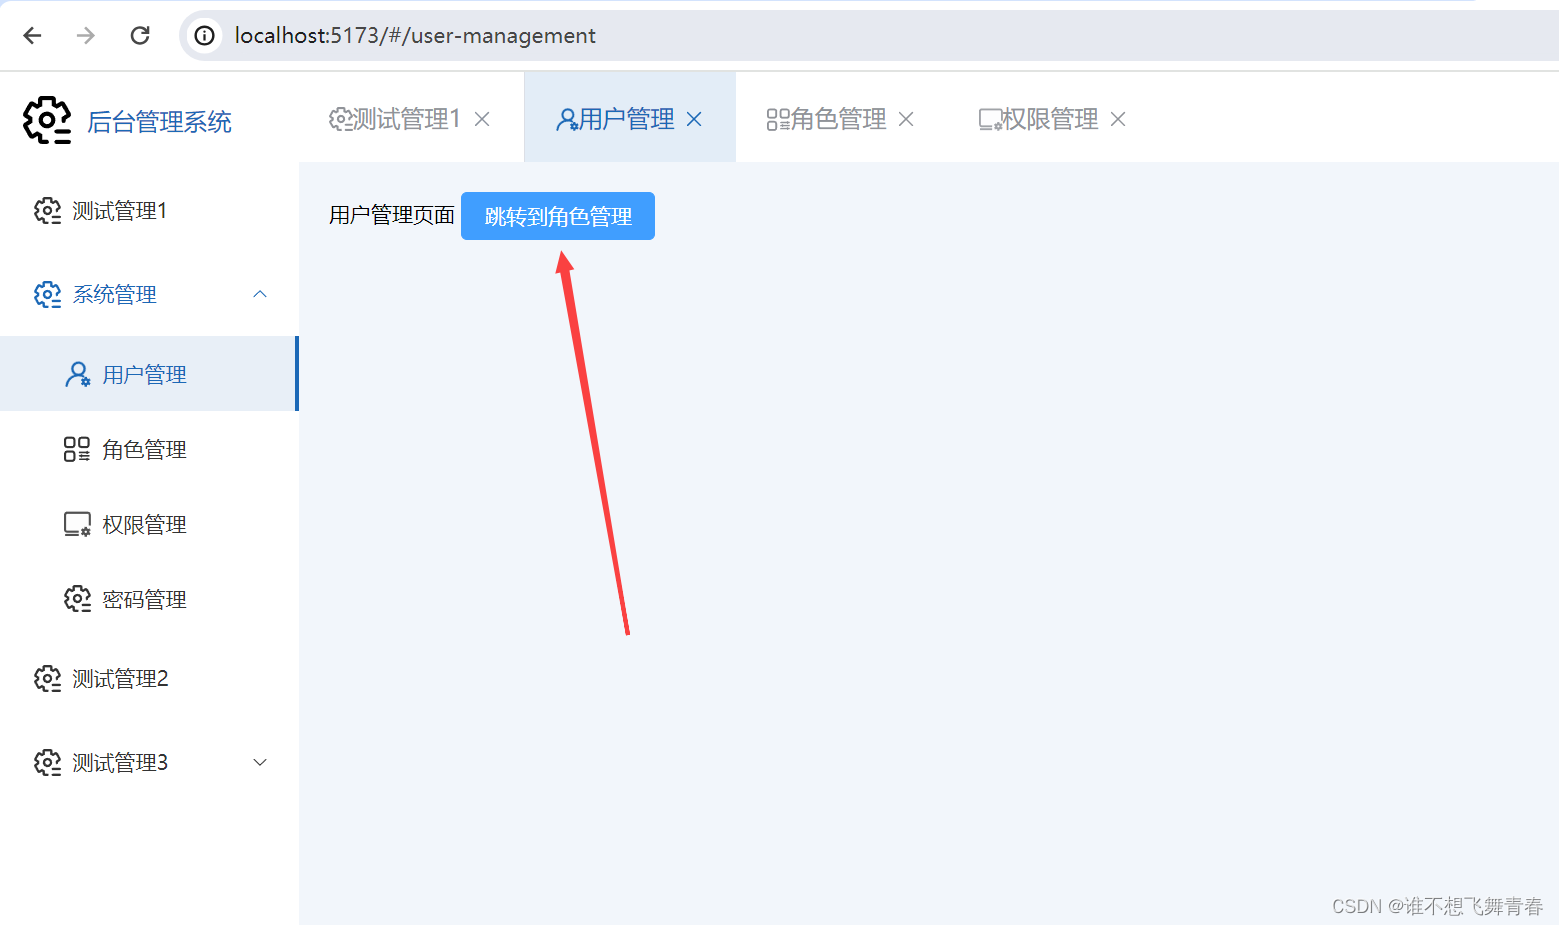
点击跳转到角色管理按钮结果如下:
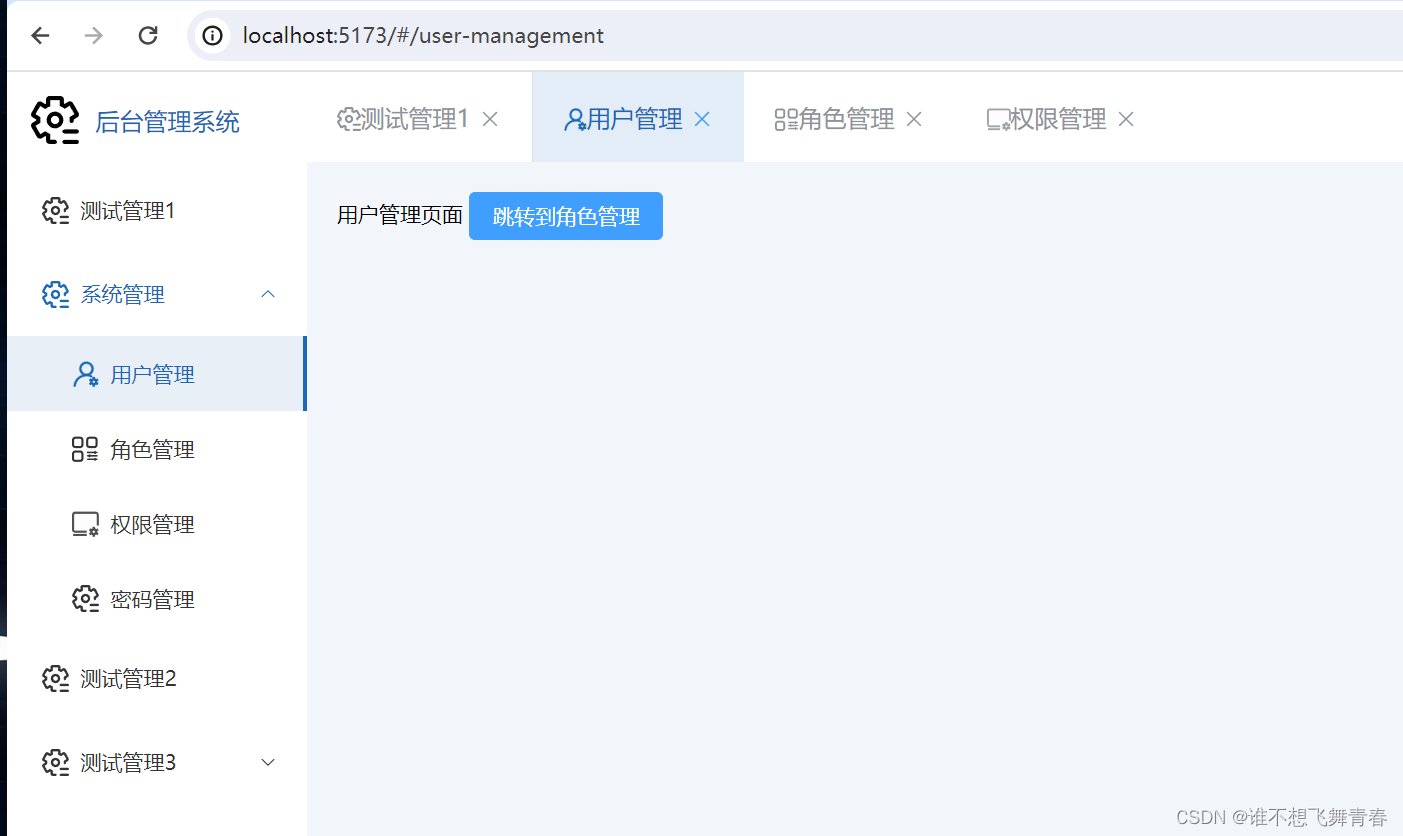
然后再次点击用户管理tab页,如下:
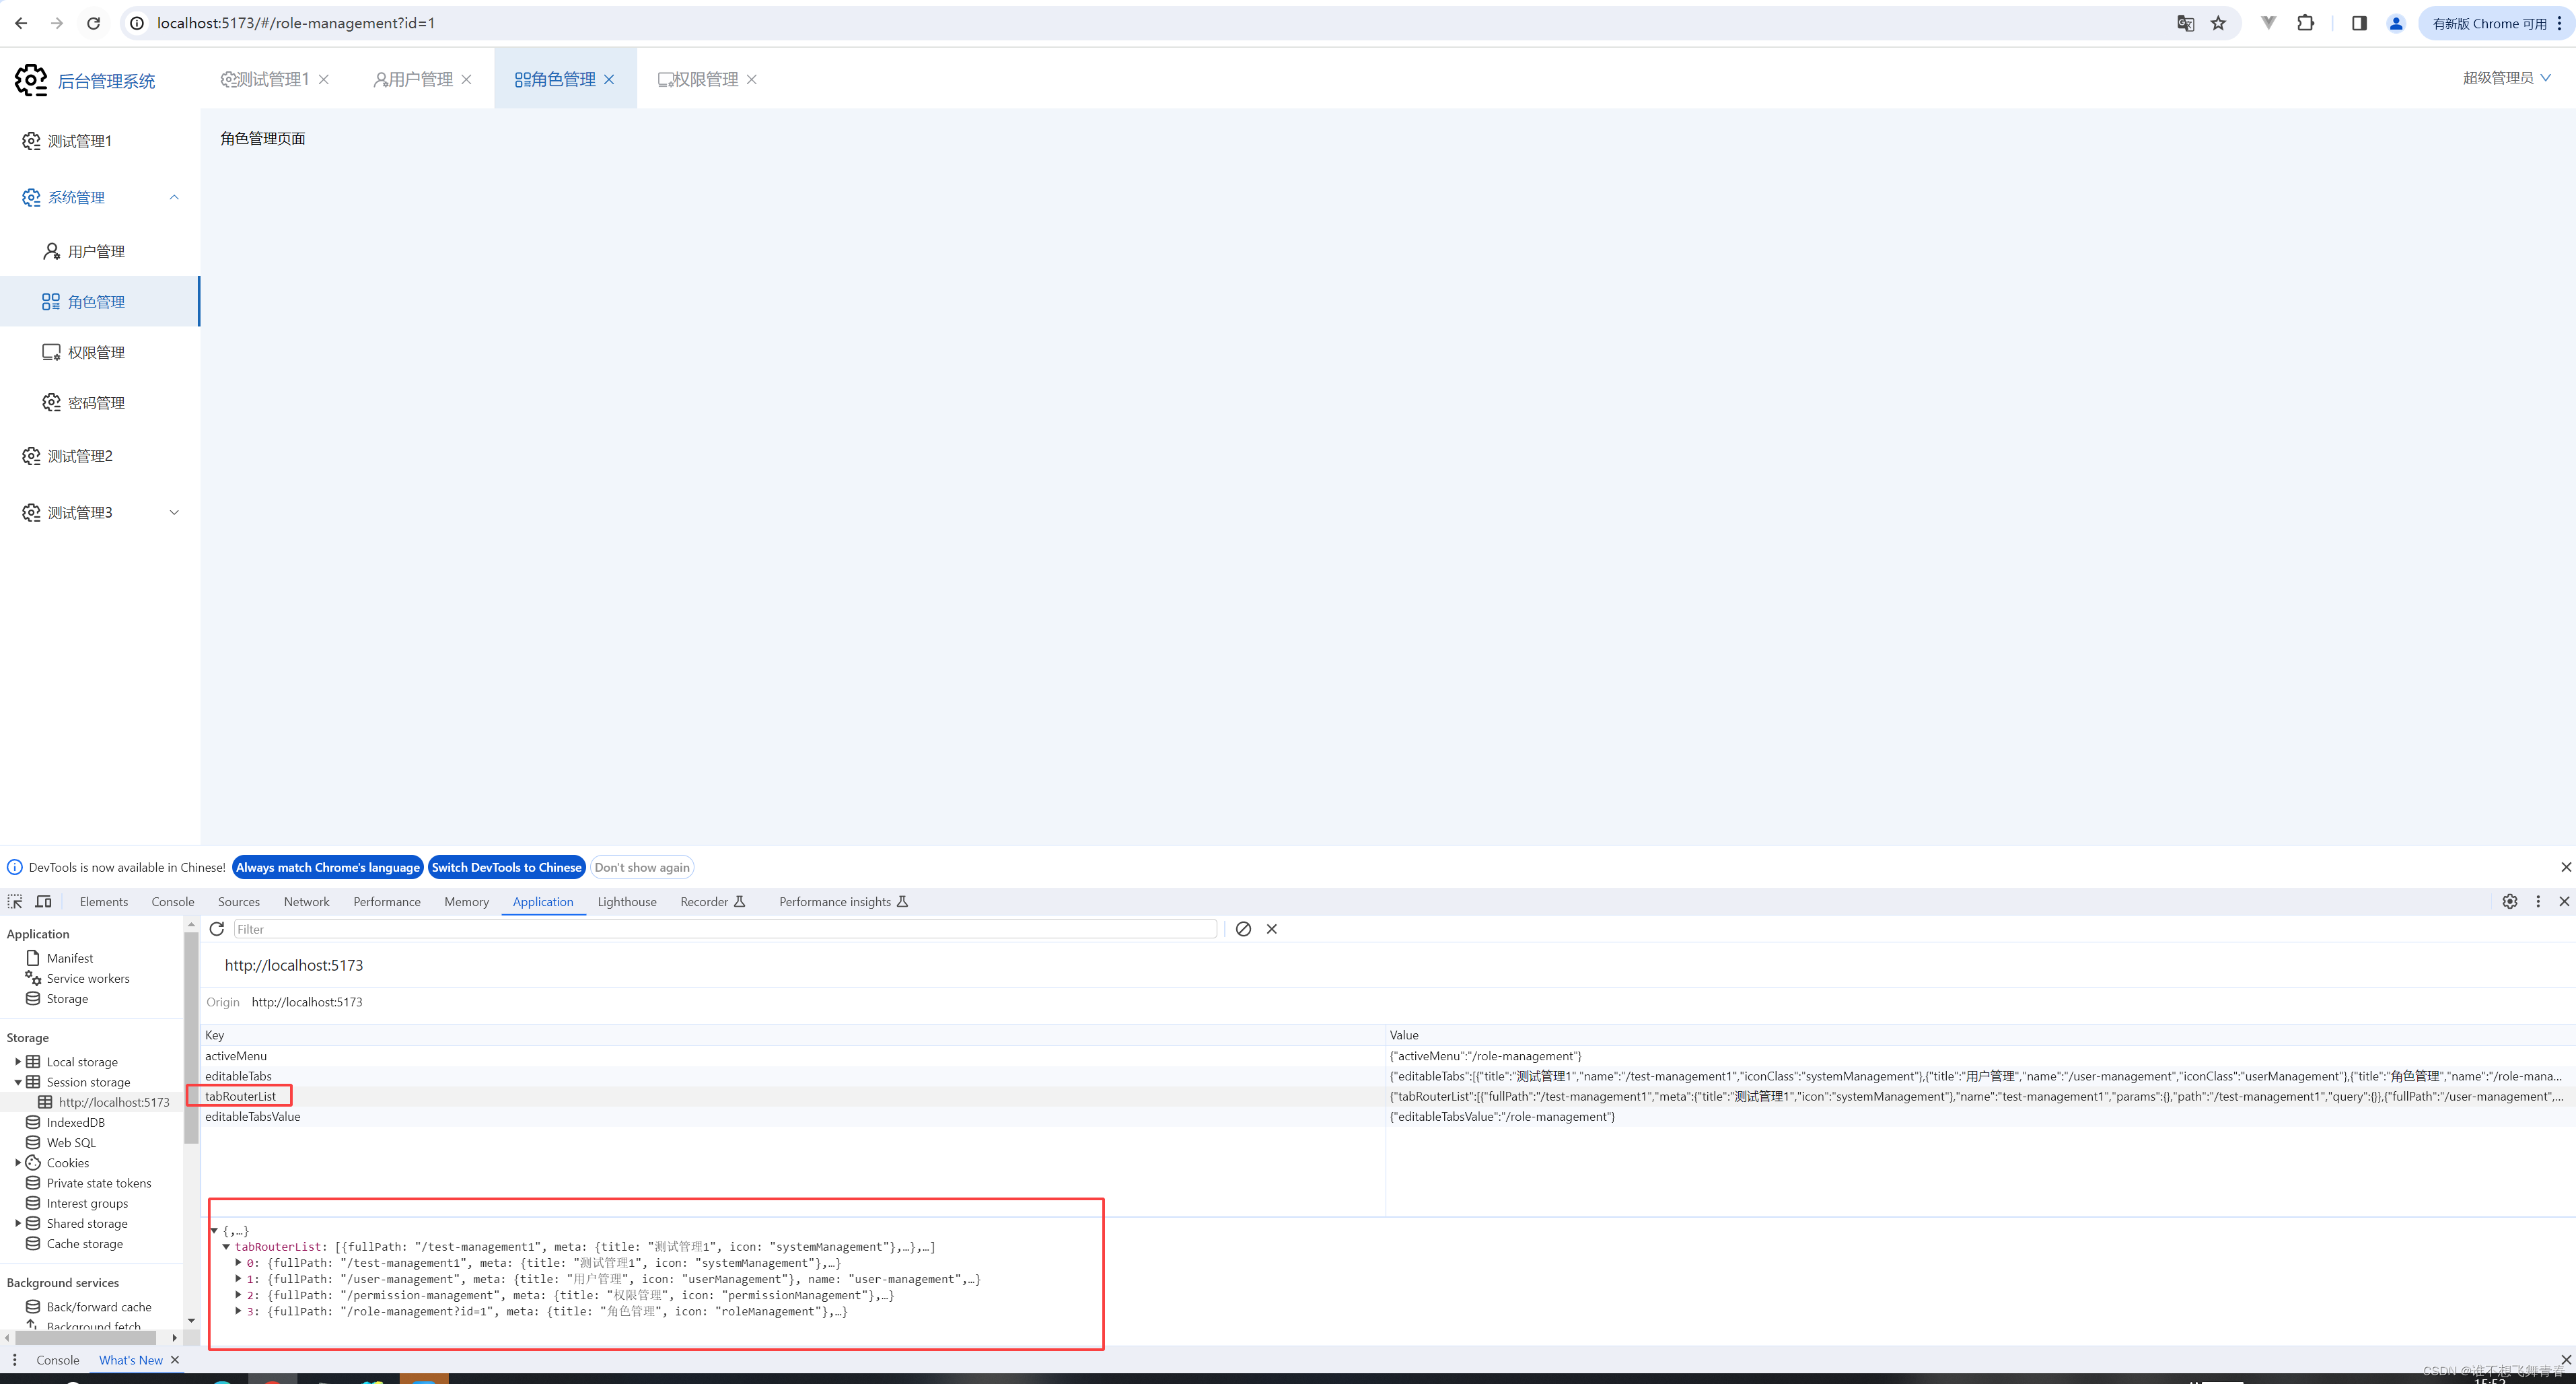
再次点击角色管理tab页,发现参数依旧在没有消失。问题解决。
到这里Vue3+vite搭建基础架构的所有代码就结束了。只需要根据实际需求添加对应页面即可。这里附上该示例项目的所有代码地址,如果有需要,自行下载即可。
Vue3+vite搭建基础架构代码链接:https://download.csdn.net/download/weixin_48040732/88855369


