一、httpd 安装组成
http 服务基于 C/S 结构
1 .常见http 服务器程序
-
httpd apache,存在C10K(10K connections)问题
-
nginx 解决C10K问题lighttpd
-
IIS .asp 应用程序服务器
-
tomcat .jsp 应用程序服务器
-
jetty 开源的servlet容器,基于Java的web容器
-
Resin CAUCHO公司,支持servlets和jsp的引擎
-
webshpere:IBM公司
-
weblogic:BEA,Oracle
-
jboss:RedHat,IBM
-
oc4j:Oracle
2.apache介绍和特点

apache 名字来源,流传最广的解释是(也是最显而易见的):这个名字来自于一个事实:当Apache在1995年初开发的时候,它是由当时最流行的HTTP服务器NCSA HTTPd 1.3的代码修改而成的,因此是"一个修补的(a patchy)”服务器。
HTTP 和 Apache 之间的关系是:HTTP定义了客户端和服务器之间的通信规则,
而 Apache 是一种能够处理这些 HTTP 请求并提供网页内容的 Web 服务器软件。
apache 功能:
-
提供http协议服务
-
多个虚拟主机:IP、Port、FQDN 用一台 物理服务器搭建多个网站 百度 jd 淘宝
-
CGI:Common Gateway Interface,通用网关接口,支持动态程序
-
反向代理
-
负载均衡
-
路径别名
-
丰富的用户认证机制:basic,digest
-
支持第三方模块
apache特性:
-
高度模块化:core + modules
-
DSO:Dynamic Shared Object 动态加载/卸载
-
MPM:multi-processing module 多路处理模块
apache 功能多,稳定,处理静态资源优秀
MPM multi-processing module 工作模式
prefork:多进程I/O模型,每个进程响应一个请求,CentOS 7 httpd默认模型一个主进程:生成和回收n个子进程,创建套接字,不响应请求多个子进程:工作 work进程,每个子进程处理一个请求;系统初始时,预先生成多个空闲进程,等待请求
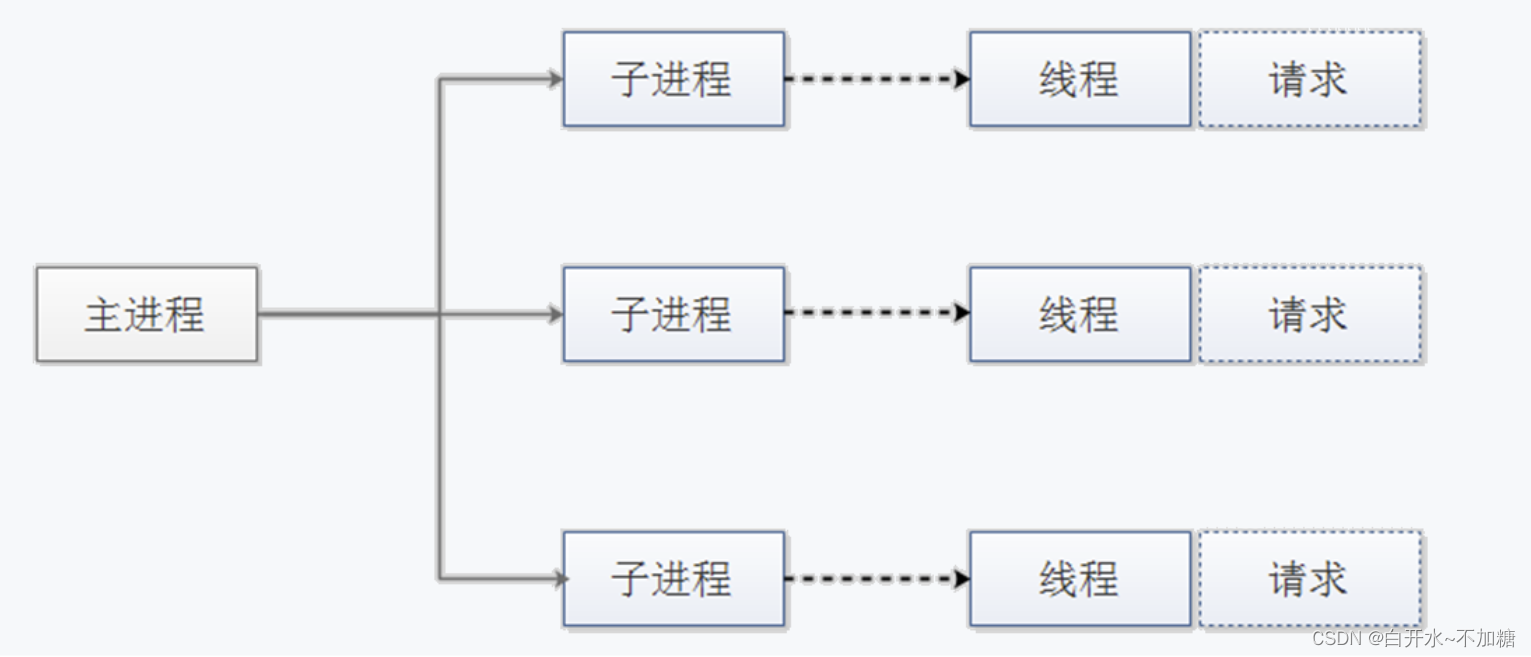
Prefork MPM预派生模式,有一个主控制进程,然后生成多个子进程,每个子进程有一个独立的线程响应用户请求,相对比较占用内存,但是比较稳定,可以设置最大和最小进程数,是最古老的一种模式,也是最稳定的模式,适用于访问量不是很大的场景
优点:稳定
缺点:慢,占用资源,不适用于高并发场景
[root@centos1 ~]#rpm -q httpd
未安装软件包 httpd
[root@centos1 ~]#yum install httpd -y
[root@centos1 ~]#systemctl start httpd
[root@centos1 ~]#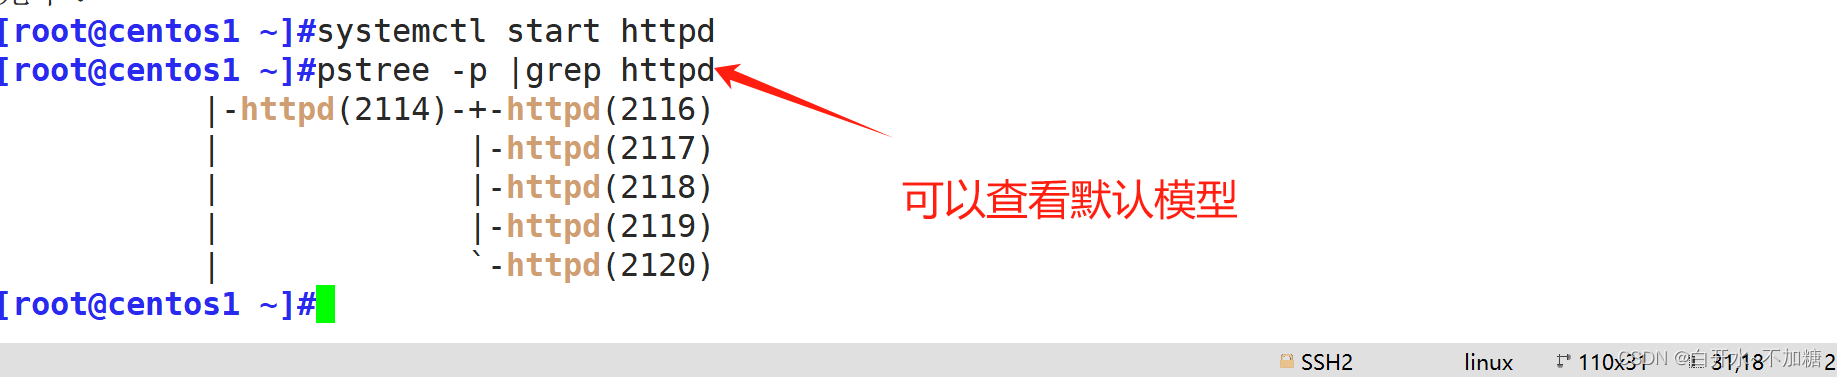
如果是yum安装,默认是prefork模型
worker:复用的多进程I/O模型,多进程多线程,IIS使用此模型
一个主进程:生成m个子进程,每个子进程负责生个n个线程,每个线程响应一个请求,并发响应请求:m*n

worker MPM是一种多进程和多线程混合的模型,有一个控制进程,启动多个子进程,每个子进程里面包含固定的线程,使用线程程来处理请求,当线程不够使用的时候会再启动一个新的子进程,然后在进程里面再启动线程处理请求,由于其使用了线程处理请求,因此可以承受更高的并发。
优点:相比prefork 占用的内存较少,可以同时处理更多的请求
缺点:使用keep-alive的长连接方式,某个线程会一直被占据,即使没有传输数据,也需要一直等待到超时才会被释放。如果过多的线程,被这样占据,也会导致在高并发场景下的无服务线程可用。(该问题在prefork模式下,同样会发生)
event:事件驱动模型(worker模型的变种),CentOS8 默认模型

event MPM是Apache中最新的模式,2012年发布的apache 2.4.X系列正式支持event 模型. 属于事件驱动模型(epoll),每个进程响应多个请求,在现在版本里的已经是稳定可用的模式。
优点:单线程响应多请求,占据更少的内存,高并发下表现更优秀,会有一个专门的线程来管理keep-alive类型的线程,当有真实请求过来的时候,将请求传递给服务线程,执行完毕后,又允许它释放
缺点:没有线程安全控制
centos 版本不一样,可能默认工作模式不一样,centos7 默认是prefork模式


3.Httpd 安装和相关文件
3.1 包安装httpd并启动httpd服务
版本说明:
CentOS 7 以上,默认系统是httpd 2.4,CentOS 6 版默认为httpd 2.2
Ubuntu 18.04 默认 Apache/2.4.29
安装方式:
-
包安装: centos发行版,稳定,建议使用
-
编译:定制或特殊需求
[root@centos1 ~]#rpm -q httpd
未安装软件包 httpd
[root@centos1 ~]#yum install httpd -y
[root@centos1 ~]#systemctl start httpd
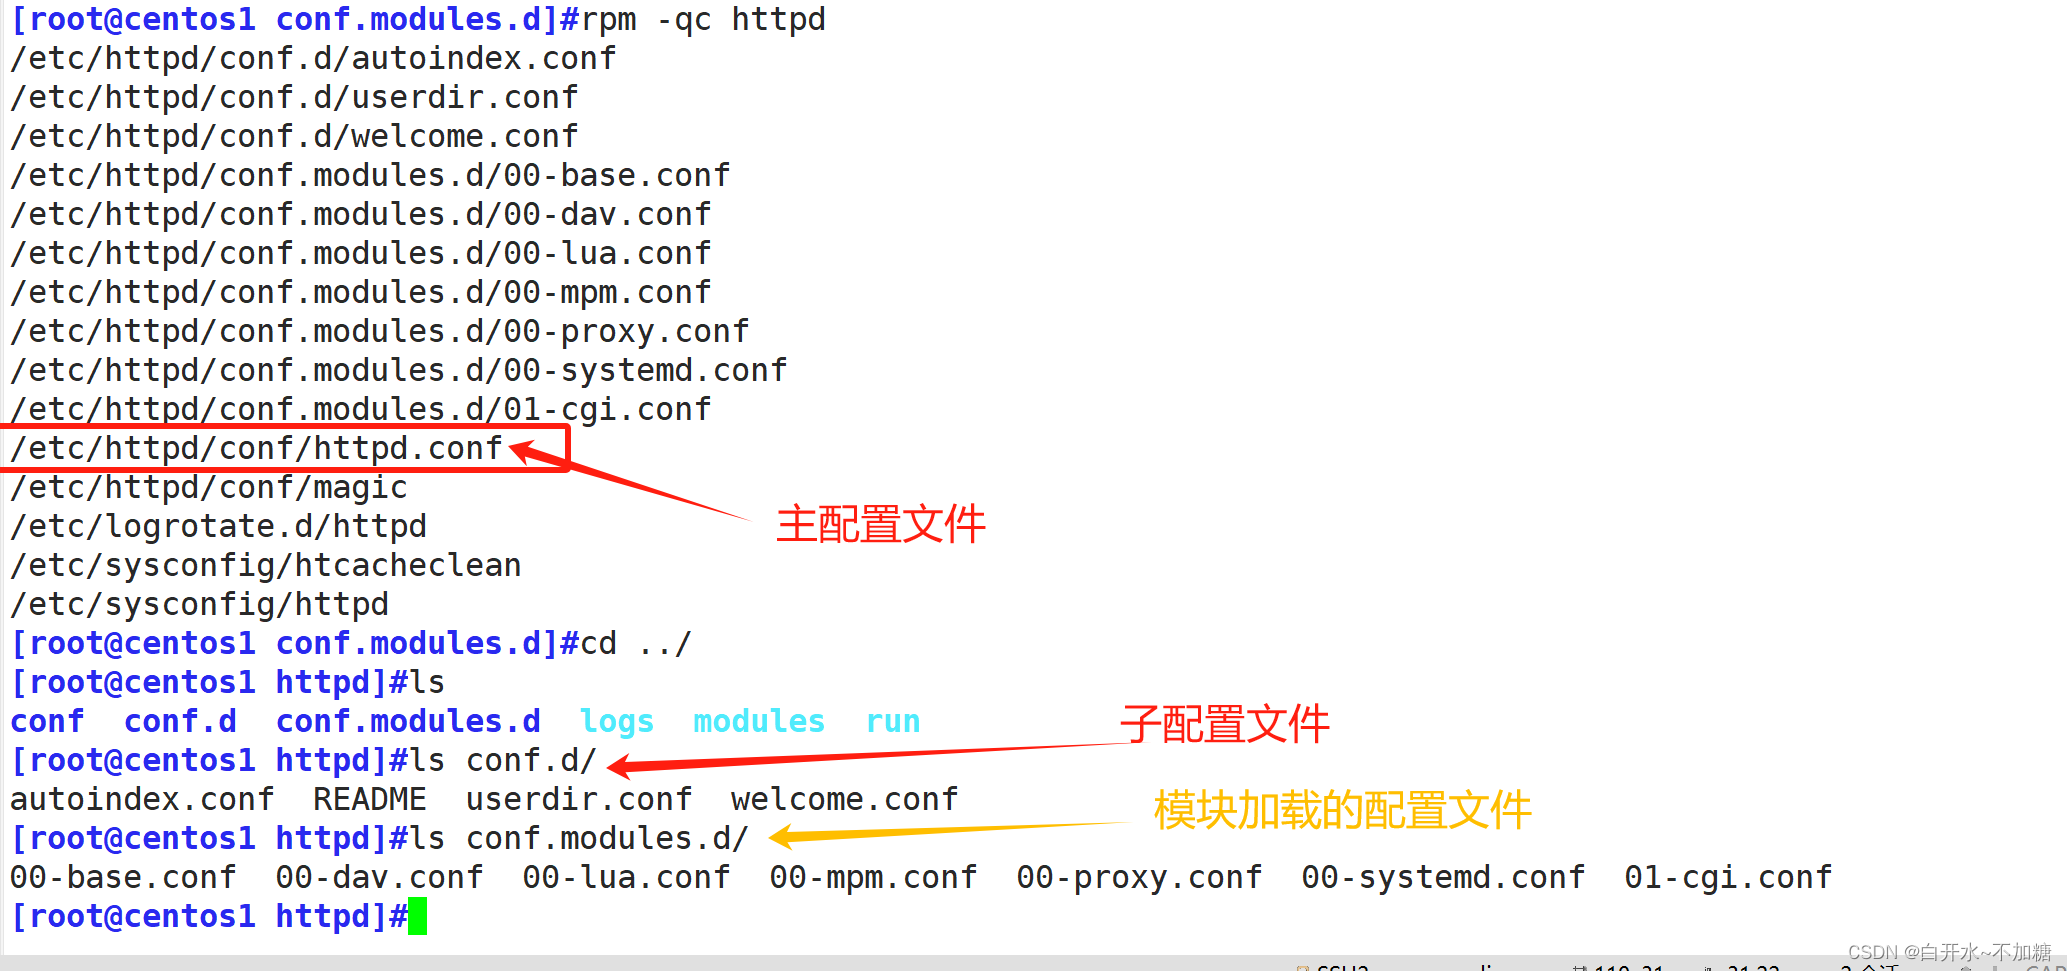
[root@centos1 ~]#3.2 httpd-2.4 相关文件
配置文件:
-
/etc/httpd/conf/httpd.conf 主配置文件
-
/etc/httpd/conf.d/*.conf 子配置文件
-
/etc/httpd/conf.d/conf.modules.d/ 模块加载的配置文件
检查配置语法:httpd -t 或 apache2 -t

服务单元文件:
-
/usr/lib/systemd/system/httpd.service
-
配置文件:/etc/sysconfig/httpd
服务控制和启动
-
systemctl enable|disable httpd.service
-
systemctl {start|stop|restart|status|reload} httpd.service
-
apachectl start|stop|restart|configtest
-
service httpd start|stop|restart|configtest
站点网页文档根目录:/var/www/html


模块文件路径:
-
/etc/httpd/modules
-
/usr/lib64/httpd/modules
主服务器程序文件:/usr/sbin/httpd
3.3 CentOS 7 编译安装httpd 2.4
编译说明和准备

APR:Apache portable Run-time libraries,Apache可移植运行库,主要为上层的应用程序提供一个可以跨越多操作系统平台使用的底层支持接口库。在早期的Apache版本中,应用程序本身必须能够处理各种具体操作系统平台的细节,并针对不同的平台调用不同的处理函数随着Apache的进一步开发,Apache组织决定将这些通用的函数独立出来并发展成为一个新的项目。这样,APR的开发就从Apache中独立出来,Apache仅仅是使用 APR而已。目前APR主要还是由Apache使用,由于APR的较好的移植性,因此一些需要进行移植的C程序也开始使用APR,开源项目:比如用于服务器压力测试的Flood loader tester
Apache安装
Apache即阿帕奇是一款开源的、世界使用排名第一的Web服务器软件,其特点是简单高效、稳定安全所以被广泛应用于计算机技术的各个领域,但现在由于其抗并发性问题现在新公司大部分都使用Nginx代替。
2、Yum安装
①yum安装与其他程序一样可以直接使用命令:yum install httpd -y。
②安装过程中注意查看提示信息,若无外网则需要配置本地yum源进行安装。
③出现以下提示即表示安装成功。注意:若出现error字样则表示安装出错!!!
[root@centos1 ~]#rpm -q httpd
未安装软件包 httpd
[root@centos1 ~]#yum install httpd -y
[root@centos1 ~]#systemctl start httpd
[root@centos1 ~]#
④ yum安装默认的主配置文件位置: /etc/httpd/conf/httpd.conf
⑤ yum安装默认的主页面配置文件夹位置: /var/www/html/
⑥ yum安装默认的日志文件位置:/var/log/httpd/access_log 此为正常日志记录,/var/log/httpd/error此为错误日志记录。
二、httpd常见配置
1.指定服务器名


[root@centos1 ~]#cd /etc/httpd/conf/
[root@centos1 conf]#ls
httpd.conf magic
[root@centos1 conf]#cp httpd.conf httpd.conf.bak
[root@centos1 conf]#ls
httpd.conf httpd.conf.bak magic
[root@centos1 conf]#httpd -t
AH00558: httpd: Could not reliably determine the server's fully qualified domain name, using fe80::183e:c32:9272:8ece. Set the 'ServerName' directive globally to suppress this message
Syntax OK
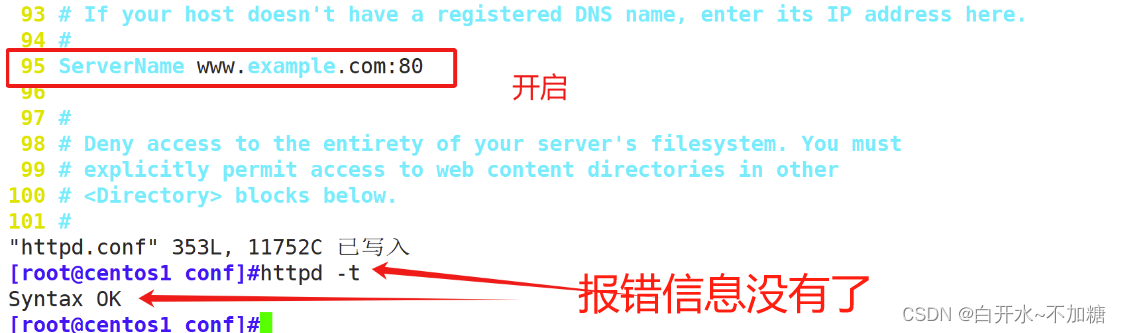
[root@centos1 conf]#vim /etc/httpd/conf/httpd.conf95 ServerName www.example.com:80
[root@centos1 conf]#httpd -t
Syntax OK2.包含其它配置文件
指令:
Include file-path|directory-path|wildcard
IncludeOptional file-path|directory-path|wildcard
说明:
-
Include和IncludeOptional功能相同,都可以包括其它配置文件
-
但是当无匹配文件时,include会报错,IncludeOptional会忽略错误
include 子配置文件
[root@node2 ~]#grep -i include /etc/httpd/conf/httpd.conf
Include conf.modules.d/*.conf#   Indexes Includes FollowSymLinks SymLinksifOwnerMatch ExecCGI MultiViews
# Possible values include: debug, info, notice, warn, error, crit,# If you include a trailing / on /webpath then the server will# To parse .shtml files for server-side includes (SSI):# (You will also need to add "Includes" to the "Options" directive.)AddOutputFilter INCLUDES .shtml
IncludeOptional conf.d/*.conf
总目录
[root@node2 httpd]#grep -i serverroot /etc/httpd/conf/httpd.conf
# with "/", the value of ServerRoot is prepended -- so 'log/access_log'
# with ServerRoot set to '/www' will be interpreted by the
# ServerRoot: The top of the directory tree under which the server's
# ServerRoot at a non-local disk, be sure to specify a local disk on the
# same ServerRoot for multiple httpd daemons, you will need to change at
ServerRoot "/etc/httpd"
3 .监听地址
Listen [IP:]PORT
说明:
(1) 省略IP表示为本机所有IP
(2) Listen指令至少一个,可重复出现多次
[root@centos1 conf]#vim /etc/httpd/conf/httpd.conf
#Listen 80
Listen 192.168.246.7:80
Listen 192.168.246.7:9527
[root@centos1 conf]#systemctl restart httpd
[root@centos1 conf]#httpd -t
Syntax OK
[root@centos1 conf]#实验1:指明具体地址


验证:


实验2:


验证


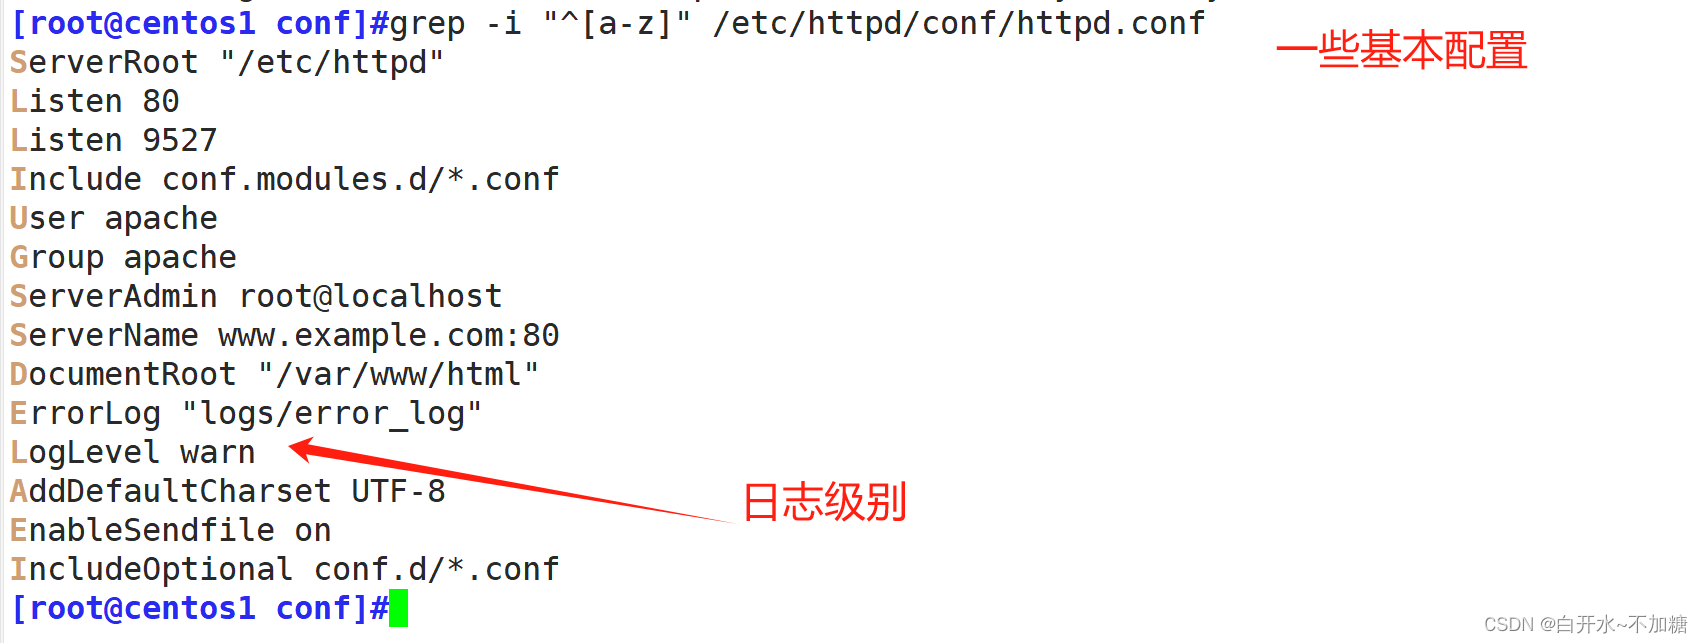
/etc/httpd/conf/httpd.conf 一些基础配置
4.隐藏服务器版本信息


再去访问
 5.持久连接
Persistent Connection:连接建立,每个资源获取完成后不会断开连接,而是继续等待其它的请求完成,默认开启持久连接
断开条件:
-
时间限制:以秒为单位, 默认5s,httpd-2.4 支持毫秒级
-
请求数量: 请求数达到指定值,也会断开
副作用:对并发访问量大的服务器,持久连接会使有些请求得不到响应
折衷:使用较短的持久连接时间
/etc/httpd/conf.d/*.conf 子配置文件
下图test是自定义 .conf结尾就可以


KeepAlive On|Off # 开启或关闭长连接
KeepAliveTimeout 15 #连接持续15s,可以以ms为单位,默认值为5s
MaxKeepAliveRequests 500 #持久连接最大接收的请求数,默认值100
进入7-2

安装

测试方法:

6.DSO (Dynamic Shared Object)
Dynamic Shared Object,加载动态模块配置,不需重启即生效动态模块所在路径: /usr/lib64/httpd/modules/
主配置 /etc/httpd/conf/httpd.conf 文件中指定加载模块配置文件


查看静态编译的模块:httpd -l
查看静态编译及动态装载的模块:httpd -M
[root@centos1 html]#httpd -M|grep basicauth_basic_module (shared)
[root@centos1 html]#
[root@centos1 html]#
[root@centos1 html]#
[root@centos1 html]#pwd
/var/www/html
[root@centos1 html]#cd /etc/httpd/
[root@centos1 httpd]#ls
conf  conf.d  conf.modules.d  logs  modules  run
[root@centos1 httpd]#cd conf.modules.d/
[root@centos1 conf.modules.d]#ls
00-base.conf  00-dav.conf  00-lua.conf  00-mpm.conf  00-proxy.conf  00-systemd.conf  01-cgi.conf
[root@centos1 conf.modules.d]#vim 00-base.conf 1 #2 # This file loads most of the modules included with the Apache HTTP3 # Server itself.4 #5 6 LoadModule access_compat_module modules/mod_access_compat.so7 LoadModule actions_module modules/mod_actions.so8 LoadModule alias_module modules/mod_alias.so9 LoadModule allowmethods_module modules/mod_allowmethods.so10 #LoadModule auth_basic_module modules/mod_auth_basic.so11 LoadModule auth_digest_module modules/mod_auth_digest.so12 LoadModule authn_anon_module modules/mod_authn_anon.so13 LoadModule authn_core_module modules/mod_authn_core.so14 LoadModule authn_dbd_module modules/mod_authn_dbd.so15 LoadModule authn_dbm_module modules/mod_authn_dbm.so16 LoadModule authn_file_module modules/mod_authn_file.so17 LoadModule authn_socache_module modules/mod_authn_socache.so18 LoadModule authz_core_module modules/mod_authz_core.so19 LoadModule authz_dbd_module modules/mod_authz_dbd.so20 LoadModule authz_dbm_module modules/mod_authz_dbm.so21 LoadModule authz_groupfile_module modules/mod_authz_groupfile.so22 LoadModule authz_host_module modules/mod_authz_host.so23 LoadModule authz_owner_module modules/mod_authz_owner.so24 LoadModule authz_user_module modules/mod_authz_user.so25 LoadModule autoindex_module modules/mod_autoindex.so26 LoadModule cache_module modules/mod_cache.so27 LoadModule cache_disk_module modules/mod_cache_disk.so28 LoadModule data_module modules/mod_data.so29 LoadModule dbd_module modules/mod_dbd.so30 LoadModule deflate_module modules/mod_deflate.so
"00-base.conf" 77L, 3740C 已写入
[root@centos1 conf.modules.d]#systemctl restart httpd
[root@centos1 conf.modules.d]#httpd -M|grep basic
[root@centos1 conf.modules.d]#


7.MPM (Multi-Processing Module)多路处理模块
httpd 支持三种MPM工作模式:prefork, worker, event
[root@centos7 ~]#vim /etc/httpd/conf.modules.d/00-mpm.conf
[root@centos7 ~]#grep Load /etc/httpd/conf.modules.d/00-mpm.conf
# one of the following LoadModule lines. See the httpd.conf(5) man
LoadModule mpm_prefork_module modules/mod_mpm_prefork.so
#LoadModule mpm_worker_module modules/mod_mpm_worker.so
#LoadModule mpm_event_module modules/mod_mpm_event.so
[root@centos7 ~]#httpd -M | grep mpm
AH00558: httpd: Could not reliably determine the server's fully qualified domain
name, using centos8.localdomain. Set the 'ServerName' directive globally to
suppress this messagempm_prefork_module (shared)
8. prefork模式相关的配置
StartServers       100
MinSpareServers   50
MaxSpareServers   80
ServerLimit     2560 #最多进程数,最大值 20000
MaxRequestWorkers    2560 #最大的并发连接数,默认256
MaxConnectionsPerChild  4000 #子进程最多能处理的请求数量。在处理MaxRequestsPerChild 个
请求之后,子进程将会被父进程终止,这时候子进程占用的内存就会释放(为0时永远不释放)
MaxRequestsPerChild 4000  #从 httpd.2.3.9开始被MaxConnectionsPerChild代替

[root@centos1 conf.modules.d]#vim 00-mpm.conf
# Select the MPM module which should be used by uncommenting exactly
# one of the following LoadModule lines:# prefork MPM: Implements a non-threaded, pre-forking web server
# See: http://httpd.apache.org/docs/2.4/mod/prefork.html
LoadModule mpm_prefork_module modules/mod_mpm_prefork.so# worker MPM: Multi-Processing Module implementing a hybrid
# multi-threaded multi-process web server
# See: http://httpd.apache.org/docs/2.4/mod/worker.html
#
#LoadModule mpm_worker_module modules/mod_mpm_worker.so# event MPM: A variant of the worker MPM with the goal of consuming
# threads only for connections with active processing
# See: http://httpd.apache.org/docs/2.4/mod/event.html
#
#LoadModule mpm_event_module modules/mod_mpm_event.soStartServers 10
[root@centos1 conf.modules.d]#systemctl restart httpd
[root@centos1 conf.modules.d]#pstree -p|grep httpd|-httpd(7485)-+-httpd(7486)|             |-httpd(7487)|             |-httpd(7488)|             |-httpd(7489)|             |-httpd(7490)|             |-httpd(7491)|             |-httpd(7493)|             |-httpd(7495)|             |-httpd(7496)|             `-httpd(7497)
[root@centos1 conf.modules.d]#
9.worker和event 模式相关的配置
ServerLimit         16  #最多worker进程数 Upper limit on configurable number of
processes
StartServers        10  #Number of child server processes created at startup
MaxRequestWorkers  150  #Maximum number of connections that will be processed
simultaneously
MinSpareThreads     25
MaxSpareThreads     75
ThreadsPerChild 25 #Number of threads created by each child process10.定义Main server的文档页面路径
DocumentRoot   "/path”
<directory /path>Require all granted
</directory>-
DocumentRoot指向的路径为URL路径的起始位置
-
/path 必须显式授权后才可以访问
[root@centos1 html]#vim /etc/httpd/conf/httpd.conf
120 DocumentRoot "/data/html"
121
122 <Directory "/data/html">
123 # Allow open access:
124 Require all granted
125 </Directory>
126 #
127 # Relax access to content within /var/www.
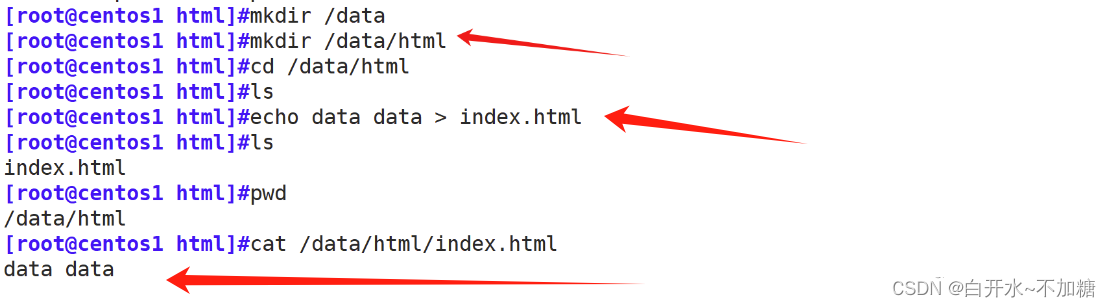
[root@centos1 html]#mkdir /data
[root@centos1 html]#mkdir /data/html
[root@centos1 html]#cd /data/html
[root@centos1 html]#ls
[root@centos1 html]#echo data data > index.html
[root@centos1 html]#ls
index.html
[root@centos1 html]#pwd
/data/html
[root@centos1 html]#cat /data/html/index.html
data data
[root@centos1 html]#httpd -t
Syntax OK
[root@centos1 html]#systemctl restart httpd
[root@centos1 html]#


去检测:
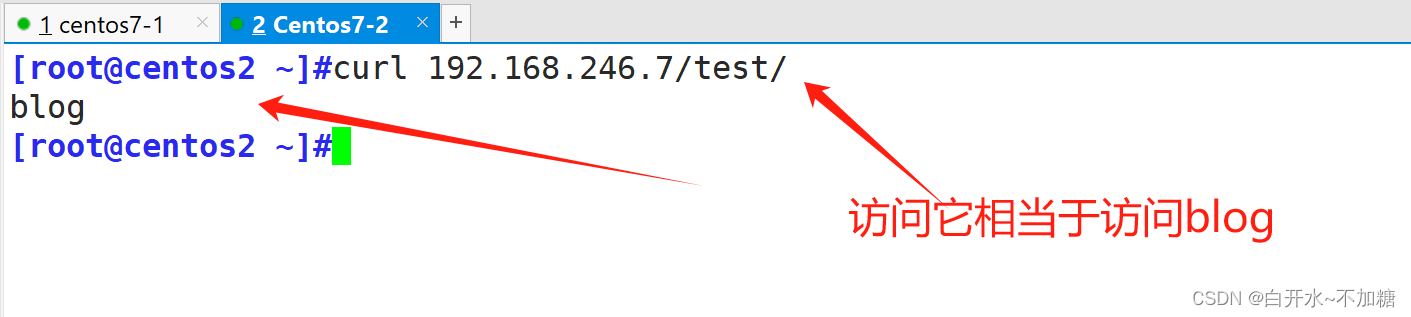
别名 alias
[root@centos1 opt]#vim /etc/httpd/conf.d/test.conf
KeepAlive On
KeepAliveTimeout 1000
MaxKeepAliveRequests 1<Directory "/opt/blog"># Allow open access:Require all granted
</Directory>alias   /test   /opt/blog/
"/etc/httpd/conf.d/test.conf" 12L, 177C 已写入
[root@centos1 opt]#systemctl restart httpd
[root@centos1 opt]#


11. 定义站点默认主页面文件
当我们访问服务器时 省略了最后的文件,默认自动会加上 index.html这个是可以修改的
DirectoryIndex index.php index.html
[root@centos1 ~]#grep -n index /etc/httpd/conf/httpd.conf
169: DirectoryIndex index.html
[root@centos1 ~]#


去浏览器访问


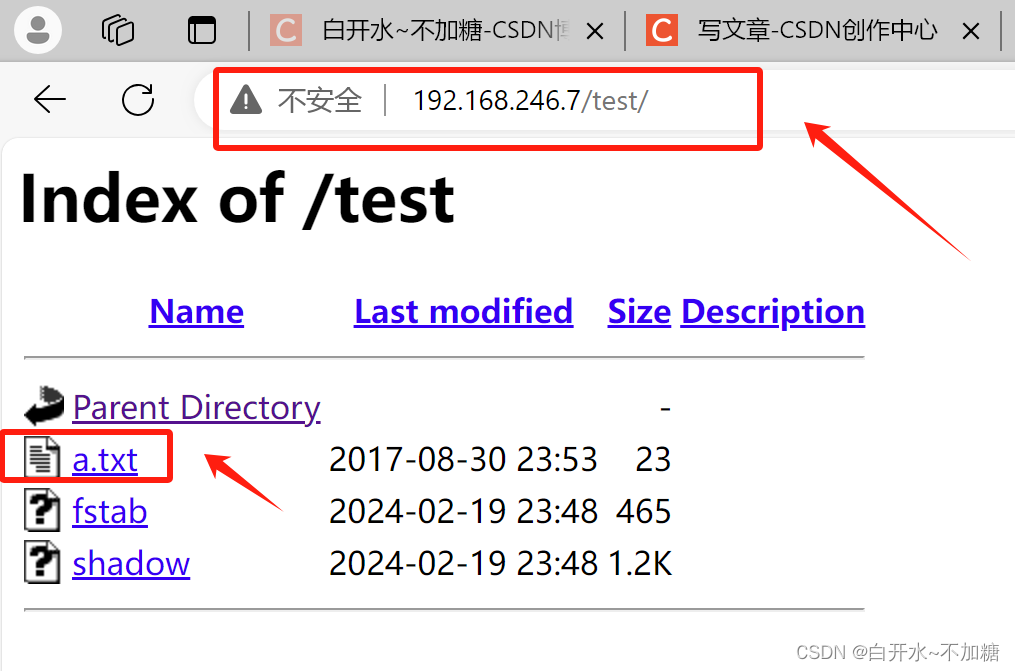
针对目录和URL实现访问控制
Options 指令
后跟1个或多个以空白字符分隔的选项列表,在选项前的+,-表示增加或删除指定选项

Options 可以写在目录里 < > 也可以写在外面
接下来:
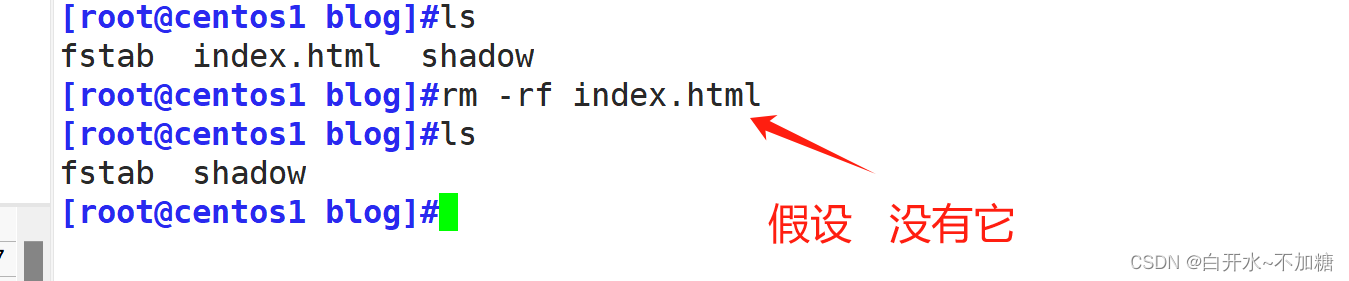
[root@centos1 ~]#vim /etc/httpd/conf.d/test.conf
KeepAlive On
KeepAliveTimeout 1000
MaxKeepAliveRequests 1<Directory "/opt/blog"># Allow open access:Require all grantedoptions Indexes
</Directory>alias   /test   /opt/blog/
[root@centos1 ~]#systemctl restart httpd


再去访问不支持

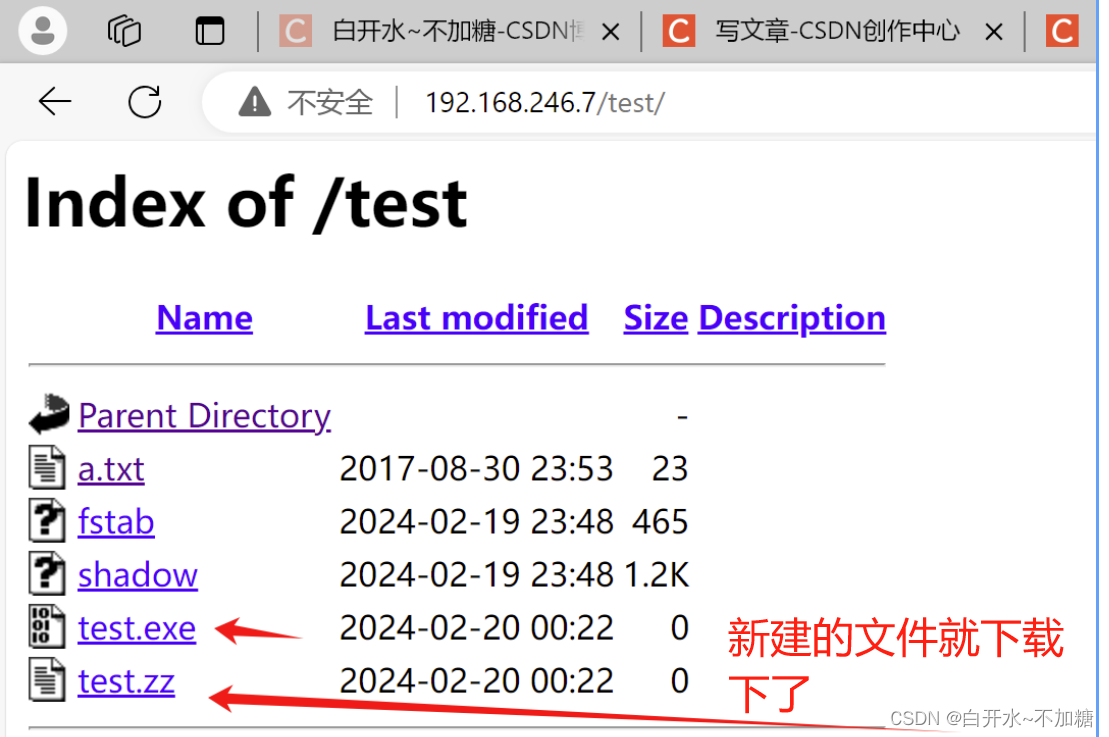
[root@centos1 ~]#vim /etc/httpd/conf.d/test.conf
<Directory "/opt/blog"># Allow open access:Require all grantedoptions Indexes FollowSymLinks
</Directory>alias   /test   /opt/blog/
[root@centos1 ~]#systemctl restart httpd
再去访问


12.虚拟主机
httpd 支持在一台物理主机上实现多个网站,即多虚拟主机
网站的唯一标识:
-
IP相同,但端口不同
-
IP不同,但端口均为默认端口
-
FQDN不同, IP和端口都相同
多虚拟主机有三种实现方案:
-
基于ip:为每个虚拟主机准备至少一个ip地址
-
基于port:为每个虚拟主机使用至少一个独立的port
-
基于FQDN:为每个虚拟主机使用至少一个FQDN,请求报文中首部 Host:www.kgc.com
理解:
基于ip地址
192.168.246.7 ---------> jd
192.168.246.8---------> taobao
基于端口
192.168.246.7:80 ---------> jd
192.168.246.7:800--------> taobao
基于域名
www.lucky.com --------> lucky
www.cloud.com ---------> cloud
虚拟主机的三种实现方式:基于IP、基于端口、基于域名; 最常用的是 基于域名
[root@centos1 ~]#cd /usr/share/doc/httpd-
httpd-2.4.6/       httpd-tools-2.4.6/
[root@centos1 ~]#cd /usr/share/doc/httpd-2.4.6/
[root@centos1 httpd-2.4.6]#lsOUT_APACHE    httpd-default.conf    httpd-manual.conf              httpd-vhosts.conf  proxy-html.conf
?HANGES         httpd-info.conf       httpd-mpm.conf                 LICENSE            README
httpd-dav.conf  httpd-languages.conf  httpd-multilang-errordoc.conf  NOTICE             VERSIONING
[root@centos1 httpd-2.4.6]#vim httpd-vhosts.conf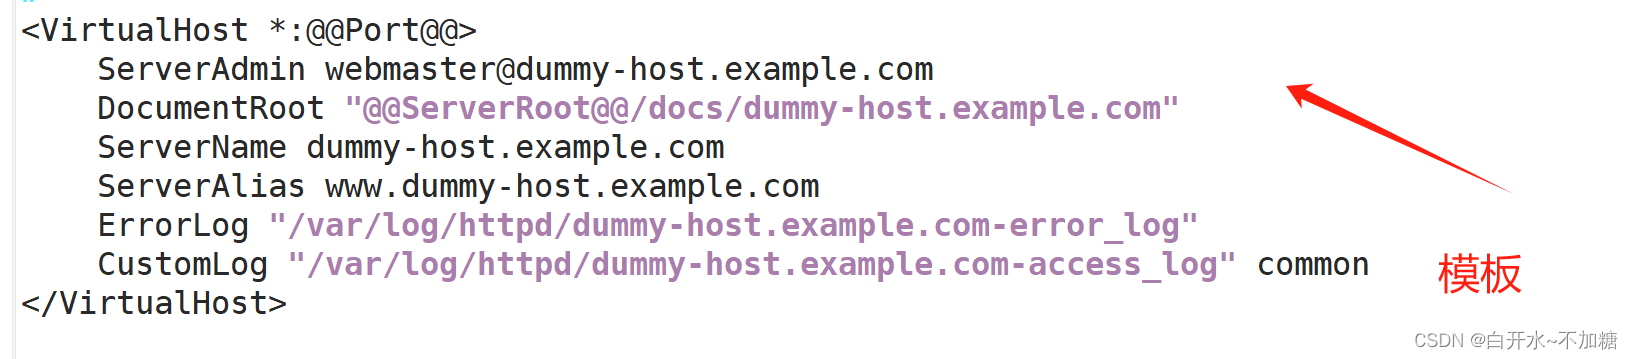
12.1 基于ip地址
[root@centos1 html]#vim /etc/httpd/conf.d/test.conf
KeepAlive On
KeepAliveTimeout 1000
MaxKeepAliveRequests 1<Directory "/opt/html">AllowOverride None# Allow open access:Require all grantedoptions Indexes FollowSymLinks
</Directory><VirtualHost 192.168.246.7>ServerAdmin support@jfedu.netDocumentRoot "/opt/html/7"ServerName www.accp.comErrorLog "logs/7_error_log"CustomLog "logs/7_access_log" common
</VirtualHost><VirtualHost 192.168.246.111>ServerAdmin support@jfedu.netDocumentRoot "/opt/html/111"ServerName www.accp.comErrorLog "logs/111_error_log"CustomLog "logs/111_access_log" common
</VirtualHost>
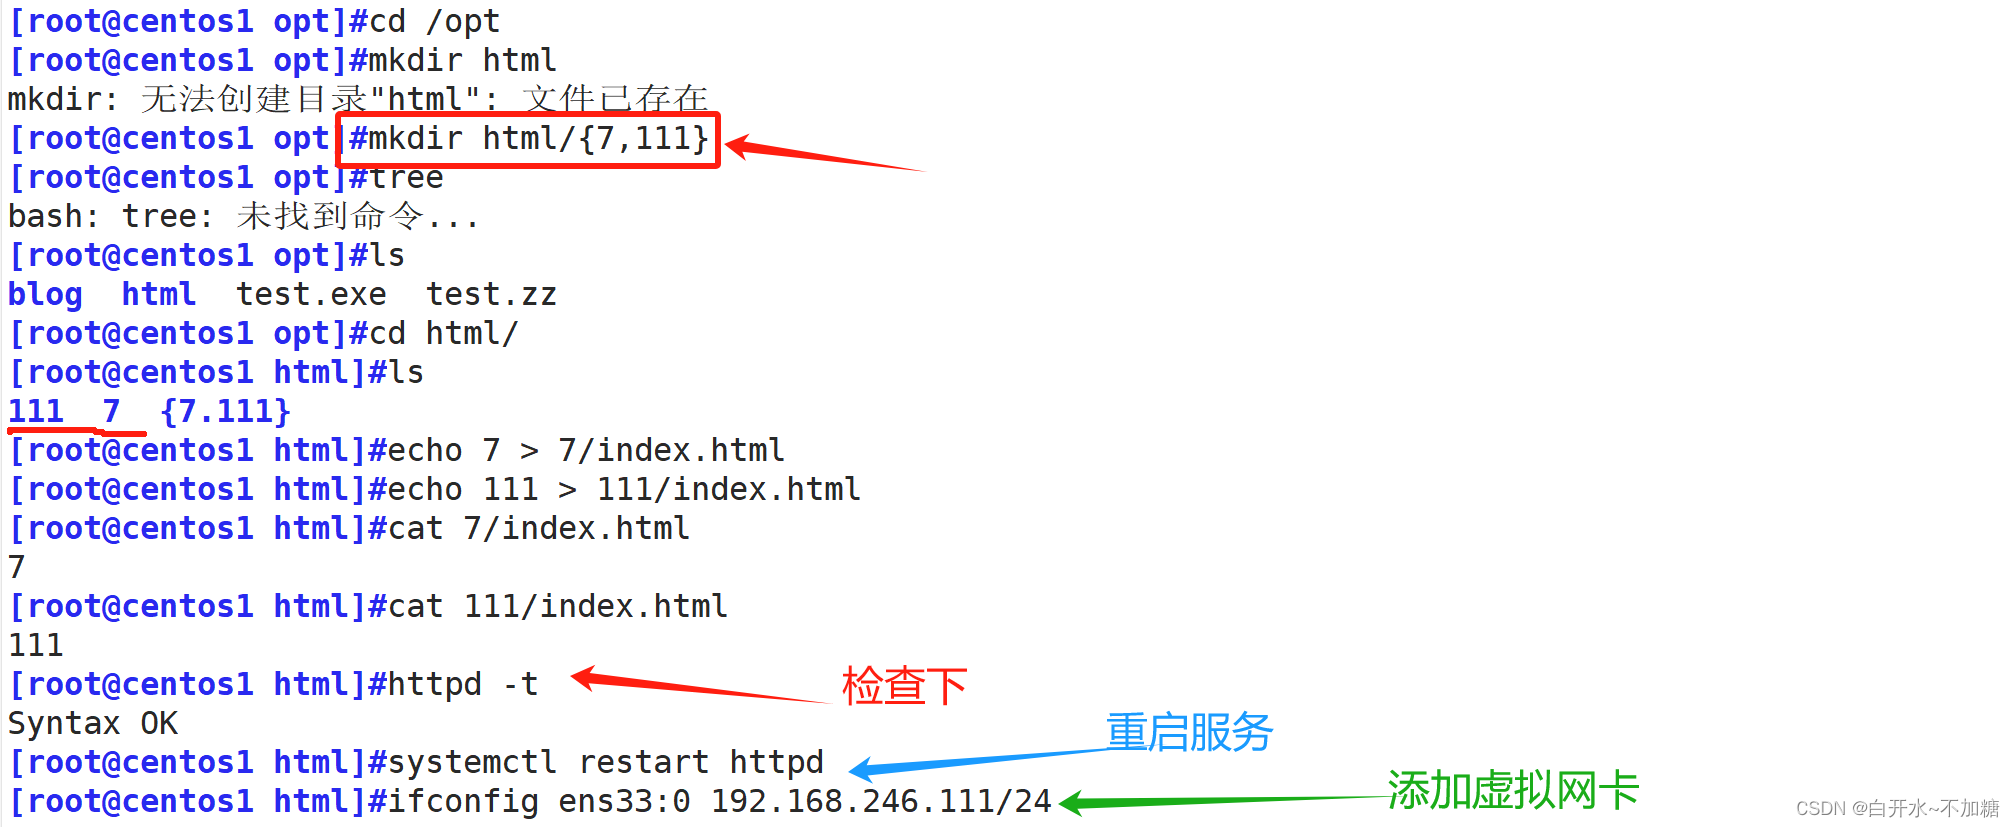
[root@centos1 opt]#cd /opt
[root@centos1 opt]#mkdir html
mkdir: 无法创建目录"html": 文件已存在
[root@centos1 opt]#mkdir html/{7,111}
[root@centos1 opt]#tree
bash: tree: 未找到命令...
[root@centos1 opt]#ls
blog html test.exe test.zz
[root@centos1 opt]#cd html/
[root@centos1 html]#ls
111 7 {7.111}
[root@centos1 html]#echo 7 > 7/index.html
[root@centos1 html]#echo 111 > 111/index.html
[root@centos1 html]#cat 7/index.html
7
[root@centos1 html]#cat 111/index.html
111
[root@centos1 html]#httpd -t
Syntax OK
[root@centos1 html]#systemctl restart httpd
[root@centos1 html]#ifconfig ens33:0 192.168.246.111/24

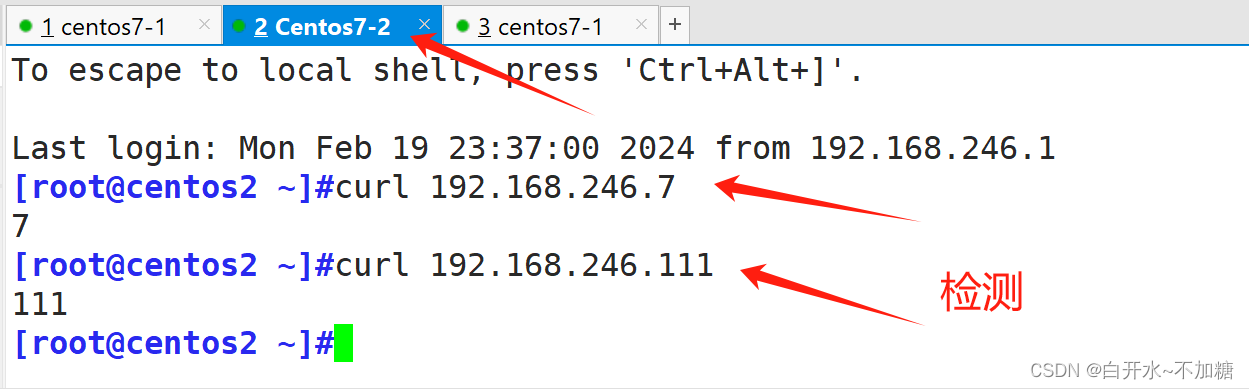
检测:
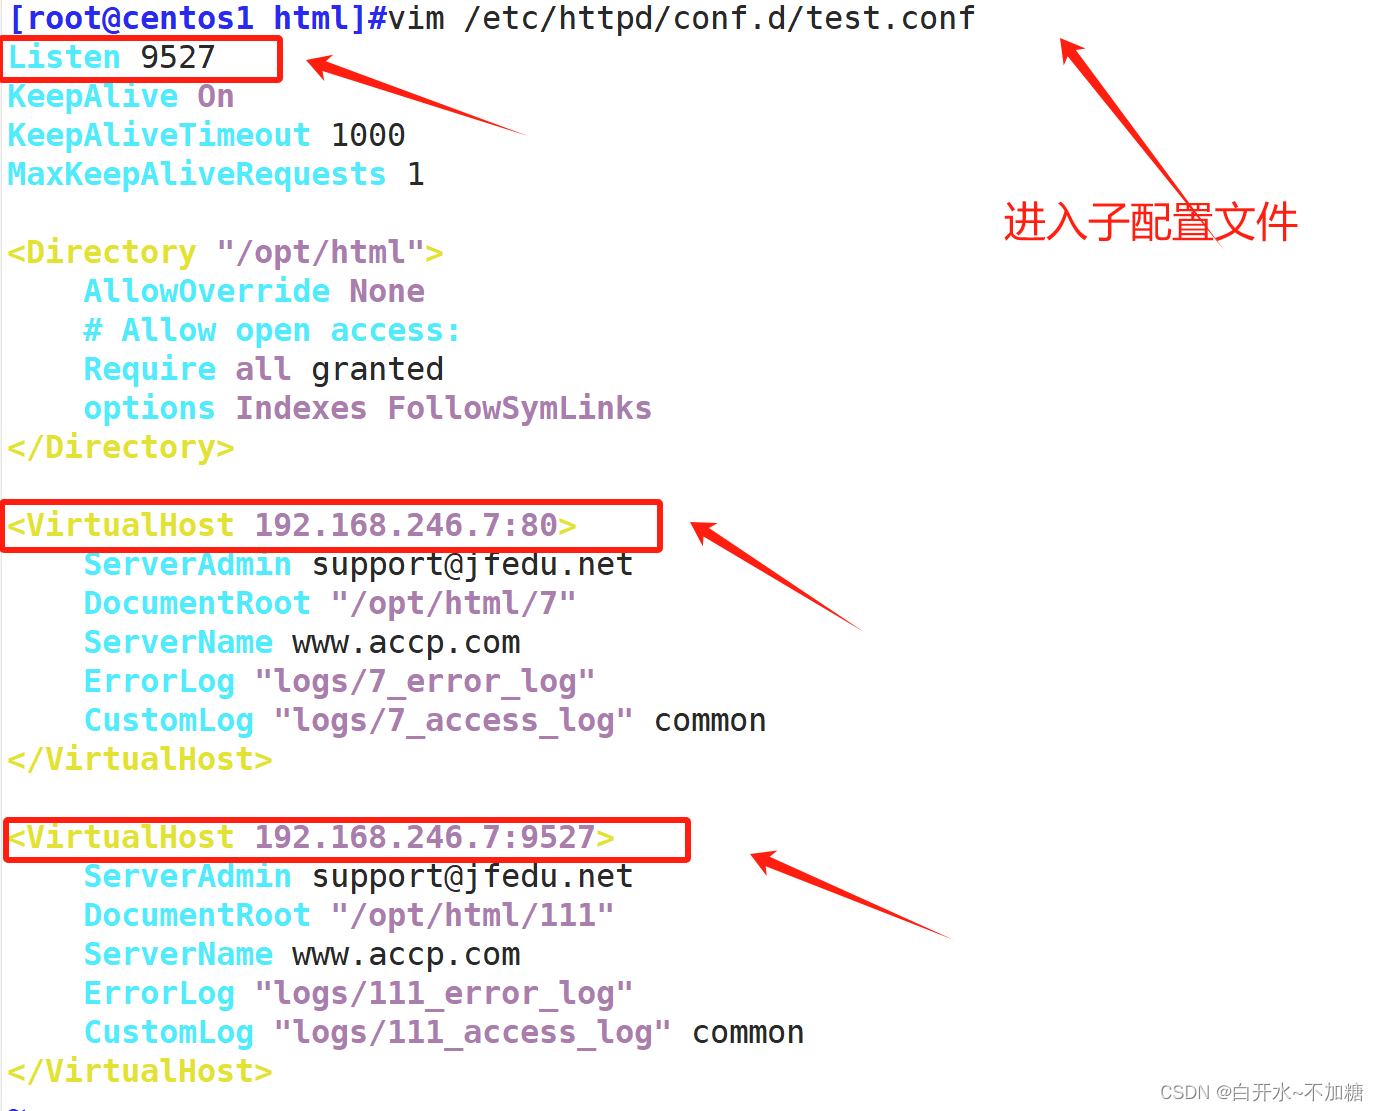
12.2 基于端口地址
[root@centos1 html]#vim /etc/httpd/conf.d/test.conf
Listen 9527
KeepAlive On
KeepAliveTimeout 1000
MaxKeepAliveRequests 1<Directory "/opt/html">AllowOverride None# Allow open access:Require all grantedoptions Indexes FollowSymLinks
</Directory><VirtualHost 192.168.246.7:80>ServerAdmin support@jfedu.netDocumentRoot "/opt/html/7"ServerName www.accp.comErrorLog "logs/7_error_log"CustomLog "logs/7_access_log" common
</VirtualHost><VirtualHost 192.168.246.7:9527>ServerAdmin support@jfedu.netDocumentRoot "/opt/html/111"ServerName www.accp.comErrorLog "logs/111_error_log"CustomLog "logs/111_access_log" common
</VirtualHost>
[root@centos1 html]#systemctl start httpd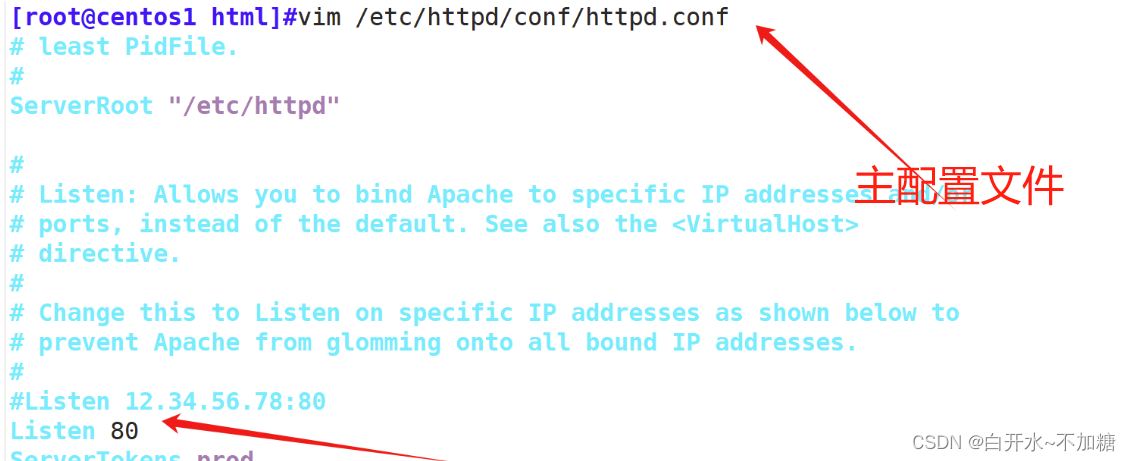

检测:
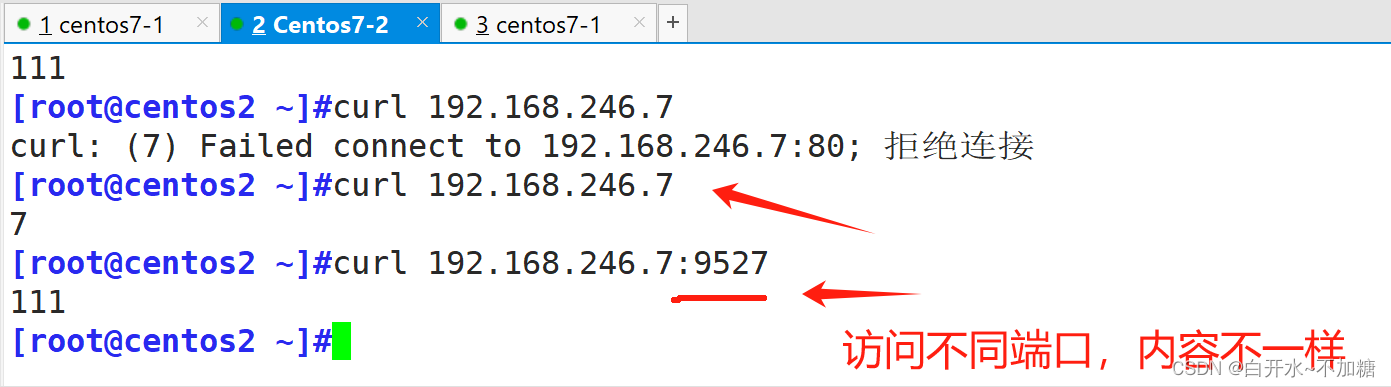
12.3 基于域名
[root@centos1 html]#vim /etc/httpd/conf.d/test.conf
Listen 9527
KeepAlive On
KeepAliveTimeout 1000
MaxKeepAliveRequests 1<Directory "/opt/html">AllowOverride None# Allow open access:Require all grantedoptions Indexes FollowSymLinks
</Directory><VirtualHost 192.168.246.7>ServerAdmin support@jfedu.netDocumentRoot "/opt/html/7"ServerName www.kgc.com
#   ErrorLog "logs/7_error_log"
#   CustomLog "logs/7_access_log" common
</VirtualHost><VirtualHost 192.168.246.7>ServerAdmin support@jfedu.netDocumentRoot "/opt/html/111"ServerName www.zzz.com
#   ErrorLog "logs/111_error_log"
#   CustomLog "logs/111_access_log" common
</VirtualHost>
[root@centos1 html]#systemctl start httpd
[root@centos1 html]#systemctl restart httpd
[root@centos1 html]#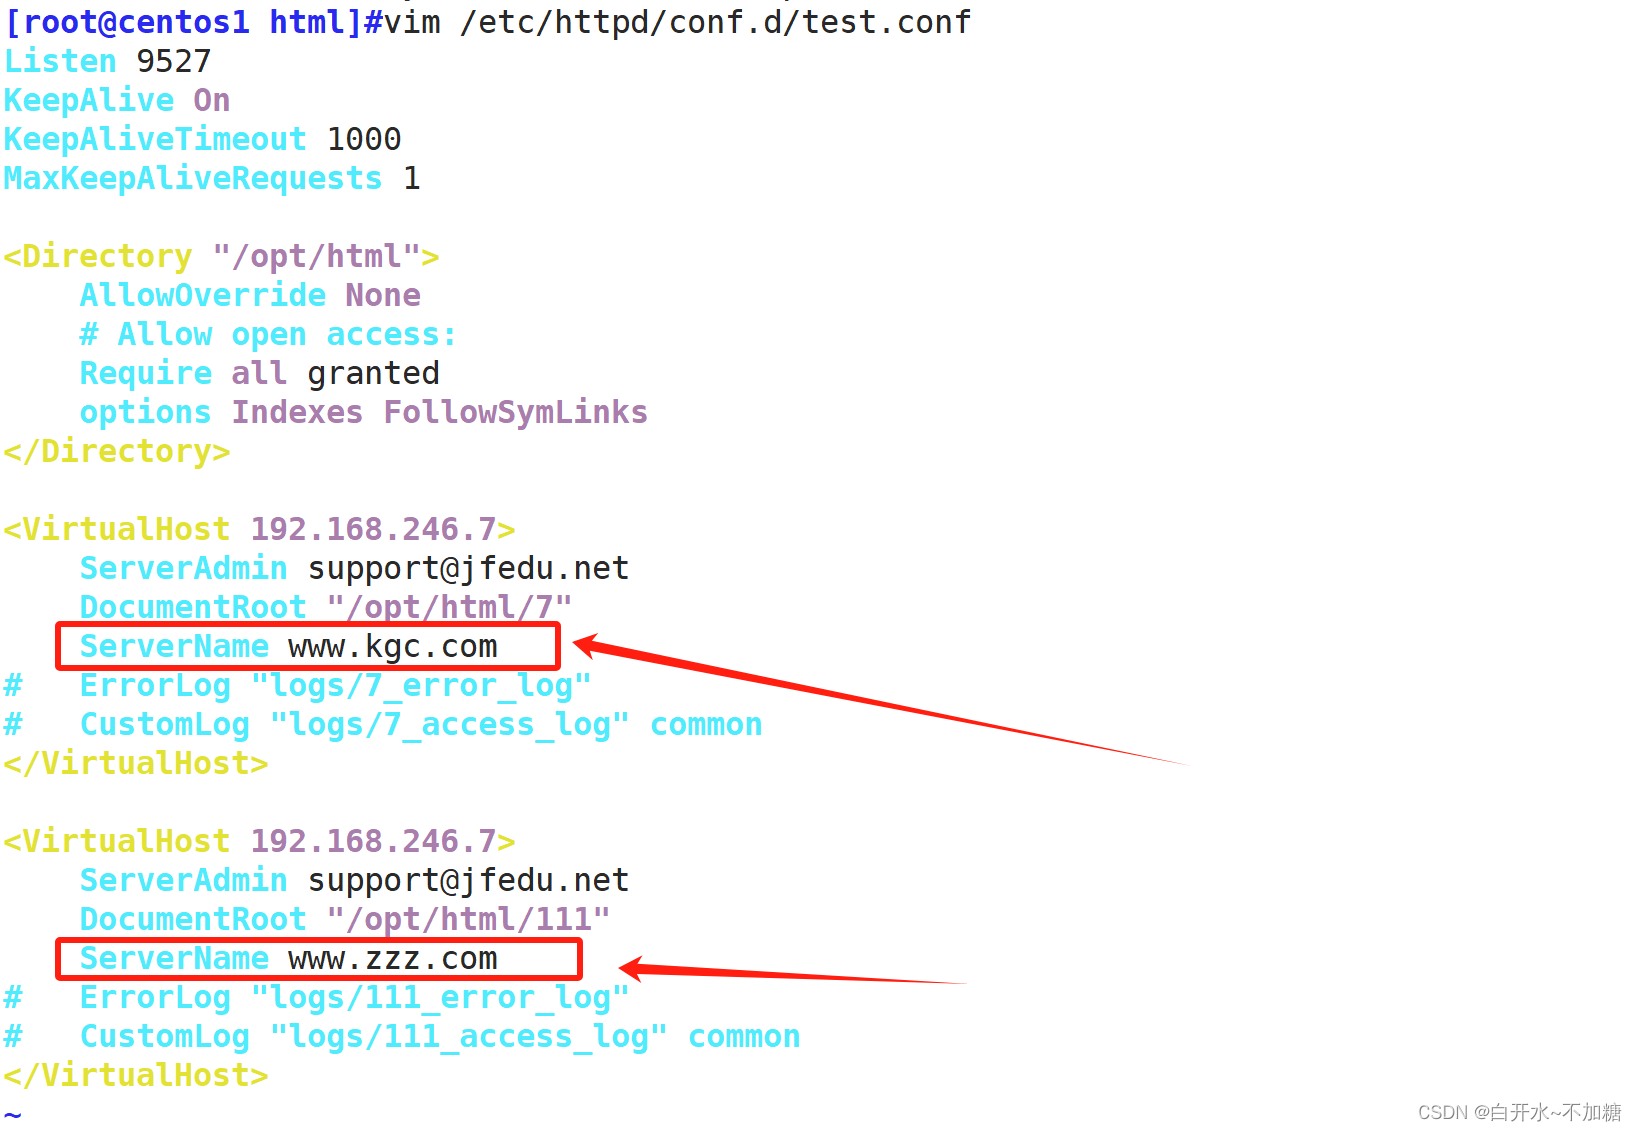

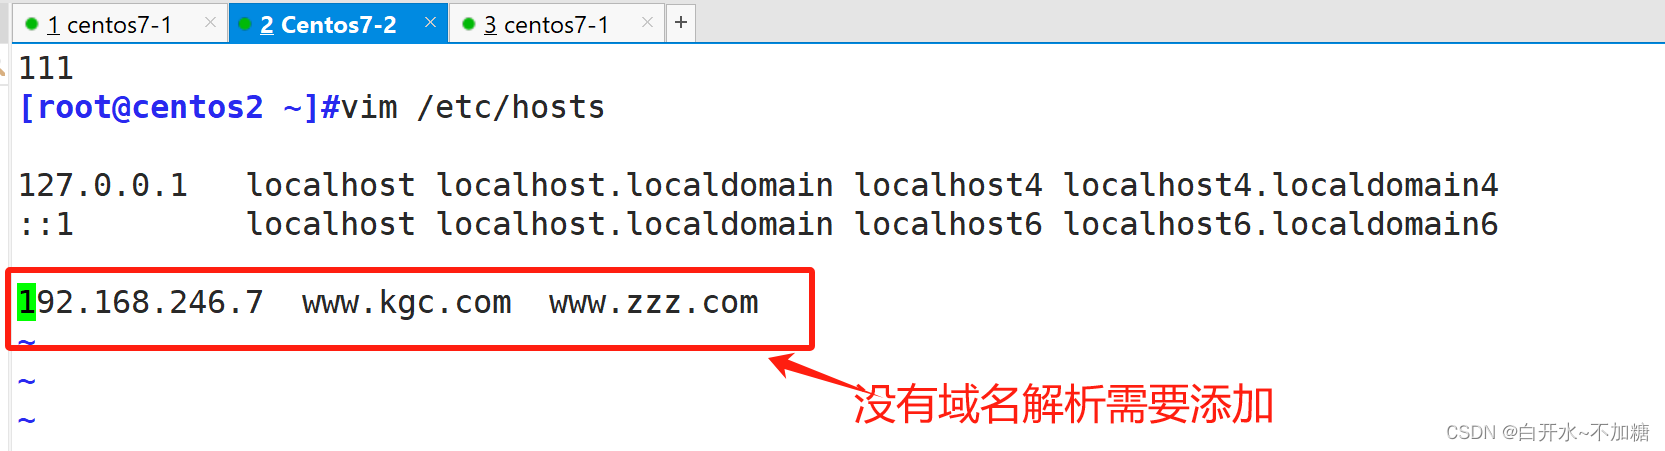
验证:

13.基于客户端 IP 地址实现访问控制
黑名单,不能有失败,至少有一个成功匹配才成功,即失败优先
<RequireAll>
RequireAll all granted
RequireAll not ip 172.16.1.1   #拒绝特定IP
</RequireAll>
白名单,多个语句有一个成功,则成功,即成功优先
<RequireAny>
RequireAny all denied
require ip 172.16.1.1   #允许特定IP
</RequireAny>
实验:
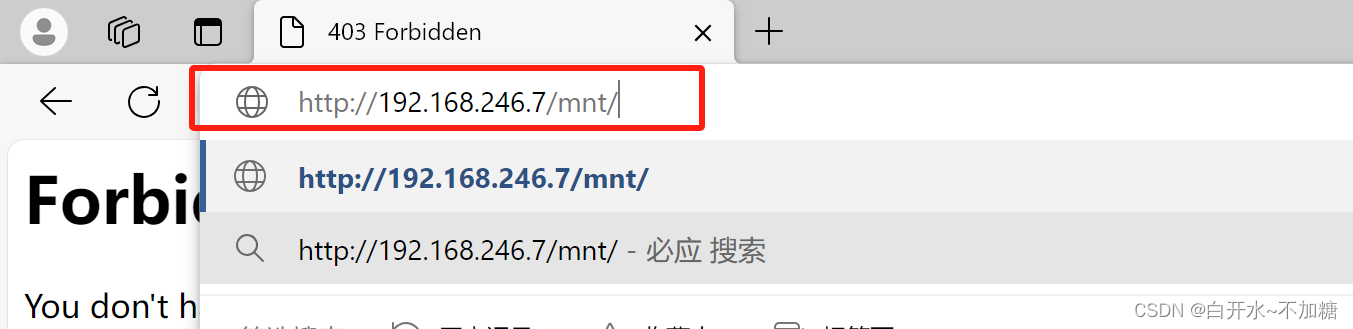
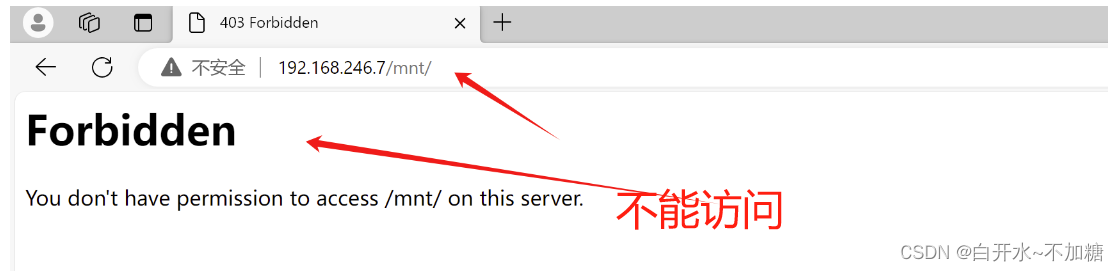
[root@centos1 html]#vim /etc/httpd/conf.d/test.conf
<directory /mnt>
<RequireAll>Require all grantedRequire not ip 192.168.246.1
</RequireAll>
</directory>alias /mnt  /mnt/html
[root@centos1 html]#mkdir /mnt/html
[root@centos1 html]#echo /mnt/html > /mnt/html/index.html
[root@centos1 html]#cat /mnt/html/index.html
/mnt/html
[root@centos1 html]#systemctl restart httpd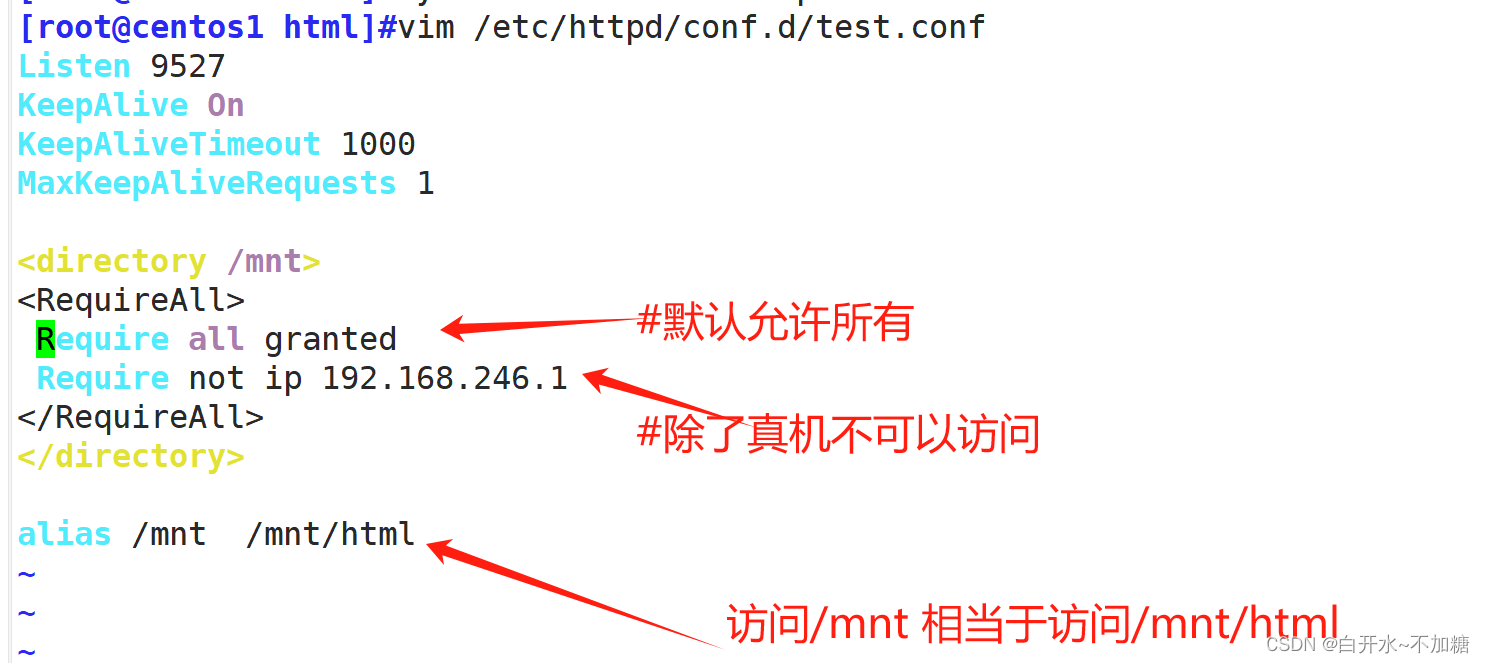

验证:
去虚拟机访问:

去真机网页验证
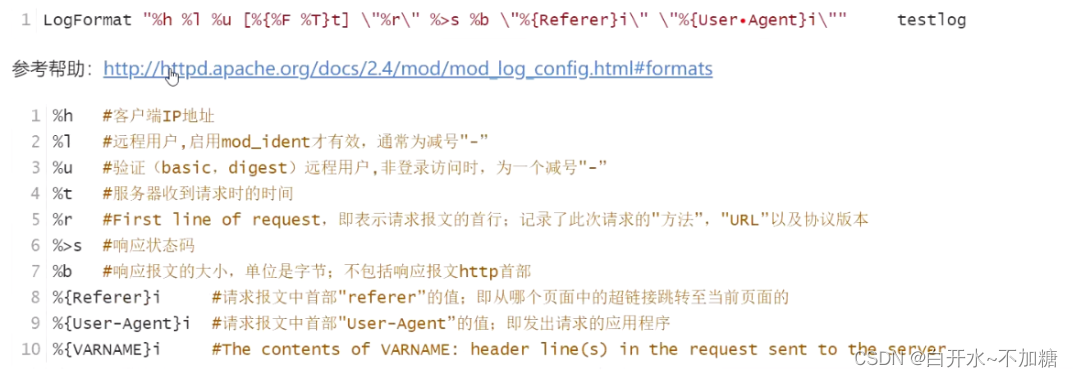
14.日志
三、Web相关工具
1.Wget相关工具
格式:
wget [OPTION]... [URL]...常用选项:
-q 静默模式
-c 断点续传
-P /path 保存在指定目录
-O filename 保存为指定文件名,filename 为 - 时,发送至标准输出
--limit-rate= 指定传输速率,单位K,M等
例子:
[root@centos7 ~]#wget --limit-rate 1M -P /data https://mirrors.aliyun.com/centos/8/isos/x86_64/CentOS-8-x86_64-1905-dvd1.iso2.curl 文字版浏览器
curl是基于URL语法在命令行方式下工作的文件传输工具,它支持FTP, FTPS, HTTP, HTTPS, GOPHER, TELNET, DICT, FILE及LDAP等协议。curl支持HTTPS认证,并且支持HTTP的POST、PUT等方法, FTP上传, kerberos认证,HTTP上传,代理服务器,cookies,用户名/密码认证, 下载文件断点续传,上载文件断点续传, http代理服务器管道( proxy tunneling),还支持IPv6,socks5代理服务器,通过http代理服务器上传文件到FTP服务器等,功能十分强大.
格式:
curl [options] [URL...]常用选项
-A/--user-agent <string> 设置用户代理发送给服务器
-e/--referer <URL> 来源网址
--cacert <file> CA证书 (SSL)
-k/--insecure   允许忽略证书进行 SSL 连接
--compressed 要求返回是压缩的格式
-H/--header "key:value” 自定义首部字段传递给服务器
-i 显示页面内容,包括报文首部信息
-I/--head 只显示响应报文首部信息
-D/--dump-header <file>将url的header信息存放在指定文件中
--basic 使用HTTP基本认证
-u/--user <user[:password]>设置服务器的用户和密码
-L   如果有3xx响应码,重新发请求到新位置
-O 使用URL中默认的文件名保存文件到本地
-o <file> 将网络文件保存为指定的文件中
--limit-rate <rate> 设置传输速度
-0/--http1.0 数字0,使用HTTP 1.0
-v/--verbose 更详细
-C 选项可对文件使用断点续传功能
-c/--cookie-jar <file name> 将url中cookie存放在指定文件中
-x/--proxy <proxyhost[:port]> 指定代理服务器地址
-X/--request <command> 向服务器发送指定请求方法
-U/--proxy-user <user:password> 代理服务器用户和密码
-T 选项可将指定的本地文件上传到FTP服务器上
--data/-d 方式指定使用POST方式传递数据
-s --silent   Silent mode
-b name=data 从服务器响应set-cookie得到值,返回给服务器
-w <format> 显示相应的指定的报文信息,如:%{http_code},%{remote_ip}等
-m, --max-time <time> 允许最大传输时间
-I/--head 只显示响应报文首部信息
[root@centos7 ~]#curl -I http://www.163.com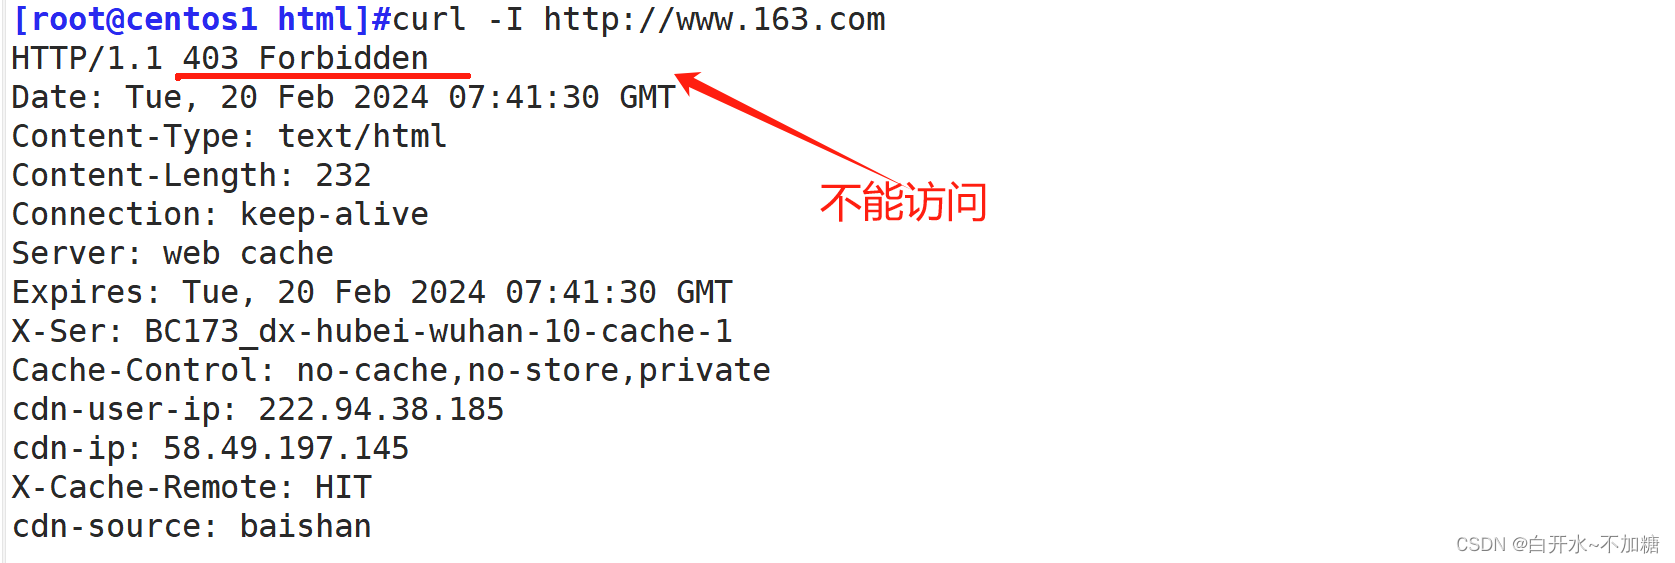
[root@localhost ~]#curl www.163.com -vA chrome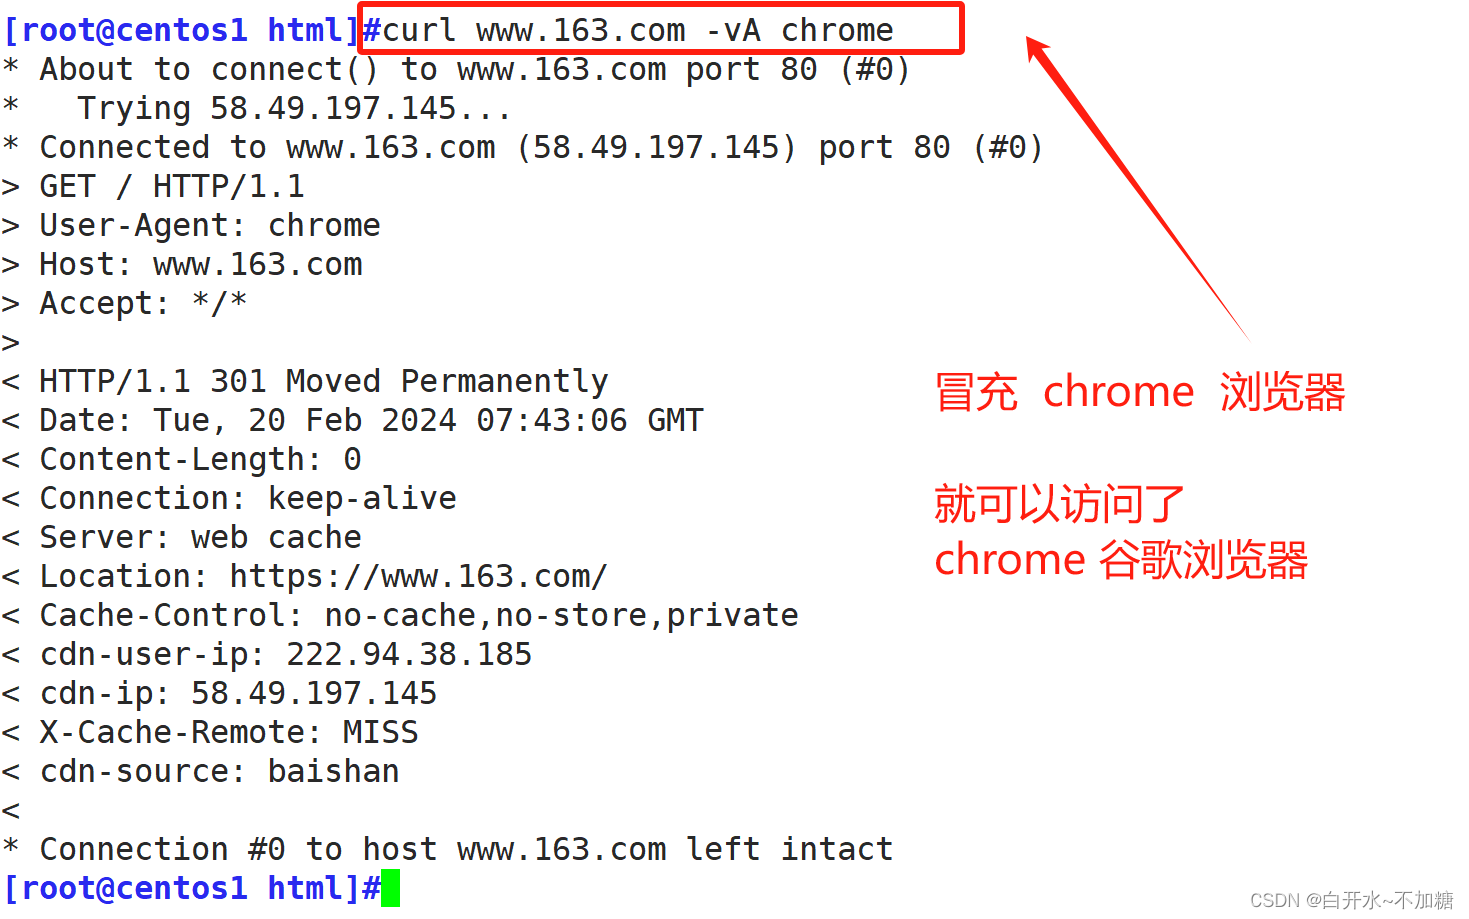
-L 如果有3xx响应码,重新发请求到新位置
-v/--verbose 更详细
补充:
提取状态码
[root@centos1 ~]#curl -s -I -m10 -o /dev/null ? -w %{http_code} http://www.baidu.com/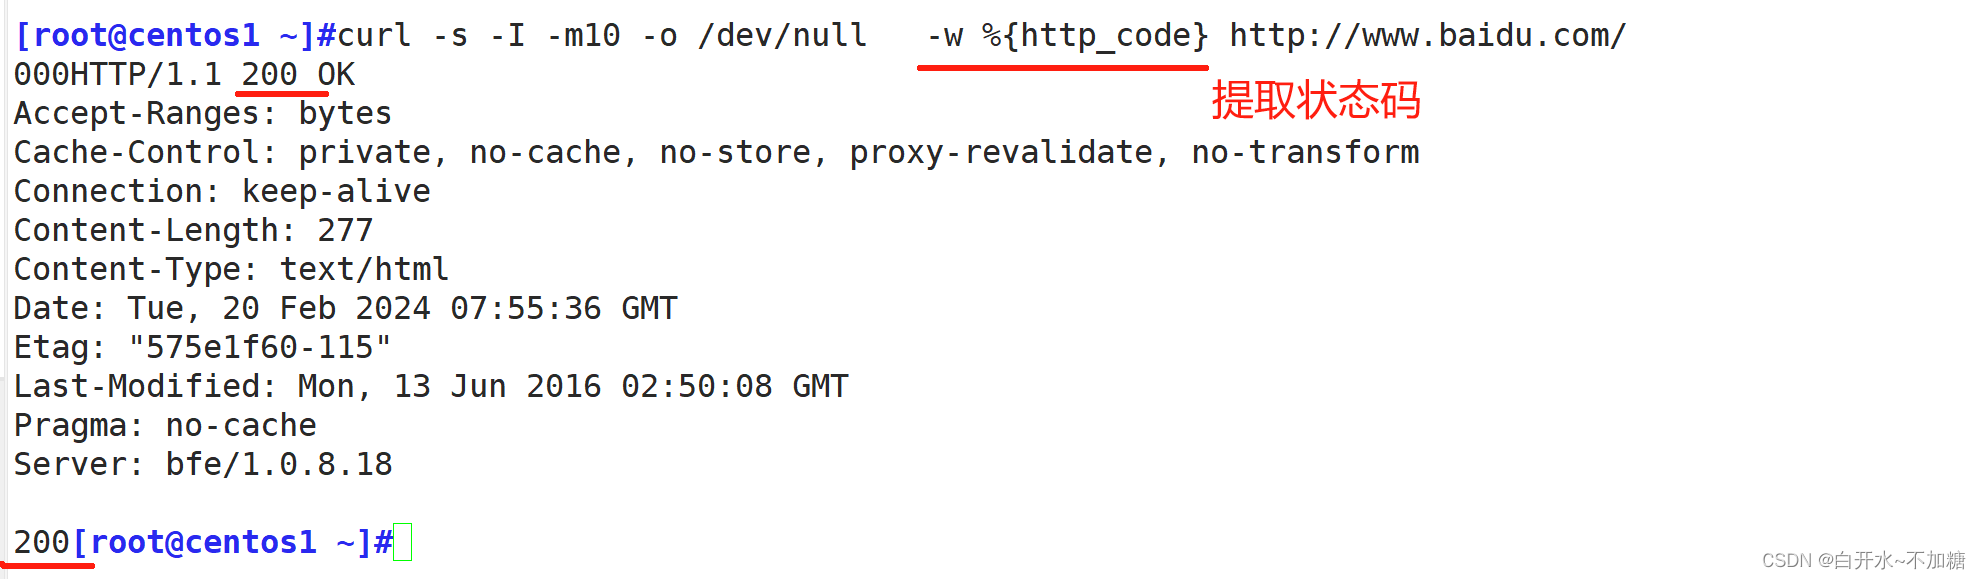
提取远端ip
[root@centos1 ~]#curl -s -I -m10 -o /dev/null -w %{remote_ip} http://www.baidu.com/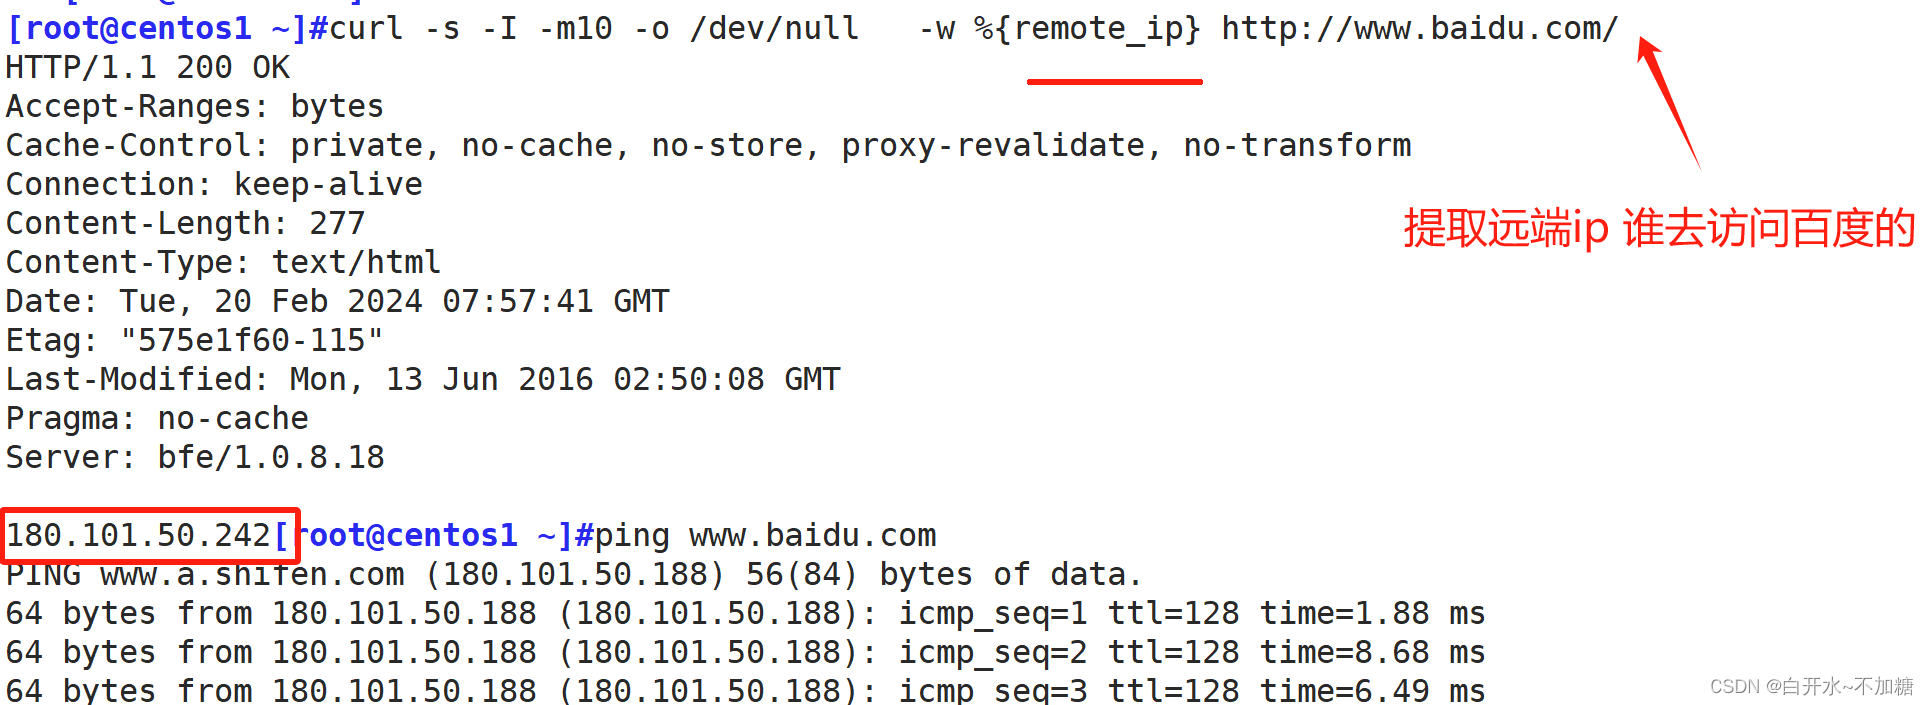
提取本地ip (自己)
[root@centos1 ~]#curl -s -I -m10 -o /dev/null ? -w %{local_ip} http://www.baidu.com/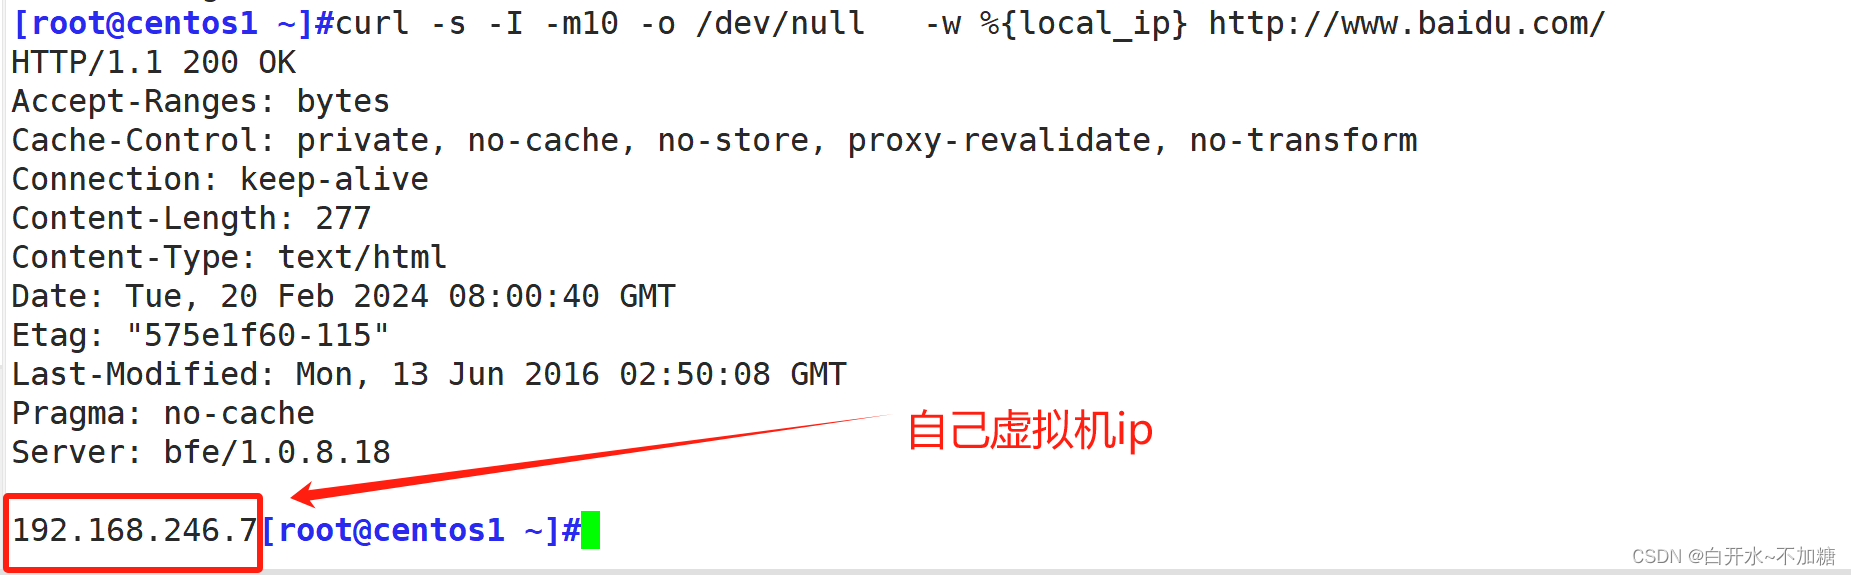
[root@centos1 ~]#curl -s -I -m10 -o /dev/null -w %{local_port} http://www.baidu.com/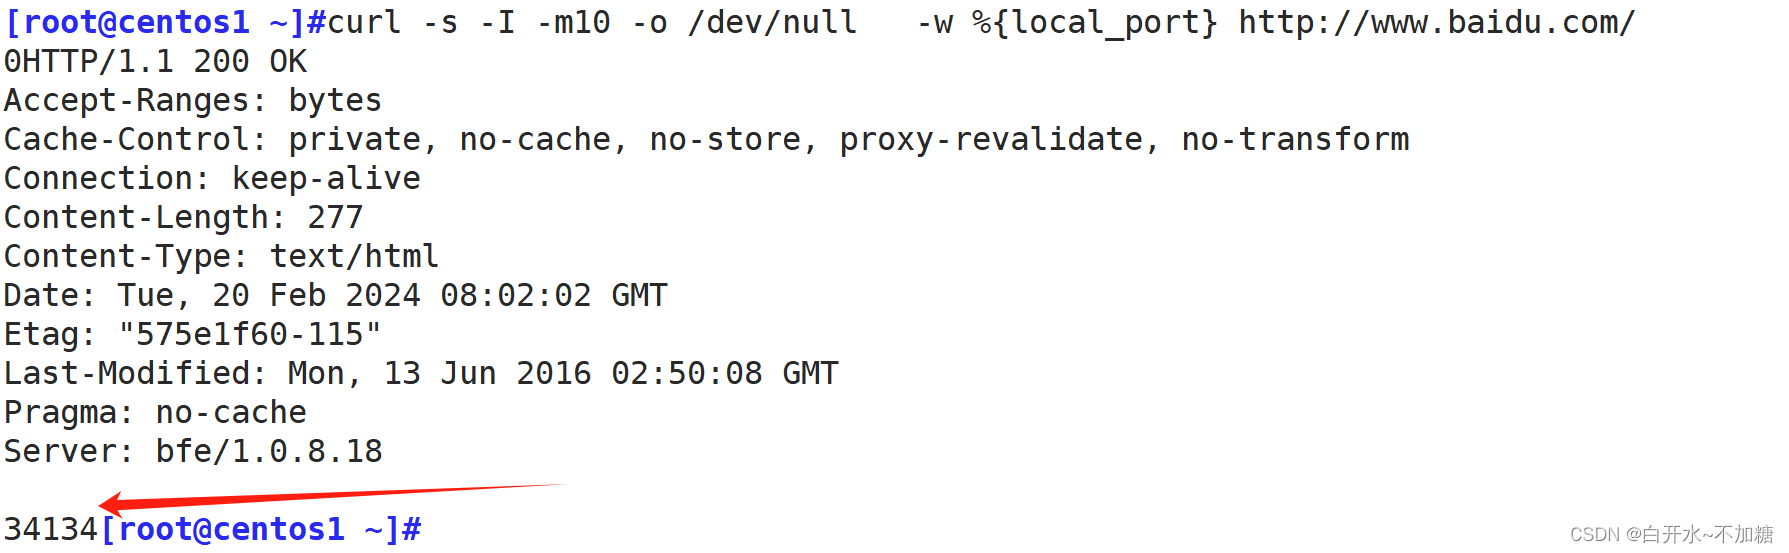
[root@centos1 ~]#curl -s -I -m10 -o /dev/null ? -w %{remote_port} http://www.baidu.com/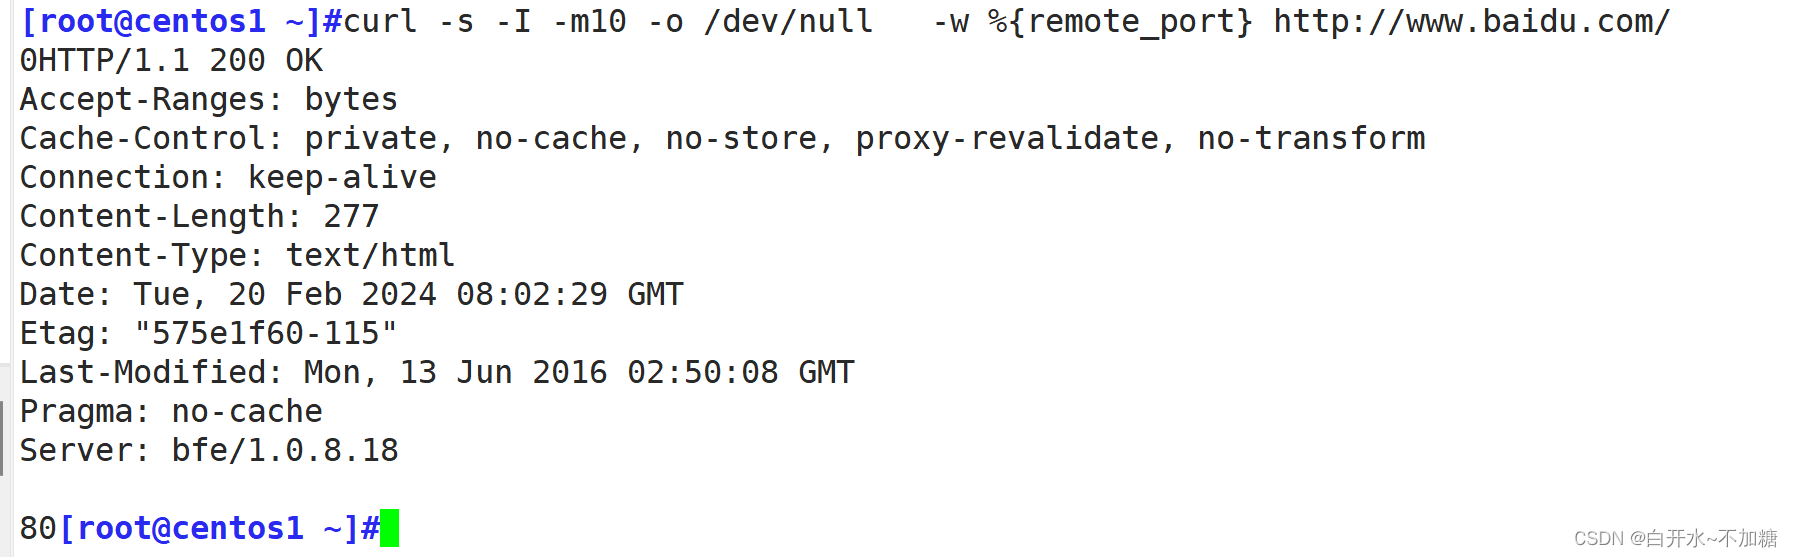
汇总:
curl -s -I -m10 -o /dev/null   -w %{http_code} http://www.baidu.com/
curl -s -I -m10 -o /dev/null   -w %{remote_ip} http://www.baidu.com/
curl -s -I -m10 -o /dev/null   -w %{local_ip} http://www.baidu.com/
curl -s -I -m10 -o /dev/null   -w %{local_port} http://www.baidu.com/
curl -s -I -m10 -o /dev/null   -w %{remote_port} http://www.baidu.com/
3.压力测试工具
httpd的压力测试工具:
-
ab, webbench, http_load, seige
-
Jmeter 开源
-
Loadrunner 商业,有相关认证
-
tcpcopy:网易,复制生产环境中的真实请求,并将之保存
ab 来自httpd-tools包

命令格式:
ab [OPTIONS] URL选项:
-n:总请求数
-c:模拟的并发数
-k:以持久连接模式测试