一,安装步骤:
Alluer工具包路径


在电脑系统中配置 bin 的路径

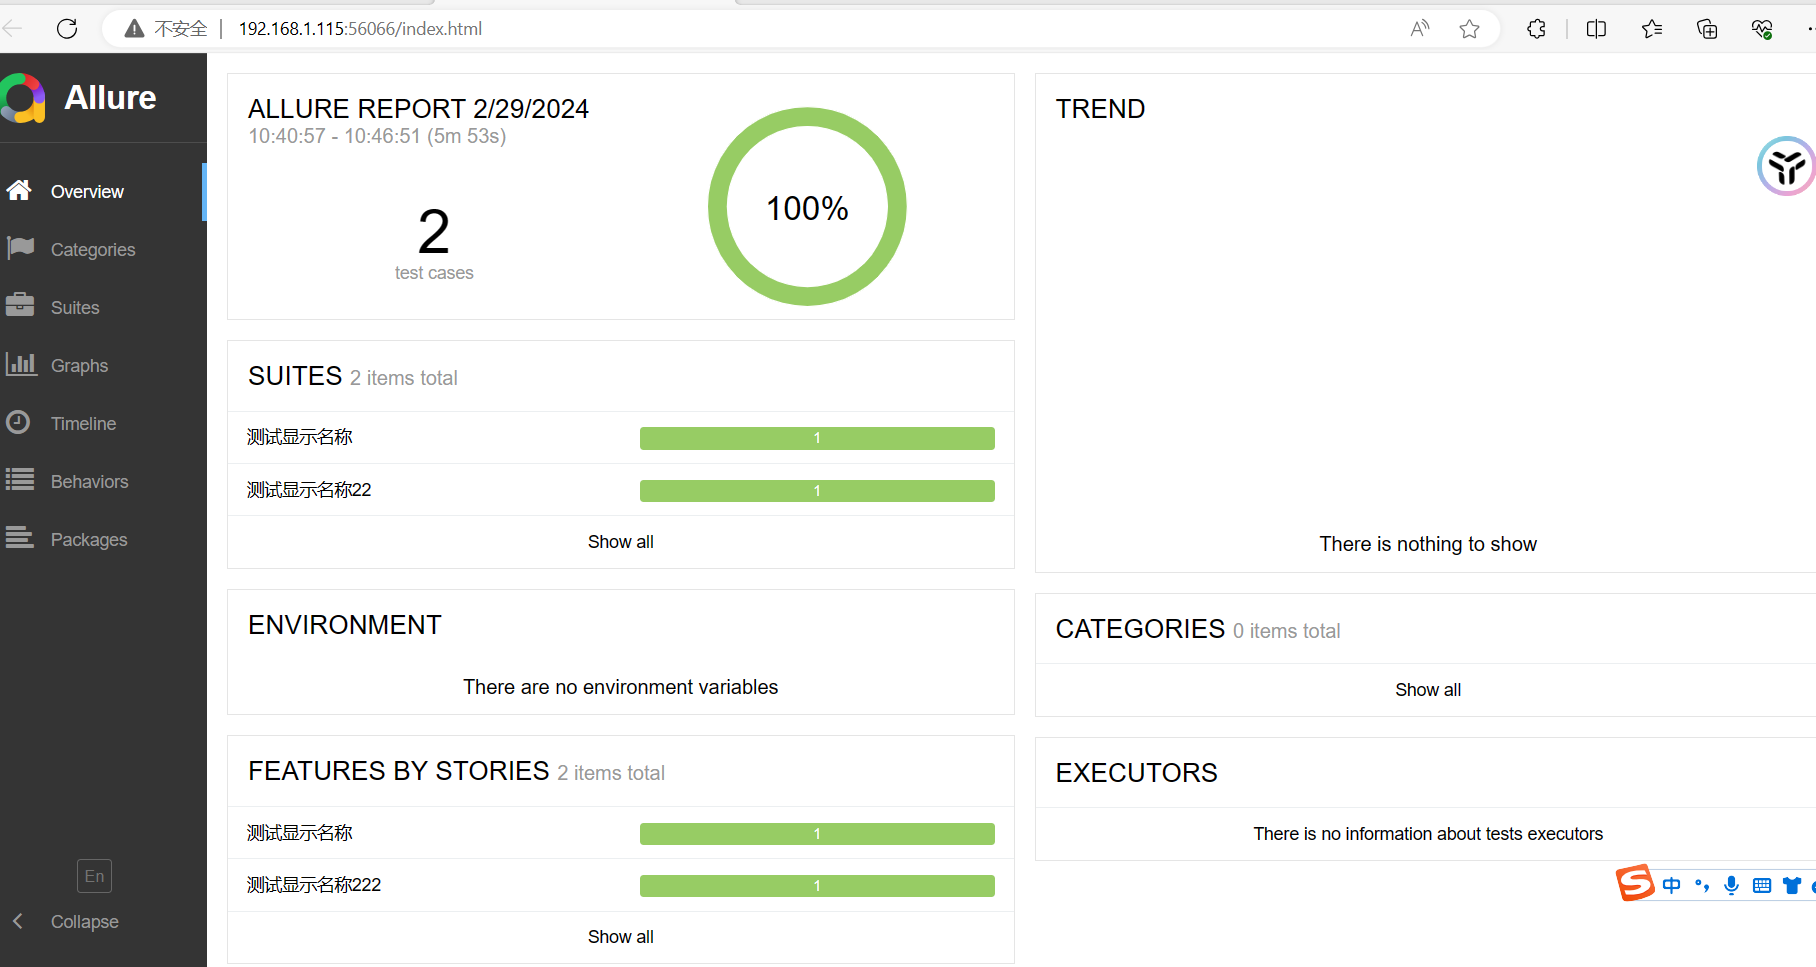
出现该页面表示安装成功

二,Java 用法
注解知识点:

依赖:
<?xml version="1.0" encoding="UTF-8"?>
<project xmlns="http://maven.apache.org/POM/4.0.0" xmlns:xsi="http://www.w3.org/2001/XMLSchema-instance"
xsi:schemaLocation="http://maven.apache.org/POM/4.0.0 https://maven.apache.org/xsd/maven-4.0.0.xsd">
<modelVersion>4.0.0</modelVersion>
<groupId>com.example</groupId>
<artifactId>demo_tess</artifactId>
<version>0.0.1-SNAPSHOT</version>
<name>demo_tess</name>
<description>demo_tess</description>
<properties>
<java.version>1.8</java.version>
<project.build.sourceEncoding>UTF-8</project.build.sourceEncoding>
<project.reporting.outputEncoding>UTF-8</project.reporting.outputEncoding>
<spring-boot.version>2.6.13</spring-boot.version>
<maven.compiler.source>8</maven.compiler.source>
<maven.compiler.target>8</maven.compiler.target>
<aspectj.version>1.8.10</aspectj.version>
<project.build.sourceEncoding>UTF-8</project.build.sourceEncoding>
</properties>
<dependencies>
<dependency>
<groupId>org.springframework.boot</groupId>
<artifactId>spring-boot-starter-web</artifactId>
</dependency><dependency>
<groupId>org.springframework.boot</groupId>
<artifactId>spring-boot-starter-test</artifactId>
<scope>test</scope>
</dependency><!--  Allure依赖 -->
<dependency>
<groupId>org.junit.jupiter</groupId>
<artifactId>junit-jupiter</artifactId>
<version>RELEASE</version>
<scope>test</scope>
</dependency>
<dependency>
<groupId>org.hamcrest</groupId>
<artifactId>hamcrest</artifactId>
<version>2.2</version>
<scope>test</scope>
</dependency>
<dependency>
<groupId>io.qameta.allure</groupId>
<artifactId>allure-junit5</artifactId>
<version>2.13.6</version>
<scope>test</scope>
</dependency>
<dependency>
<groupId>org.junit.platform</groupId>
<artifactId>junit-platform-console-standalone</artifactId>
<version>1.7.0</version>
</dependency>
<dependency>
<groupId>org.hamcrest</groupId>
<artifactId>hamcrest</artifactId>
<version>2.1</version>
<scope>compile</scope>
</dependency>
</dependencies>
<dependencyManagement>
<dependencies>
<dependency>
<groupId>org.springframework.boot</groupId>
<artifactId>spring-boot-dependencies</artifactId>
<version>${spring-boot.version}</version><type>pom</type><scope>import</scope></dependency></dependencies></dependencyManagement><build><plugins><plugin><groupId>org.apache.maven.plugins</groupId><artifactId>maven-compiler-plugin</artifactId><version>3.8.1</version><configuration><source>1.8</source><target>1.8</target><encoding>UTF-8</encoding></configuration></plugin><plugin><groupId>org.springframework.boot</groupId><artifactId>spring-boot-maven-plugin</artifactId><version>${spring-boot.version}</version><configuration><mainClass>com.example.demo_tess.DemoTessApplication</mainClass><skip>true</skip></configuration><executions><execution><id>repackage</id><goals><goal>repackage</goal></goals></execution></executions></plugin><plugin><artifactId>maven-surefire-plugin</artifactId><version>3.0.0-M5</version><configuration><includes><include>**/*Test.java</include></includes></configuration></plugin></plugins></build></project>
Java 实例测试代码:
package com.example.demo_tess;import io.qameta.allure.Description;
import io.qameta.allure.Story;
import org.junit.Assert;
import org.junit.jupiter.api.DisplayName;
import org.junit.jupiter.api.Test;@DisplayName("测试显示名称")
class TessApplicationTests {@Test@Story("测试显示名称")@Description("这是一个case的静态描述信息")void test1(){Assert.assertEquals(1,1);}}
步骤:
- 运行测试代码
- 打开 cmd 窗口在
allure serve allure-results