文章目录
- 前言
- 一、如何实现?
- 1、数值转成分数
- 2、Row+Flexible布局横向
- 3、Column+Flexible布局纵向
- 二、完整代码
- 三、使用示例
- 1、基本用法
- 2、四分屏
- 3、六分屏
- 4、八分屏
- 5、九分屏
- 6、414分屏
- 总结
前言
做视频监控项目时需要需要展示多分屏,比如2x2、3x3、414等等,如果每一种分屏都单独实现会很麻烦,而且不能支持用户定制。最好的方式还是实现一个通用的分屏容器,而且采样比例计算位置大小,可以适配任意尺寸。
一、如何实现?
最直观的实现方式是获取控件宽高然后按比例计算,但是flutter在build的时候无法获取位置宽高信息,只有绘制之后才能获取,所以这种方式并不容易实现,比较简单的方式应该是使用Row、Column结合Flexible。
1、数值转成分数
需要转换的数值
final Rect rect; //子控件位置大小,比例值范围0-1
定义一个分数对象
//分数
class Rational {int den = 1; //分母int num = 0; //分子Rational(this.num, this.den);//通过double构造,accuracy小数点后精度factory Rational.fromDouble(double d, {int accuracy = 5}) {int den = 1;while (d > d.toInt() && accuracy-- > 0) {d *= 10;den *= 10;}return Rational(d.toInt(), den);}
}
转成分数并对齐分母
//将位置大小转成分数final width = Rational.fromDouble(rect.width);final x = Rational.fromDouble(rect.left);final height = Rational.fromDouble(rect.height);final y = Rational.fromDouble(rect.top);//对齐分母if (width.den != x.den) {final den = width.den;width.den *= x.den;width.num *= x.den;x.den *= den;x.num *= den;}//对齐分母if (height.den != y.den) {final den = height.den;height.den *= y.den;height.num *= y.den;y.den *= den;y.num *= den;}
2、Row+Flexible布局横向
我们利用Row的自动布局,以及Flexible的比例布局的特性,根据上面的分数计算出控件比例的位置大小对应的flex值即可。
Row(children: [Flexible(flex: x.num,child: Container(),),Flexible(flex: width.num,child: child/*子控件,加上纵向布局则是Column*/),Flexible(flex: width.den - width.num - x.num, child: Container()),],);}
3、Column+Flexible布局纵向
我们利用Column的自动布局,以及Flexible的比例布局的特性,根据上面的分数计算出控件比例的位置大小对应的flex值即可。
Column(children: [Flexible(flex: y.num,child: Container(),),Flexible(flex: height.num, child: child/*子控件*/),Flexible(flex: height.den - height.num - y.num,child: Container(),),],)
二、完整代码
proportion.dart
import 'package:flutter/material.dart';//比例布局控件,
class Proportion extends StatelessWidget {final Rect rect; //位置大小,比例值范围0-1final Widget child;const Proportion({super.key,this.rect = const Rect.fromLTWH(0, 0, 1, 1),required this.child,});Widget build(BuildContext context) {//实现按比例显示布局final width = Rational.fromDouble(rect.width);final x = Rational.fromDouble(rect.left);final height = Rational.fromDouble(rect.height);final y = Rational.fromDouble(rect.top);if (width.den != x.den) {final den = width.den;width.den *= x.den;width.num *= x.den;x.den *= den;x.num *= den;}if (height.den != y.den) {final den = height.den;height.den *= y.den;height.num *= y.den;y.den *= den;y.num *= den;}return Row(children: [Flexible(flex: x.num,child: Container(),),Flexible(flex: width.num,child: Column(children: [Flexible(flex: y.num,child: Container(),),Flexible(flex: height.num, child: child),Flexible(flex: height.den - height.num - y.num,child: Container(),),],),),Flexible(flex: width.den - width.num - x.num, child: Container()),],);}
}//分数
class Rational {int den = 1; //分母int num = 0; //分子Rational(this.num, this.den);//通过double构造,accuracy小数点后精度factory Rational.fromDouble(double d, {int accuracy = 5}) {int den = 1;while (d > d.toInt() && accuracy-- > 0) {d *= 10;den *= 10;}return Rational(d.toInt(), den);}
}
常用布局(可选)
proportions.dart
import 'package:flutter/material.dart';import 'proportion.dart';//常用布局,需配合stack作为父容器使用
class Proportions {Proportions._();//全屏static List<Proportion> fullScreen({required Widget child,}) =>[Proportion(rect: const Rect.fromLTWH(0, 0, 1, 1),child: child,)];//二分屏static List<Proportion> halfScreen({required Widget left,required Widget right,}) =>[Proportion(rect: const Rect.fromLTWH(0, 0, 0.5, 1),child: left,),Proportion(rect: const Rect.fromLTWH(0.5, 0, 0.5, 1),child: right,),];//四分屏static List<Proportion> quadScreen({required List<Widget> children,}) {return [Proportion(rect: const Rect.fromLTWH(0, 0, 0.5, 0.5),child: children[0],), //左上Proportion(rect: const Rect.fromLTWH(0.5, 0, 0.5, 0.5),child: children[1],), //右上Proportion(rect: const Rect.fromLTWH(0, 0.5, 0.5, 0.5),child: children[2],), //左下Proportion(rect: const Rect.fromLTWH(0.5, 0.5, 0.5, 0.5),child: children[3],), //右下];}//6  分屏static List<Proportion> sixScreen({required List<Widget> children,}) {return [Proportion(rect: const Rect.fromLTWH(0, 0, 0.666, 0.666),child: children[0],), //左上Proportion(rect: const Rect.fromLTWH(0.666, 0, 0.333, 0.333),child: children[1],), //右上Proportion(rect: const Rect.fromLTWH(0.666, 0.333, 0.333, 0.333),child: children[2],), //右中Proportion(rect: const Rect.fromLTWH(0.666, 0.666, 0.333, 0.333),child: children[3],), //右下Proportion(rect: const Rect.fromLTWH(0.333, 0.666, 0.333, 0.333),child: children[4],), //中下Proportion(rect: const Rect.fromLTWH(0, 0.666, 0.333, 0.333),child: children[5],), //左下];}//8  分屏static List<Proportion> eightScreen({required List<Widget> children,}) {return [Proportion(rect: const Rect.fromLTWH(0, 0, 0.75, 0.75),child: children[0],), //左上Proportion(rect: const Rect.fromLTWH(0.75, 0, 0.25, 0.25),child: children[1],), //右上Proportion(rect: const Rect.fromLTWH(0.75, 0.25, 0.25, 0.25),child: children[2],), //右中1Proportion(rect: const Rect.fromLTWH(0.75, 0.5, 0.25, 0.25),child: children[3],), //右中2Proportion(rect: const Rect.fromLTWH(0.75, 0.75, 0.25, 0.25),child: children[4],), //右下Proportion(rect: const Rect.fromLTWH(0.5, 0.75, 0.25, 0.25),child: children[5],), //中下2Proportion(rect: const Rect.fromLTWH(0.25, 0.75, 0.25, 0.25),child: children[6],), //中下1Proportion(rect: const Rect.fromLTWH(0, 0.75, 0.25, 0.25),child: children[7],), //左下];}//9  分屏static List<Proportion> nightScreen({required List<Widget> children,}) {int n = 0;return [...children.getRange(0, 9).map((element) {final i = n++;return Proportion(rect: Rect.fromLTWH((i % 3) * 0.333,(i ~/ 3) * 0.333,0.333,0.333,),child: element,);},)];}//16  分屏static List<Proportion> sixteenScreen({required List<Widget> children,}) {int n = 0;return [...children.getRange(0, 16).map((element) {final i = n++;return Proportion(rect: Rect.fromLTWH((i % 4) * 0.25, (i ~/ 4) * 0.25, 0.25, 0.25),child: element,);},)];}//414分屏static List<Proportion> fourOneFourScreen({required List<Widget> children,}) {int n = 0;return [//左4...children.getRange(0, 4).map((element) {final i = n++;return Proportion(rect: Rect.fromLTWH((i ~/ 4) * 0.25, (i % 4) * 0.25, 0.25, 0.25),child: element,);},),//中间Proportion(rect: const Rect.fromLTWH(0.25, 0, 0.5, 1),child: children[4],),//右边4...children.getRange(5, 9).map((element) {final i = n++ + 8;return Proportion(rect: Rect.fromLTWH((i ~/ 4) * 0.25, (i % 4) * 0.25, 0.25, 0.25),child: element,);},)];}
}
三、使用示例
1、基本用法
设置子控件位置大小。一般配合stack作为父容器使用
Proportion(rect: Rect.fromLTRB(0, 0, 0.5, 0.5), //子控件位置大小,(0, 0, 0.5, 0.5)表示左上1/4的区域child: ColoredBox(color: Colors.red), //子控件);
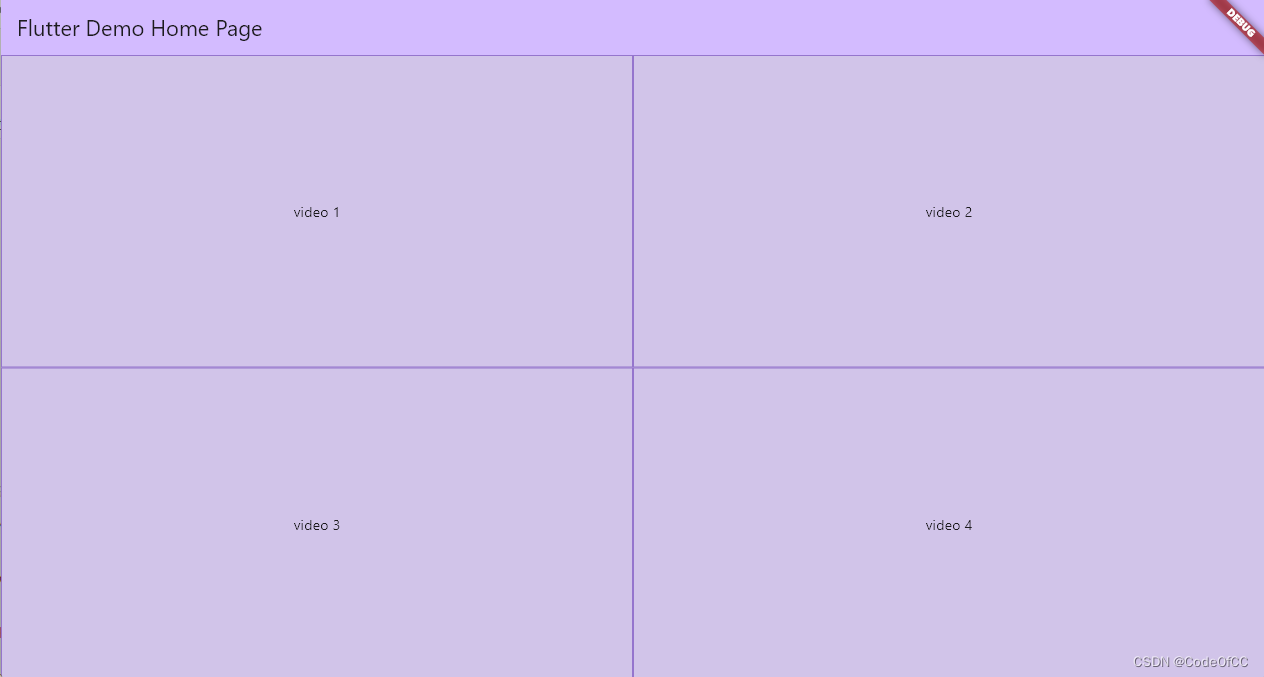
2、四分屏
final List<int> _nums = [1, 2, 3, 4, 5, 6, 7, 8, 9];
Stack(children: Proportions.quadScreen(children: [..._nums.map((e) => Container(constraints: const BoxConstraints.expand(),decoration: BoxDecoration(border: Border.all(color: Colors.deepPurple.shade300)),child: Center(child: Text("video $e")),))
3、六分屏
final List<int> _nums = [1, 2, 3, 4, 5, 6, 7, 8, 9];
Stack(children: Proportions.sixScreen(children: [..._nums.map((e) => Container(constraints: const BoxConstraints.expand(),decoration: BoxDecoration(border: Border.all(color: Colors.deepPurple.shade300)),child: Center(child: Text("video $e")),))

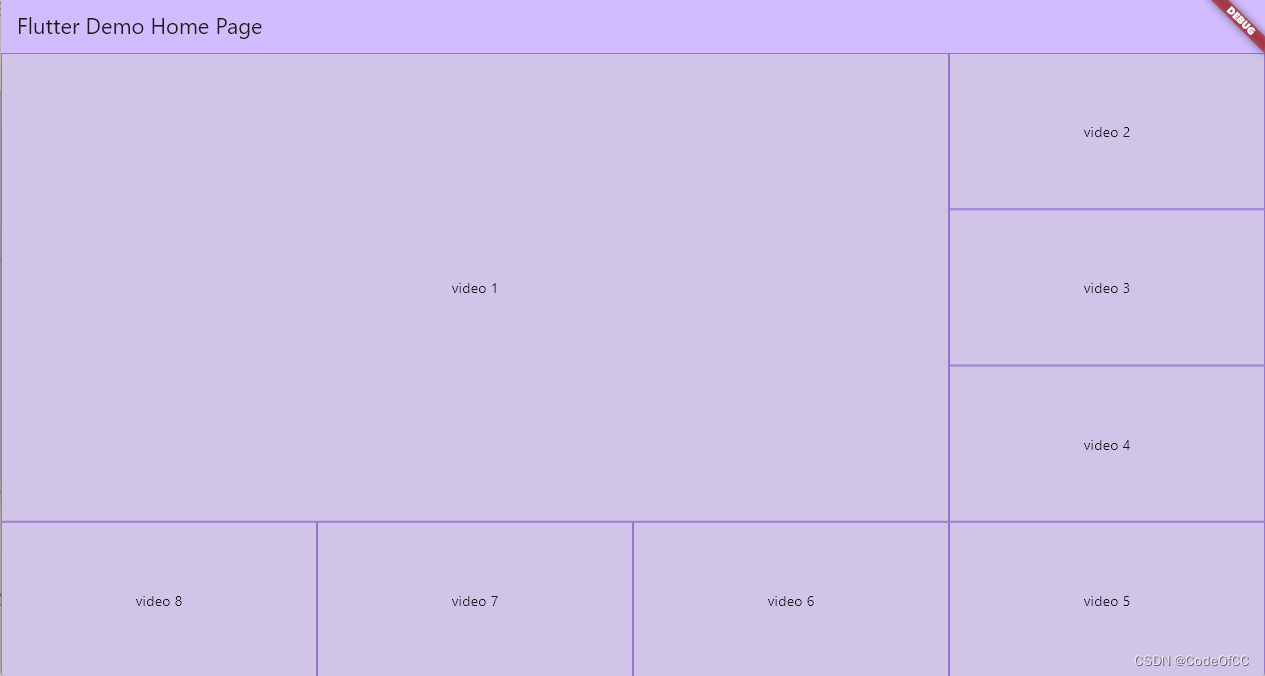
4、八分屏
final List<int> _nums = [1, 2, 3, 4, 5, 6, 7, 8, 9];
Stack(children: Proportions.eightScreen(children: [..._nums.map((e) => Container(constraints: const BoxConstraints.expand(),decoration: BoxDecoration(border: Border.all(color: Colors.deepPurple.shade300)),child: Center(child: Text("video $e")),))
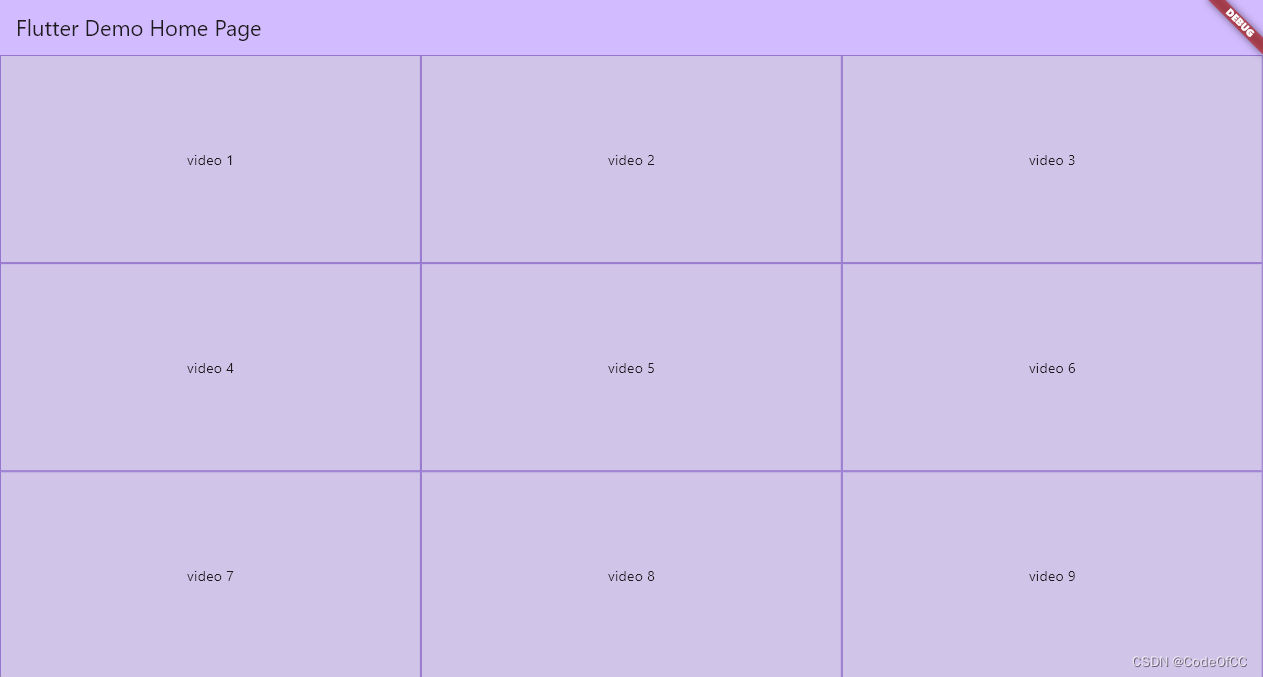
5、九分屏
final List<int> _nums = [1, 2, 3, 4, 5, 6, 7, 8, 9];
Stack(children: Proportions.nightScreen(children: [..._nums.map((e) => Container(constraints: const BoxConstraints.expand(),decoration: BoxDecoration(border: Border.all(color: Colors.deepPurple.shade300)),child: Center(child: Text("video $e")),))
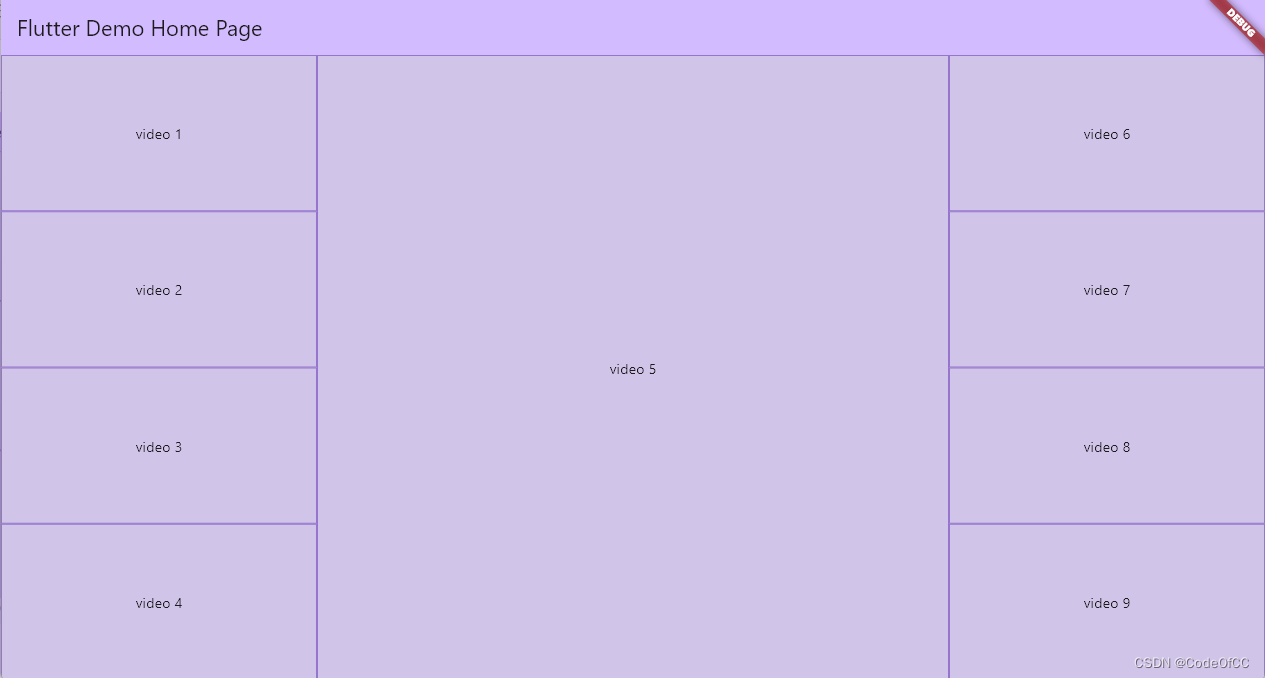
6、414分屏
final List<int> _nums = [1, 2, 3, 4, 5, 6, 7, 8, 9];
Stack(children: Proportions.fourOneFourScreen(children: [..._nums.map((e) => Container(constraints: const BoxConstraints.expand(),decoration: BoxDecoration(border: Border.all(color: Colors.deepPurple.shade300)),child: Center(child: Text("video $e")),))
始终保持比例

总结
以上就是今天要讲的内容,本文用的是比较简单的方式实现了比例布局控件,其主要特点是可以灵活使用,尤其是方便视频分屏预览的实现。本质上也是对一类布局规则的总结得出的一个通用的控件,因为考虑到2x2、3x3还是可以写死的,但是到了4x4、5x5写死则需要16、25个参数,那就必须改用数组,也就意味着需要根据规则计算位置,那和本文一样了。所以本文的控件是有实际使用意义的。