基于Flask的Web应用开发
项目来源:[【基于Flask的Web应用开发-01.应用介绍及Flask安装_s】](【基于Flask的Web应用开发-01.应用介绍及Flask安装_s】 https://www.bilibili.com/video/BV1r94y1j7uW/?share_source=copy_web&vd_source=d0886da49a29063777f2956d5780b087)
原作者首页: http://hifengge.com/index.html
我的代码仓库:https://github.com/hu0701/flask-bootstrap.git
记录学习flask笔记代码
一、应用介绍及Flask安装
二、使用模板
三、连接MySQL数据库
1、引入模块
window是安装MySQL5.7
https://blog.csdn.net/sunshine7058/article/details/138474991
requirements.txt文件追加模板
mysqlclient==2.2.0
SQLAlchemy==2.0.23
Flask-SQLAlchemy==3.1.1
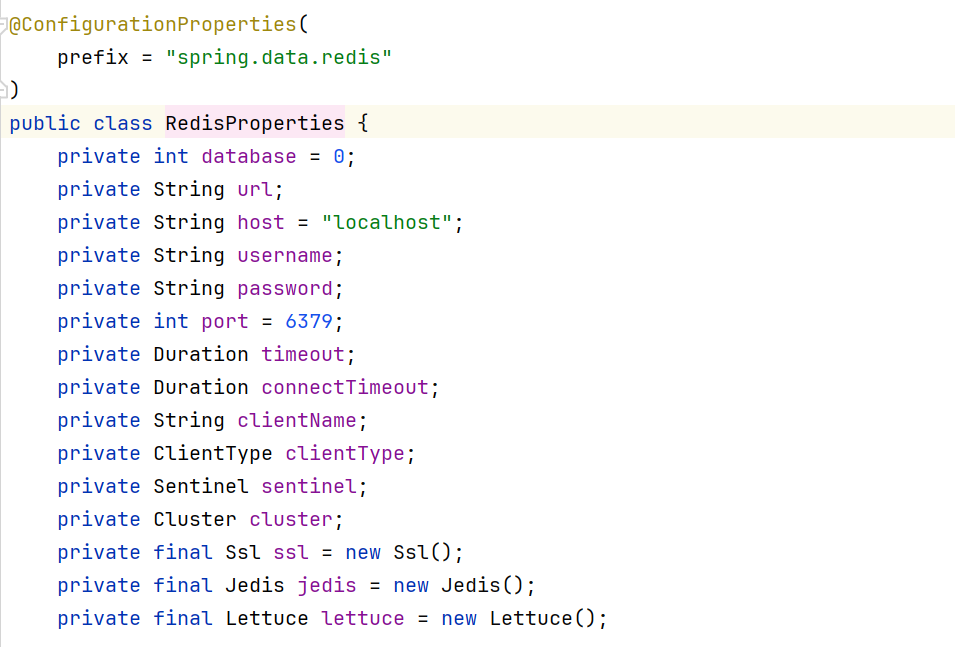
2、配置数据库连接参数
https://docs.sqlalchemy.org/en/20/dialects/mysql.html#module-sqlalchemy.dialects.mysql.mysqldb
routes/__init__.py
mysql+mysqldb://<user>:<password>@<host>[:<port>]/<dbname>
from flask import Flask
from flask_sqlalchemy import SQLAlchemyapp = Flask(__name__,template_folder='../templates',static_folder='../assets',static_url_path='/assets')app.config['SQLALCHEMY_DATABASE_URI'] = 'mysql+mysqldb://root:root@127.0.0.1/myblog_db'
db = SQLAlchemy(app)from routes import user_routes
from routes import admin_routes
3、定义数据库映射类
models/article.py
from datetime import datetime
from routes import db
from sqlalchemy import Integer, String, BLOB, TIMESTAMP
from sqlalchemy.orm import Mapped, mapped_columnclass Article(db.Model):"""踩坑,1、nullable参数写错2、格式不对齐"""__tablename__ = 'articles'id: Mapped[int] = mapped_column(Integer, primary_key=True)title: Mapped[str] = mapped_column(String(255), unique=True, nullable=False)__content: Mapped[bytes] = mapped_column(BLOB, name="content", nullable=False)create_time: Mapped[datetime] = mapped_column(TIMESTAMP, nullable=False)update_time: Mapped[datetime] = mapped_column(TIMESTAMP, nullable=True)@propertydef content(self):return self.__content.decode('utf-8')
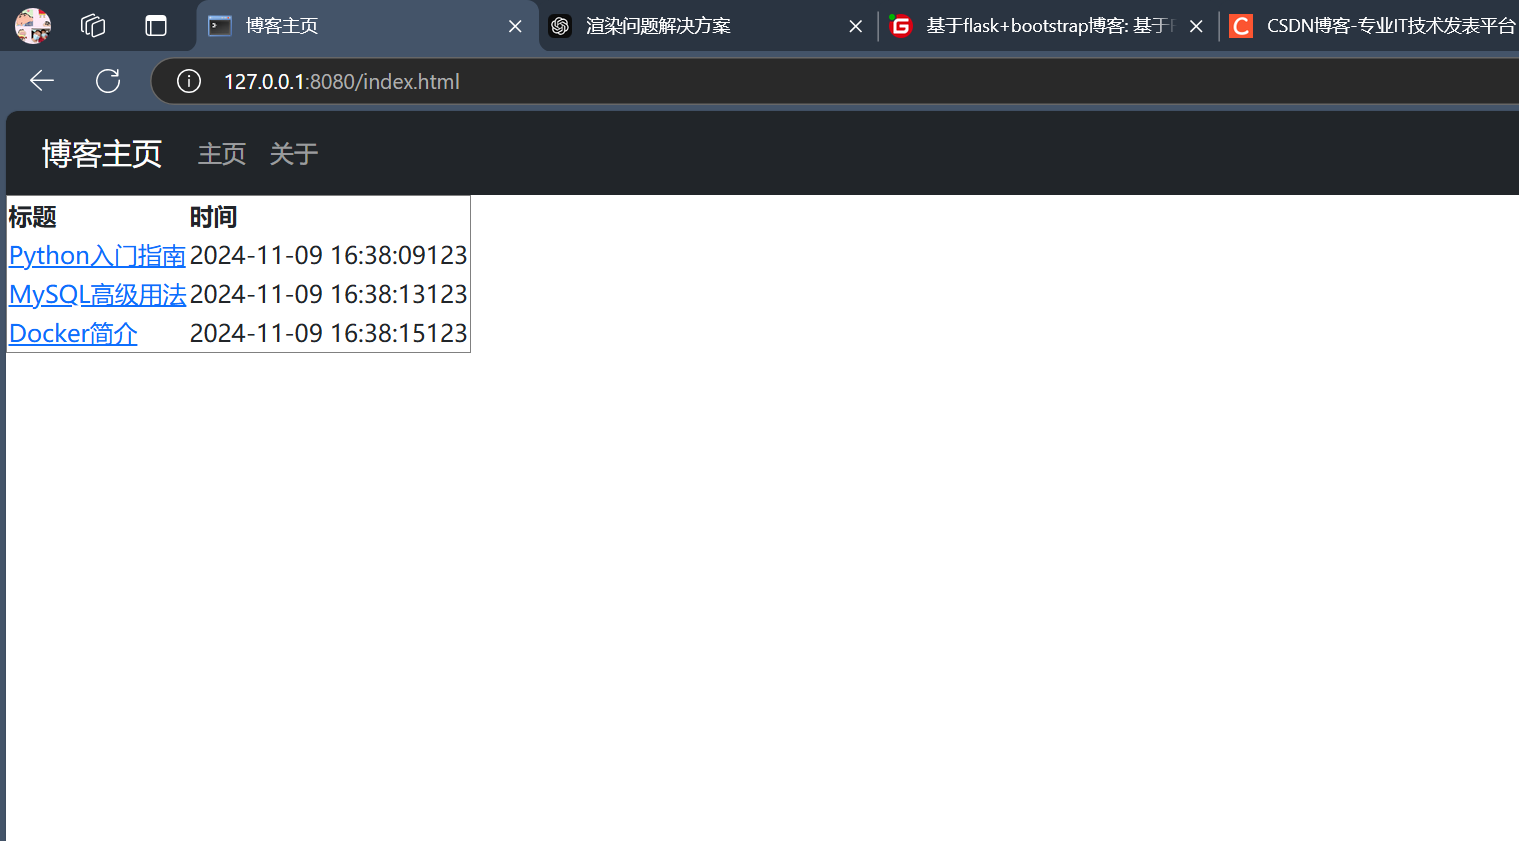
4、前端渲染
index.html
{% extends 'base.html' %}{% block title %}
博客主页
{% endblock %}
<--! 拼写错误:在 index.html 文件中,你在循环部分写成了 acticles,应该是 articles。这个拼写错误会导致循环内容无法正确显示。 -->
{% block content %}
<table border="1"><tr><th>标题</th><th>时间</th></tr>{% for article in  articles %}<tr><td><a href="/article/{{ article.id }}.html">{{ article.title }}</a></td><td>{{ article.create_time }}123</td></tr>{% endfor %}
</table>
{% endblock %}
效果:

四、实现用户登录
1、添加新的模块
requirements.txt文件追加模板
flask-WTF==1.2.1
flask-login==0.6.3
2、定义用户表的映射
modele/user.py
from flask_login import UserMixinfrom routes import db, login_manager
from sqlalchemy import Integer, String, BLOB, TIMESTAMP
from sqlalchemy.orm import Mapped, mapped_column@login_manager.user_loader
def load_user(user_id):return db.session.get(User, user_id)class User(db.Model, UserMixin):__tablename__ = 'user'id: Mapped[int] = mapped_column(Integer, primary_key=True)username: Mapped[str] = mapped_column(String(128), unique=True, nullable=False)password: Mapped[str] = mapped_column(String(255), nullable=False)fullname: Mapped[str] = mapped_column(String(128), nullable=False)description: Mapped[str] = mapped_column(String(255), nullable=True)def check_password_correction(self, attempted_password):return self.password == attempted_password
3、增加login_manager的初始化
routes/__init__.py
from flask import Flask
from flask_sqlalchemy import SQLAlchemy
from flask_login import LoginManagerapp = Flask(__name__,template_folder='../templates',static_folder='../assets',static_url_path='/assets')
app.config['SQLALCHEMY_DATABASE_URI'] = 'mysql+mysqldb://root:root@127.0.0.1/myblog_db'
app.config['SECRET_KEY'] = 'ec9439cfc6c796ae2029594d'  #初始化配置db = SQLAlchemy(app)
login_manager = LoginManager(app)					#初始化实例from routes import user_routes
from routes import admin_routes
4、为User类增加对login_manage的支持
modele/user.py
from datetime import datetimefrom flask_login import UserMixinfrom routes import db, login_manager
from sqlalchemy import Integer, String, BLOB, TIMESTAMP
from sqlalchemy.orm import Mapped, mapped_column@login_manager.user_loader
def load_user(user_id):return db.session.get(User, user_id)class User(db.Model, UserMixin):__tablename__ = 'user'id: Mapped[int] = mapped_column(Integer, primary_key=True)username: Mapped[str] = mapped_column(String(128), unique=True, nullable=False)password: Mapped[str] = mapped_column(String(255), nullable=False)fullname: Mapped[str] = mapped_column(String(128), nullable=False)description: Mapped[str] = mapped_column(String(255), nullable=True)def check_password_correction(self, attempted_password):return self.password == attempted_password
5、编写表单类
forms/login_form.py
from flask_wtf import FlaskForm
from wtforms import StringField, PasswordField, SubmitField
from wtforms.validators import DataRequiredclass LoginForm(FlaskForm):username = StringField(label="用户名:", validators=[DataRequired()])password = PasswordField(label="密码:", validators=[DataRequired()])submit = SubmitField(label="登陆")
6、编写表单页面
templates/login.html
{% extends 'base.html' %}
{% block title %}
博客主页
{% endblock %}{% block content %}
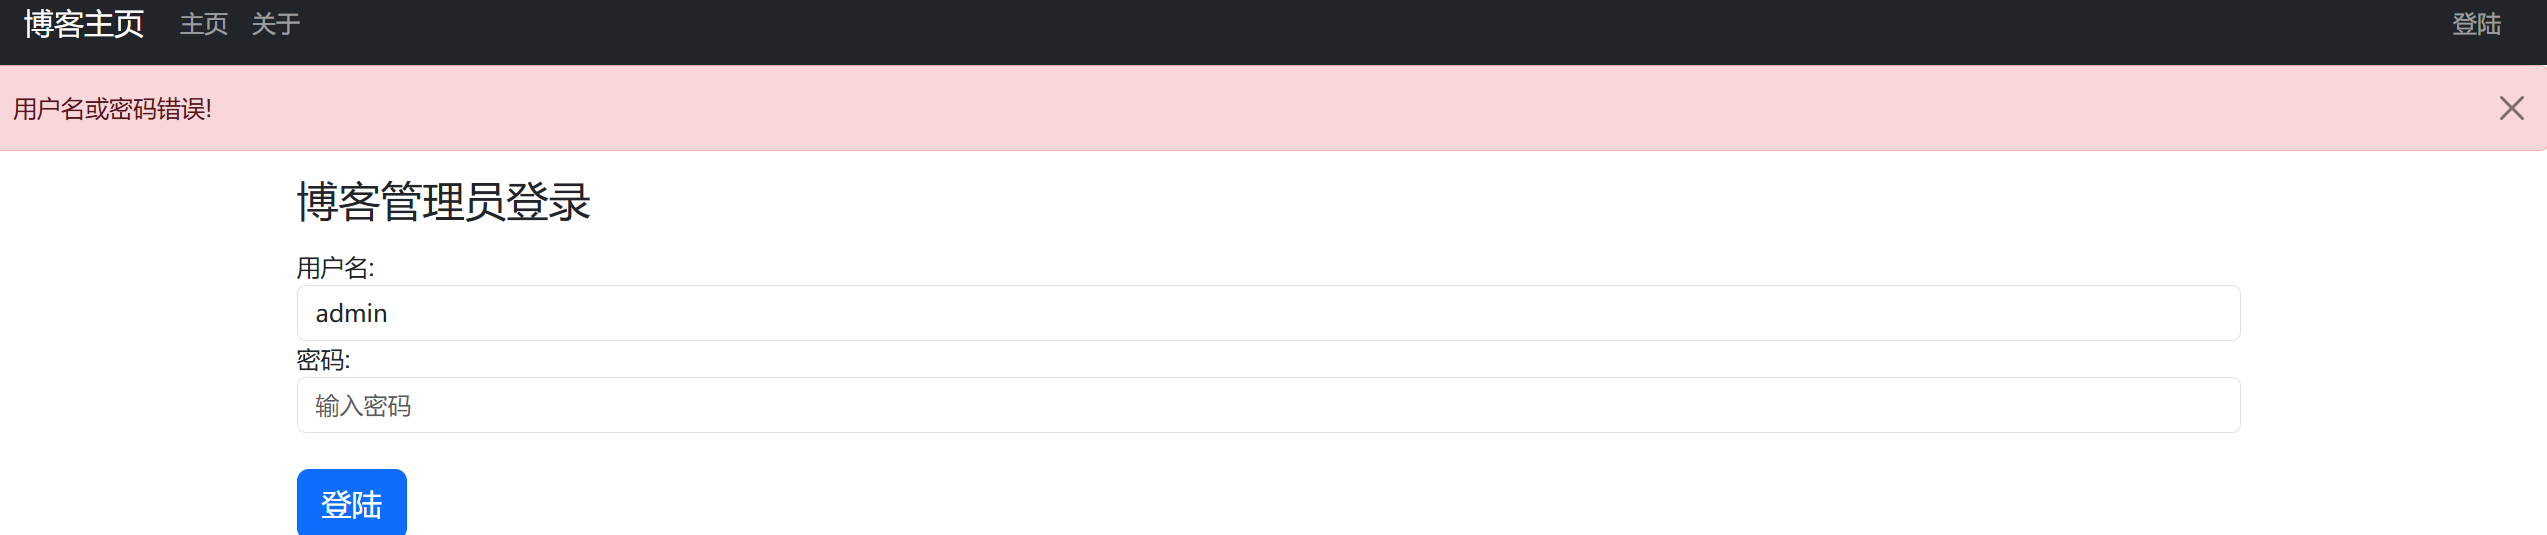
<div class="container-xl"><form method="POST" class="form-signin">{{ form.hidden_tag() }}<h1 class="h3 mb-3 font-weight-normal">博客管理员登录</h1>{{ form.username.label }}{{ form.username(class="form-control", placeholder="输入用户名") }}{{ form.password.label }}{{ form.password(class="form-control", placeholder="输入密码") }}<br>{{ form.submit(class="btn btn-lg btn-primary btn-block") }}</form>
</div>
{% endblock %}
7、添加路由追踪
routes/user_route.py
······
@app.route('/login.html', methods=['GET', 'POST'])
def login_page():form = LoginForm()if form.validate_on_submit():result = UserService().do_login(username=form.username.data, password=form.password.data)if result:flash(f'欢迎{form.username.data}回来',category='success')return redirect(url_for('home_page'))else:flash(f'用户名或密码错误!',category='error')return render_template('login.html', form=form)
8、完成UserService的登陆支持
service/user_service
from sqlalchemy import Select
from models.user import User
from routes import db
from flask_login import login_userclass UserService:def do_login(self, username: str, password: str)-> bool:query = Select(User).where(User.username == username)attempted_user = db.session.scalar(query)if attempted_user and attempted_user.check_password_correction(attempted_password=password):login_user(attempted_user)return Truereturn False


五、登陆错误处理和退出
1、增加显示提示的页面组件
templates/base.html
{% with messages = get_flashed_messages(with_categories=true) %}{% if messages %}{% for category, message in messages %}<div class="alert alert-{{ category }} alert-dismissible fade show" role="alert">{{ message }}<button type="button" class="btn-close" data-bs-dismiss="alert" aria-label="Close"></button></div>{% endfor %}{% endif %}{% endwith %}
2、添加路由
routes/user_routes.py
@app.route('/logout.html')
def logout_page():logout_user()return redirect(url_for('home_page'))
3、显示按钮
templates/base.html
·····{% if current_user.is_authenticated %}<ul class="navbar-nav"><li class="nav-item"><a class="nav-link" href="#">发布新文章</a></li><li class="nav-item"><a class="nav-link" href="{{ url_for('logout_page') }}">退出</a></li></ul>{% else %}·····


六、发布文章
1、定义表单类
forms/article_form.py
from flask_wtf import FlaskForm
from wtforms import StringField, SubmitField, HiddenField, TextAreaField
from wtforms.validators import DataRequiredclass ArticleForm(FlaskForm):title = StringField(label="标题:", validators=[DataRequired()])content = TextAreaField(label="内容:", validators=[DataRequired()])submit = SubmitField(label="保持")
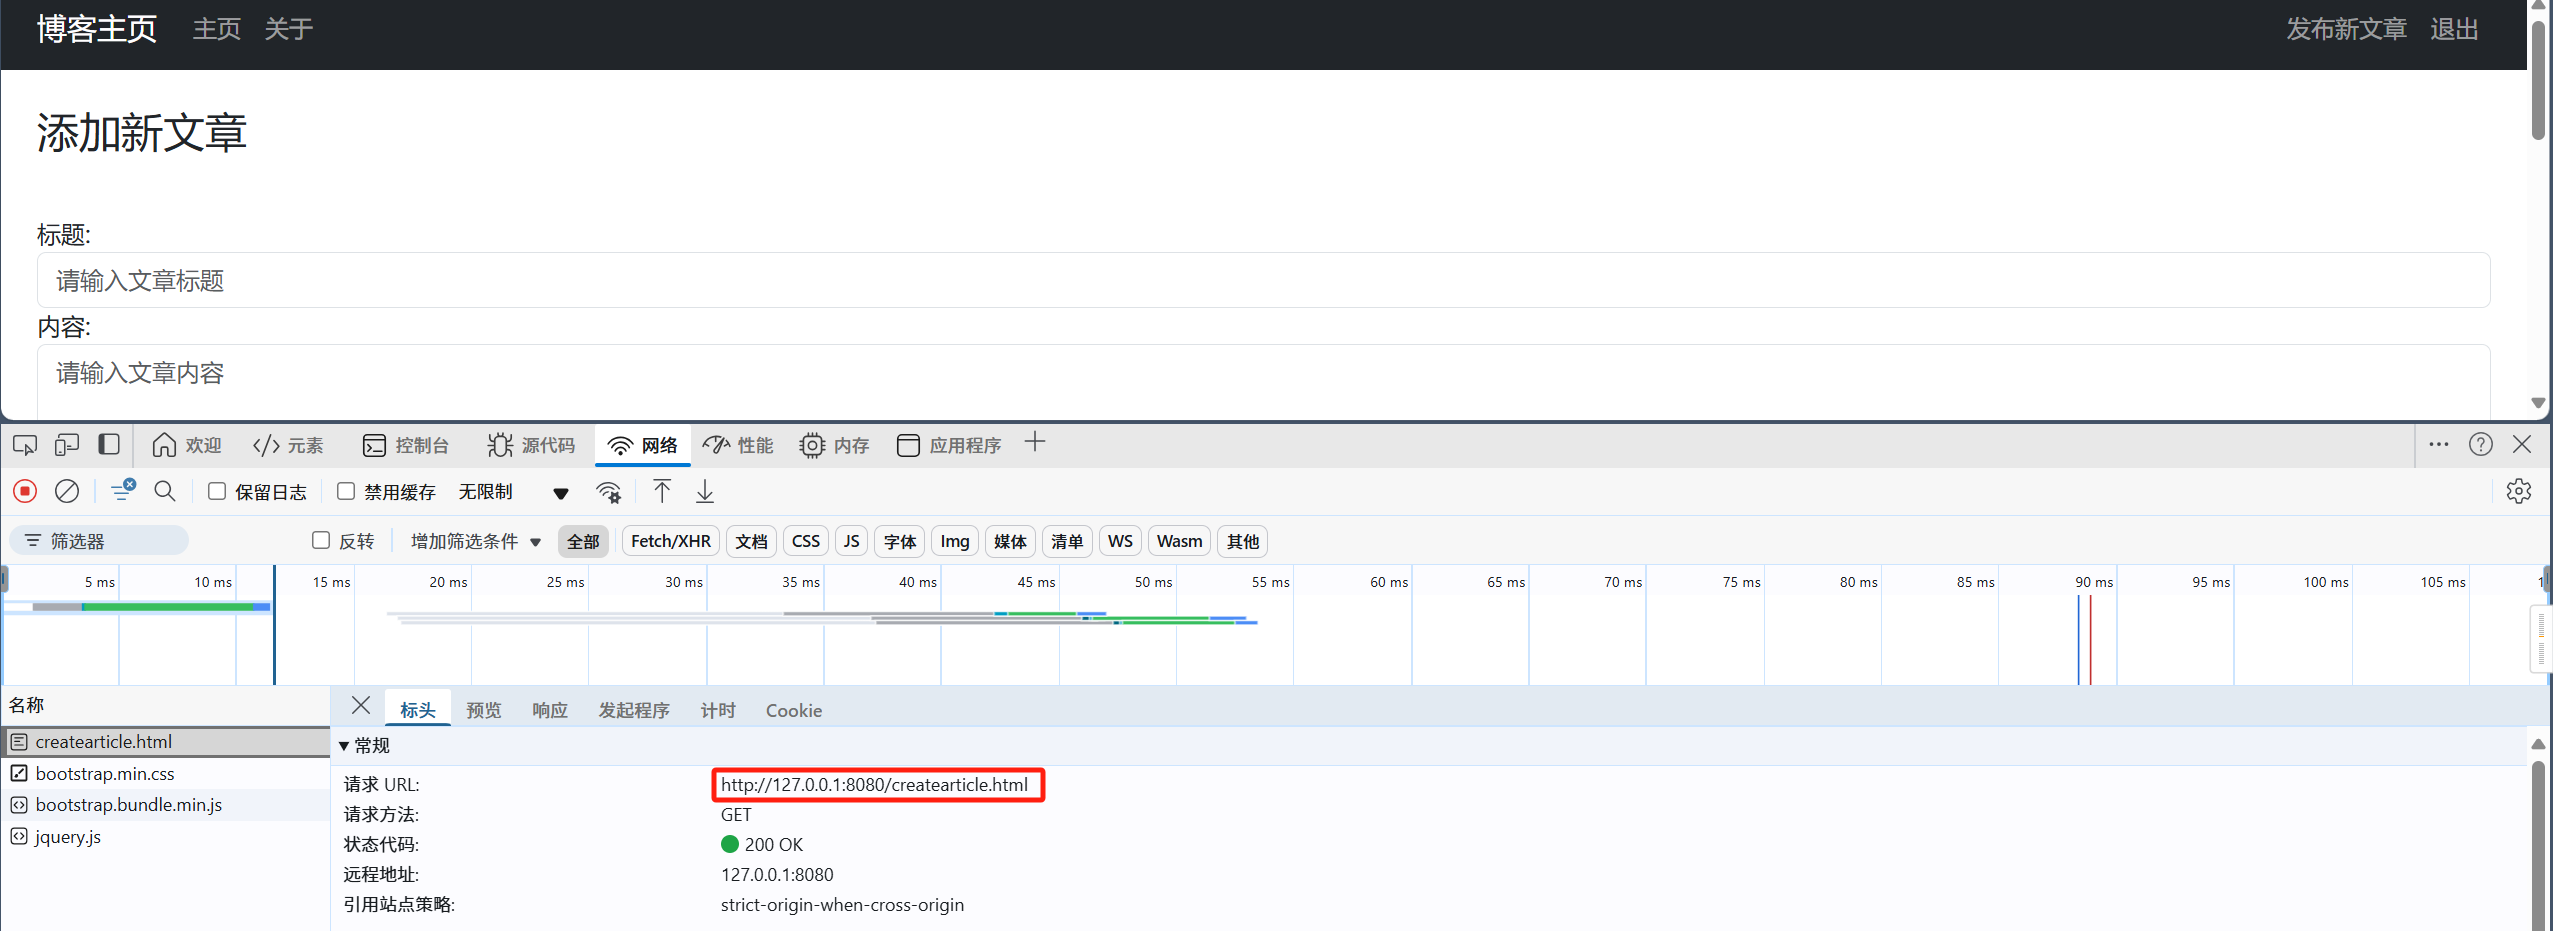
2、定义添加文章表单页面
templates/editarticle.html
{% extends 'base.html' %}
{% block title %}
博客主页
{% endblock %}
{% block content %}
<style>.content_height{height: 550px;}
</style>
<div class="container-fluid px-4 py-4"><form method="POST" class="form-signin">{{ form.hidden_tag() }}<h1 class="h3 mb-3 font-weight-normal">添加新文章</h1><br>{{ form.title.label() }}{{ form.title(class="form-control", placeholder="请输入文章标题") }}{{ form.content.label() }}{{ form.content(class="form-control content_height", placeholder="请输入文章内容") }}</br>{{ form.submit(class="btn btn-lg btn-block btn-primary")}}</form>
</div>
{% endblock %}
3、实现添加文章的service方法
service/article_service.py
class ArticleService:·····def create_article(self, article: Article):db.session.add(article)db.session.commit()return article
4、添加文章的路由处理
routes/admin_routes.py
from flask import render_template, url_for, redirect,flash
from flask_login import login_requiredfrom forms.article_form import ArticleForm
from models.article import Article
from routes import app
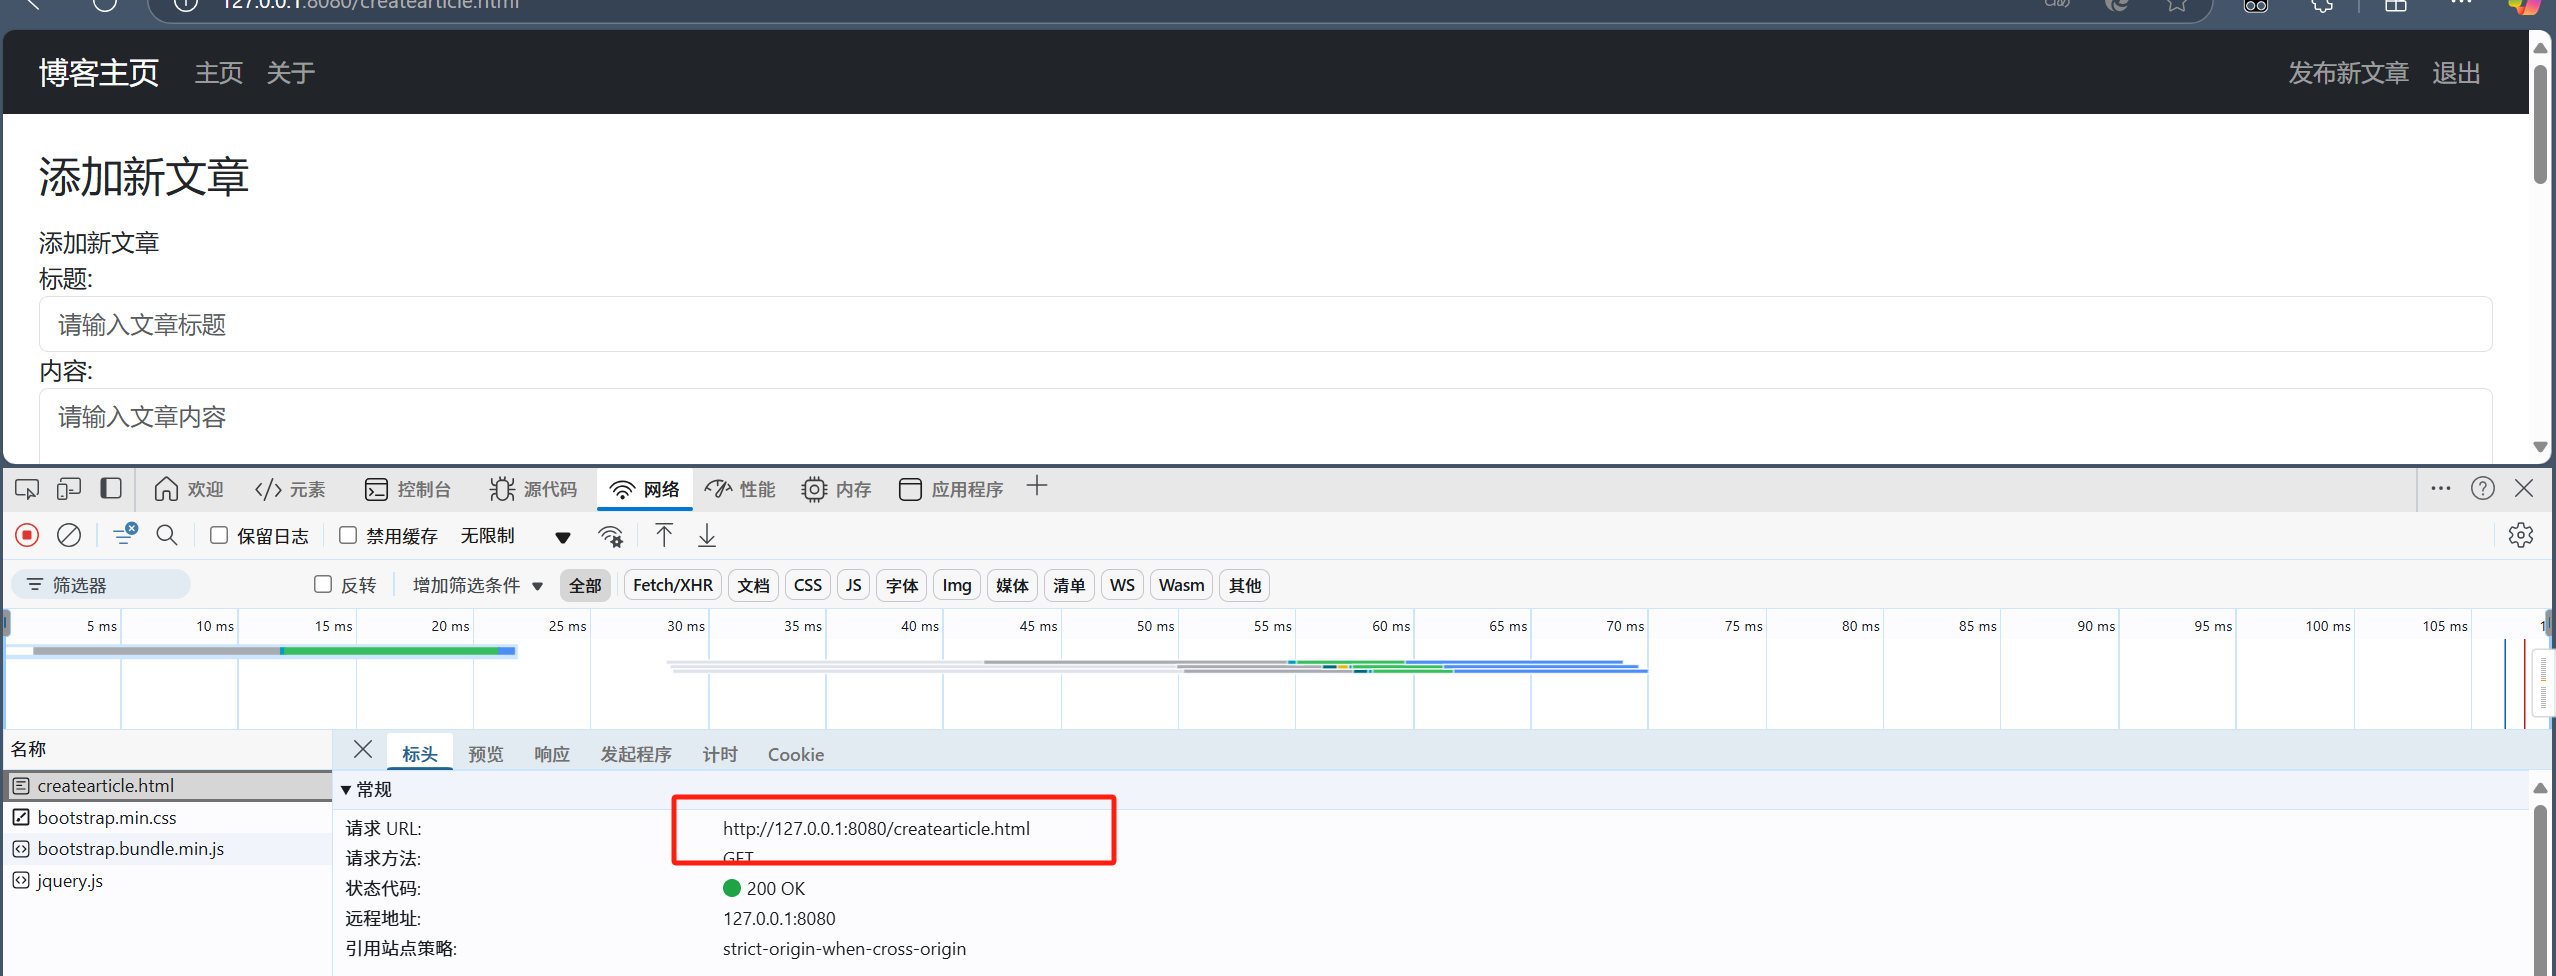
from services.article_service import ArticleService@app.route('/createarticle.html', methods=['GET','POST'])
@login_required
def create_article_page():form = ArticleForm()if form.validate_on_submit():new_article = Article()new_article.title = form.title.datanew_article.content = form.content.datatry:ArticleService().create_article(new_article)flash(message=f'发布文章完成', category='success')return redirect(url_for('home_page'))except Exception as error:flash(message=f'发布文章失败: {error}', category='danger')return render_template(template_name_or_list='editarticle.html', form=form)
七、美化主页与修改文章
1、美化主页
templates/index.html
{% extends 'base.html' %}{% block title %}
博客主页
{% endblock %}
{% block content %}
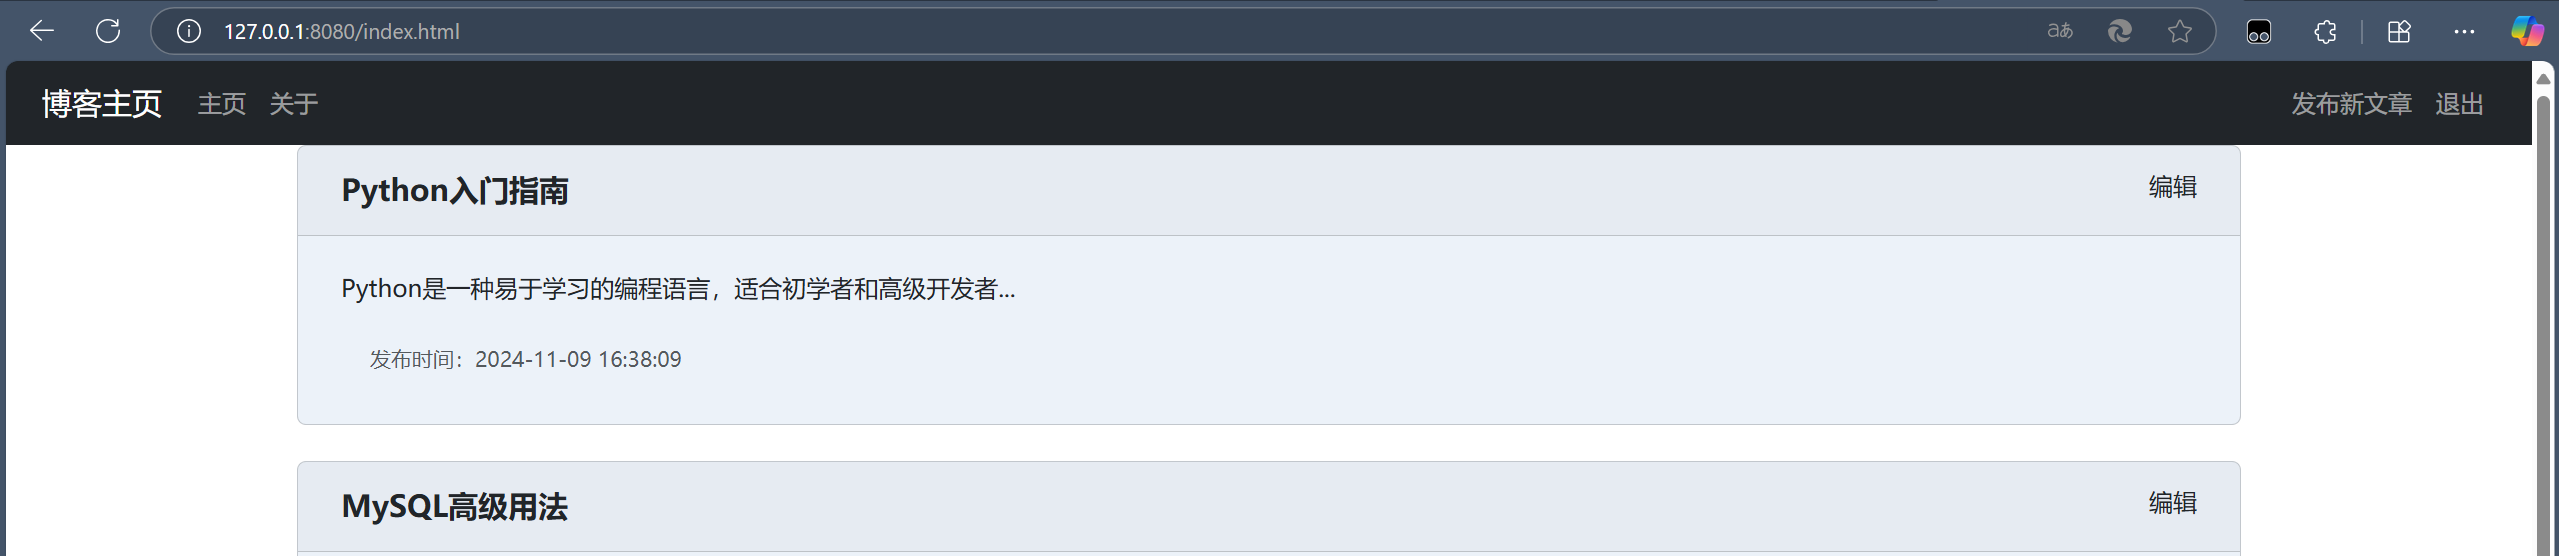
<div class="container-xl"><--! 拼写错误:在 index.html 文件中,你在循环部分写成了 acticles,应该是 articles。这个拼写错误会导致循环内容无法正确显示。 -->{% for article in articles %}<div class="card mb-4" style="background-color: #ecf2f9"><div class="card-header"><ul class="nav"><li class="nav-itme me-auto"><a class="btn fs-5 fw-bold" href="/article/{{ article.id }}.html" >{{ article.title }}</a></li>{% if current_user.is_authenticated %}<li class="nav-item px-a"><small class="text-body-secondary"><a class="btn" href="/editartical/{{ article.id }}.html">编辑</a></small></li>{% endif %}</ul></div><div class="card-body"><p class="card-text"><a class="btn fs-6" href="/article/{{ article.id }}.html">{{ article.content }}</a></p><ul class="nav-item sm-auto"><small class="text-body-secondary">发布时间:{{ article.create_time }}</small></ul></div></div>{% endfor %}
</div>
{% endblock %}
2、编辑文章功能
文章发布错误美化
route/admin_route.py
@app.route('/createarticle.html', methods=['GET','POST'])
@login_required
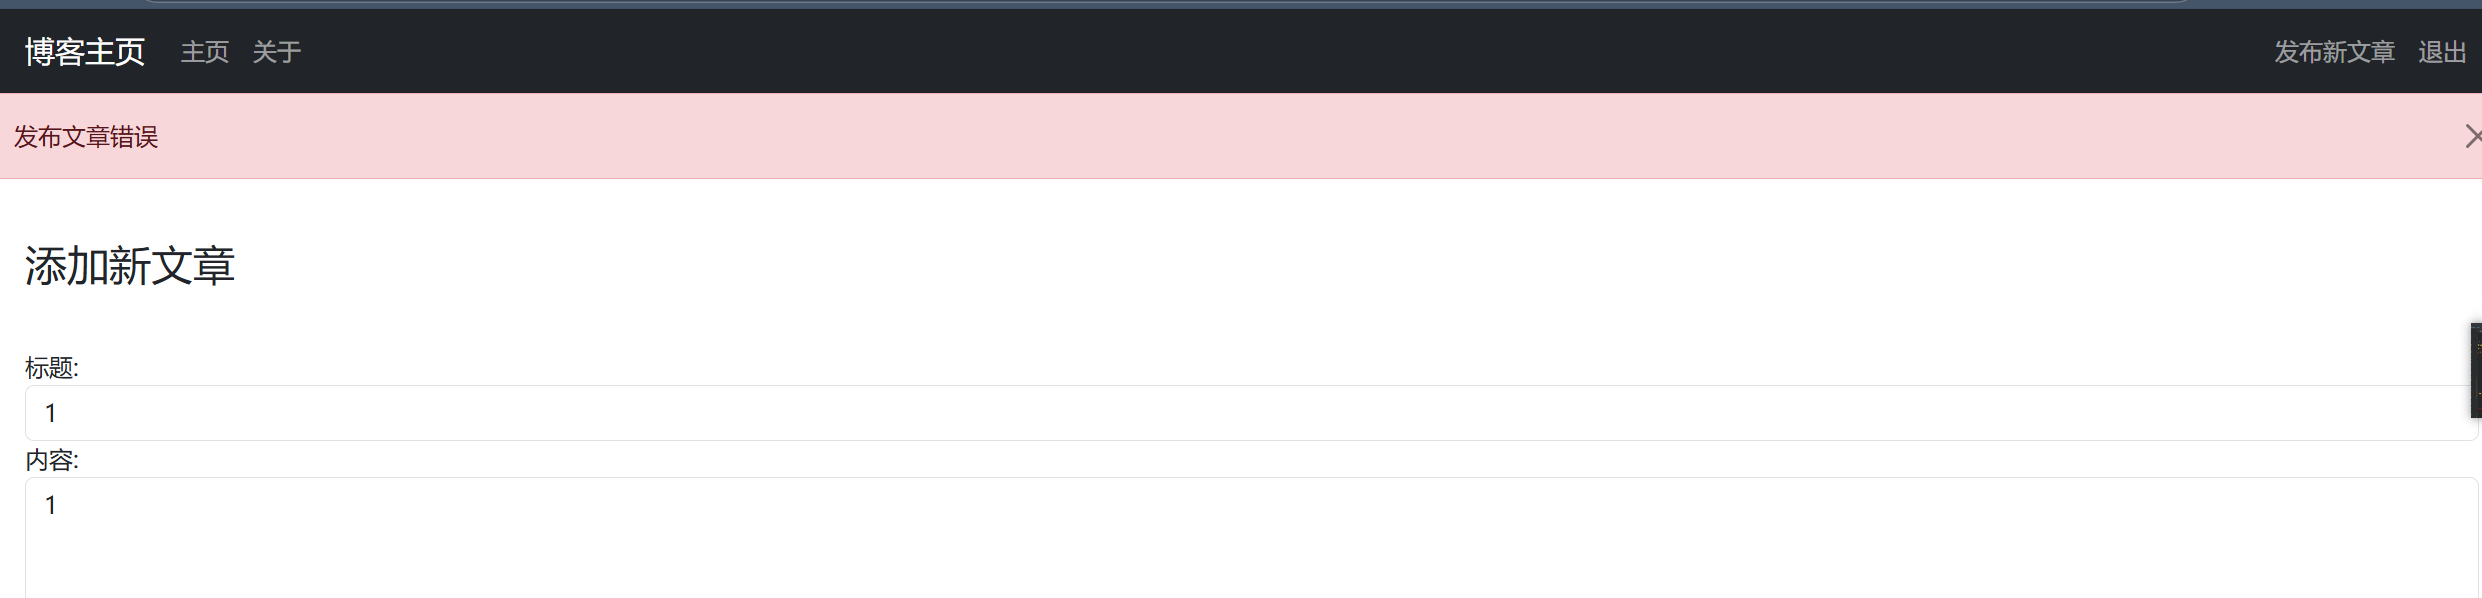
def create_article_page():form = ArticleForm()if form.validate_on_submit():new_article = Article()new_article.title = form.title.datanew_article.content = form.content.datatry:article, error_msg = ArticleService().create_article(new_article)if error_msg:flash(message=f'发布文章错误', category='danger')else:flash(message=f'发布文章完成', category='success')return redirect(url_for('home_page'))except Exception as error:flash(message=f'发布文章失败: {error}', category='danger')return render_template(template_name_or_list='editarticle.html', form=form)
文章编辑
route/admin_route.py
····
# 发布文章
@app.route('/createarticle.html', methods=['GET','POST'])
@login_required
def create_article_page():form = ArticleForm()if form.validate_on_submit():new_article = Article()new_article.title = form.title.datanew_article.content = form.content.datatry:article, error_msg = ArticleService().create_article(new_article)if error_msg:flash(message=f'发布文章错误:{error_msg}', category='danger')else:flash(message=f'发布文章完成', category='success')return redirect(url_for('home_page'))except Exception as error:flash(message=f'发布文章失败: {error}', category='danger')return render_template(template_name_or_list='editarticle.html', form=form)# 更新文章
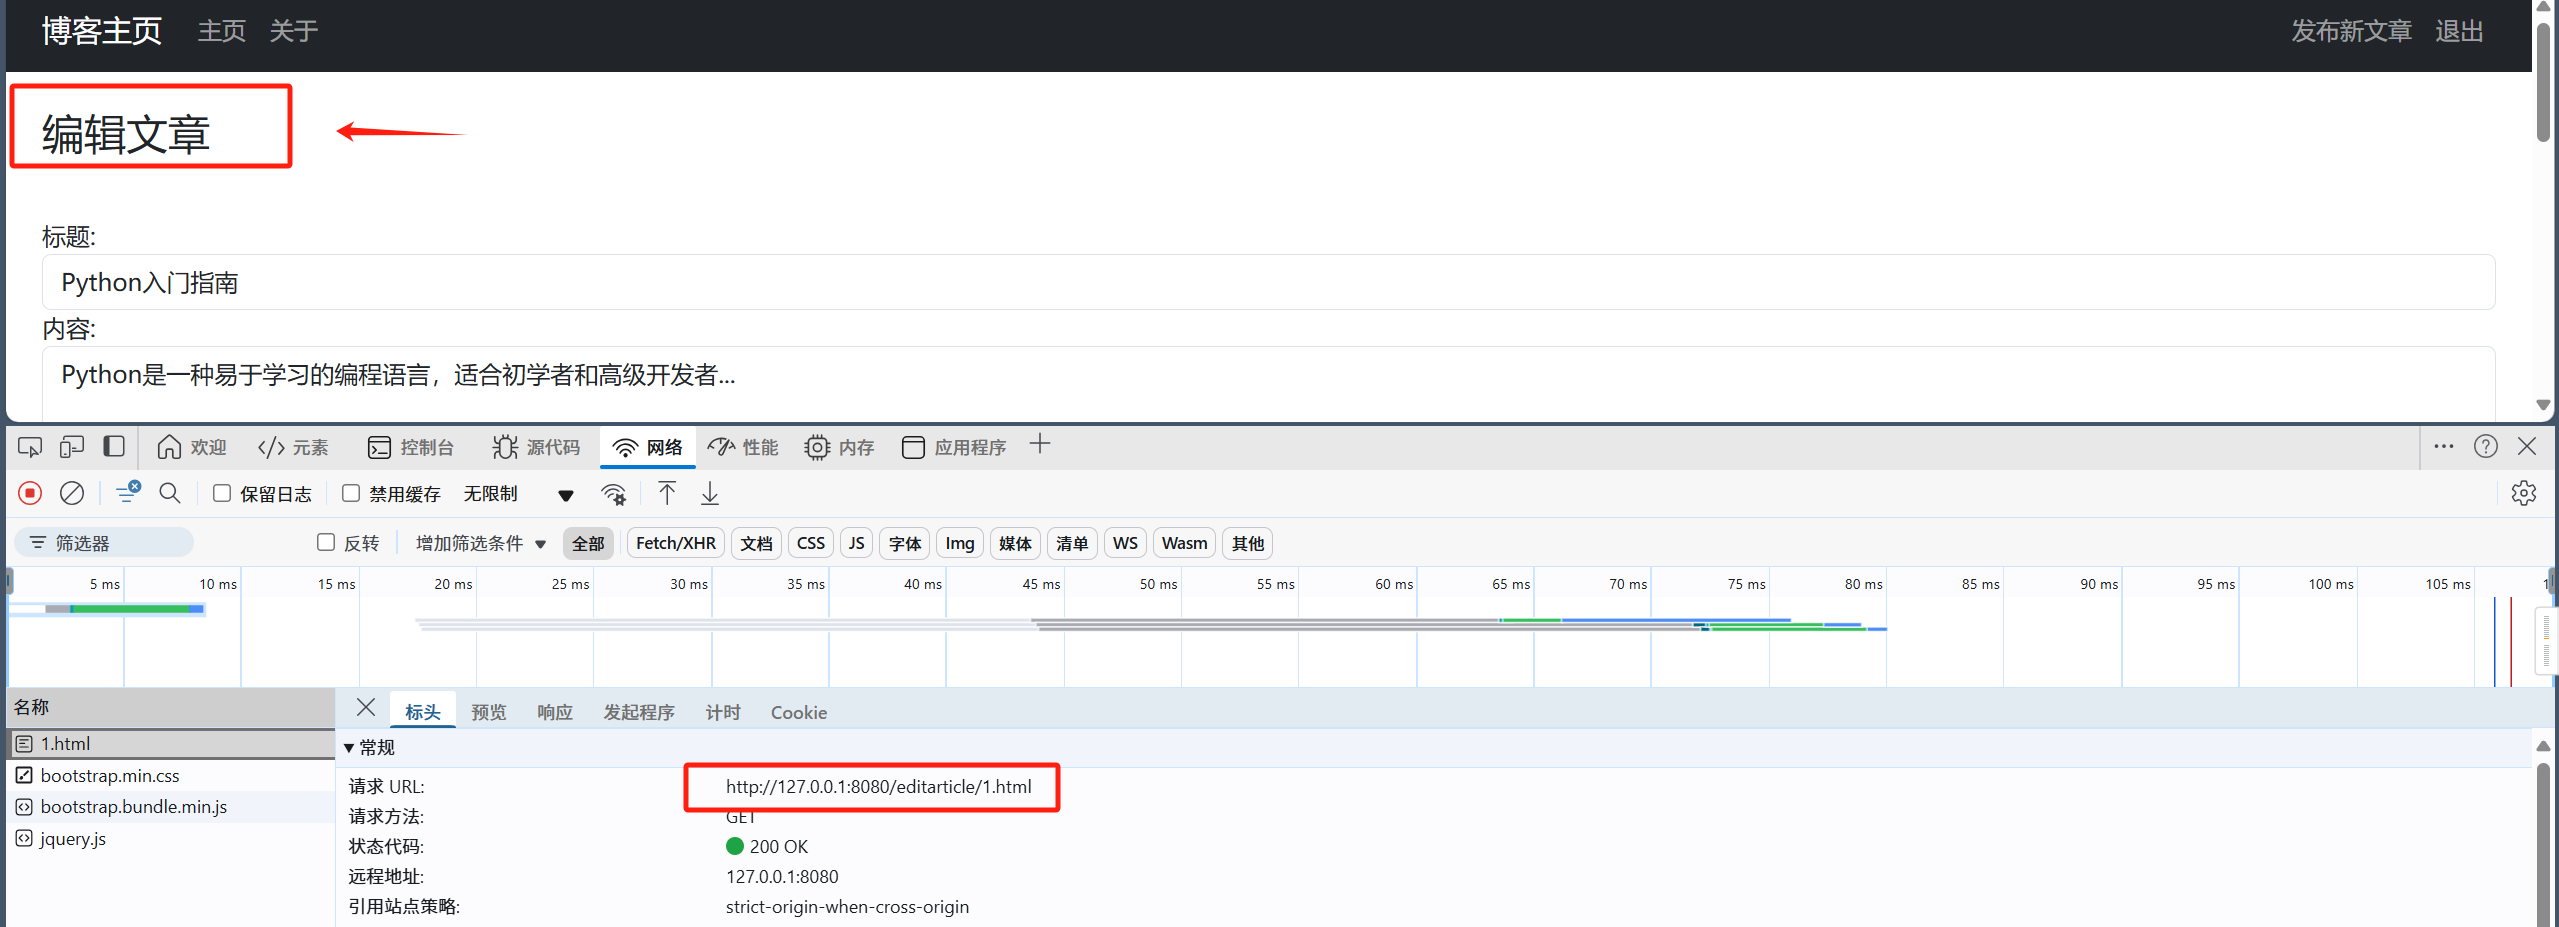
@app.route('/editarticle/<article_id>.html', methods=['GET','POST'])
@login_required
def edit_article_page(article_id: str):form = ArticleForm()if request.method == 'GET':try:article = ArticleService().get_article(int(article_id))if not article:flash(message=f'修改的文章不存在', category='danger')return redirect(url_for('home_page'))else:form.title.data = article.titleform.content.data = article.contentexcept Exception as ex:flash(massage=f'提取文件失败: {ex}', category='danger')return redirect(url_for('home_page'))if form.validate_on_submit():try:updated_article = Article()updated_article.id = int(article_id)updated_article.title = form.title.dataupdated_article.content = form.content.dataarticle, error_msg = ArticleService().update_article(updated_article)if error_msg:flash(message=f'更新文章失败', category='danger')else:flash(message=f'更新文章成功', category='success')return redirect(url_for('home_page'))return redirect(url_for('home_page'))except Exception as error:flash(message=f'发布文章失败: {error}', category='danger')return render_template(template_name_or_list='editarticle.html', form=form)
route/admin_service.py
····# 发布文章对数据库进行比对def create_article(self, article: Article):query = Select(Article).where(Article.title == article.title)# db.session.scalar和 db.session.execute。这里使用execute 有问题,无法判断是否查询到数据 所以使用scalarexit_article = db.session.scalar(query)if exit_article:return article, '同标题的文章已存在'db.session.add(article)db.session.commit()return article, None# 更新文章def update_article(self, article: Article):exit_article = db.session.get(Article, article.id)if not exit_article:return article, '文章不存在'# TODO: 检查同标题文章是否存在qury = Select(Article).where(and_(Article.title == article.title, Article.id != article.id))same_title_article = db.session.scalar(qury)if same_title_article :return article, '更新同标题的文章已存在'exit_article.title = article.titleexit_article.content = article.contentexit_article.update_time = func.now()
动态修改编译页面的文章
route/admin_route.py
····
# 发布文章
@app.route('/createarticle.html', methods=['GET','POST'])
@login_required
def create_article_page():
·····# 通过传递 is_edit参数判断编辑/更新return render_template(template_name_or_list='editarticle.html', form=form, is_edit=False)# 更新文章
@app.route('/editarticle/<article_id>.html', methods=['GET','POST'])
@login_required
def edit_article_page(article_id: str):
····# 通过传递 is_edit参数判断编辑/更新return render_template(template_name_or_list='editarticle.html', form=form, is_edit=True)
templates/editarticle.html
{% extends 'base.html' %}
{% block title %}博客主页-{% if is_edit %}编辑文章{% else %}添加新文章{% endif %}
{% endblock %}
{% block content %}
<style>.content_height{height: 550px;}
</style>
<div class="container-fluid px-4 py-4"><form method="POST" class="form-signin">{{ form.hidden_tag() }}<h1 class="h3 mb-3 font-weight-normal">{% if is_edit %}编辑文章{% else %}添加新文章{% endif %}</h1><br>{{ form.title.label() }}{{ form.title(class="form-control", placeholder="请输入文章标题") }}{{ form.content.label() }}{{ form.content(class="form-control content_height", placeholder="请输入文章内容") }}</br>{{ form.submit(class="btn btn-lg btn-block btn-primary")}}</form>
</div>
{% endblock %}
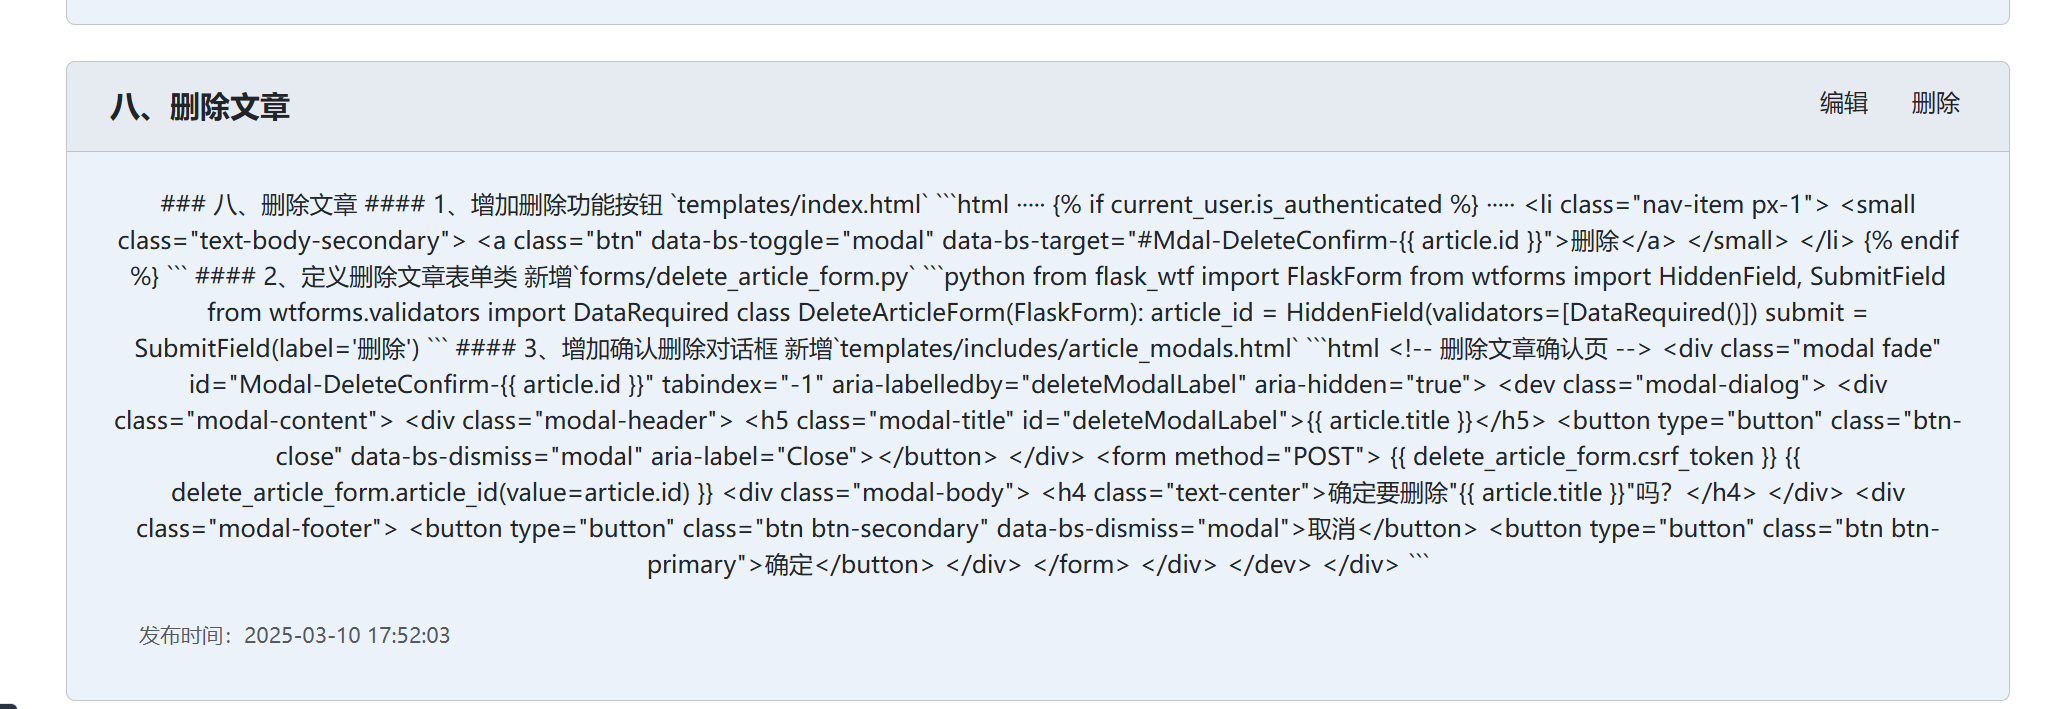
八、删除文章
1、增加删除功能按钮
templates/index.html
·····{% if current_user.is_authenticated %}·····<li class="nav-item px-1"><small class="text-body-secondary"><a class="btn" data-bs-toggle="modal" data-bs-target="#Mdal-DeleteConfirm-{{ article.id }}">删除</a></small></li>{% endif %}
2、定义删除文章表单类
新增forms/delete_article_form.py
from flask_wtf import FlaskForm
from wtforms import HiddenField, SubmitField
from wtforms.validators import DataRequiredclass DeleteArticleForm(FlaskForm):article_id = HiddenField(validators=[DataRequired()])submit = SubmitField(label='删除')
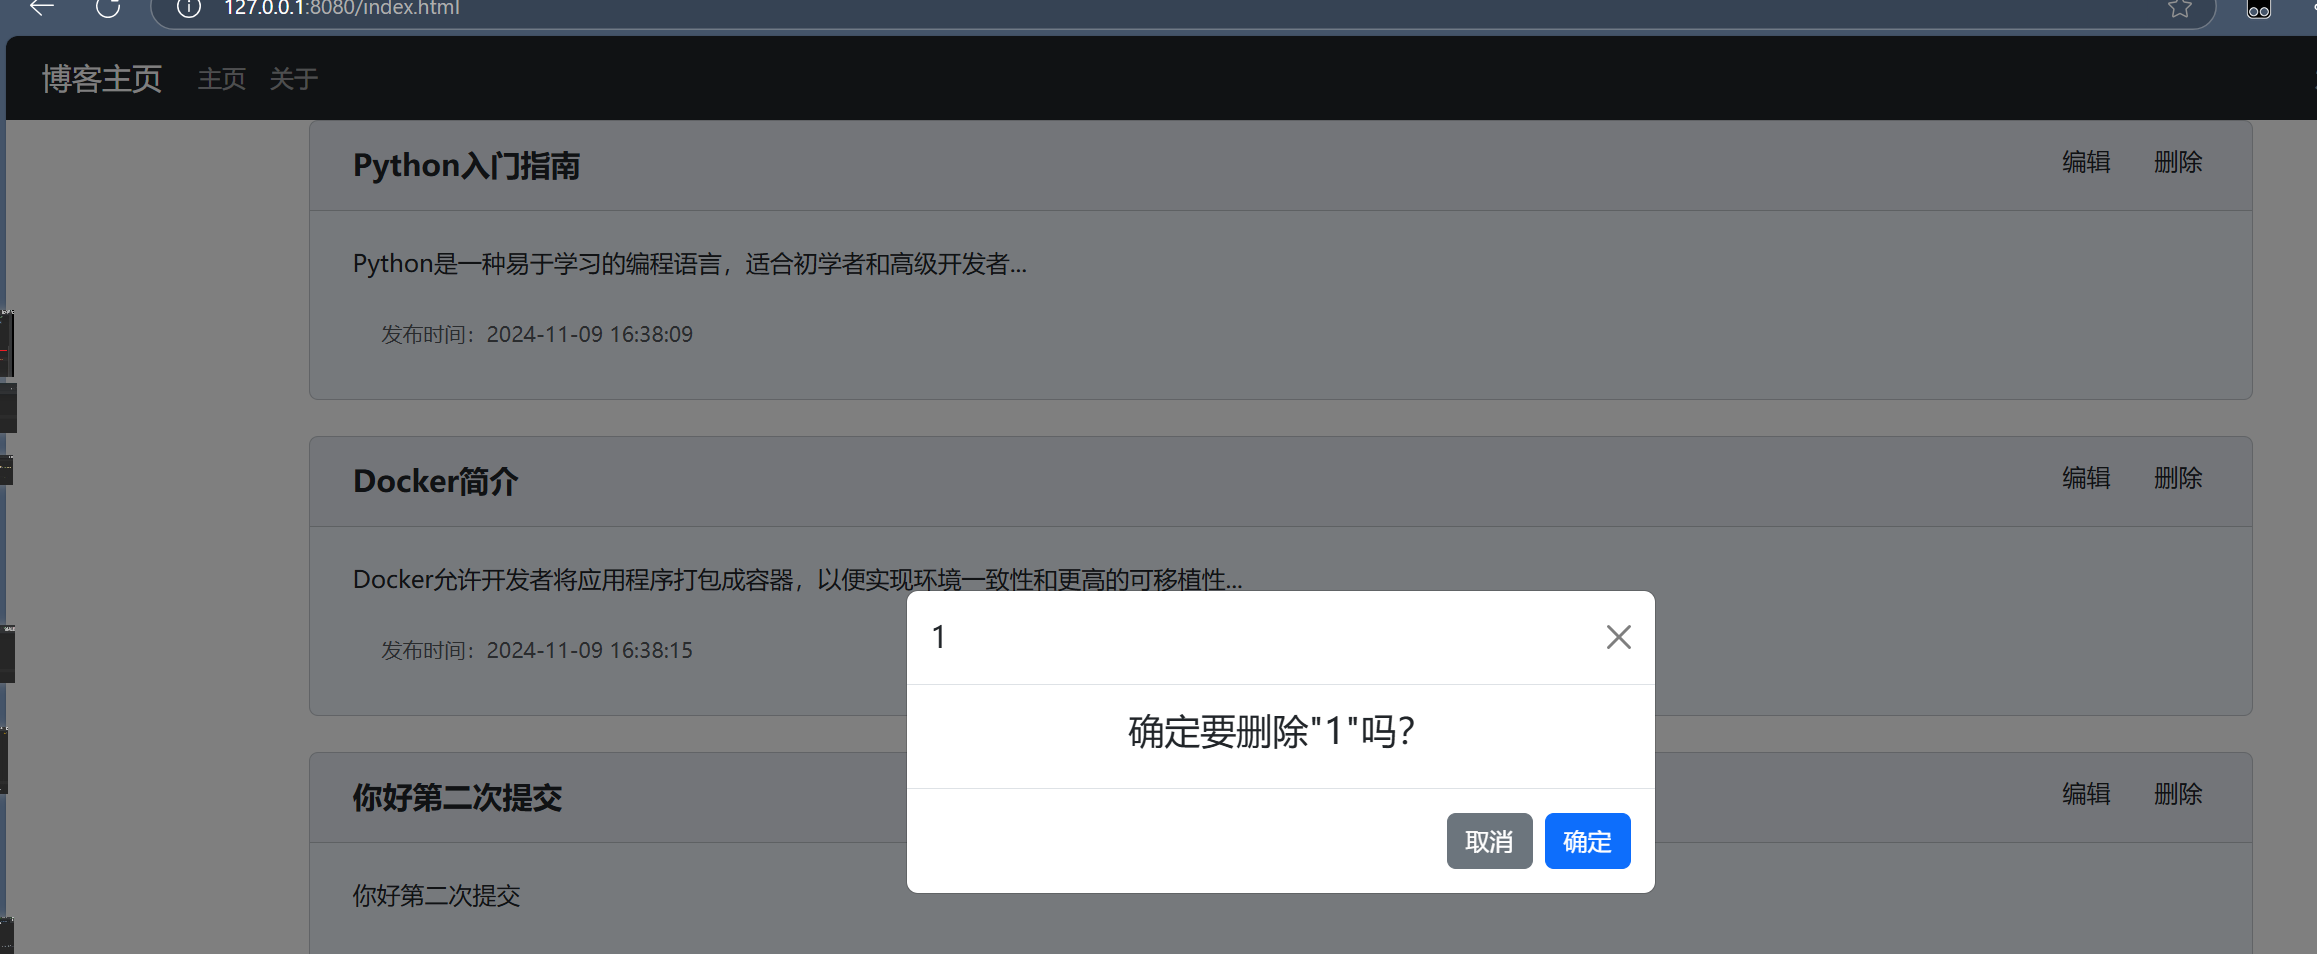
3、增加确认删除对话框
新增templates/includes/article_modals.html
<!-- 删除文章确认页 -->
<div class="modal fade" id="Modal-DeleteConfirm-{{ article.id }}" tabindex="-1" aria-labelledby="deleteModalLabel" aria-hidden="true"><dev class="modal-dialog"><div class="modal-content"><div class="modal-header"><h5 class="modal-title" id="deleteModalLabel">{{ article.title }}</h5><button type="button" class="btn-close" data-bs-dismiss="modal" aria-label="Close"></button></div><form method="POST">{{ delete_article_form.csrf_token }}{{ delete_article_form.article_id(value=article.id) }}<div class="modal-body"><h4 class="text-center">确定要删除"{{ article.title }}"吗?</h4></div><div class="modal-footer"><button type="button" class="btn btn-secondary" data-bs-dismiss="modal">取消</button><button type="button" class="btn btn-primary">确定</button></div></form></div></dev>
</div>
4、引入确认删除对话框
templates/index.html
<div class="container-xl"><!-- 拼写错误:在 index.html 文件中,你在循环部分写成了 acticles,应该是 articles。这个拼写错误会导致循环内容无法正确显示。 -->{% for article in articles %}<!-- 引入确认删除对话框 --> {% if current_user.is_authenticated %}{% include 'includes/article_modals.html' %}{% endif %}
5、在service类中添加删除文章的业务逻辑
service/article_service.py
·······def delete_article(self, article_id: int):article = db.session.get(Article, article_id)if article:db.session.delete(article)db.session.commit()return article, Noneelse:return False, '文章不存在'
6、路由处理中添加删除逻辑
routes/user_routes.py
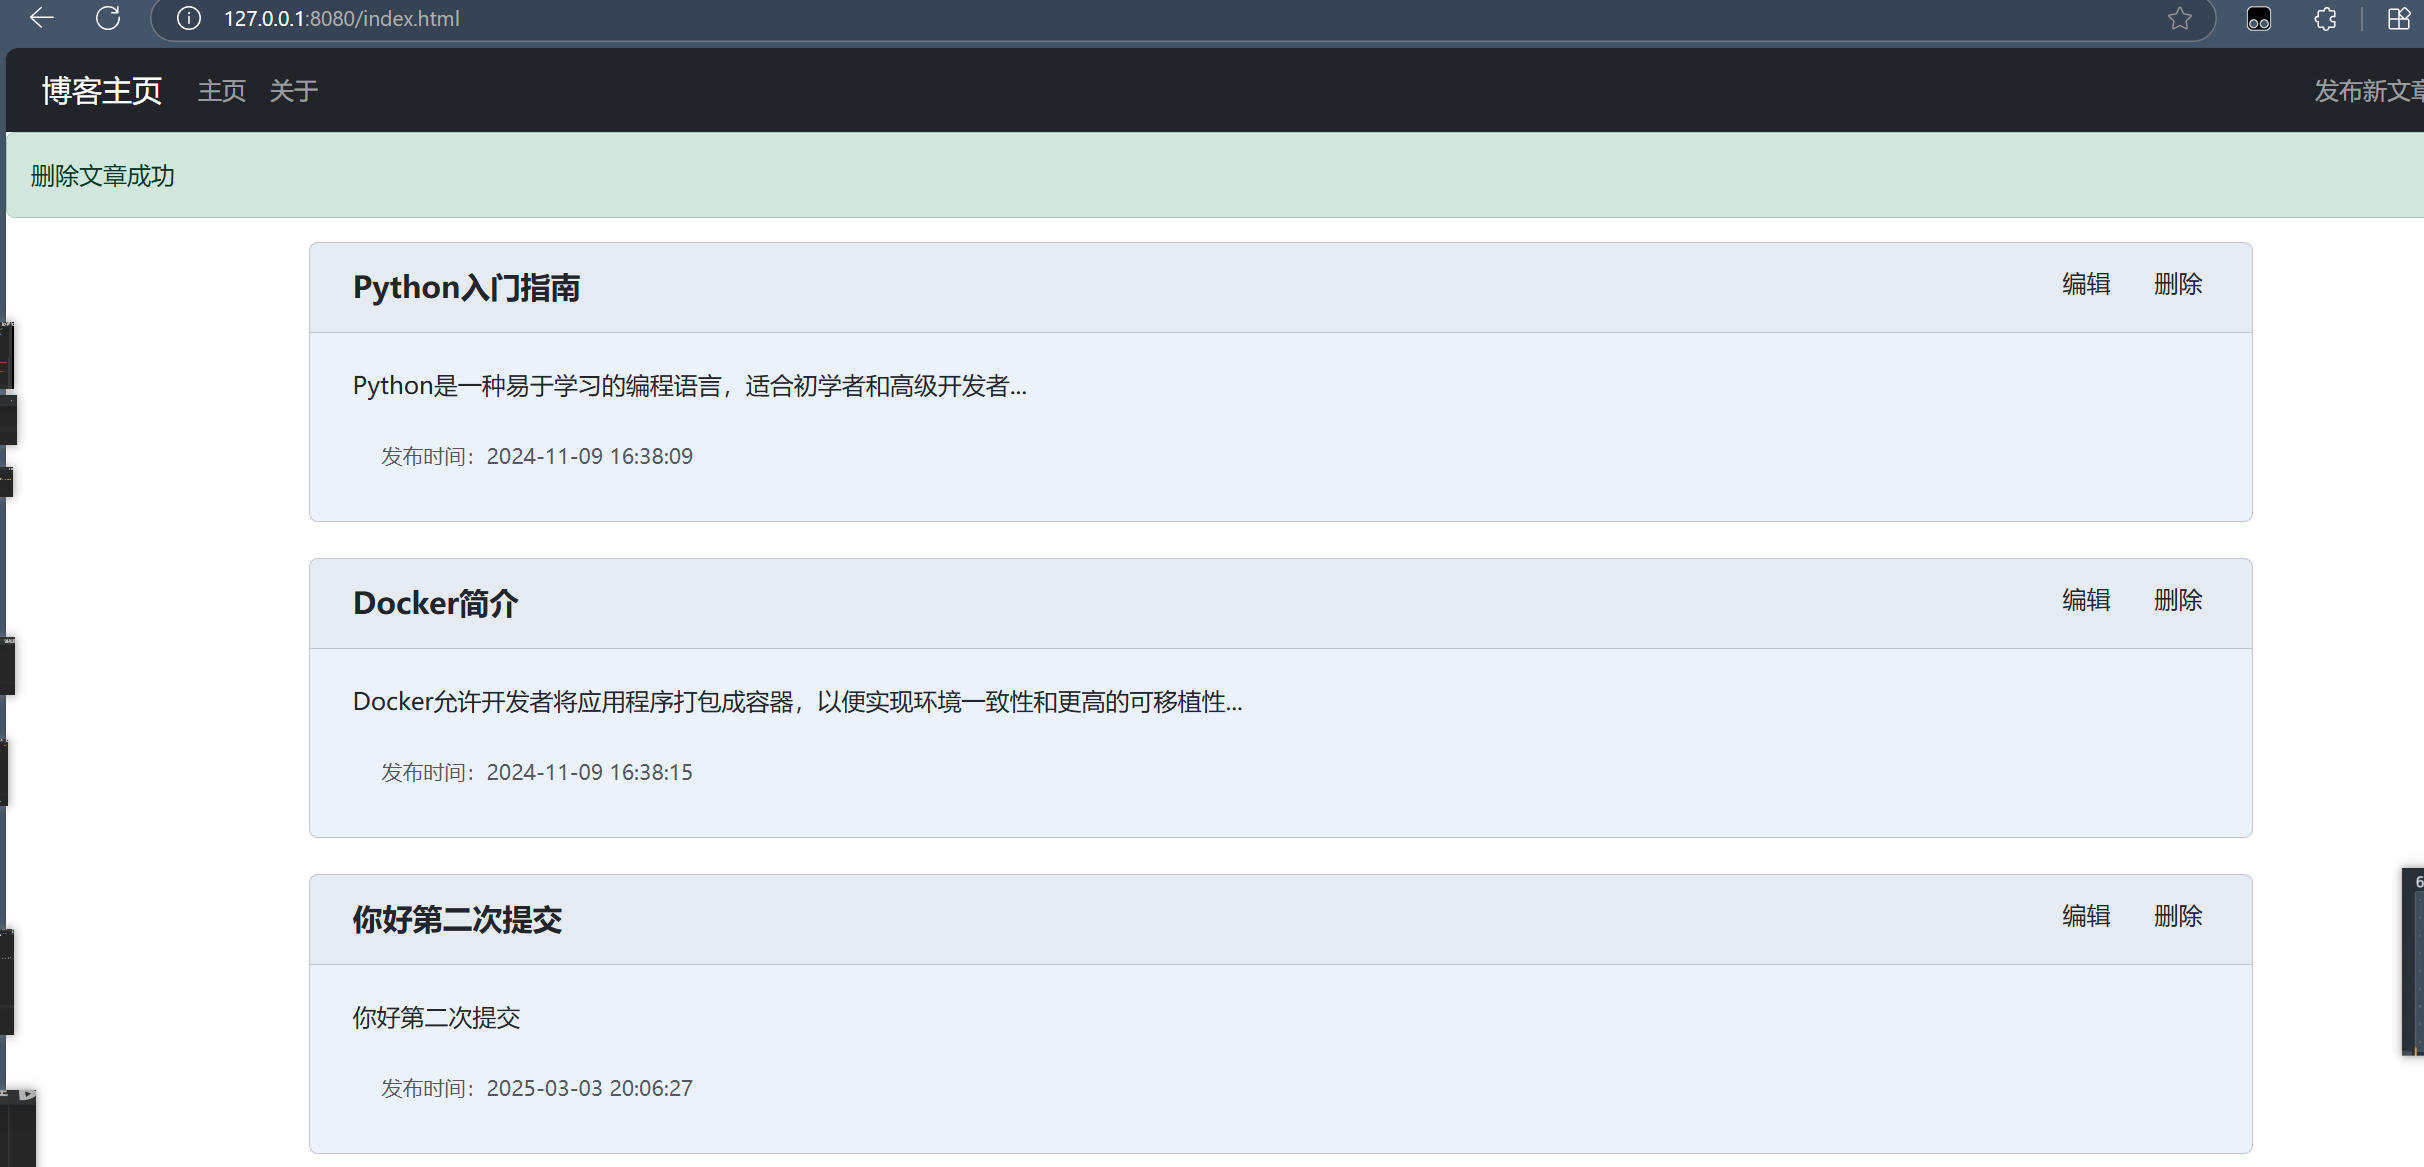
@app.route('/', methods=['GET', 'POST'])
@app.route('/index.html', methods=['GET', 'POST'])
def home_page():if current_user.is_authenticated:delete_article_form = DeleteArticleForm()if delete_article_form.validate_on_submit():if delete_article_form.validate_on_submit():result, error = ArticleService().delete_article(int(delete_article_form.article_id.data))if result:flash(message=f'删除文章成功', category='success')return redirect(url_for('home_page'))else:flash(message=f'删除文章成功', category='danger')articles = ArticleService().get_articles()if current_user.is_authenticated:return render_template(template_name_or_list='index.html', articles=articles, delete_article_form=delete_article_form)return render_template(template_name_or_list='index.html', articles=articles)
九、引入Markdown来显示文章
1、下载showdownjs
https://github.com/showdownjs/showdown/tree/master/dist
下载
showdown.min.js和showdown.min.js.map文件夹;放置assets/plugins/showdownjs-2.0.0
2、引入showdownjs与自定义markdown的一些显示样式
templates/base.html
·····<script src="/assets/plugins/showdownjs-2.0.0/showdown.min.js"></script><style>pre {white-space: pre-wrap; /* css-3 */white-space: -moz-pre-wrap; /* Mozilla, since 1999 */white-space: pre-wrap; /* Opera 4-6 */white-space: -o-pre-wrap; /* Opera 7 */word-wrap: break-word; /* Internet Explorer 5.5+ */background-color: #f8f8f8;border: 1px solid #dfdfdf;margin-top: 1.5em;margin-bottom: 1.5em;padding: 1.25rem 0.3125rem 0.0625rem;}pre code {background-color: transparent;border: 0;padding: 0;}</style>·····
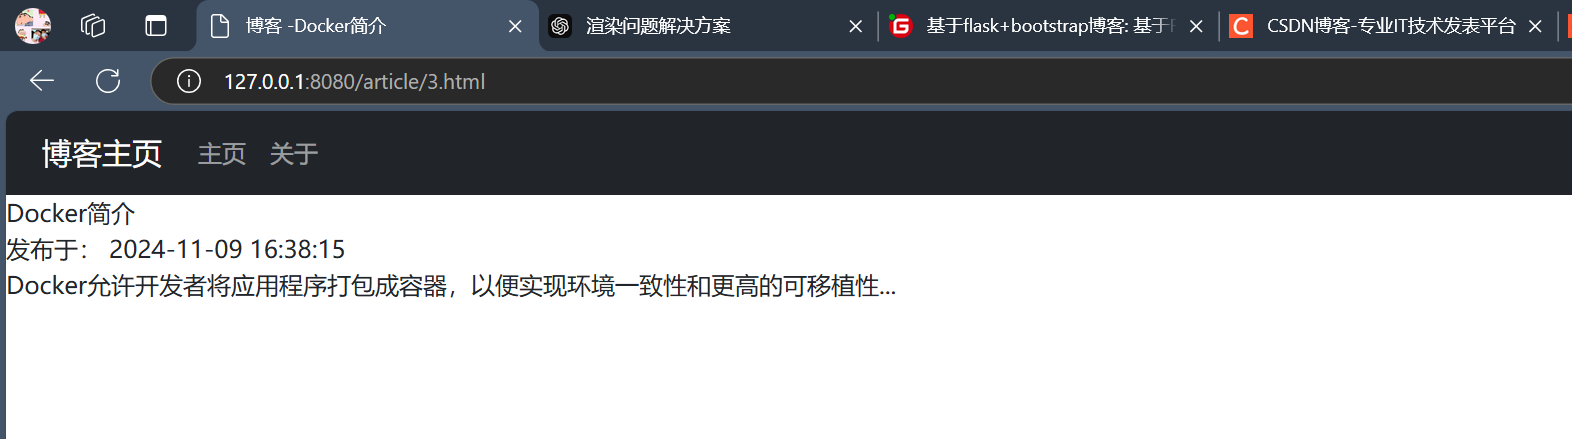
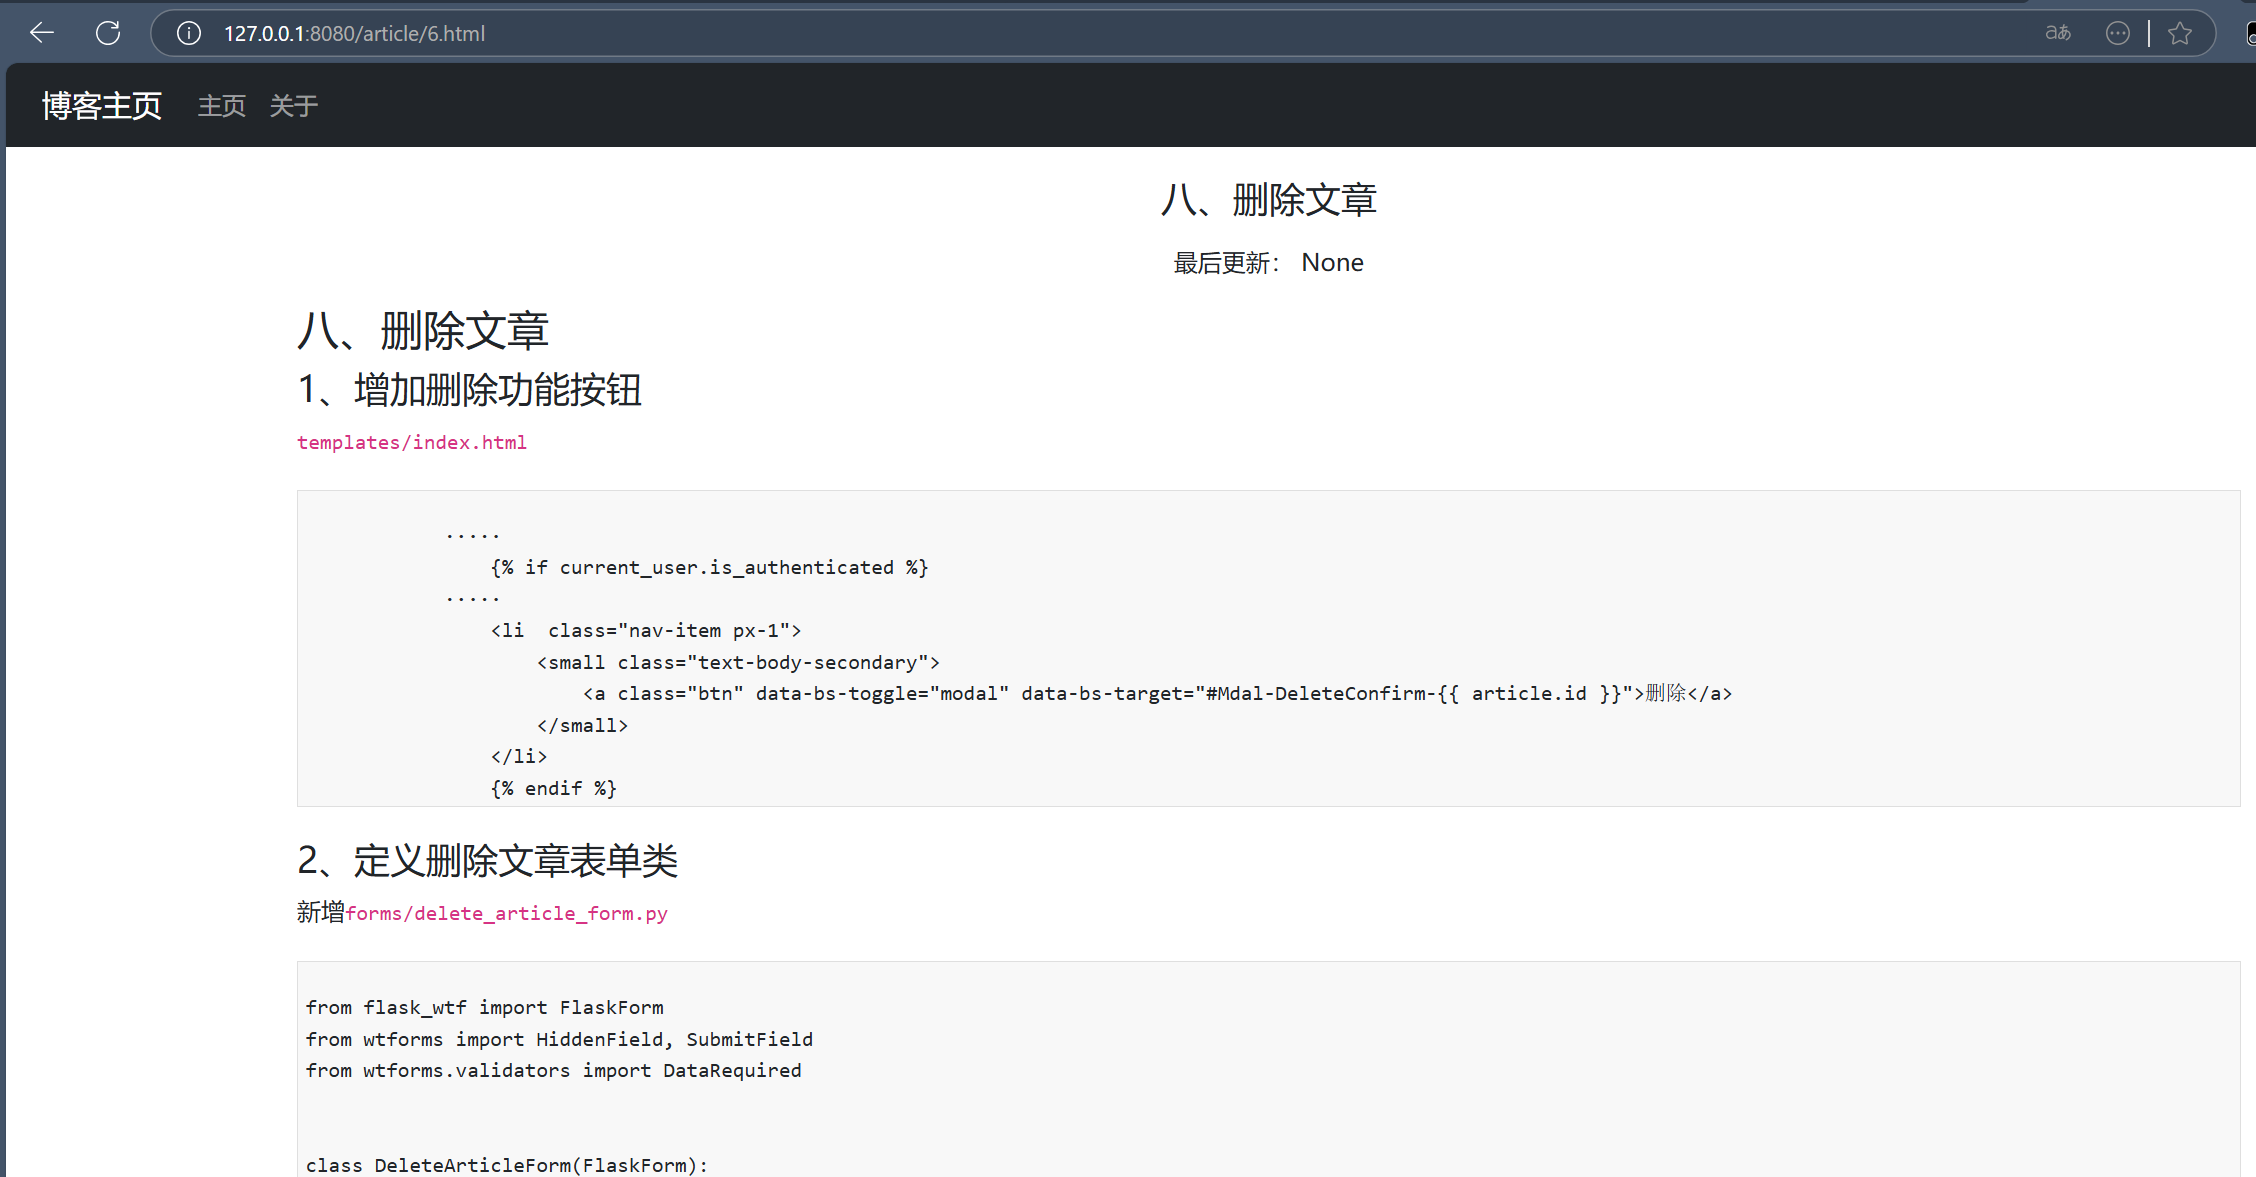
3、调试文章显示页面的内容支持markdown
templates/article.html
{% extends 'base.html' %}{% block title %}
博客 -{{ article.title }}
{% endblock %}{% block content %}
<textarea id="article_content" style="display: none;">{{ article.content }}</textarea>
<div class="container-xl"><h4><p class="text-center" style="margin-top: 20px;">{{ article.title }}</p></h4><p class="text-center" style="margin-top: 10px;">最后更新: {{ article.update_time }}</p><p id="article_viewer"></p>
</div>
<script src="/assets/js/article.js"></script>"
{% endblock %}
4、编写自己的js来使用markdown
/assets/js/article.js
$(function (){var converter = new showdown.Converter();var article_html = converter.makeHtml($('#article_content').val())$('#article_content').html(article_html)
})
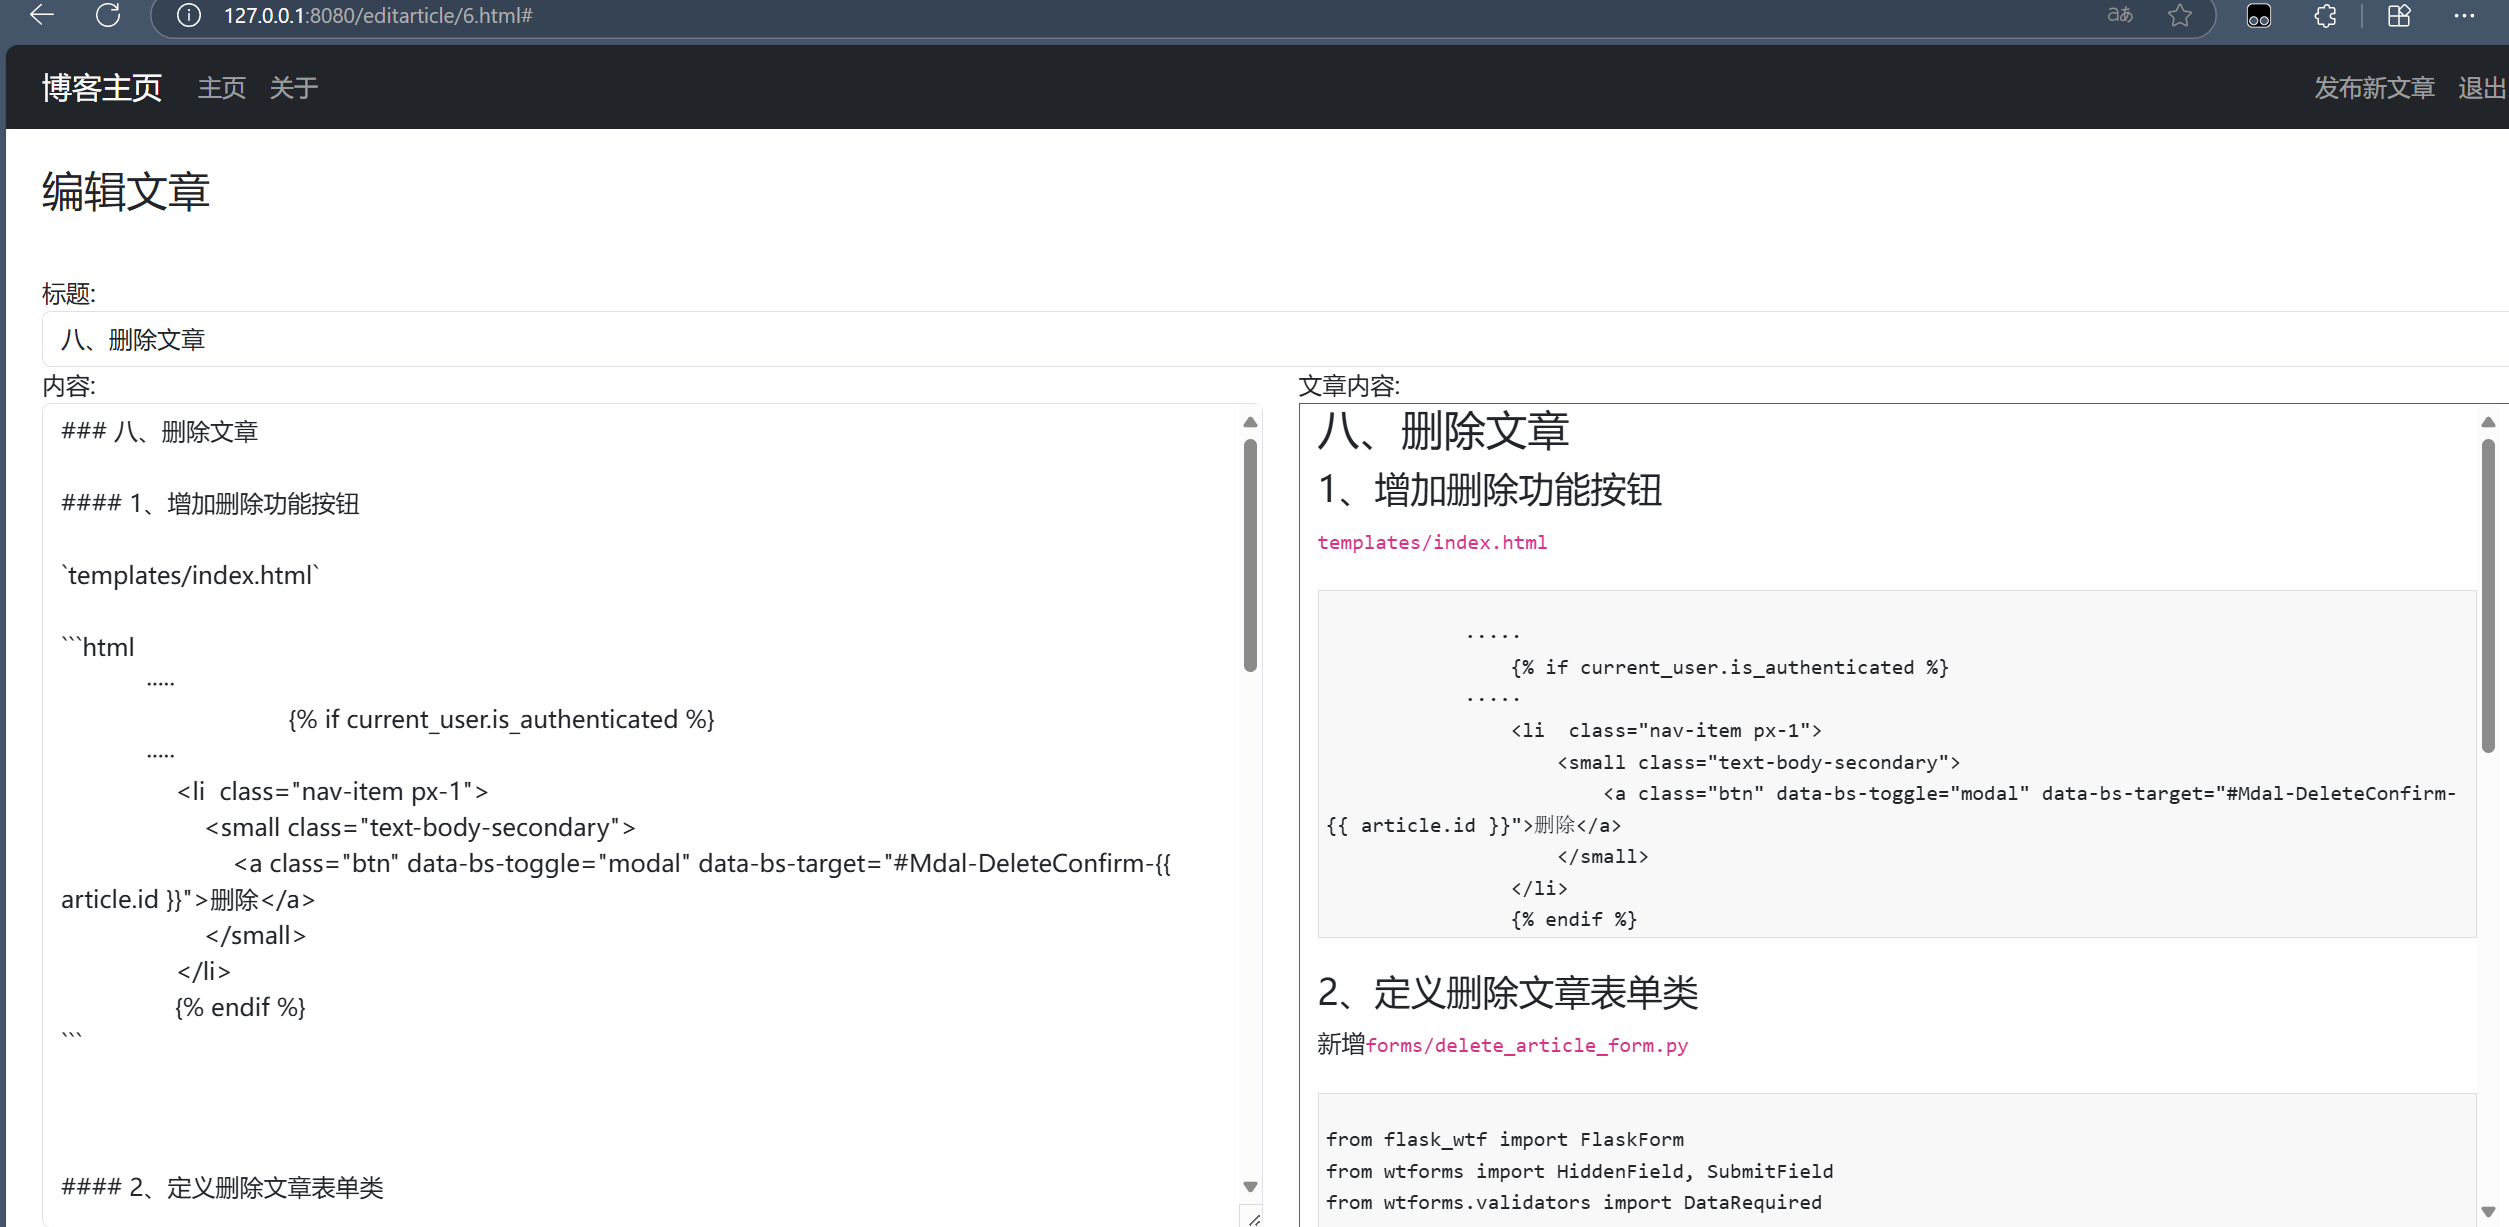
十、编辑时预览文章
1、修改编译页面
templates/editartcile.html
{% extends 'base.html' %}
{% block title %}博客主页-<!--- 通过传递 is_edit参数判断编辑/更新 --->{% if is_edit %}编辑文章{% else %}添加新文章{% endif %}
{% endblock %}
{% block content %}
<style>.content_height{height: 550px;}
</style>
<div class="container-fluid px-4 py-4"><form method="POST" class="form-signin">{{ form.hidden_tag() }}<h1 class="h3 mb-3 font-weight-normal"><!--- 通过传递 is_edit参数判断编辑/更新 渲染出来 --->{% if is_edit %}编辑文章{% else %}添加新文章{% endif %}</h1><br>{{ form.title.label() }}{{ form.title(class="form-control", placeholder="请输入文章标题") }}<div class="row"><div class="col">{{ form.content.label() }}{{ form.content(class="form-control content_height", placeholder="请输入文章内容") }}</br>{{ form.submit(class="btn btn-lg btn-block btn-primary")}}<a href="#" id="article_preview_btn" class="btn btn-lg btn-block btn-primary">预览</a></div><div class="col">文章内容:<div class="container-fluid border border-success"><div id="article_preview" class="content_height" style="overflow: auto"></div></div></div></div></form>
</div>
<script src="/assets/js/editarticle.js"></script>
{% endblock %}
2、编写js来渲染markdown
/assets/js/editarticle.js
$(function (){$('#article_preview_btn').click(function (){var converter = new showdown.Converter();var content_html = converter.makeHtml($('#content').val());$('#article_preview').html(content_html);});
});
十一、消除明文密码
使用
bcrypt做加密: https://pypi.org/project/bcrypt/
1、安装 brcypt 模块
$ pip install bcrypt
requirements.txt
Flask==3.0.0
mysqlclient==2.2.0
SQLAlchemy==2.0.23
Flask-SQLAlchemy==3.1.1
flask-WTF==1.2.1
flask-login==0.6.3
bcrypt==4.1.1
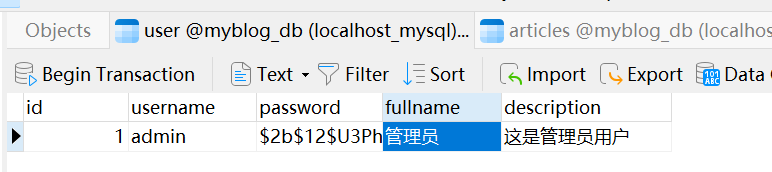
2、修改数据库明文密码
>>> import bcrypt
>>> pd='admin'
>>> hashed = bcrypt.hashpw(pd.encode(), bcrypt.gensalt())
>>> print(hashed.decode('utf-8'))
$2b$12$U3PhlQenadR1WCb63.1Rxu83TrnFxv884YpPOPjYZI0wzbl.oG4Iq
3、修改认证方式
·····def check_password_correction(self, attempted_password):password_hashed = self.password.encode()return bcrypt.checkpw(attempted_password.encode(), password_hashed)
登录免密已然是admin/admin , 但数据存储的密码以及h加密了成字符串了

十二、实现图片上传
1、上传页
forms/image_upload_form.py
from flask_wtf import FlaskForm
from flask_wtf.file import FileField, FileRequired
from wtforms import SubmitFieldclass ImageUploadForm(FlaskForm):image_file = FileField(label="选择图片", validators=[FileRequired()])submit = SubmitField(label="上传")
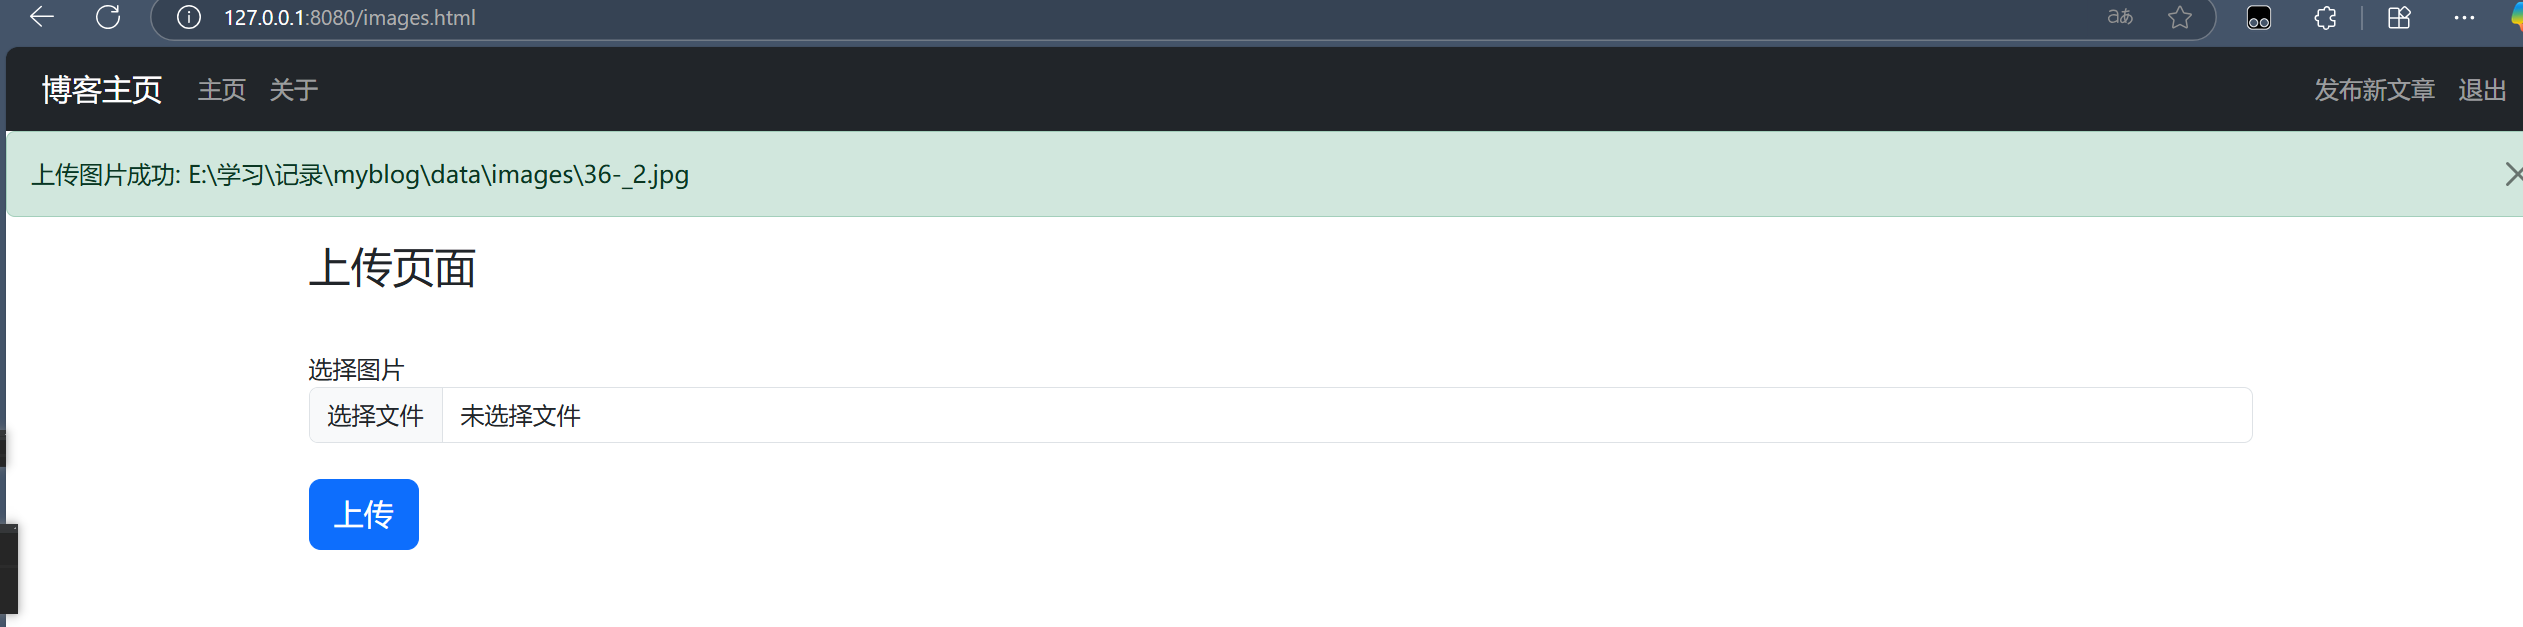
templates/images.html
{% extends 'base.html' %}
{% block title %}
博客主页
{% endblock %}{% block content %}
<div class="container-xl"><form method="POST" class="form-signin" enctype="multipart/form-data">{{ form.hidden_tag() }}<h1 class="h3 mb-3 font-weight-normal">上传页面</h1><br>{{ form.image_file.label }}{{ form.image_file(class="form-control") }}<br>{{ form.submit(class="btn btn-lg btn-primary btn-primary") }}</form>
</div>
{% endblock %}
2、工具类
commom/profile.py
定义了一个Profile类,用于获取图像文件的路径。
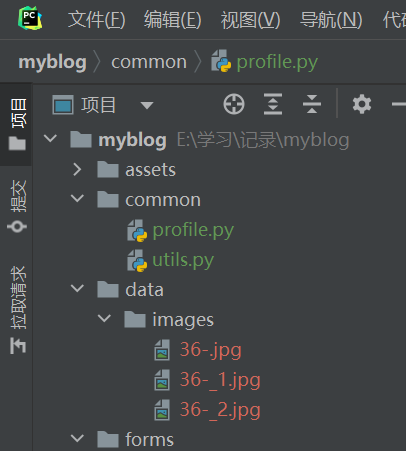
from pathlib import Pathclass Profile:__images_path = None@staticmethoddef get_images_path():home_path = Path(__file__).parent.parentimages_path = home_path.joinpath("data/images")if not images_path.exists():images_path.mkdir(parents=True)return images_path
common/utils.py
获取文件名和扩展名,并生成唯一的保存文件路径。
from pathlib import Pathdef get_file_name_parts( filename: str):pos = filename.rfind('.')if pos == -1:return filename, ''return filename[:pos], filename[pos + 1:]def get_save_filepaths(file_path: Path, filename: str):save_file = file_path.joinpath(filename)if not save_file.exists():return save_filename, ext = get_file_name_parts(filename)for index in range(1, 100):save_file = file_path.joinpath(f'{name}_{index}.{ext}')if not save_file.exists():return save_filereturn file_path.joinpath(f'{name}_override.{ext}')
3、路由上传页面
routes/admin_routes.py
	·····@app.route('/images.html', methods=['GET', 'POST'])
@login_required
def images_page():form = ImageUploadForm()if form.validate_on_submit():image_file = form.image_file.dataimages_path = Profile.get_images_path()image_filename = secure_filename(image_file.filename)image_fullpath = utils.get_save_filepaths(images_path, image_filename)image_file.save(image_fullpath)flash(message=f'上传图片成功: {image_fullpath}', category='success')return render_template(template_name_or_list='images.html', form=form)
十三、实现图片下载
1、导航栏添加“图片管理”
templates/base.html
····· {% if current_user.is_authenticated %}<ul class="navbar-nav"><!--添加图片管理--><li class="nav-item"><a class="nav-link" href="{{ url_for('images_page') }}">图片管理</a></li><li class="nav-item"><a class="nav-link" href="{{ url_for('create_article_page') }}">发布新文章</a></li><li class="nav-item"><a class="nav-link" href="{{ url_for('logout_page') }}">退出</a></li></ul>{% else %}······
2、访问服务端图片
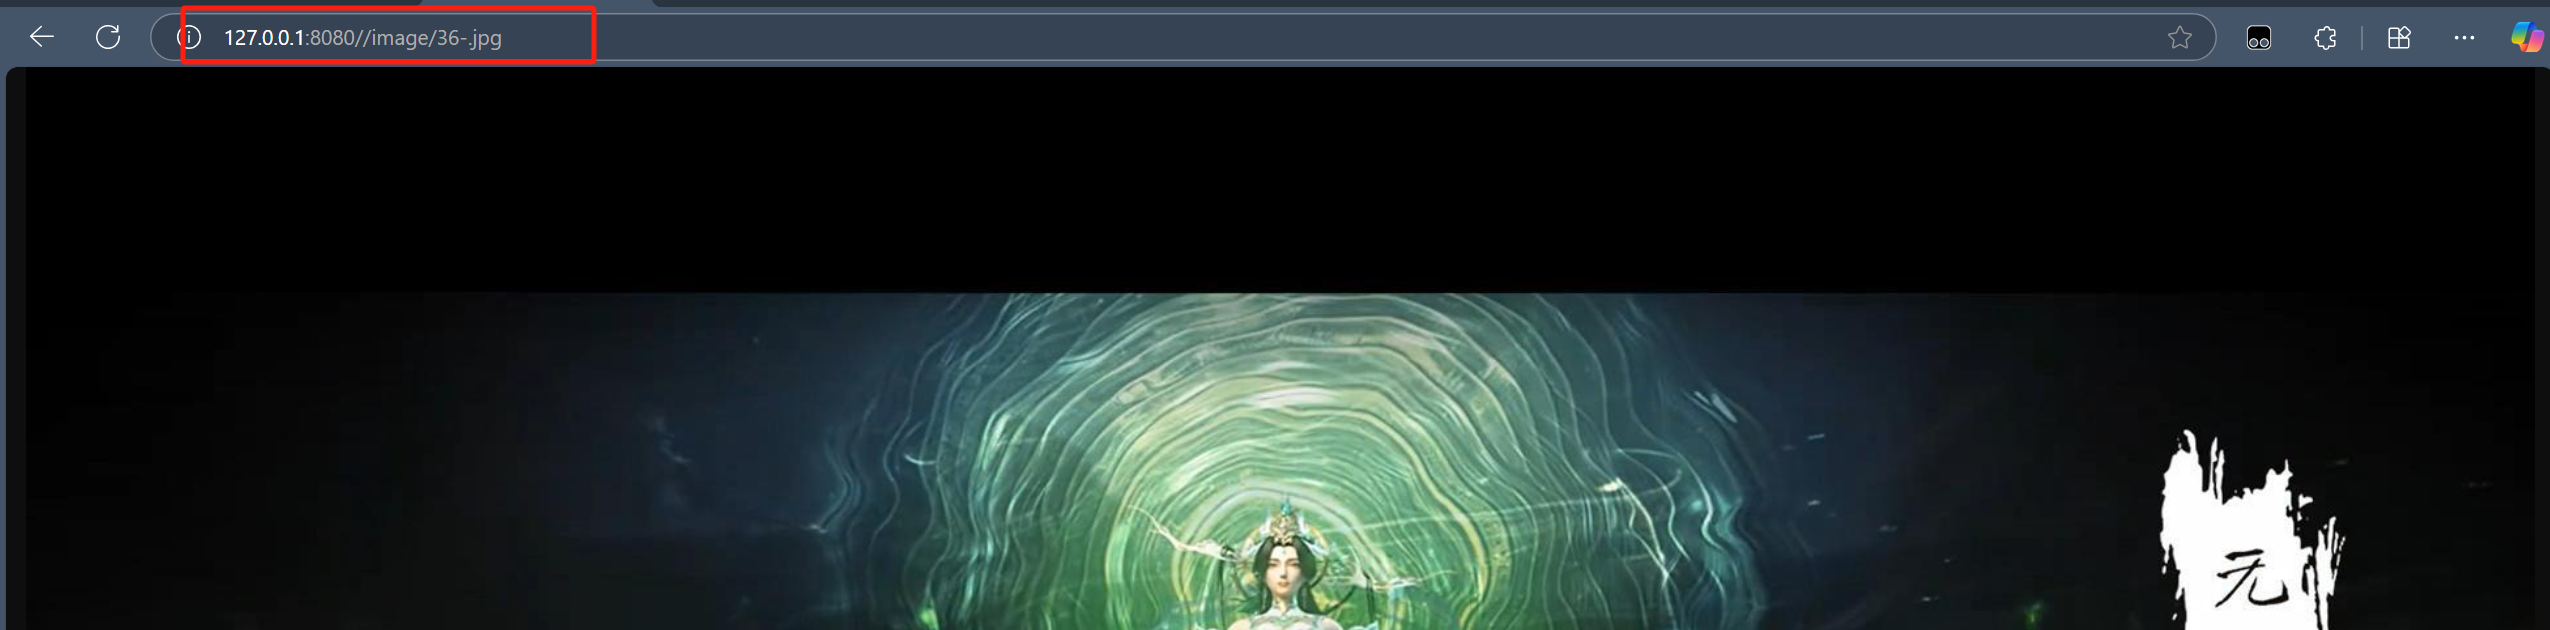
routes/user_routes.py
·····
@app.route('/image/<image_filename>')
def download_image(image_filename: str):image_path = Profile.get_images_path()image_filepath = image_path.joinpath(image_filename)if not image_filepath:return abort(404)return send_from_directory(directory=image_filepath, path=image_filename)
新增 service/image_service.py
from common.profile import Profileclass ImageService:def get_image_filename_list(self):image_paht = Profile.get_images_path()filename_list = []if image_paht.exists():for item in image_paht.iterdir():if item.is_file():filename_list.append(item.name)return filename_list
3、图片展示
routes/admin_routes.py
@app.route('/images.html', methods=['GET', 'POST'])
@login_required
def images_page():form = ImageUploadForm()if form.validate_on_submit():image_file = form.image_file.dataimages_path = Profile.get_images_path()image_filename = secure_filename(image_file.filename)image_fullpath = utils.get_save_filepaths(images_path, image_filename)image_file.save(image_fullpath)flash(message=f'上传图片成功: {image_fullpath}', category='success')image_filenames = ImageService().get_image_filename_list()return render_template(template_name_or_list='images.html', form=form, image_filenames=image_filenames)
templates/images.html
<hr/><div class="row">{% if image_filenames %}{% for image_file in image_filenames %}<div class="col-md-3"><b>/image/{{ image_file }}</b><img src="/image/{{ image_file }}" class="img-thumbnail my-2" style="width: 300px;" height="200px;"/><a href="/image/{{ image_file }}" class="btn btn-primary">查看</a><a class="btn btn-danger" data-bs-toggle="modal" data-bs-target="#Modal-DeleteConfirm-{{ image_file }}">删除</a></div>{% endfor %}{% endif %}</div>

十四、实现Docker部署
1、代码改造
main.py 主文件
import bcrypt
from sqlalchemy import inspect
from routes import app, dbdef init_db():with app.app_context():inspector = inspect(db.engine)if not inspector.has_table('users'):from models.user import Userfrom models.article import Articledb.create_all()password_hashed = bcrypt.hashpw('admin'.encode(), bcrypt.gensalt())user = User(username="root", password=password_hashed.decode('utf-8'), fullname='root', description='')db.session.add(user)db.session.commit()if __name__ == '__main__':init_db()app.run(host='0.0.0.0', debug=True, port=8080)
数据库连接方式
route/__init__.py
import osfrom flask import Flask
from flask_login import LoginManager
from flask_sqlalchemy import SQLAlchemyMYSQL_HOST = os.getenv("MYSQL_HOST", "localhost")
MYSQL_PORT = os.getenv("MYSQL_PORT", "3306")
MYSQL_USER = os.getenv("MYSQL_USER", "root")
MYSQL_PWD = os.getenv("MYSQL_PWD", "test")
MYSQL_DB = os.getenv("MYSQL_DB", "testdb")app = Flask(__name__,template_folder='../templates',static_folder='../assets',static_url_path='/assets')
app.config['SQLALCHEMY_DATABASE_URI'] = f'mysql+mysqldb://{MYSQL_USER}:{MYSQL_PWD}@{MYSQL_HOST}:{MYSQL_PORT}/{MYSQL_DB}'
app.config['SECRET_KEY'] = 'ec9439cfc6c796ae2029594d'db = SQLAlchemy(app)
login_manager = LoginManager(app)from routes import user_routes
from routes import admin_routes
2、Dockerfile编写
/Dockerfile
FROM ubuntuCOPY . /opt/myblog/WORKDIR /opt/myblog/RUN apt-get update
RUN apt-get install -y python3.9 python3-pip
RUN apt-get install -y pkg-config
RUN apt-get install -y libmysqlclient-devRUN pip3 install --upgrade pip
RUN pip3 install -r requirements.txtENV PYTHONPATH=/opt/myblog/ENTRYPOINT ["python3", "main.py"]
3、docker-compose.yaml编写
version: '3.8'
services:myblog_server:build: .image: myblogcontainer_name: myblog_serverports:- "80:8080"links:- mysql_serverenvironment:MYSQL_HOST: mysql_serverMYSQL_DB: myblog_dbMYSQL_USER: rootMYSQL_PWD: nevertellyouvolumes:- /opt/myblog_data:/opt/myblog/datadepends_on:mysql_server:condition: service_healthymysql_server:image: mysql:8.0container_name: mysql_servervolumes:- /opt/mysql:/var/lib/mysqlenvironment:MYSQL_ROOT_PASSWORD: nevertellyouMYSQL_DATABASE: myblog_dbhealthcheck:test: ["CMD", "mysqladmin" ,"ping", "-h", "localhost"]timeout: 20sretries: 10