校准曲线图表示的是预测值和实际值的差距,作为预测模型的重要部分,目前很多函数能绘制校准曲线。
一般分为两种,一种是通过Hosmer-Lemeshow检验,把P值分为10等分,求出每等分的预测值和实际值的差距.
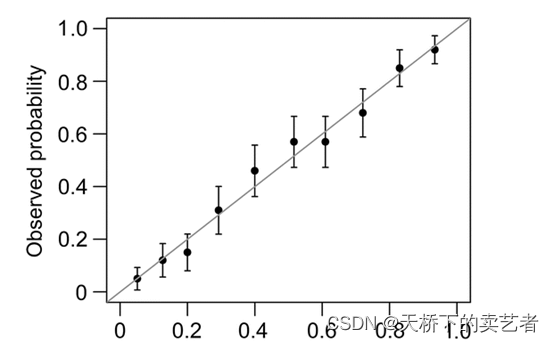
另外一种是calibration函数重抽样绘制连续的校准图
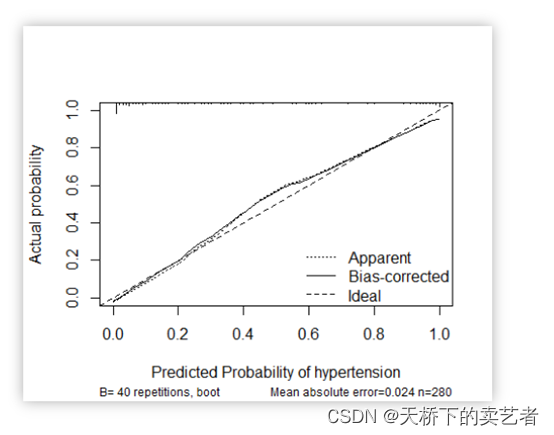
今天我们来视频演示第一种,手动绘制的好处在于加深你对绘图的理解,而且能个性化的进一步处理图形。第一种绘图本质就是我们的折线图,
R语言手动绘制logistic回归预测模型校准曲线(Calibration curve)(1)
代码
library(ggplot2)
library(rms)
#公众号:零基础说科研,公众号回复:早产数据,可以获得数据
bc<-read.csv("E:/r/test/zaochan.csv",sep=',',header=TRUE)
######
bc$race<-ifelse(bc$race=="black",1,ifelse(bc$race=="white",2,3))
bc$smoke<-ifelse(bc$smoke=="nonsmoker",0,1)
bc$race<-factor(bc$race)
bc$ht<-factor(bc$ht)
bc$ui<-factor(bc$ui)
#########
fit<-glm(low ~ age + lwt + race + smoke + ptl + ht + ui + ftv,family = binomial("logit"),data = bc)
#得出预测概率
pr1 <- predict(fit,type = c("response"))#得出预测概率
p = pr1
##使用order函数对P值排序,这里注意一下,order§排的是位置
sor <- order(p)
#P值按order来排列
p <- p[sor]
#Y值也按order来排列
y = bc[, "low"]
y <- y[sor]
###把P值分为10个等分区间
groep <- cut2(p, g = 10) #来自rms包
###计算每个等分的P值和Y值
meanpred <- round(tapply(p, groep, mean), 3)
meanobs <- round(tapply(y, groep, mean), 3)
##绘图
plot(meanpred, meanobs)
###修饰一下
plot(meanpred, meanobs,xlab = "Predicted risk", ylab = "Observed risk", pch = 16, ps = 2, xlim = c(0, 1), ylim = c(0, 1), cex.lab = 1.2, cex.axis = 1.1, las = 1)
abline(0, 1, col = "grey", lwd = 1, lty = 1)
######使用PredictABEL包的plotCalibration函数来验证一下我们计算的正确性
library(PredictABEL)
plotCalibration(data = bc,cOutcome = 2,#结果在第几行就选几predRisk = pr1,groups = 10,rangeaxis = c(0,1))
#########
source("E:/r/test/ggfit.R")#gg2<-function(data,p,y,group=1,leb) y1<-bc[, "low"]plot1<-gg2(bc,pr1,y1)ggplot(plot1, aes(x=meanpred, y=meanobs)) + geom_errorbar(aes(ymin=meanobs-1.96*se, ymax=meanobs+1.96*se), width=.02)+annotate(geom = "segment", x = 0, y = 0, xend =1, yend = 1)+expand_limits(x = 0, y = 0) + scale_x_continuous(expand = c(0, 0)) + scale_y_continuous(expand = c(0, 0))+geom_point(size=3, shape=21, fill="white")+xlab("预测概率")+ylab("实际概率")gg3(bc,pr1,y1)
