目录
- 零、版本说明
- 一、安装
- 二、使用客户端访问
零、版本说明
- centos
[root@node1 ~]# cat /etc/redhat-release
CentOS Linux release 7.9.2009 (Core)
- elasticsearch
elasticsearch-8.1.0-linux-x86_64
一、安装
systemctl stop firewalld.servicesystemctl disable firewalld.serviceyum install -y unzipcat >> /etc/security/limits.conf << EOF
es       hard    nofile  65536
es       soft    nofile  65536
EOFservice sshd restartecho "vm.max_map_count=655360" >> /etc/sysctl.confsysctl -p /etc/sysctl.confmkdir -p /export/appscd /export/appscurl -OL https://artifacts.elastic.co/downloads/elasticsearch/elasticsearch-8.1.0-linux-x86_64.tar.gztar zxf elasticsearch-8.1.0-linux-x86_64.tar.gzchown -R es:es /export/apps/elasticsearch-8.1.0ln -s elasticsearch-8.1.0 eschown -R es:es /export/apps/esuseradd espasswd essu escd esmkdir -p /export/apps/es/datamkdir -p /export/apps/es/config/certs./bin/elasticsearch-certutil ca./bin/elasticsearch-certutil cert --ca elastic-stack-ca.p12mv *.p12 config/certs/./bin/elasticsearch-certutil http
- elasticsearch-certutil http命令输入后,按以下输入操作
回车Nycerts/elastic-stack-ca.p12回车5yNnode1
node2
node3Y192.168.1.60
192.168.1.61
192.168.1.62YN回车回车
- 完成后,继续执行
mv elasticsearch/http.p12  kibana/elasticsearch-ca.pem config/certs/cat > config/elasticsearch.yml << EOF
cluster.name: es-cluster
node.name: node1
path.data: /export/apps/es/data
path.logs: /export/apps/es/logs
network.host: node1
http.port: 9200
discovery.seed_hosts: ["node1"]
xpack.security.enabled: true
xpack.security.enrollment.enabled: true
xpack.security.http.ssl:enabled: truekeystore.path: /export/apps/es/config/certs/http.p12truststore.path: /export/apps/es/config/certs/http.p12
xpack.security.transport.ssl:enabled: trueverification_mode: certificatekeystore.path: /export/apps/es/config/certs/elastic-certificates.p12truststore.path: /export/apps/es/config/certs/elastic-certificates.p12
cluster.initial_master_nodes: ["node1"]
http.host: [_local_,_site_]
ingest.geoip.downloader.enabled: false
xpack.security.http.ssl.client_authentication: none
EOF./bin/elasticsearch━━━━━━━━━━━━━━━━━━━━━━━━━━━━━━━━━━━━━━━━━━━━━━━━━━━━━━━━━━━━━━━━━━━━━━━━━━━━━━━━━━━━━━━━━━━━━━━━━━━━━━━━━━━━━━━━━━━━━━━━━━━━━━━━━━━━━━━━━━━━━━━━━━━━━━━━
✅ Elasticsearch security features have been automatically configured!
✅ Authentication is enabled and cluster connections are encrypted.ℹ️  Password for the elastic user (reset with `bin/elasticsearch-reset-password -u elastic`):2nr4oJu0RCJWljIT053Q❌ Unable to generate an enrollment token for Kibana instances, try invoking `bin/elasticsearch-create-enrollment-token -s kibana`.❌ An enrollment token to enroll new nodes wasn't generated. To add nodes and enroll them into this cluster:
• On this node:⁃ Create an enrollment token with `bin/elasticsearch-create-enrollment-token -s node`.⁃ Restart Elasticsearch.
• On other nodes:⁃ Start Elasticsearch with `bin/elasticsearch --enrollment-token <token>`, using the enrollment token that you generated.
━━━━━━━━━━━━━━━━━━━━━━━━━━━━━━━━━━━━━━━━━━━━━━━━━━━━━━━━━━━━━━━━━━━━━━━━━━━━━━━━━━━━━━━━━━━━━━━━━━━━━━━━━━━━━━━━━━━━━━━━━━━━━━━━━━━━━━━━━━━━━━━━━━━━━━━━
- 出现以上界面后,将该信息保存
- 访问https://node1:9200,使用上面的安装信息中提示的用户名(elastic)和密码(2nr4oJu0RCJWljIT053Q)登录
- 出现以下响应,代表安装成功
{"name" : "node1","cluster_name" : "es-cluster","cluster_uuid" : "nkAVncJFS8u0CXaEXwcTrQ","version" : {"number" : "8.1.0","build_flavor" : "default","build_type" : "tar","build_hash" : "3700f7679f7d95e36da0b43762189bab189bc53a","build_date" : "2022-03-03T14:20:00.690422633Z","build_snapshot" : false,"lucene_version" : "9.0.0","minimum_wire_compatibility_version" : "7.17.0","minimum_index_compatibility_version" : "7.0.0"},"tagline" : "You Know, for Search"
}
-
节点配置方法一样,需要修改config/elasticsearch.yml的node.name和network.host为对应节点配置
-
CTRL+C停止node1的es服务,使用-d参数启动后台服务,集群子节点在修改配置后,使用相同命令加入集群
./bin/elasticsearch -d
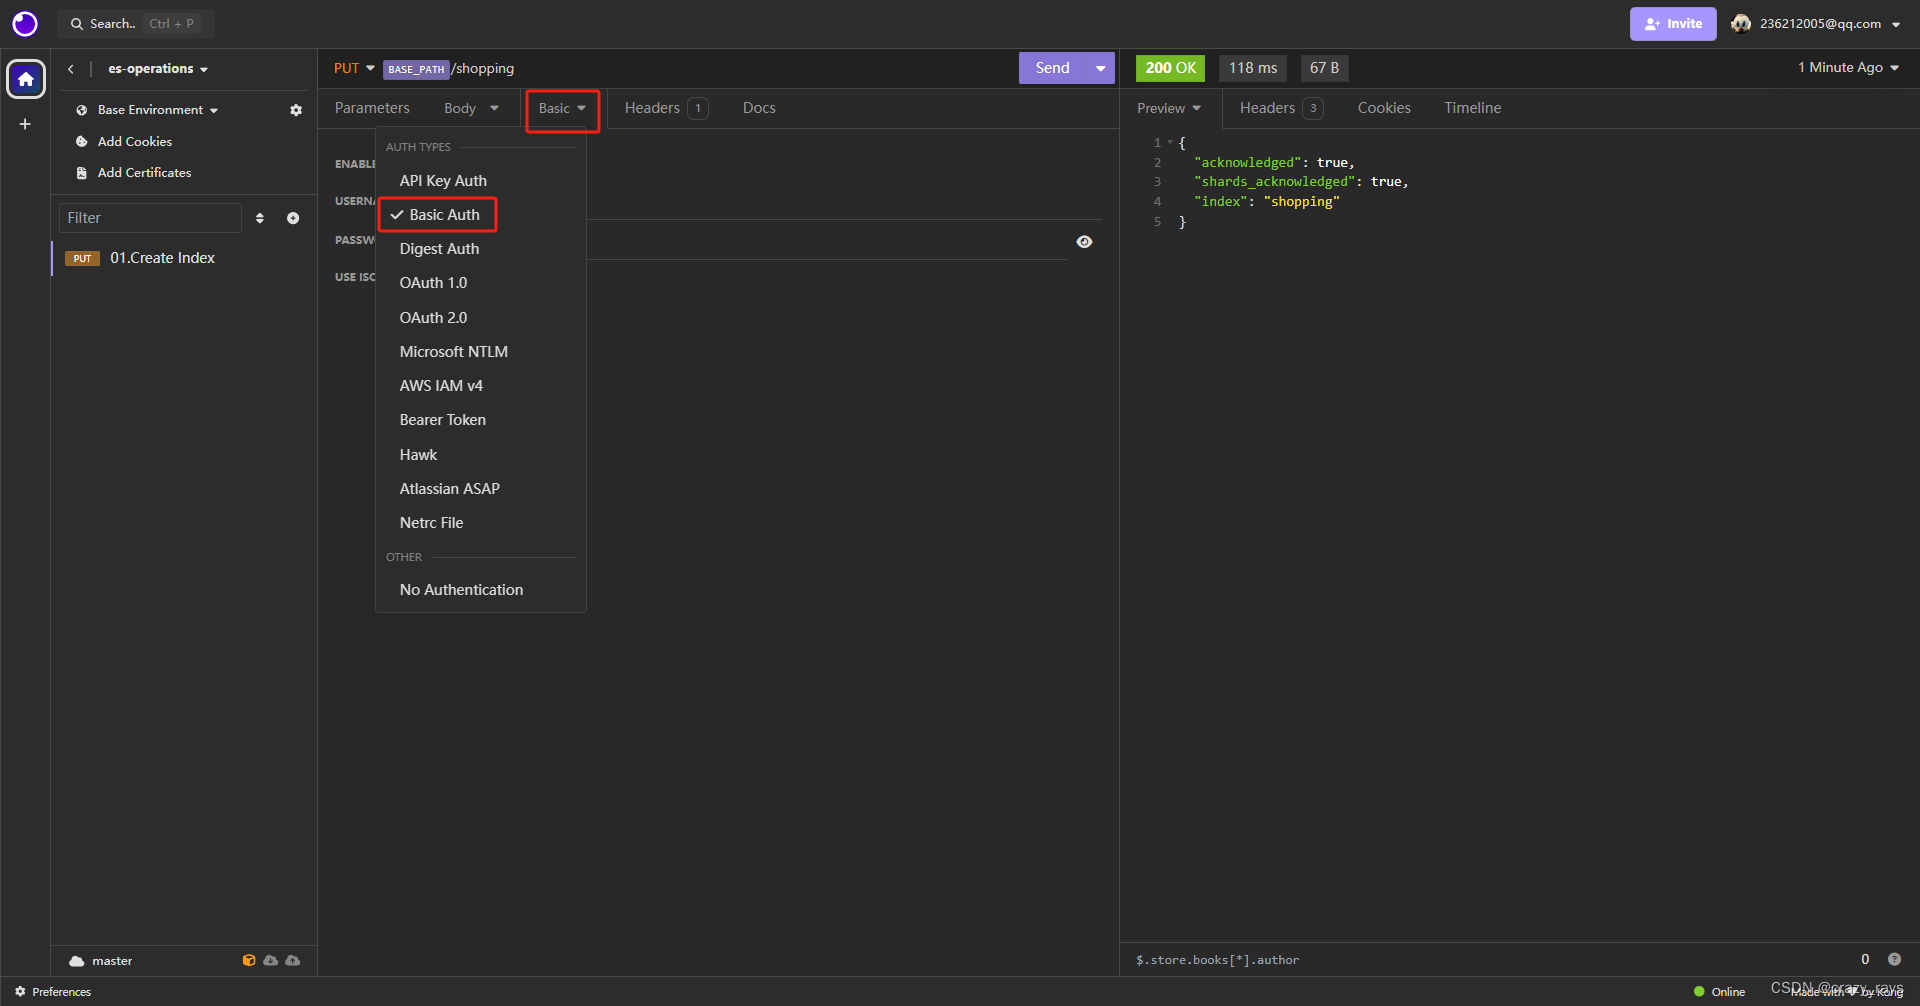
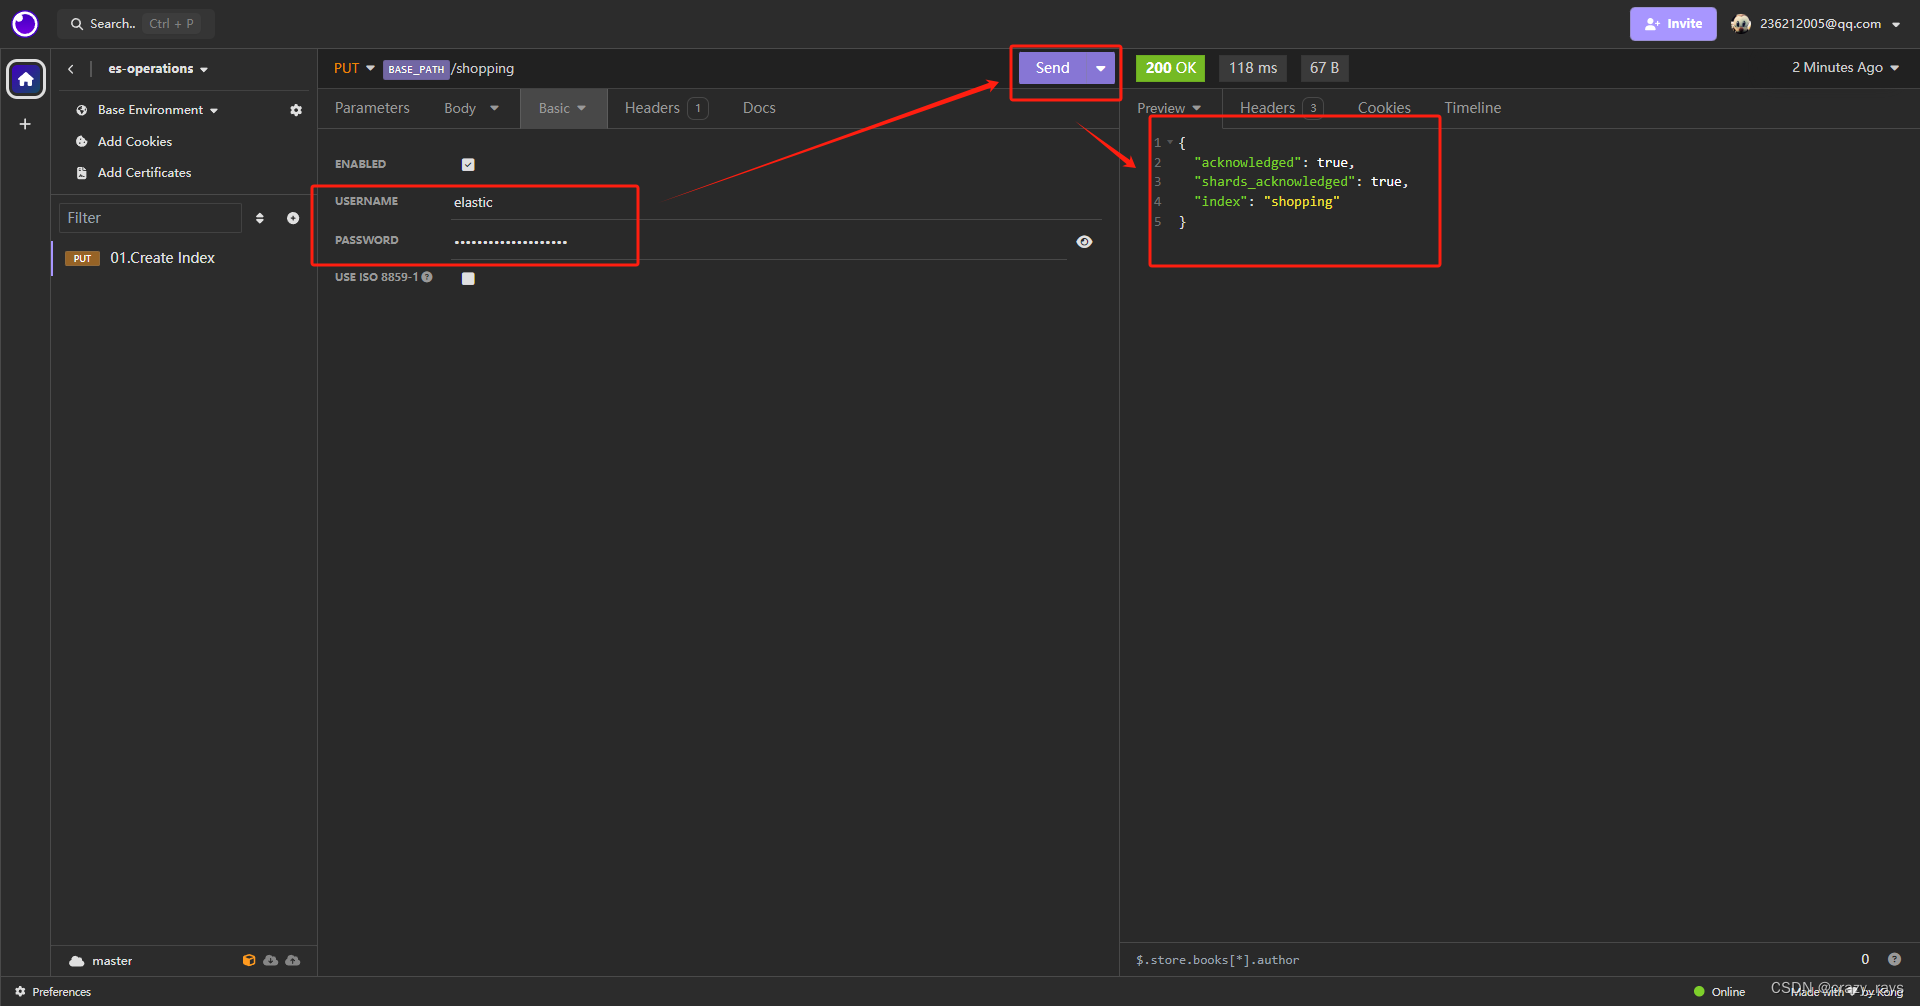
二、使用客户端访问
- 示例使用insomnia,POSTMAN和curl等同:添加OATH -> BASE_AUTH