基于 Spring Boot 博客系统开发(六)
本系统是简易的个人博客系统开发,为了更加熟练地掌握 SprIng Boot 框架及相关技术的使用。🌿🌿🌿
基于 Spring Boot 博客系统开发(五)👈👈
文章详情页实现
在Controller类中,编写处理HTTP请求的方法来获取文章详情并返回视图。
HomeController.java
@RequestMapping("/article/{id}")public String article(@PathVariable Long id,Model model){Article article = articleService.getById(id);if(article == null){return "error/404";}model.addAttribute("article",article);return "client/article";}
修改视图中代码。article.html
<title th:text="${article.title}">函数式接口</title>
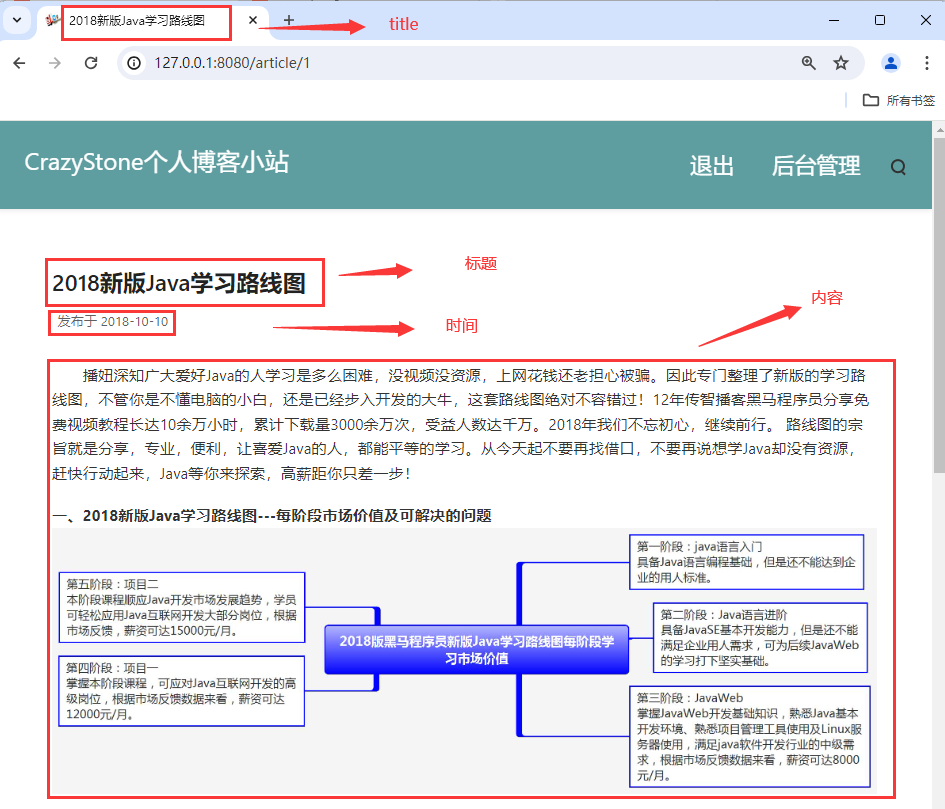
<article class="main-content post-page"><div class="post-header"><h1 class="post-title" itemprop="name headline" th:text="${article.title}">函数式接口</h1><div class="post-data"><time datetime="2018-12-01" itemprop="datePublished" >发布于 [[${article.created}]]</time></div></div><br /><div id="post-content" class="post-content content" th:utext="${@textUtils.md2Html(article.content)}"></div></article>
渲染后效果
文章评论实现
评论用户登录渲染
用户评论前需要进行登录
<span th:if="${@loginUtils.isLogin()}" class="response">Hello,<a data-no-instant="" th:text="${@loginUtils.getLoginUser().username}">admin</a>如果你想 <a href="/logout">注销</a> ?
</span>
<span th:unless="${@loginUtils.isLogin()}" class="response">用户想要评论,请先<a href="/login" title="登录" target="_blank" data-no-instant="">登录</a>!
</span>
LoginUtils.java
@Component
public class LoginUtils {@Autowiredpublic HttpServletRequest request;public boolean isLogin(){Object loginUser = request.getSession().getAttribute("loginUser");return loginUser!=null;}public User getLoginUser(){Object loginUser = request.getSession().getAttribute("loginUser");if(loginUser instanceof User){return (User)loginUser;}return null;}
}
用户登录前渲染效果:

用户登录后渲染效果:

评论列表渲染
创建CommentController.java,查询指定文章ID的评论列表并分页,以JSON格式返回。
这里注意要写@ResponseBody
@Controller
@RequestMapping("/comment")
public class CommentController {@Autowiredprivate ICommentService commentService;@RequestMapping("/list")@ResponseBodypublic PageInfo<Comment> list(Long articleId,@RequestParam(defaultValue = "1") Integer pageNum){PageHelper.startPage(pageNum,3);QueryWrapper<Comment> query = new QueryWrapper<>();query.eq("article_id",articleId);List<Comment> list = commentService.list(query);PageInfo<Comment> page = new PageInfo<>(list);return page;}
}
前端代码,需要引入JQ。由于之前有统一引入到公共JS里了,所以这里不需要引入。
引入JQ
<script src="/assets/js/jquery.min.js"></script>
HTML中添加文章ID
 <form id="comment-form" class="comment-form" role="form" ><input type="hidden" name="articleId" id="aid" th:value="${article.id}"><textarea name="content" id="textarea" class="form-control" placeholder="以上信息可以为空,评论不能为空哦!" required="required" minlength="5" maxlength="2000"></textarea><button type="button" class="submit" id="misubmit">提交</button>
</form>
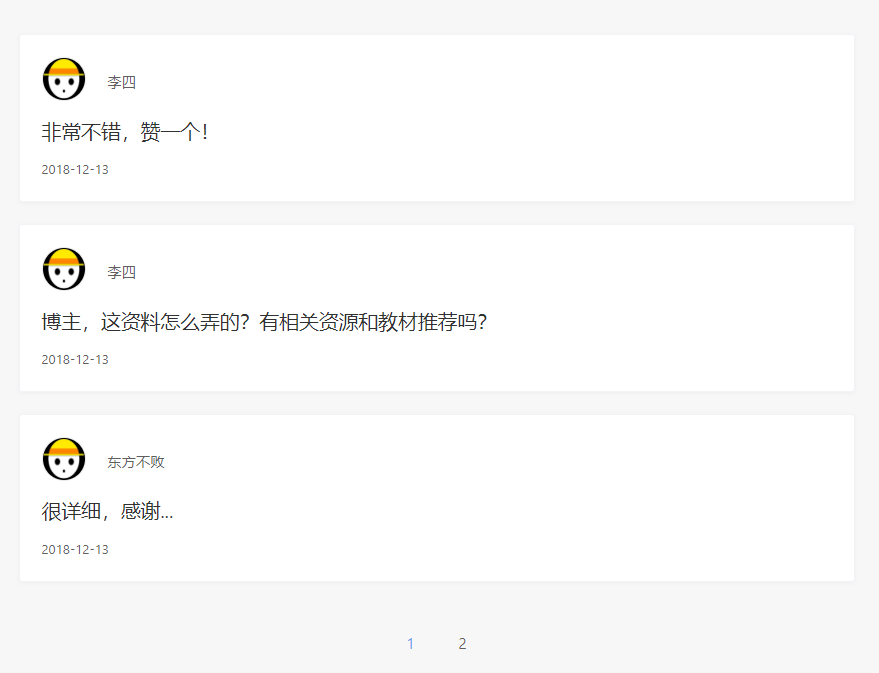
编写渲染评论列表的JS脚本。这里没有使用模板技术,采用原生文本拼接。
<script type="text/javascript">function loadComment(pageNum){$.ajax({type: 'get',url: '/comment/list',data: {articleId:$("#aid").val(),pageNum:pageNum},async: true,dataType: 'json',success: function (result) {console.log(result)let templates = '';$.each(result.list,function (i,o){// 渲染模板templates += '<li id="li-comment-15" class="comment-body comment-parent comment-odd">\n' +' <div id="comment-15">\n' +' <div class="comment-view" οnclick="">\n' +' <div class="comment-header">\n' +' <!--设置人物头像和名称-->\n' +' <img class="avatar" src="/assets/img/avatars.jpg" height="50">\n' +' <a class="comment-author" rel="external nofollow">'+o.author+'</a>\n' +' </div>\n' +' <!-- 评论内容 -->\n' +' <div class="comment-content">\n' +' <span class="comment-author-at"></span>\n' +' <p></p><p>'+o.content+'</p>\n' +' <p></p>\n' +' </div>\n' +' <!-- 评论日期 -->\n' +' <div class="comment-meta">\n' +' <time class="comment-time">'+o.created+'</time>\n' +'\n' +' </div>\n' +' </div>\n' +' </div>\n' +' </li>';})$(".comment-list").html(templates);let pageText = '';$.each(result.navigatepageNums,function (i,o){pageText +='<li class="'+(o==result.pageNum?'current':'')+'">' +'<a>'+o+'</a>' +'</li>';});$(".page-navigator").html(pageText);$(".page-navigator a").click(function (){let pageNum = $(this).text();loadComment(parseInt(pageNum));});}});}loadComment(1);</script>
渲染效果:
评论提交实现
后端 CommentController 添加评论方法
@Controller
@RequestMapping("/comment")
@Slf4j
public class CommentController {@Autowiredprivate ICommentService commentService;@RequestMapping("/list")@ResponseBodypublic PageInfo<Comment> list(Long articleId,@RequestParam(defaultValue = "1") Integer pageNum){PageHelper.startPage(pageNum,3);QueryWrapper<Comment> query = new QueryWrapper<>();query.eq("article_id",articleId);List<Comment> list = commentService.list(query);PageInfo<Comment> page = new PageInfo<>(list);return page;}@Autowiredprivate LoginUtils loginUtils;@PostMapping("/add")@ResponseBodypublic AjaxResult add(Comment comment, HttpServletRequest request){comment.setCreated(new Date()); //实体created 属性修改成Date类型comment.setIp(request.getRemoteAddr());User loginUser = loginUtils.getLoginUser();if(loginUser == null){return new AjaxResult(-1,"请先登录");}comment.setAuthor(loginUser.getUsername());try {commentService.save(comment);return AjaxResult.success();}catch (Exception e){log.error(e.getMessage());}return  AjaxResult.error();}}
创建AjaxResult 用于返回异步状态结果
AjaxResult.java
@Data
public class AjaxResult {private int code = 0;private String msg ="操作成功" ;private Object data;public AjaxResult() {}public AjaxResult(int code, String msg) {this.code = code;this.msg = msg;}public AjaxResult(int code, String msg, Object data) {this.code = code;this.msg = msg;this.data = data;}public static AjaxResult success(){return new AjaxResult();}public static AjaxResult error(){return new AjaxResult(-1,"未知错误");}
}
前端提交的HTML
<div><form id="comment-form" class="comment-form" role="form" ><input type="hidden" name="articleId" id="aid" th:value="${article.id}"><textarea name="content" id="textarea" class="form-control" placeholder="以上信息可以为空,评论不能为空哦!" required="required" minlength="5" maxlength="2000"></textarea><button type="button" class="submit" id="misubmit">提交</button></form></div>
提交评论的JS脚本
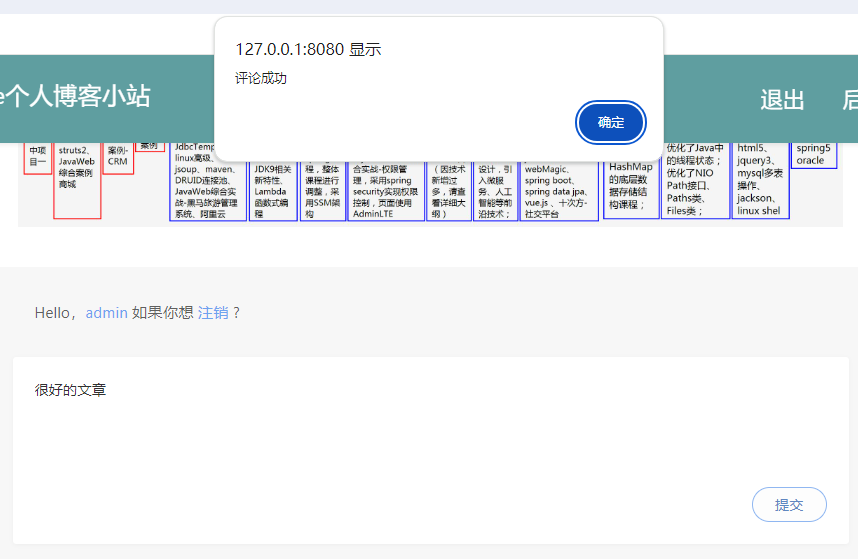
$("#misubmit").click(function (){$.ajax({type: 'post',url: '/comment/add',data: {articleId:$("#aid").val(),content:$("#textarea").val()},async: false,dataType: 'json',success: function (result) {if(result.code == 0){alert("评论成功");window.location.reload();}else{alert(result.msg)}}});});
成功提交评论效果:
