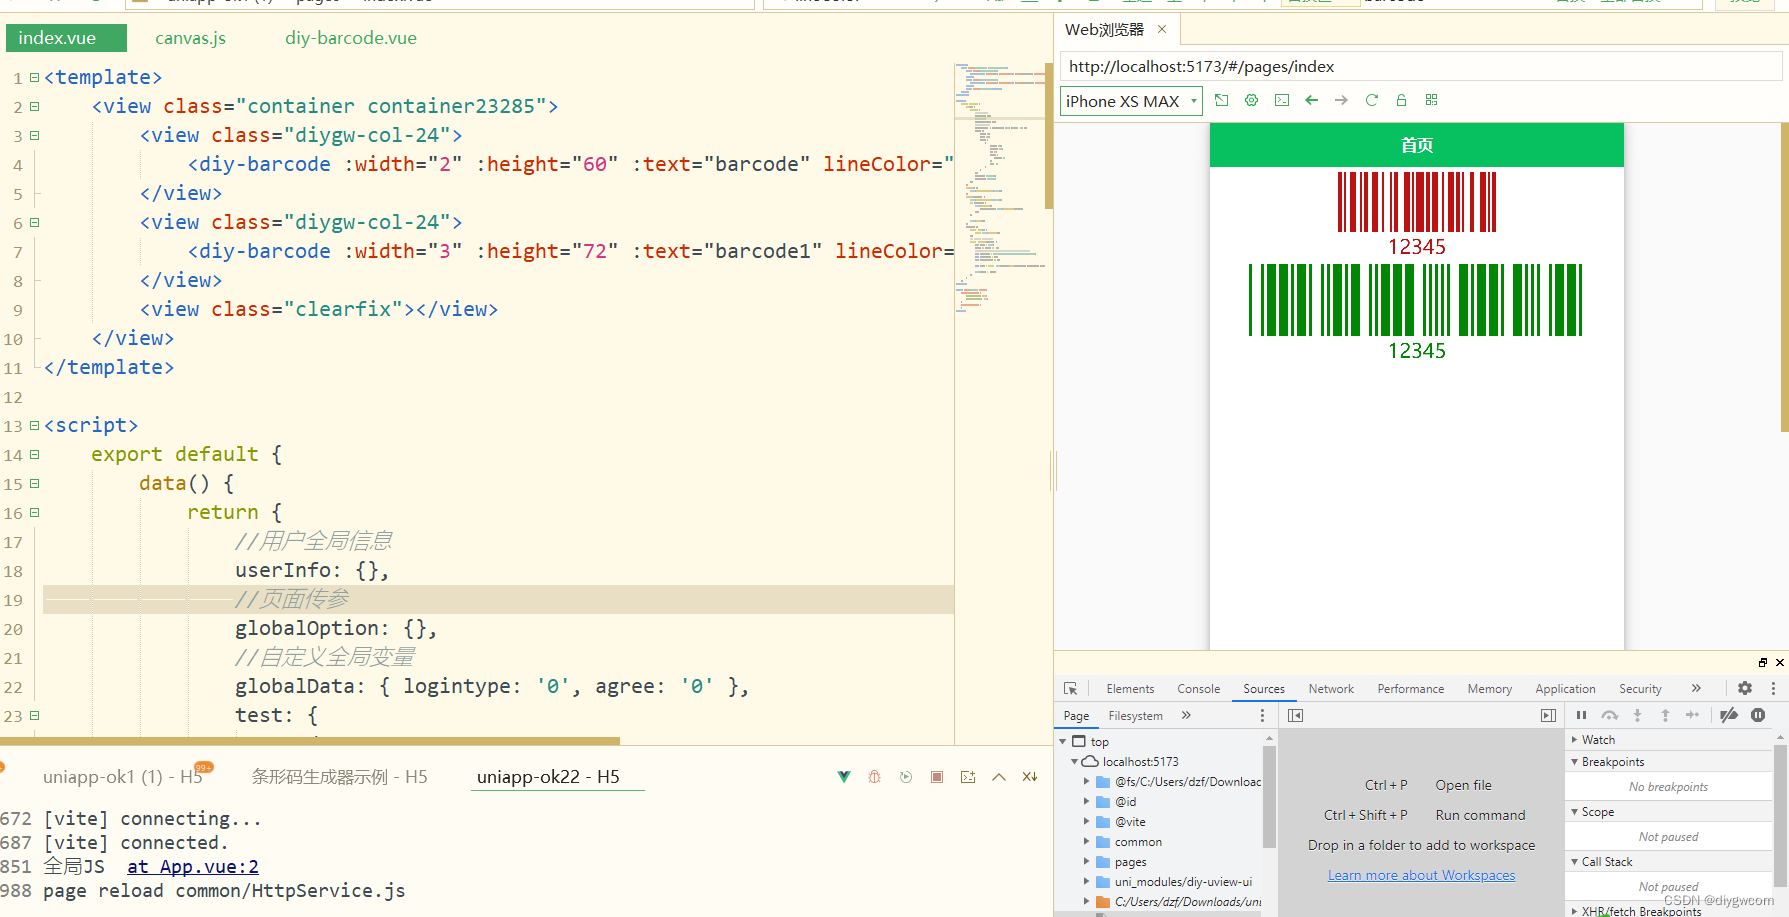
条形码在实际应用场景是经常可见的。
这里教大家如何集成uniapp条形码。条形码依赖类库JsBarcode.
下载JsBarcode源码,对CanvasRenderer进行了改进兼容uniapp。
import merge from "../help/merge.js";
import {calculateEncodingAttributes, getTotalWidthOfEncodings, getMaximumHeightOfEncodings} from "./shared.js";class CanvasRenderer{constructor(canvas, encodings, options){this.canvas = canvas;this.encodings = encodings;this.options = options;}render(){// Abort if the browser does not support HTML5 canvas// if (!this.canvas.getContext) {// 	throw new Error('The browser does not support canvas.');// }this.initSize()setTimeout(() => {this.prepareCanvas();for(let i = 0; i < this.encodings.length; i++){var encodingOptions = merge(this.options, this.encodings[i].options);this.drawCanvasBarcode(encodingOptions, this.encodings[i]);this.drawCanvasText(encodingOptions, this.encodings[i]);this.moveCanvasDrawing(this.encodings[i]);}this.canvas.draw();}, 50);// this.restoreCanvas();}initSize(){var ctx = this.canvas;calculateEncodingAttributes(this.encodings, this.options, ctx);var totalWidth = getTotalWidthOfEncodings(this.encodings);var maxHeight = getMaximumHeightOfEncodings(this.encodings);this.options.thiz.canvasWidth = totalWidth + this.options.marginLeft + this.options.marginRight;this.options.thiz.canvasHeight = maxHeight;}prepareCanvas(){// Get the canvas contextvar ctx = this.canvas;// ctx.save();// fixEncodings(this.encodings, this.options, ctx)// Paint the canvasctx.clearRect(0, 0, this.options.thiz.canvasWidth, this.options.thiz.canvasHeight);if(this.options.background){ctx.fillStyle = this.options.background;ctx.fillRect(0, 0, this.options.thiz.canvasWidth, this.options.thiz.canvasHeigh);}ctx.translate(this.options.marginLeft, 0);}drawCanvasBarcode(options, encoding){// Get the canvas contextvar ctx = this.canvas;var binary = encoding.data;// Creates the barcode out of the encoded binaryvar yFrom;if(options.textPosition == "top"){yFrom = options.marginTop + options.fontSize + options.textMargin;}else{yFrom = options.marginTop;}// ctx.fillStyle = options.lineColor;ctx.setFillStyle(options.lineColor)for(var b = 0; b < binary.length; b++){var x = b * options.width + encoding.barcodePadding;if(binary[b] === "1"){ctx.fillRect(x, yFrom, options.width, options.height);}else if(binary[b]){ctx.fillRect(x, yFrom, options.width, options.height * binary[b]);}}}drawCanvasText(options, encoding){// Get the canvas contextvar ctx = this.canvas;var font = options.fontOptions + " " + options.fontSize + "px " + options.font;// Draw the text if displayValue is setif(options.displayValue){var x, y;if(options.textPosition == "top"){y = options.marginTop + options.fontSize - options.textMargin;}else{y = options.height + options.textMargin + options.marginTop + options.fontSize;}// ctx.font = font;if(options.fontSize){ctx.setFontSize(options.fontSize)}if(options.lineColor){ctx.setFillStyle(options.lineColor)}// Draw the text in the correct X depending on the textAlign optionif(options.textAlign == "left" || encoding.barcodePadding > 0){x = 0;ctx.textAlign = 'left';}else if(options.textAlign == "right"){x = encoding.width - 1;ctx.textAlign = 'right';}// In all other cases, center the textelse{x = encoding.width / 2;ctx.textAlign = 'center';}ctx.fillText(encoding.text, x, y);}}moveCanvasDrawing(encoding){var ctx = this.canvas;ctx.translate(encoding.width, 0);}restoreCanvas(){// Get the canvas contextvar ctx = this.canvas;ctx.restore();}
}export default CanvasRenderer;
uniapp核心条码组件库
<template><view class="barcode" ><!-- #ifndef MP-ALIPAY --><canvas :canvas-id="elid" :id="elid"  type="2D" :style="{width:canvasWidth+'px',height:canvasHeight+'px'}" /><!-- #endif --><!-- #ifdef MP-ALIPAY --><canvas :id="elid" :width="canvasWidth" :height="canvasHeight" /><!-- #endif --></view>
</template><script>import JsBarcode from "./jsbarcode/JsBarcode.js"export default {data() {return {canvasWidth: 0,canvasHeight: 0,elid: this.$u.guid()}},props: {format:{type: String,default: 'CODE128'},text: {type: String,default: '123'},width: {type: Number,default: 2},height: {type: Number,default: 60},background: {type: String,default: '#ffffff'},fontSize:{type: Number,default: 20},margin:{type: Number,default: 5},// fontColor: {// 	type: String,// 	default: '#000000'// },lineColor: {type: String,default: '#000000'},displayValue: {type: Boolean,default: true},//bottom 或者 toptextPosition:{type: String,default: 'bottom'}	},// 在实例挂载完成后被立即调用//兼容非动态取值(二维码为固定内容)mounted() { this.renderCode()},watch: {text(newVal, oldVal) { //监测到text值发生改变时重新绘制this.renderCode()}},methods: {// 二维码生成工具renderCode() {let ctx = uni.createCanvasContext(this.elid,this)JsBarcode(ctx, this.text, {format:this.format,thiz:this,width:this.width,height:this.height,background:this.background,lineColor:this.lineColor,margin:this.margin,fontSize:this.fontSize,fontColor:this.fontColor,textPosition:this.textPosition,displayValue: this.displayValue});}}}
</script><style>.barcode {display: flex;align-items: center;justify-content: center;}
</style>
uniapp环境下预览效果
