-.+CSS学习笔记之中级教程(一)
6、CSS 布局 - display: inline-block
-
与
display: inline相比,主要区别在于display: inline-block允许在元素上设置宽度和高度。 -
同样,如果设置了
display: inline-block,将保留上下外边距/内边距,而display: inline则不会。 -
与
display: block相比,主要区别在于display:inline-block在元素之后不添加换行符,因此该元素可以位于其他元素旁边。
<!DOCTYPE html>
<html lang="en">
<head><meta charset="UTF-8"><meta http-equiv="X-UA-Compatible" content="IE=edge"><meta name="viewport" content="width=device-width, initial-scale=1.0"><title>Document</title><link rel="stylesheet" href="css/baseStyle.css">
</head>
<style>span.inline{display: inline;width: 100px;height: 100px;background-color: yellow;padding: 10px;}span.inline-block{display: inline-block;width: 100px;height: 100px;background-color: yellow;padding: 10px;overflow: auto;}span.block{display: block;width: 100px;height: 100px;background-color: yellow;padding: 10px;overflow: auto;}</style>
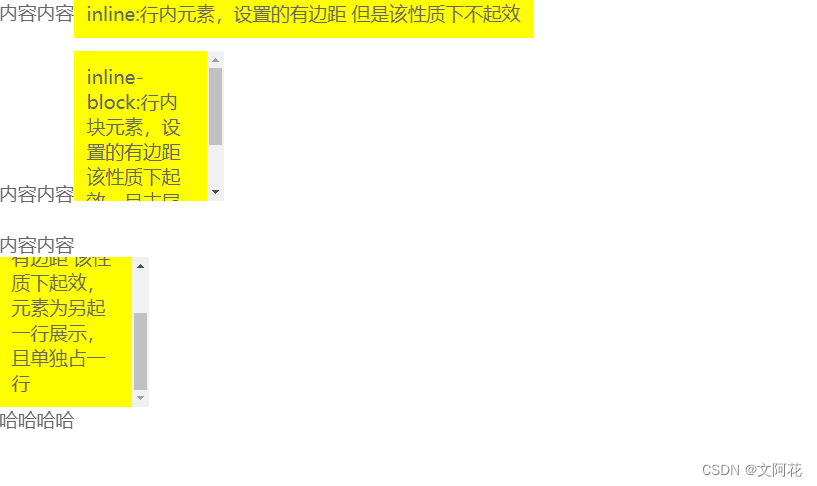
<body><p>内容内容<span class="inline">inline:行内元素,设置的有边距 但是该性质下不起效</span></p>
<br>
<p>内容内容<span class="inline-block">inline-block:行内块元素,设置的有边距 该性质下起效,且末尾不会添加换行符</span></p>
<br>
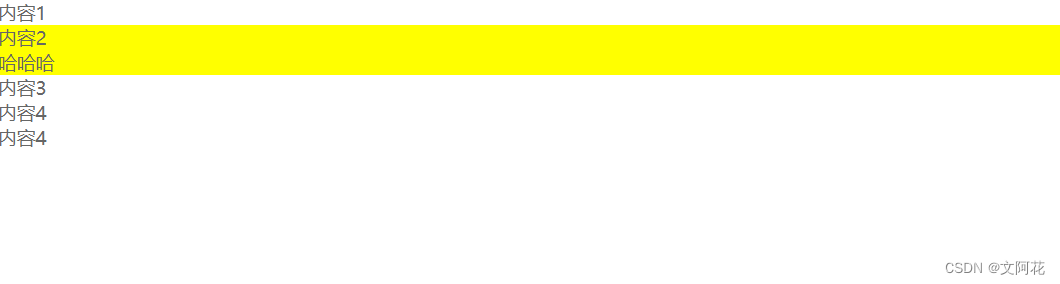
<p>内容内容<span class="block">block:块元素,设置的有边距 该性质下起效,元素为另起一行展示,且单独占一行</span>哈哈哈哈</p></body>
</html>
运行效果:
示例2:
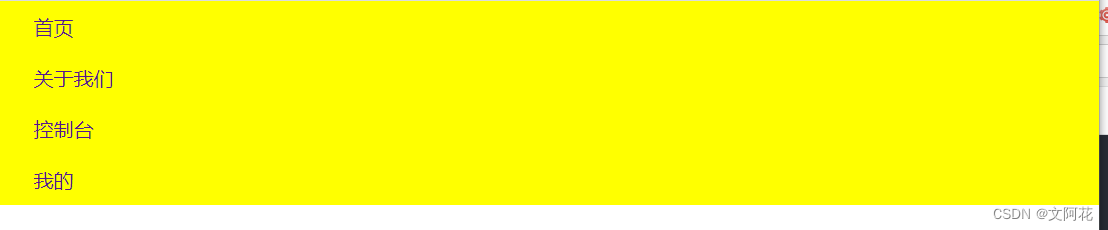
使用 display: inline-block;
<!DOCTYPE html>
<html lang="en"><head><meta charset="UTF-8"><meta http-equiv="X-UA-Compatible" content="IE=edge"><meta name="viewport" content="width=device-width, initial-scale=1.0"><title>Document</title><link rel="stylesheet" href="css/baseStyle.css"><style>ul {background-color: yellow;}li {display: inline-block;padding: 10px 15px;}a {text-decoration: none;padding: 10px 15px;}/* 鼠标选中效果 */a:hover {background-color: cadetblue;color: white;}</style>
</head><body><ul><li><a href="html_jump_page.html">首页</a></li><li><a href="html_jump_page.html">关于我们</a></li><li><a href="html_jump_page.html">控制台</a></li><li><a href="html_jump_page.html">我的</a></li></ul></body></html>
运行效果:

不使用:
display: inline-block;效果类似于float:left但是display: inline-block;子元素间会产生间距
7、CSS 布局 - 水平和垂直对齐
7.1 居中对齐元素:margin: auto;
<!DOCTYPE html>
<html lang="en"><head><meta charset="UTF-8"><meta http-equiv="X-UA-Compatible" content="IE=edge"><meta name="viewport" content="width=device-width, initial-scale=1.0"><title>Document</title><link rel="stylesheet" href="css/baseStyle.css"><style>div.center {/* 水平居中 */margin: auto;border: 1px solid #777;width: 200px;}</style>
</head><body><div class="center">你好,中国</div>
</body></html>
运行效果:

7.2 居中对齐文本: text-align: center;
<!DOCTYPE html>
<html lang="en"><head><meta charset="UTF-8"><meta http-equiv="X-UA-Compatible" content="IE=edge"><meta name="viewport" content="width=device-width, initial-scale=1.0"><title>Document</title><link rel="stylesheet" href="css/baseStyle.css"><style>div.center {border: 1px solid #777;text-align: center;}</style>
</head><body><div class="center">你好,中国</div>
</body></html>
运行效果:

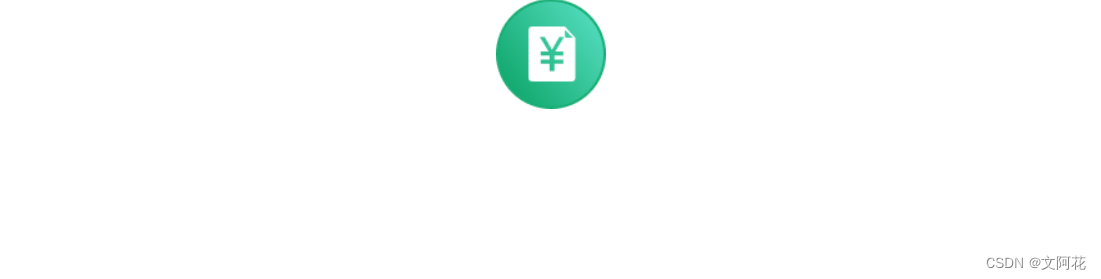
7.3 居中对齐图像
- 使图像居中,请将左右外边距设置为
auto,并使其成为一个块元素.
<!DOCTYPE html>
<html lang="en"><head><meta charset="UTF-8"><meta http-equiv="X-UA-Compatible" content="IE=edge"><meta name="viewport" content="width=device-width, initial-scale=1.0"><title>Document</title><link rel="stylesheet" href="css/baseStyle.css"><style>img.center {display: block;margin-left: auto;margin-right: auto;}</style>
</head><body><img class="center" src="imgs/icon_mess_sellorder.png" alt="pic">
</body></html>
运行效果:
7.4 左和右对齐
position
<!DOCTYPE html>
<html lang="en"><head><meta charset="UTF-8"><meta http-equiv="X-UA-Compatible" content="IE=edge"><meta name="viewport" content="width=device-width, initial-scale=1.0"><title>Document</title><link rel="stylesheet" href="css/baseStyle.css"><style>div.right {position: absolute;right: 0px;border: 1px solid #73AD21;padding: 15px 10px;}</style>
</head><body><h1>使用position:absolute来使元素右对齐</h1><div class="right">内容内容内容内容内容内容</div></body></html>
运行效果:

float
<!DOCTYPE html>
<html lang="en"><head><meta charset="UTF-8"><meta http-equiv="X-UA-Compatible" content="IE=edge"><meta name="viewport" content="width=device-width, initial-scale=1.0"><title>Document</title><link rel="stylesheet" href="css/baseStyle.css"><style>div.right {position: absolute;right: 0px;border: 1px solid #73AD21;padding: 15px 10px;}div.floatright{float: right;border: 1px solid #73AD21;padding: 15px 10px;margin-right: 20px;}</style>
</head><body><h1>使用float: right来使元素右对齐</h1><div class="floatright">内容内容内容内容内容内容</div></body></html>
7.5 垂直对齐
7.5.1 padding
<!DOCTYPE html>
<html lang="en"><head><meta charset="UTF-8">                                                                       <meta http-equiv="X-UA-Compatible" content="IE=edge"><meta name="viewport" content="width=device-width, initial-scale=1.0"><title>Document</title><link rel="stylesheet" href="css/baseStyle.css"><style>div.center_padding{padding: 70px 0;border: 2px solid #777;           text-align: center;  }</style>
</head><body> <div class="center_padding">内容内容内容内容内容内容</div></body></html>
7.5.2 line-height
另一个技巧是使用其值等于 height 属性值的 line-height 属性:
<!DOCTYPE html>
<html lang="en"><head><meta charset="UTF-8">                                                                       <meta http-equiv="X-UA-Compatible" content="IE=edge"><meta name="viewport" content="width=device-width, initial-scale=1.0"><title>Document</title><link rel="stylesheet" href="css/baseStyle.css"><style>div.center2{line-height: 100px;height: 100px;border: 2px solid #777;      text-align: center;       }</style>
</head><body> <div class="center2">内容内容内容内容内容内容</div></body></html>
多行内容时候使用:
div.center2{line-height: 1.5;border: 2px solid #777; text-align: center; display:inline-block; }
7.5.3 position 和 transform
.center { height: 200px;position: relative;border: 3px solid green;
}.center p {margin: 0;position: absolute;top: 50%;left: 50%;transform: translate(-50%, -50%);
}
7.5.4 Flexbox
.center {display: flex;justify-content: center;align-items: center;height: 200px;border: 3px solid green;
}
8、CSS 组合器
-
组合器是解释选择器之间关系的某种机制。
-
CSS选择器可以包含多个简单选择器。在简单选择器之间,我们可以包含一个组合器。
CSS 中有四种不同的组合器:
- 后代选择器 (空格)
- 子选择器 (>)
- 相邻兄弟选择器 (+)
- 通用兄弟选择器 (~)
8.1 后代选择器
后代选择器匹配属于指定元素后代的所有元素。
下面的例子选择 <div> 元素内的所有 <p> 元素:
div p {background-color: yellow;}
<!DOCTYPE html>
<!DOCTYPE html>
<html lang="en"><head><meta charset="UTF-8"><meta http-equiv="X-UA-Compatible" content="IE=edge"><meta name="viewport" content="width=device-width, initial-scale=1.0"><title>Document</title><link rel="stylesheet" href="css/baseStyle.css"><style>div  p {background-color: yellow;}</style>
</head><body><p>内容1</p><div><p>内容2</p><section><p>哈哈哈</p></section></div><p>内容3</p><p>内容4</p><p>内容4</p></body></html>
运行效果:
8.2 子选择器
- 子选择器匹配属于指定元素子元素的所有元素。
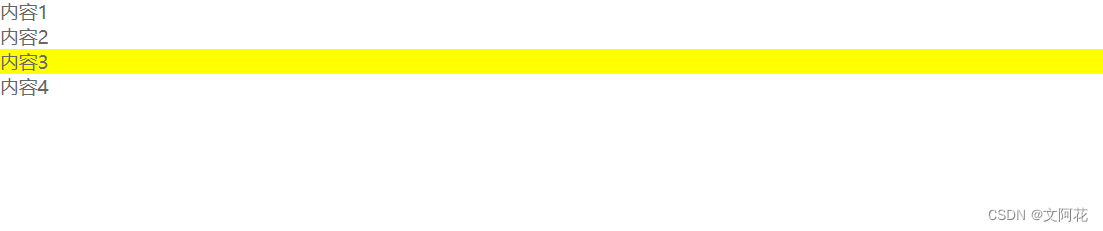
下面的例子选择属于 <div> 元素子元素的所有 <p>(直系p元素) 元素:
选择其父元素是 <div> 元素的所有 <p> 元素。
div > p {background-color: yellow;
}
<!DOCTYPE html>
<html lang="en"><head><meta charset="UTF-8"><meta http-equiv="X-UA-Compatible" content="IE=edge"><meta name="viewport" content="width=device-width, initial-scale=1.0"><title>Document</title><link rel="stylesheet" href="css/baseStyle.css"><style>div > p {background-color: yellow;}</style>
</head><body><p>内容1</p>
<div><p>内容2</p><section><p>内容3</p></section>
</div></body></html>
运行效果:

8.3 相邻兄弟选择器
-
相邻兄弟选择器匹配所有作为指定元素的相邻同级的元素。
-
兄弟(同级)元素必须具有相同的父元素,“相邻”的意思是“紧随其后”。
下面的例子选择紧随 <div> 元素之后的所有 <p> 元素:
div + p {background-color: yellow;
}
<!DOCTYPE html>
<html lang="en"><head><meta charset="UTF-8"><meta http-equiv="X-UA-Compatible" content="IE=edge"><meta name="viewport" content="width=device-width, initial-scale=1.0"><title>Document</title><link rel="stylesheet" href="css/baseStyle.css"><style>div+p {background-color: yellow;}</style>
</head><body><p>内容1</p><div><p>内容2</p></div><p>内容3</p><p>内容4</p></body></html>
运行效果:
8.4 通用兄弟选择器
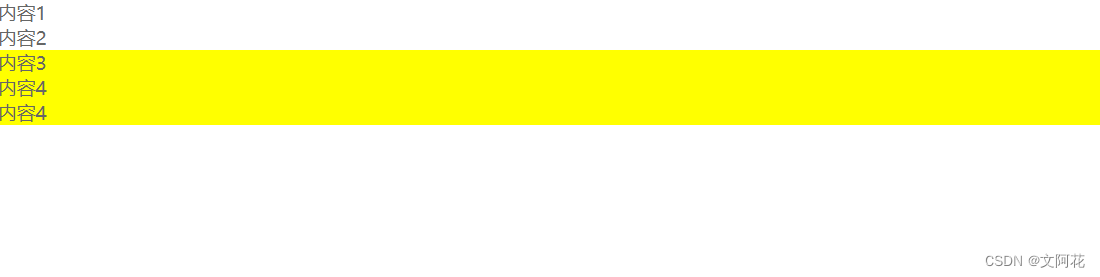
- 通用兄弟选择器匹配属于指定元素的同级元素的所有元素。
下面的例子选择属于 <div> 元素的同级元素的所有 <p> 元素:
div ~ p {background-color: yellow;
}
<!DOCTYPE html>
<html lang="en"><head><meta charset="UTF-8"><meta http-equiv="X-UA-Compatible" content="IE=edge"><meta name="viewport" content="width=device-width, initial-scale=1.0"><title>Document</title><link rel="stylesheet" href="css/baseStyle.css"><style>div ~ p {background-color: yellow;}</style>
</head><body><p>内容1</p><div><p>内容2</p></div><p>内容3</p><p>内容4</p><p>内容4</p></body></html>
运行效果:
9、CSS 伪类
9.1 什么是伪类?
- 伪类用于定义元素的特殊状态。
例如,它可以用于:
- 设置鼠标悬停在元素上时的样式
- 为已访问和未访问链接设置不同的样式
- 设置元素获得焦点时的样式
9.2 伪类的语法
selector:pseudo-class {property: value;
}
9.3 锚伪类
<!DOCTYPE html>
<html>
<head>
<style>
/* unvisited link */
a:link {color: red;
}/* visited link */
a:visited {color: green;
}/* mouse over link */
a:hover {color: hotpink;
}/* selected link */
a:active {color: blue;
}
</style>
</head>
<body><h1>CSS 链接</h1>
<p><b><a href="/index.html" target="_blank">这是一个链接</a></b></p>
<p><b>注释:</b>在 CSS 定义中,a:hover 必须位于 a:link 和 a:visited 之后才能生效。</p>
<p><b>注释:</b>在 CSS 定义中,a:active 必须位于 a:hover 之后才能生效。</p></body>
</html>注意:a:hover 必须在 CSS 定义中的 a:link 和 a:visited 之后,才能生效!a:active 必须在 CSS 定义中的 a:hover 之后才能生效!伪类名称对大小写不敏感。
9.4 伪类和 CSS 类
伪类可以与 CSS 类结合使用:
当您将鼠标悬停在例子中的链接上时,它会改变颜色:
a.highlight:hover {color: #ff0000;
}
在
<!DOCTYPE html>
<html lang="en"><head><meta charset="UTF-8"><meta http-equiv="X-UA-Compatible" content="IE=edge"><meta name="viewport" content="width=device-width, initial-scale=1.0"><title>Document</title><link rel="stylesheet" href="css/baseStyle.css"><style>div:hover {background-color: yellow;}</style>
</head><body><p>将鼠标移到下面的div元素上面来改变其背景色</p><div>把鼠标移到我上面</div></body></html>
在 <div> 元素上使用 :hover 伪类来展示提示的实例:
<!DOCTYPE html>
<html lang="en"><head><meta charset="UTF-8"><meta http-equiv="X-UA-Compatible" content="IE=edge"><meta name="viewport" content="width=device-width, initial-scale=1.0"><title>Document</title><link rel="stylesheet" href="css/baseStyle.css"><style>p {/* 默认隐藏 */display: none;background-color: yellow;padding: 20px;}div:hover p {display: block;}</style>
</head>
<body><div>把鼠标移到我上面<p>哈哈哈 提示内容</p></div>
</body>
</html>
运行效果:
默认不展示p元素,将鼠标放在div上之后p元素展示
9.5 CSS - :first-child 伪类
-
:first-child伪类与指定的元素匹配:该元素是另一个元素的第一个子元素。 -
匹配首个
<p>元素
(1)在下面的例子中,选择器匹配作为任何元素的第一个子元素的任何 <p>元素:
<!DOCTYPE html>
<html lang="en"><head><meta charset="UTF-8"><meta http-equiv="X-UA-Compatible" content="IE=edge"><meta name="viewport" content="width=device-width, initial-scale=1.0"><title>Document</title><link rel="stylesheet" href="css/baseStyle.css"><style>p:first-child {background-color: yellow;}</style>
</head><body><p>内容1</p><p>内容2</p>
</body></html>
运行效果:

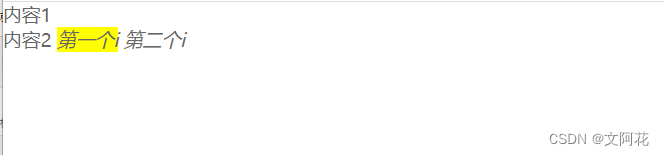
(2)匹配所有 <p> 元素中的首个 <i> 元素示例:
<!DOCTYPE html>
<html lang="en"><head><meta charset="UTF-8"><meta http-equiv="X-UA-Compatible" content="IE=edge"><meta name="viewport" content="width=device-width, initial-scale=1.0"><title>Document</title><link rel="stylesheet" href="css/baseStyle.css"><style>p i:first-child {background-color: yellow;}</style>
</head><body><p>内容1</p><p>内容2<i>第一个i</i><i>第二个i</i></p>
</body></html>
运行效果:
(3) 匹配所有首个 <p> 元素中的所有 <i> 元素示例:
<!DOCTYPE html>
<html lang="en"><head><meta charset="UTF-8"><meta http-equiv="X-UA-Compatible" content="IE=edge"><meta name="viewport" content="width=device-width, initial-scale=1.0"><title>Document</title><link rel="stylesheet" href="css/baseStyle.css"><style>p:first-child i{background-color: yellow;}</style>
</head><body><p>我很<i>强壮</i></p><p>内容2<i>第一个i</i><i>第二个i</i></p>
</body></html>
运行效果:

9.6 CSS - :lang 伪类
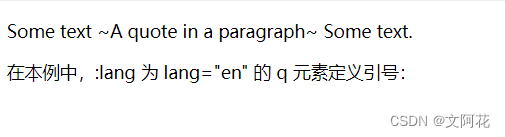
:lang伪类允许您为不同的语言定义特殊的规则。
在下面的例子中,:lang 为属性为 lang="en" 的 <q> 元素定义引号:
<html>
<head>
<style>
q:lang(en) {quotes: "~" "~";
}
</style>
</head>
<body><p>Some text <q lang="no">A quote in a paragraph</q> Some text.</p></body>
</html>
运行效果:
9.7 所有 CSS 伪类+所有 CSS 伪元素
CSS 伪类
10、CSS 伪元素
10.1 什么是伪元素?
CSS伪元素用于设置元素指定部分的样式。
例如,它可用于:
- 设置元素的首字母、首行的样式
- 在元素的内容之前或之后插入内容
10.2 伪元素的语法
selector::pseudo-element {property: value;
}
10.3 ::first-line 伪元素
- 伪元素用于向文本的首行添加特殊样式。
- 注意:
::first-line伪元素只能应用于块级元素。
以下属性适用于 ::first-line 伪元素:
- 字体属性
- 颜色属性
- 背景属性
word-spacingletter-spacingtext-decorationvertical-aligntext-transformline-heightclear
<!DOCTYPE html>
<html lang="en"><head><meta charset="UTF-8"><meta http-equiv="X-UA-Compatible" content="IE=edge"><meta name="viewport" content="width=device-width, initial-scale=1.0"><title>Document</title><link rel="stylesheet" href="css/baseStyle.css"><style>p::first-line{background-color: yellow;}</style>
</head><body><p>您可以使用 ::first-line 伪元素将特殊效果添加到文本的第一行。一些更多的文字。越来越多,越来越多,越来越多,越来越多,越来越多,越来越多,越来越多,越来越多,越来越多,越来越多。</p></body></html>
运行效果:

10.4 ::first-letter 伪元素
- 伪元素用于向文本的首字母添加特殊样式。
- 注意:::first-letter 伪元素只适用于块级元素。
下面的属性适用于 ::first-letter 伪元素:
- 字体属性
- 颜色属性
- 背景属性
- 外边距属性
- 内边距属性
- 边框属性
text-decorationvertical-align(仅当 “float” 为 “none”)text-transformline-heightfloatclear
<!DOCTYPE html>
<html lang="en"><head><meta charset="UTF-8"><meta http-equiv="X-UA-Compatible" content="IE=edge"><meta name="viewport" content="width=device-width, initial-scale=1.0"><title>Document</title><link rel="stylesheet" href="css/baseStyle.css"><style>p::first-letter{background-color: yellow;}</style>
</head><body><p>您可以使用 ::first-line 伪元素将特殊效果添加到文本的第一行。一些更多的文字。越来越多,越来越多,越来越多,越来越多,越来越多,越来越多,越来越多,越来越多,越来越多,越来越多。</p></body></html>
运行效果:

10.5 伪元素和 CSS 类
p.intro::first-letter{background-color: yellow;}
<!DOCTYPE html>
<html lang="en"><head><meta charset="UTF-8"><meta http-equiv="X-UA-Compatible" content="IE=edge"><meta name="viewport" content="width=device-width, initial-scale=1.0"><title>Document</title><link rel="stylesheet" href="css/baseStyle.css"><style>p.intro::first-letter{background-color: yellow;}</style>
</head><body><p class="intro">这是一个标题</p><p>这是内容</p></body></html>
运行效果:

10.6 多个伪元素
<!DOCTYPE html>
<html lang="en"><head><meta charset="UTF-8"><meta http-equiv="X-UA-Compatible" content="IE=edge"><meta name="viewport" content="width=device-width, initial-scale=1.0"><title>Document</title><link rel="stylesheet" href="css/baseStyle.css"><style>p::first-line{color: blue;}p::first-letter{background-color: yellow;}</style>
</head><body><p >您可以结合 ::first-letter 和 ::first-line 伪元素来为文本的首字母和首行添加特殊效果!</p></body></html>
运行效果:

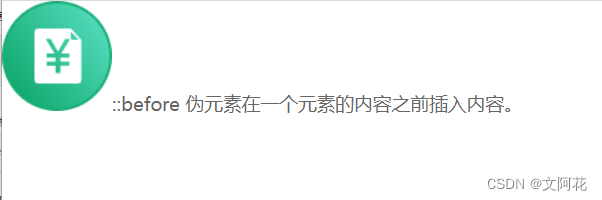
10.7 ::before 伪元素
- 伪元素可用于在元素内容之前插入一些内容。
p::before{content: url(imgs/icon_mess_sellorder.png);}
<!DOCTYPE html>
<html lang="en"><head><meta charset="UTF-8"><meta http-equiv="X-UA-Compatible" content="IE=edge"><meta name="viewport" content="width=device-width, initial-scale=1.0"><title>Document</title><link rel="stylesheet" href="css/baseStyle.css"><style>p::before{content: url(imgs/icon_mess_sellorder.png);}</style>
</head><body><p >::before 伪元素在一个元素的内容之前插入内容。</p></body></html>
运行效果:
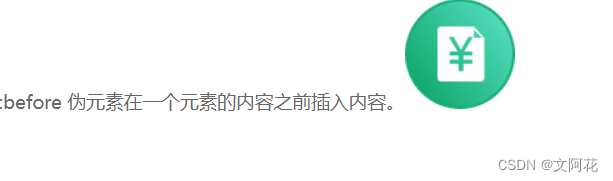
10.8 ::after 伪元素
- 伪元素可用于在元素内容之后插入一些内容。
p::after{content: url(imgs/icon_mess_sellorder.png);}
<!DOCTYPE html>
<html lang="en"><head><meta charset="UTF-8"><meta http-equiv="X-UA-Compatible" content="IE=edge"><meta name="viewport" content="width=device-width, initial-scale=1.0"><title>Document</title><link rel="stylesheet" href="css/baseStyle.css"><style>p::after{content: url(imgs/icon_mess_sellorder.png);}</style>
</head><body><p >::before 伪元素在一个元素的内容之前插入内容。</p></body></html>
运行效果:
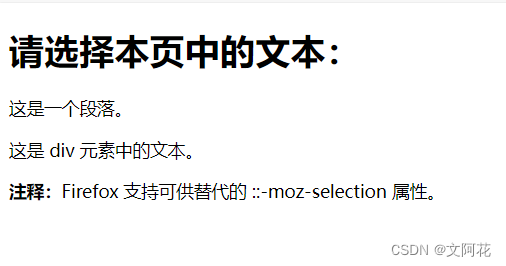
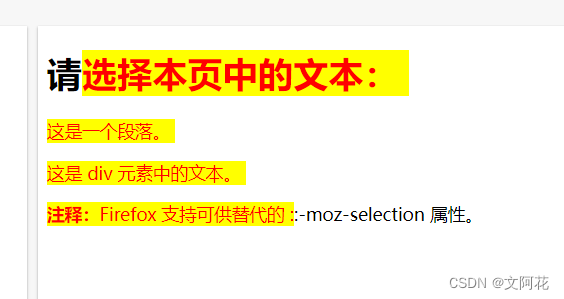
10.9 ::selection 伪元素
- 伪元素匹配用户选择的元素部分。
以下 CSS 属性可以应用于 ::selection:
colorbackgroundcursoroutline
<!DOCTYPE html>
<html>
<head>
<style>
::-moz-selection { /* 针对 Firefox 的代码 */color: red;background: yellow;
}::selection {color: red;background: yellow;
}
</style>
</head>
<body><h1>请选择本页中的文本:</h1><p>这是一个段落。</p>
<div>这是 div 元素中的文本。</div><p><b>注释:</b>Firefox 支持可供替代的 ::-moz-selection 属性。</p></body>
</html>
运行效果:
鼠标选中前:
鼠标长按移动选中后:
11、CSS 不透明度 / 透明度
opacity属性的取值范围为0.0-1.0。值越低,越透明
img {opacity: 0.5;
}
div {background: rgba(76, 175, 80, 0.3) /* 不透明度为 30% 的绿色背景 */
}
11.1 透明悬停效果
- 鼠标未悬停时候透明度为0。5,鼠标放置在元素上后透明度为1
img {opacity: 0.5;
}img:hover {opacity: 1.0;
}
12、CSS 垂直导航栏
CSS 垂直导航栏
13、CSS 水平导航栏
CSS 水平导航栏