11. Vue组合式API
11.1 为什么要使用Composition API
11.1.1 一个Options API实例
在前面都是采用Options API(基于选项的API)来些一个组件,下面是一个实例
<template>num:{{ num }}<br>double:{{ double }}<button @click="add">加</button>
</template><script lang="ts">export default {data() {return {num: 0}},computed: {double() {return this.count * 2}}methods:{add() {this.num++}}}
</script>
11.1.2 OptionsAPI存在的问题
存在的一些问题和局限性:
-
代码冗长:使用 Option API 时,组件的逻辑和状态管理分散在
data、methods、computed等多个选项中,导致代码结构不够紧凑,阅读和维护起来较为困难。 -
逻辑复用困难:在 Option API 中,逻辑复用主要通过 mixins 实现,但 mixins 存在命名冲突和隐式依赖的问题,使得代码的可维护性和可读性降低。
-
上下文依赖:在 Option API 中,
this指向组件实例,但在某些情况下(如在生命周期钩子中),this的指向可能会引起混淆,导致难以调试的问题。 -
类型推断困难:由于 Option API 的结构,TypeScript 的类型推断在某些情况下不够直观,需要额外的工作来确保类型安全。
-
状态和逻辑分离:Option API 将状态(
data)和逻辑(methods、computed)分开定义,这在大型组件中可能导致状态和逻辑的分离,增加理解和维护的难度。

11.1.3 Composition API简介
Composition API可以用函数的方式,更加优雅的组织代码,让相关功能的代码更加有序的组织在一起。

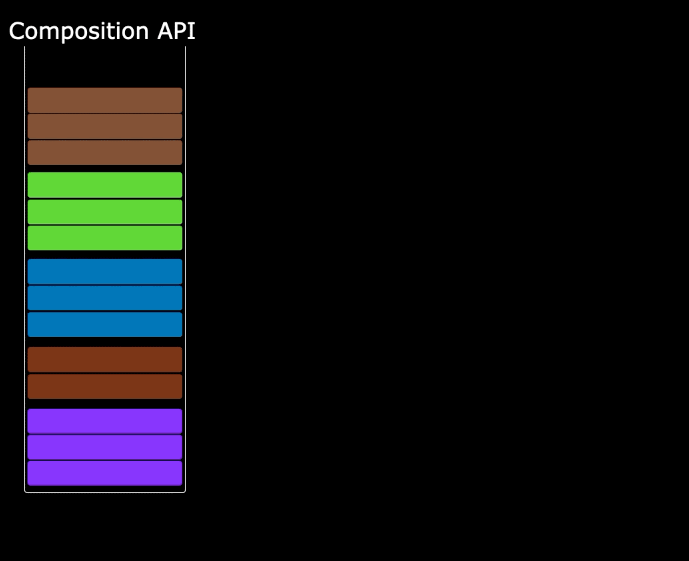
说明:以上四张动图原创作者:大帅老猿
采用Composition API来重写上面的组件:
<template>num:{{ num }}<br>double:{{ double }}<button @click="add">加</button>
</template><script lang="ts">import { reactive, computed} from "vue"export default {setup() {const state = reactive({num: 0,double: computed(() => state.count * 2)})function add() {state.num++}return {state,add}}}
</script>
11.2 Composition API
11.2.1 setup()入口
setup() 是 Vue 3 中 Composition API 的一个核心函数,是组件内使用Composition API的入口点,在vue实例创建完成前被调用,所以,setup函数中没有this指针。
<template><div></div>
</template><script>
export default {setup() {console.log('这是setup函数');}
}
</script><style></style>
setup() 用于在组件创建之前执行一些初始化逻辑,并且返回的对象可以包含响应式状态、计算属性、方法等,这些都可以在模板中直接使用。
<template><div><p>{{ num }}</p><p>{{ users.userID }},{{ users.name }}</p></div>
</template><script>
export default {setup() {let num = 100const users = {userID: 1,name: '张三'}return {num,users}}
}
</script><style></style>
11.2.2 ref响应式监听
ref 是 Vue 3 中用于创建响应式数据的函数之一。它可以将一个普通变量转换为响应式变量,使得当该变量的值发生变化时,Vue 能够自动追踪并更新相关的视图。
<template><div><p>{{ num }}</p><p>{{ users.userID }},{{ users.name }}</p><button @click="change">change</button></div>
</template><script>
import { ref } from 'vue'export default {setup() {let num = ref(100) // 使用ref包裹数据成为响应式数据let users = ref({userID: 1,name: '张三'})function change() {num.value = 200      // ref包裹的数据,使用时必须要通过value属性users.value.name = '李四'}return {num,users,change}}
}
</script><style></style>
响应式原理
ref 内部使用了 Vue 3 的响应式系统,通过 Proxy 对象来实现数据的拦截和追踪。当 ref 创建的变量被修改时,Vue 会自动检测到变化,并通知相关的依赖(如模板、计算属性等)进行更新。
与其他响应式 API 的对比
- ref vs reactive:
ref适用于单个值的响应式,返回一个包含value属性的对象。reactive适用于对象的响应式,返回一个代理对象,可以直接访问和修改对象的属性。
- ref vs computed:
ref用于创建可变的响应式变量。computed用于创建计算属性,其值是基于其他响应式数据计算得出的,并且是只读的。
11.2.3 reactive与toRefs
reactive 用于将一个普通对象转换为响应式对象。这个响应式对象的所有属性都会被代理,使得当这些属性发生变化时,Vue 能够自动追踪并更新相关的视图。
toRefs 用于将一个响应式对象的每个属性转换为单独的 ref。这在解构响应式对象时非常有用,可以保持每个属性的响应式特性。
<template><div><p>{{ num }}</p><p>{{ users.userID }},{{ users.name }}</p><button @click="change">change</button></div>
</template><script>
import { ref, reactive, toRefs } from 'vue'export default {setup() {const state = reactive({num: 100,users: {userID: 1,name: '张三'}})function change() {state.num = 200      // ref包裹的数据,使用时必须要通过value属性state.users.name = '李四'}return {// ...为扩展运算符...toRefs(state),   // 能够将state中的数据进行展开,暴露给外部change}}
}
</script><style></style>
对比 reactive 和 toRefs
- reactive:
- 用于将一个普通对象转换为响应式对象。
- 返回一个代理对象,可以直接访问和修改对象的属性。
- 适用于需要整体管理一个对象的场景。
- toRefs:
- 用于将一个响应式对象的每个属性转换为单独的
ref。 - 返回一个包含
ref属性的对象,每个属性都可以单独访问和修改。 - 适用于需要解构响应式对象并保持每个属性的响应式特性的场景。
- 用于将一个响应式对象的每个属性转换为单独的
11.2.4 computed()的用法
在 Vue.js 中,computed 属性用于定义计算属性。计算属性是基于其依赖的数据动态计算得出的属性,当依赖的数据发生变化时,计算属性会自动重新计算。计算属性通常用于简化模板中的复杂逻辑,使代码更加清晰和易于维护。
<template><div><p>{{ num }}</p><p>{{ newnum }}</p><p>{{ users.userID }},{{ users.name }}</p><button @click="change">change</button></div>
</template><script>
import { ref, reactive, toRefs, computed } from 'vue'export default {setup() {const state = reactive({num: 100,newnum: computed(() => state.num + 100),users: {userID: 1,name: '张三'}})function change() {state.num = 200state.users.name = '李四'}return {...toRefs(state),change}}
}
</script><style></style>
11.2.5 watch()的用法
在 Vue.js 中,watch 属性用于监听数据的变化,并在数据变化时执行特定的操作。watch 属性通常用于处理异步操作或开销较大的操作,以及在数据变化时执行复杂的逻辑。
监听器函数可以接收两个参数:
newValue:变化后的新值。oldValue:变化前的旧值。
<template><div><p>{{ num }}</p><p>{{ newnum }}</p><p>{{ users.userID }},{{ users.name }}</p><button @click="change">change</button></div>
</template><script>
import { ref, reactive, toRefs, computed, watch } from 'vue'export default {setup() {const state = reactive({num: 100,newnum: computed(() => state.num + 100),users: {userID: 1,name: '张三'}})/*watch(state, (newVal, oldVal) => {console.log(newVal, oldVal)})*/// 监听某一个数据的变化watch(() => state.num, (newVal, oldVal) => {console.log(newVal, oldVal)})function change() {state.num = 200state.users.name = '李四'}return {...toRefs(state),change}}
}
</script><style></style>
11.2.6 setup()参数
11.2.6.1 props参数
setup() 函数接收两个参数:props 和 context。其中,props 参数用于接收父组件传递的属性。
子组件:
<template><div>我是子组件</div>
</template><script>
export default {setup(props) {console.log(props)console.log(props.msg)},props: {msg: String}
}
</script><style></style>
父组件:
<template><div><Hello msg="Hello"></Hello></div>
</template><script>
import { ref, reactive, toRefs, computed, watch } from 'vue'
import Hello from '@/components/Hello.vue';export default {components: {Hello}
}
</script><style></style>
11.2.6.2 context参数
context 参数用于给父组件传值。
context 参数是一个对象,包含以下属性:
attrs:非响应式的属性集合,包含父组件传递的但未在props中定义的属性。slots:插槽内容,包含父组件传递的插槽内容。emit:用于触发自定义事件的函数。expose:用于暴露组件内部方法或属性的函数。
子组件:
<template><div>我是子组件<button @click="send">给父组件传值</button></div>
</template><script>
export default {setup(props,context) {console.log(props)console.log(props.msg)function send() {context.emit('childmsg', '我是子组件发送的消息')}return {send}},props: {msg: String}
}
</script><style></style>
父组件:
<template><div><Hello msg="Hello" @childmsg="get"></Hello></div>
</template><script>
import { ref, reactive, toRefs, computed, watch } from 'vue'
import Hello from '@/components/Hello.vue';export default {setup() {function get(value) {console.log(value)}return {get}},components: {Hello}
}
</script><style></style>
11.3 Composition API的使用
11.3.1 provide与inject的使用
在 Vue.js 中,provide 和 inject 是一对用于跨层级组件通信的 API。provide 用于在祖先组件中提供数据,而 inject 用于在后代组件中注入这些数据。这种方式非常适合于需要在多个层级的组件之间共享数据的场景。
父组件:
<template><div><Hello></Hello></div>
</template><script>
import {  reactive, toRefs, provide } from 'vue'
import Hello from '@/components/Hello.vue';export default {setup() {const state = reactive({})provide('msg', 'hello')return {...toRefs(state), }},components: {Hello}
}
</script><style></style>
子组件:
<template><div>我是子组件<SubHello></SubHello></div>
</template><script>
import SubHello from './SubHello.vue';export default {setup(props, context) {},components: {SubHello}
}
</script><style></style>
孙子组件:
<template><div>我是孙子组件</div>
</template><script>
import { inject } from 'vue';export default {setup() {console.log(inject('msg'))}
}
</script><style></style>
11.3.2 vue生命周期的用法
| 选项式API | setup()内部调用声明周期的钩子 |
|---|---|
| beforeCreate() | setup() |
| created() | setup() |
| beforeMount() | onBeforeMount() |
| mounted() | onMounted() |
| beforeUpdated() | onBeforeUpdate() |
| updated() | onUpdated() |
| beforeUnmount() | onBeforeUnmount() |
| unmounted() | onUnmounted() |
<template><div><Hello></Hello></div>
</template><script>
import { reactive, toRefs, provide, onBeforeMount, onMounted, onBeforeUpdate, onUpdated, onBeforeUnmount, onUnmounted } from 'vue'
import Hello from '@/components/Hello.vue';export default {setup() {const state = reactive({})provide('msg', 'hello')console.log('这里是setup,就是实例创建前和创建后的生命周期')onBeforeMount(() => {console.log('DOM挂载前')})onMounted(() => {console.log('DOM挂载后')})onBeforeUpdate(() => {console.log('数据更新前')})onUpdated(() => {console.log('数据更新后')})onBeforeUnmount(() => {console.log('实例卸载前')})onUnmounted(() => {console.log('实例卸载后')})return {...toRefs(state),}},components: {Hello}
}
</script><style></style>
11.3.3 编程式路由的使用
在Composition API中使用编程式路由
App.vue:
<template><nav><button @click="toHome">Home</button><button @click="toAbout">About</button></nav><router-view/>
</template><script>
import { useRouter } from 'vue-router'export default {setup() {const router = useRouter()function toHome() {router.push('/')}function toAbout() {router.push({ path: '/about', query: { name: '张三' } })}return {toHome,toAbout}}
}
</script><style></style>
AboutView.vue:
<template><div class="about">{{ $route.query.name }}</div>
</template><script>
import { useRoute } from 'vue-router';export default {name: 'AboutView',setup() {const route = useRoute()console.log(route.query.name)}
}
</script>
11.3.4 Vuex的使用
在Composition API中使用Vuex
<template><div><Hello></Hello></div>
</template><script>
import { reactive, toRefs } from 'vue'
import { useStore } from 'vuex'export default {setup() {const state = reactive({})const store = useStore()console.log(store.state.num)console.log(store.getters.newNum)return {...toRefs(state),}}
}
</script><style></style>
11.3.5 获取DOM的使用
在Composition API中获取DOM
<template><div><div ref="myRef">hello</div></div>
</template><script>
import { reactive, toRefs, onMounted, ref } from 'vue'
import { useStore } from 'vuex'export default {setup() {const state = reactive({})const myRef = ref(null)onMounted(() => {console.log(myRef.value)})return {...toRefs(state),myRef}}
}
</script><style></style>
11.4 使用Composition API重写ToDoList
AddNew:
<template><div><input type="text" v-model="newItem" placeholder="添加ToDo"><button @click="handleAdd">添加</button></div>
</template><script>
import { reactive, toRefs } from 'vue'export default {setup(props, context) {const state = reactive({newItem: ''})function handleAdd() {if(state.newItem === '') {alert('不能为空')return} else {context.emit('submitNewItem', state.newItem)state.newItem = ''}}return {...toRefs(state),handleAdd}}
}
</script><style scoped>input {width: 300px;height: 30px;border: none;outline: none;border: solid 1px #999;border-radius: 5px;padding-left: 10px;}button {width: 80px;height: 36px;border-radius: 5px;margin-left: 10px;border: none;outline: none;background-color: #41b883;color: #fff;}
</style>
TheList:
<template><div><ol><li v-for="(item, index) in list" :key="index" @click="judgeItem(index)">{{ item }}</li></ol></div>
</template><script>
export default {setup(props, context) {function judgeItem(index) {if (props.listType) {context.emit('deleteItem', index)} else {context.emit('judgeItem', index)}}return {judgeItem}},props: {list: {type: Array,required: true},listType: {type: Boolean,default: false}}
}
</script><style scoped>
ol {margin-top: 20px;
}ol li {cursor: pointer;
}
</style>
TodoList:
<template><div><h1>ToDoList</h1><AddNew @submitNewItem="addItem"></AddNew><TheList :list="todoList" @judgeItem="toDone"></TheList><hr><TheList :list="doneList" @deleteItem="deleteItem" :listType="true"></TheList></div>
</template><script>
import AddNew from '../components/AddNew.vue'
import TheList from '../components/TheList.vue'
import { reactive,toRefs } from 'vue';export default {setup() {const state = reactive({todoList: [],doneList: []})function addItem(newItem) {state.todoList.push(newItem)}function toDone(index) {state.doneList.push(state.todoList.splice(index, 1)[0])}function deleteItem(index) {state.doneList.splice(index, 1)}return {...toRefs(state),addItem,toDone,deleteItem}},components: {AddNew,TheList}
}
</script><style></style>
11.5 setup语法糖
setup 语法糖是 Vue 3 中引入的一种新的组合式 API 语法,用于在组件中定义和初始化响应式状态、计算属性、方法等。它提供了一种更直观和简洁的方式来组织和复用逻辑代码。setup 语法糖的优势在于它将组件的逻辑代码集中在一个地方,使得代码更易于理解和维护。同时,它也提供了更好的类型推断支持,使得在 TypeScript 项目中使用更加方便。
11.5.1 setup语法糖的基本结构
<template><div>{{ msg }}</div>
</template><script setup>
const msg = 'hello'
</script><style></style>
- 在script标签中使用setup属性即可
- 运行时,script标签中的内容会被重新编译成setup()函数的形式
- 声明的数据、函数不需要通过return暴露即可被template所使用
11.5.2 响应式数据的使用
11.5.2.1 声明响应式数据
当数据被声明为响应式数据时,无论是let还是const声明都可以。
<template><div>{{ num }}<button @click="add">加</button></div>
</template><script setup>
import { ref } from 'vue'let num = ref(0)function add() {num.value++
}
</script><style></style>
11.5.2.2 ref与reactive的区别
<template><div>{{ num }}<br><p>{{ dept.deptno }} , {{ dept.dname }}</p><ul><li v-for="item in userArr" :key="item">{{ item.userID }} , {{ item.userName }}</li></ul><button @click="add">加</button></div>
</template><script setup>
import { ref } from 'vue'let num = ref(0)const dept = ref({deptno: 100,dname: 'IT'
})const userArr = ref([{userID: 1,userName: '张三'},{userID: 2,userName: '李四'}
])function add() {num.value++// dept.value.dname = 'IT云学堂'// userArr.value[1].userName = '王五'dept.value = {}userArr.value = []
}
</script><style></style>
ref和reactive都是用于创建响应式数据的API,但它们有一些关键的区别:
- 数据类型:
ref:通常用于创建单一值的响应式数据,例如数字、字符串或布尔值。ref返回的对象包含一个.value属性,通过这个属性可以访问和修改其值。reactive:用于创建对象或数组的响应式数据。reactive返回的对象可以直接访问和修改其属性。
- 使用方式:
ref:使用时需要通过.value属性来访问和修改值。reactive:使用时直接访问和修改对象的属性。
- 响应式深度:
ref:创建的响应式数据是浅层的,即只有.value属性是响应式的。reactive:创建的响应式数据是深层的,即对象的所有嵌套属性都是响应式的。
- 解构赋值:
ref:可以直接解构赋值,但解构后的变量不再是响应式的。reactive:不能直接解构赋值,因为解构后的变量会失去响应性。需要使用toRefs函数来保持响应性。
总结来说,ref适用于简单的单一值,而reactive适用于复杂对象或数组。选择使用哪种方式取决于需要处理的响应式数据的类型和结构。
11.5.3 其它语法的使用
下面例子演示computed计算属性、watch监听、生命周期函数的使用
<template><div><p>{{ num }}</p><p>{{ newNum }}</p><button @click="add">加</button></div>
</template><script setup>
import { ref, computed, watch, onMounted } from 'vue'const num = ref(0)const newNum = computed(() => {return num.value*2
})watch(num, (newVal, oldVal) => {console.log(newVal, oldVal)
})onMounted(() => {console.log('DOM挂载后')
})function add() {num.value++
}
</script><style></style>
11.5.4 引入组件的使用
引入的组件不必注册,可直接使用
<template><div>我是子组件<SubHello></SubHello></div>
</template><script setup>
import SubHello from './SubHello.vue';
</script><style></style>
11.5.5 父子组件传值的使用
11.5.5.1 defineProp的使用
父组件:
子组件:
11.5.5.2 defineEmits的使用
父组件:
<template><div><Hello msg="hello" num="10"></Hello></div>
</template><script setup>
import Hello from '@/components/Hello.vue';</script><style></style>
子组件:
<template><div>我是子组件,{{ msg }},{{ num }}<SubHello></SubHello></div>
</template><script setup>
import SubHello from './SubHello.vue';// 接受父组件传递过来的值
/*
const myProps = defineProps({msg: {type: String},num: {type: Number,required: true}
})*///  另一种写法
const myProps = defineProps(['msg', 'num'])
</script><style></style>
11.6 使用setup语法糖重写ToDoList
AddNew:
<template><div><input type="text" v-model="newItem" placeholder="添加ToDo"><button @click="handleAdd">添加</button></div>
</template><script setup>
import { ref } from 'vue'const newItem = ref('')
const emit = defineEmits(['submitNewItem'])function handleAdd() {if (newItem.value === '') {alert('不能为空')return} else {emit('submitNewItem', newItem.value)newItem.value = ''}
}
</script><style scoped>
input {width: 300px;height: 30px;border: none;/* outline: none;是为了防止在输入框中输入时,光标闪烁 */outline: none;border: solid 1px #999;border-radius: 5px;padding-left: 10px;
}button {width: 80px;height: 36px;border-radius: 5px;margin-left: 10px;border: none;outline: none;background-color: #41b883;color: #fff;
}
</style>
TheList:
<template><div><ol><li v-for="(item, index) in list" :key="index" @click="judgeItem(index)">{{ item }}</li></ol></div>
</template><script setup>
const emit = defineEmits(['judgeItem', 'deleteItem'])
const props = defineProps({list: {type: Array,required: true},listType: {type: Boolean,default: false}
})function judgeItem(index) {if (props.listType) {emit('deleteItem', index)} else {emit('judgeItem', index)}
}
</script><style scoped>
ol {margin-top: 20px;
}ol li {cursor: pointer;
}
</style>
TodoList:
<template><div><h1>ToDoList</h1><AddNew @submitNewItem="addItem"></AddNew><TheList :list="todoList" @judgeItem="toDone"></TheList><hr><TheList :list="doneList" @deleteItem="deleteItem" :listType="true"></TheList></div>
</template><script setup>
import AddNew from '../components/AddNew.vue'
import TheList from '../components/TheList.vue'
import { ref } from 'vue';const todoList = ref([])
const doneList = ref([])function addItem(newItem) {todoList.value.push(newItem)
}function toDone(index) {doneList.value.push(todoList.value.splice(index, 1)[0])
}function deleteItem(index) {doneList.value.splice(index, 1)
}
</script><style></style>

![luoguP5369 [PKUSC2018] 最大前缀和](https://img2024.cnblogs.com/blog/1785205/202408/1785205-20240829222508682-974503557.png)