一.Windows下Rust与C/C++互相调用
1.C/C++调用rust
1.1动态库调用
1.1.1以LoadLibrary方式显示调用
add.rs
#[no_mangle] // 防止 Rust 修改函数名
pub extern "C" fn hello_world() {println!("Hello from Rust!");
}#[no_mangle]
pub extern "C" fn add(a:i32,b:i32) ->i32 {a+b
}
编译成动态库,windows下就是dll,同时生成lib文件,只是调用的时候方便一些
rustc --crate-type=dylib add.rsMode                 LastWriteTime         Length Name
----                 -------------         ------ ----
-a----        2024/12/28     10:04         871936 add.dll
-a----        2024/12/28     10:04         515792 add.dll.exp
-a----        2024/12/28     10:04         849164 add.dll.lib
-a----        2024/12/28     10:04        3837952 add.pdb
-a----        2024/12/28     10:03            188 add.rs
-a----        2024/12/28     10:01           1026 msvc_add.cpp
-a----        2024/12/28     10:02            310 msvc_add2.cpp
msvc_add.cpp(以LoadLibrary方式调用,不需要lib文件进行构建)
#include <iostream>
#include <windows.h>typedef int (*AddFunction)(int, int);  // 定义函数指针类型
typedef void (*HelloWorldFunction)();  // 定义函数指针类型int main() {// 加载 DLLHMODULE hModule = LoadLibrary("add.dll");if (hModule == NULL) {std::cerr << "Failed to load DLL!" << std::endl;return 1;}// 获取函数地址AddFunction add = (AddFunction)GetProcAddress(hModule, "add");HelloWorldFunction hello_world = (HelloWorldFunction)GetProcAddress(hModule, "hello_world");// 检查函数地址是否有效if (add == NULL || hello_world == NULL) {std::cerr << "Failed to get function address!" << std::endl;FreeLibrary(hModule);return 1;}// 调用 add 函数int result = add(10, 20);std::cout << "Result of add: " << result << std::endl;// 调用 hello_world 函数hello_world();// 卸载 DLLFreeLibrary(hModule);return 0;
}
编译链接是很简单的。
cl msvc_add.cpp
/out:msvc_add.exe
msvc_add.obj
就直接生成了exe文件,可以直接执行
D:\code\leetcode\ffi>msvc_add.exe
Result of add: 30
Hello from Rust!
可见,动态调用dll正常注:
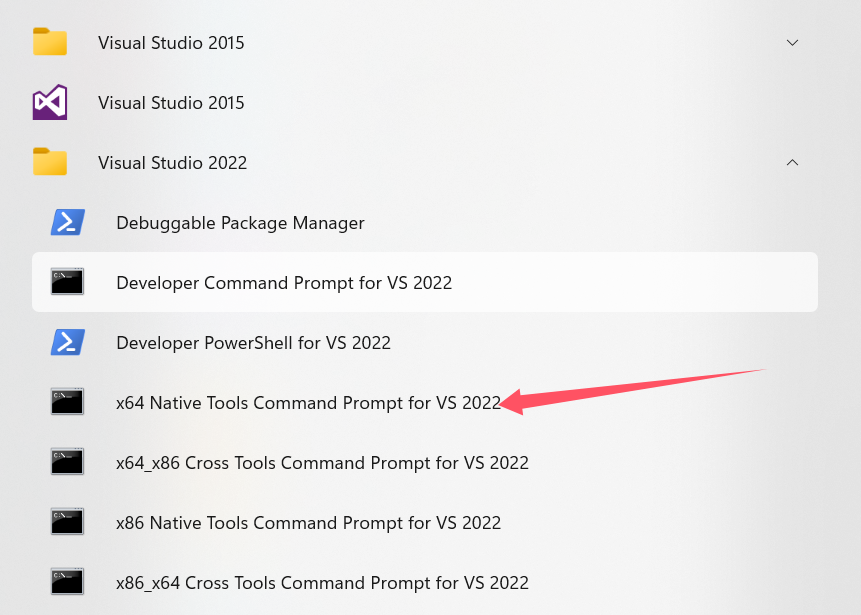
1.使用cl命令需要在visual studio的prompt里面,也就是从下图中启动一个cmd窗口
2.这里仅作为学习测试使用,换台设备,也许需要处理cpp里面的宽字符串的问题
1.1.2 msvc_add2.cpp 隐式调用(需要lib文件进行构建)
#include <iostream>
// 声明 add 函数的类型
extern "C" int add(int a, int b);
extern "C" void hello_world();
int main() {// 调用 Rust 中的 add 函数int result = add(10, 20);std::cout << "Result of add(10, 20): " << result << std::endl;hello_world();return 0;
}
编译链接执行
cl msvc_add2.cpp add.dll.lib
/out:msvc_add2.exe
msvc_add2.obj
add.dll.lib
生成的exe也是可以直接执行的
D:\code\leetcode\ffi\a>msvc_add2.exe
Result of add(10, 20): 30
Hello from Rust!
当然了,以上本质上都是在exe执行时动态加载dll,也就是dll需要在exe可以加载到的地方,只不过下面的调用方式更加友好。
1.2 静态库调用
下面来试一下rs生成一个静态库,完全以静态的方式生成
重新创建一个新的文件夹,把add.rs以及msvc_add2.cpp复制进去
rustc --crate-type=staticlib add.rs
PS D:\code\leetcode\ffi\a> ls
Mode                 LastWriteTime         Length Name
----                 -------------         ------ ----
-a----        2024/12/28     10:26       13421554 add.lib
-a----        2024/12/28     10:03            188 add.rs
-a----        2024/12/28     10:02            310 msvc_add2.cpp
只生成了一个add.lib 并且体积比之前的dll大很多,忽略这个问题,这不是目前需要关注的点
然后编译链接cpp端
cl /c /EHsc msvc_add2.cpp /link add.lib
然后就是错麻了。(不知道为什么,下午使用重新操作的时候就没有报错了,但是只是生成了obj,什么也没有提示,就这样。当然,要生成exe,还是需要下面的命令,链接一些系统库)
D:\code\leetcode\ffi\a>cl /c /EHsc msvc_add2.cpp /link add.lib
用于 x64 的 Microsoft (R) C/C++ 优化编译器 19.41.34120 版
版权所有(C) Microsoft Corporation。保留所有权利。msvc_add2.cpp
msvc_add2.cpp(1): warning C4819: 该文件包含不能在当前代码页(936)中表示的字符。请将该文件保存为 Unicode 格式以防止数据丢 失以下的内容是上午实验出现的错误
...
add.lib(std-c09b6dac30a2ec7e.std.ee6e9694672c5e9f-cgu.0.rcgu.o) : error LNK2019: 无法解析的外部符号 __imp_connect,函数 _ZN3std3sys3pal7windows3net6Socket7connect17hb28ff0696137b3ffE 中引用了该符号
add.lib(std-c09b6dac30a2ec7e.std.ee6e9694672c5e9f-cgu.0.rcgu.o) : error LNK2019: 无法解析的外部符号 __imp_select,函数 _ZN3std3sys3pal7windows3net6Socket15connect_timeout17h8b53b1a97c7255d1E 中引用了该符号
add.lib(std-c09b6dac30a2ec7e.std.ee6e9694672c5e9f-cgu.0.rcgu.o) : error LNK2019: 无法解析的外部符号 __imp_recvfrom,函数 _ZN3std3sys3pal7windows3net6Socket20recv_from_with_flags17h2837dff830ece405E 中引用了该符号
add.lib(std-c09b6dac30a2ec7e.std.ee6e9694672c5e9f-cgu.0.rcgu.o) : error LNK2019: 无法解析的外部符号 __imp_bind,函数 _ZN3std10sys_common3net11TcpListener4bind17h5a713b6feaaa40bbE 中引用了该符号
add.lib(std-c09b6dac30a2ec7e.std.ee6e9694672c5e9f-cgu.0.rcgu.o) : error LNK2019: 无法解析的外部符号 __imp_listen,函数 _ZN3std10sys_common3net11TcpListener4bind17h5a713b6feaaa40bbE 中引用了该符号
add.lib(std-c09b6dac30a2ec7e.std.ee6e9694672c5e9f-cgu.0.rcgu.o) : error LNK2019: 无法解析的外部符号 __imp_getsockname, 函数 _ZN3std10sys_common3net11TcpListener11socket_addr17h16b279c66391dd42E 中引用了该符号
add.lib(std-c09b6dac30a2ec7e.std.ee6e9694672c5e9f-cgu.0.rcgu.o) : error LNK2019: 无法解析的外部符号 __imp_sendto,函数 _ZN3std10sys_common3net9UdpSocket7send_to17hab2f79caf944e057E 中引用了该符号
msvc_add2.exe : fatal error LNK1120: 30 个无法解析的外部命令
...
现在知道为什么这么大了嘛,因为rustc编译的时候包含了很多不需要的玩意儿,暂且不考虑优化编译时的东西,现在希望能跑通这个过程。缺少链接一些系统库,直接链接上就好了。
cl /EHsc msvc_add2.cpp /link add.lib Ws2_32.lib Kernel32.lib Advapi32.lib ntdll.lib userenv.libD:\code\leetcode\ffi\a>cl /EHsc msvc_add2.cpp /link add.lib Ws2_32.lib Kernel32.lib Advapi32.lib ntdll.lib userenv.lib
用于 x64 的 Microsoft (R) C/C++ 优化编译器 19.41.34120 版
版权所有(C) Microsoft Corporation。保留所有权利。msvc_add2.cpp
D:\code\leetcode\ffi\a\add.h(1): warning C4819: 该文件包含不能在当前代码页(936)中表示的字符。请将该文件保存为 Unicode 格式以防止数据丢失
Microsoft (R) Incremental Linker Version 14.41.34120.0
Copyright (C) Microsoft Corporation.  All rights reserved./out:msvc_add2.exe
add.lib
Ws2_32.lib
Kernel32.lib
Advapi32.lib
ntdll.lib
userenv.lib
msvc_add2.objD:\code\leetcode\ffi\a>msvc_add2.exe
Result of add(10, 20): 30
Hello from Rust!
这次编译出来的exe,可以随便移动到其他地方,不需要lib文件了。
下面讨论windows下的mingw调用(fail to do it,just ignore.)
PS D:\code\leetcode\ffi\c> rustc --crate-type=dylib add.rs  --target=x86_64-pc-windows-gnu
error[E0463]: can't find crate for `std`|= note: the `x86_64-pc-windows-gnu` target may not be installed= help: consider downloading the target with `rustup target add x86_64-pc-windows-gnu`= help: consider building the standard library from source with `cargo build -Zbuild-std`安装这个倒是不麻烦,但是我已经安装了dev-cpp的mingw,好像有点冲突,所有这些操作都不顺利。但其实过程都是一样的,因为rustc或者cargo编译的时候可以指定target为gnu库可用的二进制
2.下面讨论msvc生成动态库给rust调用
2.1以动态库的形式调用
add.cpp
#include<stdio.h>
extern "C" {__declspec(dllexport) int add(int a, int b) {return a + b;
}__declspec(dllexport) void hello_world() {printf("hello world!\n");}
}
以extern "C" 包裹,可以让名称不会发生变化
D:\code\leetcode\ffi\ctor>cl /LD add.cpp
用于 x64 的 Microsoft (R) C/C++ 优化编译器 19.41.34120 版
版权所有(C) Microsoft Corporation。保留所有权利。add.cpp
Microsoft (R) Incremental Linker Version 14.41.34120.0
Copyright (C) Microsoft Corporation.  All rights reserved./out:add.dll
/dll
/implib:add.lib
add.obj正在创建库 add.lib 和对象 add.expls
add.cpp add.dll add.exp add.lib add.obj
生成的dll和lib需要用到
rust调用这样的库文件,貌似单独的rs文件不行?或许是可以吧,不过需要手动管理依赖,很麻烦(just ignore it!)
这里暂且使用cargo项目,需要把刚才的add.dll和add.lib复制到项目根目录下。
cargo new ctor
PS D:\code\leetcode\ffi\ctor\ctor> ls目录: D:\code\leetcode\ffi\ctor\ctor
Mode                 LastWriteTime         Length Name
----                 -------------         ------ ----
d-----        2024/12/28     12:11                src
-a----        2024/12/28     12:15         133632 add.dll
-a----        2024/12/28     12:15           1804 add.lib
-a----        2024/12/28     12:13            366 Cargo.lock
-a----        2024/12/28     12:13             87 Cargo.toml修改cargo.toml
[package]
name = "ctor"
version = "0.1.0"
edition = "2024"[dependencies]
libc = "0.2"
主要是引入这个依赖
然后是修改main.rs
// main.rs
extern crate libc;
use libc::c_int;#[link(name = "add", kind = "dylib")] // 指定库名为 add.dll
unsafe extern {fn add(a: c_int, b: c_int) -> c_int;fn hello_world();
}fn main() {unsafe {let result = add(10, 20);println!("The result is: {}", result);hello_world();}
}
一切顺利的话,cargo run.我这里是已经构建过,crate都下载好了
PS D:\code\leetcode\ffi\ctor\ctor> cargo runCompiling ctor v0.1.0 (D:\code\leetcode\ffi\ctor\ctor)Finished `dev` profile [unoptimized + debuginfo] target(s) in 0.19sRunning `D:\cargo\debug\ctor.exe`
The result is: 30
hello world!
当然了,生成的exe,在执行的时候,还是需要dll在可以加载的地方。
2.2以静态库的形式调用
再来看一下rust如何静态调用呢,也就是调用个静态库,生成的exe不依赖对应的库
如何生成msvc格式的静态库,可以看微软官方的资料,里面有详细解释
https://learn.microsoft.com/zh-cn/cpp/build/walkthrough-creating-and-using-a-static-library-cpp?view=msvc-170
cl /c add.cpp
lib add.obj
也就是编译和链接要分成两步操作
创建一个空白文件夹,复制add.cpp进去,保持环境的整洁,以免混乱。
D:\code\leetcode\ffi\ctor\a>cl /c add.cpp
用于 x64 的 Microsoft (R) C/C++ 优化编译器 19.41.34120 版
版权所有(C) Microsoft Corporation。保留所有权利。
add.cpp
Mode                 LastWriteTime         Length Name
----                 -------------         ------ ----
-a----        2024/12/28     12:15            211 add.cpp
-a----        2024/12/28     12:28           2616 add.objD:\code\leetcode\ffi\ctor\a>lib add.obj
Microsoft (R) Library Manager Version 14.41.34120.0
Copyright (C) Microsoft Corporation.  All rights reserved.PS D:\code\leetcode\ffi\ctor\a> ls目录: D:\code\leetcode\ffi\ctor\aMode                 LastWriteTime         Length Name
----                 -------------         ------ ----
-a----        2024/12/28     12:15            211 add.cpp
-a----        2024/12/28     12:30           3100 add.lib
-a----        2024/12/28     12:28           2616 add.obj
然后呢,cargo新建一个项目吧
cargo new libtest
大体的操作和上面差不多,只是这次把上面使用lib命令生成的add.lib复制到根目录,修改cargo.toml,再修改main.rs
// main.rs
extern crate libc;use libc::c_int;#[link(name = "add", kind = "static")]
unsafe extern {fn add(a: c_int, b: c_int) -> c_int;fn hello_world();
}fn main() {unsafe {let result = add(10, 20);println!("The result is: {}", result);hello_world();}
}
cargo build --release 或者cargo run。这次,生成的exe文件,复制到哪里,都可以正常运行了,而无需依赖dll或者lib
二:Linux下C/C++与rust的互相调用
1.还是先看rust调用C/C++
安装rust
curl --proto '=https' --tlsv1.2 -sSf https://sh.rustup.rs | sh
source $HOME/.cargo/env
rustc --version
安装成功
直接cargo新建一个项目r
root@ubuntu:~/libtest/ctor/r# tree
.
├── Cargo.toml
├── add.cpp
└── src└── main.rs2 directories, 3 files
root@ubuntu:~/libtest/ctor/r#
1.1动态调用
注:Cargo.toml,main.rs和上面的rust动态调用,静态调用分别对应,没有变化,这里就不再贴了,下面也是
add.cpp
// add.cpp
#include<stdio.h>
extern "C" {int add(int a, int b) {return a + b;
}void hello_world() {printf("hello world!\n");}
}
//不需要windows下那些修饰了
g++ -fPIC -shared -o libadd.so add.cpp
编译链接成动态库
root@ubuntu:~/libtest/ctor/r# ls
Cargo.toml  add.cpp  libadd.so src
Linux下加载库就需要麻烦一些了首先提示
ie" "-Wl,-z,relro,-z,now" "-nodefaultlibs"= note: /usr/bin/ld: cannot find -ladd: No such file or directorycollect2: error: ld returned 1 exit status
error: could not compile `r1` (bin "r1") due to 1 previous error
这个问题,添加build.rs可以解决,
随后提示
root@ubuntu:~/libtest/ctor/r# cargo runFinished `dev` profile [unoptimized + debuginfo] target(s) in 0.01sRunning `target/debug/r`
target/debug/r: error while loading shared libraries: libadd.so: cannot open shared object file: No such file or directory
build.rs
fn main() {// 指定库的路径// println!("cargo:rustc-link-lib=add");println!(r"cargo:rustc-link-search=native=/root/libtest/ctor/r");
}
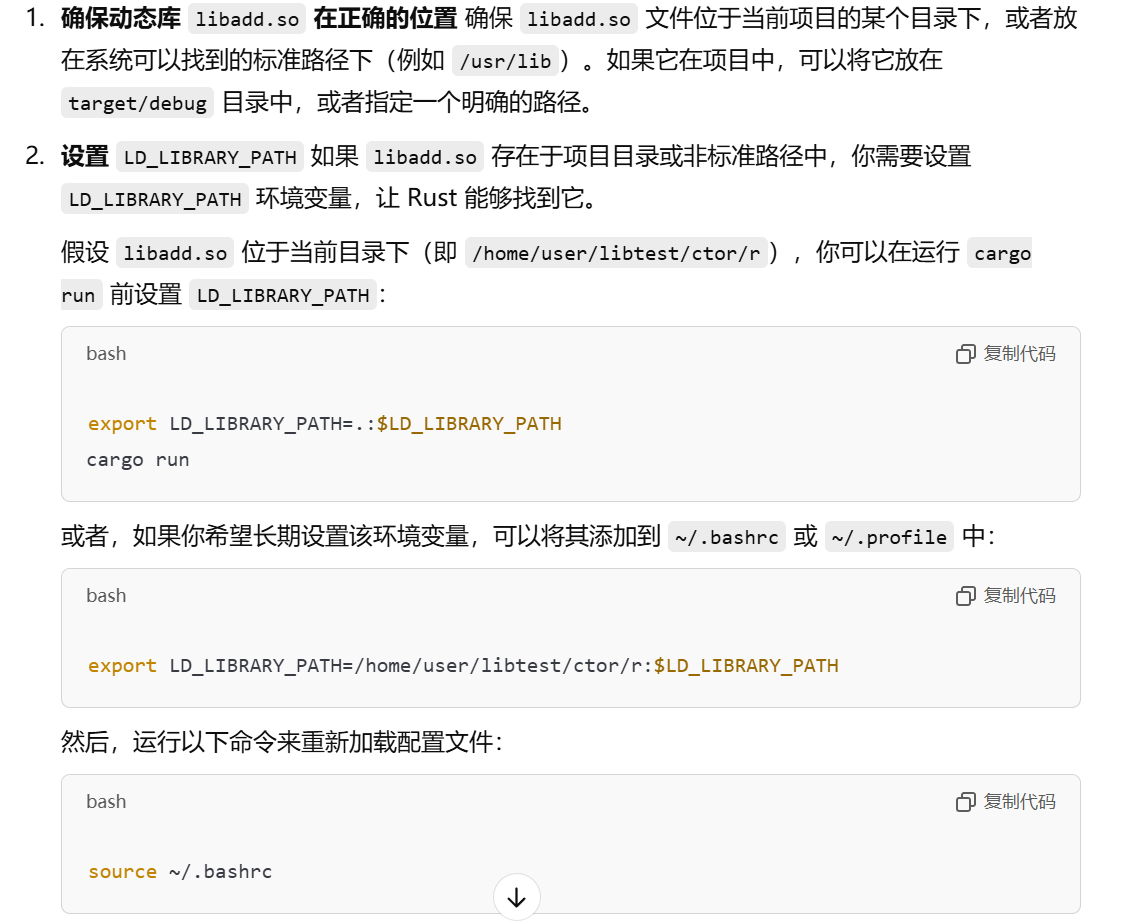
添加build.rs以后,可以正常生成可执行文件了,错误只是因为执行的时候找不到加载的库文件,复制库到可执行文件目录下也没用,直接设置一个环境变量就好了
export LD_LIBRARY_PATH=.:$LD_LIBRARY_PATH
root@ubuntu:~/libtest/ctor/r# pwd
/root/libtest/ctor/r
root@ubuntu:~/libtest/ctor/r# ls
Cargo.lock  Cargo.toml  add.cpp  build.rs  libadd.so  src  target
root@ubuntu:~/libtest/ctor/r# cargo runFinished `dev` profile [unoptimized + debuginfo] target(s) in 0.01sRunning `target/debug/r`
The result is: 30
hello world!
root@ubuntu:~/libtest/ctor/r#cargo build --release
新开一个窗口进入release,还是需要设置一下那个环境变量
root@ubuntu:~/libtest/ctor/r/target/release# cp /root/libtest/ctor/r/libadd.so ./
root@ubuntu:~/libtest/ctor/r/target/release# ls
build  deps  examples  incremental  libadd.so  r  r.d
root@ubuntu:~/libtest/ctor/r/target/release# ./r
./r: error while loading shared libraries: libadd.so: cannot open shared object file: No such file or directory
root@ubuntu:~/libtest/ctor/r/target/release# export LD_LIBRARY_PATH=.:$LD_LIBRARY_PATH
root@ubuntu:~/libtest/ctor/r/target/release# ./r
The result is: 30
hello world!
root@ubuntu:~/libtest/ctor/r/target/release#
1.2静态调用,静态编译
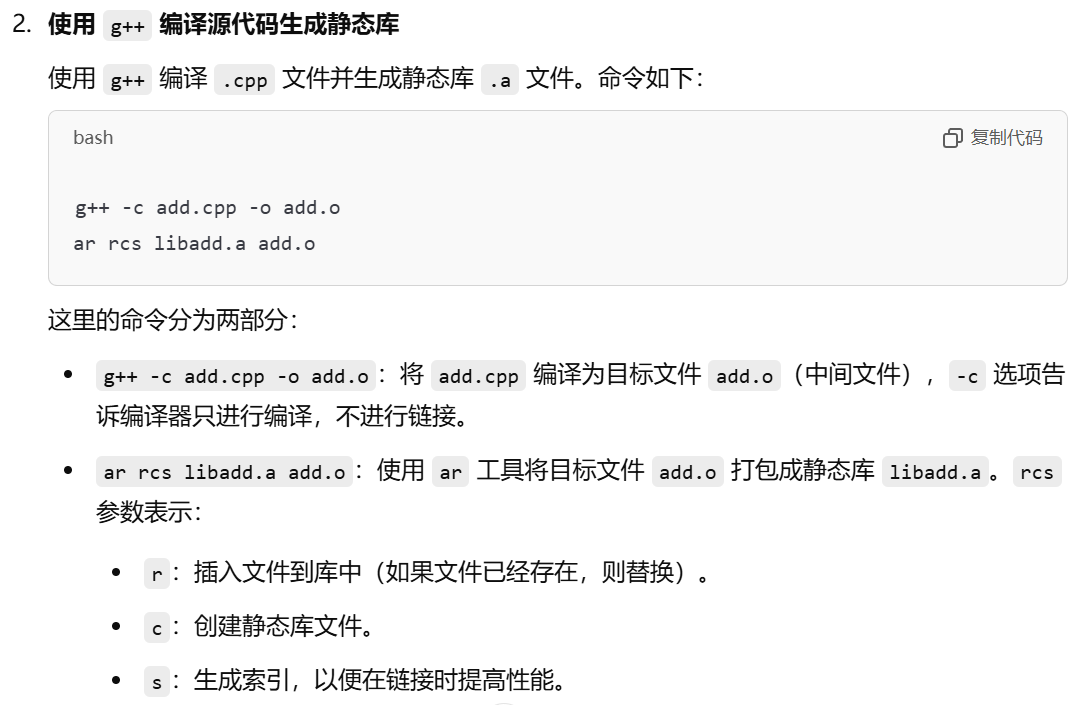
root@ubuntu:~/libtest/ctor/r1# g++ -c add.cpp -o add.o
root@ubuntu:~/libtest/ctor/r1# ar rcs libadd.a add.o
root@ubuntu:~/libtest/ctor/r1# ls
Cargo.toml  add.cpp  add.o  libadd.a  src
没有build.rs,直接cargo run试试
ie" "-Wl,-z,relro,-z,now" "-nodefaultlibs"= note: /usr/bin/ld: cannot find -ladd: No such file or directorycollect2: error: ld returned 1 exit status
error: could not compile `r1` (bin "r1") due to 1 previous error
还是和之前一样的错误,
vim build.rs
fn main() {// 指定库的路径// println!("cargo:rustc-link-lib=add");println!(r"cargo:rustc-link-search=native=/root/libtest/ctor/r1");
}
然后cargo run
cargo build --release
都是可以正常生成的,不需要设置LD_LIBRARY_PATH
为了测试,新开一个窗口,没有设置任何环境变量。
root@ubuntu:~/libtest/ctor/r1/target/release# pwd
/root/libtest/ctor/r1/target/release
root@ubuntu:~/libtest/ctor/r1/target/release# ls
build  deps  examples  incremental  r1  r1.d
root@ubuntu:~/libtest/ctor/r1/target/release# ./r1
The result is: 30
hello world!
2.接下来是C/C++调用Rust库
add.rs和之前的一样,main.cpp其实和windows下也是没有区别的,区别的地方就在于g++命令是链接动态还是静态库
2.1动态库的使用
root@ubuntu:~/libtest/rtoc/c# pwd
/root/libtest/rtoc/c
root@ubuntu:~/libtest/rtoc/c# ls
add.rs  main.cpp
接下来,进行编译链接的部分
root@ubuntu:~/libtest/rtoc/c# rustc --crate-type=dylib add.rs
root@ubuntu:~/libtest/rtoc/c# ls
add.rs  libadd.so  main.cpp
root@ubuntu:~/libtest/rtoc/c# g++ main.cpp -L./ -ladd -o main -Wl,-rpath=./
root@ubuntu:~/libtest/rtoc/c# ls
add.rs  libadd.so  main  main.cpp
root@ubuntu:~/libtest/rtoc/c# ./main
Hello from Rust!
The result of adding 3 and 5 is: 8
root@ubuntu:~/libtest/rtoc/c# cp ./main /root/libtest/
root@ubuntu:~/libtest/rtoc/c# cp libadd.so /root/libtest/
root@ubuntu:~/libtest/rtoc/c# 复制库和可执行文件到同意目录,都可以正常执行
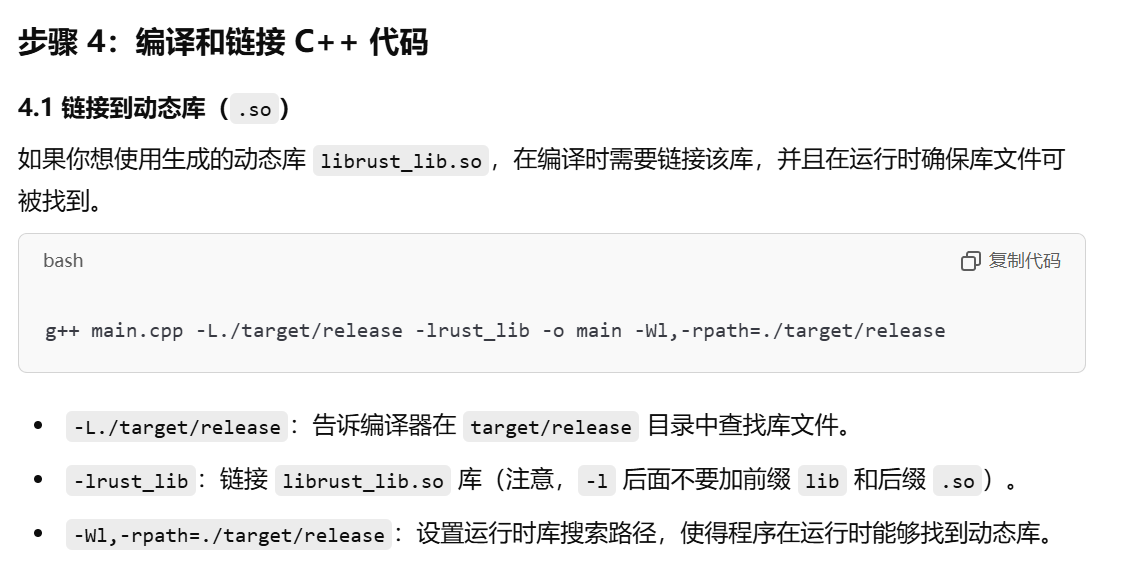
root@ubuntu:~/libtest# pwd
/root/libtest
root@ubuntu:~/libtest# ls
ctor  libadd.so  main  rtoc
root@ubuntu:~/libtest# ./main
Hello from Rust!
The result of adding 3 and 5 is: 8
确实是可以正常调用的,只要动态库和可执行文件再相同目录下
2.2现在试一下静态库
其实整个过程,代码都是一样的,只是生成库和生成可执行文件的命令不同
root@ubuntu:~/libtest/rtoc/c1# pwd
/root/libtest/rtoc/c1
root@ubuntu:~/libtest/rtoc/c1# ls
add.rs  main.cpp
root@ubuntu:~/libtest/rtoc/c1# rustc --crate-type=staticlib add.rs

root@ubuntu:~/libtest/rtoc/c1# ls
add.rs  libadd.a  main.cpp
root@ubuntu:~/libtest/rtoc/c1# g++ main.cpp ./libadd.a -o c1
root@ubuntu:~/libtest/rtoc/c1# ls
add.rs  c1  libadd.a  main.cpp
root@ubuntu:~/libtest/rtoc/c1# ./c1
Hello from Rust!
The result of adding 3 and 5 is: 8root@ubuntu:~/libtest/rtoc/c1# cp c1 /root/libtest/
root@ubuntu:~/libtest/rtoc/c1# /root/libtest/c1
Hello from Rust!
The result of adding 3 and 5 is: 8
root@ubuntu:~/libtest/rtoc/c1#
注:当然是可以使用cargo项目直接把rust代码生成动态,静态库的。
Cargo.toml
cargo new add --lib
[package]
name = "add"
version = "0.1.0"
edition = "2021"[dependencies][lib]
name = "add"
crate-type = ["staticlib", "cdylib"]
至于lib.rs,和之前的add.rs是一致的
D:\code\leetcode\ffi\d\add>cargo build --releaseCompiling add v0.1.0 (D:\code\leetcode\ffi\d\add)Finished `release` profile [optimized] target(s) in 0.36s如果把cargo.toml里面的edition改成2024,就会出现下面的报错
D:\code\leetcode\ffi\d\add>cargo build --releaseCompiling add v0.1.0 (D:\code\leetcode\ffi\d\add)
error: unsafe attribute used without unsafe--> src\lib.rs:1:3|
1 | #[no_mangle] // 防止 Rust 修改函数名|   ^^^^^^^^^ usage of unsafe attribute|
help: wrap the attribute in `unsafe(...)`|
1 | #[unsafe(no_mangle)] // 防止 Rust 修改函数名|   +++++++         +error: unsafe attribute used without unsafe--> src\lib.rs:6:3|
6 | #[no_mangle]|   ^^^^^^^^^ usage of unsafe attribute|
help: wrap the attribute in `unsafe(...)`|
6 | #[unsafe(no_mangle)]|   +++++++         +error: could not compile `add` (lib) due to 2 previous errors
至于其他的调用方式,下次再看了


