1 下载docker的安装文件
下载地址:https://download.docker.com/linux/static/stable/x86_64/
2 解压
tar -zxvf docker-18.06.3-ce.tgz
3 复制
cp ./docker/* /usr/bin
4 创建docker.service文件
cd /etc/systemd/system/
touch docker.service
5 编辑docker.service文件
vi docker.service
复制以下内容到文件:
[Unit]Description=Docker Application Container EngineDocumentation=https://docs.docker.comAfter=network-online.target firewalld.serviceWants=network-online.target[Service]Type=notify# the default is not to use systemd for cgroups because the delegate issues still# exists and systemd currently does not support the cgroup feature set required# for containers run by dockerExecStart=/usr/bin/dockerdExecReload=/bin/kill -s HUP $MAINPID# Having non-zero Limit*s causes performance problems due to accounting overhead# in the kernel. We recommend using cgroups to do container-local accounting.LimitNOFILE=infinityLimitNPROC=infinityLimitCORE=infinity# Uncomment TasksMax if your systemd version supports it.# Only systemd 226 and above support this version.#TasksMax=infinityTimeoutStartSec=0# set delegate yes so that systemd does not reset the cgroups of docker containersDelegate=yes# kill only the docker process, not all processes in the cgroupKillMode=process# restart the docker process if it exits prematurelyRestart=on-failureStartLimitBurst=3StartLimitInterval=60s[Install]WantedBy=multi-user.target按Esc键后输入 :wq 保存并退出文件。
若不放心,可使用命令 cat docker.service 查看文件内容。
6 添加执行权限
chmod +x docker.service
7 加载docker.service文件
systemctl daemon-reload
8 启动docker
systemctl start docker
9 设置开机自启
systemctl enable docker
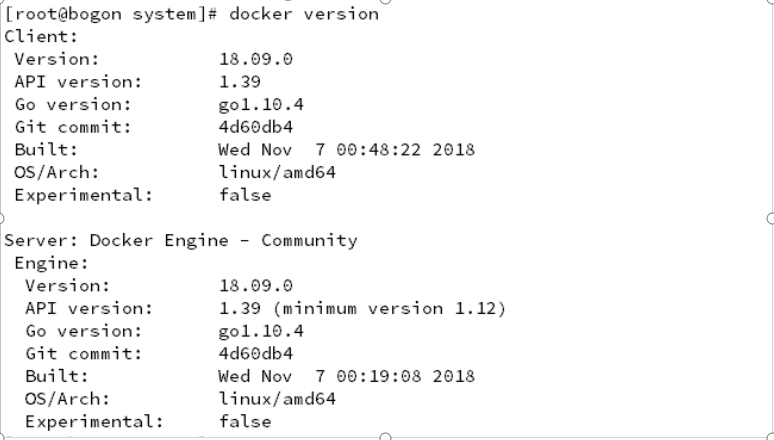
10 验证是否安装成功
有 client 和 service 两部分表示安装成功了
docker version
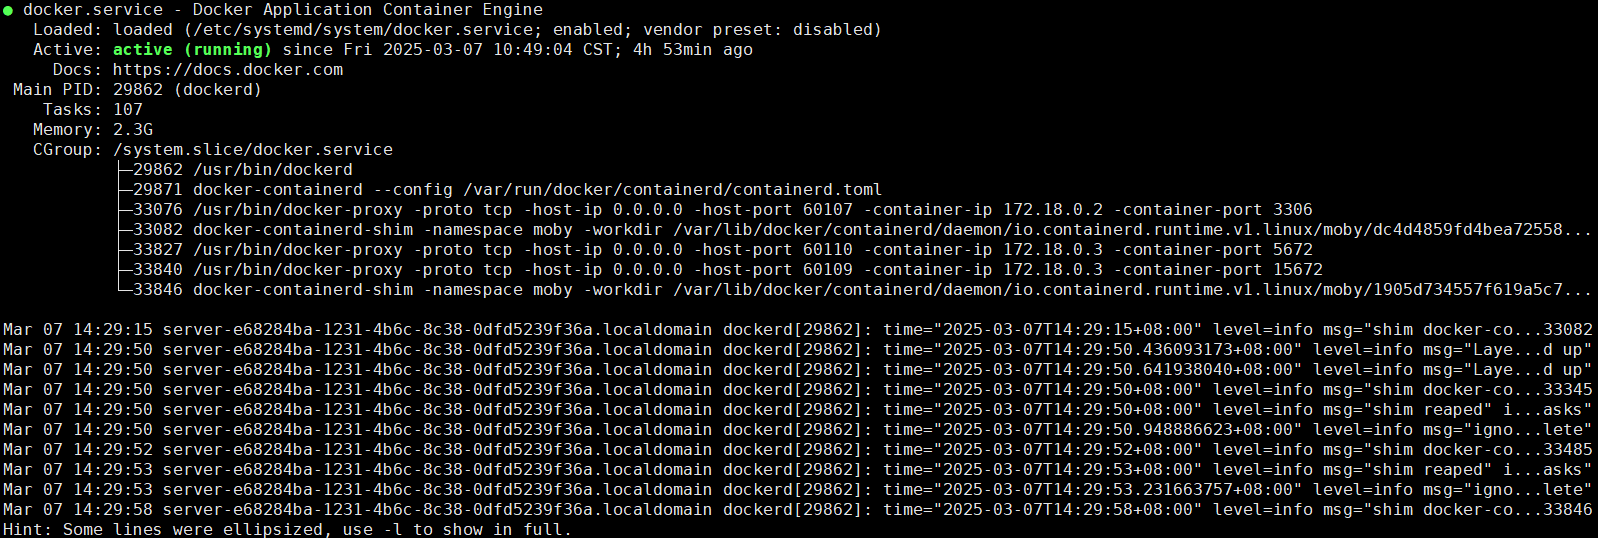
11 查看docker状态
systemctl status docker
如下图即启动成功
12 设置日志
vi /etc/docker/daemon.json
复制以下内容到文件:
{ "log-driver": "json-file","log-opts": {"max-size": "100m","max-file":"3"},"registry-mirrors": ["https://tng4fttt.mirror.aliyuncs.com","https://registry.docker-cn.com","http://hub-mirror.c.163.com","https://docker.mirrors.ustc.edu.cn"]
}
13 加载日志配置
systemctl daemon-reload
14 重启docker
systemctl restart docker