欢迎关注我的CSDN:https://spike.blog.csdn.net/
本文地址:https://spike.blog.csdn.net/article/details/131565068
Stable Diffusion的模型网站 LiblibAI:https://www.liblibai.com
墨幽人造人网址:https://www.liblibai.com/modelinfo/9470cdf92e33f5ad72cc2f40f834a69a
版本号:v1010修剪,时间2023.6.30

启动服务:
conda deactivate
source venv/bin/activate
nohup python -u launch.py --port 9301 --listen --xformers > nohup.sd.out &
1. 配置模型
模型类型是Checkpoint,即下载存储至 stable-diffusion-webui/models/Stable-diffusion。
下载模型:
# 4G 修剪
wget https://liblibai-online.liblibai.com/web/model/dfab1a61233ef2812e6de35730449c330657961d3f0d9d51a5b057a17b80ab67.safetensors -O 墨幽人造人_v1010_修剪.safetensors  # 7G 完整版
wget https://liblibai-online.liblibai.com/web/model/6a226dd292a983b3ed4987402453ad4d954b77825c1cf99d39d8746909791761.safetensors -O 墨幽人造人_v1010_完整版.safetensors
墨幽人造人模型的版本介绍:
-
v1010修剪:更小体积的4G修剪版,但是整体色彩及细节表现力、好手好脸概率均略逊于v1010的7G完整版。
-
v1010:真正的首个可以称之为人造人的“墨幽”。完全真正对墨幽进行了跨世代的全面升级。
推荐Tag:
- 提示词:
- 正:1girl,moyou,(在此基础上添加,无需添加任何质量词)
- 负:EasyNegativeV2,(badhandv4:1.2),(这是两个embedding嵌入式文件,可入鹅群自取。无需额外添加任何负面质量提示词)(这两个embedding的排列顺序会明显影响最终画面,请一定按照此说明中的顺序排列!!!)
- 推荐参数:
- VAE:840000
- 采样:DDIM(新的人造人墨幽也更换了采样器哦,不要使用之前版本用的采样器啦!)
- 步数:30~50 (常用30,50质量更高)(亲测继续提高步数仍会达到更好的质量,但变化很小)
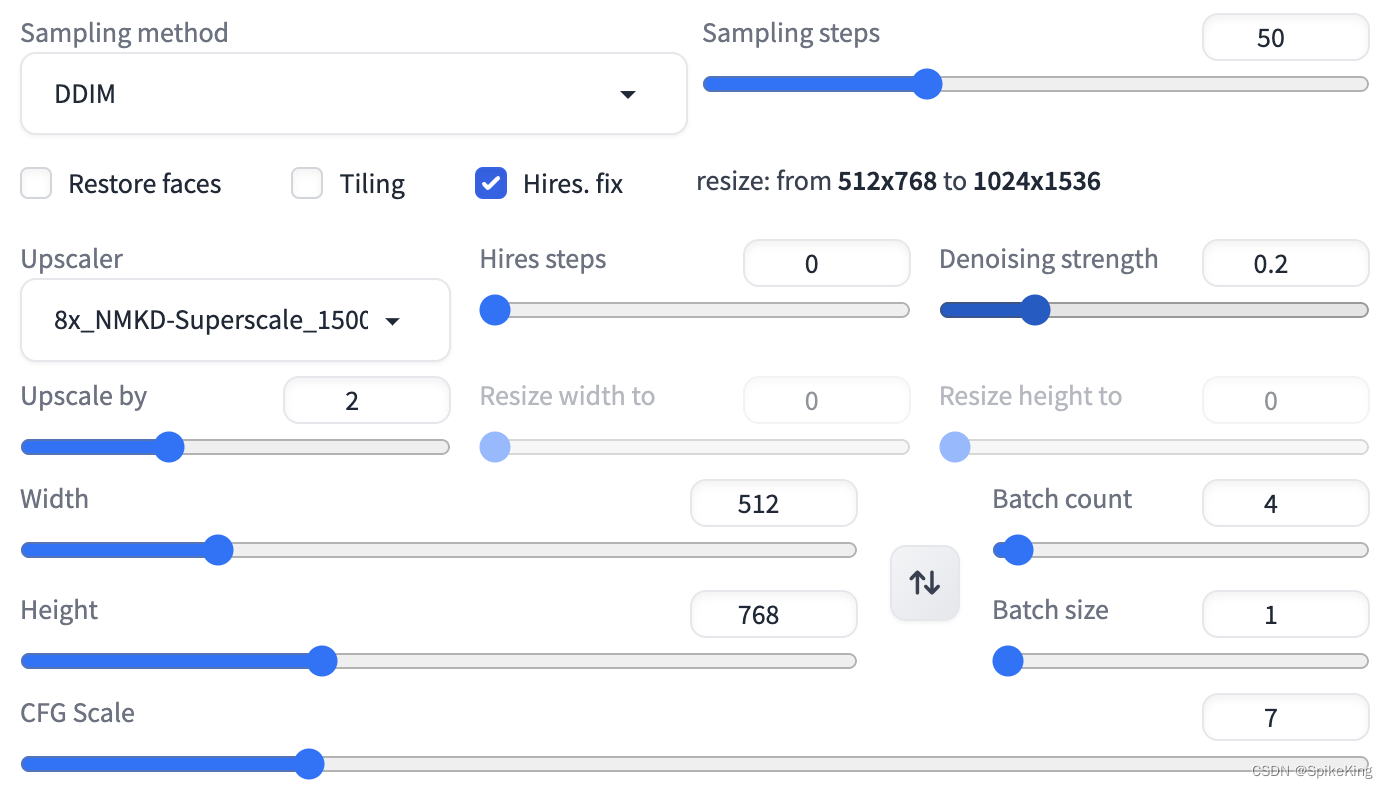
- 高分辨率修复参数:(一定要开!)
- 放大算法:8x_NMKD-Superscale_150000_G (可入鹅群自取)
- 重绘幅度:0.2
- 基础分辨率:短边512
- 放大倍数:2
- CFG:7
具体配置:
2. 配置参数
模型文件检查器:https://spell.novelai.dev/
2.1 Embeddings
推荐 Tag 的负向提示词是 Embeddings 类型,存储位置 stable-diffusion-webui/embeddings。
下载路径:
- EasyNegative:https://huggingface.co/datasets/gsdf/EasyNegative、https://civitai.com/models/7808/easynegative,建议下载
EasyNegative.pt - badhandv4 - AnimeIllustDiffusion:https://civitai.com/models/16993/badhandv4-animeillustdiffusion,建议下载
badhandv4.pt
点击:
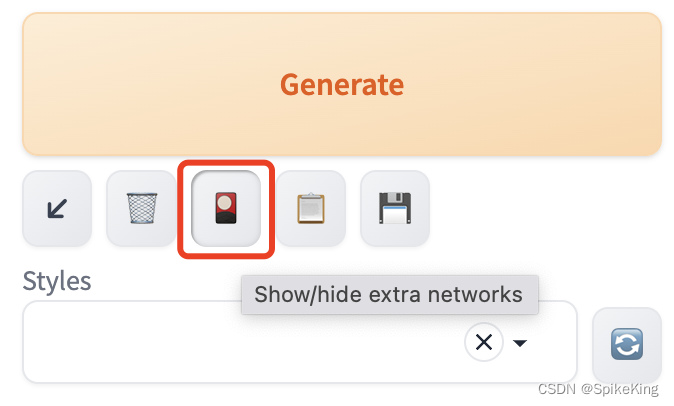
在 Textual Inversion (文本反转) 中,即可使用。
配置参数,注意 Used embeddings,表示使用EasyNegative和badhandv4:
1girl,moyou,
Negative prompt: EasyNegative,(badhandv4:1.2),
Steps: 50, Sampler: DDIM, CFG scale: 7, Seed: 841743923, Size: 512x768, Model hash: 6a226dd292, Model: 墨幽人造人_v1010_完整版, Denoising strength: 0.2, Hires upscale: 2, Hires upscaler: 8x_NMKD-Superscale_150000_G, Version: v1.4.0Used embeddings: EasyNegative [119b], badhandv4 [dba1]
Time taken: 17.53sTorch active/reserved: 5345/8764 MiB, Sys VRAM: 10262/81070 MiB (12.66%)
2.2 VAE
VAE 默认没有出现 WebUI 中,需要手动配置。Settings - User interface - Quicksettings list.

再点击 Apply settings ,重启服务即可生效:

重启服务即可,在 WebUI 中,增加两个框,即 Add Lora to prompt 和 SD VAE。

下载路径:vae-ft-mse-840000-ema-pruned:https://civitai.com/models/76118/vae-ft-mse-840000-ema-pruned
模型存储至:stable-diffusion-webui/models/VAE,刷新,即可应用。
关于 sd_vae 与 sd_vae_as_default,即 sd_vae 是配合主模型使用:
- “sd_vae”: OptionInfo(“Automatic”, “SD VAE”, gr.Dropdown, lambda: {“choices”: shared_items.sd_vae_items()}, refresh=shared_items.refresh_vae_list).info(“choose VAE model: Automatic = use one with same filename as checkpoint; None = use VAE from checkpoint”),
- “sd_vae_as_default”: OptionInfo(True, “Ignore selected VAE for stable diffusion checkpoints that have their own .vae.pt next to them”)
使用 VAE 模型的主要作用是修饰细节。例如,左侧是使用VAE,右侧是未使用VAE的效果:

2.3 Upscaler
放大算法:8x_NMKD-Superscale_150000_G
下载地址:
- 包括全部的放大算法:https://huggingface.co/uwg/upscaler/tree/main
8x_NMKD-Superscale_150000_G:https://huggingface.co/uwg/upscaler/blob/main/ESRGAN/8x_NMKD-Superscale_150000_G.pth,67M
放入文件夹:stable-diffusion-webui/models/ESRGAN
需要重启 WebUI,才能在列表中生效,可以选用。
3. 绘图示例
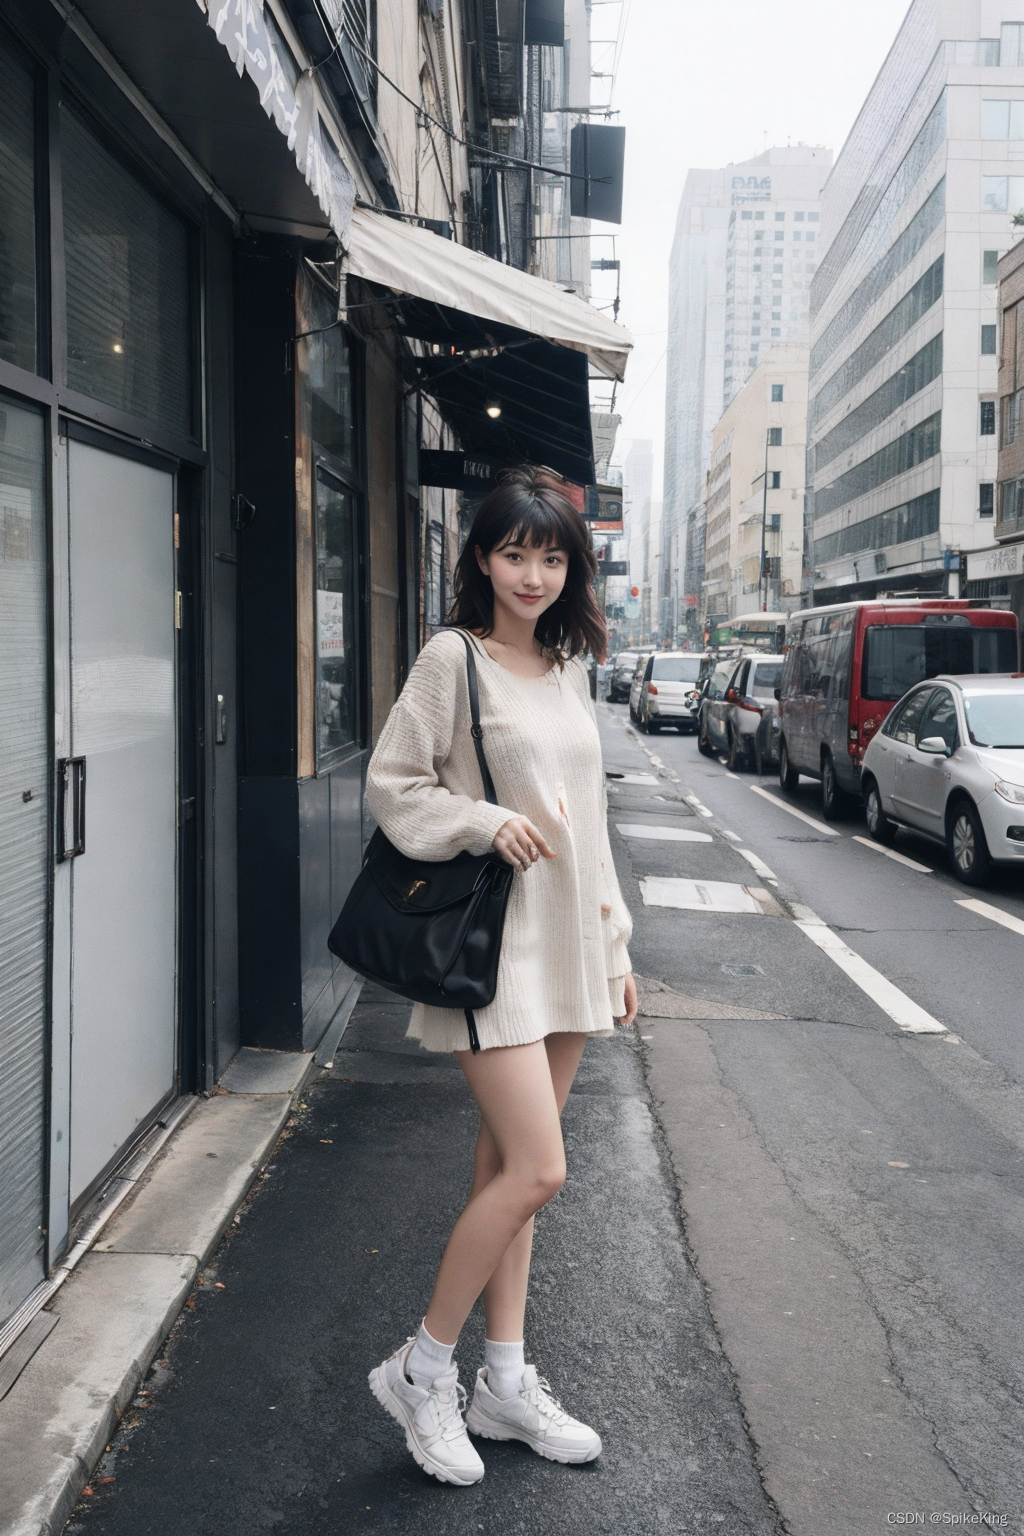
Prompt:
1girl,moyou,fullbody
Negative prompt: EasyNegative,(badhandv4:1.2),
Steps: 50, Sampler: DDIM, CFG scale: 7, Seed: 3940251232, Face restoration: CodeFormer, Size: 512x768, Model hash: 6a226dd292, Model: 墨幽人造人_v1010_完整版, Denoising strength: 0.2, Hires upscale: 2, Hires upscaler: 8x_NMKD-Superscale_150000_G, Version: v1.4.0Saved: 00030-3940251232.png
图像:
参考:
- 知乎 - stable diffusion里用到的模型(ckpt文件)是啥?
- 探索【Stable-Diffusion WEBUI】的附加功能:图片缩放&抠图
- 百度贴吧 - 大佬请教,为啥没有VAE模型的工具栏呢
- Bilibili - (紧急)下载下来的模型怎么用?分别放哪里?是什么类型?分享个小工具一招解决!
- Stable Diffusion用embedding模型避免画崩
