五、域对象共享数据
1、使用ServletAPI向request域对象共享数据
首页:
@Controller
public class TestController {@RequestMapping("/")public String index(){return "index";}
}
<!DOCTYPE html>
<html lang="en" xmlns:th="http://www.thymeleaf.org">
<head><meta charset="UTF-8"><title>首页</title>
</head>
<body>
<h1>您已进入首页!</h1><a th:href="@{/testRequestByServletAPI}">通过servletAPI向request域对象共享数据</a>
</body>
</html>跳转页:
@Controller
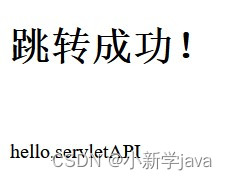
public class ScopeController {//使用servletAPI向request域对象共享数据@RequestMapping("/testRequestByServletAPI")public String testRequestByServletAPI(HttpServletRequest request){//共享数据。参数一个是键,一个是值request.setAttribute("testRequestScope","hello,servletAPI");return "success";}
}
<!DOCTYPE html>
<html lang="en" xmlns:th="http://www.thymeleaf.org">
<head><meta charset="UTF-8"><title>Title</title>
</head>
<body>
<h1>跳转成功!</h1><br>
<p th:text="${testRequestScope}"></p></body>
</html>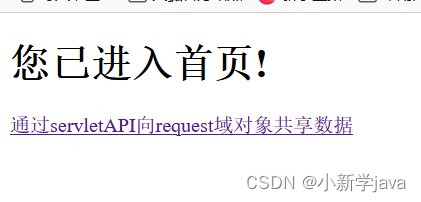
2、使用ModelAndView向request域对象共享数据
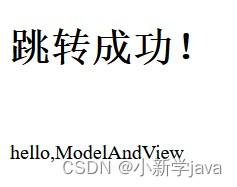
@RequestMapping("/testModelAndView")//必须使用ModelAndView作为该方法的返回值返回public ModelAndView testModelAndView(){ModelAndView mav = new ModelAndView();//处理模型数据,即向请求域request共享数据mav.addObject("testRequestScope","hello,ModelAndView");//设置视图名称mav.setViewName("success");return mav;}<a th:href="@{/testModelAndView}">通过ModelAndView向request域对象共享数据</a><br><!DOCTYPE html>
<html lang="en" xmlns:th="http://www.thymeleaf.org">
<head><meta charset="UTF-8"><title>Title</title>
</head>
<body>
<h1>跳转成功!</h1><br>
<p th:text="${testRequestScope}"></p></body>
</html>
3、使用Model向request域对象共享数据
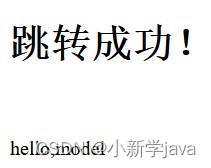
@RequestMapping("/testModel")public String testModel(Model model){model.addAttribute("testRequestScope","hello,model");return "success";}<a th:href="@{/testModel}">通过Model向request域对象共享数据</a><br><!DOCTYPE html>
<html lang="en" xmlns:th="http://www.thymeleaf.org">
<head><meta charset="UTF-8"><title>Title</title>
</head>
<body>
<h1>跳转成功!</h1><br>
<p th:text="${testRequestScope}"></p></body>
</html>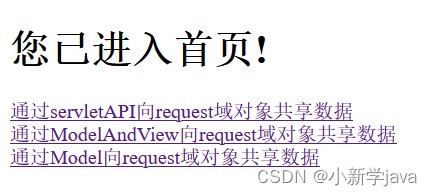
4、使用map向request域对象共享数据
@RequestMapping("/testMap")public String testMap(Map<String, Object> map){map.put("testRequestScope","hello,map");return "success";}<a th:href="@{/testMap}">通过Map向request域对象共享数据</a><br><!DOCTYPE html>
<html lang="en" xmlns:th="http://www.thymeleaf.org">
<head><meta charset="UTF-8"><title>Title</title>
</head>
<body>
<h1>跳转成功!</h1><br>
<p th:text="${testRequestScope}"></p></body>
</html>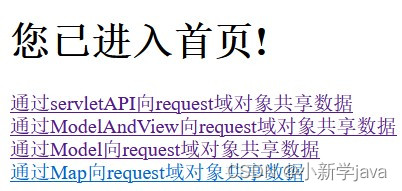

5、使用ModelMap向request域对象共享数据
@RequestMapping("/testModelMap")public String testModelMap(ModelMap modelMap){modelMap.addAttribute("testRequestScope","hello,ModelMap");return "success";}<a th:href="@{/testModelMap}">通过ModelMap向request域对象共享数据</a><br><!DOCTYPE html>
<html lang="en" xmlns:th="http://www.thymeleaf.org">
<head><meta charset="UTF-8"><title>Title</title>
</head>
<body>
<h1>跳转成功!</h1><br>
<p th:text="${testRequestScope}"></p></body>
</html> 

6、Model、ModelMap、Map的关系
Model 、 ModelMap 、 Map 类型的参数其实本质上都是 BindingAwareModelMap 类型的
publicinterfaceModel{}public class LinkedHashMap<K,V>extends HashMap<K,V> implements Map<K,V>publicclassModelMapextendsLinkedHashMap<String,Object>{}publicclassExtendedModelMapextendsModelMapimplementsModel{}publicclassBindingAwareModelMapextendsExtendedModelMap{}
7、向session域共享数据
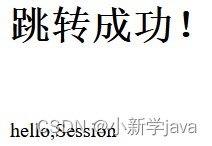
@RequestMapping("/testSession")public String testSession(HttpSession session){session.setAttribute("testSessionScope","hello,Session");return "success";}<a th:href="@{/testSession}">通过ServletAPI向session域对象共享数据</a><br><!DOCTYPE html>
<html lang="en" xmlns:th="http://www.thymeleaf.org">
<head><meta charset="UTF-8"><title>Title</title>
</head>
<body>
<h1>跳转成功!</h1><br>
<!--<p th:text="${testRequestScope}"></p>-->
<p th:text="${session.testSessionScope}"></p></body>
</html>
8、向application域共享数据
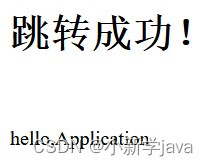
@RequestMapping("/testApplication")public String testApplication(HttpSession session){ServletContext application = session.getServletContext();application.setAttribute("testApplicationScope","hello,Application");return "success";}<a th:href="@{/testApplication}">通过ServletAPI向Application域对象共享数据</a><br><!DOCTYPE html>
<html lang="en" xmlns:th="http://www.thymeleaf.org">
<head><meta charset="UTF-8"><title>Title</title>
</head>
<body>
<h1>跳转成功!</h1><br>
<!--<p th:text="${testRequestScope}"></p>-->
<!--<p th:text="${session.testSessionScope}"></p>-->
<p th:text="${application.testApplicationScope}"></p></body>
</html>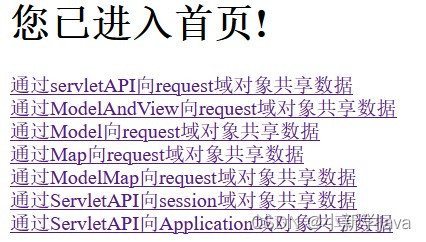
六、SpringMVC的视图
SpringMVC 中的视图是 View 接口,视图的作用渲染数据,将模型 Model 中的数据展示给用户
SpringMVC 视图的种类很多,默认有转发视图和重定向视图
当工程引入 jstl 的依赖,转发视图会自动转换为 JstlView
若使用的视图技术为 Thymeleaf ,在 SpringMVC 的配置文件中配置了 Thymeleaf 的视图解析器,由此视图解析器解析之后所得到的是ThymeleafView
1、ThymeleafView
当控制器方法中所设置的视图名称没有任何前缀时,此时的视图名称会被 SpringMVC 配置文件中所配置的视图解析器解析,视图名称拼接视图前缀和视图后缀所得到的最终路径,会通过转发的方式实现跳转
@Controller
public class ViewController {@RequestMapping("/testThymeleafView")public String testThymeleafView(){return "success";}
}
<!DOCTYPE html>
<html lang="en" xmlns:th="http://www.thymeleaf.org">
<head><meta charset="UTF-8"><title>Title</title>
</head>
<body>
<a th:href="@{/testThymeleafView}">测试ThymeleafView</a>
</body>
</html>
2、转发视图
SpringMVC 中默认的转发视图是 InternalResourceView
SpringMVC 中创建转发视图的情况:
当控制器方法中所设置的视图名称以 "forward:" 为前缀时,创建 InternalResourceView 视图,此时的视图名称不会被SpringMVC 配置文件中所配置的视图解析器解析,而是会将前缀 "forward:" 去掉,剩余部分作为最终路径通过转发的方式实现跳转
例如 "forward:/" , "forward:/employee"
@RequestMapping("/testForward")public String testForward(){return "forward:/testThymeleafView";}<a th:href="@{/testForward}">测试InternalResourceView</a><br>
3、重定向视图
SpringMVC 中默认的重定向视图是 RedirectView
当控制器方法中所设置的视图名称以 "redirect:" 为前缀时,创建 RedirectView 视图,此时的视图名称不会被SpringMVC 配置文件中所配置的视图解析器解析,而是会将前缀 "redirect:" 去掉,剩余部分作为最终路径通过重定向的方式实现跳转
例如 "redirect:/" , "redirect:/employee"
@RequestMapping("/testRedirect")public String testRedirect(){return "redirect:/testThymeleafView";}<a th:href="@{/testRedirect}">测试RedirectView</a><br>
注:重定向视图在解析时,会先将 redirect: 前缀去掉,然后会判断剩余部分是否以 / 开头,若是则会自动拼接上下文路径
转发和重定向的区别?
参考连接:https://www.cnblogs.com/qzhc/p/11313879.html
4、视图控制器view-controller
当控制器方法中,仅仅用来实现页面跳转,即只需要设置视图名称时,可以将处理器方法使用 view-controller标签进行表示
<!--path:设置处理的请求地址view-name:设置请求地址所对应的视图名称--><mvc:view-controller path="/" view-name="index"></mvc:view-controller><!--开启MVC的注解驱动--><mvc:annotation-driven/>注:当 SpringMVC 中设置任何一个 view-controller 时,其他控制器中的请求映射将全部失效,此时需要在SpringMVC 的核心配置文件中设置开启 mvc 注解驱动的标签:<mvc:annotation-driven />
七、RESTful
1、RESTful简介
REST : Re presentational S tate T ransfer ,表现层资源状态转移。
a> 资源
资源是一种看待服务器的方式,即,将服务器看作是由很多离散的资源组成。每个资源是服务器上一个可命名的抽象概念。因为资源是一个抽象的概念,所以它不仅仅能代表服务器文件系统中的一个文件、数据库中的一张表等等具体的东西,可以将资源设计的要多抽象有多抽象,只要想象力允许而且客户端应用开发者能够理解。与面向对象设计类似,资源是以名词为核心来组织的,首先关注的是名词。一个资源可以由一个或多个URI 来标识。 URI 既是资源的名称,也是资源在 Web 上的地址。对某个资源感兴趣的客户端应用,可以通过资源的URI 与其进行交互。
b> 资源的表述
资源的表述是一段对于资源在某个特定时刻的状态的描述。可以在客户端 - 服务器端之间转移(交
换)。资源的表述可以有多种格式,例如 HTML/XML/JSON/ 纯文本 / 图片 / 视频 / 音频等等。资源的表述格式可以通过协商机制来确定。请求- 响应方向的表述通常使用不同的格式。
c> 状态转移
状态转移说的是:在客户端和服务器端之间转移( transfer )代表资源状态的表述。通过转移和操作资源的表述,来间接实现操作资源的目的。
2、RESTful的实现
具体说,就是 HTTP 协议里面,四个表示操作方式的动词: GET 、 POST 、 PUT 、 DELETE 。
它们分别对应四种基本操作: GET 用来获取资源, POST 用来新建资源, PUT 用来更新资源, DELETE 用来删除资源。
REST 风格提倡 URL 地址使用统一的风格设计,从前到后各个单词使用斜杠分开,不使用问号键值对方 式携带请求参数,而是将要发送给服务器的数据作为 URL 地址的一部分,以保证整体风格的一致性。

@Controller
public class UserController {//使用RESTFul模拟用户资源的增删改查// /user    GET   查询所有用户// /user/1    GET   根据用户id查询用户信息// /user    POST   添加用户信息// /user    DELETE   删除用户信息// /user    PUT   更新用户信息@RequestMapping(value = "/user",method = RequestMethod.GET)public String getAllUser(){System.out.println("查询所有用户");return "success";}@RequestMapping(value = "/user/{id}",method = RequestMethod.GET)public String getUserById(){System.out.println("根据用户id查询用户信息");return "success";}@RequestMapping(value = "/user",method = RequestMethod.POST)public String insertUser(String username,String password){System.out.println("添加用户信息:"+username+","+password);return "success";}
}
<!DOCTYPE html>
<html lang="en" xmlns:th="http://www.thymeleaf.org">
<head><meta charset="UTF-8"><title>Title</title>
</head>
<body>
<a th:href="@{/user}">查询所有用户</a><br>
<a th:href="@{/user/1}">根据id查询用户信息</a><br>
<form th:action="@{/user}" method="post">用户名:<input type="text" name="username"><br>密码: <input type="text" name="password"><br><input type="submit" value="添加"><br>
</form>
</body>
</html> <!--path:设置处理的请求地址view-name:设置请求地址所对应的视图名称--><mvc:view-controller path="/" view-name="index"></mvc:view-controller><mvc:view-controller path="/test_view" view-name="test_view"></mvc:view-controller><mvc:view-controller path="/test_rest" view-name="test_rest"></mvc:view-controller><!--开启MVC的注解驱动--><mvc:annotation-driven/>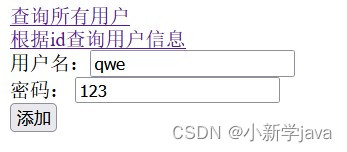

3、HiddenHttpMethodFilter
由于浏览器只支持发送 get 和 post 方式的请求,那么该如何发送 put 和 delete 请求呢?
SpringMVC 提供了 HiddenHttpMethodFilter 帮助我们 将 POST 请求转换为 DELETE 或 PUT 请求 HiddenHttpMethodFilter 处理 put 和 delete 请求的条件:
a> 当前请求的请求方式必须为 post
b> 当前请求必须传输请求参数 _method
满足以上条件, HiddenHttpMethodFilter 过滤器就会将当前请求的请求方式转换为请求参数 _method的值,因此请求参数 _method 的值才是最终的请求方式
在 web.xml 中注册 HiddenHttpMethodFilter
<!--配置HiddenHttpMethodFilter--><filter><filter-name>HiddenHttpMethodFilter</filter-name><filter-class>org.springframework.web.filter.HiddenHttpMethodFilter</filter-class></filter><filter-mapping><filter-name>HiddenHttpMethodFilter</filter-name><url-pattern>/*</url-pattern></filter-mapping>注:目前为止, SpringMVC 中提供了两个过滤器: CharacterEncodingFilter 和HiddenHttpMethodFilter在 web.xml 中注册时,必须先注册 CharacterEncodingFilter ,再注册 HiddenHttpMethodFilter原因:
- 在 CharacterEncodingFilter 中通过 request.setCharacterEncoding(encoding) 方法设置字符集的
- request.setCharacterEncoding(encoding) 方法要求前面不能有任何获取请求参数的操作
- 而 HiddenHttpMethodFilter 恰恰有一个获取请求方式的操作:
- String paramValue = request.getParameter(this.methodParam);
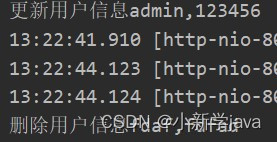
@RequestMapping(value = "/user",method = RequestMethod.PUT)public String updateUser(String username,String password){System.out.println("更新用户信息"+username+","+password);return "success";}@RequestMapping(value = "/user/{id}",method = RequestMethod.DELETE)public String deleteUser(String username,String password){System.out.println("删除用户信息"+username+","+password);return "success";}<form th:action="@{/user}" method="post"><input type="hidden" name="_method" value="PUT" >用户名:<input type="text" name="username"><br>密码: <input type="text" name="password"><br><input type="submit" value="修改"><br>
</form><br><form th:action="@{/user/1}" method="post"><input type="hidden" name="_method" value="DELETE" >用户名:<input type="text" name="username"><br>密码: <input type="text" name="password"><br><input type="submit" value="删除"><br>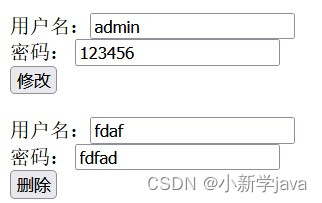
八、RESTful案例
1、准备工作
和传统 CRUD 一样,实现对员工信息的增删改查。
- 搭建环境
- 准备实体类
public class Employee {private Integer id;private String lastName;private String email;private Integer gender;public Employee() {}public Employee(Integer id, String lastName, String email, Integer gender) {this.id = id;this.lastName = lastName;this.email = email;this.gender = gender;}//get,set,toString方法
}- 准备dao模拟数据
@Repository
public class EmployeeDao {private static Map<Integer, Employee> employees = null;static{employees = new HashMap<Integer, Employee>();employees.put(1001, new Employee(1001, "E-AA", "aa@163.com", 1));employees.put(1002, new Employee(1002, "E-BB", "bb@163.com", 1));employees.put(1003, new Employee(1003, "E-CC", "cc@163.com", 0));employees.put(1004, new Employee(1004, "E-DD", "dd@163.com", 0));employees.put(1005, new Employee(1005, "E-EE", "ee@163.com", 1));}private static Integer initId = 1006;public void save(Employee employee){if(employee.getId() == null){employee.setId(initId++);}employees.put(employee.getId(), employee);}public Collection<Employee> getAll(){return employees.values();}public Employee get(Integer id){return employees.get(id);}public void delete(Integer id){employees.remove(id);}
}2、功能清单

3、具体功能:访问首页
a> 配置 view-controller
<!--配置视图控制器--><mvc:view-controller path="/" view-name="index"></mvc:view-controller><!--开启mvc注解驱动--><mvc:annotation-driven/> b> 创建页面
<!DOCTYPE html>
<html lang="en" xmlns:th="http://www.thymeleaf.org">
<head><meta charset="UTF-8"><title>首页</title>
</head>
<body>
<h1>首页</h1>
<a th:href="@{/employee}">查看员工信息</a></body>
</html>4、具体功能:查询所有员工数据
a> 控制器方法
@Controller
public class EmployeeController {@Autowiredprivate EmployeeDao employeeDao;@RequestMapping(value = "/employee",method = RequestMethod.GET)public String getAllEmployee(Model model){Collection<Employee> employeeList = employeeDao.getAll();model.addAttribute("employeeList",employeeList);return "employee_list";}}
b> 创建 employee_list.html
<!DOCTYPE html>
<html lang="en" xmlns:th="http://www.thymeleaf.org">
<head><meta charset="UTF-8"><title>Employee Info</title>
</head>
<body>
<table border="1" cellspacing="0" style="text-align: center"><tr><th colspan="5">Employee Info</th></tr><tr><th>id</th><th>lastName</th><th>email</th><th>gender</th><th>options</th></tr><tr th:each="employee:${employeeList}"><td th:text="${employee.id}"></td><td th:text="${employee.lastName}"></td><td th:text="${employee.email}"></td><td th:text="${employee.gender}"></td><td><a href="">delete</a><a href="">update</a></td></tr>
</table></body>
</html>5、具体功能:删除
a> 创建处理 delete 请求方式的表单
<!-- 作用:通过超链接控制表单的提交,将post请求转换为delete请求 --><form id="deleteForm" method="post"><!-- HiddenHttpMethodFilter要求:必须传输_method请求参数,并且值为最终的请求方式 --><input type="hidden" name="_method" value="delete"></form> b> 删除超链接绑定点击事件
引入 vue.js
<script type="text/javascript" th:src="@{/static/js/vue.js}"></script> 删除超链接
<a @click="deleteEmployee" th:href="@{/employee/}+${employee.id}">delete</a> 通过 vue 处理点击事件
<script type="text/javascript">var vue = new Vue({el:"#dataTable",methods:{deleteEmployee:function (event){//根据id获取表单元素var deleteForm = document.getElementById("deleteForm");//将触发点击事件的超链接的href属性赋值给表达的actiondeleteForm.action=event.target.href;//提交表单deleteForm.submit();//取消超链接的默认行为event.preventDefault();}}});</script>
c> 控制器方法
@RequestMapping(value = "/employee/{id}",method = RequestMethod.DELETE)public String deleteEmployee(@PathVariable("id") Integer id){employeeDao.delete(id);return "redirect:/employee";}6、具体功能:跳转到添加数据页面
a>添加add连接
<th>options (<a th:href="@{/toAdd}">add</a> )</th> b> 配置 view-controller
<mvc:view-controller path="/toAdd" view-name="employee_add"></mvc:view-controller> c> 创建 employee_add.hctml
<!DOCTYPE html>
<html lang="en" xmlns:th="http://www.thymeleaf.org">
<head><meta charset="UTF-8"><title>add employee</title>
</head>
<body><form th:action="@{/employee}" method="post">lastName: <input type="text" name="lastName"><br>email: <input type="text" name="email"><br>gender: <input type="radio" name="gender" value="1">male<br>gender: <input type="radio" name="gender" value="0">female<br><input type="submit" value="add"><br>
</form></body>
</html>
d>控制器方法
@RequestMapping(value = "/employee",method = RequestMethod.POST)public String addEmployee(Employee employee){employeeDao.save(employee);return "redirect:/employee";}8、具体功能:跳转到更新数据页面
a> 修改超链接
<a th:href="@{/employee/}+${employee.id}">update</a> b> 控制器方法 ,先获取要修改的内容
@RequestMapping(value = "/employee/{id}",method = RequestMethod.GET)public String getEmployeeById(@PathVariable("id") Integer id, Model model){Employee employee = employeeDao.get(id);model.addAttribute("employee",employee);return "employee_update";} c> 创建 employee_update.html
<!DOCTYPE html>
<html lang="en" xmlns:th="http://www.thymeleaf.org">
<head><meta charset="UTF-8"><title>update employee</title>
</head>
<body>
<form th:action="@{/employee}" method="post"><input type="hidden" name="_method" value="put"><input type="hidden" name="id" th:value="${employee.id}">lastName: <input type="text" name="lastName" th:value="${employee.lastName}"><br>email: <input type="text" name="email" th:value="${employee.email}"><br>gender: <input type="radio" name="gender" value="1" th:field="${employee.gender}">male<br>gender: <input type="radio" name="gender" value="0" th:field="${employee.gender}">female<br><input type="submit" value="update"><br>
</form></body>
</html>
d> 控制器方法
@RequestMapping(value = "/employee",method = RequestMethod.PUT)public String updateEmployee(Employee employee){employeeDao.save(employee);return "redirect:/employee";}
