🎊专栏【 前端易错合集】
🍔喜欢的诗句:更喜岷山千里雪 三军过后尽开颜。
🎆音乐分享【如愿】
大一同学小吉,欢迎并且感谢大家指出我的问题🥰
文章目录
- 🍔实现如图的导航栏
- ⭐代码
- 🎄注意
- 🍔事件代理
- ⭐效果
- ⭐代码
- 🎄分析
- 🤖先看前一段代码
- ⭐添加点击后框框变成红色的效果
- 🍔轮播图
- 🎄分析
- 🍔效果如图
🍔实现如图的导航栏
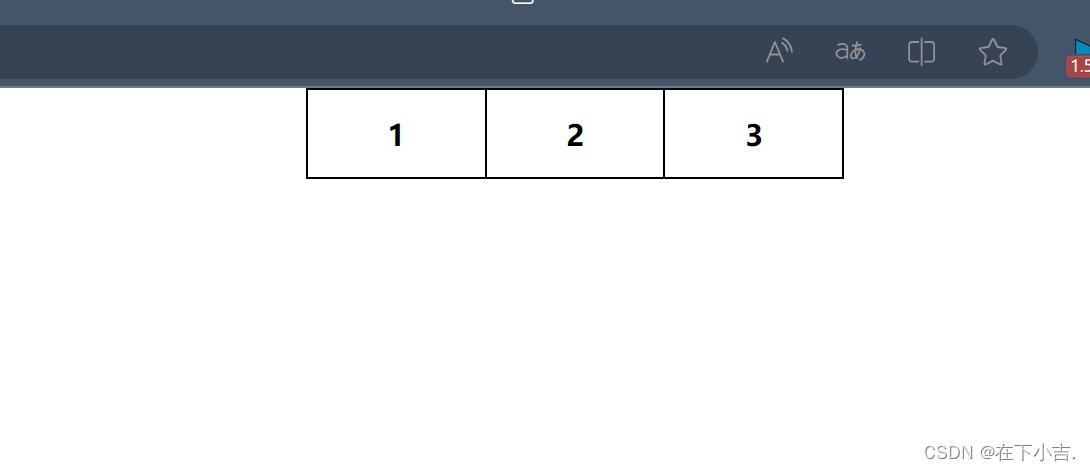
⭐代码
<!DOCTYPE html>
<html lang="en">
<head><meta charset="UTF-8"><meta name="viewport" content="width=device-width, initial-scale=1.0"><title>Document</title><style>* {margin: 0;padding: 0;}li {box-sizing: border-box;float: left;display: block;line-height: 50px;width: 100px;height: 50px;text-align: center;font-weight: bold;list-style: none;color:black;border: 1px solid;text-decoration: none;}div{border: 1px solid black;margin: 0 auto;width: 300px;height: 50px;}</style></head>
<body><div><ul><li>1</li><li>2</li><li>3</li></ul></div>
</body>
</html>
🎄注意
- 一定要给边框设置为
border: 1px solid;而不是border: solid,要指定大小 - 因为外盒子是300px,三个内盒子都是100px,而且
边框也有1px,为了防止冲突,要设置为box-sizing: border-box;,这样子可以自动调整大小
🍔事件代理
⭐效果
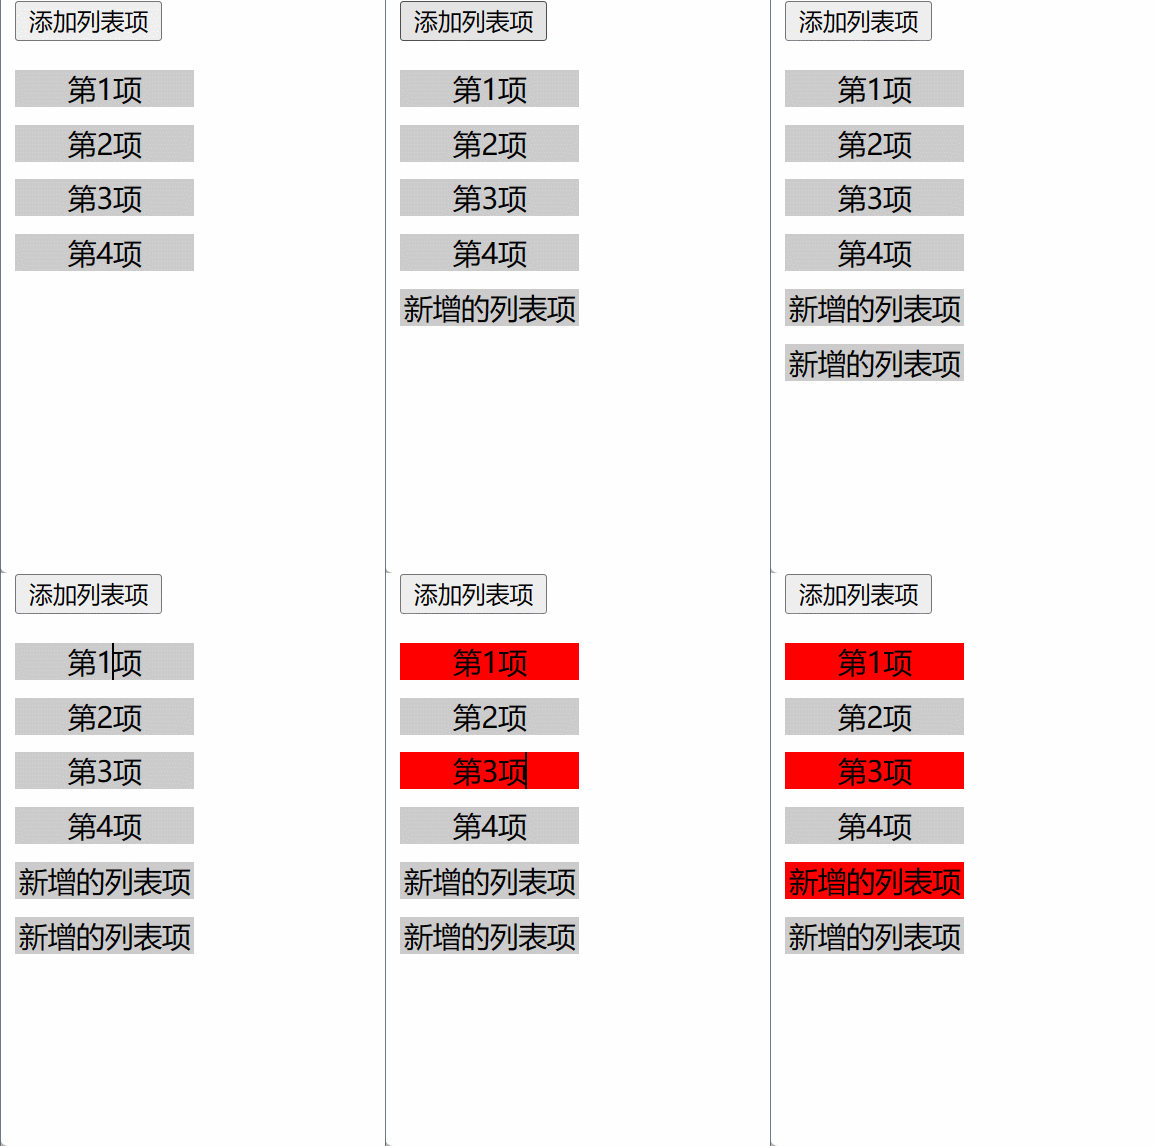
⭐代码
<!DOCTYPE html>
<html lang="en"><head><meta charset="UTF-8"><title>Document</title><style>.menu {width: 100px;padding: 0;list-style: none;}.menu li {margin: 10px 0;text-align: center;background-color: #ccc;cursor: pointer;}</style>
</head><body><input type="button" value="添加列表项" onclick="addLi()"><ul class="menu"><li>第1项</li><li>第2项</li><li>第3项</li><li>第4项</li></ul><script>function addLi() {var ll = document.createElement("li");ll.innerHTML = "新增的列表项";document.querySelector(".menu").appendChild(ll);}//事件委托:将事件监听委托给祖先元素(一般委托给父元素)//事件委托实现的原理是利用事件冒泡//1.先获取到ulvar ul = document.querySelector('.menu');//2.为ul添加click事件ul.onclick = function (e) {if (e.target.nodeName == 'LI')e.target.style.backgroundColor = 'red';};</script>
</body></html>
🎄分析
对于这样子的代码,特别是js
我的建议是
分开来看
🤖先看前一段代码
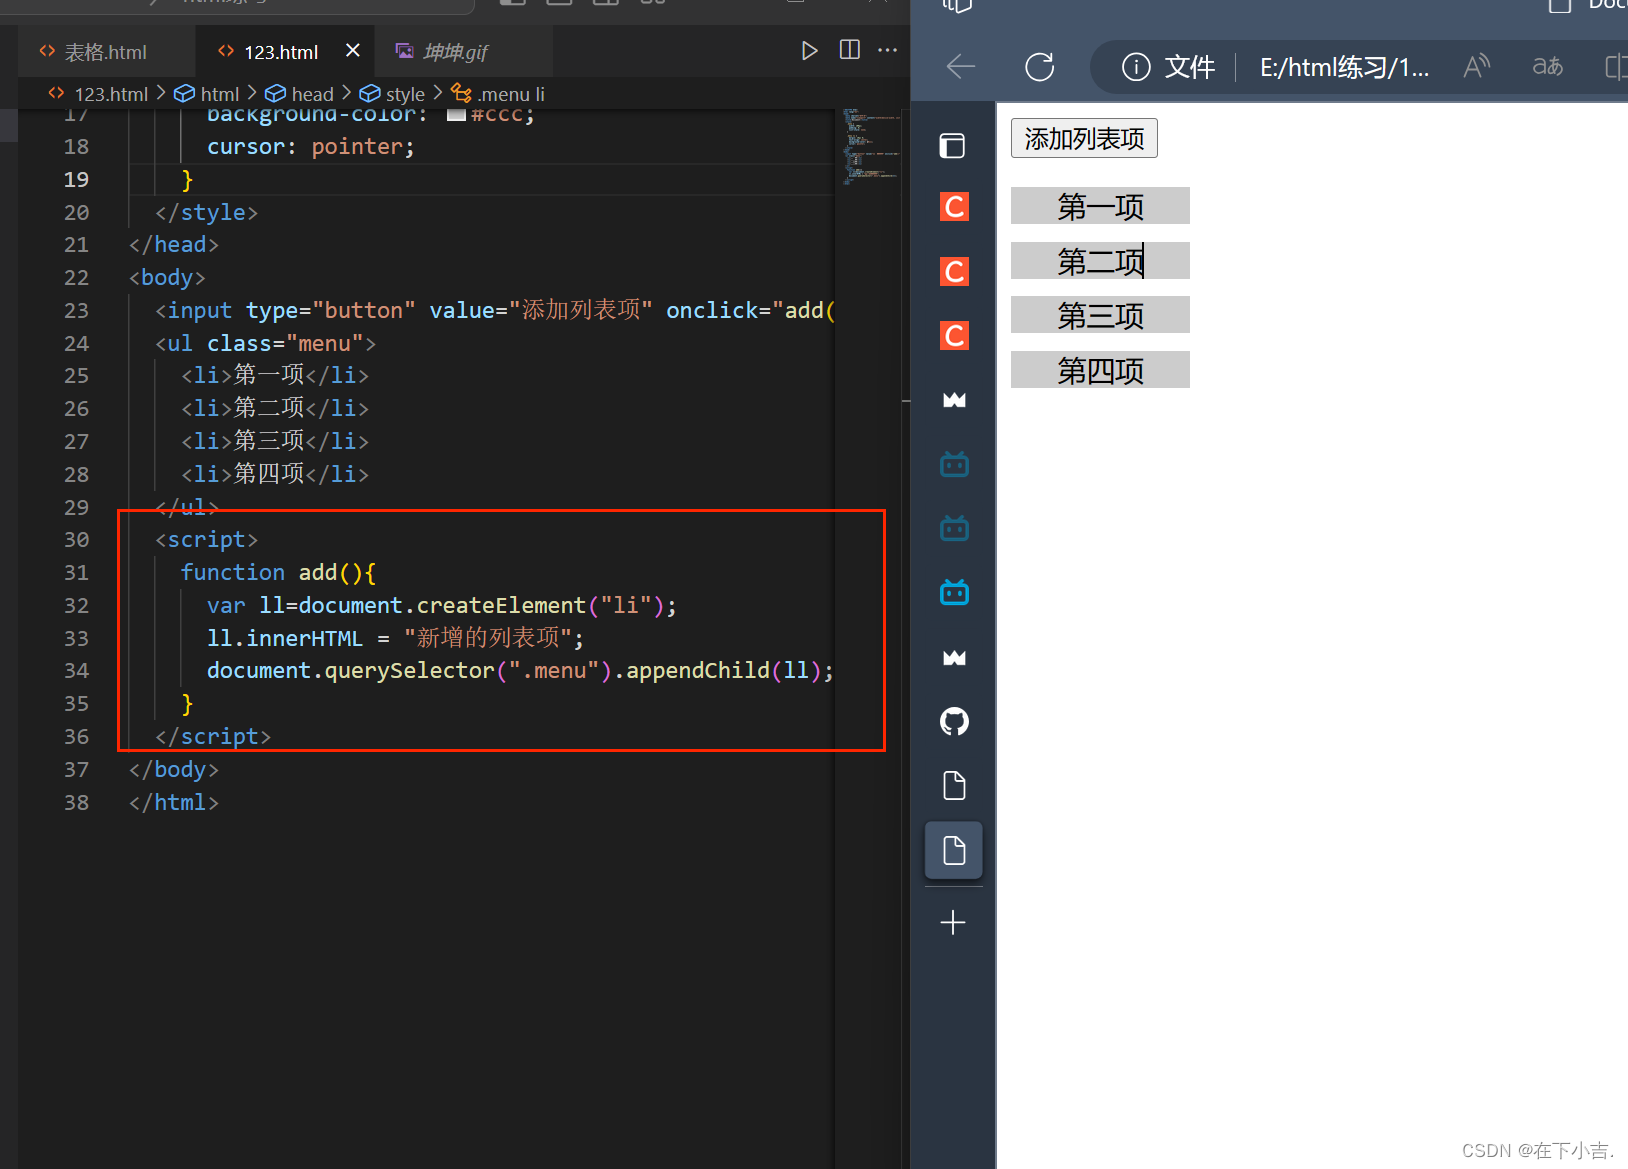
⭐添加点击后框框变成红色的效果
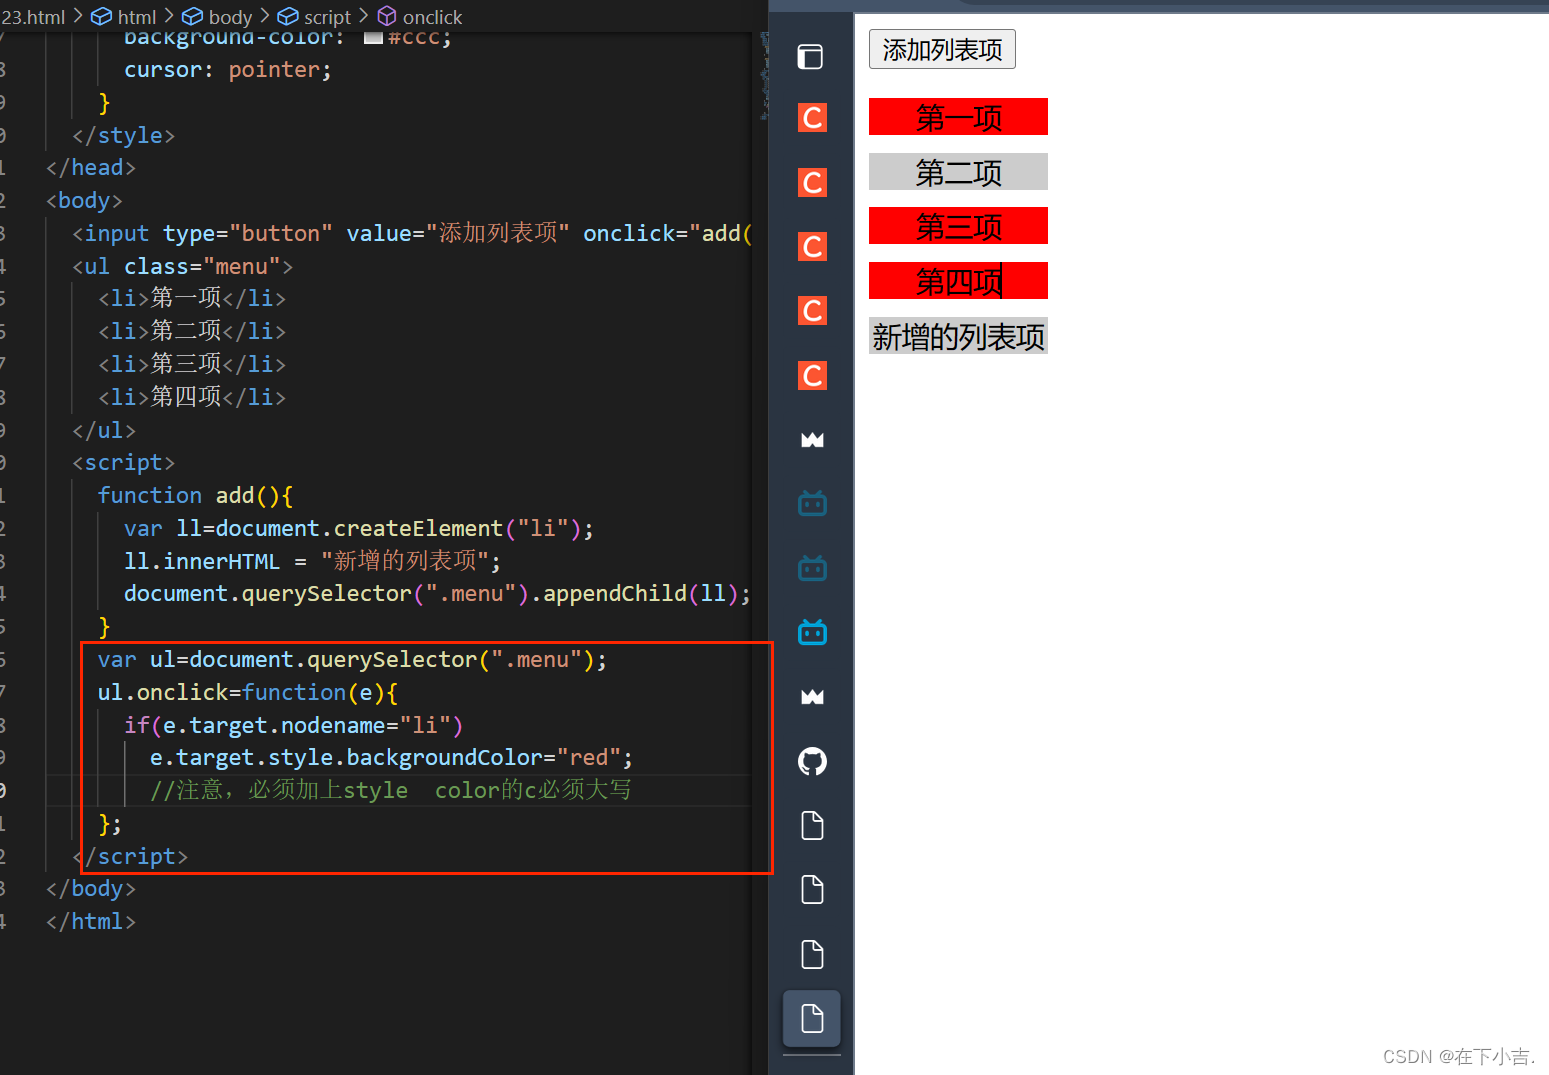
if (e.target.nodeName == ‘LI’)
这个LI必须大写
🍔轮播图
<!DOCTYPE html>
<html><head><meta charset="UTF-8" /><title>轮播图效果演示</title><style>.wrapper {width: 100%;height: 400px;margin: 10px auto;border: 1px solid red;position: relative;/*父元素使用相对定位的目的:(1)保持父元素不动;(2)绝对定位的子元素偏移量是相对父元素*/overflow: hidden;}.wrapper img {width: 100%;height: 100%;}.links {position: absolute;left: 50%;bottom: 5px;transform: translate(-50%);}.links a {display: inline-block;width: 150px;height: 20px;line-height: 20px;/*文字垂直居中*/font-size: 14px;text-align: center;/*文字水平居中*/text-decoration: none;}.a1 {/*没有选中的样式*/color: #FFF;background-color: red;}.a2 {/*选中的样式*/color: #000;background-color: yellow;}</style></head><body><!-- 网页开发中,书写css常用class选择器 --><div class="wrapper"><div class="container"><img src="1.jpg" id="img1" /><img src="2.jpg" id="img2" style="display:none;" /><img src="3.jpg" id="img3" style="display:none;" /><img src="4.jpg" id="img4" style="display:none;" /></div><div class="links"><a href="javascript:;" class="a2" id="btn1" onmouseover="show(1)" onmouseout="star()">1</a><a href="javascript:;" class="a1" id="btn2" onmouseover="show(2)" onmouseout="star()">2</a><a href="javascript:;" class="a1" id="btn3" onmouseover="show(3)" onmouseout="star()">3</a><a href="javascript:;" class="a1" id="btn4" onmouseover="show(4)" onmouseout="star()">4</a></div></div><script>var NowImg=2;var MaxImg=4;var timer;var imgs=document.querySelectorAll(".container img");var links=document.querySelectorAll(".links a");function show(){if(arguments.length>0){NowImg=arguments[0];window.clearInterval(timer);}for(var i=1;i<=MaxImg;i++){if(i==NowImg){imgs[i-1].style.display="block";links[i-1].className="a2";}else{imgs[i-1].style.display="none";links[i-1].className="a1";}}if(NowImg==MaxImg) NowImg=1;else NowImg++;}timer=setInterval(show,1500);function star(){timer=setInterval(show,1500);}</script>
</body></html>
🎄分析
arguments.length
- 是传入的参数
- arguments[0]表示函数调用时
传入的第一个参数
imgs[i-1].style.display="block";
links[i-1].className="a2";
- 通过将图片元素的显示样式设置为 “block”,该图片元素将变为可见状态,并在页面上显示出来。同时,将链接元素的类名设置为 “a2”,可以应用相应的样式,以突出显示当前选中的链接。
这段代码中, links[i-1].className="a2";有什么用
- 在这段代码中,.a1 类名定义了非选中状态的样式,而 .a2 类名定义了选中状态的样式。
- 在这段代码中,.a1 类名定义了非选中状态的样式,而 .a2 类名定义了选中状态的样式。
timer=setInterval(show,1500);
function star(){timer=setInterval(show,1500);
}
- 使用setInterval函数创建一个定时器,每1500毫秒(1.5秒)调用一次show()函数,实现图片的自动轮播效果。
- star()函数用于重新启动定时器,当鼠标离开时重新开始自动轮播
onmouseover="show(1)"有什么用
- 具体来说,在链接元素上使用 onmouseover 属性,当鼠标悬停在链接元素上时,会触发 show() 函数,并将相应的参数(例如 1、2、3 或 4)传递给它。这样做的目的是在鼠标悬停在链接上时,切换到对应索引的图片和链接的显示状态,以提供与用户交互的反馈。
- 在这段代码中,οnmοuseοver=“show(4)” 表示当鼠标悬停在具有 id=“btn4” 的链接元素上时,会调用 show() 函数,并将参数值 4 传递给它。这样,当鼠标悬停在该链接上时,会显示第四张图片,并将该链接的类名设置为 “a2”,表示当前选中状态。
onmouseout="star()"有什么用
- onmouseout 是一个事件属性,用于在鼠标移出元素时触发相应的事件处理程序。在给定的代码中,onmouseout 用于调用名为 star() 的函数,这样做的目的是在鼠标移出链接时重新开始轮播图的自动播放。
🍔效果如图
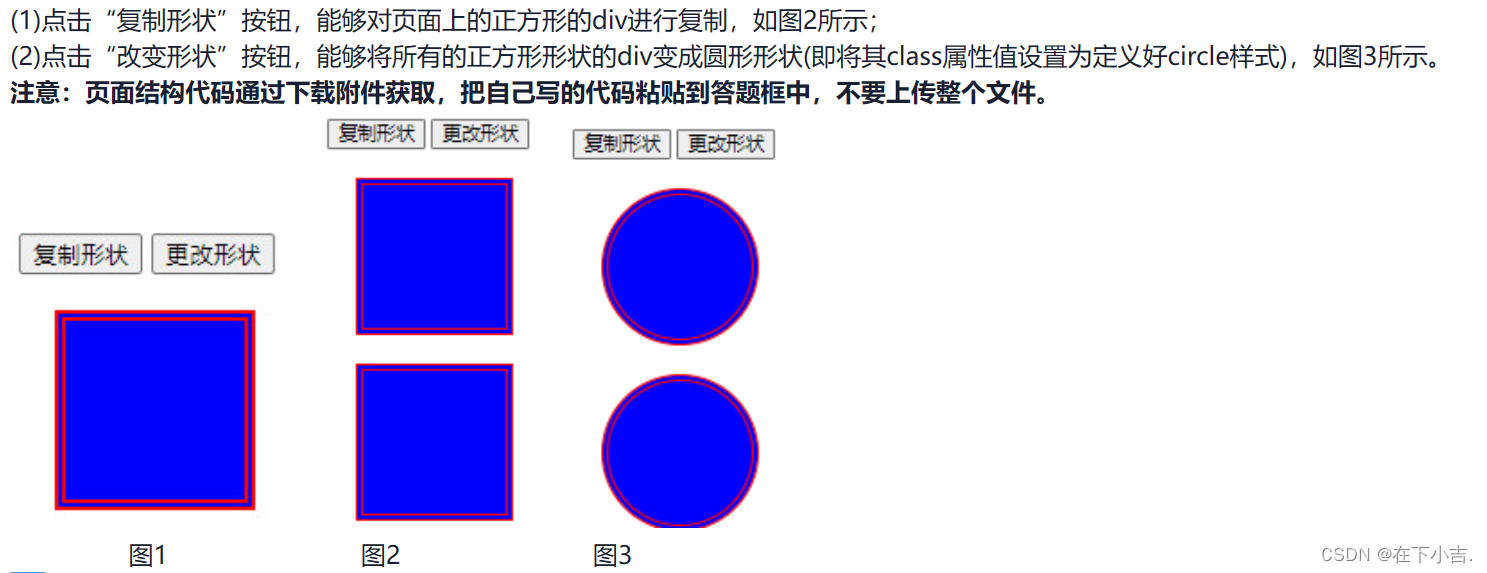
<!DOCTYPE html>
<html>
<head><meta charset="UTF-8"><title>Document</title><style>.shape {width: 100px;height: 100px;margin: 20px;background-color: blue;border: 6px double red;}.circle {border-radius: 50%;}</style>
</head>
<body><input type="button" value="复制形状" onclick="cloneShape();"><input type="button" value="更改形状" onclick="changeShape();"><div class="shape" id="div"></div>
</body>
<script>function cloneShape() {var originalShape = document.getElementById("div");var clonedShape = originalShape.cloneNode(true);document.body.appendChild(clonedShape);}function changeShape() {var shapes = document.getElementsByClassName("shape");for (var i = 0; i < shapes.length; i++) {shapes[i].classList.toggle("circle");}}
</script>
</html>
🥰如果大家有不明白的地方,或者文章有问题,欢迎大家在评论区讨论,指正🥰
