🎈 作者:Linux猿
🎈 简介:CSDN博客专家🏆,华为云享专家🏆,Linux、C/C++、云计算、物联网、面试、刷题、算法尽管咨询我,关注我,有问题私聊!
🎈 欢迎小伙伴们点赞👍、收藏⭐、留言💬
目录
一、实验环境
二、安装 harbor
2.1 安装 docker 和 docker-compose
2.2 安装 harbor
2.3 登录 harbor UI 界面
三、测试上传和下载镜像
3.1 docker 常用命令
3.2 上传镜像
3.3 下载镜像
本篇文章主要介绍 Docker 私有仓库 harbor 的搭建,搭建成功后测试镜像的上传和下载。
一、实验环境
本文是在 CentOS 7.9 上进行配置,环境如下所示。
[root@k8s-master node]# cat /etc/centos-release
CentOS Linux release 7.9.2009 (Core)
[root@k8s-master imagesJar]# docker --version
Docker version 1.13.1, build 7d71120/1.13.1
[root@k8s-master imagesJar]# docker-compose --version
docker-compose version 1.18.0, build 8dd22a9
[root@k8s-master imagesJar]#
二、安装 harbor
2.1 安装 docker 和 docker-compose
首先,需要在服务器上安装 docker 和 docker-compose,执行如下命令。
[root@k8s-master node]# yum install docker docker-compose2.2 安装 harbor
在服务器上执行如下命令,下载 harbor 软件包。
[root@k8s-master node]# wget https://storage.googleapis.com/harbor-releases/harbor-offline-installer-v1.5.3.tgz下载比较慢,可以通过迅雷下载。
解压下载的压缩包,执行命令如下。
[root@k8s-master harbor]# tar zxvf harbor-offline-installer-v1.5.3.tgz执行命令拷贝解压后的目录到 /opt 目录下,执行命令如下所示。
[root@k8s-master harbor]# mv harbor /opt进入到 /opt/harbor 目录下,修改文件 harbor.cfg,修改如下字段。
hostname = 192.168.231.152 # 修改 IP 地址为本机 IP执行如下命令,安装 harbor。
[root@k8s-master harbor]# ./prepare
[root@k8s-master harbor]# ./install.sh
问题 1:
[node@k8s-master harbor]$ sudo ./install.sh
➜ Please set hostname and other necessary attributes in harbor.cfg first. DO NOT use localhost or 127.0.0.1 for hostname, because Harbor needs to be accessed by external clients.
Please set --with-notary if needs enable Notary in Harbor, and set ui_url_protocol/ssl_cert/ssl_cert_key in harbor.cfg bacause notary must run under https.
Please set --with-clair if needs enable Clair in Harbor
[node@k8s-master harbor]$ 解决方法:在 harbor.cfg 配置文件中仅保留一个 hostname 字段。:
问题 2:
执行 install.sh 脚本的时候如下报错如下。
ERROR: for nginx  Cannot start service proxy: b'driver failed programming external connectivity on endpoint nginx (b08a457eb0d19583b0d42a53137a3e8d3a0bc89813b1def8afef7df1d85e1411): Error starting userland proxy: listen tcp 0.0.0.0:80: bind: address already in use'ERROR: for proxy  Cannot start service proxy: b'driver failed programming external connectivity on endpoint nginx (b08a457eb0d19583b0d42a53137a3e8d3a0bc89813b1def8afef7df1d85e1411): Error starting userland proxy: listen tcp 0.0.0.0:80: bind: address already in use'
ERROR: Encountered errors while bringing up the project.
说明本机 80 端口占用了,可以
[node@k8s-master harbor]$ netstat -natp | grep 80查找到 80 端口对应的进程,通过 kill 命令停止进程。
2.3 登录 harbor UI 界面
在浏览器输入 192.168.231.152/harbor,进入 harbor UI 界面,如下所示。
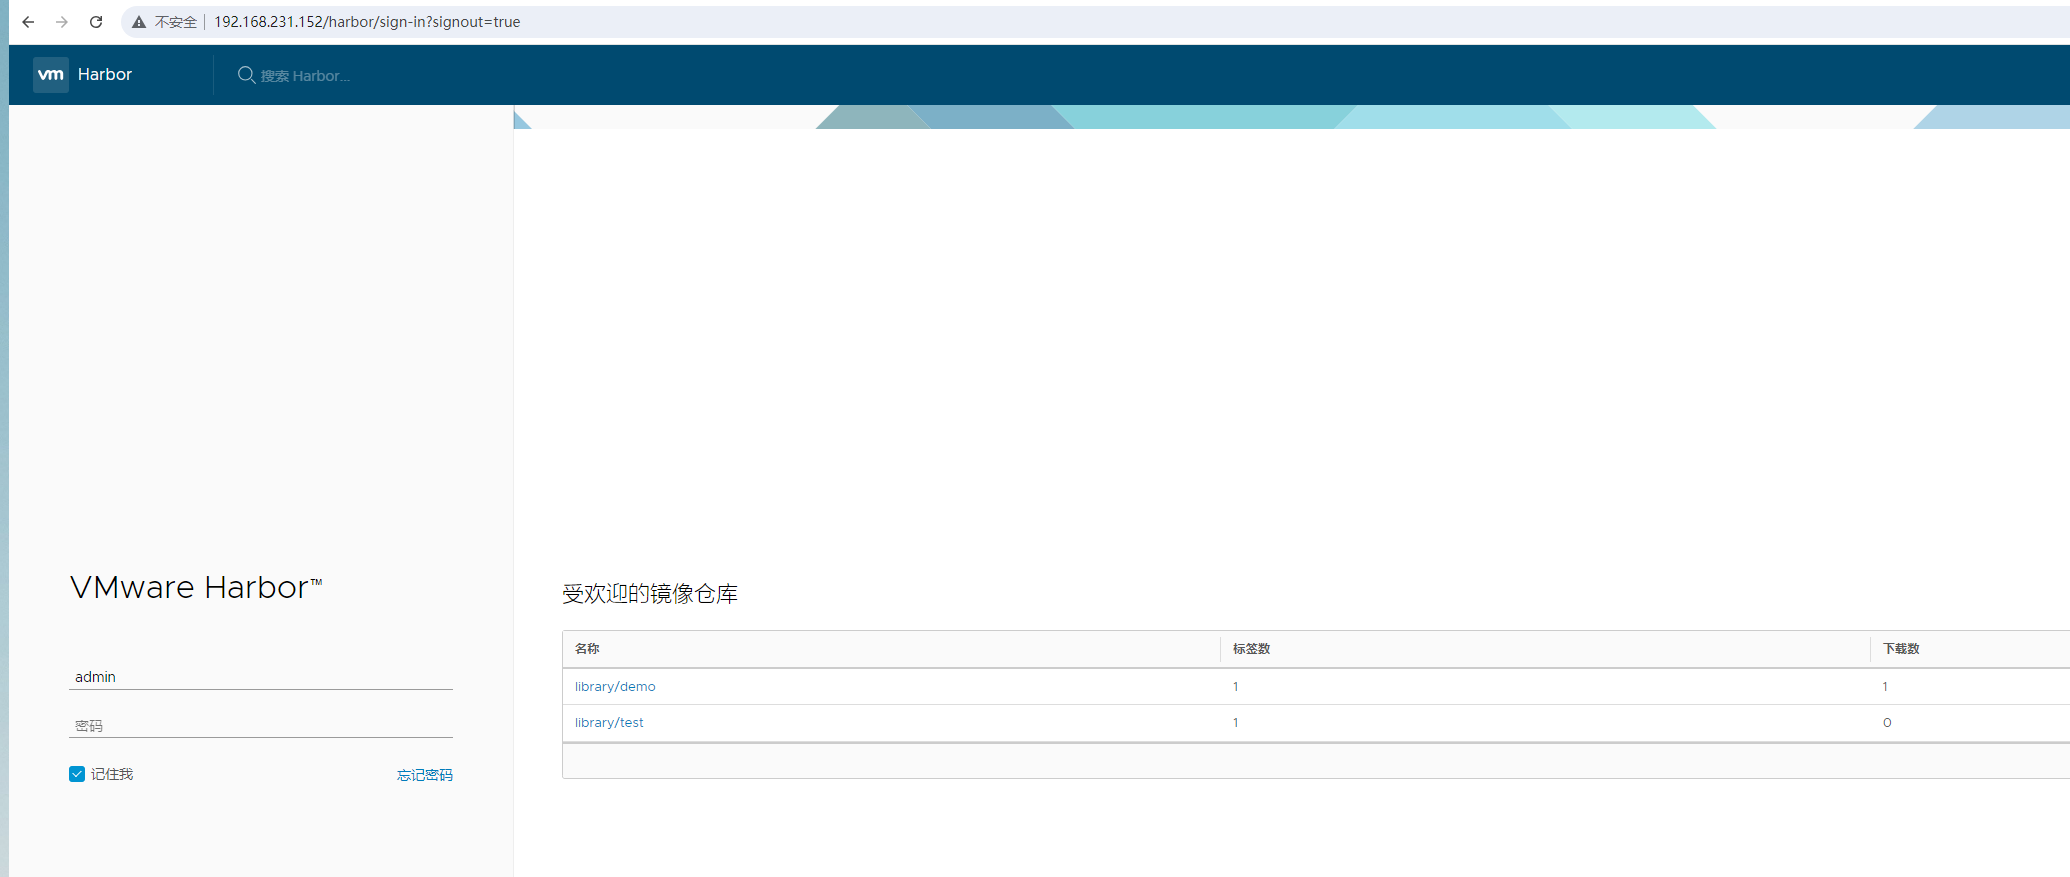
用户名和密码如下所示。
用户名:admin
密码:Harbor12345
密码在 /opt/harbor/harbor.cfg 中配置,默认是 Harbor12345
登录后界面如下所示。
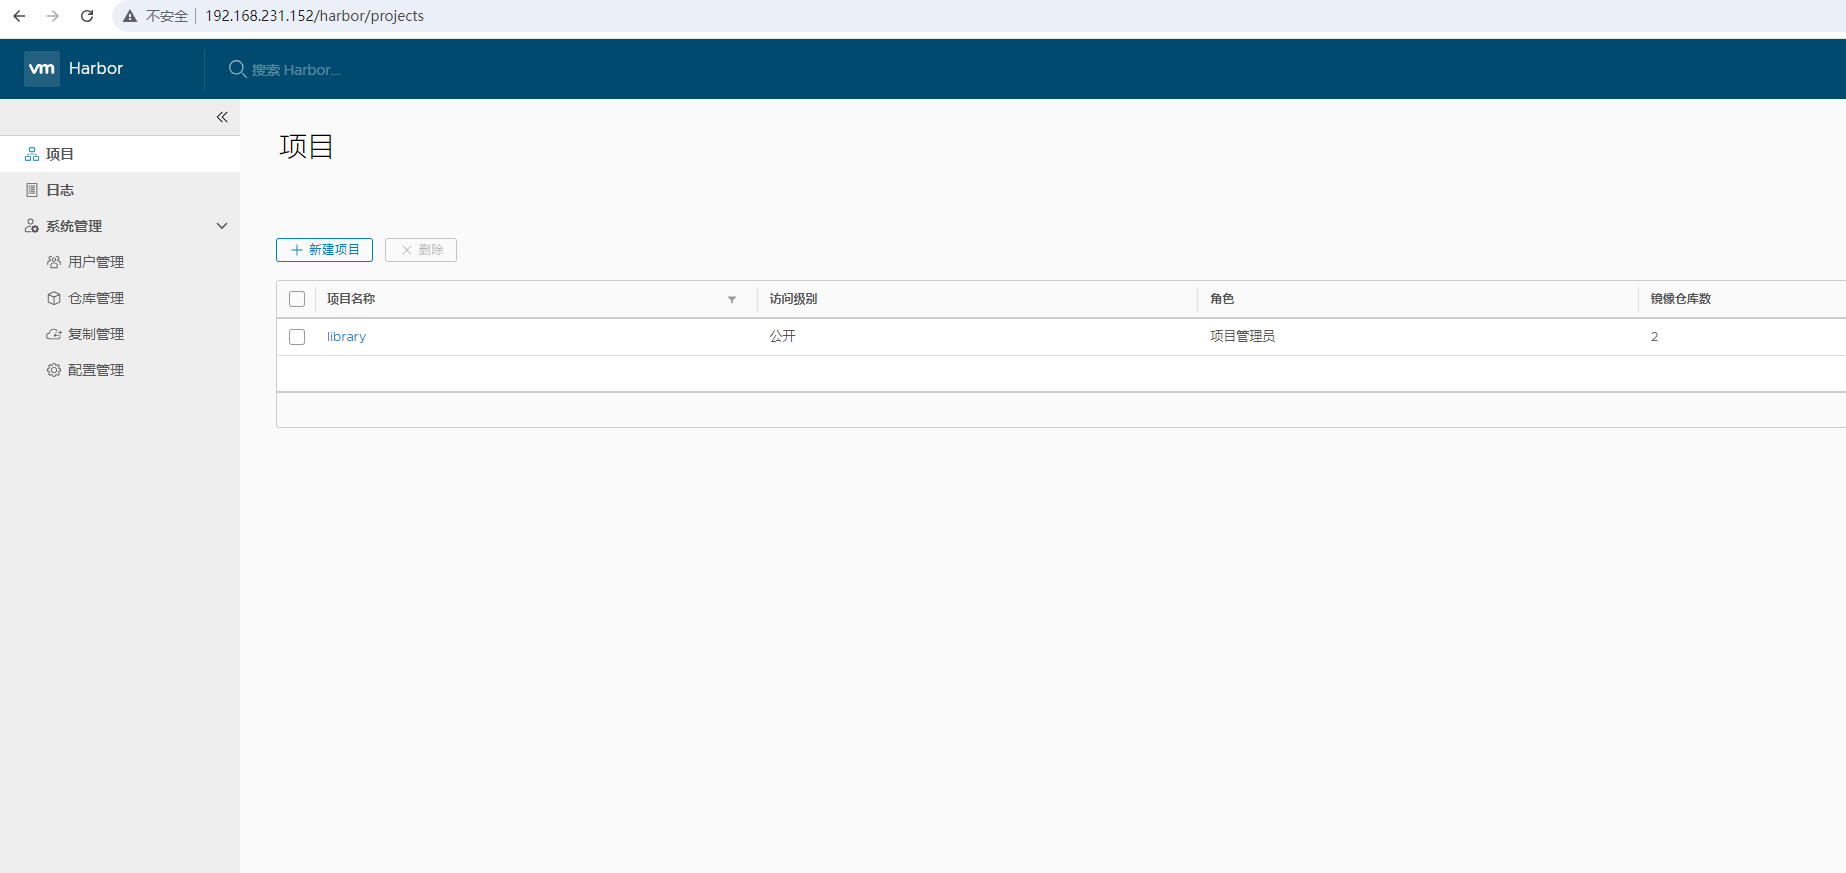
三、测试上传和下载镜像
先来看下 docker 的常用命令,如果想直接看测试,移步到 2.2 上传镜像即可。
3.1 docker 常用命令
(1)docker save
将指定镜像打包成 tar,方便镜像移动。
docker save -o /root/打包名.tar 镜像名:版本号例如:
[node@k8s-master dockerImages]$ sudo docker save -o ./demo-1.2.0.tar test/demo:1.2.0
[sudo] node 的密码:
[node@k8s-master dockerImages]$ ls
demo-1.2.0.tar
[node@k8s-master dockerImages]$
执行上述 docker save 命令会在当前目录下出现 demo-1.2.0.tar 包,将该包复制到别的机器,执行docker load 命令就完成 docker 镜像的转移了。
(2)docker load
用于载入打包好的镜像。例如:
[node@k8s-node-1 dockerImages]$ sudo docker load -i demo-1.2.0.tar
9c742cd6c7a5: Loading layer [==================================================>] 129.2 MB/129.2 MB
03127cdb479b: Loading layer [==================================================>]  11.3 MB/11.3 MB
293d5db30c9f: Loading layer [==================================================>] 19.31 MB/19.31 MB
5c384ea5f752: Loading layer [==================================================>] 12.32 MB/12.32 MB
990c5138f5d1: Loading layer [==================================================>] 3.584 kB/3.584 kB
1aaddf64804f: Loading layer [==================================================>] 108.3 MB/108.3 MB
0a8cde955e2b: Loading layer [==================================================>] 3.584 kB/3.584 kB
0931afb63541: Loading layer [==================================================>]  16.5 MB/16.5 MB
Loaded image: test/demo:1.2.0
[node@k8s-node-1 dockerImages]$ sudo docker images
REPOSITORY                                            TAG                 IMAGE ID            CREATED             SIZE
test/demo                                             1.2.0               fff004fa39a7        11 hours ago        290 MB
docker.io/nginx                                       alpine              4937520ae206        3 weeks ago         41.4 MB
docker.io/nginx                                       latest              eb4a57159180        3 weeks ago         187 MB
registry.access.redhat.com/rhel7/pod-infrastructure   latest              99965fb98423        5 years ago         209 MB
[node@k8s-node-1 dockerImages]$
(3)docker tag
用于给镜像打标签,语法格式如下所示。
docker tag SOURCE_IMAGE[:TAG] TARGET_IMAGE[:TAG](4)docker push
将本地的镜像上传到镜像仓库,要先登陆到镜像仓库。语法格式如下所示。
docker push [OPTIONS] NAME[:TAG]3.2 上传镜像
(1)登录 Harbor
首先,需要修改配置,修改 /etc/docker/daemon.json 文件,添加如下内容。
{"insecure-registries": ["192.168.231.152"]
}
其中,IP 是 Harbor 仓库 IP。然后执行如下命令,重启服务。
[root@k8s-master harbor]# systemctl daemon-reload
[root@k8s-master harbor]# systemctl restart docker
然后,需要在本地的服务器(Linux 机器)上登录,执行如下命令登录。
[root@k8s-master harbor]# docker login 192.168.231.152其中,IP 是 Harbor 仓库的 IP,然后输入用户名和密码(这里默认用户名:admin,密码:Harbor12345)。
登录如果有问题,可以执行如下命令尝试,或者重启机器。
docker-compose down -v
# 需要在 harbor 解压包的目录下执行
docker-compose up -d
(2)登录 Harbor UI 界面
登录 Harbor UI 界面后,点击 项目 -> library -> 推送镜像,如下所示。
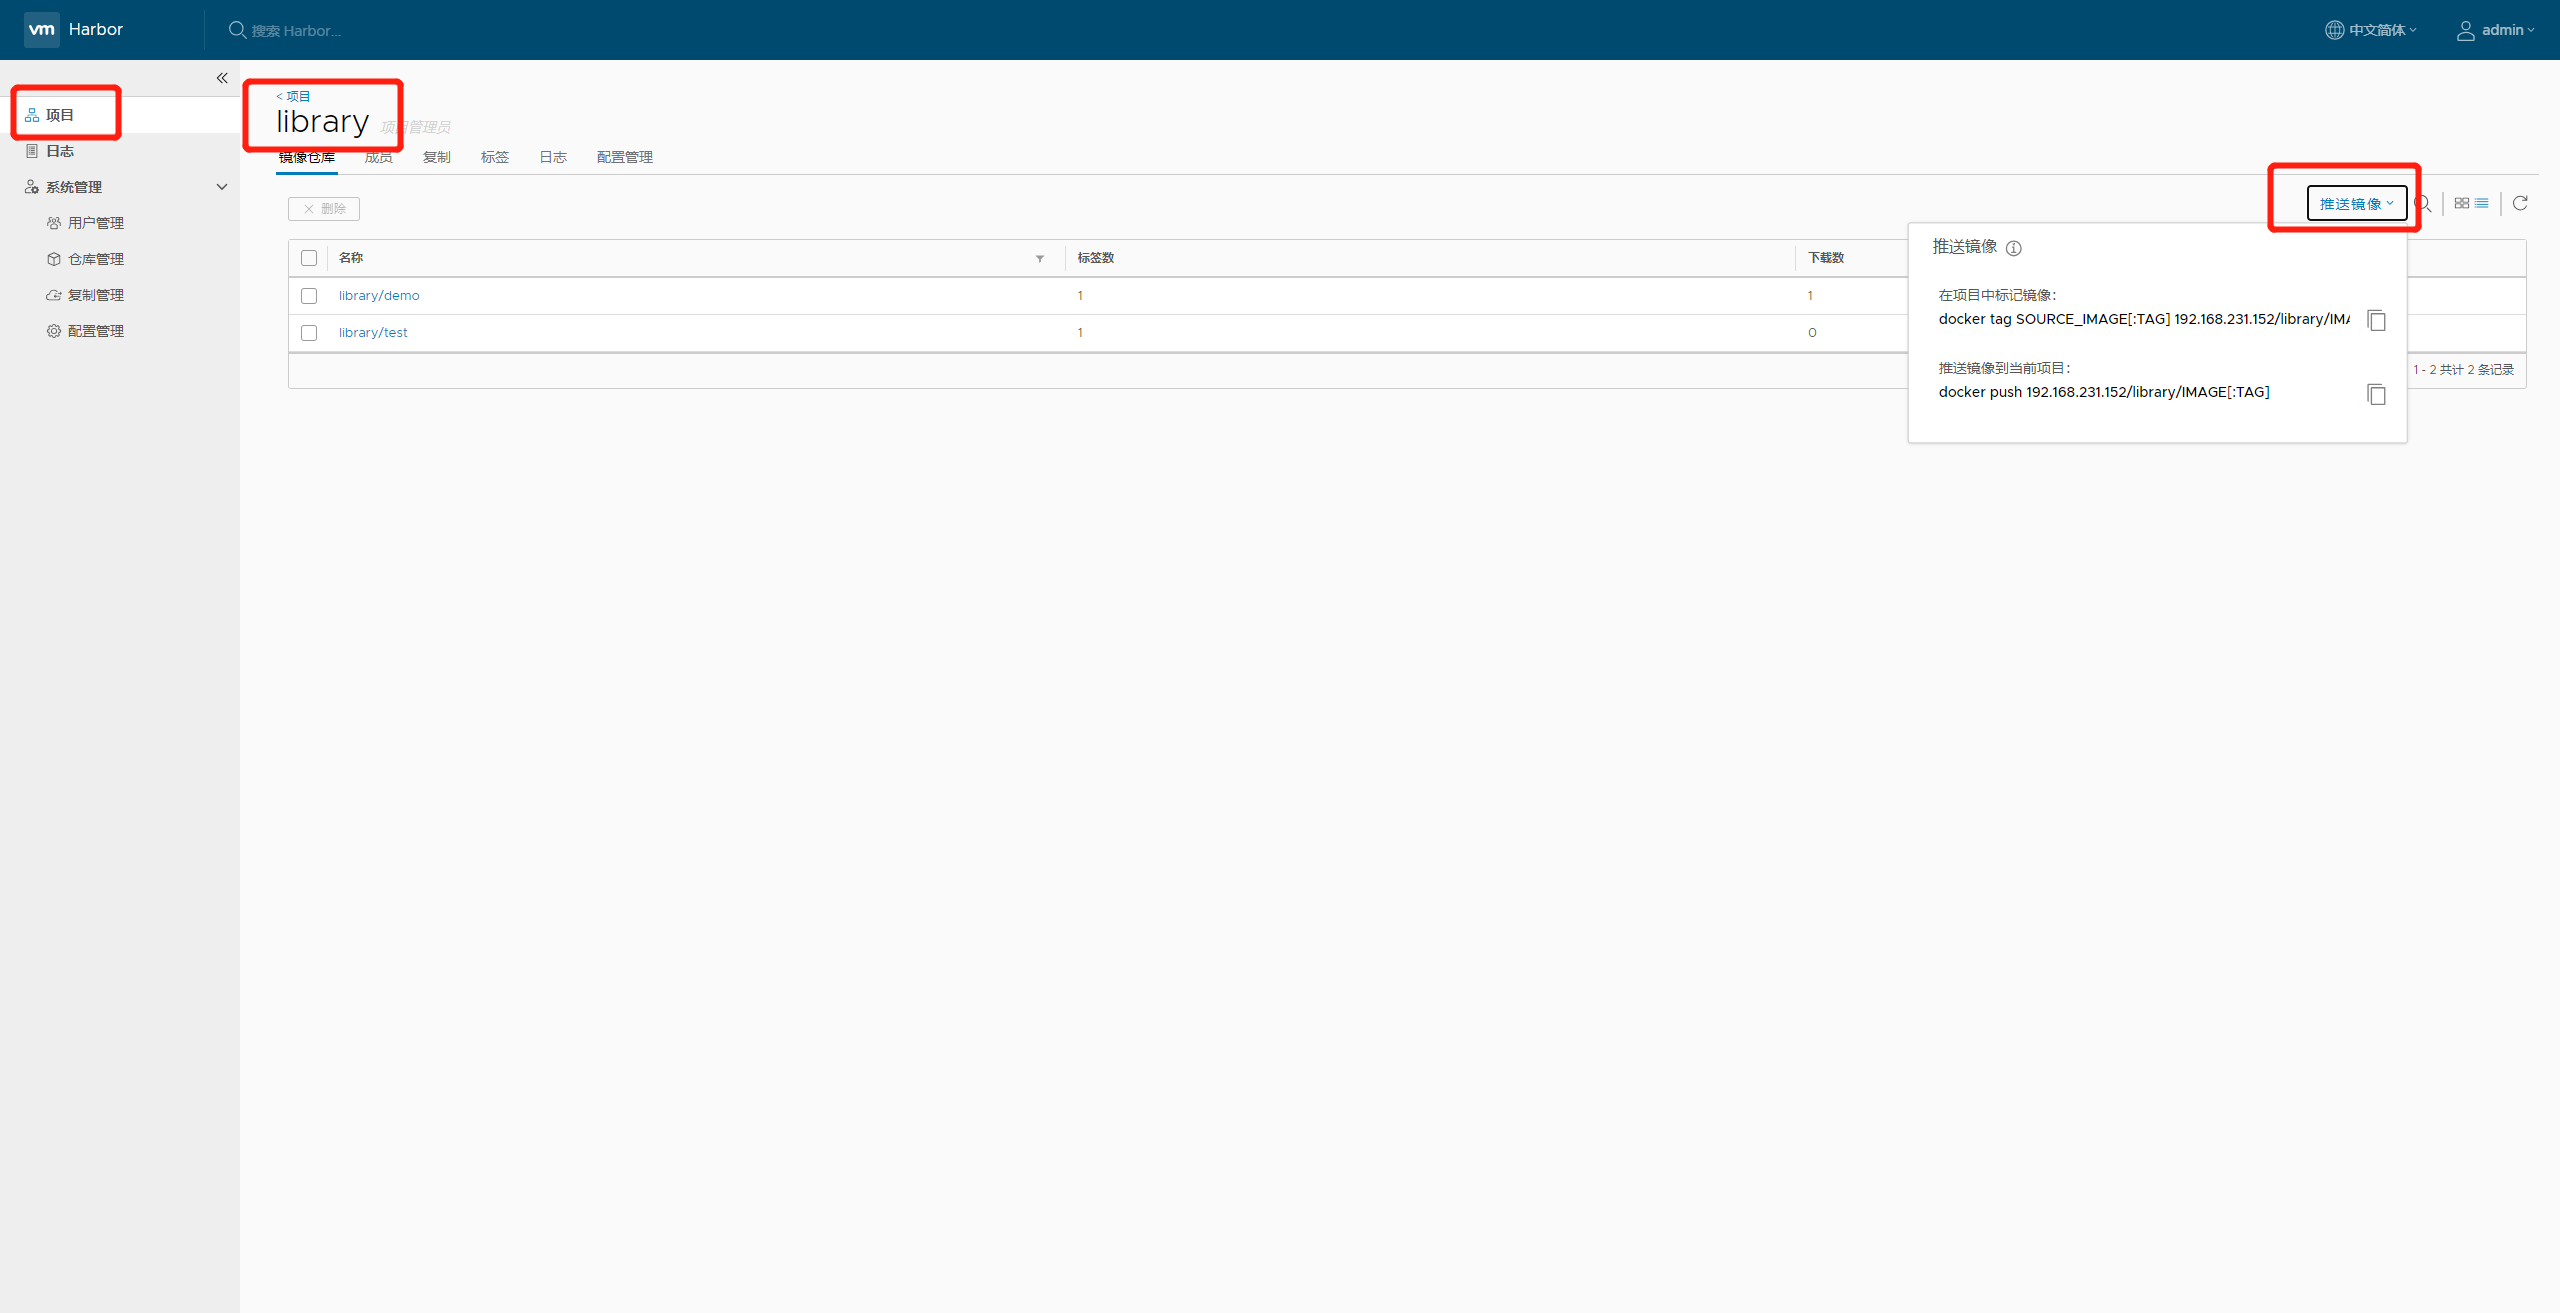
可以看到两条命令,第一个命令就是推送到 library 项目下的镜像需要打 TAG 的命令,第二条命令是推送到 library 项目下镜像的推送命令。
(3)上传镜像
执行 docker tag 和 docker push 命令,将镜像上传到 Harbor 中,如下所示。
[root@k8s-master imagesJar]# docker tag test/demo:1.2.0 192.168.231.152/library/test:1.9.0
[root@k8s-master imagesJar]# docker push 192.168.231.152/library/test:1.9.0
The push refers to a repository [192.168.231.152/library/test]
0931afb63541: Mounted from library/demo
0a8cde955e2b: Mounted from library/demo
1aaddf64804f: Mounted from library/demo
990c5138f5d1: Mounted from library/demo
5c384ea5f752: Mounted from library/demo
293d5db30c9f: Mounted from library/demo
03127cdb479b: Mounted from library/demo
9c742cd6c7a5: Mounted from library/demo
1.9.0: digest: sha256:f864fb61dc16e5df453fcb6697418d0229871c6bb584cccdfd8662b1fd06c335 size: 2001
[root@k8s-master imagesJar]#
在 Harbor UI 界面中可以看到对应的镜像。
3.3 下载镜像
执行如下命令拉取镜像。
[root@k8s-master imagesJar]# docker pull 192.168.231.152/library/demo:1.8.0
Trying to pull repository 192.168.231.152/library/demo ...
1.8.0: Pulling from 192.168.231.152/library/demo
Digest: sha256:f864fb61dc16e5df453fcb6697418d0229871c6bb584cccdfd8662b1fd06c335
Status: Image is up to date for 192.168.231.152/library/demo:1.8.0
[root@k8s-master imagesJar]#
参考链接:
https://www.runoob.com/docker/docker-push-command.html
https://www.cnblogs.com/pzk7788/p/10180919.html
Harbor私有镜像仓库离线部署-harbor 2.5.3_harbor离线部署_渡渡甲的博客-CSDN博客
Harbor安装小坑Please set hostname and other necessary attributes in harbor.cfg first._please do not set --with-chartmuseum, as chartmusu_流年 Narcissus yu的博客-CSDN博客 报错:ERROR: for nginx Cannot start service proxy;for proxy Cannot start service proxy;......_这闺女长得真俊啊的博客-CSDN博客
push到harbor的注意事项_error parsing http 405 response body: invalid char_阿白,的博客-CSDN博客
https://www.cnblogs.com/anxminise/p/9764221.html
🎈 感觉有帮助记得「一键三连」支持下哦!有问题可在评论区留言💬,感谢大家的一路支持!🤞猿哥将持续输出「优质文章」回馈大家!🤞🌹🌹🌹🌹🌹🌹🤞
