文章目录
- 前提
- 重要概念
- 部署rgw
- 使用对象存储(s3cmd)
- 创建radosgw user
- 安装s3cmd
- 配置s3cmd
- s3cmd使用
- 使用对象存储(Java代码)
- 引入依赖
- 编码测试
- 参考
前提
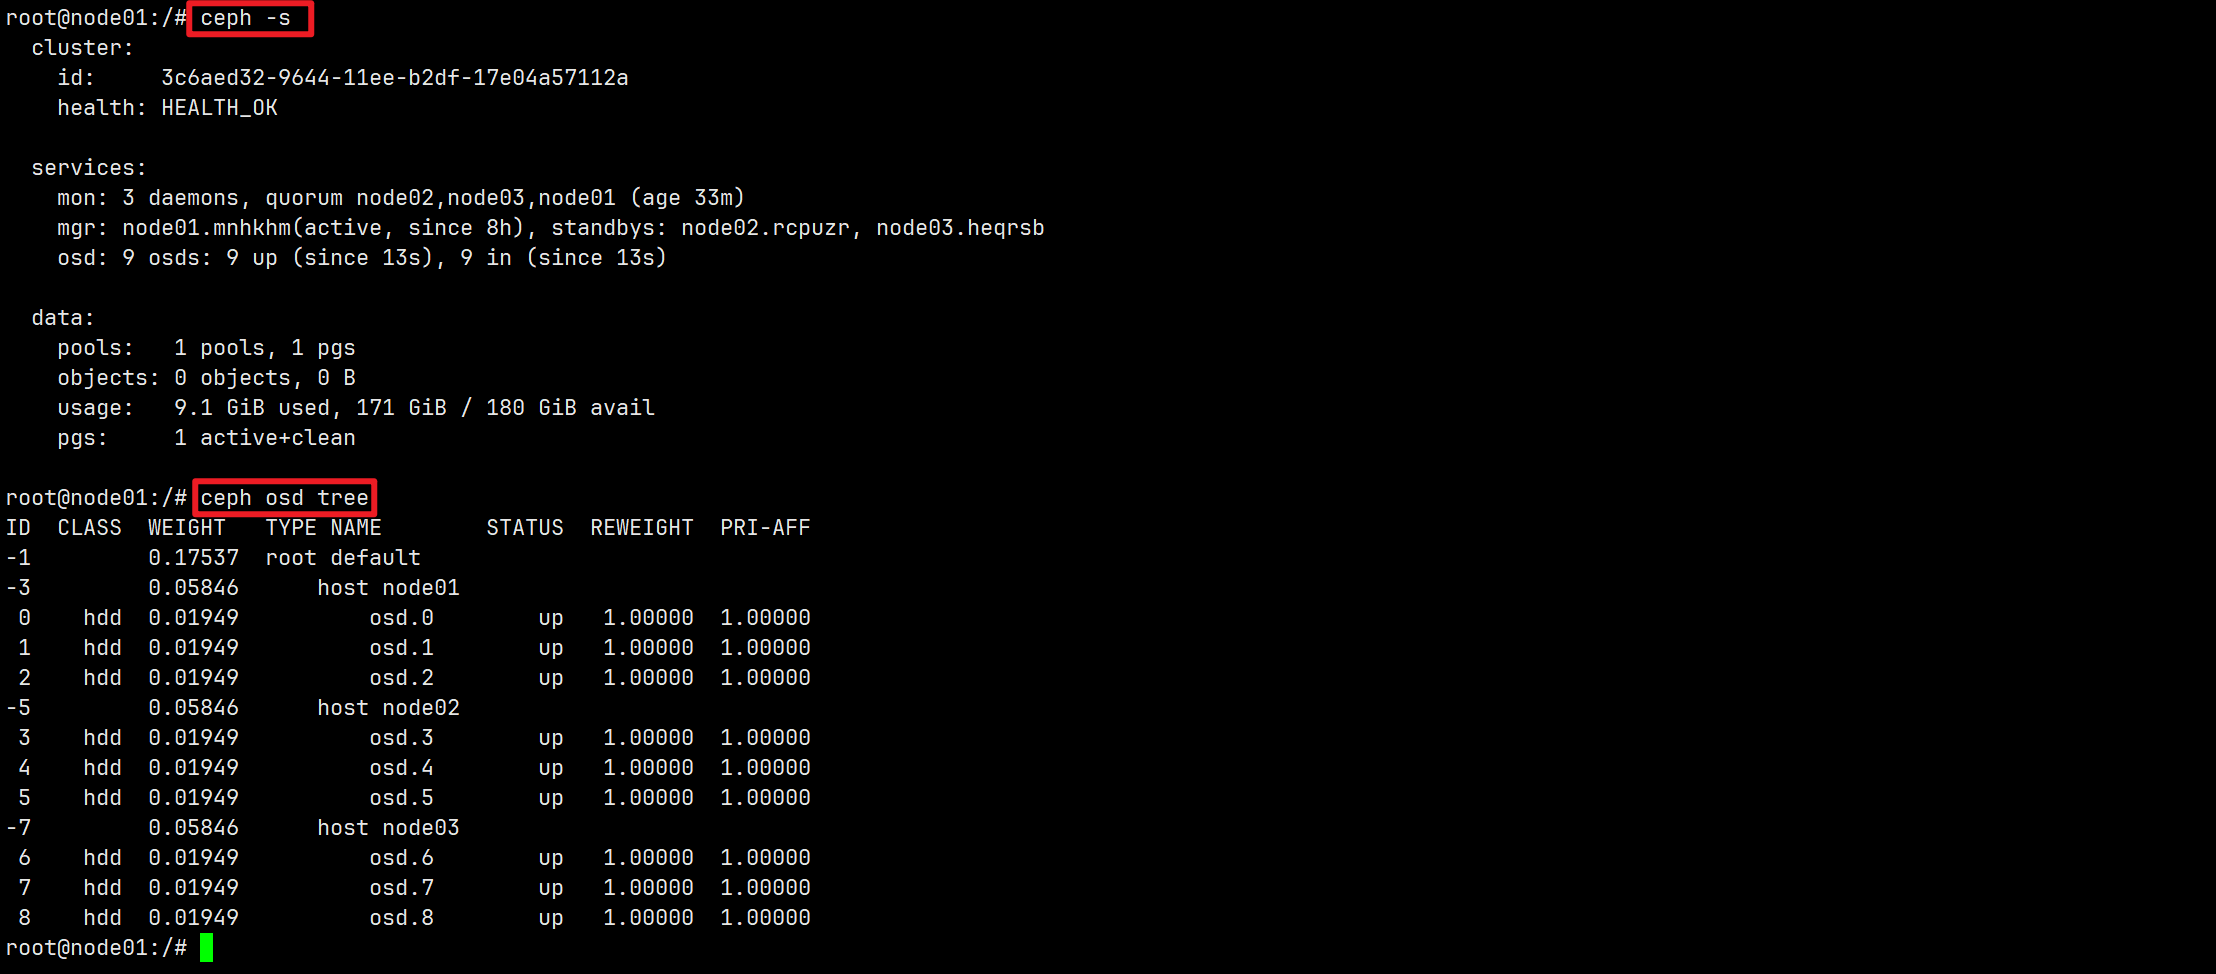
RGW的部署基于以下集群,集群信息如下:
重要概念
区域(zone): 一个ceph集群可以包含多个区域,一个区域只属于一个集群,一个区域可以有多个RGW
区域组(zonegroup):由一个或多个区域组成,包含一个主区域(master zone),其他区域称为Secondary Zone,区域组内的所有区域之间同步数据
域(realm): 同一个或多个区域组组成,包含一个主区域组,其他都次区域组。域中的所有rados网关都从位于主区域组和主区域中的rados网关拉取配置
注意:master zone group中的master zone处理所元数据更新,因此创建用户、bucket等操作都必须经由master zone
多区域网关配置架构
-
single-zone:一个realm中只有一个zonegroup和一个zone,可以有多个RGW
-
multi-zone:一个relam中只有一个zonegroup,但是有多个zone。一个realm中存储的数据复制到该zonegroup中的所有zone中
-
multi-zonegroup:一个realm中有多个zonegroup,每个zonegroup中又有一个或多个zone
-
multi-realms:多个realm

部署rgw
ceph orch apply rgw myrealm myzone --placement="3 node01 node02 node03"
查看你的Ceph版本,不同版本的命令可能不太一样,以Ceph官方文档上的为准。我这里是ceph 15.2.7
使用对象存储(s3cmd)
创建radosgw user
radosgw-admin user create --uid=s3 --display-name="object_storage" --system
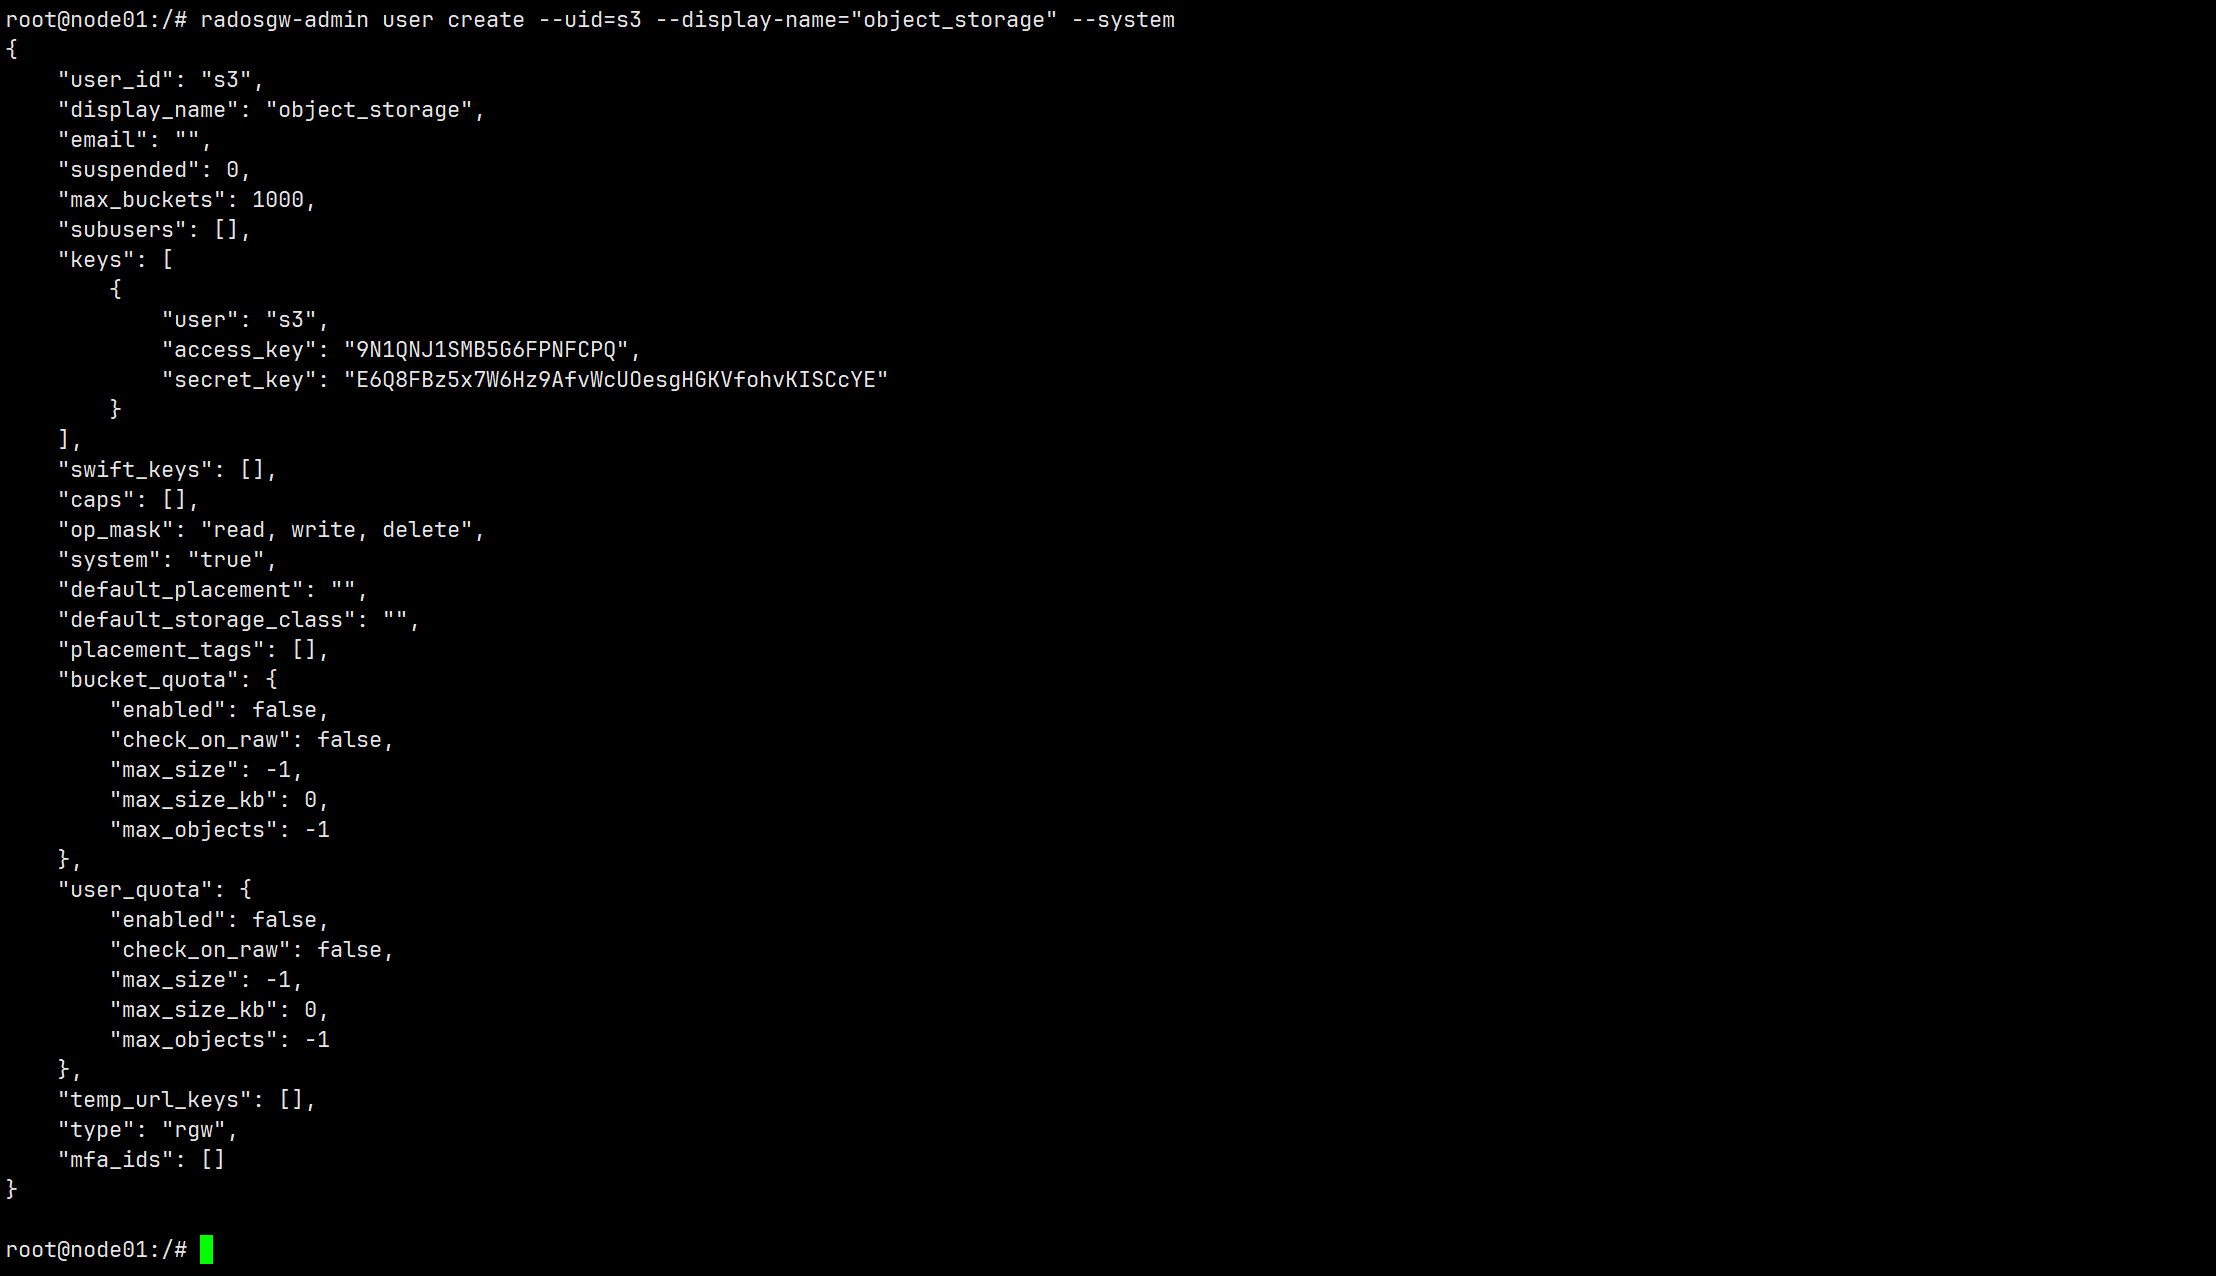
# 记住你的access_key和secret_key
"access_key": "9N1QNJ1SMB5G6FPNFCPQ",
"secret_key": "E6Q8FBz5x7W6Hz9AfvWcUOesgHGKVfohvKISCcYE"
安装s3cmd
apt install s3cmd
# 验证s3cmd
root@node01:~# whereis s3cmd
s3cmd: /usr/bin/s3cmd /usr/share/man/man1/s3cmd.1.gz
或者在GitHub下载,下载地址:https://github.com/s3tools/s3cmd
配置s3cmd
root@node01:~# s3cmd --configureEnter new values or accept defaults in brackets with Enter.
Refer to user manual for detailed description of all options.Access key and Secret key are your identifiers for Amazon S3. Leave them empty for using the env variables.
Access Key [9N1QNJ1SMB5G6FPNFCPQ]:
Secret Key [E6Q8FBz5x7W6Hz9AfvWcUOesgHGKVfohvKISCcYE]:
Default Region [US]: Use "s3.amazonaws.com" for S3 Endpoint and not modify it to the target Amazon S3.
S3 Endpoint [192.168.64.128:80]: Use "%(bucket)s.s3.amazonaws.com" to the target Amazon S3. "%(bucket)s" and "%(location)s" vars can be used
if the target S3 system supports dns based buckets.
DNS-style bucket+hostname:port template for accessing a bucket [192.168.64.128:80/%(bucket)s]: Encryption password is used to protect your files from reading
by unauthorized persons while in transfer to S3
Encryption password:
Path to GPG program [/usr/bin/gpg]: When using secure HTTPS protocol all communication with Amazon S3
servers is protected from 3rd party eavesdropping. This method is
slower than plain HTTP, and can only be proxied with Python 2.7 or newer
Use HTTPS protocol [No]: noOn some networks all internet access must go through a HTTP proxy.
Try setting it here if you can't connect to S3 directly
HTTP Proxy server name: New settings:Access Key: 9N1QNJ1SMB5G6FPNFCPQSecret Key: E6Q8FBz5x7W6Hz9AfvWcUOesgHGKVfohvKISCcYEDefault Region: USS3 Endpoint: 192.168.64.128:80DNS-style bucket+hostname:port template for accessing a bucket: 192.168.64.128:80/%(bucket)sEncryption password: Path to GPG program: /usr/bin/gpgUse HTTPS protocol: FalseHTTP Proxy server name: HTTP Proxy server port: 0Test access with supplied credentials? [Y/n]
Please wait, attempting to list all buckets...
Success. Your access key and secret key worked fine :-)Now verifying that encryption works...
Not configured. Never mind.Save settings? [y/N] y
- Access Key:刚才创建的radosgw user的access_key
- Secret Key:刚才创建的radosgw user的secret_key
- Default Region:默认直接回车
- S3 Endpoint:IP地址:port,例如“192.168.64.128:80”
- DNS-style bucket+hostname:“bootstrap_host_ip:80/%(bucket)s”,如"192.168.64.128:80/%(bucket)s"
- Encryption password:默认直接回车
- Path to GPG program [/usr/bin/gpg]:默认直接回车
- Use HTTPS protocol [No]: no
- HTTP Proxy server name: 默认直接回车
- Test access with supplied credentials? [Y/n] 默认直接回车
- 最后保存设置,会生成
/root/.s3cfg文件
s3cmd使用
通过s3cmd --help查看具体使用方法;
s3cmd ls # 列举所有 Buckets
s3cmd mb s3://my-bucket-name # 创建bucket,且bucket名称是唯一的,不能重复。
s3cmd rb s3://my-bucket-name # 删除空bucket
s3cmd ls s3://my-bucket-name # 列举Bucket中的内容
s3cmd put file.txt s3://my-bucket-name/file.txt # 上传file.txt到某个bucket
s3cmd put --acl-public file.txt s3://my-bucket-name/file.txt # 上传并将权限设置为所有人可读
s3cmd put ./* s3://my-bucket-name/ # 批量上传文件
s3cmd get s3://my-bucket-name/file.txt file.txt # 下载文件
s3cmd get s3://my-bucket-name/* ./ # 批量下载
s3cmd del s3://my-bucket-name/file.txt # 删除文件
s3cmd du -H s3://my-bucket-name # 来获得对应的bucket所占用的空间大小
s3cmd setacl s3://myexamplebucket.calvium.com/ --acl-public --recursive # 设置S3 bucket的Public权限
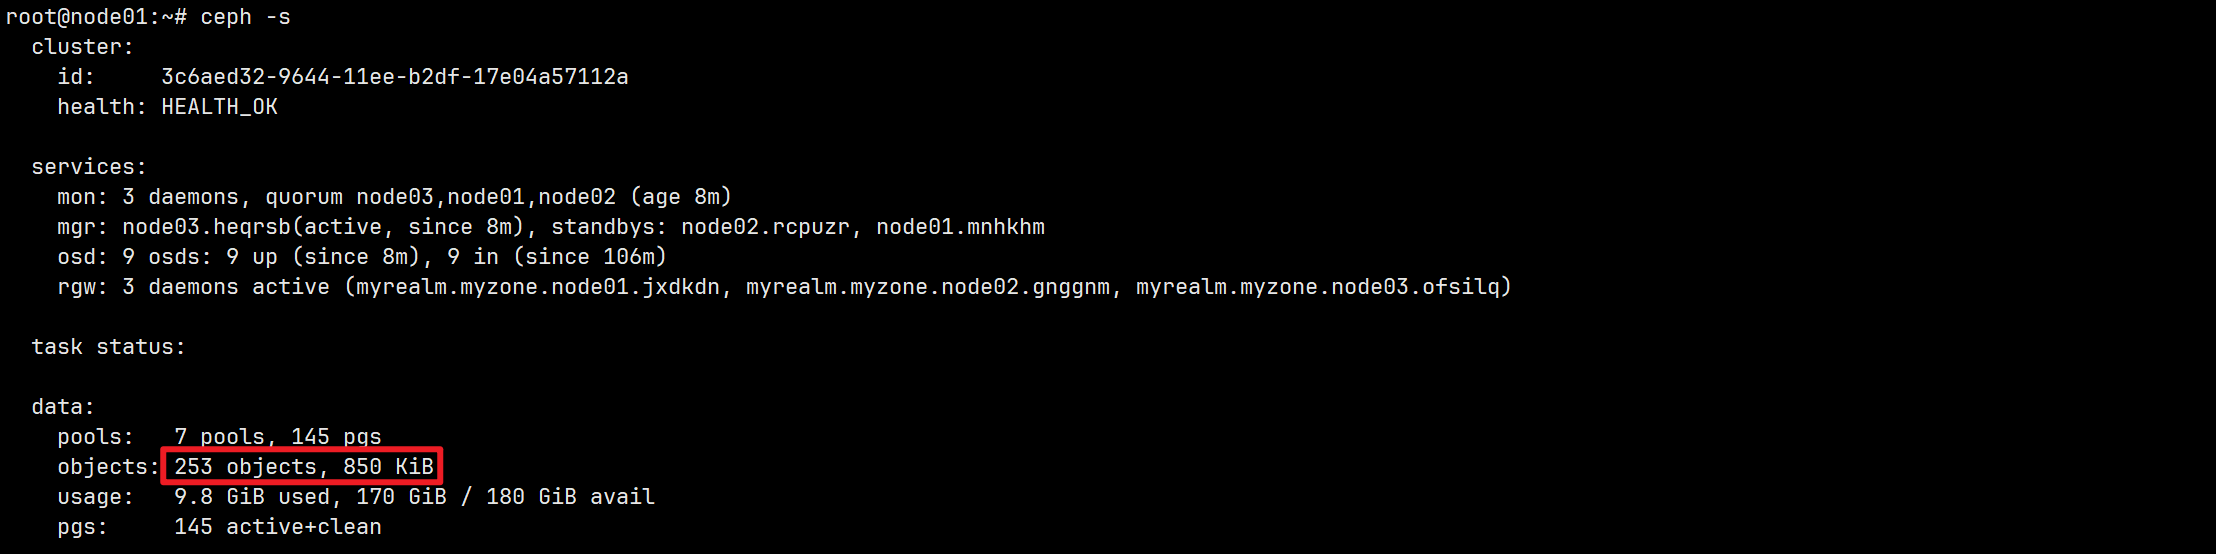
上传文件前集群对象数量:
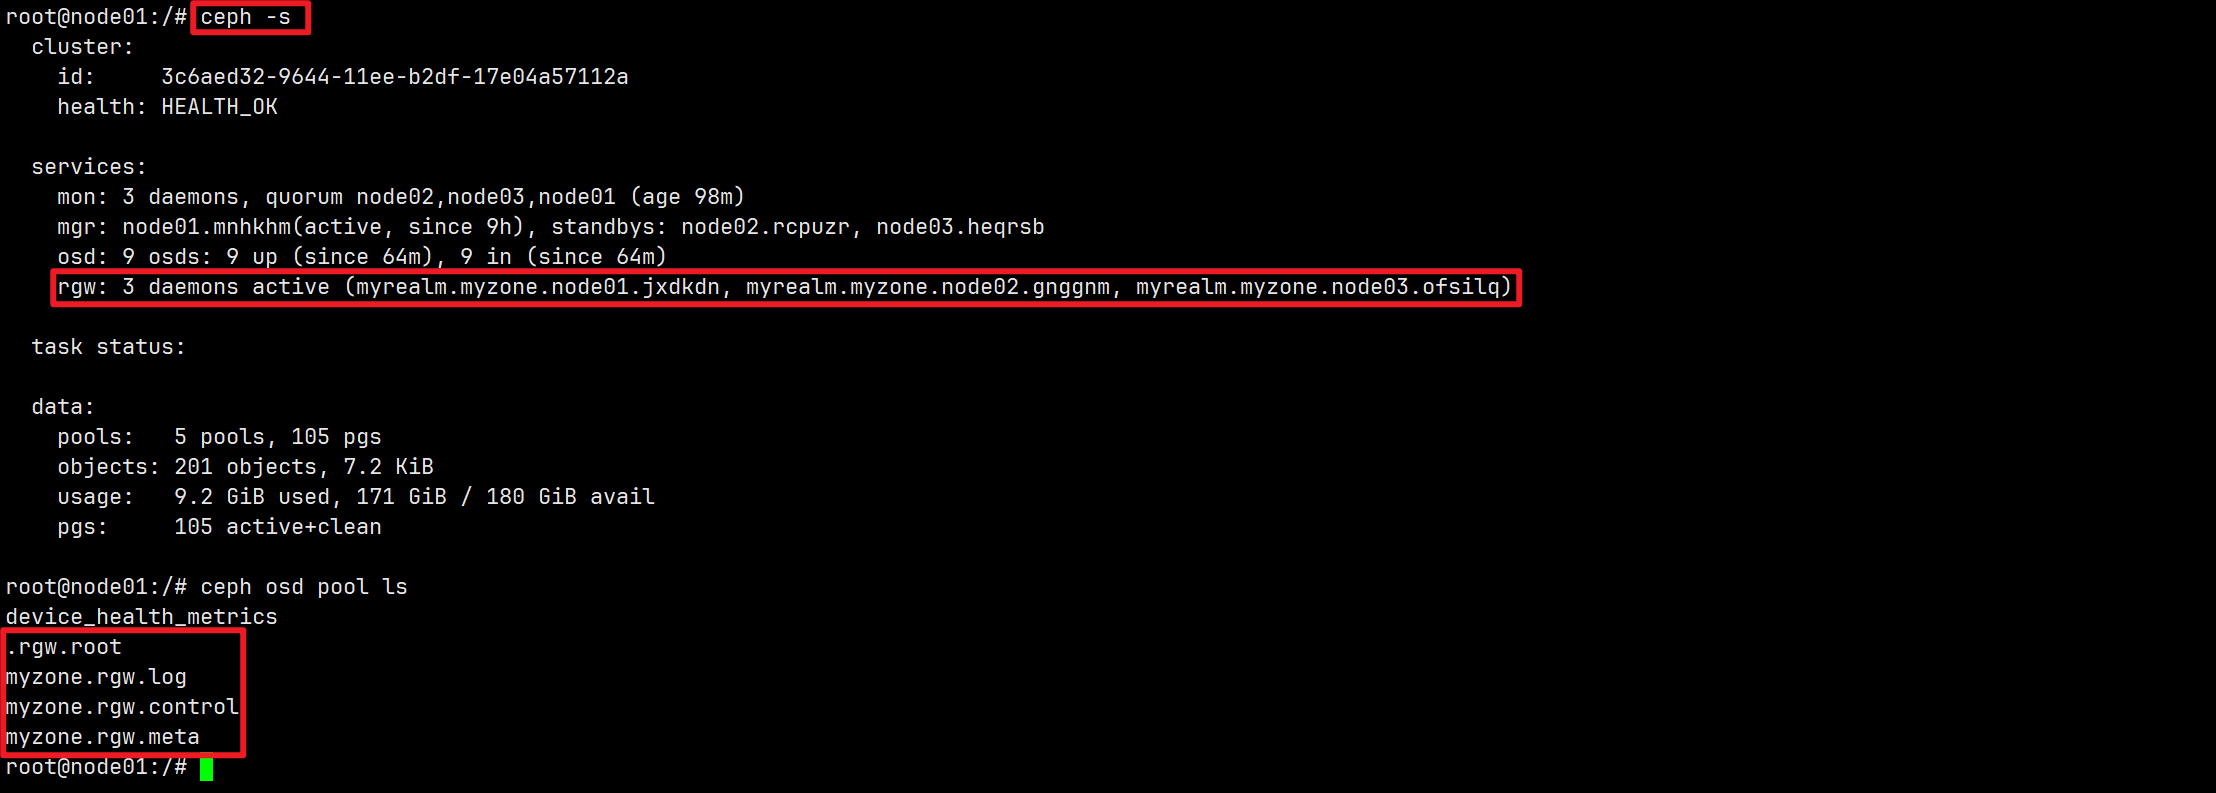
新建bucket,上传文件测试:

使用对象存储(Java代码)
引入依赖
<dependency><groupId>com.amazonaws</groupId><artifactId>aws-java-sdk</artifactId><version>1.12.429</version>
</dependency>
编码测试
import com.amazonaws.AmazonClientException;
import com.amazonaws.AmazonServiceException;
import com.amazonaws.ClientConfiguration;
import com.amazonaws.Protocol;
import com.amazonaws.auth.AWSCredentials;
import com.amazonaws.auth.AWSStaticCredentialsProvider;
import com.amazonaws.auth.BasicAWSCredentials;
import com.amazonaws.client.builder.AwsClientBuilder;
import com.amazonaws.services.s3.AmazonS3;
import com.amazonaws.services.s3.AmazonS3ClientBuilder;
import com.amazonaws.services.s3.model.*;import java.io.File;
import java.io.FileOutputStream;
import java.io.IOException;
import java.util.List;public class S3Demo {static AmazonS3 s3;private static void init() {AWSCredentials credentials = new BasicAWSCredentials("access_key","access_secret");// 禁用s3 httpsClientConfiguration configuration = new ClientConfiguration();configuration.setUseExpectContinue(false);configuration.setProtocol(Protocol.HTTP);String endPoint = "ip:port";AwsClientBuilder.EndpointConfiguration endpointConfiguration = new AwsClientBuilder.EndpointConfiguration(endPoint, null);s3 = AmazonS3ClientBuilder.standard().withEndpointConfiguration(endpointConfiguration).withClientConfiguration(configuration).withCredentials(new AWSStaticCredentialsProvider(credentials))//.withChunkedEncodingDisabled(true).withPathStyleAccessEnabled(true).build();}public static void deleteObject(String bucket, String object) {try {s3.deleteObject(bucket, object);} catch (AmazonServiceException e) {System.out.println("status code:" + e.getStatusCode());} catch (AmazonClientException e2) {System.out.println("status code:" + e2.getMessage());}}public static void putObject(String bucket, String object) {try {PutObjectRequest request = new PutObjectRequest(bucket, object,new File("C:\\Users\\gengduc\\Pictures\\壁纸\\c9f5cfbd-eb85-308c-b930-894548c0daa7_wallpaper_large.jpg"));s3.putObject(request);} catch (AmazonServiceException e) {System.out.println("status code:" + e.getStatusCode());} catch (AmazonClientException e2) {System.out.println("status code:" + e2.getMessage());}}public static void getObject(String bucket, String object) {try {GetObjectRequest request = new GetObjectRequest(bucket, object, null);System.out.println(object);S3Object result = s3.getObject(request);S3ObjectInputStream s3is = result.getObjectContent();FileOutputStream fos = new FileOutputStream(new File("C:\\Users\\gengduc\\Pictures\\" + object));byte[] read_buf = new byte[1024 * 34];int read_len = 0;while ((read_len = s3is.read(read_buf)) > 0) {fos.write(read_buf, 0, read_len);}s3is.close();fos.close();} catch (AmazonServiceException e) {System.err.println(e.getErrorMessage());} catch (IOException e) {System.err.println(e.getMessage());}}public static void listObjects(String bucket) {try {ListObjectsV2Request request = new ListObjectsV2Request();request.setBucketName(bucket);ListObjectsV2Result result = s3.listObjectsV2(request);List<String> commonPrefix = result.getCommonPrefixes();for (int i = 0; i < commonPrefix.size(); i++) {System.out.println("commonPrefix:" + commonPrefix.get(i));}List<S3ObjectSummary> objectList = result.getObjectSummaries();for (int i = 0; i < objectList.size(); i++) {System.out.println("key:" + objectList.get(i).getKey());}} catch (AmazonServiceException e) {System.out.println("status code:" + e.getStatusCode());} catch (AmazonClientException e2) {System.out.println("status code:" + e2.getMessage());}}public static void putBucket(String bucket) {try {s3.createBucket(bucket);} catch (AmazonServiceException e) {System.err.println(e.getStatusCode());System.err.println(e.getErrorCode());System.err.println(e.getErrorMessage());}}//运行主函数public static void main(String[] args) throws Exception {String bucketName = "bucket-demo";String keyName = "example.png";//初始化连接init();//创建桶putBucket(bucketName);//添加对象putObject(bucketName, keyName);//获取对象getObject(bucketName, keyName);//删除对象deleteObject(bucketName, keyName);//枚举对象列表listObjects(bucketName);}
}
代码中有三个地方需要修改:
access_key:改为上面用户的access_keysecret_key:改为上面用户的secret_keyendpoint:修改为s3cmd --configure中设置的IP:port
使用HTTP:configuration.setProtocol(Protocol.HTTP);
参考
- https://scs.buaa.edu.cn/doc/ns-labs/table-of-contents/ceph/#ceph-rgw-%E5%AF%B9%E8%B1%A1%E5%AD%98%E5%82%A8
- https://www.cnblogs.com/sunhongleibibi/p/11661123.html
- https://developer.aliyun.com/article/794642
- https://www.jianshu.com/p/41095ae4a5f5
- https://www.cnblogs.com/zyxnhr/p/10599990.html